
Mybatis-注解开发(单表)
Mybatis注解开发
什么是Mybatis注解开发?
这几年来注解开发越来越流行,Mybatis也可以使用注解开发方式,这样我们就可以减少编写Mapper映射文件了。
所以使不使用Mybatis注解,都可以实现我们想要实现的功能!Mybatis注解开发最大的优势就是简化映射配置文件!减少代码量。
MyBatis的常用注解
(1)@Insert("新增的SQL语句"):实现新增
(2)@Update("更新的SQL语句"):实现更新
(3)@Delete("删除的SQL语句"):实现删除
(4)@Select("查询的SQL语句"):实现查询
详细案例
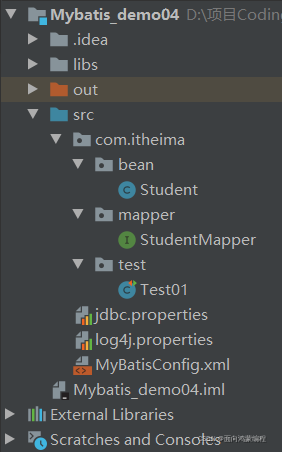
项目骨架
由于过于简单就不使用MVC设计模式了!
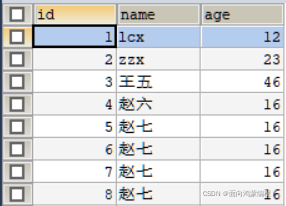
数据准备
我们使用的是db1数据库下的student表,表的结构如下所示,具体的SQL语句这里就不再提供了,在本人的Mybatis的专栏的其他文章中有。
bean包下存放的就是实体类对象Student
package com.itheima.bean;

public class Student {
    private Integer id;
    private String name;
    private Integer age;

    public Student() {
    }

    public Student(Integer id,String name,Integer age){
        this.id = id;
        this.name = name;
        this.age = age;
    }

    public Integer getId() {
        return id;
    }

    public void setId(Integer id) {
        this.id = id;
    }

    public String getName() {
        return name;
    }

    public void setName(String name) {
        this.name = name;
    }

    public Integer getAge() {
        return age;
    }

    public void setAge(Integer age) {
        this.age = age;
    }

    @Override
    public String toString() {
        return "Student{" +
                "id=" + id +
                ", name='" + name + '\'' +
                ", age=" + age +
                '}';
    }
}
mapper包下的StudentMapper接口
public interface StudentMapper {
    // 查询全部
    @Select("SELECT * FROM student")
    public abstract List<Student> selectAll();

    // 新增操作
    @Insert("INSERT INTO student VALUES (#{id},#{name},#{age})")
    public abstract Integer insert(Student stu);

    // 修改操作
    @Update("UPDATE student SET name=#{name},age=#{age} WHERE id=#{id}")
    public abstract Integer update(Student stu);

    // 删除操作
    @Delete("DELETE FROM student WHERE id=#{id}")
    public abstract Integer delete(Integer id);
}由于使用了注解,就不用去编写关于映射的xml文件了,大大提高了开发的速度,简化了代码
核心配置文件还是要的MyBatisConfig.xml
<?xml version="1.0" encoding="UTF-8" ?>
<!DOCTYPE configuration
        PUBLIC "-//mybatis.org//DTD Config 3.0//EN"
        "http://mybatis.org/dtd/mybatis-3-config.dtd">

<!--configuration 核心根标签-->
<configuration>

    <!-- 引入数据库连接的配置文件 -->
    <properties resource="jdbc.properties"/>

    <!-- 配置log4j -->
    <settings>
        <setting name="logImpl" value="log4j"/>
    </settings>

    <!-- 使用通用的配置方式起别名 ,别名默认是类名 -->
    <typeAliases>
        <package name="com.itheima.bean"/>
    </typeAliases>

    <!--environments配置数据库环境,环境可以有多个。default属性指定使用的是哪个-->
    <environments default="mysql">
        <!--environment配置数据库环境  id属性唯一标识-->
        <environment id="mysql">
            <!-- transactionManager事务管理。  type属性,采用JDBC默认的事务-->
            <transactionManager type="JDBC"/>
            <!-- dataSource数据源信息   type属性 连接池-->
            <dataSource type="POOLED">
                <!-- property获取数据库连接的配置信息 -->
                <property name="driver" value="${driver}" />
                <property name="url" value="${url}" />
                <property name="username" value="${username}" />
                <property name="password" value="${password}" />
            </dataSource>
        </environment>
    </environments>

    <!-- mappers引入映射配置文件 -->
    <mappers>
        <!-- mapper 引入指定的映射配置文件 resource属性指定映射配置文件的名称 -->
        <!-- package 的name属性用来指定包的路径-->
        <package name="com.itheima.mapper"/>
    </mappers>

</configuration>
注意:
在<mappers>标签中的子标签<package>,通过name属性指定StudentMapper接口所在的包名 ,此时对应的映射文件必须与接口位于同一路径下,并且名称相同。即:这里我们是只有一个StudentMapper接口,之后如果有更多的接口需要编写,我们只要将接口放置于mapper包下就行了。
测试类Test01
public class Test01 {
    @Test
    public void selectAll() throws IOException {
        // 1.加载核心配置文件
        InputStream is = Resources.getResourceAsStream("MyBatisConfig.xml");
        // 2.获取SqlSession工厂对象
        SqlSessionFactory sqlSessionFactory = new SqlSessionFactoryBuilder().build(is);
        // 3.通过工厂对象获取SqlSession对象
        SqlSession sqlSession = sqlSessionFactory.openSession(true);
        // 4.获取StudentMapper接口的实现类对象
        // 通过StudentMapper的字节对象 来得到实现类对象
        StudentMapper mapper = sqlSession.getMapper(StudentMapper.class);
        // 5.调用实现类对象中的方法
        List<Student> list = mapper.selectAll();
        // 6.处理结果
        for (Student student : list) {
            System.out.println(student);
        }
        // 7.释放资源
        sqlSession.close();
        is.close();
    }

    @Test
    public void insert() throws IOException {
        // 1.加载核心配置文件
        InputStream is = Resources.getResourceAsStream("MyBatisConfig.xml");
        // 2.获取SqlSession工厂对象
        SqlSessionFactory sqlSessionFactory = new SqlSessionFactoryBuilder().build(is);
        // 3.通过工厂对象获取SqlSession对象
        SqlSession sqlSession = sqlSessionFactory.openSession(true);
        // 4.获取StudentMapper接口的实现类对象
        // 通过StudentMapper的字节对象 来得到实现类对象
        StudentMapper mapper = sqlSession.getMapper(StudentMapper.class);
        // 5.调用实现类对象中的方法
        Student stu = new Student(9,"张九",90);
        Integer result = mapper.insert(stu);

        // 6.处理结果
        System.out.println(result);
        // 7.释放资源
        sqlSession.close();
        is.close();
    }

    @Test
    public void update() throws IOException {
        // 1.加载核心配置文件
        InputStream is = Resources.getResourceAsStream("MyBatisConfig.xml");
        // 2.获取SqlSession工厂对象
        SqlSessionFactory sqlSessionFactory = new SqlSessionFactoryBuilder().build(is);
        // 3.通过工厂对象获取SqlSession对象
        SqlSession sqlSession = sqlSessionFactory.openSession(true);
        // 4.获取StudentMapper接口的实现类对象
        // 通过StudentMapper的字节对象 来得到实现类对象
        StudentMapper mapper = sqlSession.getMapper(StudentMapper.class);
        // 5.调用实现类对象中的方法
        Student stu = new Student(9,"张九",1000);
        Integer result = mapper.update(stu);

        // 6.处理结果
        System.out.println(result);
        // 7.释放资源
        sqlSession.close();
        is.close();
    }

    @Test
    public void delete() throws IOException {
        // 1.加载核心配置文件
        InputStream is = Resources.getResourceAsStream("MyBatisConfig.xml");
        // 2.获取SqlSession工厂对象
        SqlSessionFactory sqlSessionFactory = new SqlSessionFactoryBuilder().build(is);
        // 3.通过工厂对象获取SqlSession对象
        SqlSession sqlSession = sqlSessionFactory.openSession(true);
        // 4.获取StudentMapper接口的实现类对象
        // 通过StudentMapper的字节对象 来得到实现类对象
        StudentMapper mapper = sqlSession.getMapper(StudentMapper.class);
        // 5.调用实现类对象中的方法
        Integer result = mapper.delete(9);

        // 6.处理结果
        System.out.println(result);
        // 7.释放资源
        sqlSession.close();
        is.close();
    }
}
运行结果
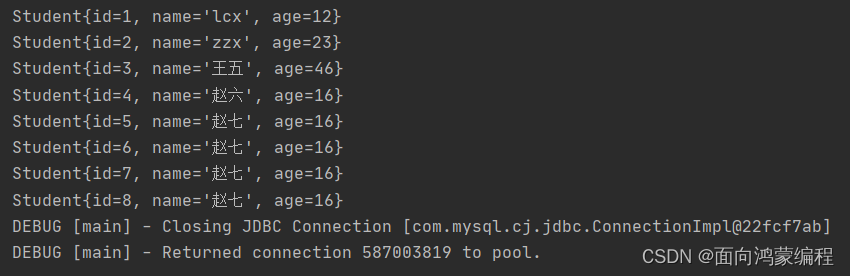
就不一一演示了。只展示一个查询的就好了
※代码分析※
我们以select查询为例,在Test中的第四步,获取到了mapper接口的实现类对象,该对象调用selectAll()方法,在selectAll()方法上我们通过注解的方式指定了一条关于查询的SQL语句,底层就会为我们去解析这个注解,来拿到我们写的SQL语句,并执行它,再将结果返回。
比之前使用映射配置文件的方式简单多了!


【推荐】国内首个AI IDE,深度理解中文开发场景,立即下载体验Trae
【推荐】编程新体验,更懂你的AI,立即体验豆包MarsCode编程助手
【推荐】抖音旗下AI助手豆包,你的智能百科全书,全免费不限次数
【推荐】轻量又高性能的 SSH 工具 IShell:AI 加持,快人一步
· 全程不用写代码,我用AI程序员写了一个飞机大战
· DeepSeek 开源周回顾「GitHub 热点速览」
· 记一次.NET内存居高不下排查解决与启示
· MongoDB 8.0这个新功能碉堡了,比商业数据库还牛
· .NET10 - 预览版1新功能体验(一)