创建基本的2D场景(part2)
让我们继续来学习Unity2D游戏场景的制作,本文分为以下3个部分:
· 添加角色和控制
. 添加2D物理阻挡
· 添加2D效果
通过制作一个移动帽子接保龄球的小游戏,我们可以学习到任何创建游戏对象,使用2D物理引擎和制作2D特效等。
· 添加角色和控制
1. 创建游戏主角帽子
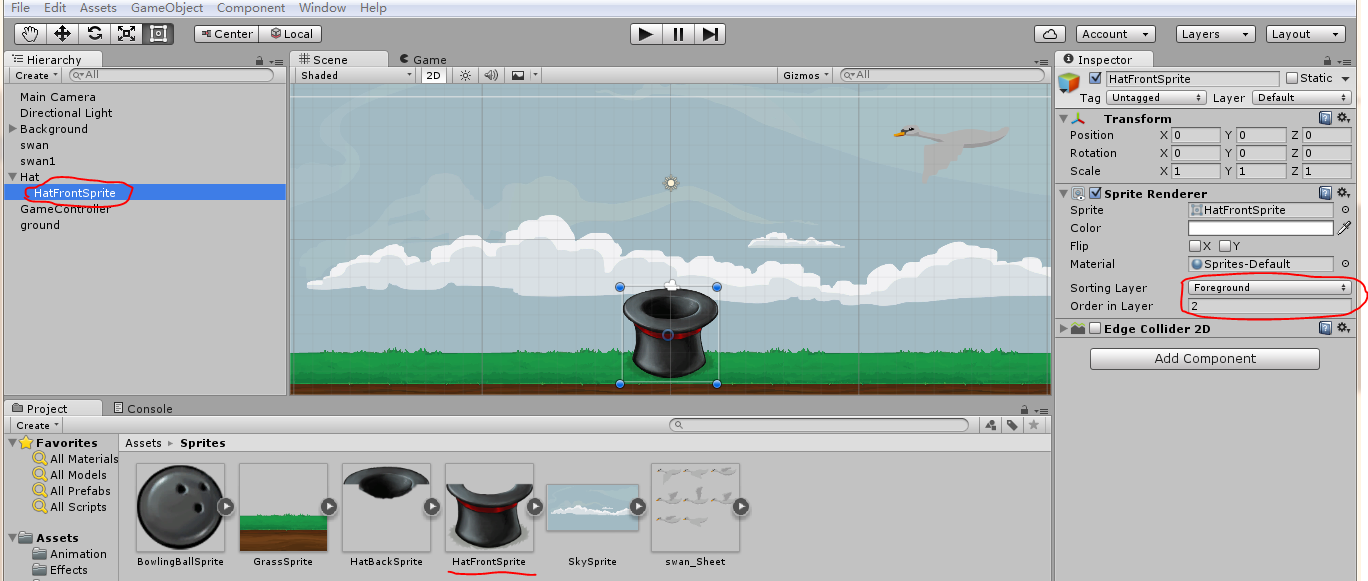
帽子整体由Hat和HatFrontSprite两部分组成,为了让保龄球在被帽子接住时达到进入帽子的视觉效果,我们设置帽子的属性如下两张图所示。Hat的层级为0,而HatFrontSprite的层级为2,我们只要将保龄球的层级设置为1,就可以到达效果了。


为帽子添加刚体,并且防止帽子下落。选择菜单栏中的命令,Component——Physic 2D——Rigidbody 2D(刚体)。在帽子的Inspector视图中,将Gravity Scale设置为0,防止帽子下落。选中Freeze Rotation Z 来固定帽子的角度,

2. 创建保龄球
创建好保龄球sprite后,为了让保龄球有自由下落的效果,我们为它添加刚体。选择菜单栏中的命令,Component——Physic 2D——Rigidbody 2D(刚体)。为了让保龄球与其他碰撞体之间有碰撞效果,选择Component——Physic 2D——Circle Colider 2D(2D圆形碰撞体)。
如果不给保龄球添加刚体,那么游戏中的保龄球就不会自由下落。
在游戏中,我们要生成多个保龄球,所以要将保龄球sprite制作成Prefab。将Hierarchy视图中的sprite直接拖到Project视图的文件夹中,就可以制作成预设体了。如下图所示:

3. 创建脚本来控制保龄球和帽子
我们先创建一个空的游戏对象GameController,创建一个C#脚本也名为GameController,然后将GameController脚本拖到GameController对象上。
public class GameController : MonoBehaviour {
    public GameObject ball;
    private float maxWidth;
    private float time = 2;
    private GameObject newball;
    // Use this for initialization
    void Start () {
        //将屏幕的宽度转换成世界坐标
        Vector3 screenPos = new Vector3(Screen.width, 0, 0);
        Vector3 moveWidth = Camera.main.ScreenToWorldPoint(screenPos);
        //获取保龄球自身的宽度
        float ballWidth = ball.GetComponent<Renderer>().bounds.extents.x;
        //计算保龄球实例化位置的宽度
        maxWidth = moveWidth.x - ballWidth;
    }

    void FixedUpdate () {
        time -= Time.deltaTime;
        if (time < 0)
        {
            //产生一个随机数,代表实例化下一个保龄球所需的时间
            time = Random.Range(1.5f, 2.0f);
            //在保龄球实例化位置的宽度内产生一个随机数,来控制实例化的保龄球的位置
            float posX = Random.Range(-maxWidth, maxWidth);
            Vector3 spawnPosition = new Vector3(posX, transform.position.y, 0);
            //实例化保龄球,10秒后销毁
            newball = (GameObject)Instantiate(ball, spawnPosition, Quaternion.identity);
            //如果不写时间的话,组件会被马上销毁的
            Destroy(newball, 10);
        }
    }
}
再来创建一个脚本HatController来控制帽子的移动,然后将HatController脚本拖到Hat对象上。
public class HatController : MonoBehaviour {
    public GameObject effect;
    private Vector3 rawPosition;
    private Vector3 hatPosition;
    private float maxWidth;
    // Use this for initialization
    void Start () {
        //将屏幕的宽度转换成世界坐标
        Vector3 screenPos = new Vector3(Screen.width, 0, 0);
        Vector3 moveWidth = Camera.main.ScreenToWorldPoint(screenPos);
        //计算帽子的宽度
        float hatWidth = GetComponent<Renderer>().bounds.extents.x;
        //获得帽子的初始位置
        hatPosition = transform.position;
        //计算帽子的移动宽度
        maxWidth = moveWidth.x - hatWidth;
    }

    // Update is called once per physics timestep
    void FixedUpdate () {
        //将鼠标的屏幕位置转换成世界坐标
        rawPosition = Camera.main.ScreenToWorldPoint(Input.mousePosition);//设置帽子将要移动的位置,帽子移动范围控制
        hatPosition = new Vector3(rawPosition.x, hatPosition.y, 0);//限制value的值在min和max之间
        hatPosition.x = Mathf.Clamp(hatPosition.x, -maxWidth, maxWidth);
        //帽子移动
        GetComponent<Rigidbody2D>().MovePosition(hatPosition);
    }
}
现在,在游戏中我们可以看到保龄球从天上随机不同位置掉落,但保龄球下落后,会穿过草地。帽子则会跟着鼠标左右移动。
· 添加2D物理阻挡
注意:假如帽子有碰撞体,而保龄球没有添加碰撞体,那结果会怎样呢?保龄球与帽子碰撞后,没有任何反应。所以,参与碰撞的物体都必须要添加碰撞体。
先给HatFrontSprite添加边缘碰撞体,Component——Physics 2D——Edge Collider 2D(2D边缘碰撞体)。然后再给Hat添加一个触发器,用来判断保龄球是否进入帽子,在Inspector视图中选中Is Trigger复选框。给Hat添加一个Edge Collider 2D组件,在编辑Edge Collider 2D之前,要先点击Edit Collider按钮,让Edge Collider 2D组件包裹住Hat。编辑过程要有耐心,需要不断地调整,学会编辑后,最好把编辑过程录制成视屏,以后忘记了的话,就可以按照视屏来操作。如下图所示:


为了让帽子能够持续地接取保龄球,我们要在保龄球进入触发器后删除保龄球。于是我们在HatController脚本中添加如下代码:
    void OnTriggerEnter2D(Collider2D col)
    {
        //删除该碰撞物体
        Destroy(col.gameObject);
    }
为了让保龄球落到草地上后,不再下落,我们要给草地也添加一个碰撞体。GameObject——Create Empty,命名为ground,Component——Physics 2D——Box Collider 2D,设置ground属性如下图:

现在,保龄球落到地面上后会被被地面挡住,我们移动帽子接到保龄球,不管你是否接到了保龄球,一段时间后,保龄球都会自动消失。
· 添加2D效果
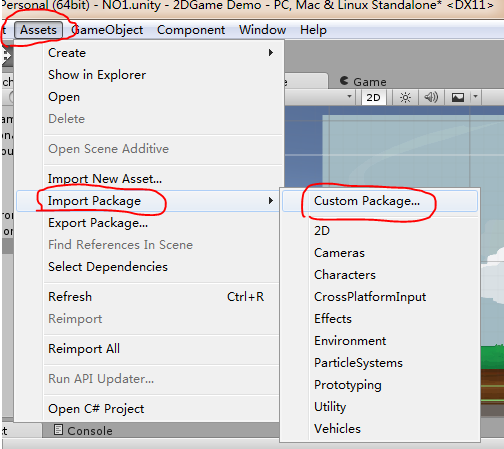
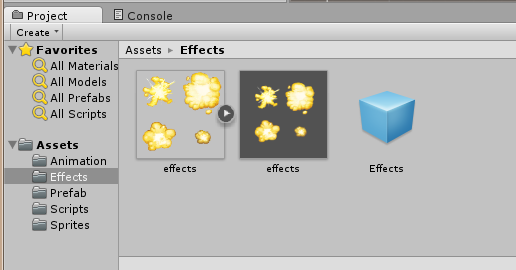
为了让帽子接到了保龄球后会出现火花粒子特效,现在让我们来制作一个简单的特效。先将粒子效果资源包导入到项目中,点击Import按钮导入即可。


导入Effects资源之后,设置Effects粒子预设体的Inspector面板中的Renderer属性。


在HatController中添加帽子接取到保龄球之后,产生的粒子效果代码。
public class HatController : MonoBehaviour {
    public GameObject effect;
    private Vector3 rawPosition;
    private Vector3 hatPosition;
    private float maxWidth;
    // Use this for initialization
    void Start () {
        //将屏幕的宽度转换成世界坐标
        Vector3 screenPos = new Vector3(Screen.width, 0, 0);
        Vector3 moveWidth = Camera.main.ScreenToWorldPoint(screenPos);
        //计算帽子的宽度
        float hatWidth = GetComponent<Renderer>().bounds.extents.x;
        //获得帽子的初始位置
        hatPosition = transform.position;
        //计算帽子的移动宽度
        maxWidth = moveWidth.x - hatWidth;
    }

    // Update is called once per physics timestep
    void FixedUpdate () {
        //将鼠标的屏幕位置转换成世界坐标
        rawPosition = Camera.main.ScreenToWorldPoint(Input.mousePosition);
        //print(rawPosition);
        //设置帽子将要移动的位置,帽子移动范围控制
        hatPosition = new Vector3(rawPosition.x, hatPosition.y, 0);
        //print(hatPosition);
        //限制value的值在min和max之间
        hatPosition.x = Mathf.Clamp(hatPosition.x, -maxWidth, maxWidth);
        //帽子移动
        GetComponent<Rigidbody2D>().MovePosition(hatPosition);
    }

    void OnTriggerEnter2D(Collider2D col)
    {
        GameObject neweffect = (GameObject)Instantiate(effect, transform.position, effect.transform.rotation);
        neweffect.transform.parent = transform;
        //删除该碰撞物体
        Destroy(col.gameObject);
        Destroy(neweffect, 1.0f);
    }
}
为HatController脚本添加粒子效果组件。

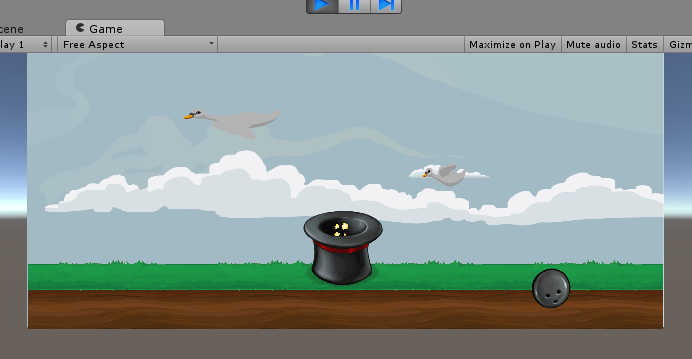
最终游戏效果:


 浙公网安备 33010602011771号