02-水平垂直网格布局理解
1. 之前使用布局基本都是创建带有UI界面的,并使用ui设计师进行布局,为了更直观理解水平与垂直布局,在mini qt工程基础上,实现水平垂直布局
2. 垂直布局VBoxLayout


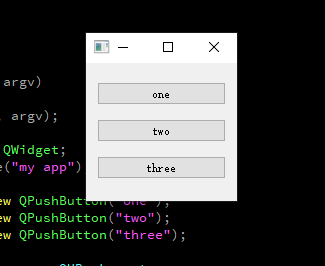
 1 #include <QApplication>
 2 #include <QLabel>
 3
 4 #include <QHBoxLayout>
 5 #include <QVBoxLayout>
 6 #include <QPushButton>
 7
 8 int main(int argc, char** argv)
 9 {
10     QApplication app(argc, argv);
11
12     QWidget *widget = new QWidget;
13     widget->setWindowTitle("my app");
14
15     QPushButton* btn1 = new QPushButton("one");
16     QPushButton* btn2 = new QPushButton("two");
17     QPushButton* btn3 = new QPushButton("three");
18
19     QVBoxLayout* vlayout = new QVBoxLayout;
20     vlayout->addWidget(btn1);
21     vlayout->addWidget(btn2);
22     vlayout->addWidget(btn3);
23     widget->setLayout(vlayout);
24
25     widget->show();
26     return app.exec();
27 }
实现效果:
3. 水平布局HBoxLayout
 1 #include <QApplication>
 2 #include <QLabel>
 3
 4 #include <QHBoxLayout>
 5 #include <QVBoxLayout>
 6 #include <QPushButton>
 7
 8 int main(int argc, char** argv)
 9 {
10     QApplication app(argc, argv);
11
12     QWidget *widget = new QWidget;
13     widget->setWindowTitle("my app");
14
15     QPushButton* btn1 = new QPushButton("one");
16     QPushButton* btn2 = new QPushButton("two");
17     QPushButton* btn3 = new QPushButton("three");
18
19     QHBoxLayout *hlayout = new QHBoxLayout;
20     hlayout->addWidget(btn1);
21     hlayout->addWidget(btn2);
22     hlayout->addWidget(btn3);
23     widget->setLayout(hlayout);
24
25     widget->show();
26     return app.exec();
27 }
实现效果:

使用这样的方法更加深刻了解布局方式;
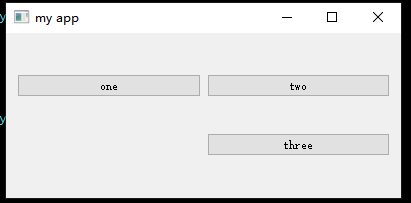
4. 网格布局QGridLayout
 1 #include <QApplication>
 2 #include <QLabel>
 3
 4 #include <QHBoxLayout>
 5 #include <QVBoxLayout>
 6 #include <QGridLayout>
 7 #include <QPushButton>
 8
 9 int main(int argc, char** argv)
10 {
11     QApplication app(argc, argv);
12
13     QWidget *widget = new QWidget;
14     widget->setWindowTitle("my app");
15
16     QPushButton* btn1 = new QPushButton("one");
17     QPushButton* btn2 = new QPushButton("two");
18     QPushButton* btn3 = new QPushButton("three");
19
20
21     QGridLayout* glayout = new QGridLayout;
22     glayout->addWidget(btn1, 0, 0);
23     glayout->addWidget(btn2, 0, 1);
24     glayout->addWidget(btn3, 1, 1);
25     widget->setLayout(glayout);
26
27     widget->show();
28     return app.exec();
29 }
实现效果:
这些布局与ui设计师界面实现几乎一样

 浙公网安备 33010602011771号