
Java WEB框架——SSM迈向M之登录
1.pom.xml
关于pom.xml,<version>等标签先暂时不谈,<dependency> 的作用主要是添加相应的支持包,比如spring,servlet,jdbc等等。<build>标签,详情可以看这篇博文。
如何写pom,访问http://mvnrepository.com/,具体操作参照https://blog.csdn.net/congzi0424/article/details/52149419。
2.web.xml
web.xml加载后的作用是设置url相应的servlet-name,从而找到相应默认的【servlet-name】-servlet.xml(本例中的spring-mvc-servlet.xml),当然我们可以 自定义名称,通过添加如下代码:
    <init-param>
      <param-name>contextConfigLocation</param-name>
      <param-value>classpath:【你想要的名称】.xml</param-value>
    </init-param>
此外,还有contextConfigLocation的文件设置路径。
3.spring-mvc-servlet.xml
作用:将controller文件返回的字符串转换成jsp文件路径
4.HelloworldController.java
package com.demo.controller;
import org.springframework.stereotype.Controller;
import org.springframework.ui.Model;
import org.springframework.web.bind.annotation.RequestMapping;

@Controller
public class HelloWorldController {
    @RequestMapping("/hello")
    public String hello(Model model){
        return "login";
    }
}
没有具体操作,当url是/hello时,打开login.jsp,也是本项目的初始页面。
5.login.jsp
<%--
  Created by IntelliJ IDEA.
  User: wym
  Date: 2019/10/8
  Time: 23:17
  To change this template use File | Settings | File Templates.
--%>
<%@ page language="java" contentType="text/html; charset=UTF-8"
         pageEncoding="UTF-8"%>
<!DOCTYPE html PUBLIC "-//W3C//DTD HTML 4.01 Transitional//EN" "http://www.w3.org/TR/html4/loose.dtd">
<html>
<head>
    <meta http-equiv="Content-Type" content="text/html; charset=UTF-8">
    <title>添加用户</title>
</head>
<body>
<form action="${pageContext.request.contextPath}/login" method="post">
    用户名:<input type="text" name="username"/> <br><br>
    年龄:<input type="password" name="password"/> <br><br>
    <input type="submit" value="提交"/>
</form>
</body>
</html>
关于html和js等前端我不进行美化,不过多予以赘述(其实我不会😂)。只看form表单提交,action指向${pageContext.request.contextPath}/login,其实是与键入url等效的,也是在指定包中寻找@RequestMapping("/login"),这是会找到LoginController.java文件。
6.LoginController.java
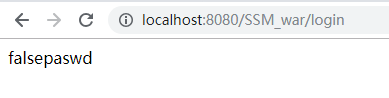
package com.demo.controller;


import com.demo.model.user;
import com.demo.service.Userservice;
import org.springframework.beans.factory.annotation.Autowired;
import org.springframework.stereotype.Controller;
import org.springframework.web.bind.annotation.ModelAttribute;
import org.springframework.web.bind.annotation.RequestMapping;
import org.springframework.web.bind.annotation.RequestMethod;
import javax.servlet.http.HttpSession;

@Controller
public class LoginController {
    @Autowired
    private Userservice userService;

    @RequestMapping(value="/login", method= RequestMethod.POST)
    public String hello(@ModelAttribute user u, HttpSession session){
        session.setAttribute("user", u);
        user user = userService.findbyname(u.getUsername());
        if(user == null)
            return "loginfail";
        else if(!user.getPassword().equals(u.getPassword()))
            return "falsepaswd";
        else
        return "helloworld";
    }


}
这时通过表单提交的内容被存储在对象u中,中间的传递过程很有意思,关于@ModelAttribute和pojo类之间传递新开一篇好了:springmvc后台获取表单提交的数据——@ModelAttribute等方式。
我们先来看一看user类文件。
7.user.java
package com.demo.model;

public class user {
    private String username;
    private String password;
    private  int nsex;


    public String getUsername() {
        return username;
    }

    public void setUsername(String username) {
        this.username = username;
    }

    public String getPassword() {
        return password;
    }

    public void setPassword(String password) {
        this.password = password;
    }


    public void setNsex(int nsex) {
        this.nsex = nsex;
    }

    public int getNsex() {return nsex;}
}
一个简单的pojo,但是名称却不是随意取得,成员域建议均为小写,相应的getter和setter函数则将首字母大写。
8.dao.java(interface),service.java(interface),serviceimpl.java(class)


package com.demo.dao;


import com.demo.model.user;
public interface Userdao {
    user findbyname(String name);

}
package com.demo.service;

import com.demo.model.user;

public interface Userservice {
    user findbyname (String name);
}
package com.demo.service.impl;
import com.demo.dao.Userdao;
import com.demo.model.user;
import com.demo.service.Userservice;
import org.springframework.stereotype.Service;

import  javax.annotation.Resource;


@Service("userService")
public class Userserviceimpl implements Userservice {

    @Resource
    private Userdao userDao;

    public user findbyname(String  username) {
        return userDao.findbyname(username);
    }
}
这是模型中必不可少的部分,最大化的解耦,使得修改代码更加简单
返回到6来看,将对象u写入到Session中(为了通信),接下来通过代码userService.findbyname(String )来在数据库里进行查找,那么它是如何与数据库进行通信的呢?这就需要看web.xml中配置的applicationContext.xml文件了。
  <!-- Load by Spring ContextLoaderListener -->

  <context-param>
    <param-name>contextConfigLocation</param-name>
    <param-value>classpath:applicationContext.xml</param-value>
  </context-param>

  <!-- Spring ContextLoaderListener -->
  <listener>
    <listener-class>org.springframework.web.context.ContextLoaderListener</listener-class>
  </listener>
9.applicationContext.xml
<?xml version="1.0" encoding="UTF-8"?>
<beans xmlns="http://www.springframework.org/schema/beans"
       xmlns:xsi="http://www.w3.org/2001/XMLSchema-instance"
       xmlns:tx="http://www.springframework.org/schema/tx" xmlns:context="http://www.springframework.org/schema/context"
       xsi:schemaLocation="http://www.springframework.org/schema/beans
                        http://www.springframework.org/schema/beans/spring-beans-3.1.xsd
                        http://www.springframework.org/schema/tx
                        http://www.springframework.org/schema/tx/spring-tx.xsd http://www.springframework.org/schema/context http://www.springframework.org/schema/context/spring-context.xsd">

    <!-- 加载properties文件 -->
    <bean id="propertyConfigurer" class="org.springframework.beans.factory.config.PropertyPlaceholderConfigurer">
        <property name="location" value="classpath:jdbc.properties"/>
    </bean>

    <!-- 配置数据源 -->
    <bean id="dataSource" class="com.alibaba.druid.pool.DruidDataSource">
        <property name="driverClassName" value="${driver}"/>
        <property name="url" value="${url}"/>
        <property name="username" value="${username}"/>
        <property name="password" value="${password}"/>
    </bean>

    <!-- mybatis和spring完美整合,不需要mybatis的配置映射文件 -->
    <bean id="sqlSessionFactory" class="org.mybatis.spring.SqlSessionFactoryBean">
        <property name="dataSource" ref="dataSource"/>
        <!-- 扫描model包 -->
        <property name="typeAliasesPackage" value="com.demo.model"/>
        <!-- 扫描sql配置文件:mapper需要的xml文件-->
        <property name="mapperLocations" value="classpath:mapper/*.xml"/>
    </bean>

    <!-- Mapper动态代理开发,扫描dao接口包-->
    <bean class="org.mybatis.spring.mapper.MapperScannerConfigurer">
        <!-- 注入sqlSessionFactory -->
        <property name="sqlSessionFactoryBeanName" value="sqlSessionFactory"/>
        <!-- 给出需要扫描Dao接口包 -->
        <property name="basePackage" value="com.demo.dao"/>
    </bean>

    <!-- 事务管理 -->
    <bean id="transactionManager" class="org.springframework.jdbc.datasource.DataSourceTransactionManager">
        <!--数据库连接池-->
        <property name="dataSource" ref="dataSource"/>
    </bean>
</beans>
其中加载jdbc.properties和配置数据源两部分共同指定了连接数据库的参数。然后还指定了model,dao以及mybatis-mapper等文件的位置。
10.UserDao.xml
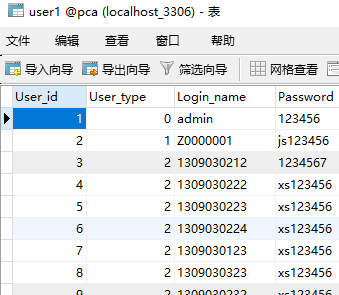
<?xml version="1.0" encoding="UTF-8"?> <!DOCTYPE mapper PUBLIC "-//mybatis.org//DTD Mapper 3.0//EN" "http://mybatis.org/dtd/mybatis-3-mapper.dtd"> <!-- 设置为DAO接口方法提供sql语句配置 --> <mapper namespace="com.demo.dao.Userdao"> <!-- <resultMap type="com.demo.model.user" id="userResultMap"> <!– 用result属性来映射非主键字段 –> <result property="username" column="Login_name"/> <result property="password" column="Password"/> </resultMap> --> <select id="findbyname" resultType="user" parameterType="String"> SELECT * FROM user1 WHERE Login_name = #{name} </select> </mapper>
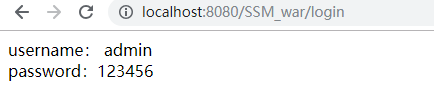
SQL语句。这里通过username查找出相应的user类,相关内容可以参考:Mybatis映射文件中数据库表列名称和POJO成员域的联系。继续回到6,6的逻辑很简单,form表单传递内容组成的对象u,在数据库中查找u的username返回user类对象,如果没有,代表没这个用户;若两个对象的密码不符合,表示密码错误;当然若密码和用户名均能对上,则能够登录成功。
数据库内容
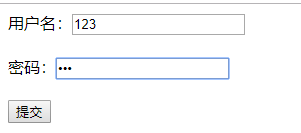
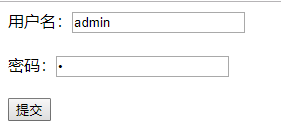
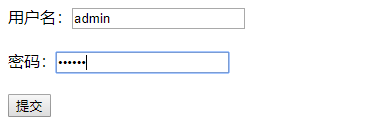
登录主界面

用户不存在

密码错误
登录成功

 浙公网安备 33010602011771号