
1:认识Vue.js
2:Vue常用指令
3:Vue常用属性
4:Vue常用指令之流程控制
1:Vue.js介绍
Vue.js:简称Vue,是一套用于快速构建用户界面的渐进式前端框架。
1.1:Vue.js核心实现
1:响应式数据绑定:当数据发生改变,视图可以自动更新,不用关心DOM操作,专心数据操作。
2:可组合的视图组件:把视图按照功能切分成若干个基本单元,可维护,可重用,可测试等特点

官网:https://cn.vuejs.org/
1.2:使用Vue的四种方式
1:在html中使用CDN包的形式引入
2:下载js文件保存到本地再导入
3:使用npm安装
4:使用官方vuecli脚手架创建项目(不建议新手使用)

参考文档:https://cn.vuejs.org/guide/quick-start.html

我们在前面学习使用`CDN`来引入`JS`文件
<!DOCTYPE html>
<html lang="en">
<head>
    <meta charset="UTF-8">
    <title>Vue Test</title>
    <!-- 引入 Vue -->
    <script src="https://unpkg.com/vue@3"></script>
</head>
<body>
    <div id="hello-vue">
        {{ message }}  <!-- message 是一个变量 -->
    </div>
    <script>
        // 定义一个vue实例
        const HelloVueApp = {
            data() {
                return {
                    message: 'Hello Vue!'  // 变量名和值
                }
            }
        }
        Vue.createApp(HelloVueApp).mount('#hello-vue')  // 创建实例并将实例绑定到元素
    </script>
</body>
</html>

这是一个简单的demo,从这个简单的demo我们可以看出,其实vue的写法类似于我们以前的前后端融合在一起的方式使用template那种方式去引用后端变量的形式,但是也只是这一点像而已。
1.2.1:声明式渲染
vue.js的核心是一个允许采用简洁的模板语法来声明式的将数据渲染进DOM的系统
<!DOCTYPE html>
<html lang="en">
<head>
    <meta charset="UTF-8">
    <title>Vue Test</title>
    <!-- 引入 Vue -->
    <script src="https://unpkg.com/vue@3"></script>
</head>
<body>
    <div id="counter">
        Counter: {{ counter }}
    </div>
    <script>
        const HelloVueApp = {
            data() {
                return {
                    counter: 0
                }
            },
            mounted() { // 实例生命周期中的一个钩子
                setInterval(()=>{    // js语法,定时器
                    this.counter++   // 动态改变Counter的值
                }, 1000)
            }
        }
        Vue.createApp(HelloVueApp).mount('#counter')
    </script>
</body>
</html>
我们可以清楚的看出,我们的值每秒都会去加`1`,这个就是我们所谓的`响应式`
1.2.2:模板语法
Vue.js使用了基于HTML的模板语法,允许开发者声明式的将`DOM`绑定致底层组件实例的数据,所有Vue.js的模板都是合法的HTML,所以能被遵循规范的浏览器和HTML解析器解析,

数据绑定最常见的形式就是使用`{{  }}`,语法在HTML中插入文本:
<span>Message:{{ msg }}</span>
{{ msg }}将被替换为对应组件实例中`msg`属性的值,无论如何,绑定的组件实例上`msg`属性发生改变,传入HTML的值也会随之改变。
2:Vue.js常用指令
1:指令介绍
2:v-text
3:v-html
4:v-bind
5:v-on
6:指令缩写
2.1:指令介绍
指令:带有`v-`前缀的的特殊属性。
指令的作用:当表达式的值改变时,将其产生的连带相应,响应式地作用于DOM。
2.2:v-text
它的作用和`{{ }}`作用一样,将数据填充到标签中,但没有闪烁问题
<!DOCTYPE html>
<html lang="en">
<head>
    <meta charset="UTF-8">
    <title>Vue Test</title>
    <script src="https://unpkg.com/vue@3"></script>
</head>
<body>
    <div id="counter">
        <p>{{ msg }}</p>
        <p v-text="msg"></p>
    </div>
    <script>
        const HelloVueApp = {
            data() {
                return {
                    msg: "Hello Vue!"
                }
            }
        }
        Vue.createApp(HelloVueApp).mount('#counter')
    </script>
</body>
</html>

可以看得出它的作用貌似真的和`{{ }}`的作用是一样的,只是`{{ }}`会出现那种打开页面闪一下加载数据的问题,但是用这个`v-text`它就不会出现这种问题。
2.3:v-html
在某些情况下,从服务端请求的数据本身就是一个HTML代码,如果用`{{ }}`会将数据解释为普通文本,而非HTML代码,为了输出真正的HTML,所以需要`v-html`指令
<!DOCTYPE html>
<html lang="en">
<head>
    <meta charset="UTF-8">
    <title>Vue Test</title>
    <script src="https://unpkg.com/vue@3"></script>
</head>
<body>
    <div id="counter">
        <p>{{ msg }}</p>
        <p v-html="msg"></p>
    </div>
    <script>
        const HelloVueApp = {
            data() {
                return {
                    msg: "<h1>这是一个HTML代码</h1>"
                }
            }
        }
        Vue.createApp(HelloVueApp).mount('#counter')
    </script>
</body>
</html>
从上图我们可以看出`{{ }}`只给我们解析了代码的原本数据,而`v-html`则是直接把HTTML渲染后的样式展示出来了,这就是`v-html`的作用。
2.4:v-on
在前端开发中,我们经常监听用户发生的事件,例如:点击、拖拽、键盘等事件,那么在Vue中如何监听事件呢?就是使用`v-on`指令
<!DOCTYPE html>
<html lang="en">
<head>
    <meta charset="UTF-8">
    <title>Vue Test</title>
    <script src="https://unpkg.com/vue@3"></script>
</head>
<body>
    <div id="counter">
        <p>点击次数:{{ counter }}</p>
        <button type="button" v-on:click="counter++">点击</button>
    </div>
    <script>
        const HelloVueApp = {
            data() {
                return {
                    counter: 0,
                }
            }
        }
        Vue.createApp(HelloVueApp).mount('#counter')
    </script>
</body>
</html>

`v-on`冒号后就是我们要监听的事件,比如`click`、`change`等
2.5:v-bind
它主要用于动态绑定一个或多个属性值,或者向另一个组件传递`props`值(后面介绍)
应用场景:图片地址src、超链接href、动态绑定一些类,样式等等
<!DOCTYPE html>
<html lang="en">
<head>
    <meta charset="UTF-8">
    <title>Vue Test</title>
    <script src="https://unpkg.com/vue@3"></script>
</head>
<body>
    <div id="counter">
        <a v-bind:href="url">点击跳转</a>
    </div>
    <script>
        const HelloVueApp = {
            data() {
                return {
                    url: "https://www.baidu.com"
                }
            }
        };
        Vue.createApp(HelloVueApp).mount('#counter');
    </script>
</body>
</html>

这个指令其实主要实现了,我们在引用图片或者url的时候可以动态的修改这个地址,而不是我们去自己手动修改代码这样子。而这个URL从哪儿来,一般都是从后端获取或者其他方式获取的地址,并且这个地址会动态变化。

目前我们看到的这个是绑定的`超链接`,

它可以绑定的参数很多,例如:class、style等
操作元素(标签)的class和style属性是数据绑定的一个常见需求,希望动态却换class,为div改变不同背景颜色
<!DOCTYPE html>
<html lang="en">
<head>
    <meta charset="UTF-8">
    <title>Vue Test</title>
    <script src="https://unpkg.com/vue@3"></script>
    <style>
        .bind {
            background: deepskyblue;
            width: 200px;
            height: 200px;
        }
        .active {
            background: palegreen;
            width: 200px;
            height: 200px;
        }
    </style>
</head>
<body>
<div id="hello-vue">
    <div class="bind" v-bind:class="{active: isActive}">

    </div>
    <button v-on:click="btn">切换样式</button>
</div>
<script>
    const HelloVueApp = {
        data() {
            return {
                isActive: false
            }
        },
        methods: {
            btn() {
                this.isActive = true
                // this.isActive = !this.isActive  // 一个按钮动态切换样式
            }
        }
    };
    Vue.createApp(HelloVueApp).mount('#hello-vue');
</script>
</body>
</html>
一个按钮动态切换
<!DOCTYPE html>
<html lang="en">
<head>
    <meta charset="UTF-8">
    <title>Vue Test</title>
    <script src="https://unpkg.com/vue@3"></script>
    <style>
        .bind {
            background: deepskyblue;
            width: 200px;
            height: 200px;
        }
        .active {
            background: palegreen;
            width: 200px;
            height: 200px;
        }
    </style>
</head>
<body>
<div id="hello-vue">
    <div class="bind" v-bind:class="{active: isActive}">

    </div>
    <button v-on:click="btn">切换样式</button>
</div>
<script>
    const HelloVueApp = {
        data() {
            return {
                isActive: false
            }
        },
        methods: {
            btn() {
                this.isActive = !this.isActive
            }
        }
    };
    Vue.createApp(HelloVueApp).mount('#hello-vue');
</script>
</body>
</html>
这里我们主要观察的就是闪烁的地方,就是我们动态添加的东西了

再往下就是动态添加CSS的问题了
<!DOCTYPE html>
<html lang="en">
<head>
    <meta charset="UTF-8">
    <title>Vue Test</title>
    <script src="https://unpkg.com/vue@3"></script>
    <style>
        .bind {
            background: deepskyblue;
            width: 200px;
            height: 200px;
        }
    </style>
</head>
<body>
<div id="hello-vue">
    <div v-bind:style="{background: background}" class="bind">
    </div>
</div>
<script>
    const HelloVueApp = {
        data() {
            return {
                background: 'red'
            }
        }
    };
    Vue.createApp(HelloVueApp).mount('#hello-vue');
</script>
</body>
</html>
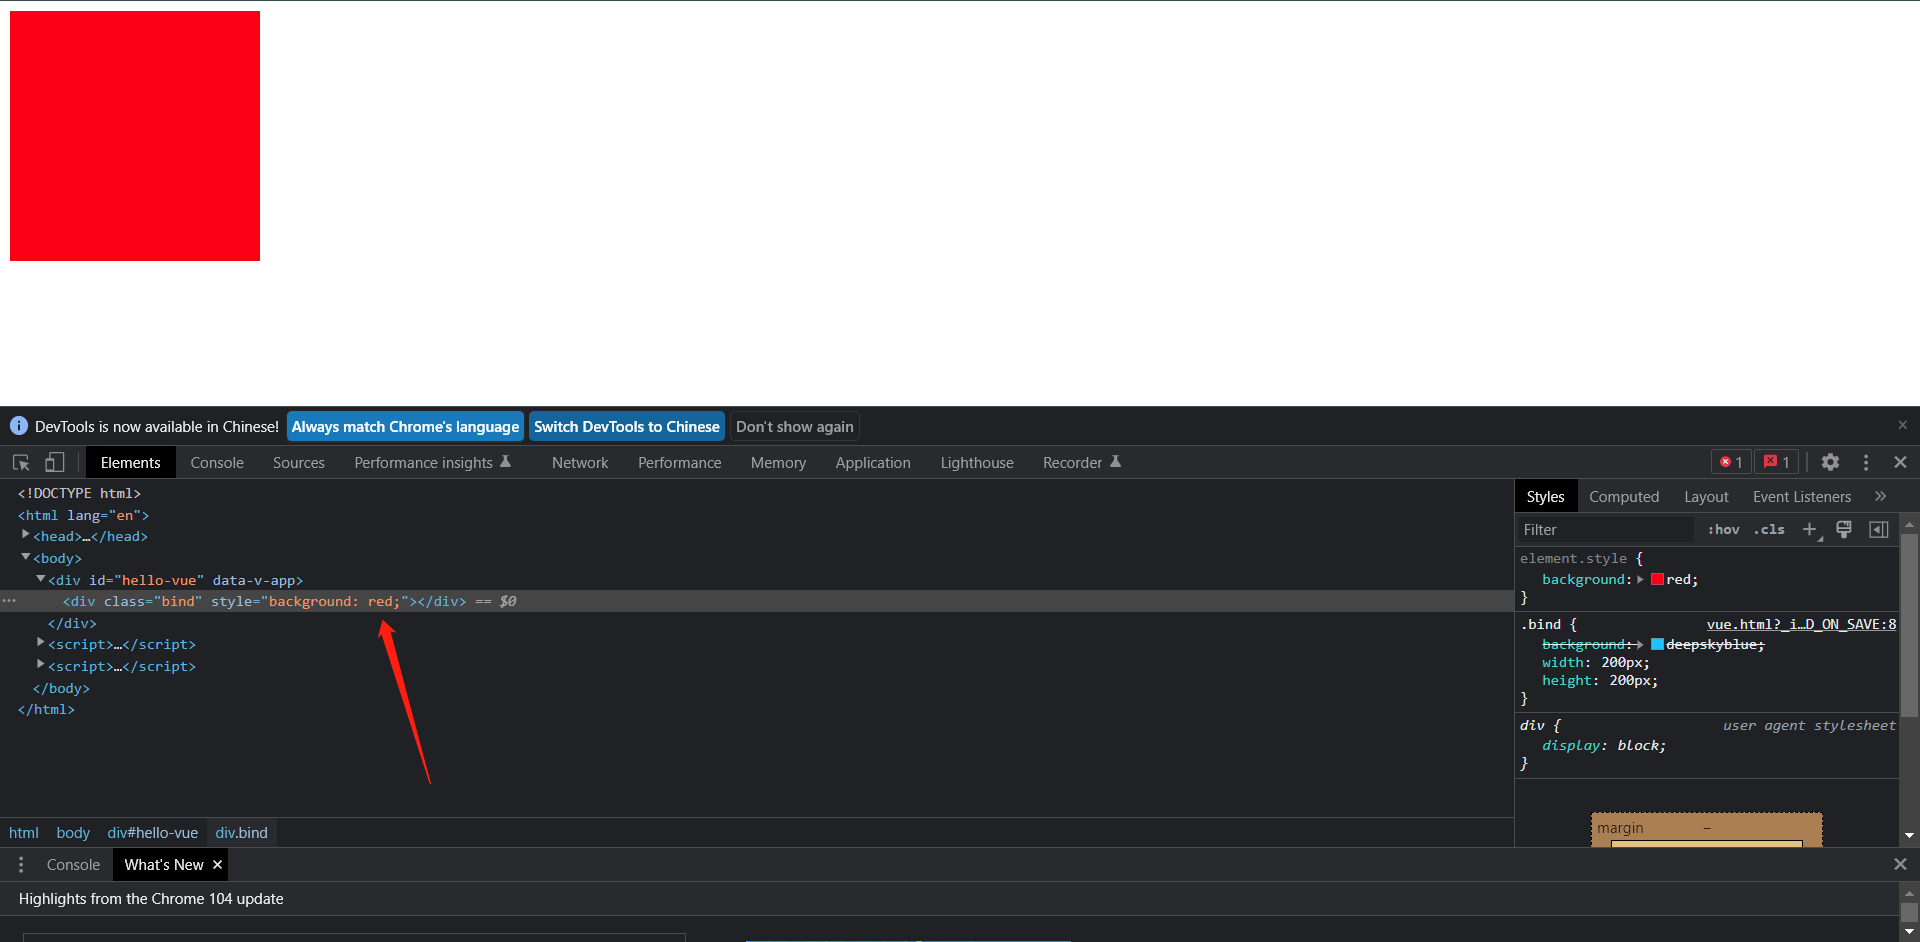
从箭头指的方向可以看到,这里vue已经帮你做到了动态引入这个样式的操作了,默认如果没有引入则是使用class的类,如果引入了,那就是使用引入的类的参数了
2.6:指令缩写
v-前缀作为一种视觉提示,用来识别模板中Vue特定的属性,但是对于一些频繁用到的指令来说,就会感觉到非常的繁琐,因此Vue为v-bind和v-on这两个最常用的指令,提供了特定的缩写

v-bind缩写:

<!-- 完整语法 -->
<a v-bind:href="url">......</a>

<!-- 缩写 -->
<a :href="url">......</a>

<!-- 动态参数缩写 -->
<a :[key]="url">......</a>


v-on缩写:

<!-- 完整语法 -->
<a v-on:click="doSomething">......</a>

<!-- 缩写 -->
<a @click="doSomething">......</a>

<!-- 动态参数缩写 -->
<a @[event]="doSomething">......</a>
<!DOCTYPE html>
<html lang="en">
<head>
    <meta charset="UTF-8">
    <title>Vue Test</title>
    <script src="https://unpkg.com/vue@3"></script>
    <style>
        .bind {
            background: deepskyblue;
            width: 200px;
            height: 200px;
        }
        .active {
            background: palegreen;
            width: 200px;
            height: 200px;
        }
    </style>
</head>
<body>
<div id="hello-vue">
    <div class="bind" :class="{active: isActive}">

    </div>
    <button @click="btn">切换样式</button>
</div>
<script>
    const HelloVueApp = {
        data() {
            return {
                isActive: false
            }
        },
        methods: {
            btn() {
                this.isActive = !this.isActive
            }
        }
    };
    Vue.createApp(HelloVueApp).mount('#hello-vue');
</script>
</body>
</html>
3:Vue常用属性
1:数据属性
2:方法
3:计算属性
4:监听属性
3.1:数据属性
组件的`data`选项是一个函数,Vue会在创建新组件实例的过程中调用此函数,它应该返回一个对象,然后Vue会通过响应性系统将其包裹起来,并以$data的形式存储在组件实例中,方便起见,该对象的任何顶级`属性`也会直接通过组件实例暴露出来,接下来我们来看一下实例。
<!DOCTYPE html>
<html lang="en">
<head>
    <meta charset="UTF-8">
    <title>Vue Test</title>
    <script src="https://unpkg.com/vue@3"></script>
</head>
<body>
<div id="hello-vue">
    {{ msg }}
</div>
<script>
    const HelloVueApp = {
        data() {
            return {
                msg: 'Hello Vue!'
            }
        }
    }
    const vm = Vue.createApp(HelloVueApp).mount('#hello-vue')
    console.log(vm.$data.msg)   // Hello Vue!
    console.log(vm.msg)     // Hello Vue!

    // 修改msg的值,$data.msg 也会跟着修改
    vm.msg = "Hello Golang!"
    console.log(vm.$data.msg) // "Hello Golang!"

    // 反之也是一样的
    vm.$data.msg = "Hello Kubernetes!"
    console.log(vm.msg)  // "Hello Kubernetes!"
</script>
</body>
</html>
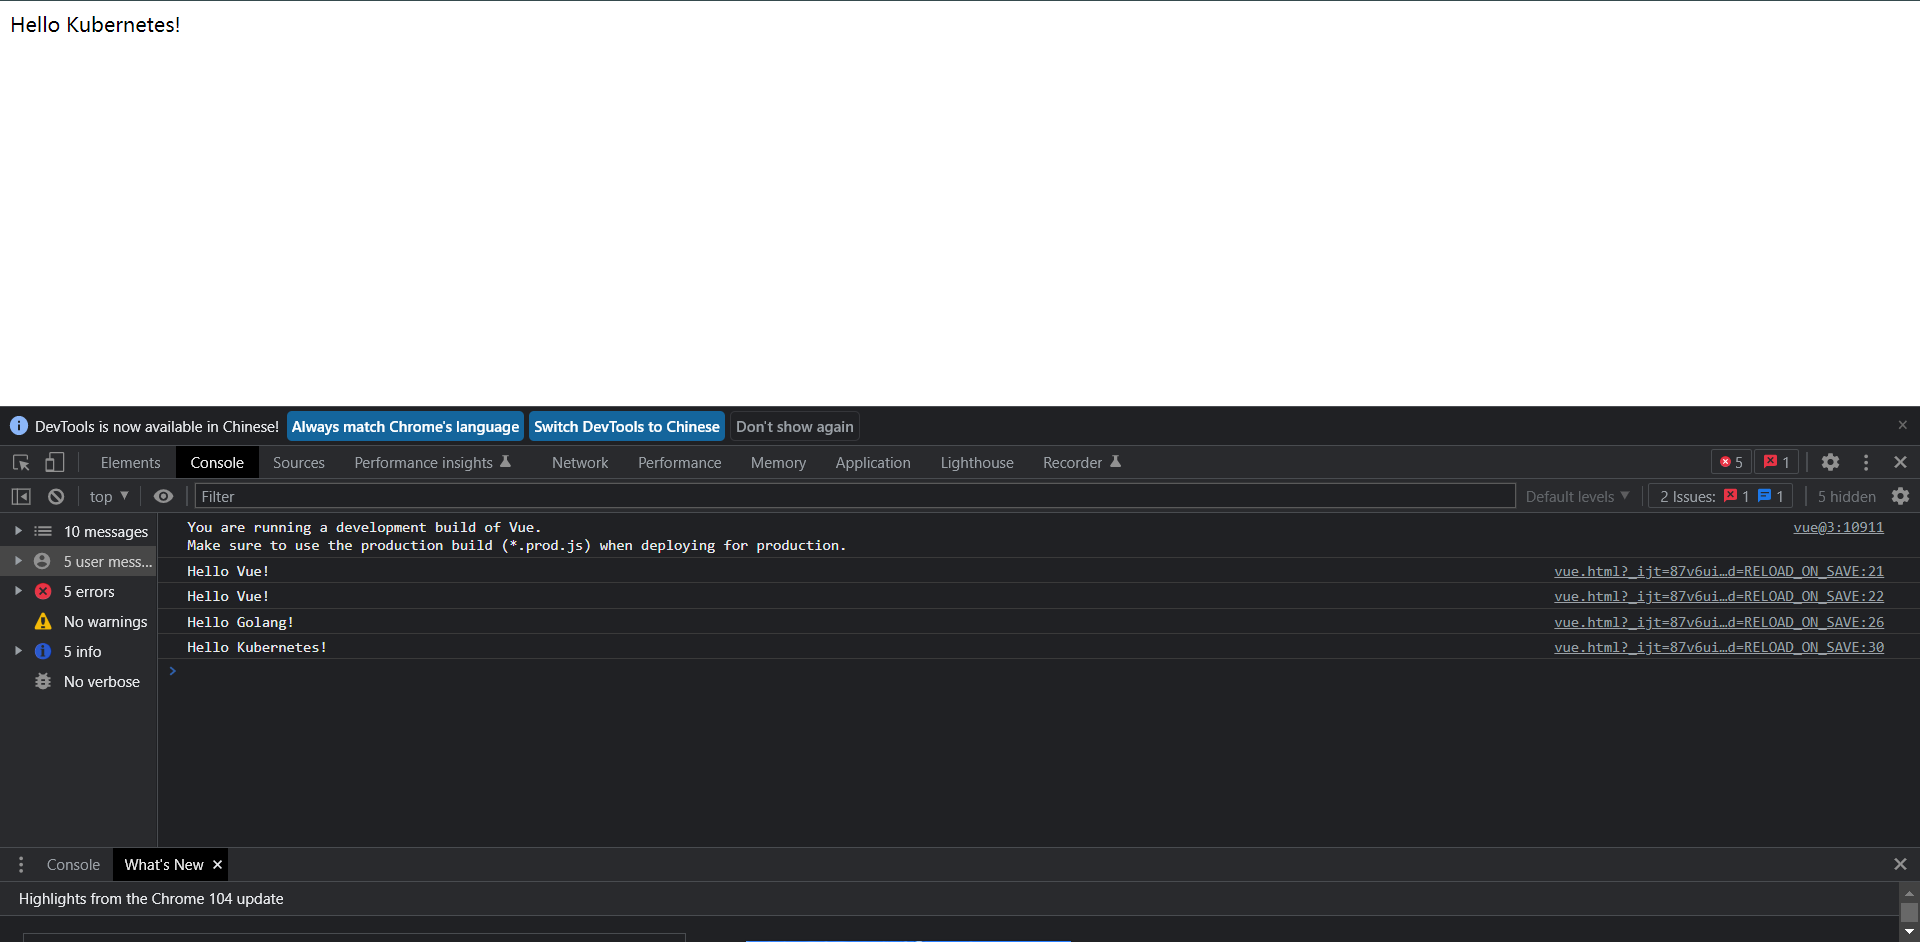
可以结合上面的代码来看啊我们的生效级别,当然下面还有一种书写方式
<!DOCTYPE html>
<html lang="en">
<head>
    <meta charset="UTF-8">
    <title>Vue Test</title>
    <script src="https://unpkg.com/vue@3"></script>
</head>
<body>
<div id="hello-vue">
    {{ msg }}
</div>
<script>
    const HelloVueApp = Vue.createApp({
        data() {
            return {
                msg: 'Hello Vue!'
                isActive: true
            }
        },
        // 定义方法都写在这咯
        methods: {
            // btn就是一个方法
            btn() {
                this.isActive = !this.isActive;
            }
        }
    });
    const vm = HelloVueApp.mount('#hello-vue');
</script>
</body>
</html>
这种写法其实是和上面的写法是一模一样的。

3.2:计算属性
计算属性(Computed):根据所依赖的数据动态的显示新的计算结果。

示例:需要在`{{  }}`内添加计算再展示数据,demo如下:
<!DOCTYPE html>
<html lang="en">
<head>
    <meta charset="UTF-8">
    <title>Vue Test</title>
    <script src="https://unpkg.com/vue@3"></script>
</head>
<body>
<div id="hello-vue">
    <h1>总分:{{ math + language + english }}</h1>
</div>
<script>
    const HelloVoeApp = {
        data() {
            return {
                math: 90,
                language: 80,
                english: 70
            }
        }
    }
    Vue.createApp(HelloVoeApp).mount('#hello-vue')
</script>
</body>
</html>

从这里可以看得出,它是可以支持到我们的计算符的,比如:+ - * / 等都支持,可以说`js`支持的它都支持
<!DOCTYPE html>
<html lang="en">
<head>
    <meta charset="UTF-8">
    <title>Vue Test</title>
    <script src="https://unpkg.com/vue@3"></script>
</head>
<body>
<div id="hello-vue">
    <h1>总分:{{ sum }}</h1>
</div>
<script>
    const HelloVoeApp = {
        data() {
            return {
                math: 90,
                language: 80,
                english: 70
            }
        },
        // 这里就是专门用于计算的属性,
        computed: {
            sum () {
                // 使用this调用函数内的值进行计算并赋值给函数,然后在html内直接调用函数即可
                return this.math + this.language + this.english
            }
        }
    }
    Vue.createApp(HelloVoeApp).mount('#hello-vue')
</script>
</body>
</html>

`computed`计算属性的好处在于它有一个缓存的功能,意思就是如果第一次和后面的值是相同的,那么它就会从缓存直接取值,而不会再去计算了,这样节省了资源和时间的问题,那么这个时候可能会有人问,这个计算放在`methods`可以么,咱们先不说它是否可以,单纯看我们缓存的这个功能的优点它就比放在`methods`内好上N呗,其次是它放在`methods`是可行的,但是基于性能的考虑,我们还是放在计算属性内去zu
3.3:监听属性
监听属性(watch):是一个观察动作,监听`data`数据变化后触发对应的函数,函数有`newValue`(变化之后结构)和`oldValue`(变化之前结果)两个参数,当需要在数据变化时执行异步或开销较大的操作时,这个方式是最有用的,demo如下:
<!DOCTYPE html>
<html lang="en">
<head>
    <meta charset="UTF-8">
    <title>Vue Test</title>
    <script src="https://unpkg.com/vue@3"></script>
</head>
<body>
<div id="hello-vue">
    <p>消息:{{ msg }}</p>
    <p>观察的消息:{{ watchMsg }}</p>
    <button type="button" @click="btn">按钮</button>
</div>
<script>
    const HelloVueApp = {
        data() {
            return {
                msg: 'Hello Vue!',
                watchMsg: ''
            }
        },
        methods: {
            // 点击按钮执行函数,msg重新赋值,模拟msg值变化
            btn() {
                this.msg = 'Hello Goland!'
            }
        },
        watch: {
            // 每当msg值发生变化,执行该函数
            msg(newVal, oldVal) {
                this.watchMsg = `消息变化了,新的值是:${newVal},旧的值是:${oldVal}` // watchMsg 重新赋值渲染到页面上
            }
        }
    }
    Vue.createApp(HelloVueApp).mount('#hello-vue')
</script>
</body>
</html>

根据上面的操作,`msg`是我们原来的值,但是我们点击按钮之后就会改变这个属性,然后我们还想拿到原来的值的时候,这个是由这个监听方法就是非常有你要的操作了,这里监听属性使用的是`watch`
4:Vue常用指令-流程控制
1:v-if
2:v-show
3:v-for
4.1:v-if v-else v-else-if
<!DOCTYPE html>
<html lang="en">
<head>
    <meta charset="UTF-8">
    <title>Vue Test</title>
    <script src="https://unpkg.com/vue@3"></script>
</head>
<body>
<div id="hello-vue">
    <h1 v-if="onemessage">Onemessage Yes</h1>
    <h1 v-else>One Message is Null</h1>
    <h1 v-if="twomessage">Twomessage Yes</h1>
    <h1 v-else>Two Message is Null</h1>
</div>
<script>
    const HelloVueApp = {
        data() {
            return {
                onemessage: true,
                twomessage: false
            }
        }
    }
    Vue.createApp(HelloVueApp).mount('#hello-vue')
</script>
</body>
</html>
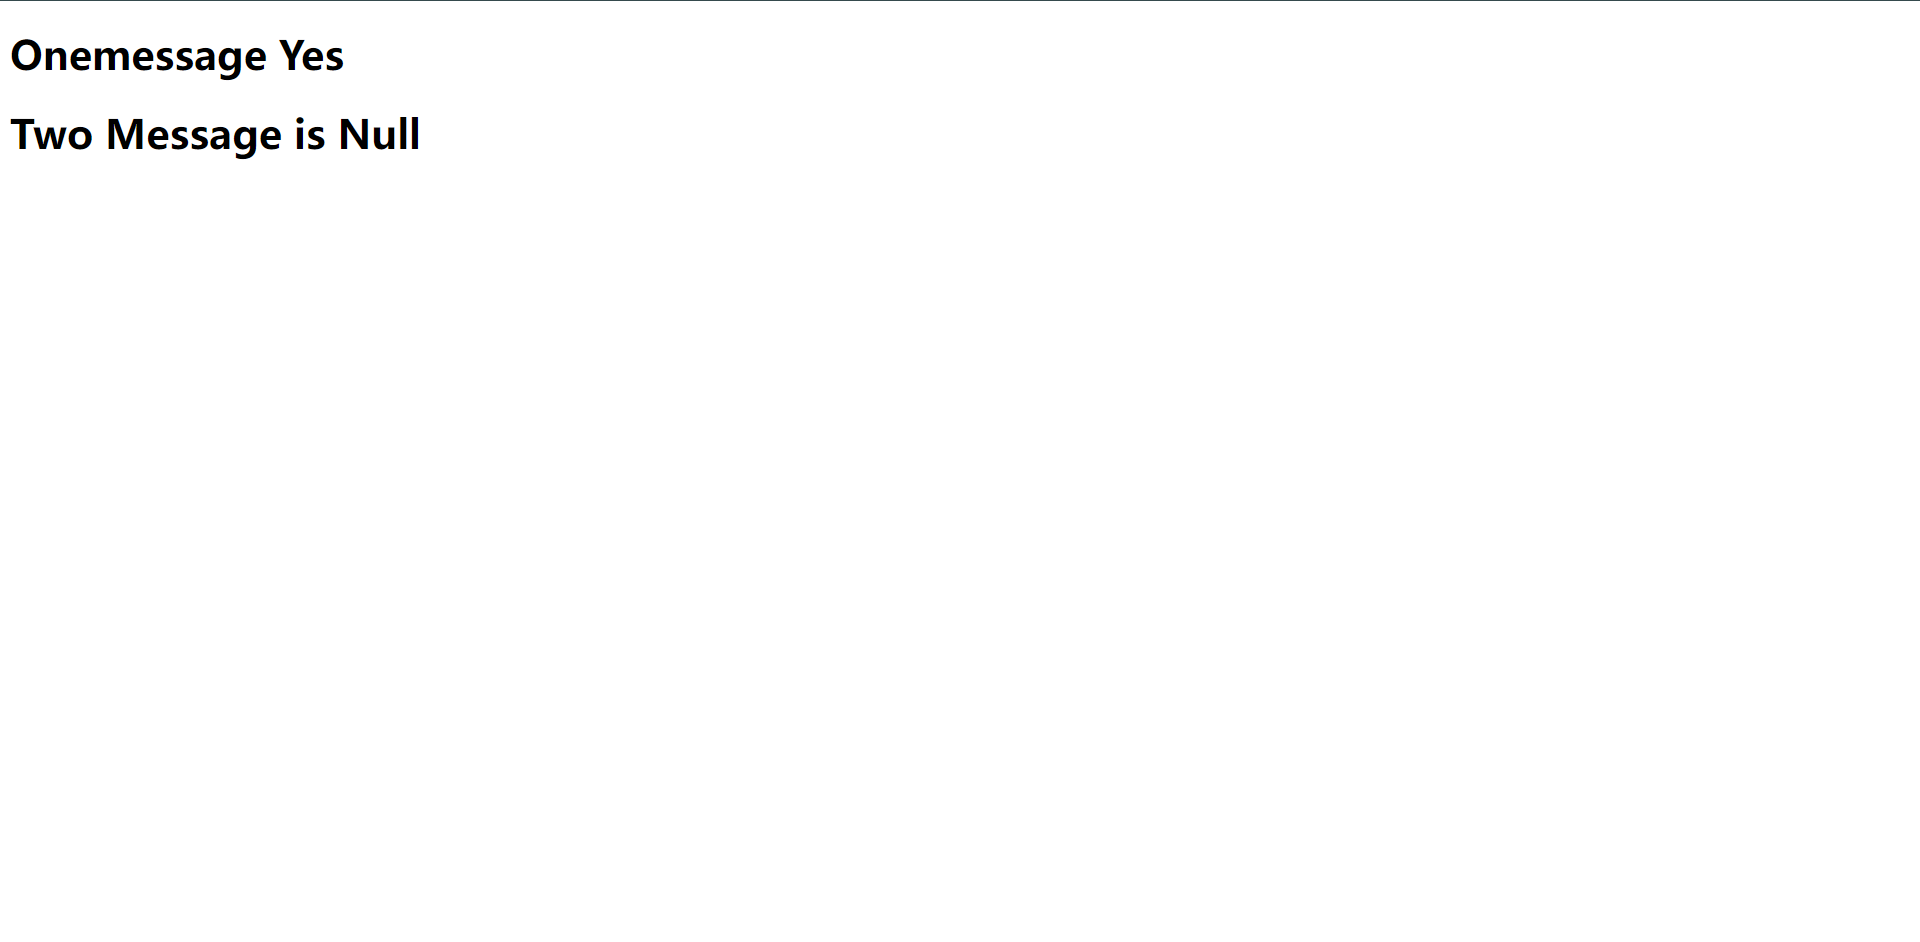
从上方我们可以看出,判断`变量`为`true`则显示,若为`false`则可以 不显示或者显示其他。
<!DOCTYPE html>
<html lang="en">
<head>
    <meta charset="UTF-8">
    <title>Vue Test</title>
    <script src="https://unpkg.com/vue@3"></script>
</head>
<body>
<div id="hello-vue">
    <h1 v-if="onemessage">Onemessage Yes</h1>
    <h1 v-else>One Message is Null</h1>
    <!--通过标签判断onemessage是否为真来决定是否显示template的内容-->
    <template v-if="onemessage">
        <h1>Develment</h1>
        <p>这是一个段落</p>
    </template>
</div>
<script>
    const HelloVueApp = {
        data() {
            return {
                onemessage: true,
                twomessage: false
            }
        }
    }
    Vue.createApp(HelloVueApp).mount('#hello-vue')
</script>
</body>
</html>
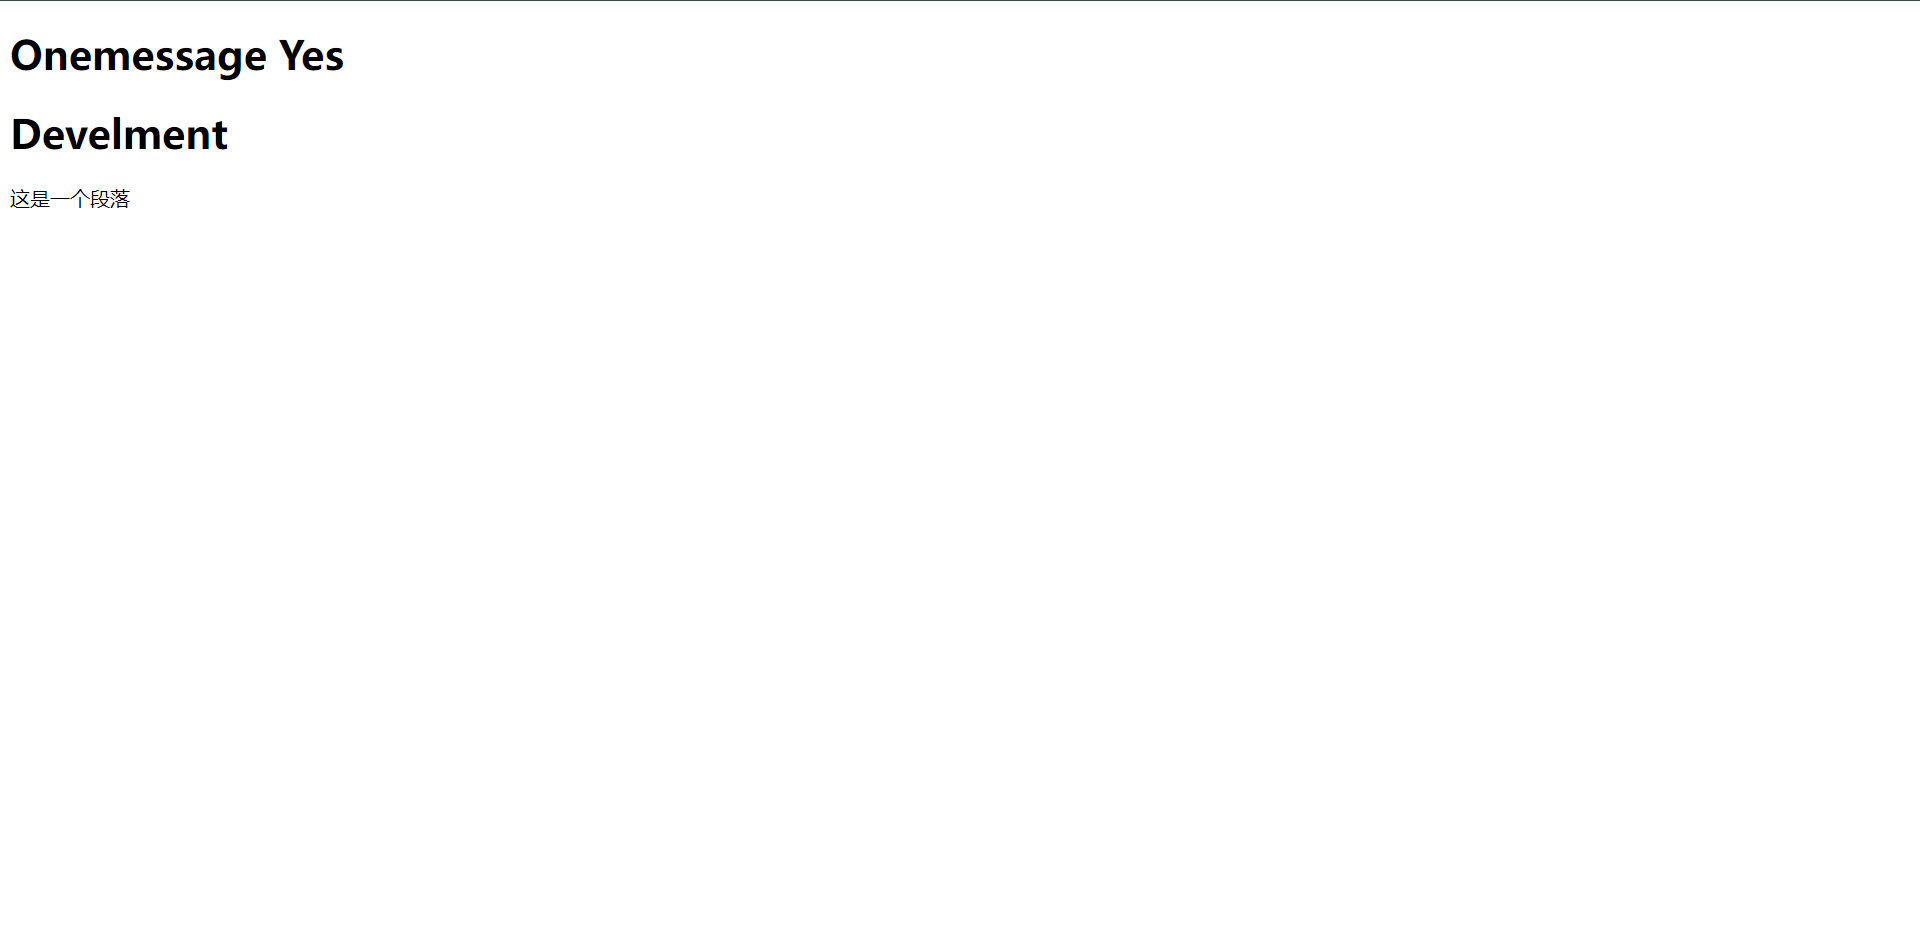
其实这个也是应用于`v-if`的基本上我们需要知道的就是`v-if`可以应用的标签是非常多的,接下来再看看它应用在`div`标签中
<!DOCTYPE html>
<html lang="en">
<head>
    <meta charset="UTF-8">
    <title>Vue Test</title>
    <script src="https://unpkg.com/vue@3"></script>
</head>
<body>
<div id="hello-vue">
    <div v-if="onemessage">
        <h1>这是第一个div</h1>
    </div>
    <div v-else>
        <h1>这是第二个div</h1>
    </div>
    <div v-if="twomessage">
        <h1>这是第三个div</h1>
    </div>
</div>
<script>
    const HelloVueApp = {
        data() {
            return {
                onemessage: true,
                twomessage: true
            }
        }
    }
    Vue.createApp(HelloVueApp).mount('#hello-vue')
</script>
</body>
</html>
我们大致推断一下,这个展示出来的一定是:第一个div和第三个div,因为第二个是第一个不显示才会显示出来的,那好我们结合实际来看看
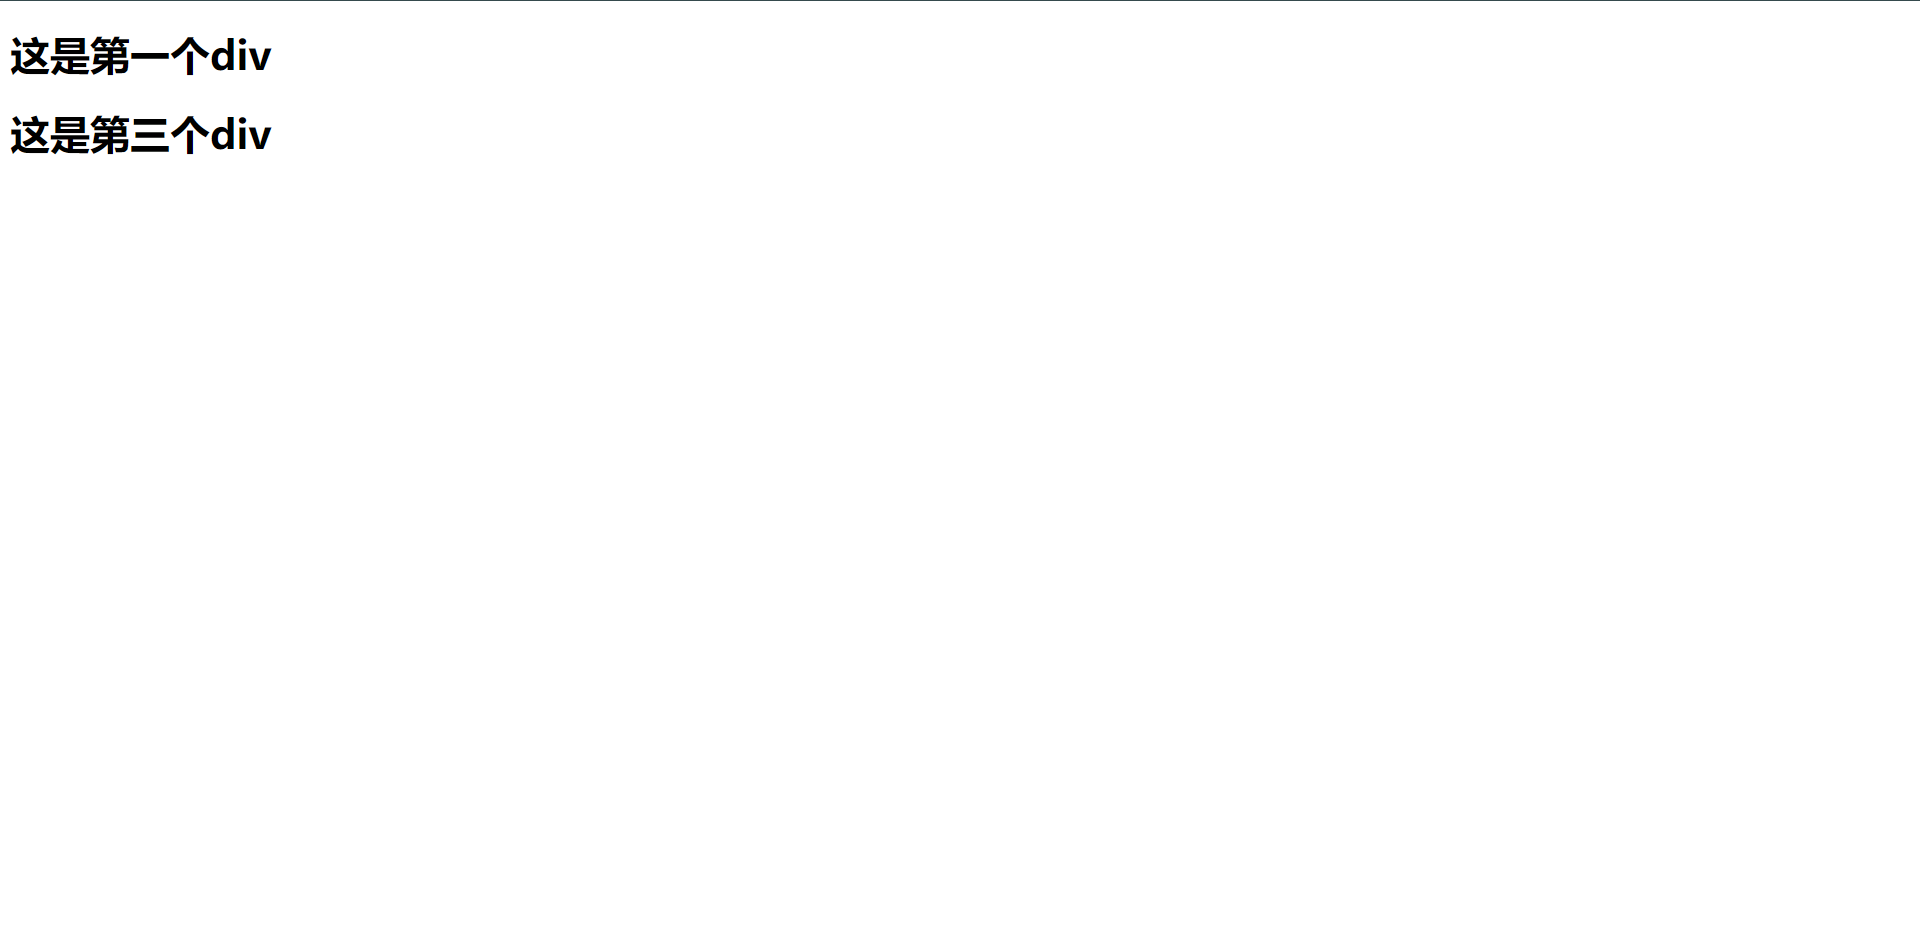
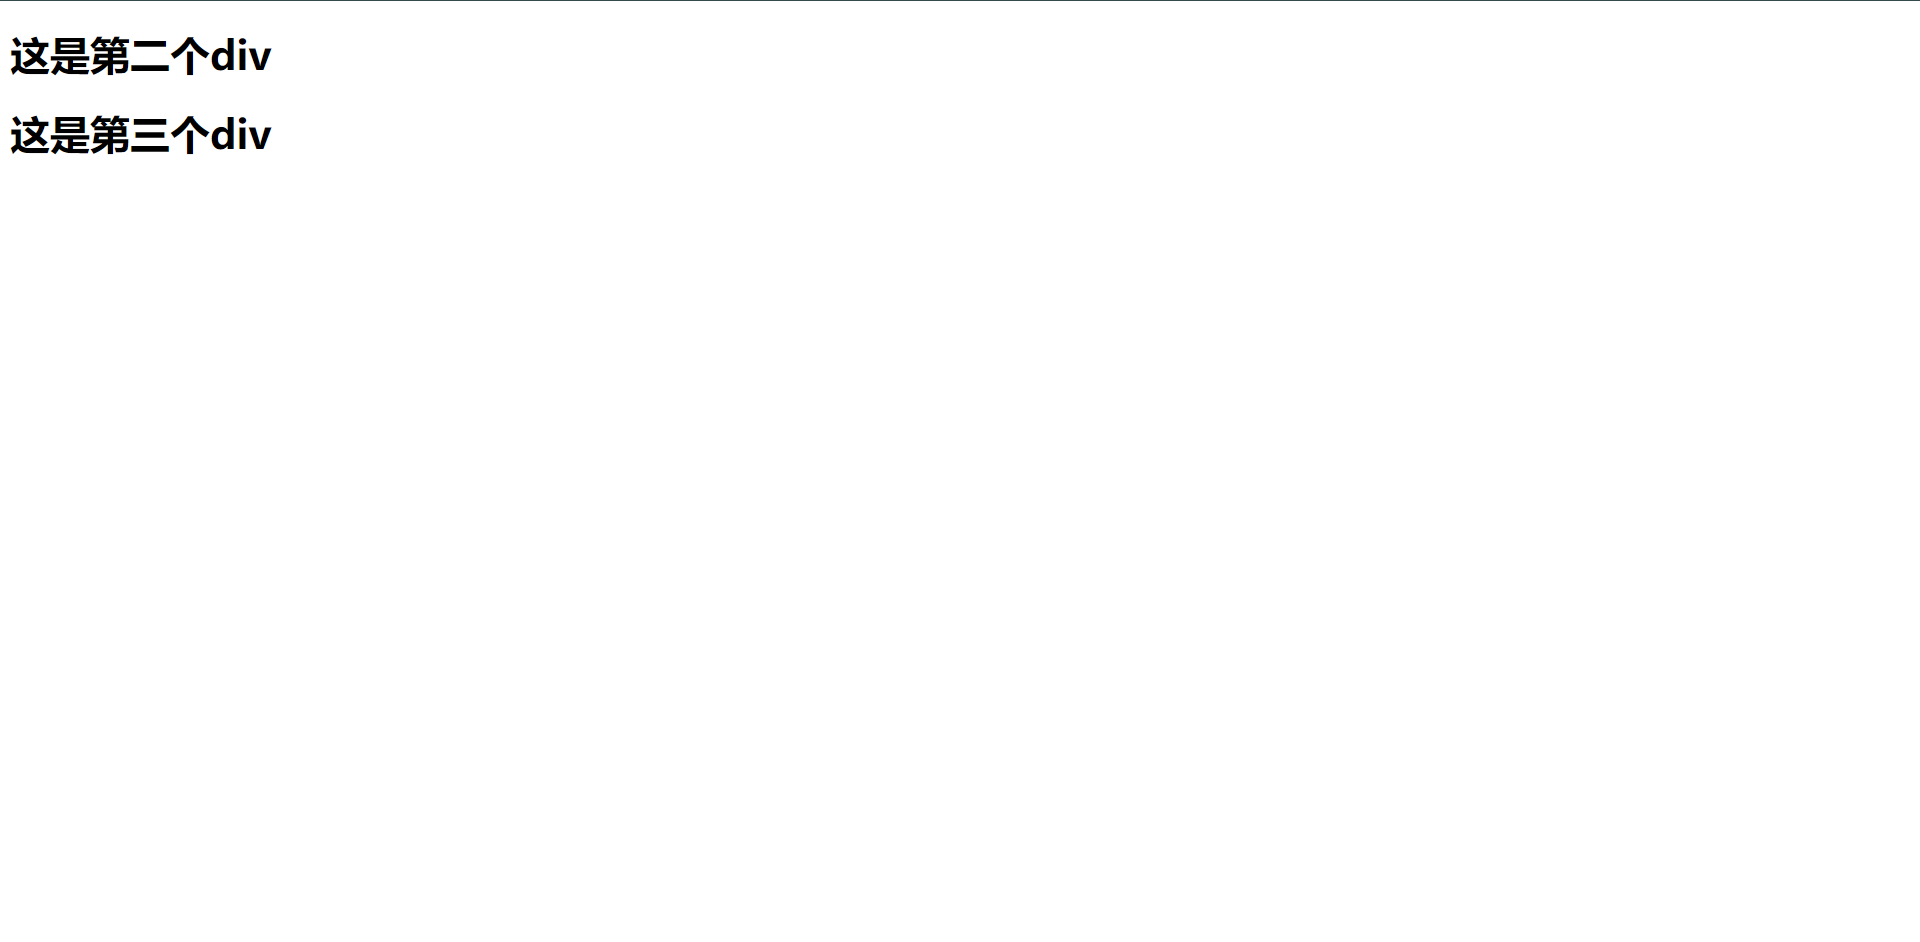
当我们变更了`onemessage`为`false`时我们再来看看结果
当然了,我们如果把`twomessage`也变更为`false`那么页面上只会展现出第二个div了,因为第三个div没有`else`显示了

当然了,它还可以接入js的对比运算符,比如:==、!=、<=、>= ...... 等等等等的计算符,总之js支持ide它都支持。
<!DOCTYPE html>
<html lang="en">
<head>
    <meta charset="UTF-8">
    <title>Vue Test</title>
    <script src="https://unpkg.com/vue@3"></script>
</head>
<body>
<div id="hello-vue">
    <div v-if="type === 'A'">
        <h1>true</h1>
    </div>
    <div v-else-if="type === 'B'">
        <h1>false</h1>
    </div>
    <div v-else>
        <h1>Other</h1>
    </div>
</div>
<script>
    const HelloVueApp = {
        data() {
            return {
                type: 'A',
            }
        },
    };
    Vue.createApp(HelloVueApp).mount('#hello-vue')
</script>
</body>
</html>

当我们随着变更`type`的值的时候,我们的web也会随之切换其他的`div`显示,总之这就是v-if、v-else-if、v-else的用法
4.2:v-show
v-show:是另一个用于条件性展示元素的命令,与`v-if`不同的是,`v-show`的元素始终会被渲染并保存在`DOM`中,所以`v-show`只是简单的切换元素的display,css属性
<!DOCTYPE html>
<html lang="en">
<head>
    <meta charset="UTF-8">
    <title>Vue Test</title>
    <script src="https://unpkg.com/vue@3"></script>
</head>
<body>
<div id="hello-vue">
    <div v-show="type">{{ msg }}</div>
</div>
<script>
    const HelloVueApp = {
        data() {
            return {
                msg: "Hello Vue",
                type: true
            }
        },
    };
    Vue.createApp(HelloVueApp).mount('#hello-vue')
</script>
</body>
</html>

4.3:v-for
可以用`v-for`指令基于一个数组来渲染一个列表,`v-for`指令需要使用item in items 形式的特殊语法,其中items是源数据数组,而item则是被迭代的数组元素的别名。
<!DOCTYPE html>
<html lang="en">
<head>
    <meta charset="UTF-8">
    <title>Vue Test</title>
    <script src="https://unpkg.com/vue@3"></script>
</head>
<body>
<div id="hello-vue">
    <li v-for="(v,k) in user ">
        {{ k }}:{{ v }}
    </li>
</div>
<script>
    const HelloVueApp = {
        data() {
            return {
                user: [
                    'zhangsan',
                    23,
                    'Shanghai'
                ]
            }
        },
    };
    Vue.createApp(HelloVueApp).mount('#hello-vue')
</script>
</body>
</html>

<!DOCTYPE html>
<html lang="en">
<head>
    <meta charset="UTF-8">
    <title>Vue Test</title>
    <script src="https://unpkg.com/vue@3"></script>
</head>
<body>
<div id="hello-vue">
    <li v-for="(v,k) in user ">
        {{ k }}:{{ v }}
    </li>
</div>
<script>
    const HelloVueApp = {
        data() {
            return {
                user: {
                    name: 'zhangsan',
                    age: 23,
                    city: 'Shanghai'
                }
            }
        },
    };
    Vue.createApp(HelloVueApp).mount('#hello-vue')
</script>
</body>
</html>

其实看下来,不管是对象还是数组,遍历的方法基本是一致的,
当Vue正在更新使用`v-for`渲染的元素列表时,它默认使用"就地更新"的策略,如果数据项的顺序被改变,Vue将不会移动DOM元素来匹配数据项的顺序,而是就地更新每个元素,并且确保它们在每个索引位置正确渲染。

为了给Vue一个提示,以便它能跟踪每个节点的身份,从而重用和重新排序现有元素,你需要为每一项提供一个唯一的`key`属性
<!DOCTYPE html>
<html lang="en">
<head>
    <meta charset="UTF-8">
    <title>Vue Test</title>
    <script src="https://unpkg.com/vue@3"></script>
</head>
<body>
<div id="hello-vue">
    <li v-for="(v,k) in user " :key="k">
        {{ k }}:{{ v }}
    </li>
</div>
<script>
    const HelloVueApp = {
        data() {
            return {
                user: {
                    name: 'zhangsan',
                    age: 23,
                    city: 'Shanghai'
                }
            }
        },
    };
    Vue.createApp(HelloVueApp).mount('#hello-vue')
</script>
</body>
</html>
下面我们来看一个`v-for`的案例
<!DOCTYPE html>
<html lang="en">
<head>
    <meta charset="UTF-8">
    <title>Vue Test</title>
    <script src="https://unpkg.com/vue@3"></script>
</head>
<body>
<div id="hello-vue">
    <select @change="selectComputer($event)">
        <option value="None">未选择</option>
        <option v-for="row in computers" :key="row.id" :value="row.id">
            {{row.name}}
        </option>
    </select>
    <p>当前主机ID:{{ selectComputerId }}</p>
</div>
<script>
    const HelloVueApp = {
        data() {
            return {
                computers: [
                    {id:1, name: 'MacBook Pro'},
                    {id:2, name: 'MacBook Air'},
                    {id:3, name: 'Mac mini'},
                ],
                selectComputerId: ""
            }
        },
        methods: {
            selectComputer(event) { // 获取该事件的事件对象
                this.selectComputerId = event.target.value;  // 获取事件对象的值
                if (this.selectComputerId === "None") {
                    this.selectComputerId = "未选择";
                }
            }
        }
    }
    Vue.createApp(HelloVueApp).mount('#hello-vue')
</script>
</body>
</html>
我们来捋一下:

1:定义了一个列表它去遍历了`computers`这个数组,获取数组的`name`段、
2:p字段打印`selectComputerId`
3:列表内触发了一个函数为`selectComputer($event)`,函数内判断`selectComputerId`是否有值,有的话则显示,若没有则显示`未选择`
4.4:v-model
双向数据绑定,通过前面的知识学习知道Vue是数据驱动的,数据驱动有一个精髓之处是数据双向绑定,即数据发生变化的时候,视图也就发生变化,当视图发生变化的时候,数据也会跟着同步变化,demo如下:
<!DOCTYPE html>
<html lang="en">
<head>
    <meta charset="UTF-8">
    <title>Vue Test</title>
    <script src="https://unpkg.com/vue@3"></script>
</head>
<body>
<div id="hello-vue">
    <select name="" id="" v-model="select">
        <option value="None">未选择</option>
        <option value="Go">Go</option>
        <option value="Vue">Vue</option>
        <option value="Java">Java</option>
    </select>
    <p>当前值:{{ select }}</p>

    </br>
    <input type="radio" name="language" value="Go" v-model="result">Go</br>
    <input type="radio" name="language" value="Vue" v-model="result">Vue</br>
    <p>当前选择:{{ result }}</p>

    </br>
    <input type="text" v-model="msg">
    <p>{{ msg }}</p>
</div>
<script>
    const HelloVueApp = {
        data() {
            return {
                msg: 'Hello Vue!',
                result: '',
                select: ''
            }
        }
    }
    Vue.createApp(HelloVueApp).mount('#hello-vue')
</script>
</body>
</html>
v-model指令提供表单输入绑定,可以在<input>,<textarea>及<select>元素上创建双向数据绑定,

v-model指令其实是一个语法塘,背后本质上包含v-bind和v-on两个操作

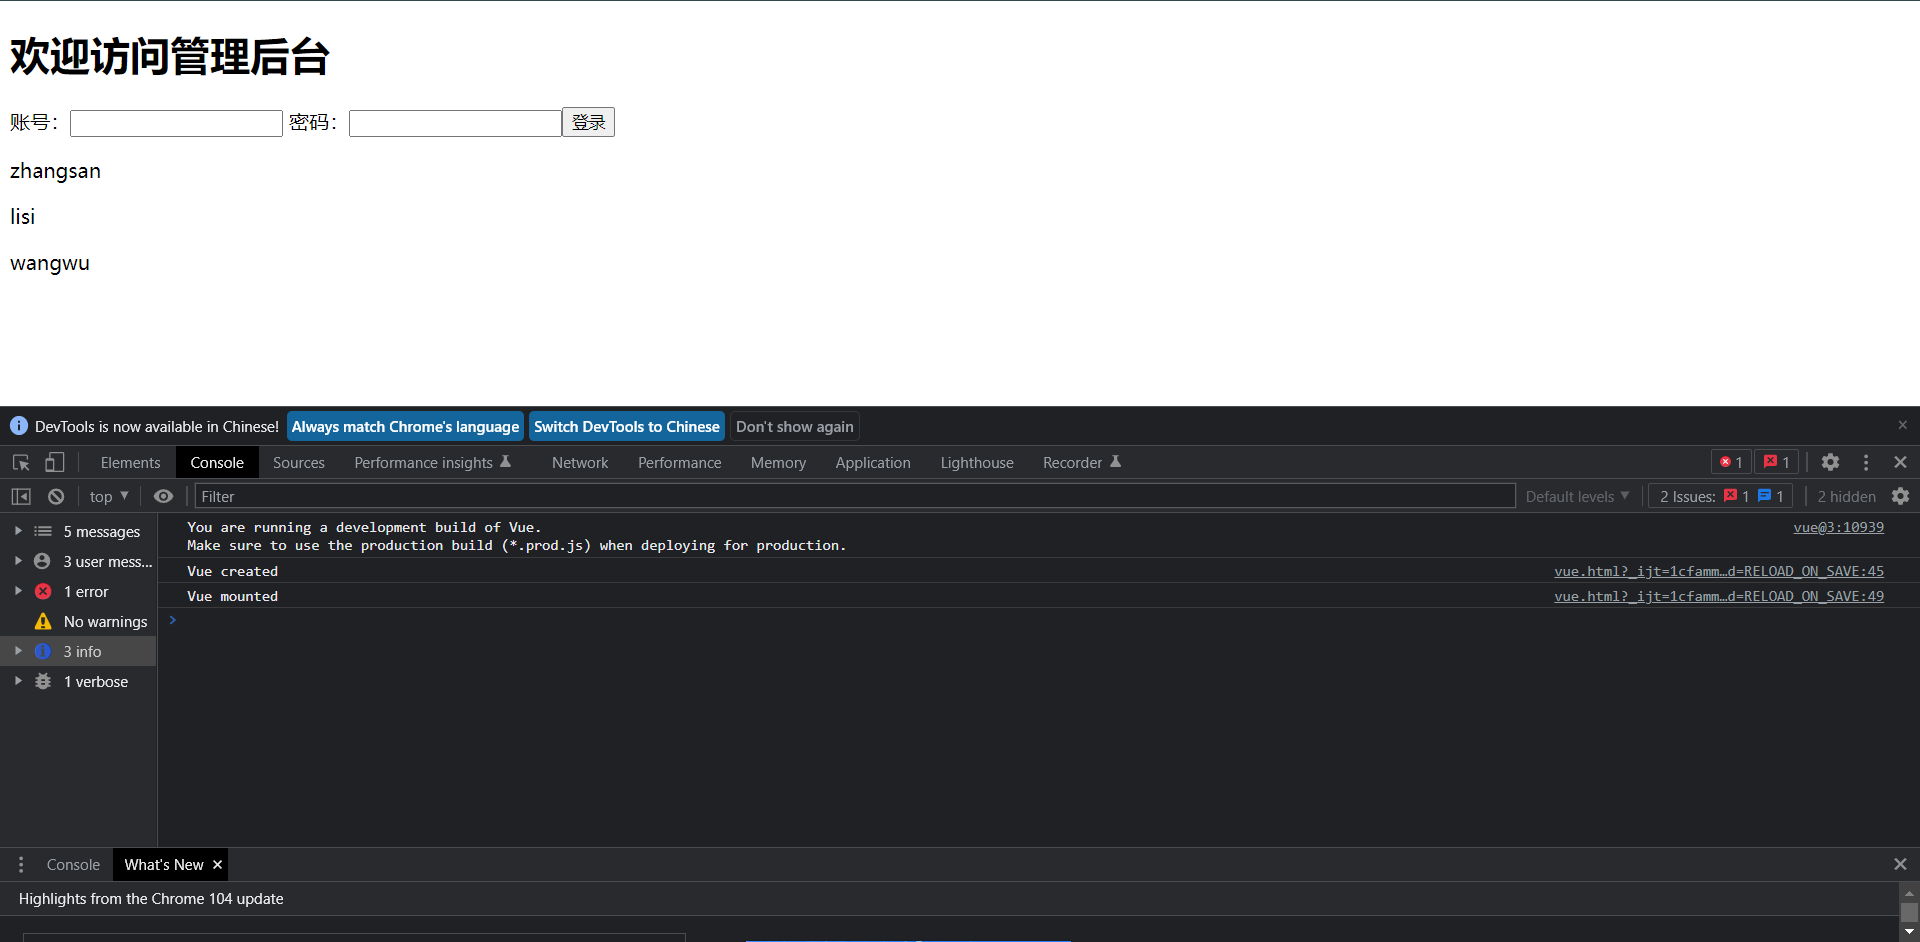
4.5:v-model登录案例
<!DOCTYPE html>
<html lang="en">
<head>
    <meta charset="UTF-8">
    <title>Vue Test</title>
    <script src="https://unpkg.com/vue@3"></script>
</head>
<body>
<div id="hello-vue">
    <h1>欢迎访问管理后台</h1>
    <form action="#">
        账号:<input type="text" v-model="form.username">
        密码:<input type="password" v-model="form.password">
        <input type="button" @click="login" value="登录">
    </form>
    <p style="color: red" v-if="notice">账号密码不能为空!</p>
</div>
<script>
    const HelloVueApp = {
        data() {
            return {
                form: {
                    username: '',
                    password: '',
                },
                notice: false,
            }
        },
        methods: {
            login() {
                if (this.form.username === "" || this.form.password === "") {
                    this.notice = true
                } else {
                    this.notice = false
                    console.log("Successfully")
                }
            }
        }
    }
    Vue.createApp(HelloVueApp).mount('#hello-vue')
</script>
</body>
</html>
总体我们过一下这个demo的一个源码,其实非常的简单,首先是两个输入框,然后v-model监听了两个变量的值,然后按钮触发了一个login事件,事件去判断两个按钮的值是否为空,若为空则将notice设置为true,也就是配合v-if显示`账号密码不能为空!`,若不为空则走到`else`在consol打印`Successfully`
4.6:常用指令小结
| 指令 |
效果 |
| v-text |
没有闪烁问题,数据加载成功后,清空元素内容,将数据重新覆盖上去 |
| v-html |
输出html格式的字符串,会自动解析成html格式 |
| v-cloak |
解决插值表达式在页面上初始加载时的闪烁问题,在数据加载成功前隐藏,成功后显示 |
| v-on |
监听事件,缩写@ |
| v-bind |
给元素动态绑定属性,缩写: |
| v-model |
数据双向绑定,只能用于表单元素 |
| v-if |
显示或隐藏元素,每次都会删除或者创建,性能有一定开销 |
| v-show |
显示或隐藏元素,通过display属性实现,适合频繁切换的场景 |
| v-for |
循环遍历,需要绑定key属性并唯一 |
5:生命周期钩子
生命周期钩子是指vue示例从创建到销毁的过程,就是vue实例从开始创建、初始化数据、编译模板、挂载Dom、渲染->更新->渲染、卸载等一系列过程,在vue生命周期中提供了一系列的生命周期函数:
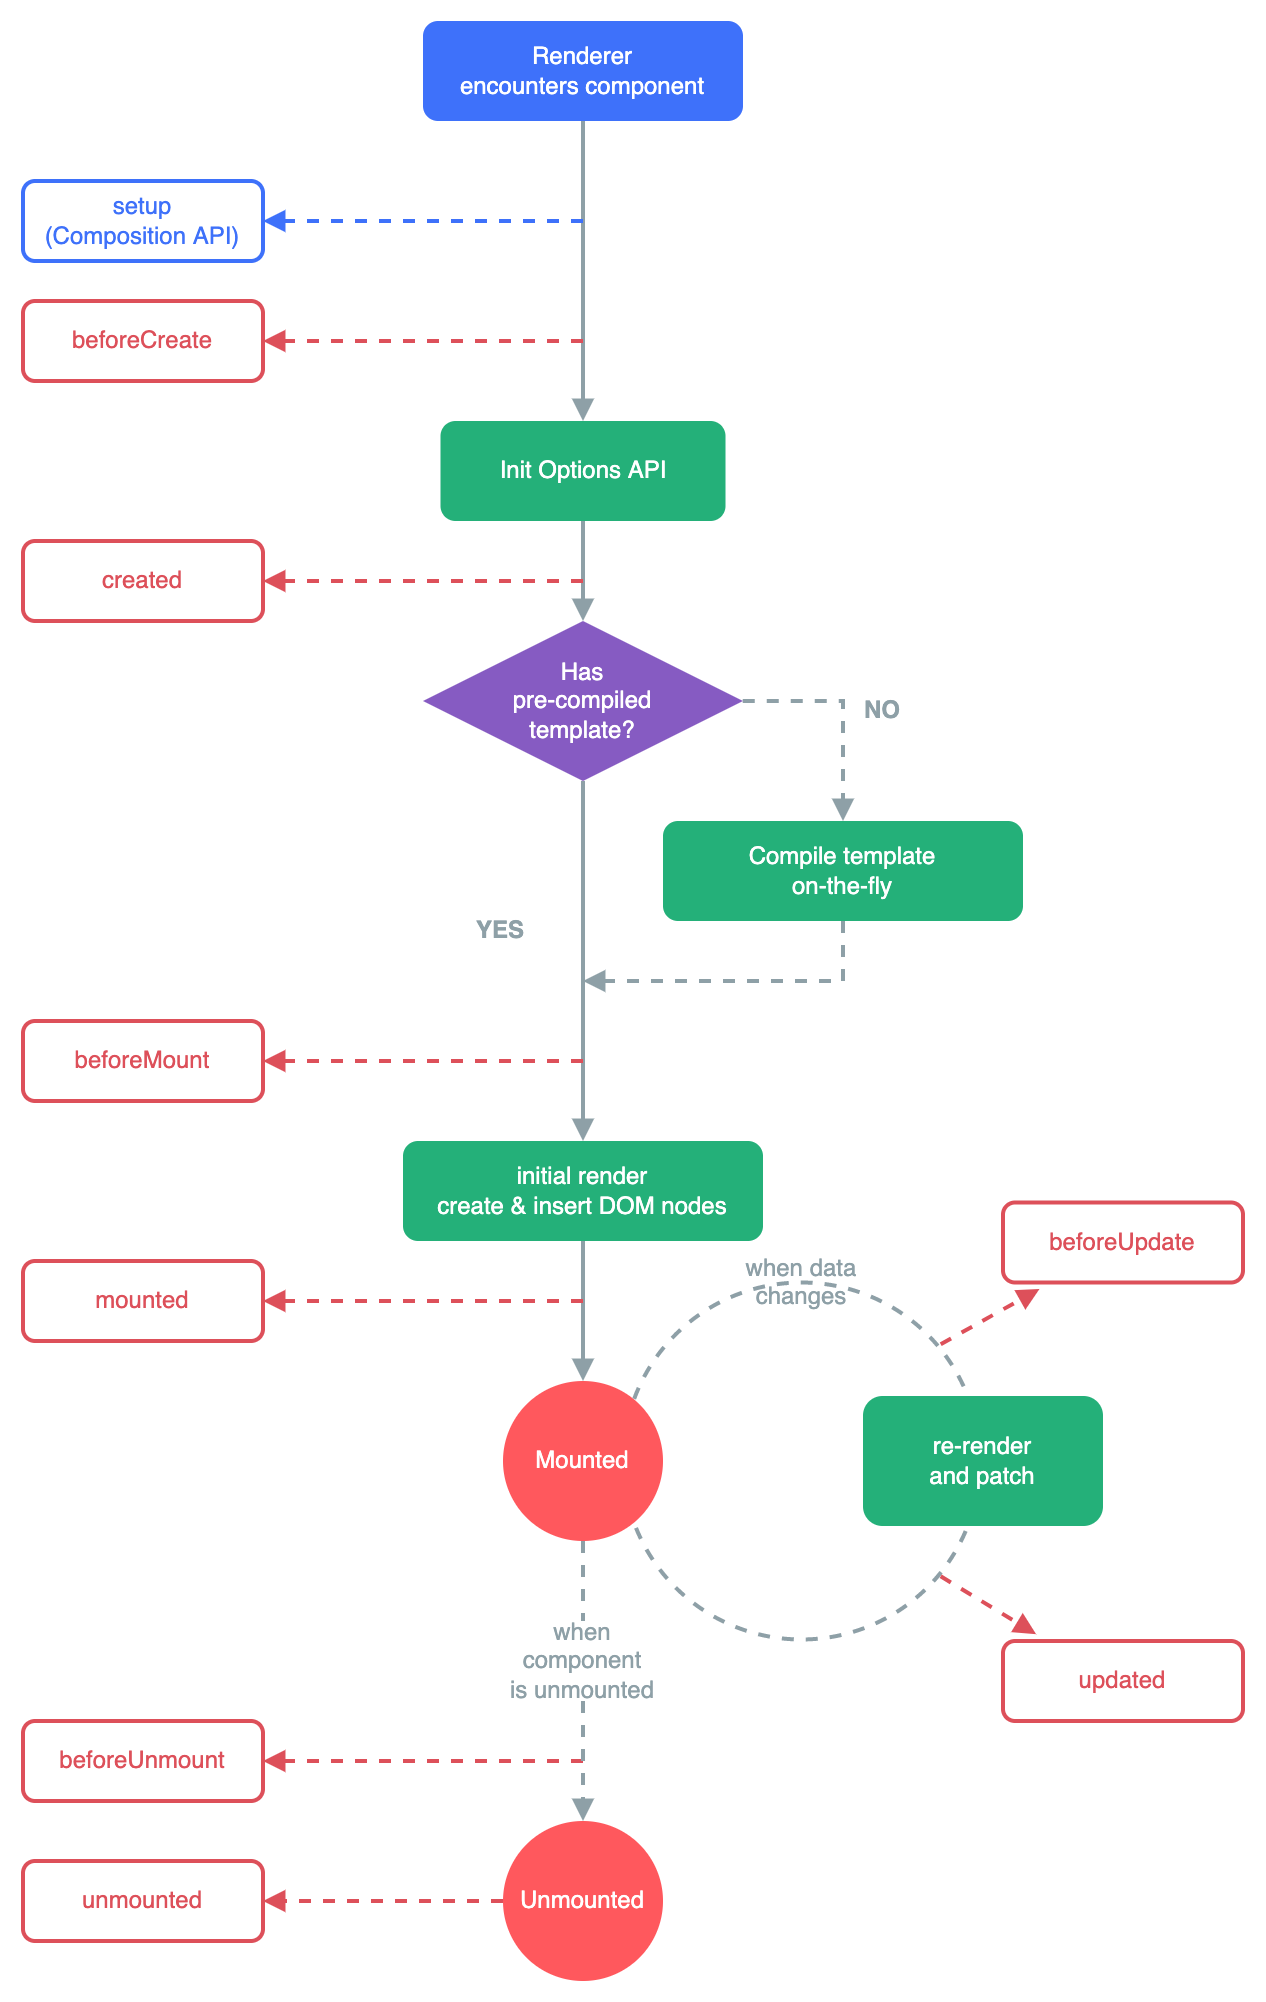
这是官方的一个图,大家可以从上面看的出,红色框框就是我们所谓的`hook`也称之为`钩子`,在每个阶段都会去调用钩子去执行相应的动作,下面是一些实力生命周期钩子
| 名称 |
作用 |
| beforeCreate |
在Vue实例生成前,初始化后会自动生成的函数(此时Vue实例并未完全创建出来) |
| created |
在Vue实例创建完成之后会自动执行的函数(Vue实例创建完成) |
| beforeMount |
把组件内容渲染到页面之前自动执行的函数(相关的rander函数首次被调用) |
| mounted |
把组件内容渲染到页面之后自动执行的函数 |
| beforeUpdate |
当data数据发生变化会自动执行的函数 |
| updated |
当data数据发生变化且页面数据重新渲染后会自动执行的函数(在大多数情况下,避免在此期间更改状态,可能导致更新无限循环) |
| beforeUnmount |
Vue实例销毁前自动执行的函数(此时实例仍然可用) |
| unmounted |
Vue实例失效且demo完全销毁后自动执行的函数(此时所有东西都会解绑定,所有事件监听器都会移除,子实例也会被销毁) |
接下来我们来看看这些函数该怎么去使用。
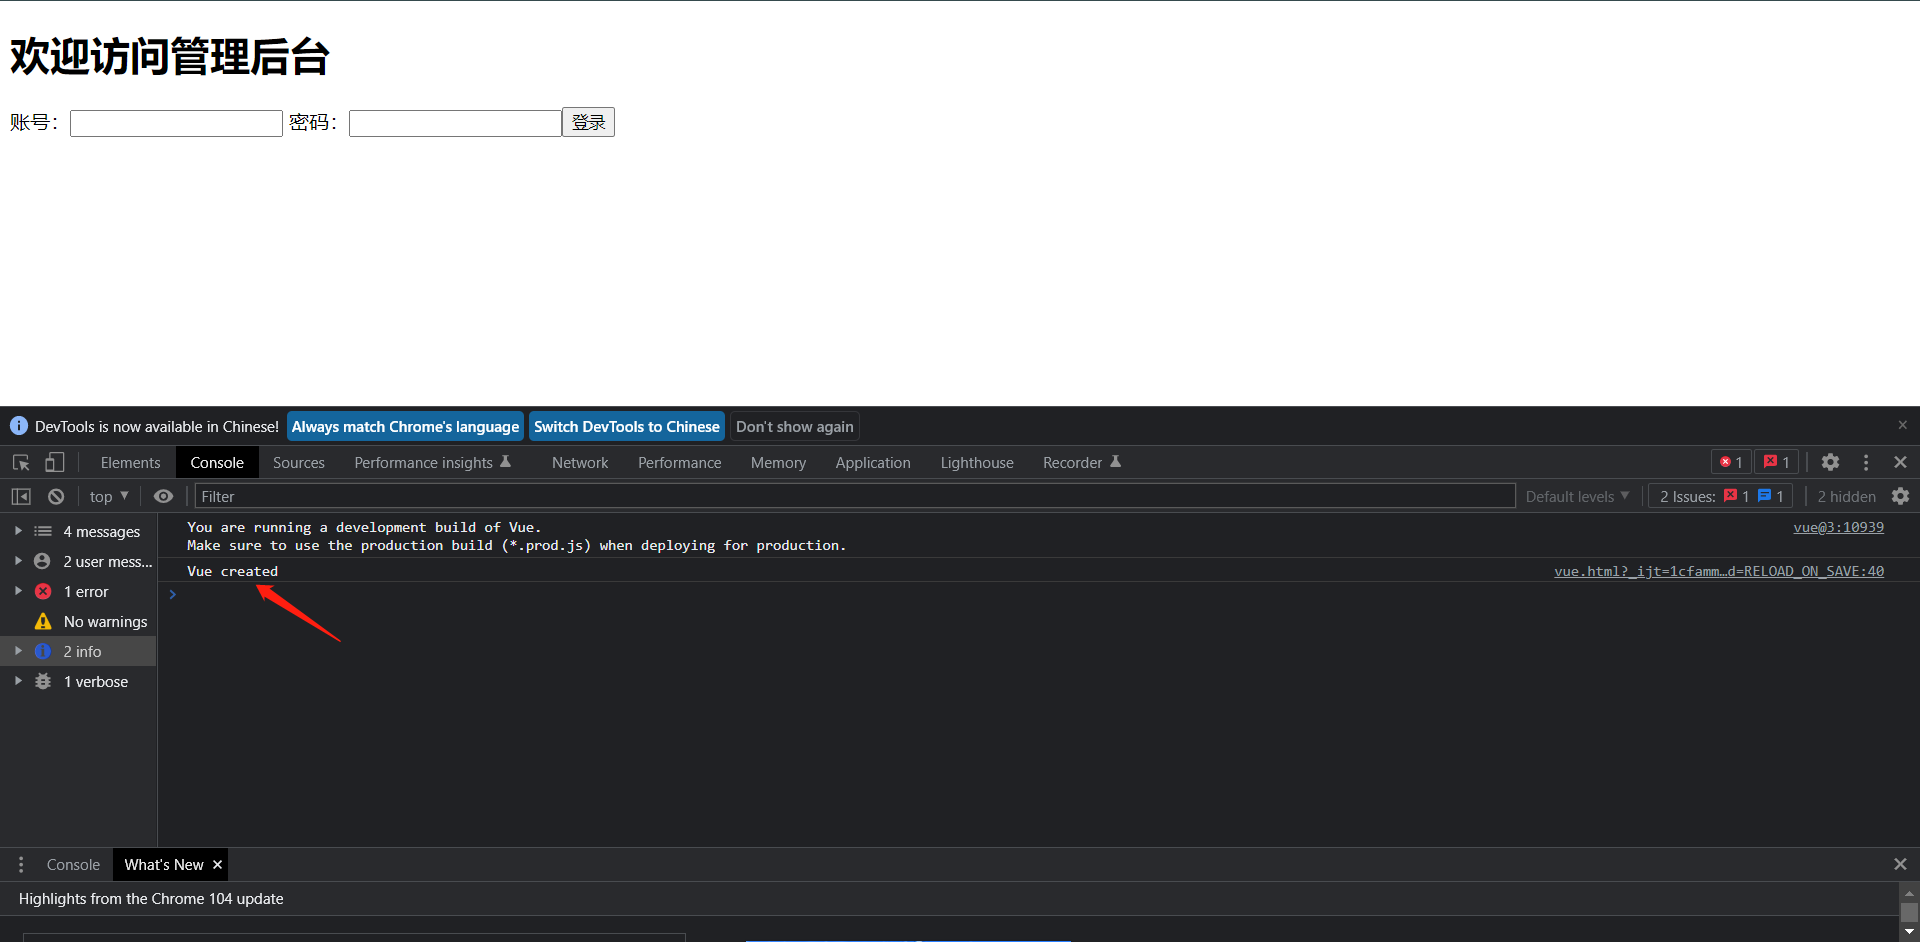
5.1:created
<!DOCTYPE html>
<html lang="en">
<head>
    <meta charset="UTF-8">
    <title>Vue Test</title>
    <script src="https://unpkg.com/vue@3"></script>
</head>
<body>
<div id="hello-vue">
    <h1>欢迎访问管理后台</h1>
    <form action="#">
        账号:<input type="text" v-model="form.username">
        密码:<input type="password" v-model="form.password">
        <input type="button" @click="login" value="登录">
    </form>
    <p style="color: red" v-if="notice">账号密码不能为空!</p>
</div>
<script>
    const HelloVueApp = {
        data() {
            return {
                form: {
                    username: '',
                    password: '',
                },
                notice: false,
            }
        },
        methods: {
            login() {
                if (this.form.username === "" || this.form.password === "") {
                    this.notice = true
                } else {
                    this.notice = false
                    console.log("Successfully")
                }
            }
        },
        // 第一个我们看到的是 `created钩子`
        created() {
            console.log("Vue created")
        }
    }
    Vue.createApp(HelloVueApp).mount('#hello-vue')
</script>
</body>
</html>
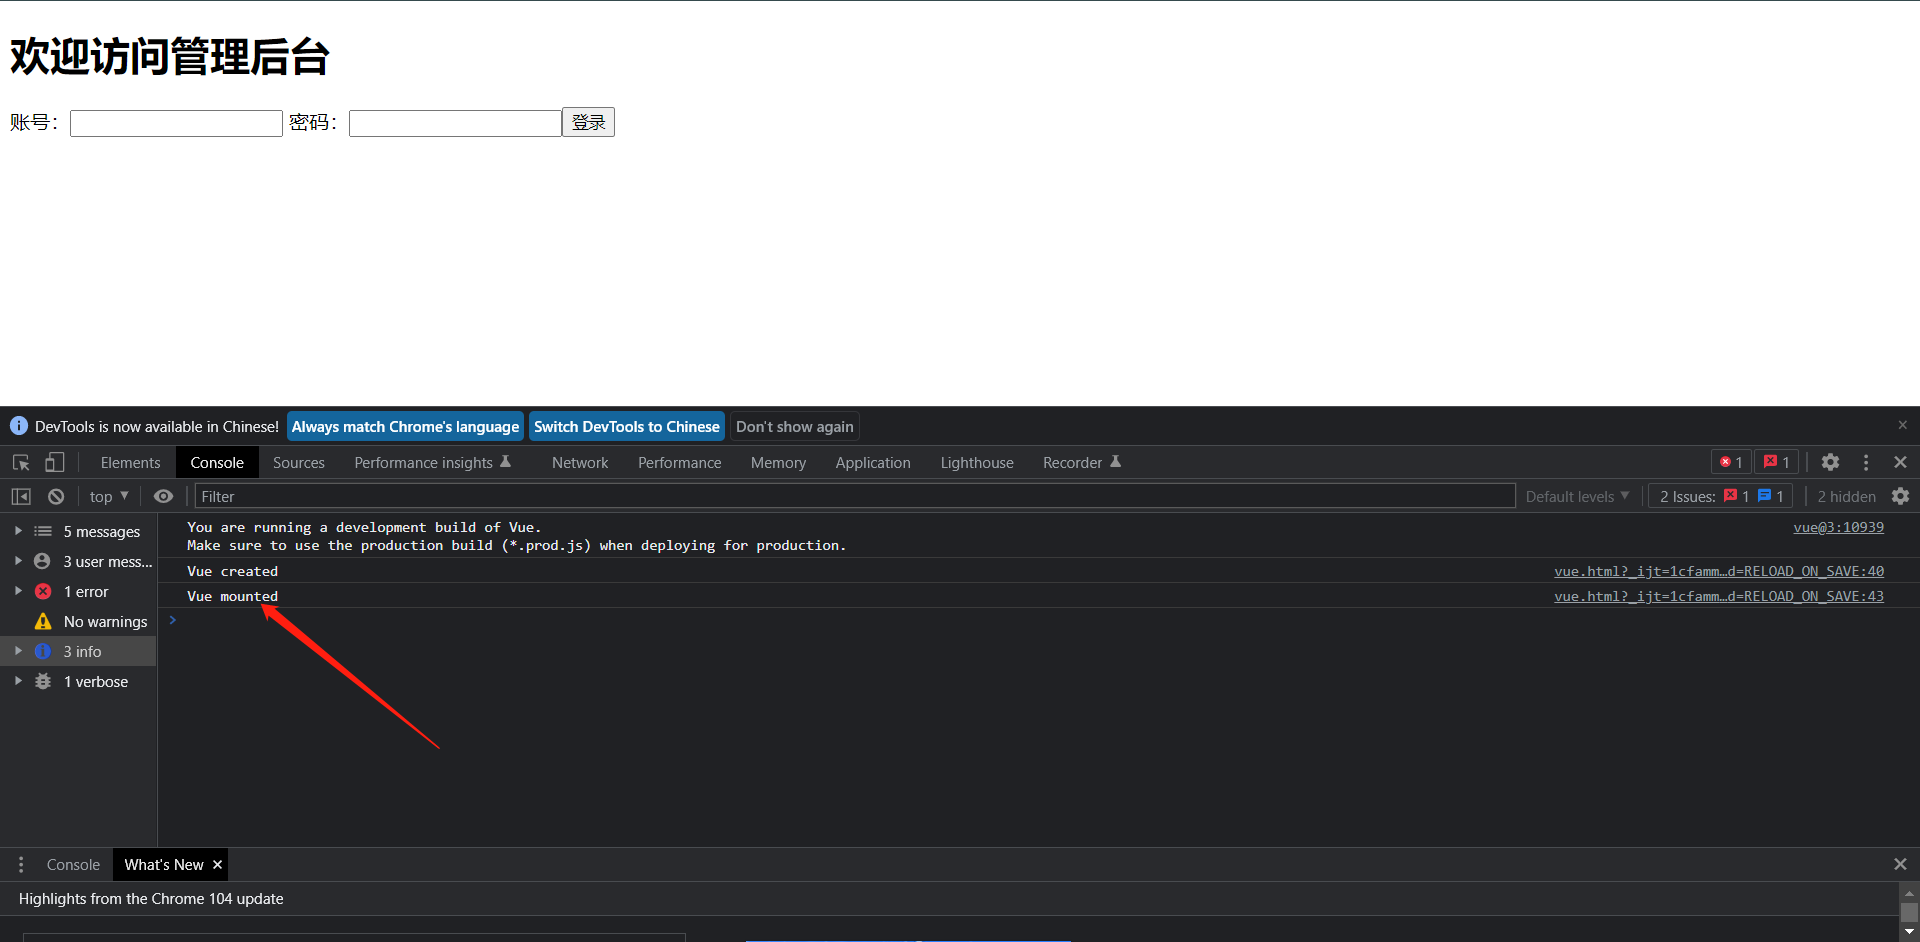
5.2:mounted
<!DOCTYPE html>
<html lang="en">
<head>
    <meta charset="UTF-8">
    <title>Vue Test</title>
    <script src="https://unpkg.com/vue@3"></script>
</head>
<body>
<div id="hello-vue">
    <h1>欢迎访问管理后台</h1>
    <form action="#">
        账号:<input type="text" v-model="form.username">
        密码:<input type="password" v-model="form.password">
        <input type="button" @click="login" value="登录">
    </form>
    <p style="color: red" v-if="notice">账号密码不能为空!</p>
</div>
<script>
    const HelloVueApp = {
        data() {
            return {
                form: {
                    username: '',
                    password: '',
                },
                notice: false,
            }
        },
        methods: {
            login() {
                if (this.form.username === "" || this.form.password === "") {
                    this.notice = true
                } else {
                    this.notice = false
                    console.log("Successfully")
                }
            }
        },
        created() {
            console.log("Vue created")
        },
        mounted() {
            console.log("Vue mounted")
        }
    }
    Vue.createApp(HelloVueApp).mount('#hello-vue')
</script>
</body>
</html>
<!DOCTYPE html>
<html lang="en">
<head>
    <meta charset="UTF-8">
    <title>Vue Test</title>
    <script src="https://unpkg.com/vue@3"></script>
</head>
<body>
<div id="hello-vue">
    <h1>欢迎访问管理后台</h1>
    <form action="#">
        账号:<input type="text" v-model="form.username">
        密码:<input type="password" v-model="form.password">
        <input type="button" @click="login" value="登录">
    </form>
    <p style="color: red" v-if="notice">账号密码不能为空!</p>
    <!--按理来说这个参数应该会显示-->
    <p v-for="i in info" :key="i">{{i}}</p>
</div>
<script>
    const HelloVueApp = {
        data() {
            return {
                form: {
                    username: '',
                    password: '',
                },
                notice: false,
            }
        },
        methods: {
            login() {
                if (this.form.username === "" || this.form.password === "") {
                    this.notice = true
                } else {
                    this.notice = false
                    console.log("Successfully")
                }
            },
            // 但是如果我们把这个写错了地方,那么它就不会执行了
            getData() {
                info = ['zhangsan', 'lisi', 'wangwu']
                this.info = info
            }
        },
        created() {
            console.log("Vue created")
        },
        mounted() {
            console.log("Vue mounted")
        }
    }
    Vue.createApp(HelloVueApp).mount('#hello-vue')
</script>
</body>
</html>
可以看到,它没有被渲染出来,这个时候我们其实就可以利用钩子去调用它了,比如我们放在created钩子内调用。
<!DOCTYPE html>
<html lang="en">
<head>
    <meta charset="UTF-8">
    <title>Vue Test</title>
    <script src="https://unpkg.com/vue@3"></script>
</head>
<body>
<div id="hello-vue">
    <h1>欢迎访问管理后台</h1>
    <form action="#">
        账号:<input type="text" v-model="form.username">
        密码:<input type="password" v-model="form.password">
        <input type="button" @click="login" value="登录">
    </form>
    <p style="color: red" v-if="notice">账号密码不能为空!</p>
    <p v-for="i in info" :key="i">{{i}}</p>
</div>
<script>
    const HelloVueApp = {
        data() {
            return {
                form: {
                    username: '',
                    password: '',
                },
                notice: false,
            }
        },
        methods: {
            login() {
                if (this.form.username === "" || this.form.password === "") {
                    this.notice = true
                } else {
                    this.notice = false
                    console.log("Successfully")
                }
            },
            getData() {
                info = ['zhangsan', 'lisi', 'wangwu']
                this.info = info
            }
        },
        created() {
            console.log("Vue created")
            // 在这个钩子内调用函数,我们就可以发现函数生效了。
            this.getData()
        },
        mounted() {
            console.log("Vue mounted")
        }
    }
    Vue.createApp(HelloVueApp).mount('#hello-vue')
</script>
</body>
</html>
这里无非我们只需要知道的是在什么时候你可能需要显示什么数据,然后需要在哪儿个钩子下去执行这个调用数据的方法。
6:VueCli脚手架
其实到目前为止,我们的vue基本使用已经学的差不多了,但这种在HTML中引用Vue.js的方法,简单的页面还没什么问题,但是如果使用Vue开发一个完整的前端项目的话,组建Vue项目结构及配置还是比较复杂的,例如引入各种js文件,打包上线等,因此,为了提高开发效率,官方开发了VueCli脚手架快捷搭建开发环境。

官网:https://cli.vuejs.org/zh/
Vue Cli是一个基于Vue.js进行快速开发的完整系统,提供:

1:通过@vue/cli实现的交互式的项目脚手架。
2:通过@vue/cli + @vue/cli-service-global实现的零配置原型开发。
3:一个运行时依赖(@vue/cli-service),该依赖:
	1:可升级
	2:基于webpack构建,并带有合理的默认配置
	3:可以通过项目内的配置文件进行配置
	4:可以通过插件进行扩展
4:一个丰富的官方插件集合,集成了前端生态中最好的工具,
5:一个完全图形化的创建和管理Vue.js项目的用户界面。

Vue Cli致力于将Vue生态中的工具基础标准化,它确保了各种构建工具能够基于智能的默认配置即可平稳衔接,这样你可以专注在撰写应用上,而不必花几天去纠结配置的问题。
6.1:认识NPM
在使用Vue Cli之前我们需要先了解一下什么是NPM。

1:NPM(Node Package Manager,Node包管理器),存放JavaScript代码共享中心,是目前最大的JavaScript仓库,类似于Linux的Yum仓库
2:可能你会联想到node.js,其实node.js是服务端的JavaScript,类似于Gin,Django,NPM是基于Node.js开发的软件。
3:随着Node.js兴起,生态圈的JS库都纷纷向NPM官方仓库发布,所以现在,大家都是使用npm install命令来安装JS库,而不必再去它们的官网下载了

不过后面其实也有其他的工具了,比如现在官方推荐的create-vue:它是基于vite的,而我们目前说的Vue Cli是基于webpack的,另外我们可以参考如下的链接:
https://cn.vuejs.org/guide/scaling-up/tooling.html
安装nodejs其实已经内置了npm,具体的安装可以百度搜一下,官方地址是:https://nodejs.org

下面来看看npm常用的一些命令
| 命令 |
描述 |
| npm -v |
查看npm版本 |
| npm install <模块名> |
安装模块 |
| npm install -g <模块名> |
可以直接在命令行里使用 |
| npm list -g |
查看所有全局安装的模块 |
| npm list <模块名> |
查看某个模块的版本号 |
| npm install -g <模块名>@<版本号> |
更新模块版本 |
| npm install --save <模块名> |
在package.json文件中写入依赖,(npm5之前需要指定,之后版本无需再加--save选项) |
| npm config |
管理npm的配置路径 |
| npm run serve |
运行项目 |
| npm run build |
打包项目 |
配置淘宝npm仓库
npm config set registry https://registry.npmmirror.com --global
查看当前仓库
npm config get registry
安装vuecli
npm install -g @vue/cli --force
检查版本
vue -V
6.2:创建项目
vue create <项目名>
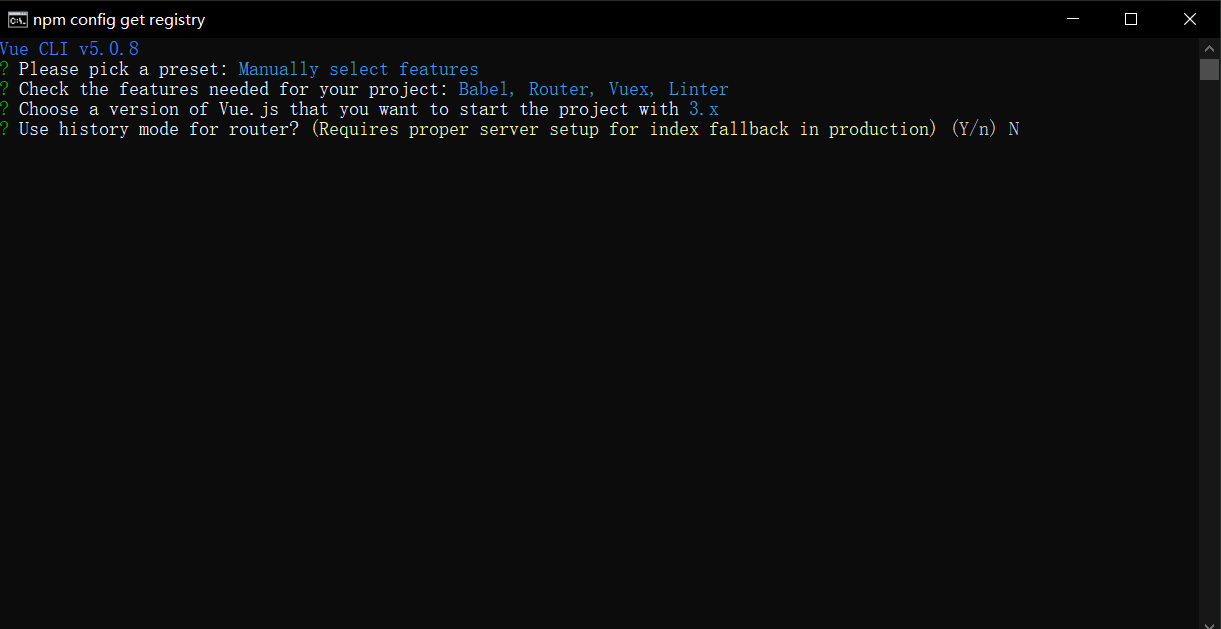
vue create hello-vue
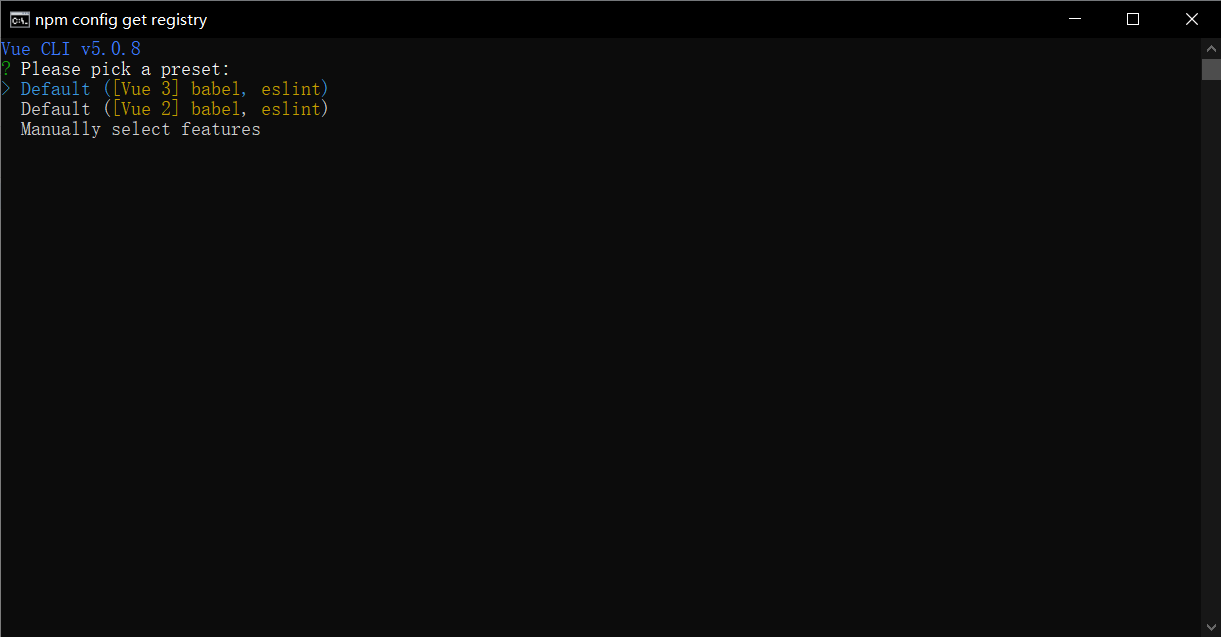
上图是选择vue版本是3还是其他版本,我们选择第三个,手动配置
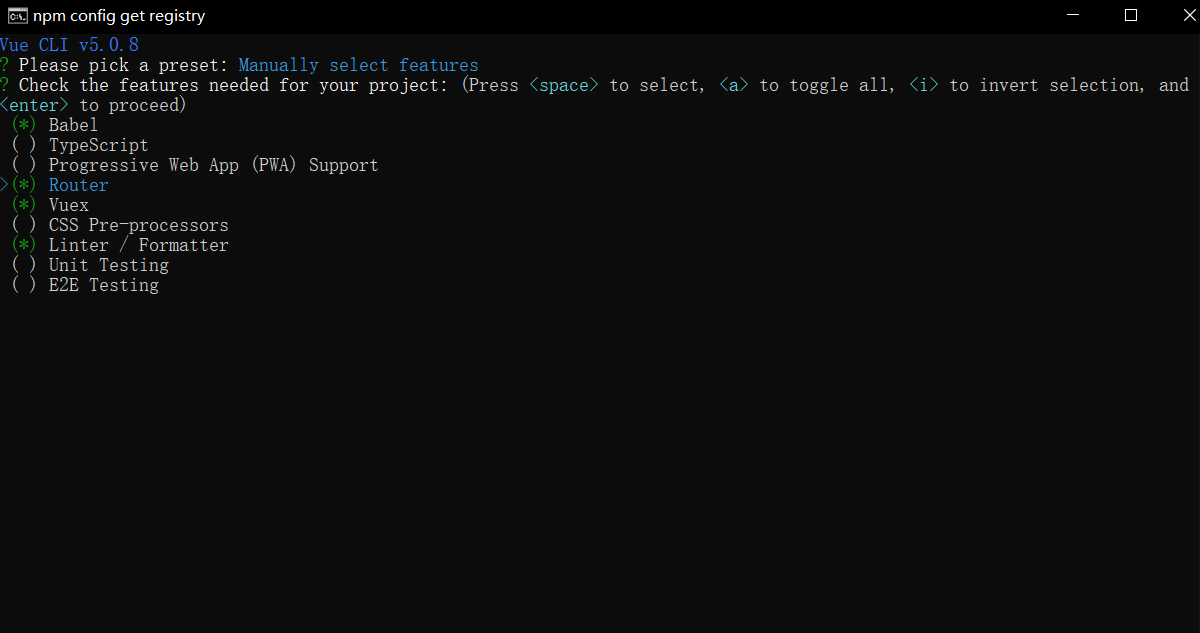
这里选择一些我们要装的东西,这里↑↓选择 空格选中
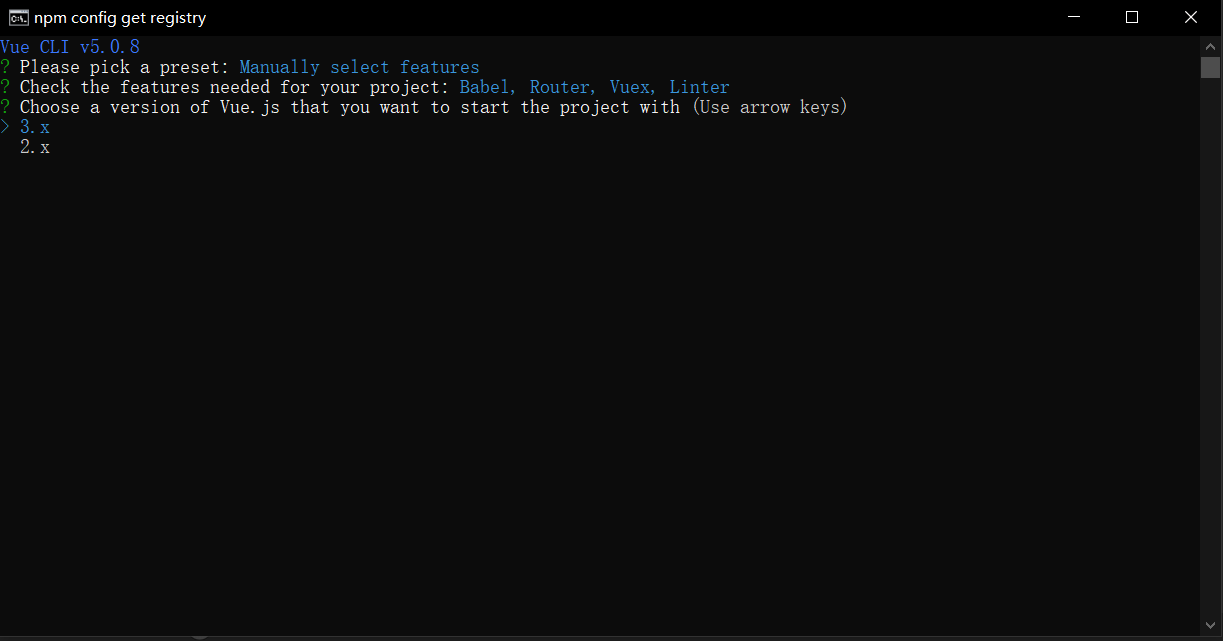
选择vue的版本
这是关于是否选用history router模式,我们这里选择N
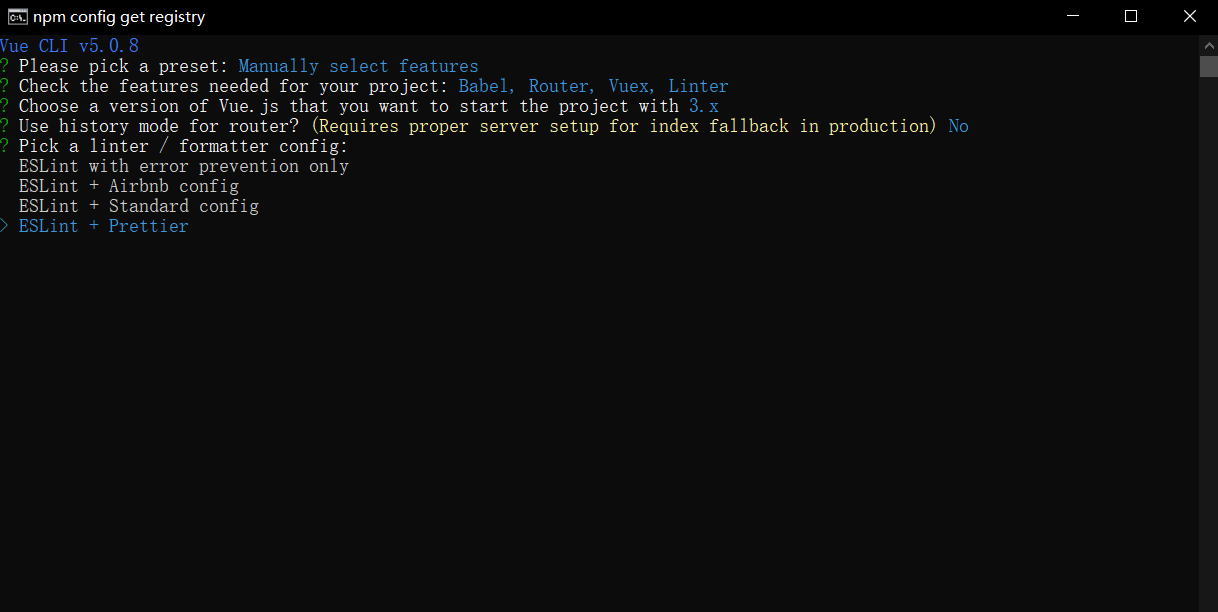
选择ESlint代码校验规则,它提供一个插件化的JavaScript代码检测工具,这种方式使用较多
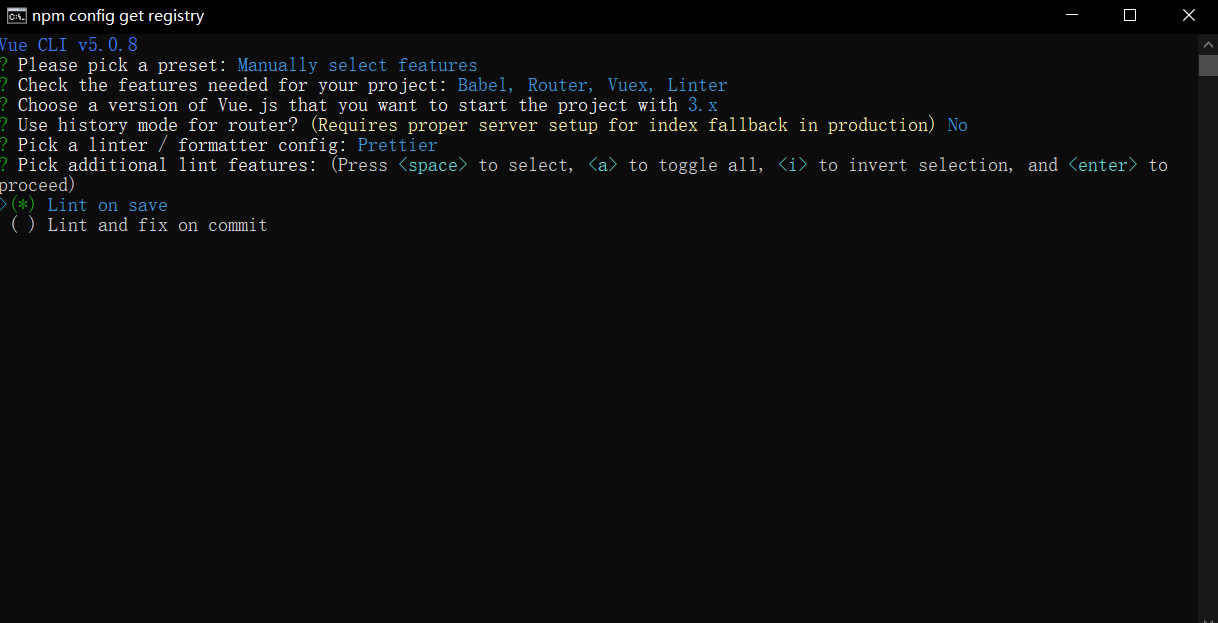
选择何时进行代码校验,第一个是保存就校验,第二个是fix或commit的时候校验,这里我们用第一个
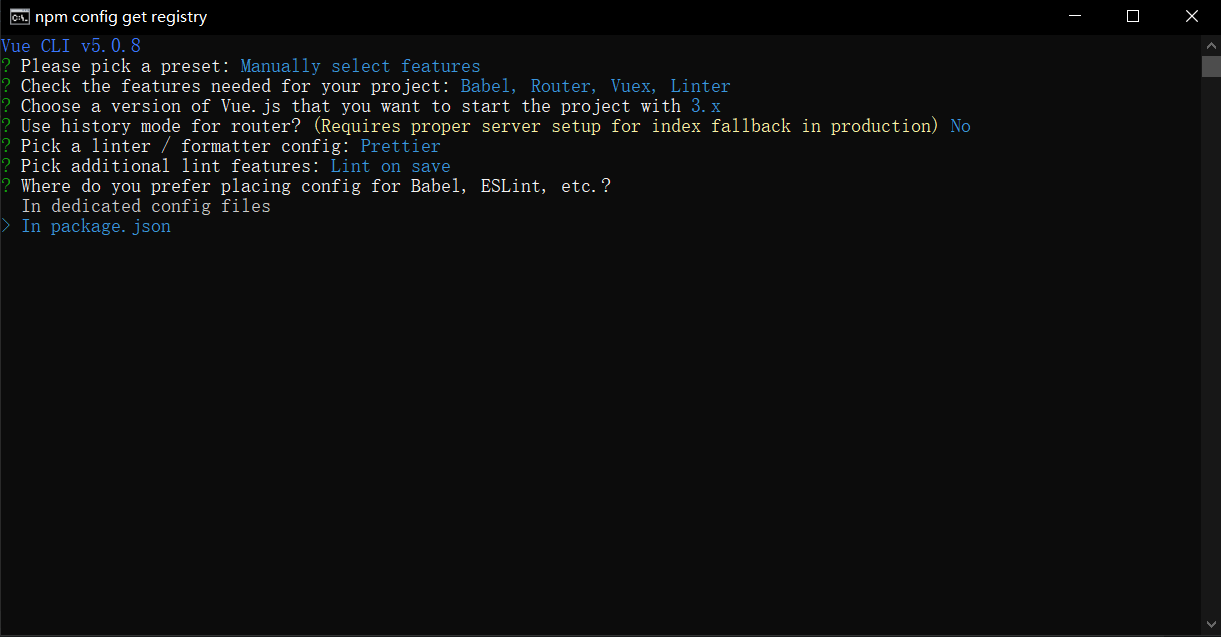
这里是如何保存配置,我们选择第二个
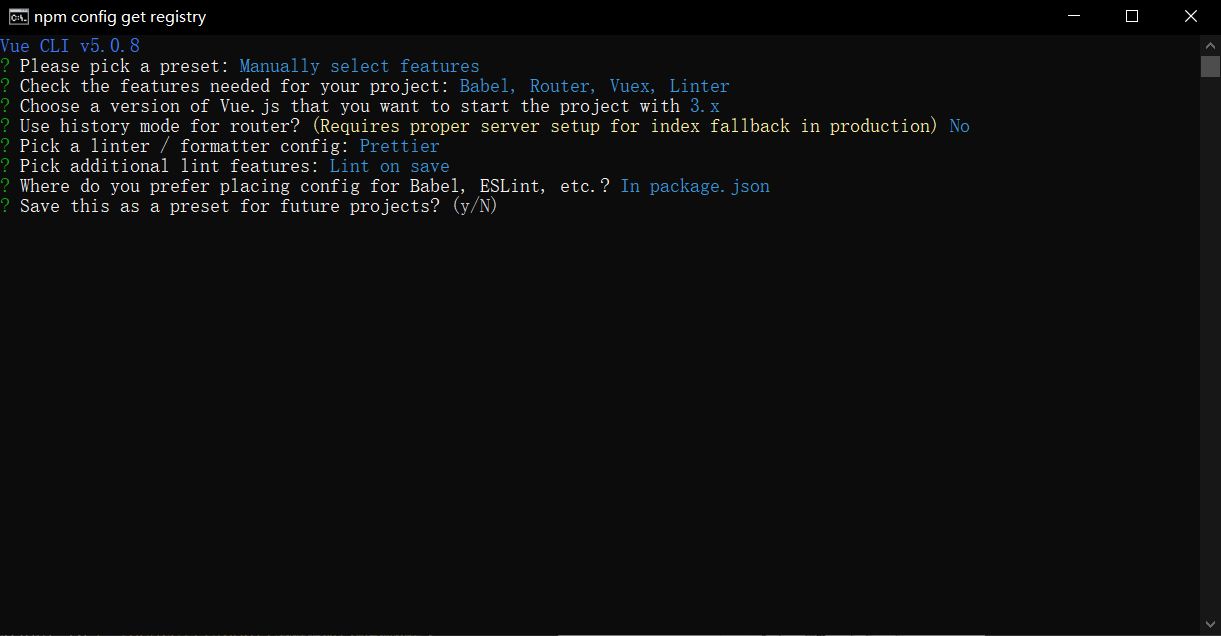
选择是否保存本次配置,这里我们不保存
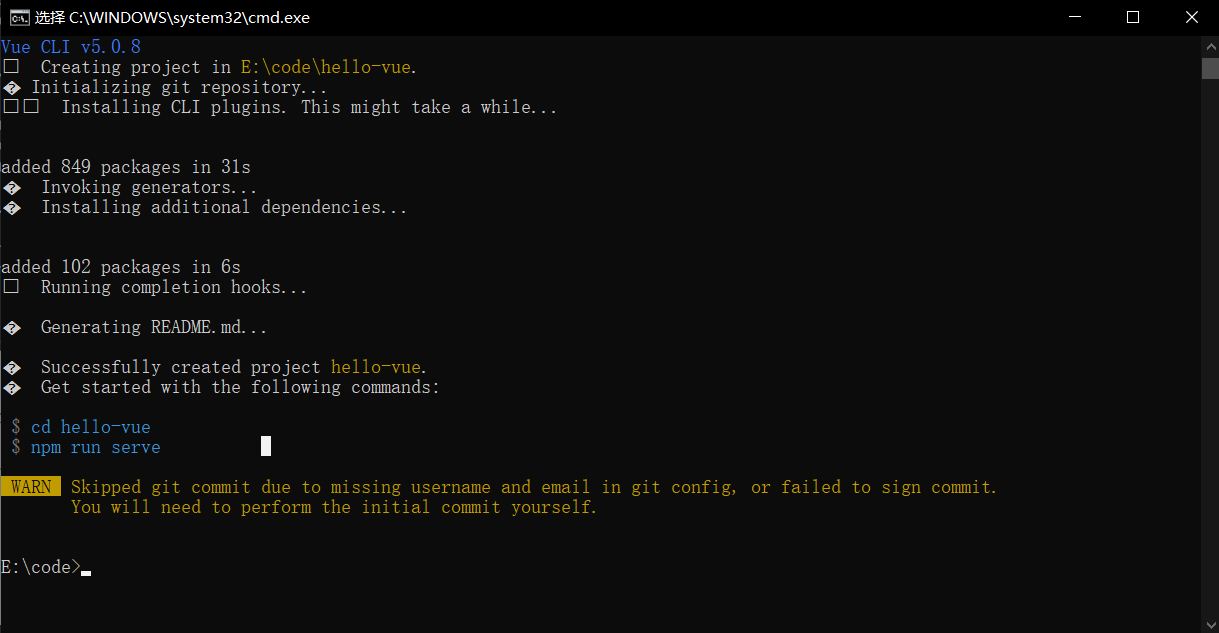
创建完成
6.3:启动项目
进入创建好的项目目录执行如下命令进行启动

npm run serve
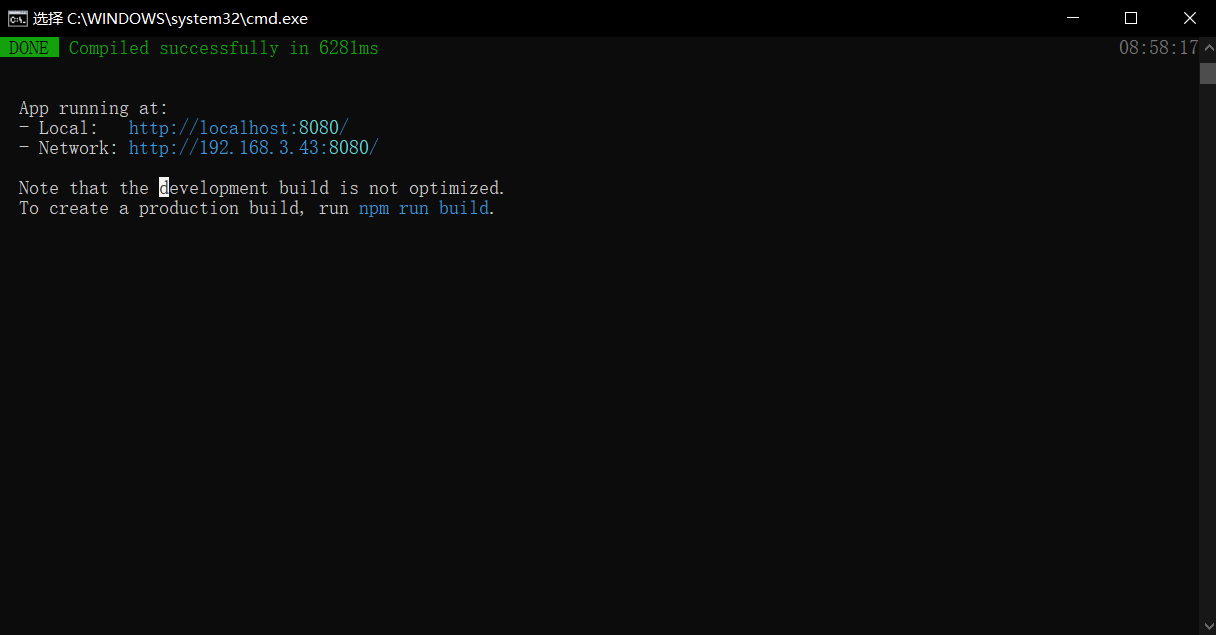
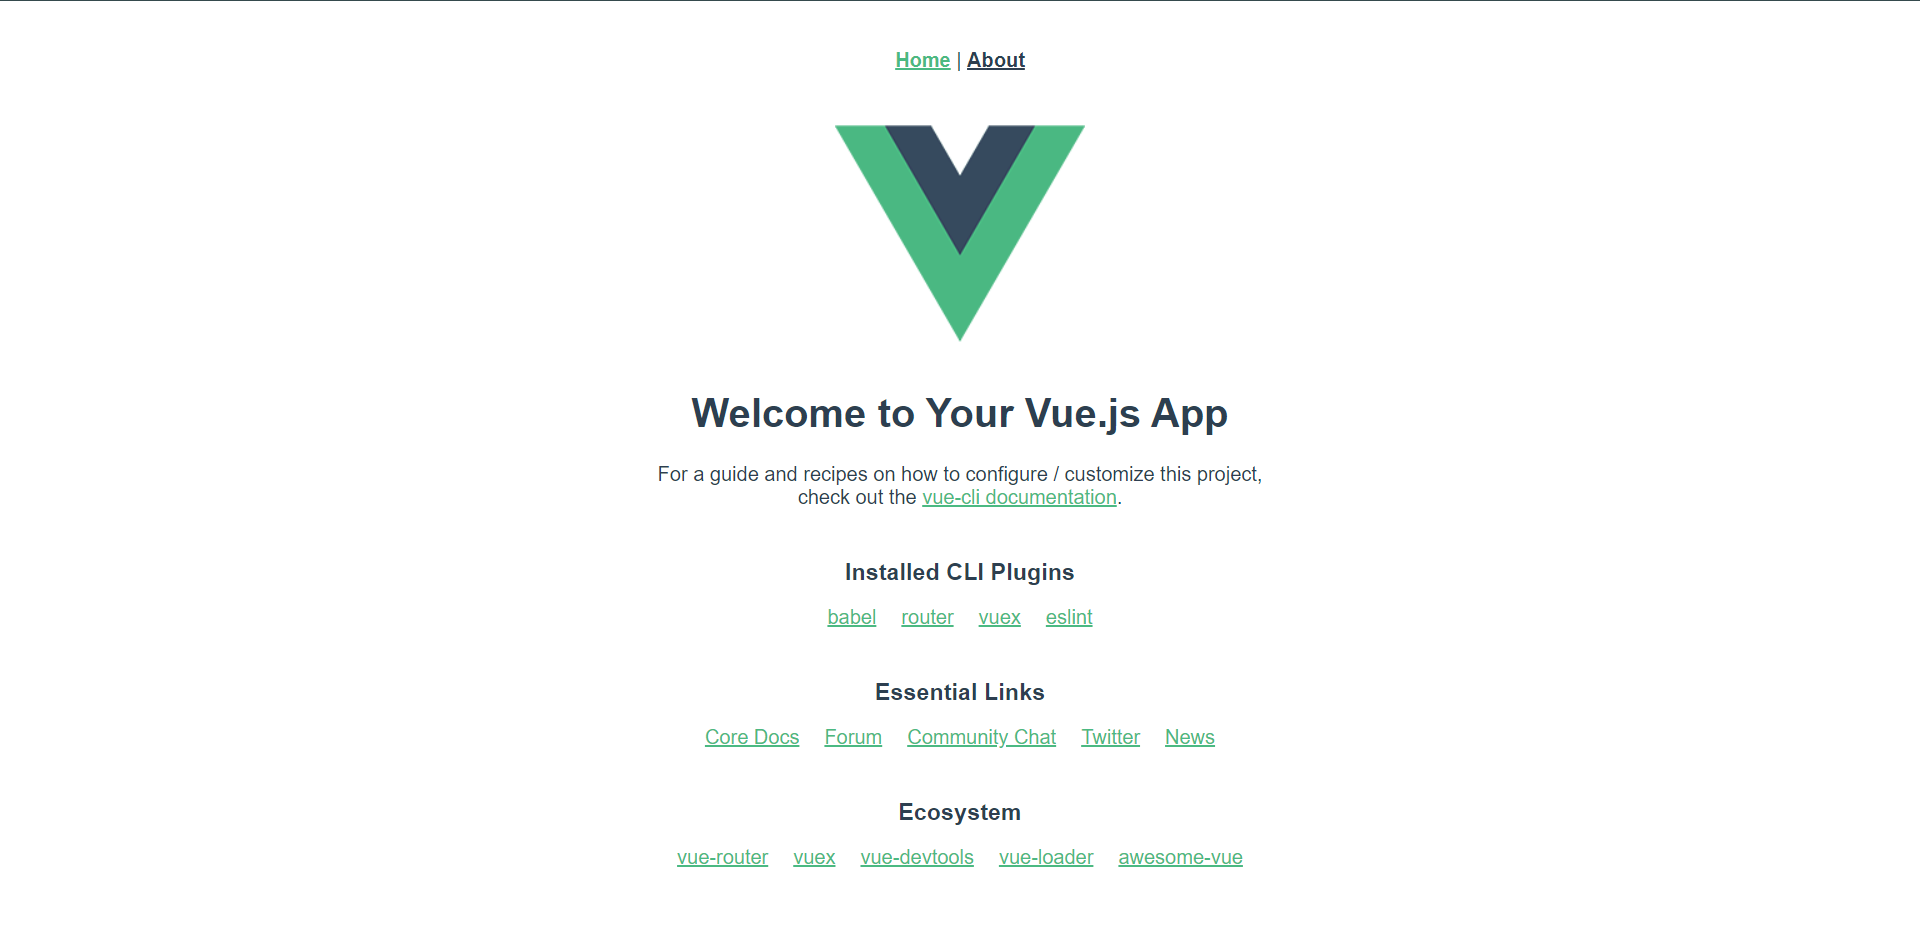
访问给出的链接去访问,即可得到如下图
6.4:Goland创建Vue项目

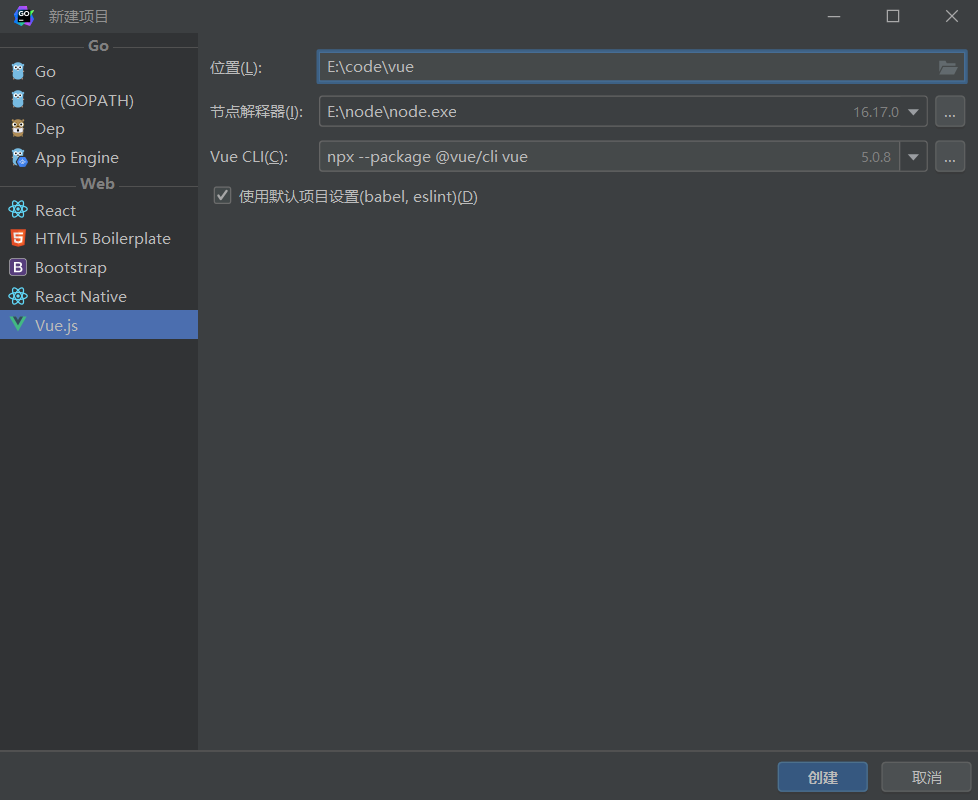
这样也是可以创建的。但是我更习惯用命令行来做这个事情。
我们使用Goland打开vue创建的项目之后,就可以使用Goland进行开发了,这里推荐使用一个Goland插件,如下:

直接搜索插件就可以安装。
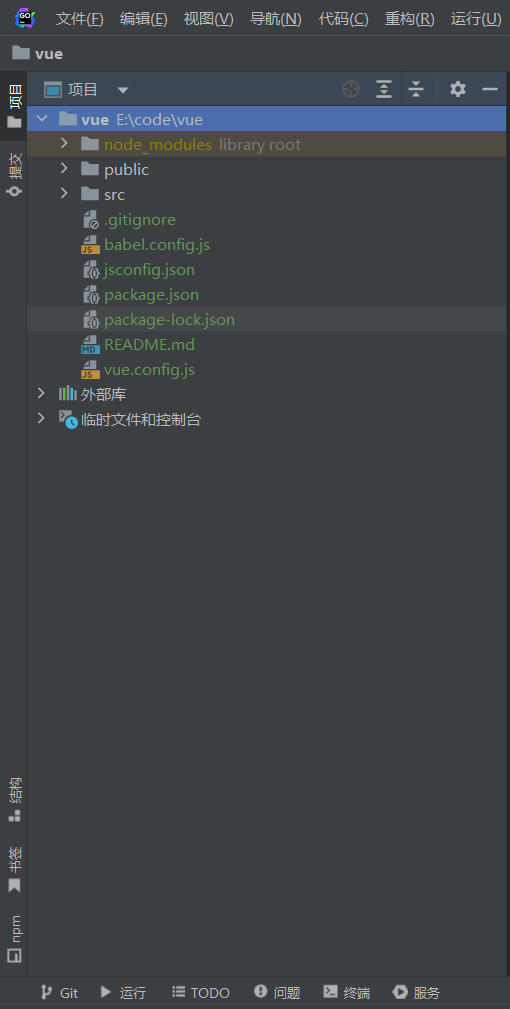
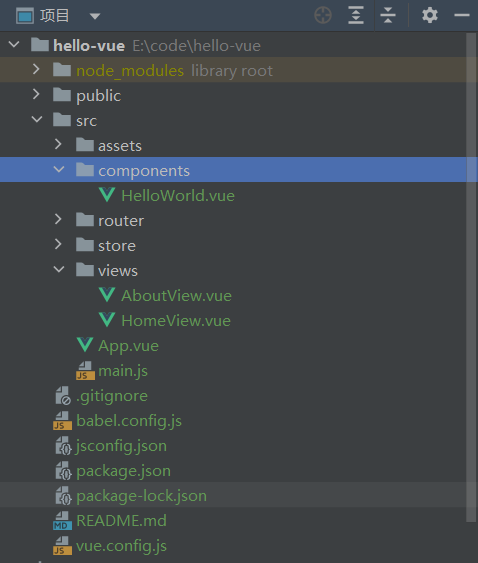
6.5:目录介绍
node_modules				# 项目开发依赖的一些模块,不用管
pulbic					    # 主要存储首页,favicon
src							# 源码目录,这里也就是我们要开发的目录,基本上要做的事情都在这个目录里面,里面包含了几个目录及文件
							# assets:放入资源,例如图片,css等
							# components:公共组件目录
							# routes:前端路由
							# store:应用级数据
							# views:单页面组件目录
							# App.vue:项目入口文件(根组件)
							# main.js:项目的全局配置,在任意一个文件都有效
.gitignore					 # git提交文件,忽略
babel.config.js				  # babel配置,比如es5转es6
package.json				  # 项目配置文件,NPM包配置文件,里面定义了项目的npm脚本,依赖包等信息
README.md					 # 项目说明文档,Markdown文档格式
7:Vue组件
1:介绍
2:文件格式
3:使用
4:注册
5:传参
7.1:介绍
组件:一段独立的,能代表页面某一个部分的代码片段,拥有自己独立的数据、JavaScript脚本、以及css样式。
组件是可复用的Vue实例,在开发过程中,可以把经常复用的功能,封装为组件,达到快速开发的目的。
组件的好处:
1:提高开发效率
2:方便重复使用
3:易于管理和维护
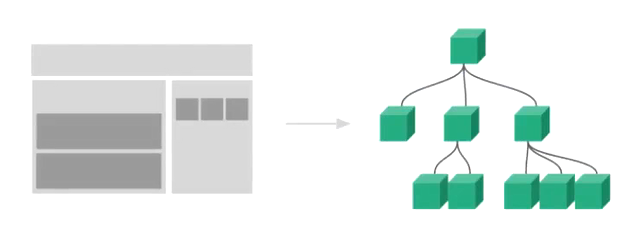
通常一个应用会以一颗嵌套的组件树的形式来组织,例如你可能会有页头、侧边栏、内容区、每个组件又包含其他的像导航链接、博文之类的组件
7.2:文件格式
Vue单文件组件(又名*.vue文件,缩写为SFC)是一种特殊的文件格式,它允许将Vue组件的模板,逻辑与样式封装在单个文件中。

如下图所见,Vue SFC是经典的HTML、CSS与JavaScript三个经典组合的自然伸缩,每个*.vue文件由三种类型的顶层代码块组成,<template>,<script>,与<style>:

<template>:部分定义了组件的模板
<script>:部分是一个标准的JavaScript模块。它应该导出一个Vue组件定义作为其默认导出。
<style>:部分定义了与此组件相关联的CSS
我们主要来看看示例。
<template>
  <div class="home">
    <img alt="Vue logo" src="../assets/logo.png" />
    <!--引用过来的组件放在这里传入msg-->
    <HelloWorld msg="Welcome to Your Vue.js App" />
  </div>
</template>

<script>
// @ is an alias to /src
// 在这里面引用了子组件HelloWorld.vue
import HelloWorld from "@/components/HelloWorld.vue";

export default {
  name: "HomeView",
  components: {
    HelloWorld,
  },
};
</script>


其实它的核心实现代码在`components`下面

<template>
  <div class="hello">
    <h1>{{ msg }}</h1>
    <p>
      For a guide and recipes on how to configure / customize this project,<br />
      check out the
      <a href="https://cli.vuejs.org" target="_blank" rel="noopener"
        >vue-cli documentation</a
      >.
    </p>
    <h3>Installed CLI Plugins</h3>
    <ul>
      <li>
        <a
          href="https://github.com/vuejs/vue-cli/tree/dev/packages/%40vue/cli-plugin-babel"
          target="_blank"
          rel="noopener"
          >babel</a
        >
      </li>
      <li>
        <a
          href="https://github.com/vuejs/vue-cli/tree/dev/packages/%40vue/cli-plugin-router"
          target="_blank"
          rel="noopener"
          >router</a
        >
      </li>
      <li>
        <a
          href="https://github.com/vuejs/vue-cli/tree/dev/packages/%40vue/cli-plugin-vuex"
          target="_blank"
          rel="noopener"
          >vuex</a
        >
      </li>
      <li>
        <a
          href="https://github.com/vuejs/vue-cli/tree/dev/packages/%40vue/cli-plugin-eslint"
          target="_blank"
          rel="noopener"
          >eslint</a
        >
      </li>
    </ul>
    <h3>Essential Links</h3>
    <ul>
      <li>
        <a href="https://vuejs.org" target="_blank" rel="noopener">Core Docs</a>
      </li>
      <li>
        <a href="https://forum.vuejs.org" target="_blank" rel="noopener"
          >Forum</a
        >
      </li>
      <li>
        <a href="https://chat.vuejs.org" target="_blank" rel="noopener"
          >Community Chat</a
        >
      </li>
      <li>
        <a href="https://twitter.com/vuejs" target="_blank" rel="noopener"
          >Twitter</a
        >
      </li>
      <li>
        <a href="https://news.vuejs.org" target="_blank" rel="noopener">News</a>
      </li>
    </ul>
    <h3>Ecosystem</h3>
    <ul>
      <li>
        <a href="https://router.vuejs.org" target="_blank" rel="noopener"
          >vue-router</a
        >
      </li>
      <li>
        <a href="https://vuex.vuejs.org" target="_blank" rel="noopener">vuex</a>
      </li>
      <li>
        <a
          href="https://github.com/vuejs/vue-devtools#vue-devtools"
          target="_blank"
          rel="noopener"
          >vue-devtools</a
        >
      </li>
      <li>
        <a href="https://vue-loader.vuejs.org" target="_blank" rel="noopener"
          >vue-loader</a
        >
      </li>
      <li>
        <a
          href="https://github.com/vuejs/awesome-vue"
          target="_blank"
          rel="noopener"
          >awesome-vue</a
        >
      </li>
    </ul>
  </div>
</template>

<script>
export default {
  name: "HelloWorld",
  props: {
    msg: String,
  },
};
</script>

<!-- Add "scoped" attribute to limit CSS to this component only -->
<style scoped>
h3 {
  margin: 40px 0 0;
}
ul {
  list-style-type: none;
  padding: 0;
}
li {
  display: inline-block;
  margin: 0 10px;
}
a {
  color: #42b983;
}
</style>
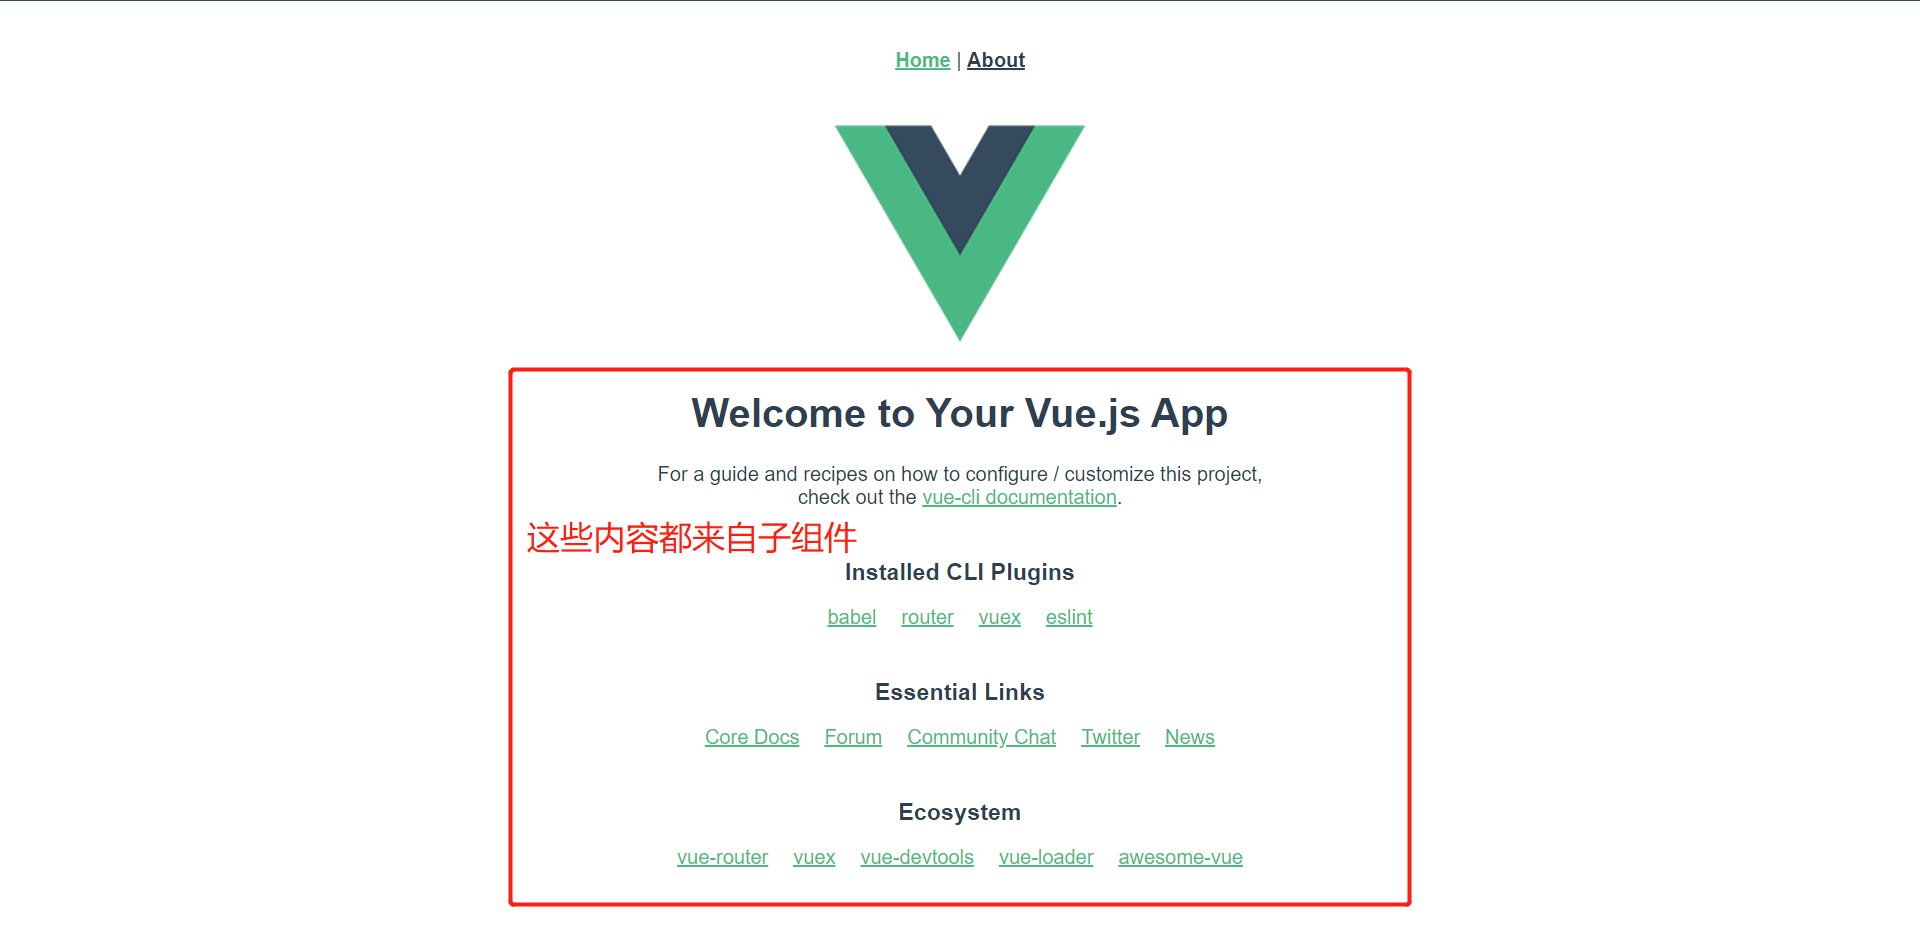
所以我们基本得知,一个网页的内容其实都是靠引用其他的子组件来实现的,并且还有超链接那些功能都是通过router实现的,而主页只是去加载这些组件然后渲染数据这样子。
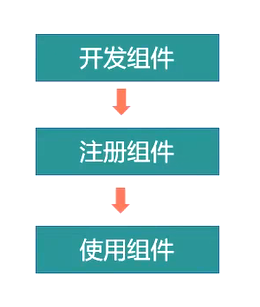
7.3:使用
具体使用流程:
1:在src/components目录下开发一个组件(首字母大写)
2:在父组件里引用子组件 import xxx from 'xxx'
3:在默认导出里注册组件
4:在template模板里使用组件
接下来我们来开发一个组件,来感受一下过程
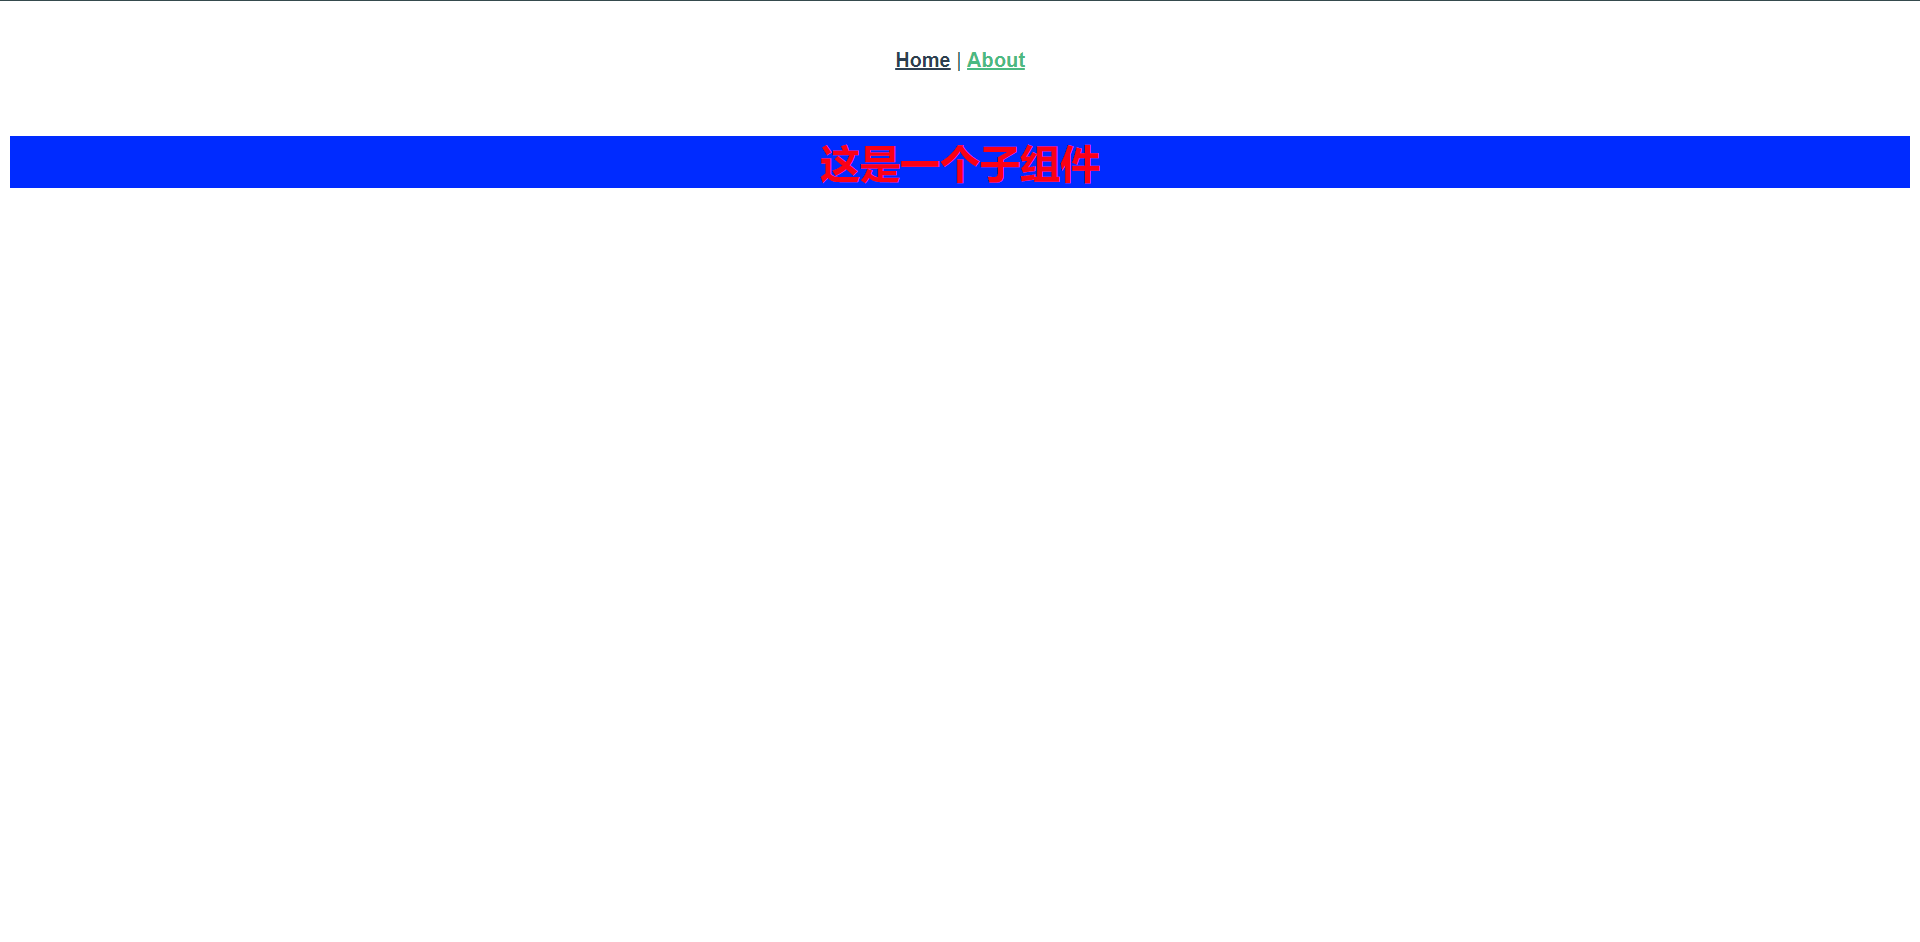
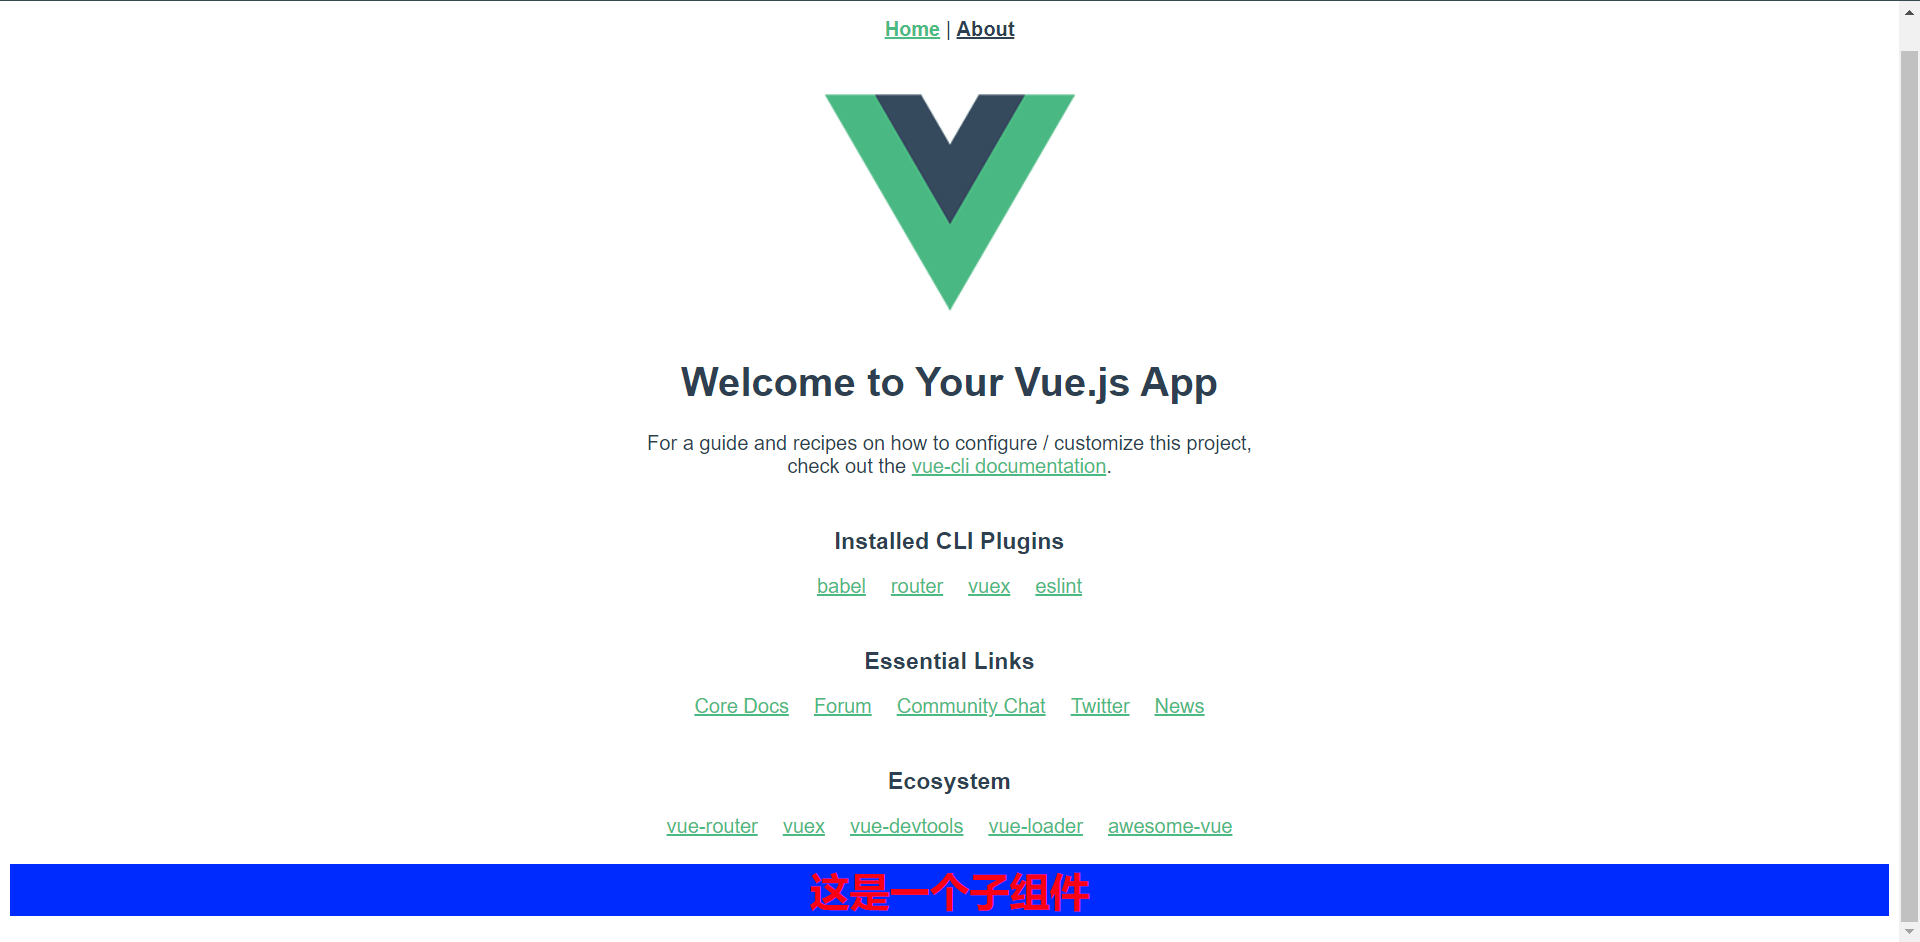
7.2.1:创建子组件在src/componets下
src/componets/Test.vue

<template>
  <div class="test">
    <h1>{{ msg }}</h1>
  </div>
</template>

<script>
  export default {
    name: "Text",
    data() {
      return {
        msg: "这是一个子组件",
      };
    },
  }
</script>

<style scoped>
  .test {
      color: red;
      background: blue;
  }
</style>
7.2.2:在父组件引用并使用
<template>
  <div class="home">
    <img alt="Vue logo" src="../assets/logo.png" />
    <HelloWorld msg="Welcome to Your Vue.js App" />
    <!--引用组件-->
    <TestPage></TestPage>
  </div>
</template>

<script>
// @ is an alias to /src
import HelloWorld from "@/components/HelloWorld.vue";
import TestPage from "@/components/TestPage.vue";  // 引入组件

export default {
  name: "HomeView",
  components: {
    HelloWorld,
    TestPage,  // 注册组件
  },
};
</script>

这就是生效后的样子,这就证明着我们已经注册成功了并且已经渲染生效了,这个就是我们自己开发的一个组件的效果,这里我们需要知道的一点就是,注册的组件必须使用,否则会报错的。
<template>
  <div class="about">
    <h1>This is an about page</h1>
    <TestPage></TestPage>
  </div>
</template>
<script>
  import TestPage from "@/components/TestPage.vue";

  export default {
    components: {
      TestPage,
    }
  }
</script>
从这里我们可以看出,这个组件其实在AboutView的父组件内也是可以使用的
7.4:注册组件
为了能在模板中使用,这些组件必须先注册	以便Vue能够识别,这里由两种组件注册类型:全局注册和局部注册,我们上面做的那个是局部注册,只能用用在当前模板。

全局注册:声明一次,在任何vue模板文件中使用,一般使用该组件的地方多的时候使用此方法
局部注册:在使用组件的时候Vue文件中声明和使用,一般只需要解耦代码时使用。
<template>
  <div class="about">
    <h1>This is an about page</h1>
    <TestPage></TestPage>
  </div>
</template>
<script>
  import TestPage from "@/components/TestPage.vue";

  export default {
    components: {
      TestPage,
    }
  }
</script>

上面这串就是局部注册
我们可以在src/main.js内注册一个全局的组件

import { createApp } from "vue";
import App from "./App.vue";
import router from "./router";
import store from "./store";
import TestPage from "@/components/TestPage"; // 引入组件

const app = createApp(App);
app.use(router).use(router).mount("#app") // 改造下面的创建注册语句,这样写的意思时方便注册js组件使用

// createApp(App).use(store).use(router).mount("#app"); // 改造前

app.component("TestPage", TestPage); // 注册我们的组件
这样就注册好了一个全局的组件,然后这个组件就可以生效在任意的.vue文件中了,我们来看看
<template>
  <div class="about">
    <TestPage></TestPage>
  </div>
</template>
我们可以发现,代码简化了非常的多,并且也生效着,这就是所谓的全局组件,而不需要在这个模板中注册了。
<template>
  <div class="home">
    <img alt="Vue logo" src="../assets/logo.png" />
    <HelloWorld msg="Welcome to Your Vue.js App" />
    <TestPage></TestPage>
  </div>
</template>

<script>
// @ is an alias to /src
import HelloWorld from "@/components/HelloWorld.vue";

export default {
  name: "HomeView",
  components: {
    HelloWorld,
  },
};
</script>
同样的,我们看到主页也没有注册,但是也是可以用的,所以这个就证明它是一个全局的组件,在哪儿都可以调用它,这就是全局注册和局部注册的区别了
7.5:传参
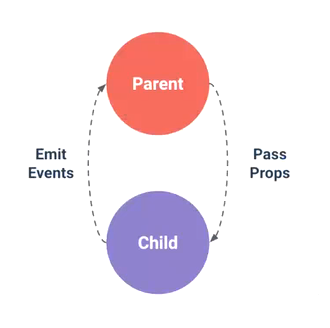
学习了组件用法,就像一种嵌套引用的关系,在这个关系中,经常会涉及到相互传递数据的需求,即父组件传子组件,子组件传父组件。

父、子组件的关系可以总结为:prop向下传递,事件向上传递。
父组件通过prop给子组件下发数据,子组件通过事件给父组件发送消息,如图:
我们还是来看一个demo是如何实现的
<template>
  <div class="home">
    <img alt="Vue logo" src="../assets/logo.png" />
    <!--父组件传参Welcome to Your Vue.js App-->
    <HelloWorld msg="Welcome to Your Vue.js App" />
    <TestPage></TestPage>
  </div>
</template>

<script>
// @ is an alias to /src
import HelloWorld from "@/components/HelloWorld.vue";

export default {
  name: "HomeView",
  components: {
    HelloWorld,
  },
};
</script>

下面是子组件
......
<script>
export default {
  name: "HelloWorld",
  props: {
    <!--其实值是传给它-->
    msg: String,
  },
};
</script>
......


这就是一个典型的父传子使用的"props"来传的,下面我们自己写一个
这个是我们自己写的 TestPage.vue

<template>
  <div class="test">
    <h1>{{ msg }}</h1>
  </div>
</template>

<script>
  export default {
    name: "TestPage",
    props: {
      msg: String
    }
  }
</script>

<style scoped>
  .test {
      color: red;
      background: blue;
  }
</style>


下面是一个引用

<template>
  <div class="home">
    <img alt="Vue logo" src="../assets/logo.png" />
    <HelloWorld msg="Welcome to Your Vue.js App" />
    <!--这里是给msg传参-->
    <TestPage msg="这是一个子组件"></TestPage>
  </div>
</template>

<script>
// @ is an alias to /src
import HelloWorld from "@/components/HelloWorld.vue";

export default {
  name: "HomeView",
  components: {
    HelloWorld,
  },
};
</script>


最终看下效果

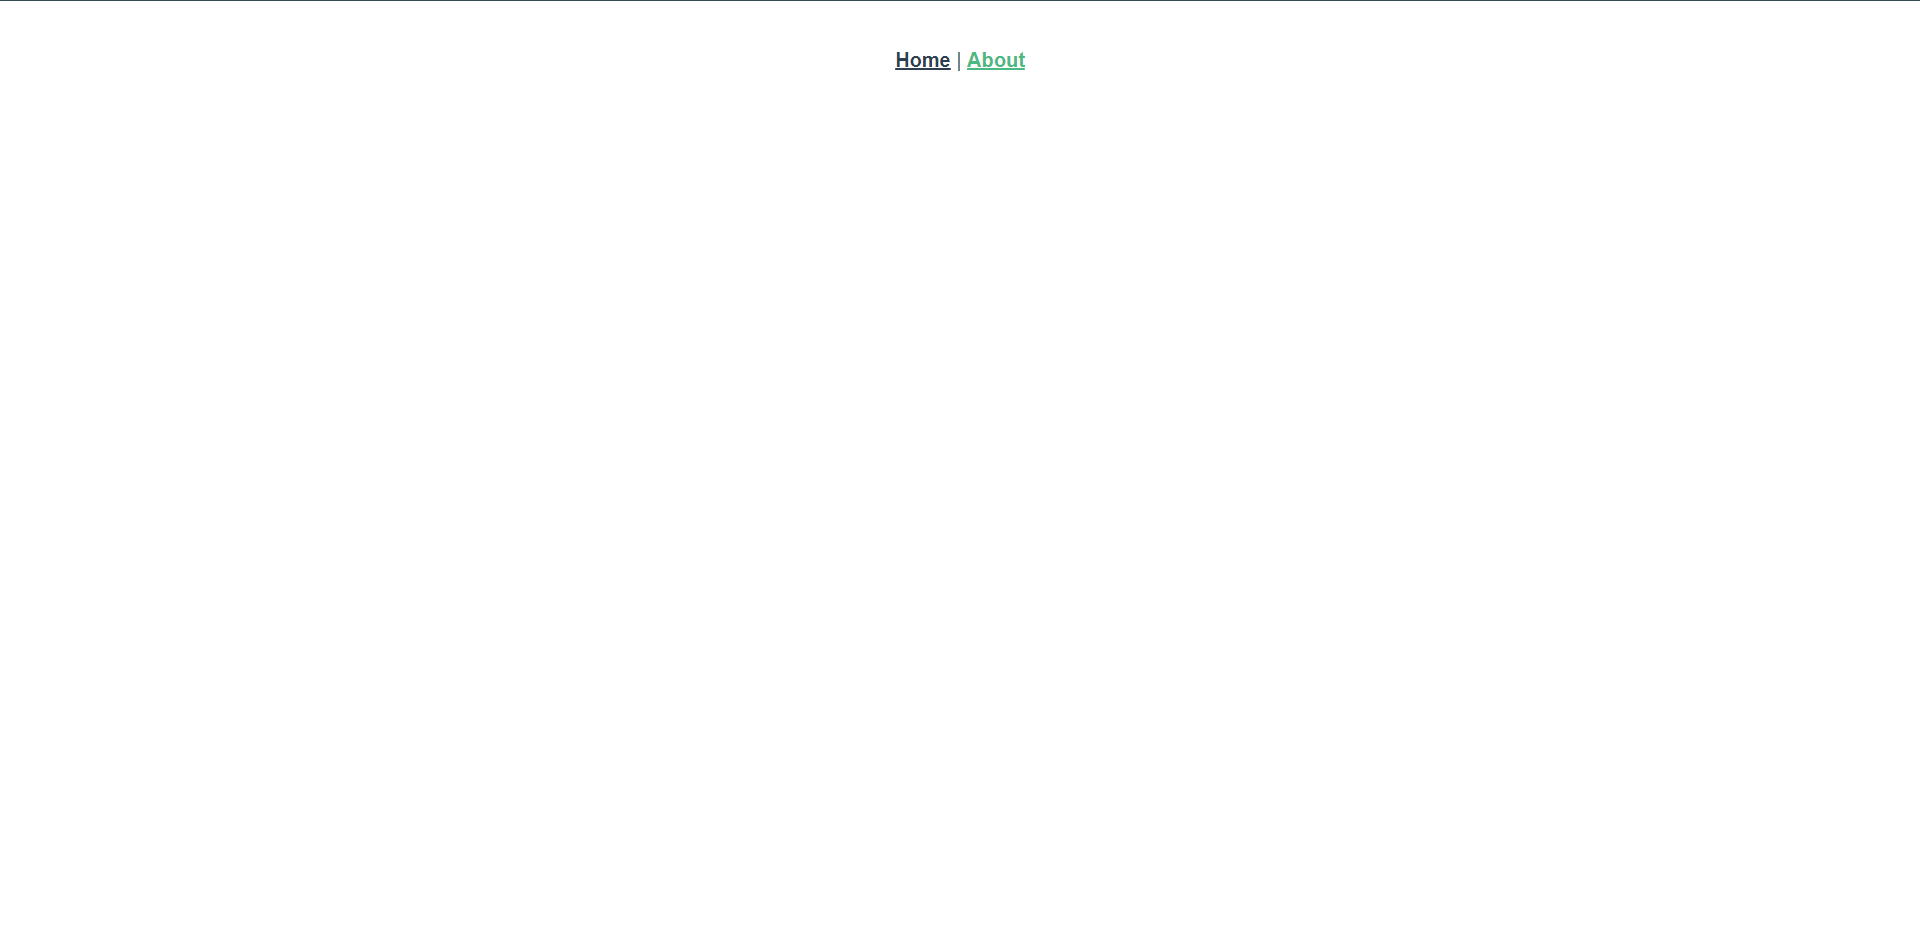
这个时候about我们是没有传参的,它就不应该有这个参数进来,我们可以顺便看一下
<template>
  <div class="about">
    <TestPage></TestPage>
  </div>
</template>
当然了,我们也完全可以使用绑定属性的方法传递值到我们的子组件内,接下来看一下
<template>
  <div class="about">
    <TestPage :msg="info"></TestPage>
  </div>
</template>
<script>
  export default {
      data(){
        return {
          msg: '这是一个子组件_变量方式传递', // 传递字符串
          info: {  // 传递对象,也可以传递数组
            name: 'zhangsan',
            age: 23,
            city: 'Shanghai',
          }
        }
      }
  }
</script>
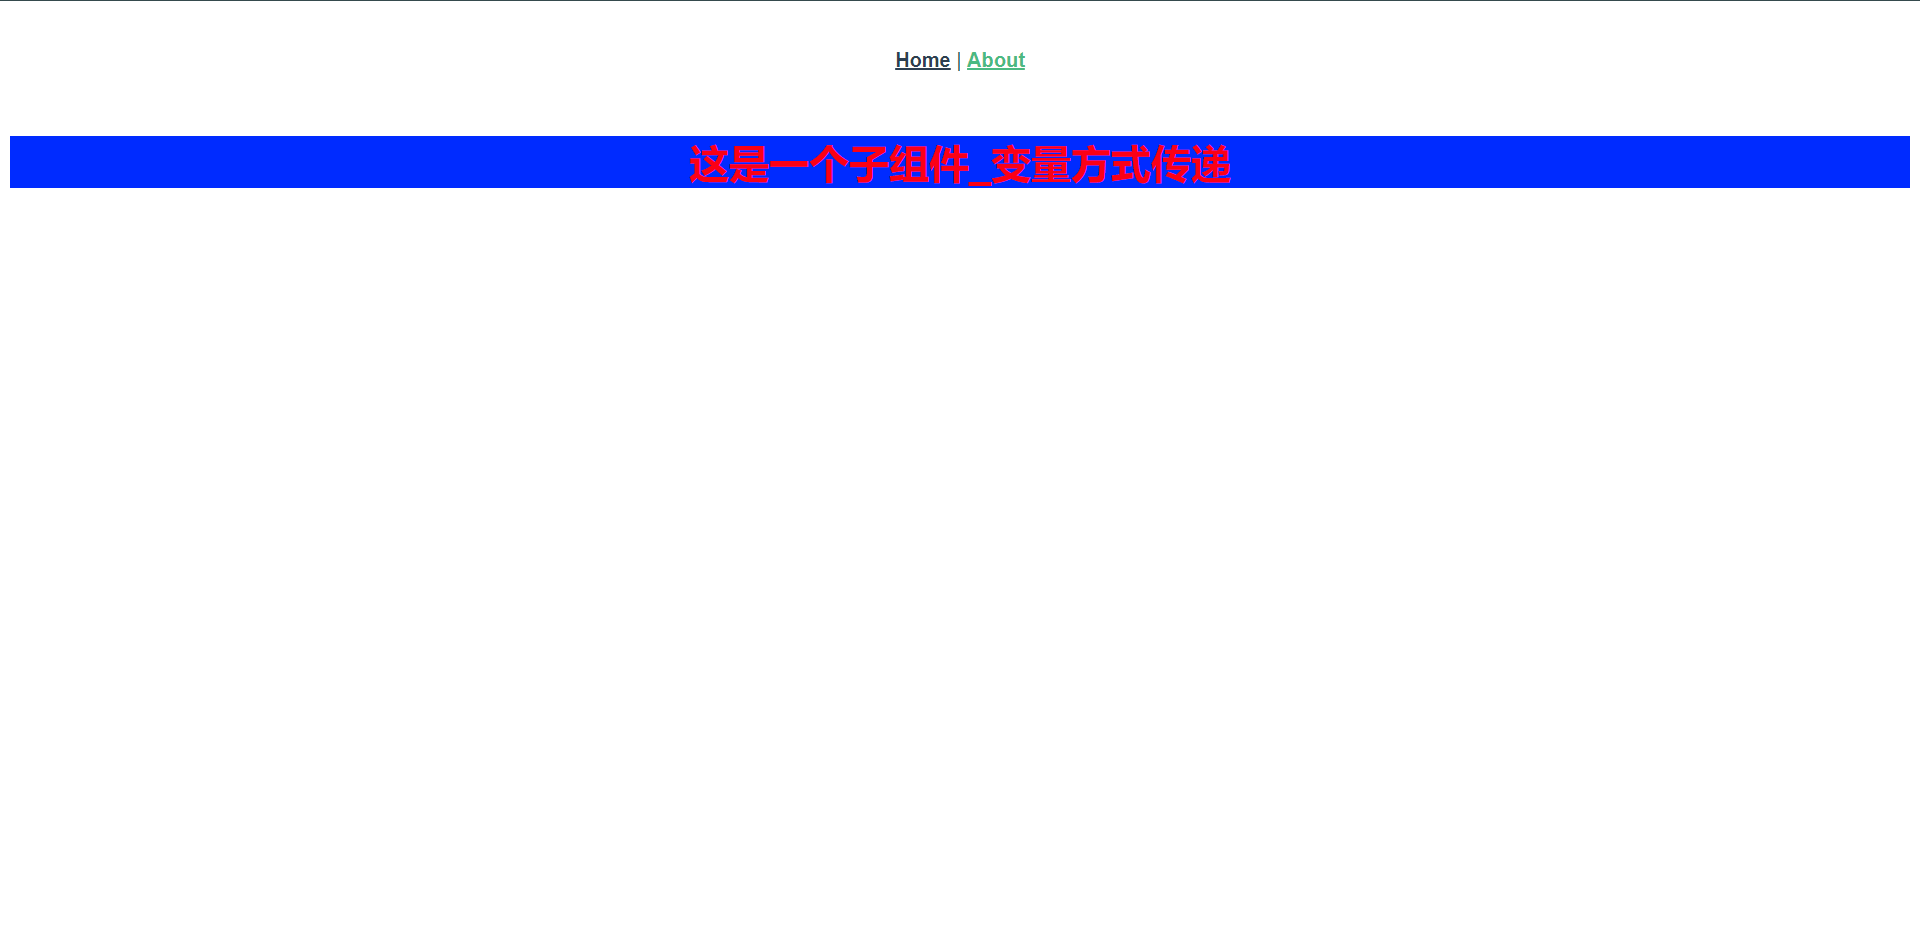
这就是我们的效果了,当然我们看到的这些都是父传子的操作,那么接下来我们要看到的是子传父的操作
<template>
  <div class="test">
    <h1>{{ msg }}</h1>
    <!--这是定义了一个触发传输数据的按钮-->
    <button type="button" @click="btn">传递数据到父组件</button>
  </div>
</template>

<script>
  export default {
    name: "TestPage",
    props: {
      msg: Array
    },
    // 这里定义了传输所需要的数据
    data() {
      return {
        childMsg: "你好,这是一个子组件消息!"
      }
    },
    // 用于处理按钮的触发事件
    methods: {
      btn() {
        this.$emit('childMsg', this.childMsg);
      }
    }
  }
</script>

<style scoped>
  .test {
      color: red;
      background: blue;
  }
</style>
<template>
  <div class="about">
    <!--通过绑定事件来接收消息,childMsg与子组件传递的名称必须一致,但事件名称child可以自定义-->
    <TestPage :msg="info" @childMsg="child"></TestPage>
  </div>
</template>
<script>
  export default {
    data(){
      return {
        msg: '这是一个子组件_变量方式传递',
      }
    },
    <!--这里来处理这个事件接收的数据-->
    methods: {
      child(msg){   // msg就是子组件传过来的数据
        console.log(msg)   // 在控制台打印出来
      }
    }
  }
</script>
从这里我们可以看出,数据是传递过来了的,并且根据我们的定义的逻辑传输的,因为引用和触发在一个页面,所以看起来不是特别的和谐
8:前后端数据交互Axios
1:介绍
2:使用
3:异常处理
4:全局默认值
5:自定义实例默认值
6:拦截器
8.1:介绍
在前端页面展示的数据大多都是通过访问一个API获取的,做这件事的方法有好几种,例如:jQuery ajax、vue-resource、axios、而vue-resource是vue组件,但是3版本不再更新,目前官方主流推荐axios、axios是一个http请求库。

官方文档:http://www.axios-js.com/zh-cn/docs
8.2:使用
1:安装axios:npm install axios --save
2:在main.js文件中全局注册
3:在组件中使用


1:安装就在项目目录下直接安装即可,然后可以查看package.json内可以找到axios的依赖

2:在main.js内注册

import { createApp } from "vue";
import App from "./App.vue";
import router from "./router";
import store from "./store";
import TestPage from "@/components/TestPage"; // 引入组件
import axios from "axios"; // 引入axios

const app = createApp(App);

// 注册axios
app.config.globalProperties.$axios = axios; // 新版注册方法

app.use(router).use(router).mount("#app") // 改造下面的创建注册语句,这样写的意思时方便注册js组件使用

// createApp(App).use(store).use(router).mount("#app"); // 改造前

app.component("TestPage", TestPage); // 注册我们的组件
这里我先去部署一个模拟API服务器,可以直接Nginx先暴露一个json使用
从API获取数据,在前端展示,我们先获取数据,这里我是写在了AboutView.vue内
<template>
  <button @click="getData">获取后端数据</button>
</template>
<script>
  export default {
    methods: {
      getData() {
        this.$axios.get('http://api.layzer.com/info.json').then(res => {
          console.log(res)
        })
      }
    }
  }
</script>
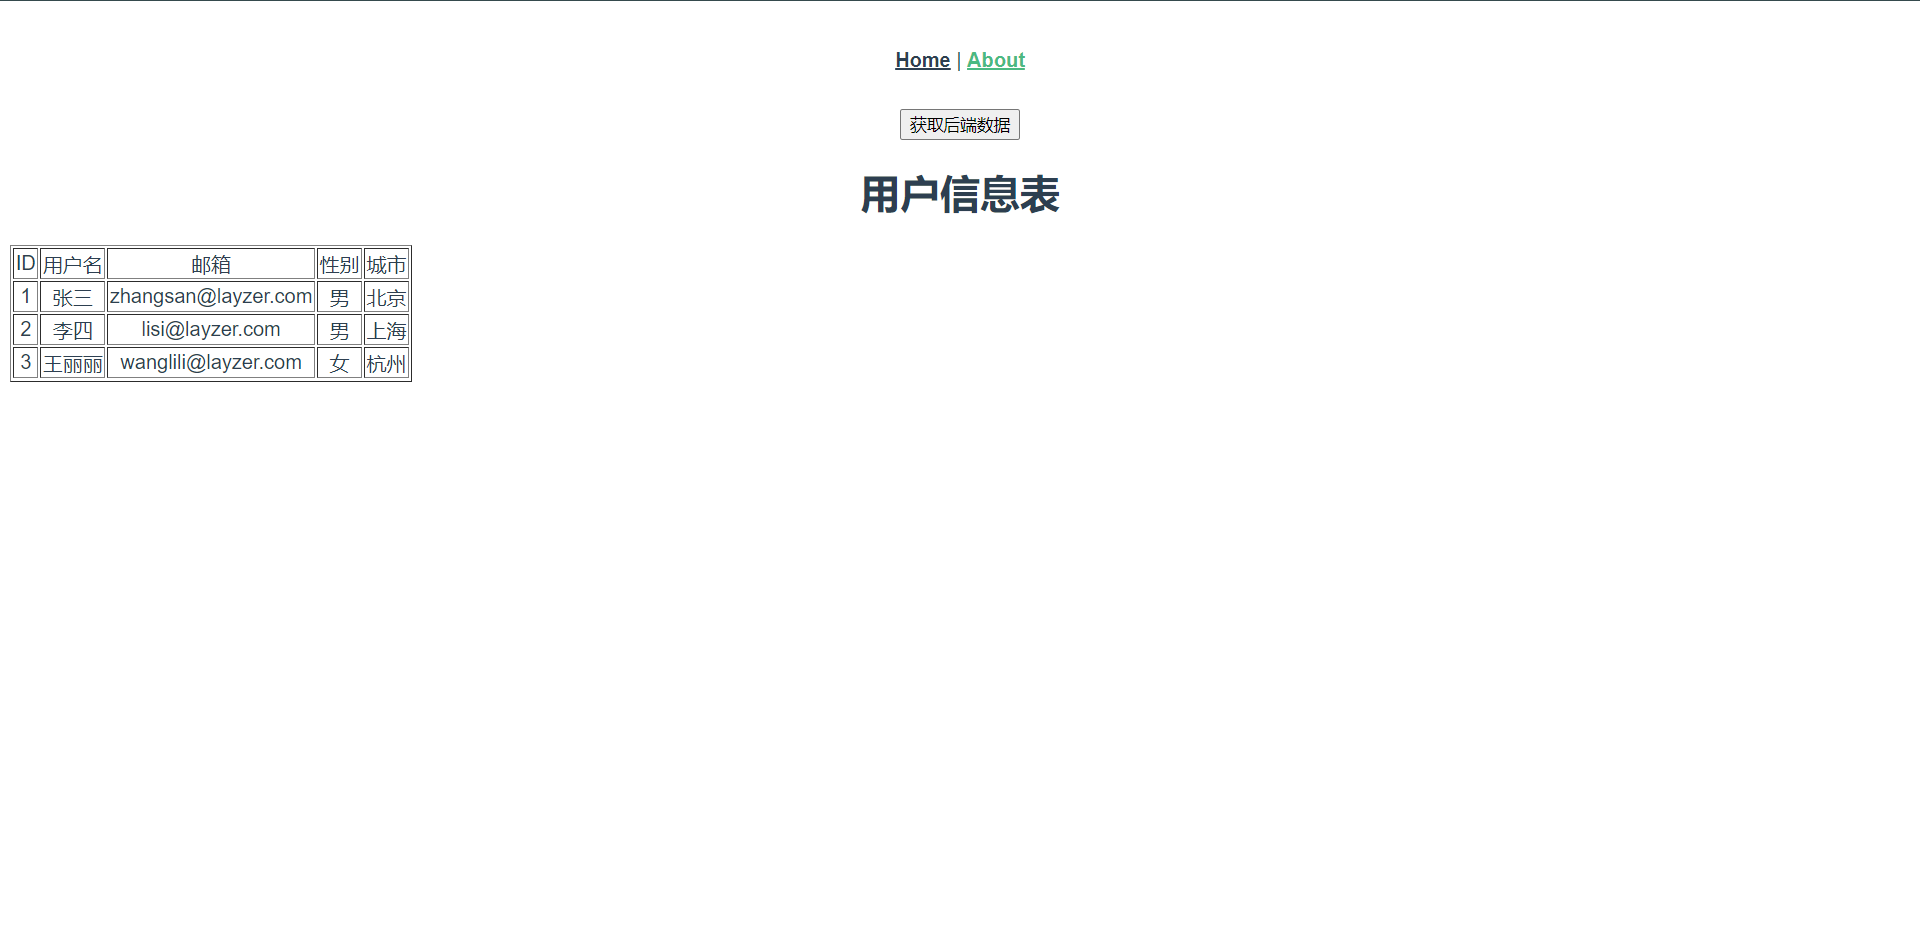
还是那句话,中间可能会出现CORS跨域的问题,这个问题大家可以结合html当时学习的方法去解决,下面是去渲染数据了
<template>
<button @click="getData">获取后端数据</button>
<br>
<h1>用户信息表</h1>
<table border="1">
<thead>
<tr>
<td>ID</td>
<td>用户名</td>
<td>邮箱</td>
<td>性别</td>
<td>城市</td>
</tr>
</thead>
<tbody>
<!--循环遍历userInfo,渲染到下面-->
<tr v-for="row in userInfo" :key="row.id">
<td>{{ row.id }}</td>
<td>{{ row.username }}</td>
<td>{{ row.email }}</td>
<td>{{ row.sex }}</td>
<td>{{ row.city }}</td>
</tr>
</tbody>
</table>
</template>
<script>
export default {
data() {
return {
userInfo: ''
}
},
methods: {
getData() {
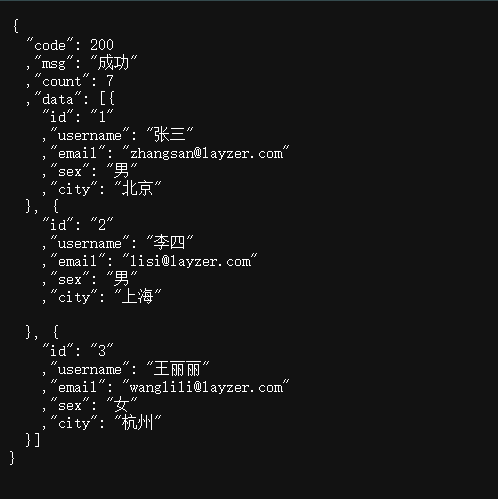
// 去API获取数据,这里的res.data就是我们的数据(也就是json)
this.$axios.get('http://api.layzer.com/info.json').then(res => {
this.userInfo = res.data.data // 将数据赋值给userInfo
console.log(res.data)
})
}
}
}
</script>
通过如上操作,我们可以看到,我们已经把`api`获取的数据获取到并渲染给了前端,这其实就是我们整个开发的过程,只不过我们后面开发的json数据是通过Go语言提供的API然后由前端去请求这个`API`获取数据,然后渲染,但是如果我想打开页面就渲染这个列表怎么解决呢?前面我们讲过,可以利用钩子实现
<template>
  <button @click="getData">获取后端数据</button>
  <br>
  <h1>用户信息表</h1>
  <table border="1">
    <thead>
      <tr>
        <td>ID</td>
        <td>用户名</td>
        <td>邮箱</td>
        <td>性别</td>
        <td>城市</td>
      </tr>
    </thead>
    <tbody>
      <tr v-for="row in userInfo" :key="row.id">
        <td>{{ row.id }}</td>
        <td>{{ row.username }}</td>
        <td>{{ row.email }}</td>
        <td>{{ row.sex }}</td>
        <td>{{ row.city }}</td>
      </tr>
    </tbody>
  </table>
</template>
<script>
  export default {
    data() {
      return {
        userInfo: ''
      }
    },
    methods: {
      getData() {
        this.$axios.get('http://api.layzer.com/info.json').then(res => {
          this.userInfo = res.data.data // 将数据赋值给userInfo
          console.log(res.data)
        })
      }
    },
    // 加这个就可以了
    created() {
      this.getData()
    }
  }
</script>
这样就可以实现我们点开这个界面的时候就回去帮我们请求数据,并且渲染出来了,

但是我们这个时候其实走的是一个HTTP的GET请求,下面我们来看一下POST请求是如何做到的。
<template>
  <div class="home">
    <h1>欢迎访问管理后台</h1>
    <form action="#">
      账号:<input type="text" v-model="form.username">
      密码:<input type="password" v-model="form.password">
      <input type="button" @click="login" value="登录">
    </form>
    <p style="color: red" v-if="notice">账号密码不能为空!</p>
  </div>
</template>

<script>
  export default {
    data() {
      return {
        form: {
          username: '',
          password: ''
        },
        notice: false
      }
    },
    methods: {
      login() {
        if (this.form.username === '' || this.form.password === '') {
          this.notice = true
        } else {
          this.notice = false
          this.$axios.post('http://api.layzer.com/login', this.form)
          // 因为我这里还没写API,所以暂时使用控制台打印出来看看
          console.log(this.form)
        }
      }
    }
  }
</script>
8.3:异常处理
很多时候我们可能并没有从API获取到数据,这可能是由于多种原因造成的,比如:axios调用可能由于多种原因而失败,包括但不限于:
1:API服务器故障了
2:请求发送错误
3:API没有返回预期格式信息等

我们可以使用catch异常处理来处理这些问题。
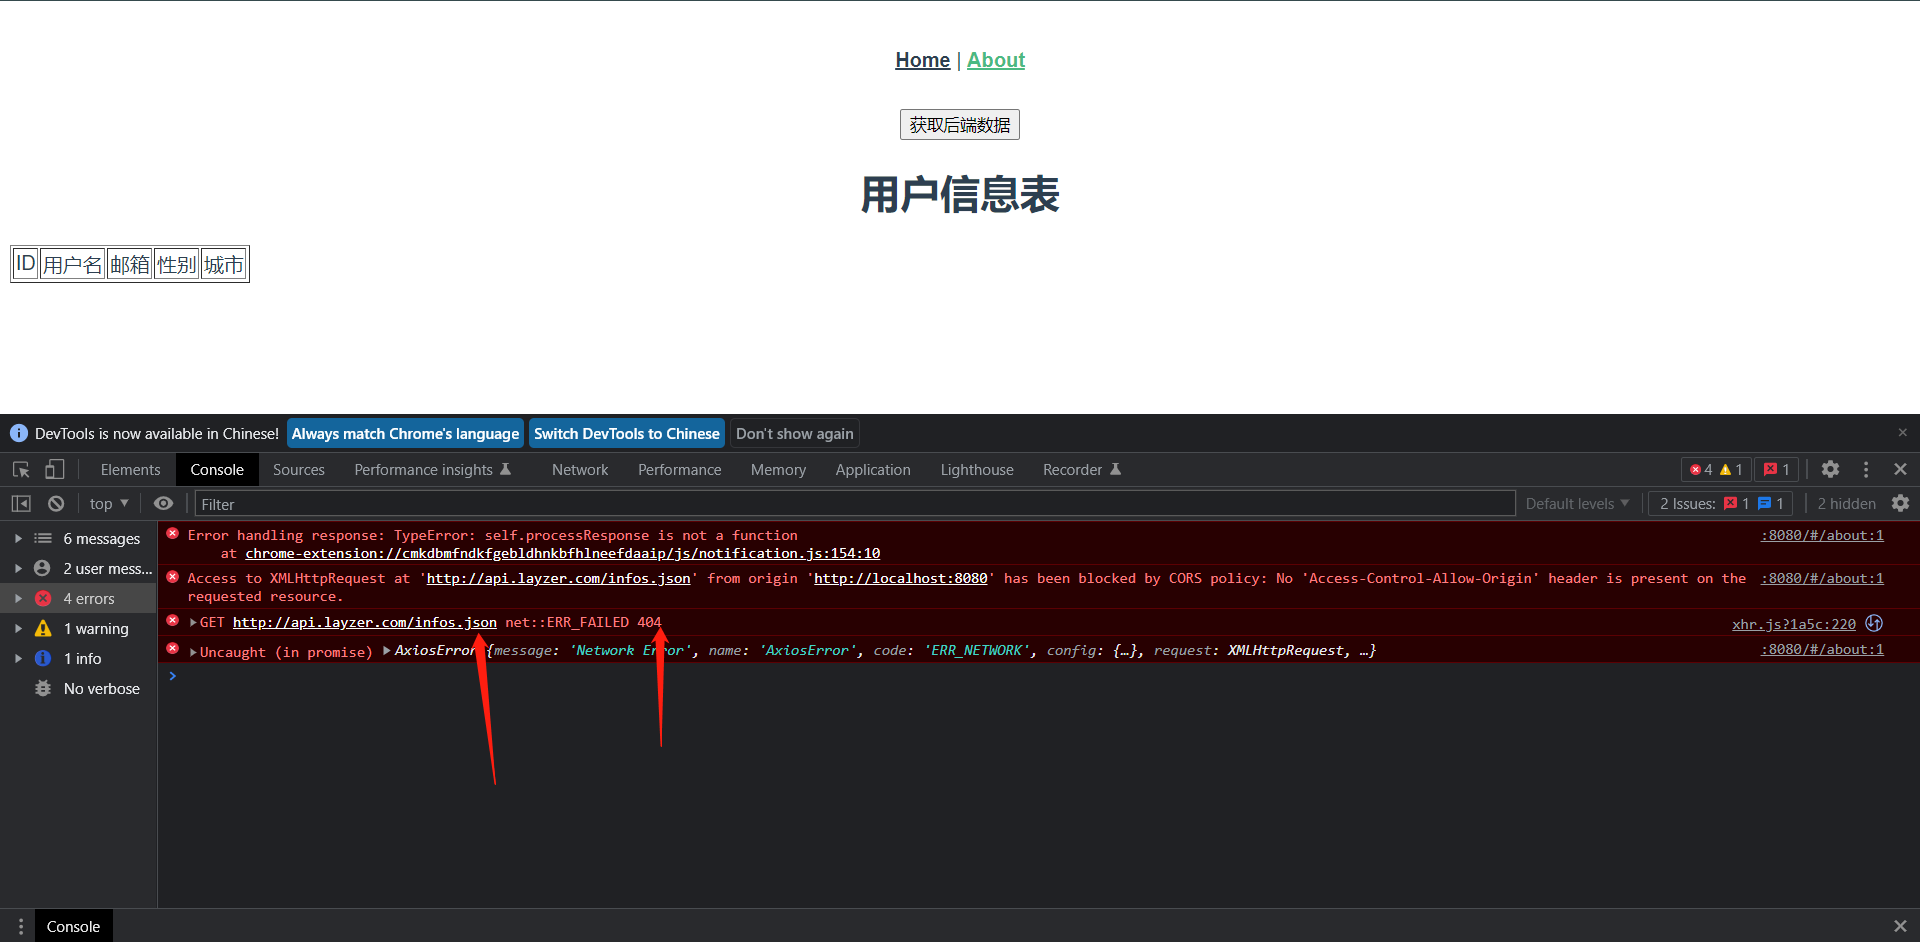
JS会告诉我们说请求404了,可是在用户侧,我们没有任何感知说404了,也就是用户不知道这个报错是因为什么,所以我们应该给用户来一个友好的提醒来展示。
<template>
  <button @click="getData">获取后端数据</button>
  <br>
  <h1>用户信息表</h1>
  <table border="1">
    <thead>
      <tr>
        <td>ID</td>
        <td>用户名</td>
        <td>邮箱</td>
        <td>性别</td>
        <td>城市</td>
      </tr>
    </thead>
    <tbody>
      <tr v-for="row in userInfo" :key="row.id">
        <td>{{ row.id }}</td>
        <td>{{ row.username }}</td>
        <td>{{ row.email }}</td>
        <td>{{ row.sex }}</td>
        <td>{{ row.city }}</td>
      </tr>
    </tbody>
  </table>
</template>
<script>
  export default {
    data() {
      return {
        userInfo: ''
      }
    },
    methods: {
      getData() {
        this.$axios.get('http://api.layzer.com/infos.json').then(res => {
          this.userInfo = res.data.data.catch
          console.log(res.data)
        }).catch(err => {  // 相应失败的信息会保存在这里
          console.log(err)
        })
      },
    },
    created() {
      this.getData()
    }
  }
</script>
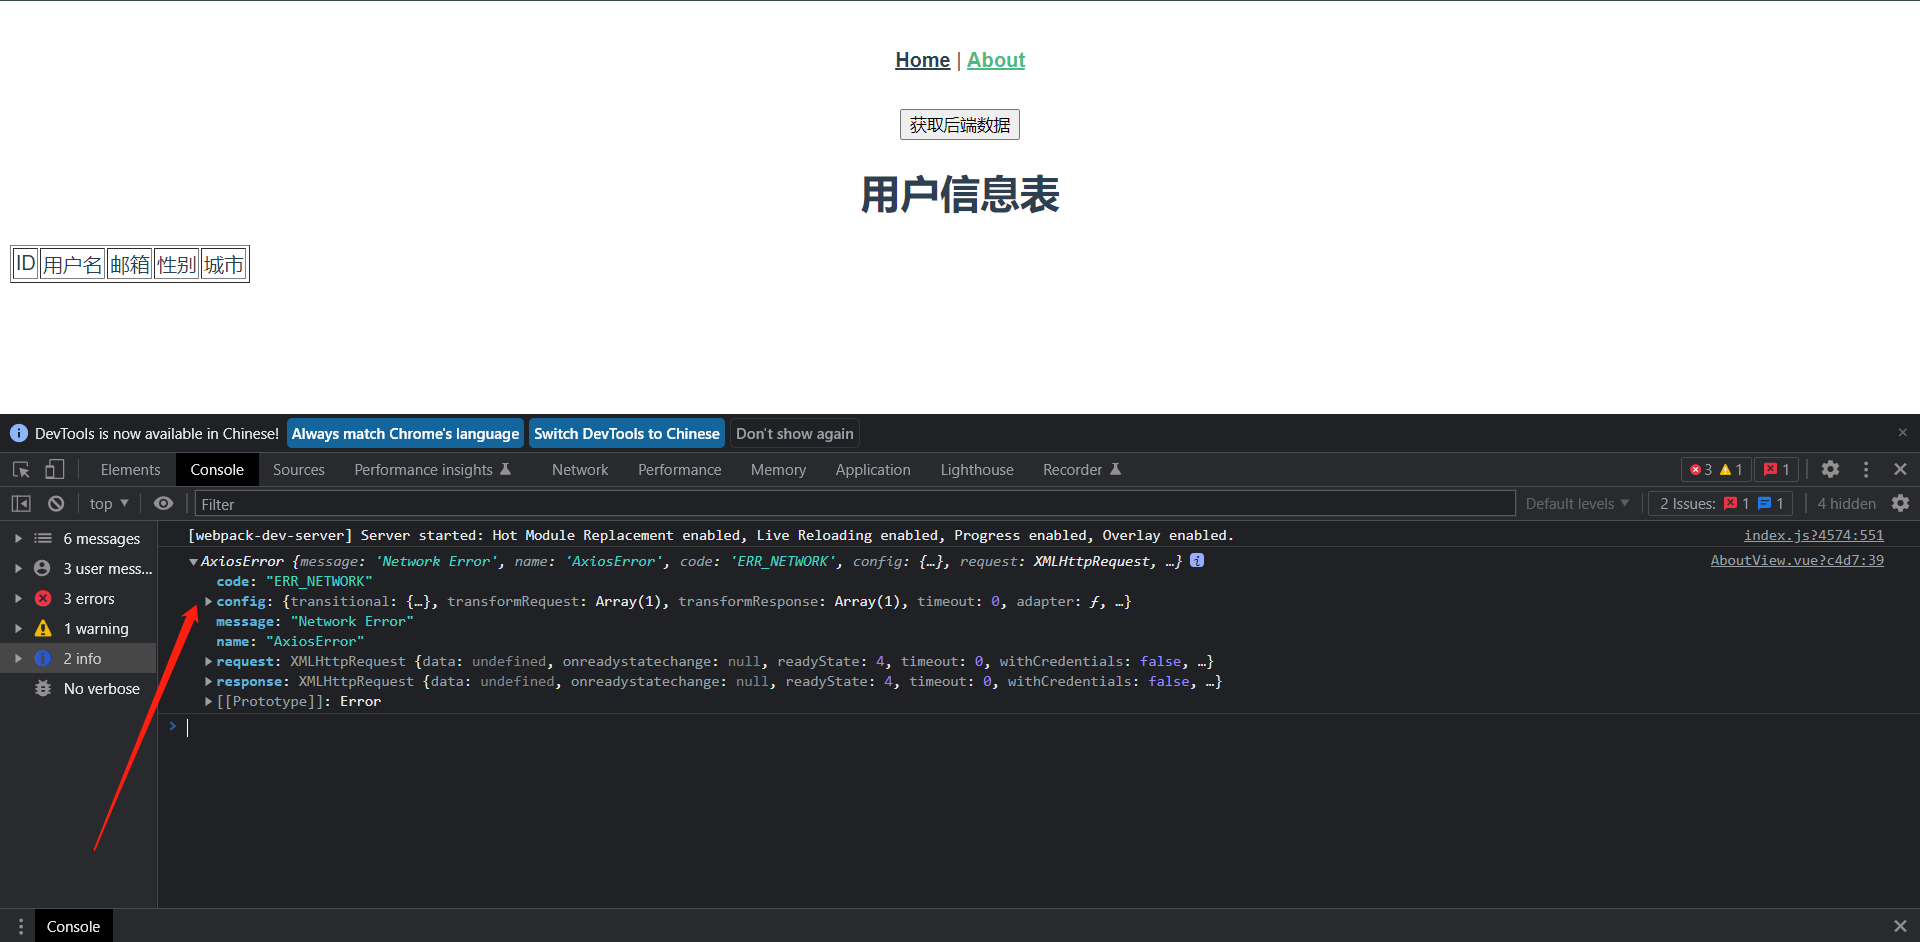
注意看,这个信息不是js抛出来的,这个是我们Consol.log打印出来的
<template>
  <button @click="getData">获取后端数据</button>
  <br>
  <h1>用户信息表</h1>
  <table border="1">
    <thead>
      <tr>
        <td>ID</td>
        <td>用户名</td>
        <td>邮箱</td>
        <td>性别</td>
        <td>城市</td>
      </tr>
    </thead>
    <tbody>
      <tr v-for="row in userInfo" :key="row.id">
        <td>{{ row.id }}</td>
        <td>{{ row.username }}</td>
        <td>{{ row.email }}</td>
        <td>{{ row.sex }}</td>
        <td>{{ row.city }}</td>
      </tr>
    </tbody>
  </table>
  <p style="color: red">错误信息:{{ err }}</p>
</template>
<script>
  export default {
    data() {
      return {
        userInfo: '',
        err: ''
      }
    },
    methods: {
      getData() {
        this.$axios.get('http://api.layzer.com/infos.json').then(res => {
          this.userInfo = res.data.data.catch
          console.log(res.data)
        }).catch(err => {  // 相应失败的信息会保存在这里
          this.err = err
        })
      },
    },
    created() {
      this.getData()
    }
  }
</script>
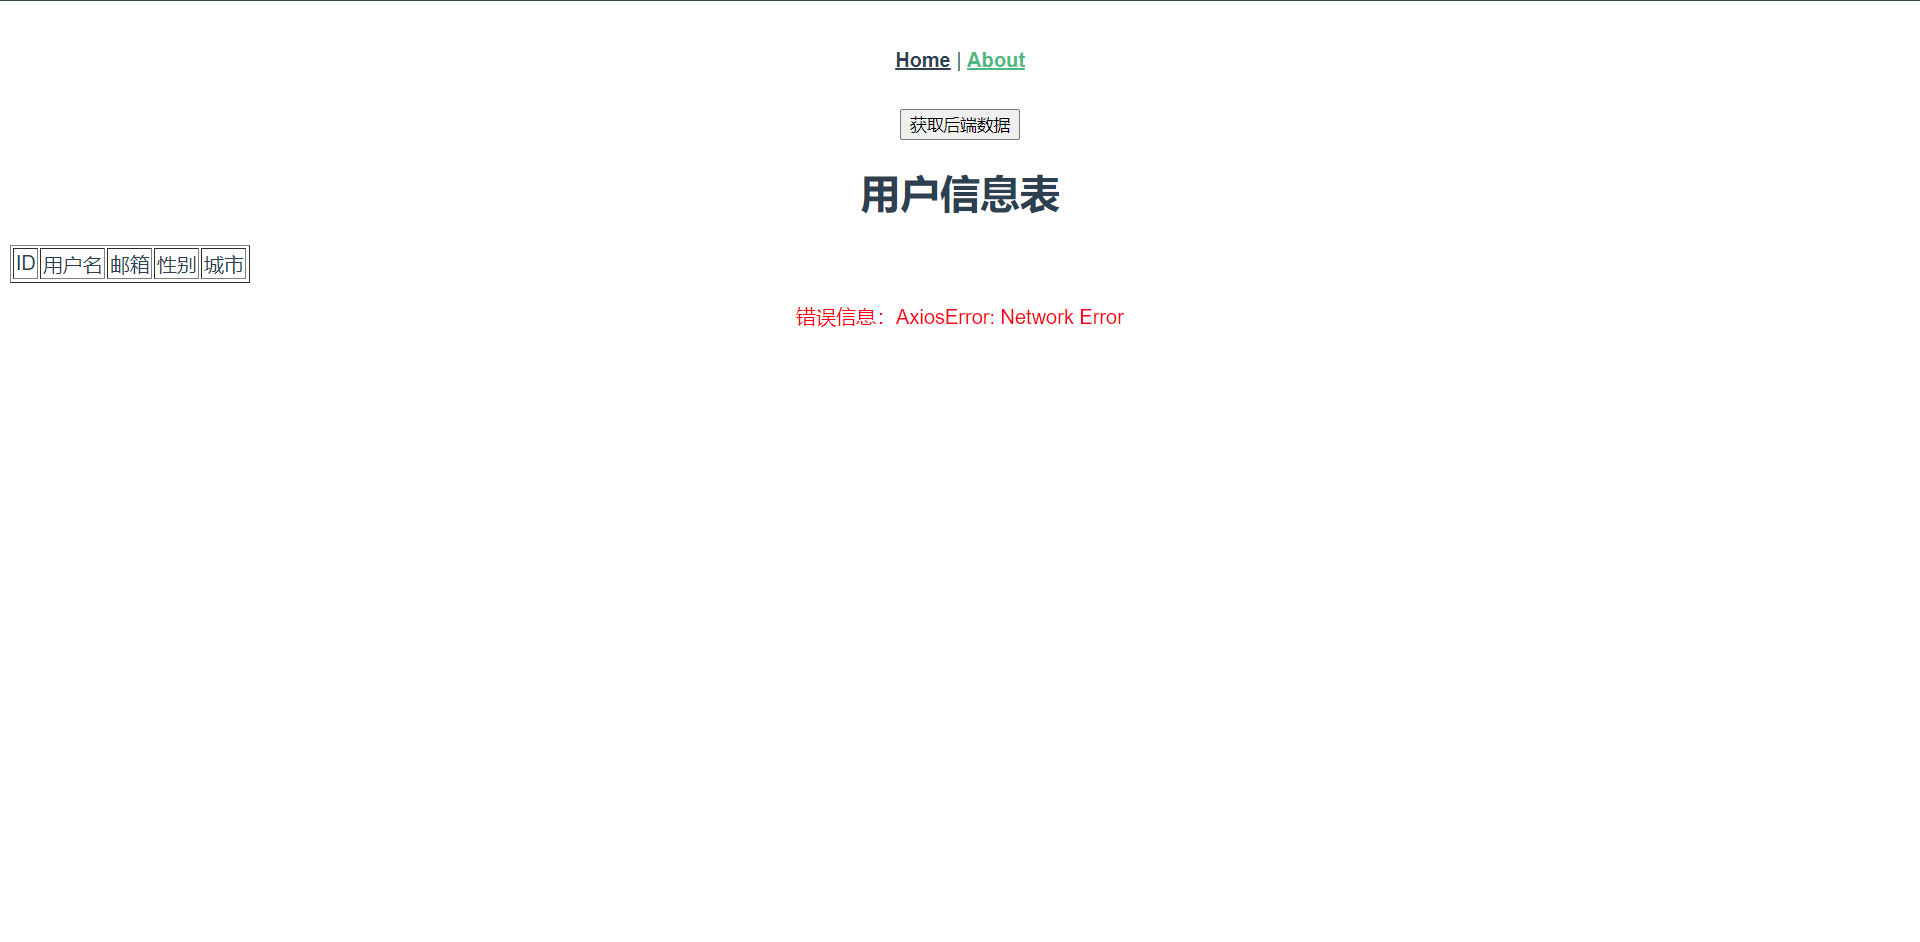
但是针对于客户来说,这个报错客户是看不懂的,一般我肯会按照如下写法去告诉使用者
<template>
  <button @click="getData">获取后端数据</button>
  <br>
  <h1>用户信息表</h1>
  <table border="1">
    <thead>
      <tr>
        <td>ID</td>
        <td>用户名</td>
        <td>邮箱</td>
        <td>性别</td>
        <td>城市</td>
      </tr>
    </thead>
    <tbody>
      <tr v-for="row in userInfo" :key="row.id">
        <td>{{ row.id }}</td>
        <td>{{ row.username }}</td>
        <td>{{ row.email }}</td>
        <td>{{ row.sex }}</td>
        <td>{{ row.city }}</td>
      </tr>
    </tbody>
  </table>
  <!--判断错误信息是否显示-->
  <p style="color: red" v-if="status">连接服务器失败,请检查服务器</p>
</template>
<script>
  export default {
    data() {
      return {
        userInfo: '',
        // 默认为 false,不显示
        status: false
      }
    },
    methods: {
      getData() {
        this.$axios.get('http://api.layzer.com/infos.json').then(res => {
          this.userInfo = res.data.data
          console.log(res.data)
        }).catch(err => {  // 相应失败的信息会保存在这里
          this.status = true  // 如果捕获到异常则将status重置为true,就会在页面显示了
        })
      },
    },
    created() {
      this.getData()
    }
  }
</script>
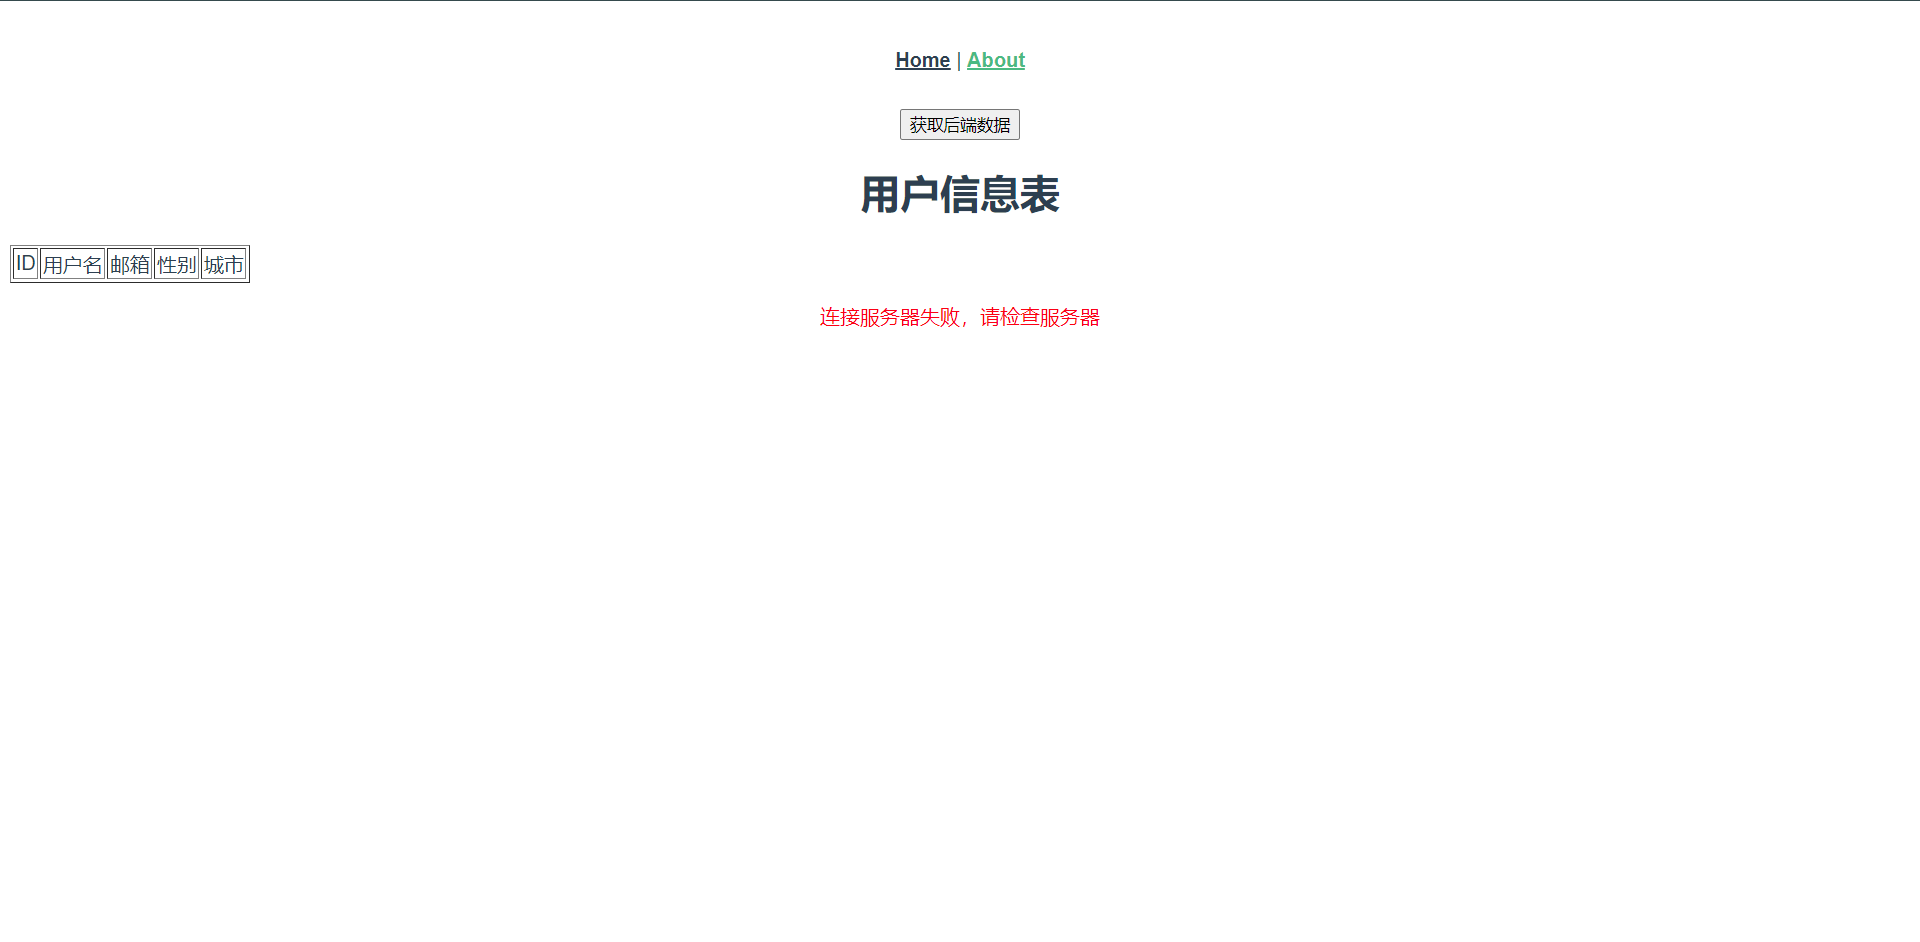
这种写法非常的简单粗暴,就是告诉我们服务器出问题了,需要检查服务器错误
8.4:全局默认值
在实际开发中,几乎每个组件都会用到axios发起数据请求,如果每次都去填写完整的请求url,不利于后期维护,这个时候我们就可以考虑到全局axios默认值。

我们可以在main.js内注册设定默认值,下面我们来看看
import { createApp } from "vue";
import App from "./App.vue";
import router from "./router";
import store from "./store";
import TestPage from "@/components/TestPage"; // 引入组件
import axios from "axios"; // 引入axios

const app = createApp(App);

// 这里配置默认的一些配置
axios.defaults.baseURL = "http://api.layzer.com"; // 设置默认的请求地址
axios.defaults.timeout = 5000; // 设置默认请求超时时间为5s

// 注册axios
app.config.globalProperties.$axios = axios; // 新版注册方法

app.use(router).use(router).mount("#app") // 改造下面的创建注册语句,这样写的意思时方便注册js组件使用

// createApp(App).use(store).use(router).mount("#app"); // 改造前

app.component("TestPage", TestPage); // 注册我们的组件
<template>
  <button @click="getData">获取后端数据</button>
  <br>
  <h1>用户信息表</h1>
  <table border="1">
    <thead>
      <tr>
        <td>ID</td>
        <td>用户名</td>
        <td>邮箱</td>
        <td>性别</td>
        <td>城市</td>
      </tr>
    </thead>
    <tbody>
      <tr v-for="row in userInfo" :key="row.id">
        <td>{{ row.id }}</td>
        <td>{{ row.username }}</td>
        <td>{{ row.email }}</td>
        <td>{{ row.sex }}</td>
        <td>{{ row.city }}</td>
      </tr>
    </tbody>
  </table>
  <p style="color: red" v-if="status">连接服务器失败,请检查服务器</p>
</template>
<script>
  export default {
    data() {
      return {
        userInfo: '',
        status: false
      }
    },
    methods: {
      getData() {
        // 这里就可以直接引用路由地址了,不需要再去写全部url了
        this.$axios.get('/info.json').then(res => {
          this.userInfo = res.data.data
          console.log(res.data)
        }).catch(err => {  // 相应失败的信息会保存在这里
          this.status = true
        })
      },
    },
    created() {
      this.getData()
    }
  }
</script>

8.5:自定义实例默认值
这个其实是有时候我们的后端不只是一个API地址,域名不同,就会涉及到配置的不相同,这个时候自定义实例默认值就非常好用了。

主要配置顺序如下:

1:创建js文件(配置API地址)
2:全局注册js文件
3:组件使用
1:我们在src/下创建api目录,并且在api目录创建http.js

import axios from "axios";

const Axiosinterface = axios.create({
    baseURL: 'http://api.layzer.com',
    timeout: 5000
    // 这里也可以设置一些头部信息
    // headers: {...}
})

// 将函数暴露出去
export default Axiosinterface


2:注册到main.js中

import { createApp } from "vue";
import App from "./App.vue";
import router from "./router";
import store from "./store";
import TestPage from "@/components/TestPage"; // 引入组件
import axios from "axios"; // 引入axios
import http from "./api/http"; // 引入axios封装的方法

const app = createApp(App);

// 这个时候这两个就可以注释掉了
// axios.defaults.baseURL = "http://api.layzer.com"; // 设置默认的请求地址
// axios.defaults.timeout = 5000; // 设置请求超时时间

// 注册axios新的注册
app.config.globalProperties.$http = http; // 新版注册方法

app.use(router).use(router).mount("#app") // 改造下面的创建注册语句,这样写的意思时方便注册js组件使用

// createApp(App).use(store).use(router).mount("#app"); // 改造前

app.component("TestPage", TestPage); // 注册我们的组件


3:应用新的封装进行操作
<template>
  <button @click="getData">获取后端数据</button>
  <br>
  <h1>用户信息表</h1>
  <table border="1">
    <thead>
      <tr>
        <td>ID</td>
        <td>用户名</td>
        <td>邮箱</td>
        <td>性别</td>
        <td>城市</td>
      </tr>
    </thead>
    <tbody>
      <tr v-for="row in userInfo" :key="row.id">
        <td>{{ row.id }}</td>
        <td>{{ row.username }}</td>
        <td>{{ row.email }}</td>
        <td>{{ row.sex }}</td>
        <td>{{ row.city }}</td>
      </tr>
    </tbody>
  </table>
  <p style="color: red" v-if="status">连接服务器失败,请检查服务器</p>
</template>
<script>
  export default {
    data() {
      return {
        userInfo: '',
        status: false
      }
    },
    methods: {
      getData() {
        // 这里可以发现关于axios的我们都替换掉了
        this.$http.get('/info.json').then(res => {
          this.userInfo = res.data.data
          console.log(res.data)
        }).catch(err => {  // 相应失败的信息会保存在这里
          this.status = true
        })
      },
    },
    created() {
      this.getData()
    }
  }
</script>
效果依旧出奇的好,其实我做这些操作就是将axios又封装了一层,意思也就是后面如果你由多个API的地址,可以创建多个JS文件来支持整个项目请求,就可以了,流程和上面的注册方法一致。
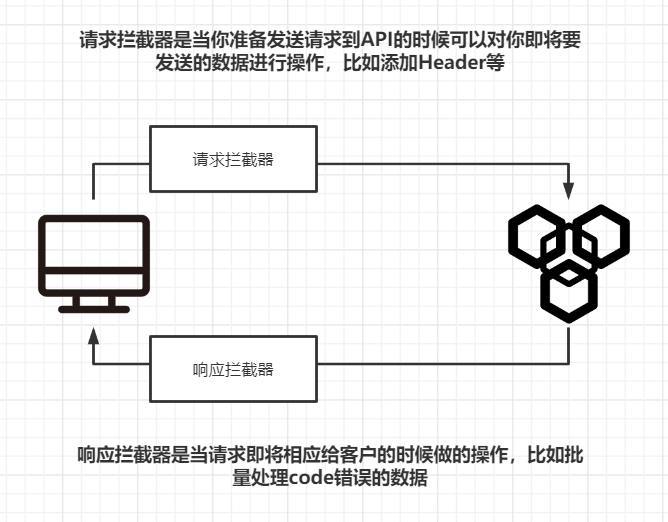
8.6:拦截器
拦截器可以拦截每一次请求和相应,然后进行响应处理。

请求拦截器应用场景:
	- 发起请求前添加header

响应拦截应用场景:
	- 统一处理API响应状态码为200或非200的提示消息
	- 统一处理catch异常提示信息

那么下面我们来看看我们的拦截器是如何实现的,还是在我们的http.js去操作
import axios from "axios";

const Axiosinterface = axios.create({
    baseURL: 'http://api.layzer.com',
    timeout: 5000
})

// 拦截器:请求拦截
Axiosinterface.interceptors.request.use(config => {
    // 请求被发送之前要做些什么
    // 例如添加请求头
    config.headers['Content-Type'] = 'application/json;charset=UTF-8';
    return config;
}, error => {
    // 处理请求错误
    return Promise.reject(error);
});

// 拦截器:响应拦截
Axiosinterface.interceptors.response.use(response => {
    // 处理响应数据
    if (response.data.code != 200) {
        // 弹窗提示请求数据失败
        alert("请求数据失败!")
    }
    return response;
}, error => {
    alert("请求服务器接口错误!")
    return Promise.reject(error);
});

export default Axiosinterface
总之它可以帮我们解决很多事情,比如如果我们不用拦截器,你需要在每个页面都去处理一下异常等信息,但是如果用了拦截器,那么只需要在拦截器处理一次就行了。
9:Vue路由:Vue-router
1:介绍
2:使用
3:路由参数
4:导航守卫
8.1:介绍
Vue Router是Vue.js(opens new window)官方的路由管理器,它和Vue.js的核心深度集成,包含功能有

1:嵌套的路由/视图表
2:模块化的.基于组件的路由配置
3:路由参数、查询、通配符
4:基于Vue.js深度系统的视图过滤效果
5:细粒度的导航控制
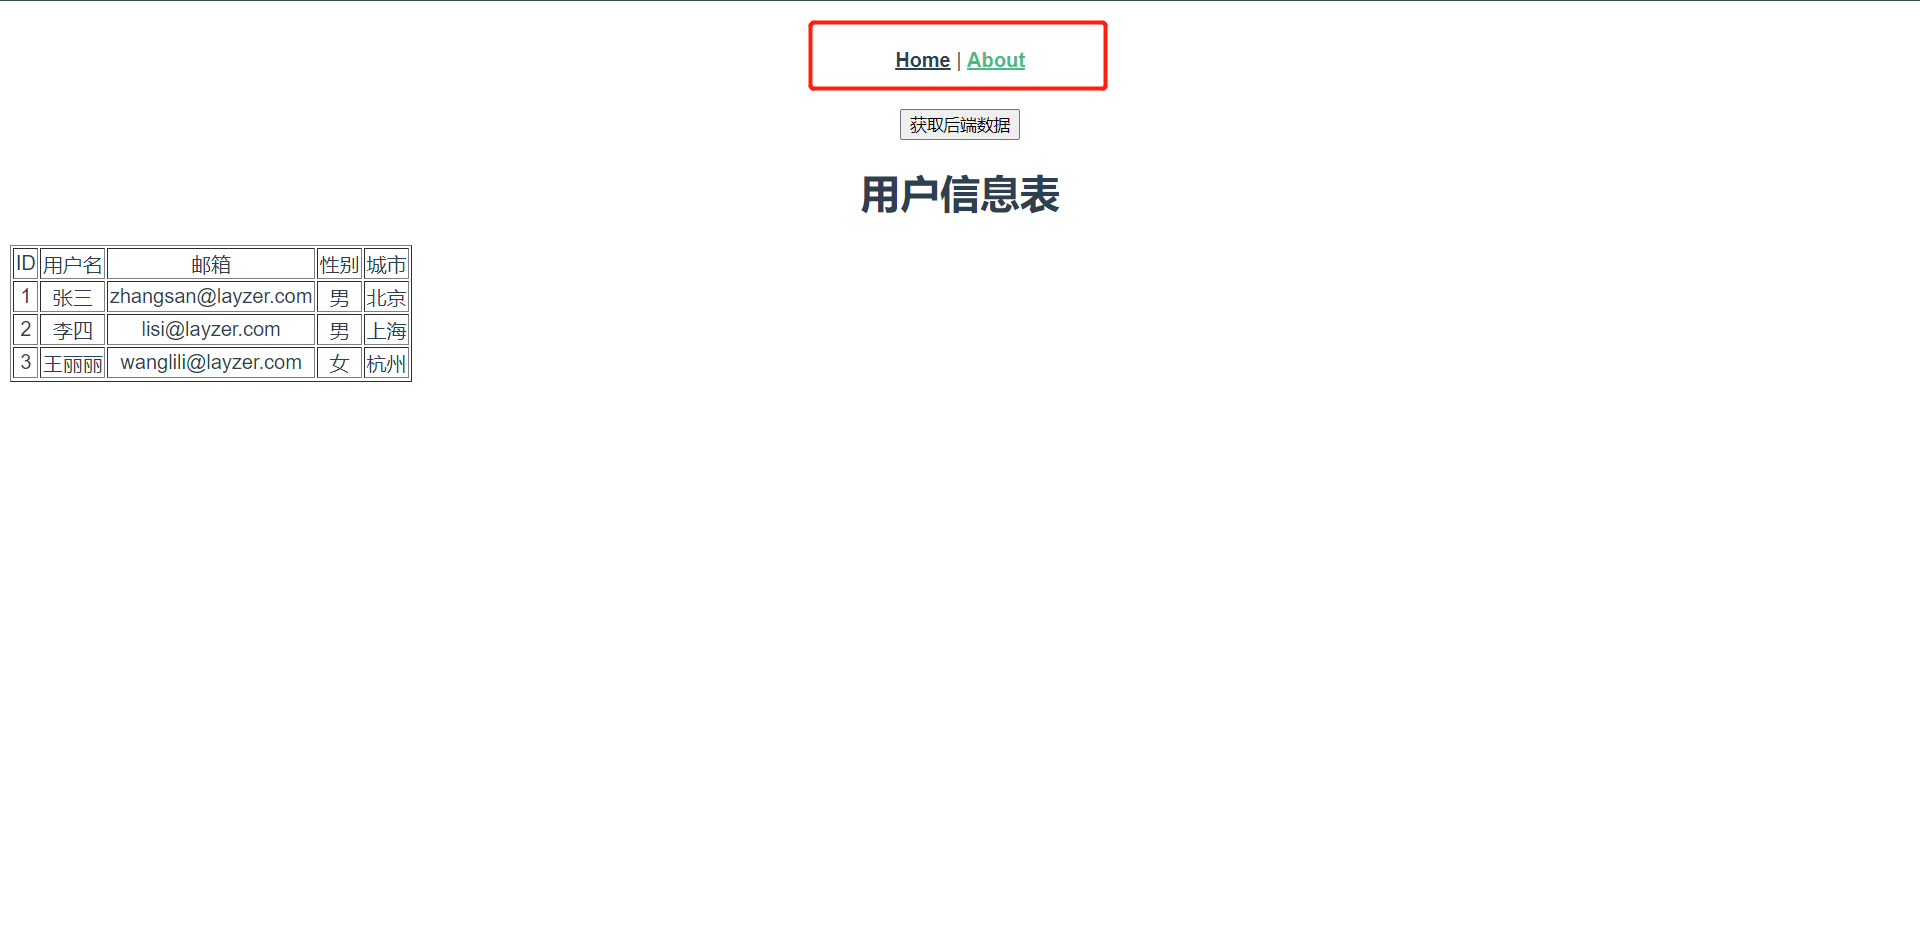
如图所示,上面的导航栏就是由路由实现的。
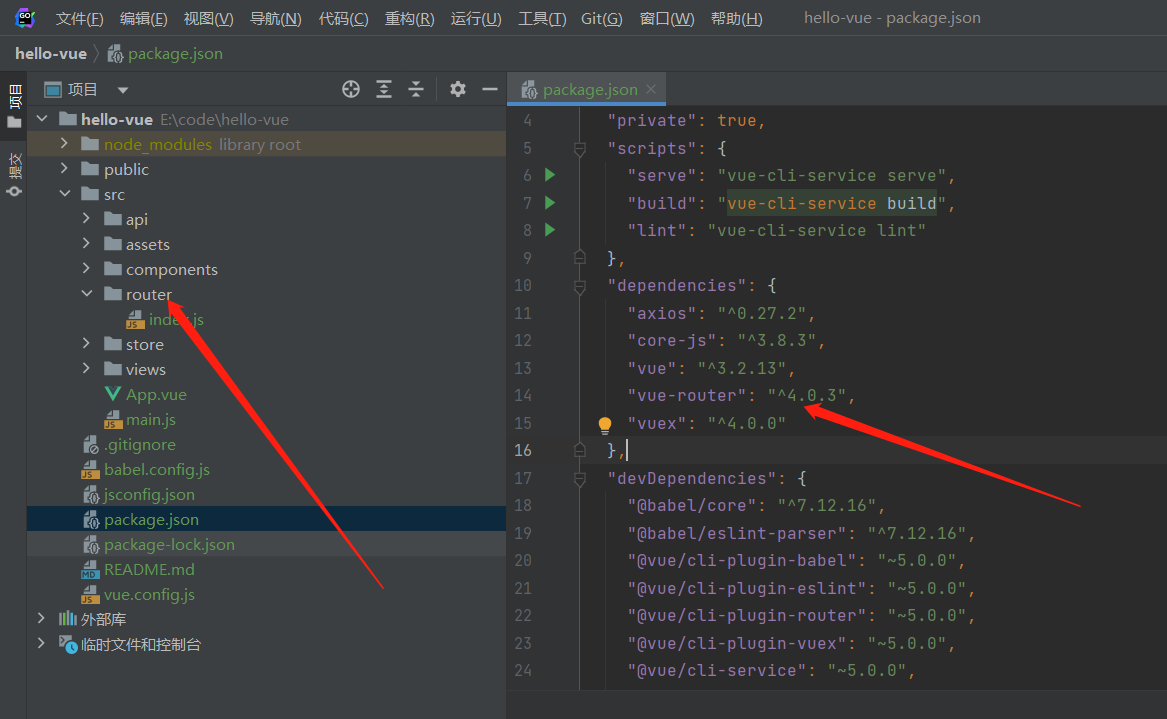
8.2:Vue Route安装
安装方法我们在前面创建vue项目的时候已经选择了安装。

主要效果是项目创建完成之后会生成一个router的目录,并且在package.json内会由router的包
8.3:Vue-Router介绍
使用流程:

1:开发页面(组件)
2:定义路由
3:组件使用路由
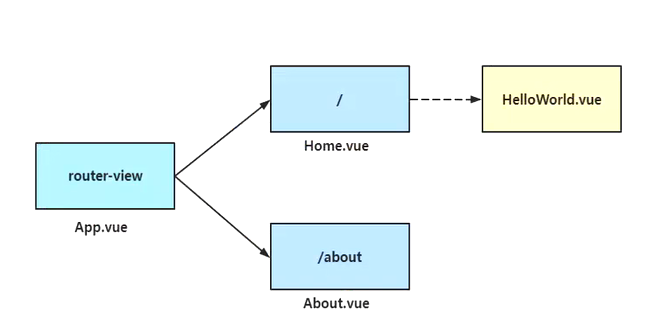
上图是我们已有项目的一个路由的示例,下面我们自己来定义一个路由来看看这个路由到底该如何使用
在src/views下创建一个新的页面叫UserPage.vue,这只是一个简单的页面

<template>
  <div class="demo">
      <ul>
        <li>ID</li>
        <li>名称</li>
        <li>权限</li>
      </ul>
  </div>
</template>

<script>
export default {
  name: "UserPage"
}
</script>

<style scoped>
  .demo {
    color: red;
    background: blue;
  }
</style>
然后需要在router/index.js内添加路由

// 这是自带的路由功能
import { createRouter, createWebHashHistory } from "vue-router";
// 导入组件
import HomeView from "../views/HomeView.vue";
// 导入刚刚写好的组件,方式为两种,第一种先导入后引用,第二种是当路由被访问时才会加载组件
import UserPage from "../views/UserPage";

// 定义一个路由对象
const routes = [
  // 第一种
  {
    path: "/",
    name: "home",
    component: HomeView,
  },
  // 第二种
  {
    path: "/about",
    name: "about",
    component: () =>
      import(/* webpackChunkName: "about" */ "../views/AboutView.vue"),
  },
  // 添加自己的路由
  {
    path: "/UserPage",  // 访问路径
    name: "userpage",  // 路由名称
    component: UserPage,  // 引用组件
  },
];

// 创建一个路由实例
const router = createRouter({
  history: createWebHashHistory(),
  routes,
});

export default router;
在组件中使用路由,我们可以在首页中使用,也就是App.vue

<template>
  <nav>
    <router-link to="/">Home</router-link> |
    <router-link to="/about">About</router-link> |
    <router-link to="/userpage">UserPage</router-link>
  </nav>
  <router-view />
</template>
......
router-link:它是一个用于设置路由跳转的标签,参数内的to就是我们上面写过的路由地址,说白了就是生成了一个a标签而已但是它的好处就在于,我们请求别的页面不需要到后端请求,而是前端直接帮你路由,不需要后端的介入才可以路由
router-view:用于设置路由跳转,根据路由显示页面内容,其实它类似于占位符,你点击哪儿个路由,你的数据就会替代它显示出来
<template>
  <nav>
    <router-link to="/">Home</router-link> |
    <router-link to="/about">About</router-link> |
    <router-link to="/userpage">UserPage</router-link>
  </nav>
  <h1>占位符</h1>
  <router-view />
</template>
8.4:路由传参
query传参:
1:直接拼接传参<router-link to="/about?id=1"></router-link>
2:直接拼接传参<router-link to="{path: '/about',query:{id:123}}"></router-link>
通过$route.query.name得到query传递的url参数

params传参
1:设置路由规则时则通过:id形式匹配{path: '/about/:id/:name', component: about}
2:通过路径/属性方法传参,<router-link to="/about/1"></router-link>
通过$rooute.params.id得到params传递的id值
我们还是基于UserPage来看一下params传参

<template>
<h1>用户信息表</h1>
<table border="1">
<thead>
<tr>
  <td>ID</td>
  <td>用户名</td>
  <td>邮箱</td>
  <td>性别</td>
  <td>城市</td>
</tr>
</thead>
<tbody>
<tr v-for="row in userInfo" :key="row.id">
  <td>{{ row.id }}</td>
  <td>
    <router-link to="/user_details">{{ row.username }}</router-link>
  </td>
  <td>{{ row.email }}</td>
  <td>{{ row.sex }}</td>
  <td>{{ row.city }}</td>
</tr>
</tbody>
</table>
<p style="color: red" v-if="status">连接服务器失败,请检查服务器</p>
</template>
<script>
export default {
  data() {
    return {
      userInfo: '',
      status: false
    }
  },
  methods: {
    getData() {
      this.$http.get('/info.json').then(res => {
        this.userInfo = res.data.data
        console.log(res.data)
      }).catch(err => {  // 相应失败的信息会保存在这里
        this.status = true
      })
    },
  },
  created() {
    this.getData()
  }
}
</script>

<style scoped>
  .demo {
    color: red;
    background: blue;
  }
</style>
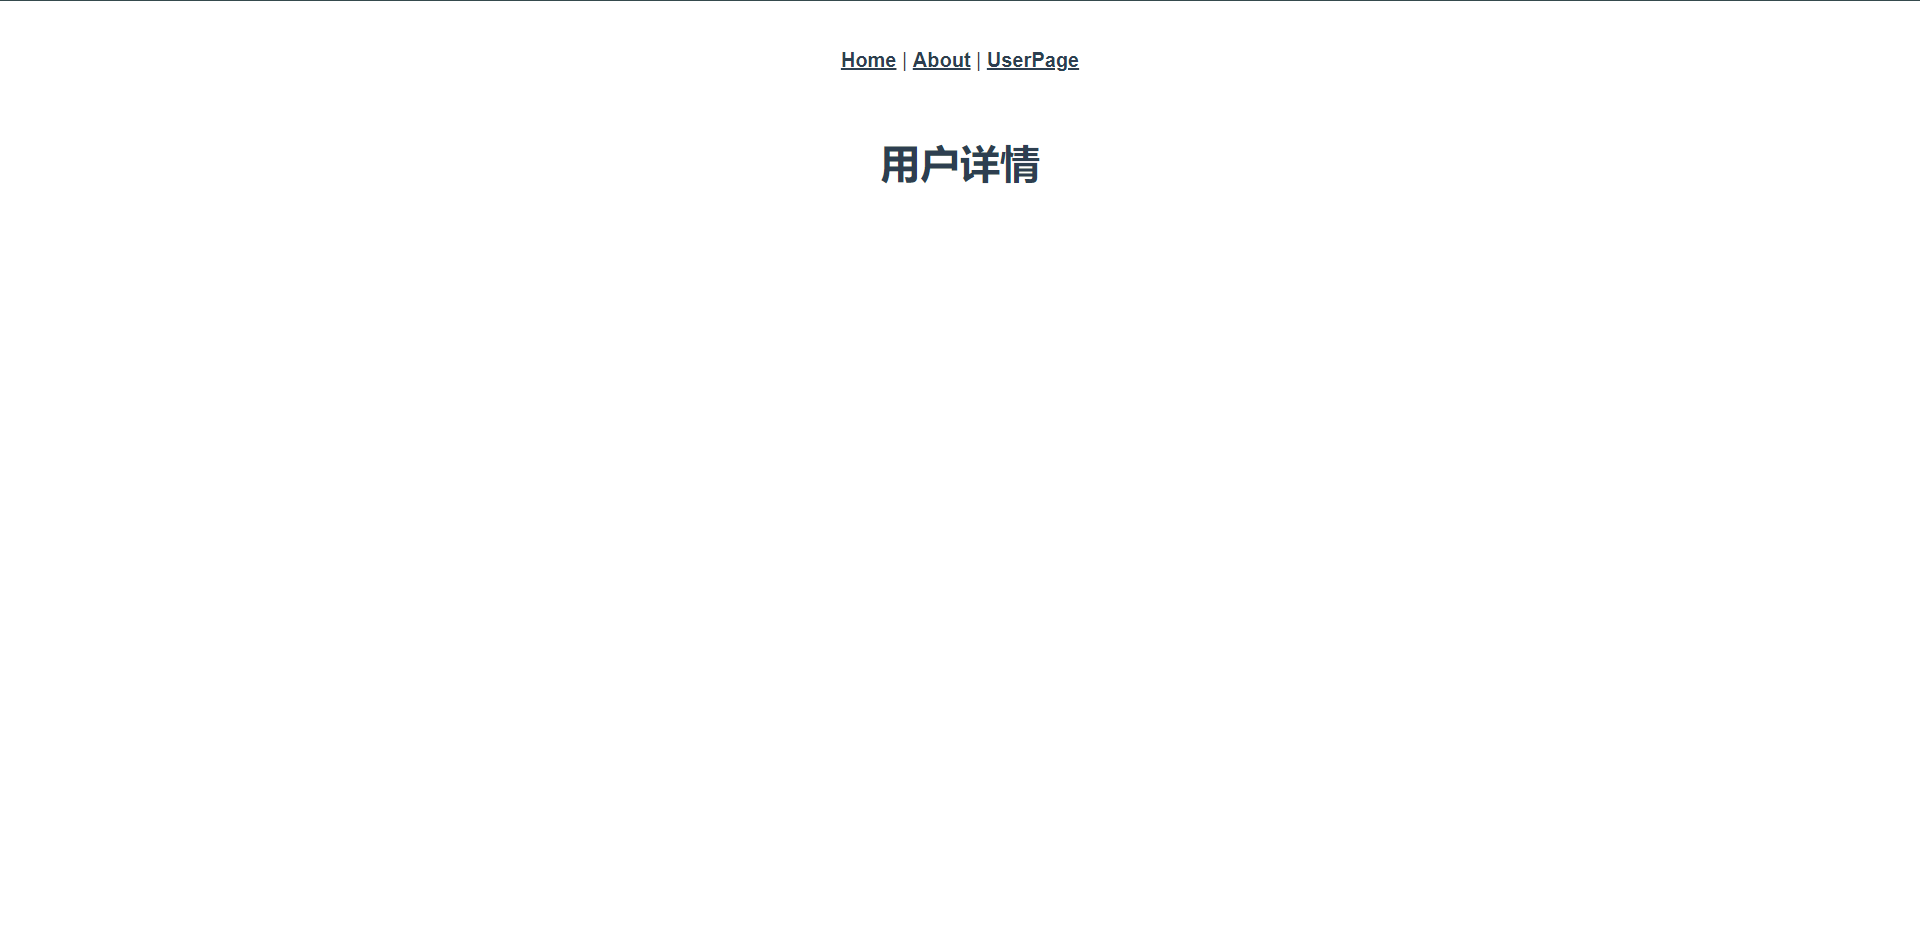
然后我们新增一个用户详情页面在src/views下

<template>
  <h1>用户详情</h1>
</template>

<script>
export default {
  name: "UserDetails"
}
</script>

<style scoped>

</style>
添加路由
......
  {
    path: "/user_details",
    name: "userdetails",
    component: UserDetails,
  },
......
访问测试:http://localhost:8080/#/user_details
那么这个时候路由地址:`http://localhost:8080/#/user_details` 就会带着传递的参数去后端查询数据然后展示详情,那么我们接下来来写一下,首先我们要知道的是我们的数据是从`http://localhost:8080/#/userpage`这个路由传递过去的
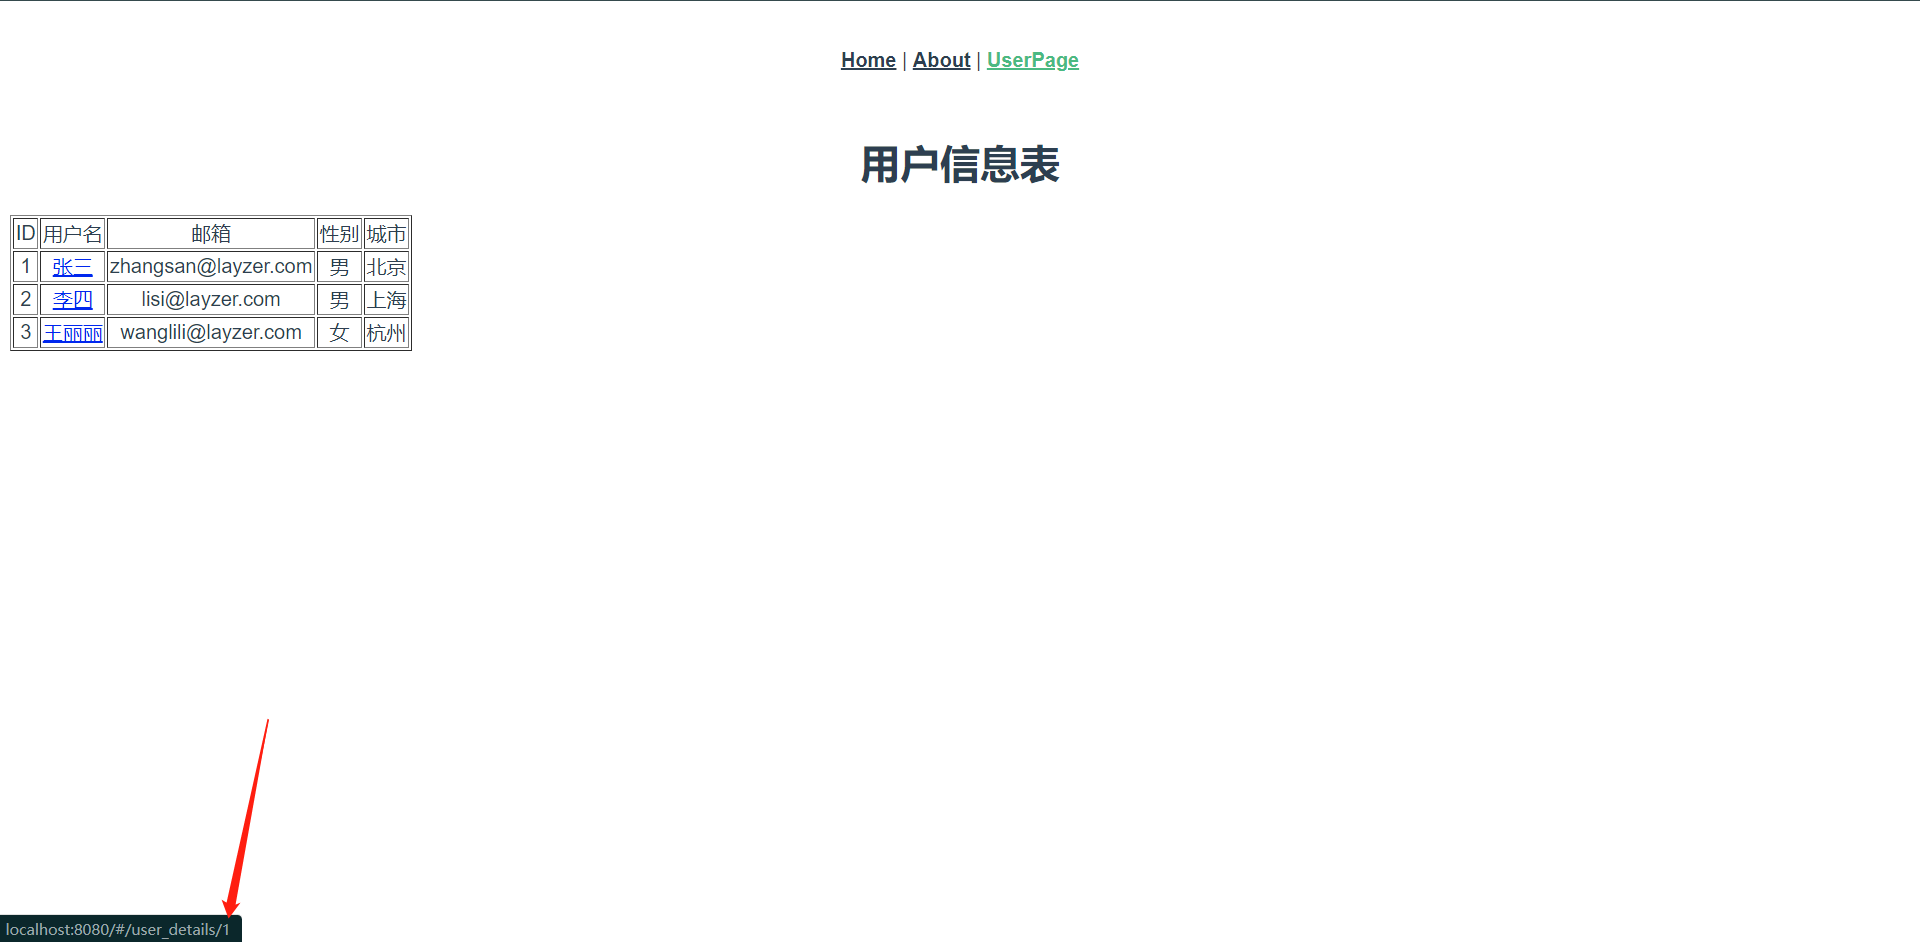
修改我们的UserPage.vue页面

<template>
<h1>用户信息表</h1>
<table border="1">
<thead>
<tr>
  <td>ID</td>
  <td>用户名</td>
  <td>邮箱</td>
  <td>性别</td>
  <td>城市</td>
</tr>
</thead>
<tbody>
<tr v-for="row in userInfo" :key="row.id">
  <td>{{ row.id }}</td>
  <td>
    <!--这里说明了我们需要将循环内的row.id传递给这个路由后面-->
    <router-link :to="/user_details/+row.id">{{ row.username }}</router-link>
  </td>
  <td>{{ row.email }}</td>
  <td>{{ row.sex }}</td>
  <td>{{ row.city }}</td>
</tr>
</tbody>
</table>
<p style="color: red" v-if="status">连接服务器失败,请检查服务器</p>
</template>
<script>
export default {
  data() {
    return {
      userInfo: '',
      status: false
    }
  },
  methods: {
    getData() {
      this.$http.get('/info.json').then(res => {
        this.userInfo = res.data.data
        console.log(res.data)
      }).catch(err => {  // 相应失败的信息会保存在这里
        this.status = true
      })
    },
  },
  created() {
    this.getData()
  }
}
</script>

<style scoped>
  .demo {
    color: red;
    background: blue;
  }
</style>
然后我们就需要去`http://localhost:8080/#/user_details`内接收数据去后端查询了
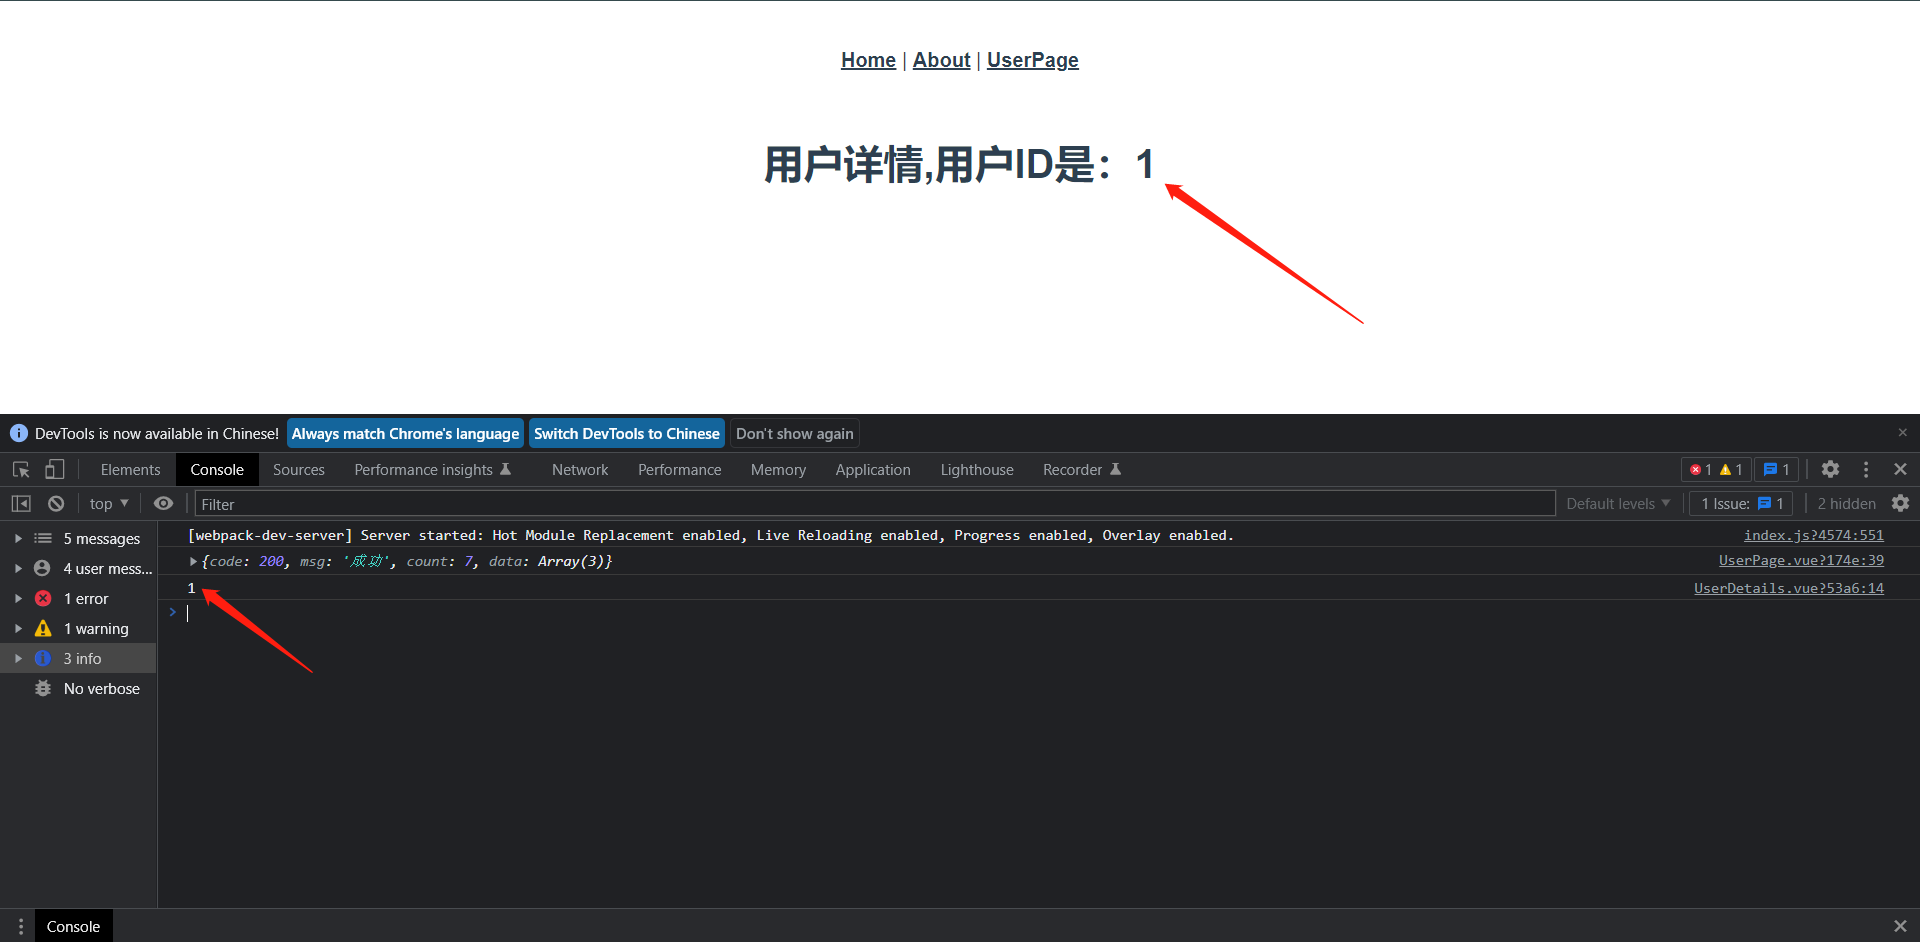
配置路由规则

  {
    // 这里面需要配置一下:id 否则是不会生效的,它主要用于接收传值的
    path: "/user_details/:id",
    name: "userdetails",
    component: UserDetails,
  },
<template>
  <!--这里直接使用$route.params.id获取数据-->
  <h1>用户详情,用户ID是:{{$route.params.id}}</h1>
</template>

<script>
  export default {
    name: "UserDetails"
  }
</script>

<style scoped>

</style>

<template>
  <h1>用户详情,用户ID是:{{$route.params.id}}</h1>
</template>

<script>
  export default {
    data() {
      return {

      }
    },
    methods: {
      getData() {
        console.log(this.$route.params.id)
      },
    },
    created() {
      this.getData();
    }
  }
</script>
<template>
  <h1>用户详情,用户ID是:{{$route.params.id}}</h1>
</template>

<script>
  export default {
    data() {
      return {

      }
    },
    methods: {
      getData() {
        console.log(this.$route.params.id)
        // 上面拿到ID之后只需要传到api内去查询就OK了
        // this.$http.get('/info.json/1').then(res => {
        //   console.log(res.data)
        // }).catch(err => {  // 相应失败的信息会保存在这里
        //   console.log(err)
        // })
      },
    },
    created() {
      this.getData();
    }
  }
</script>
下面我们再看一下Query传参
修改路由参数

  {
    path: "/user_details/",
    name: "userdetails",
    component: UserDetails,
  },
<template>
<h1>用户信息表</h1>
<table border="1">
<thead>
<tr>
  <td>ID</td>
  <td>用户名</td>
  <td>邮箱</td>
  <td>性别</td>
  <td>城市</td>
</tr>
</thead>
<tbody>
<tr v-for="row in userInfo" :key="row.id">
  <td>{{ row.id }}</td>
  <td>
    <!--更改拼接方式-->
    <router-link :to="/user_details/+'?id='+row.id">{{ row.username }}</router-link>
  </td>
  <td>{{ row.email }}</td>
  <td>{{ row.sex }}</td>
  <td>{{ row.city }}</td>
</tr>
</tbody>
</table>
<p style="color: red" v-if="status">连接服务器失败,请检查服务器</p>
</template>
<script>
export default {
  data() {
    return {
      userInfo: '',
      status: false
    }
  },
  methods: {
    getData() {
      this.$http.get('/info.json').then(res => {
        this.userInfo = res.data.data
        console.log(res.data)
      }).catch(err => {  // 相应失败的信息会保存在这里
        this.status = true
      })
    },
  },
  created() {
    this.getData()
  }
}
</script>

<style scoped>
  .demo {
    color: red;
    background: blue;
  }
</style>
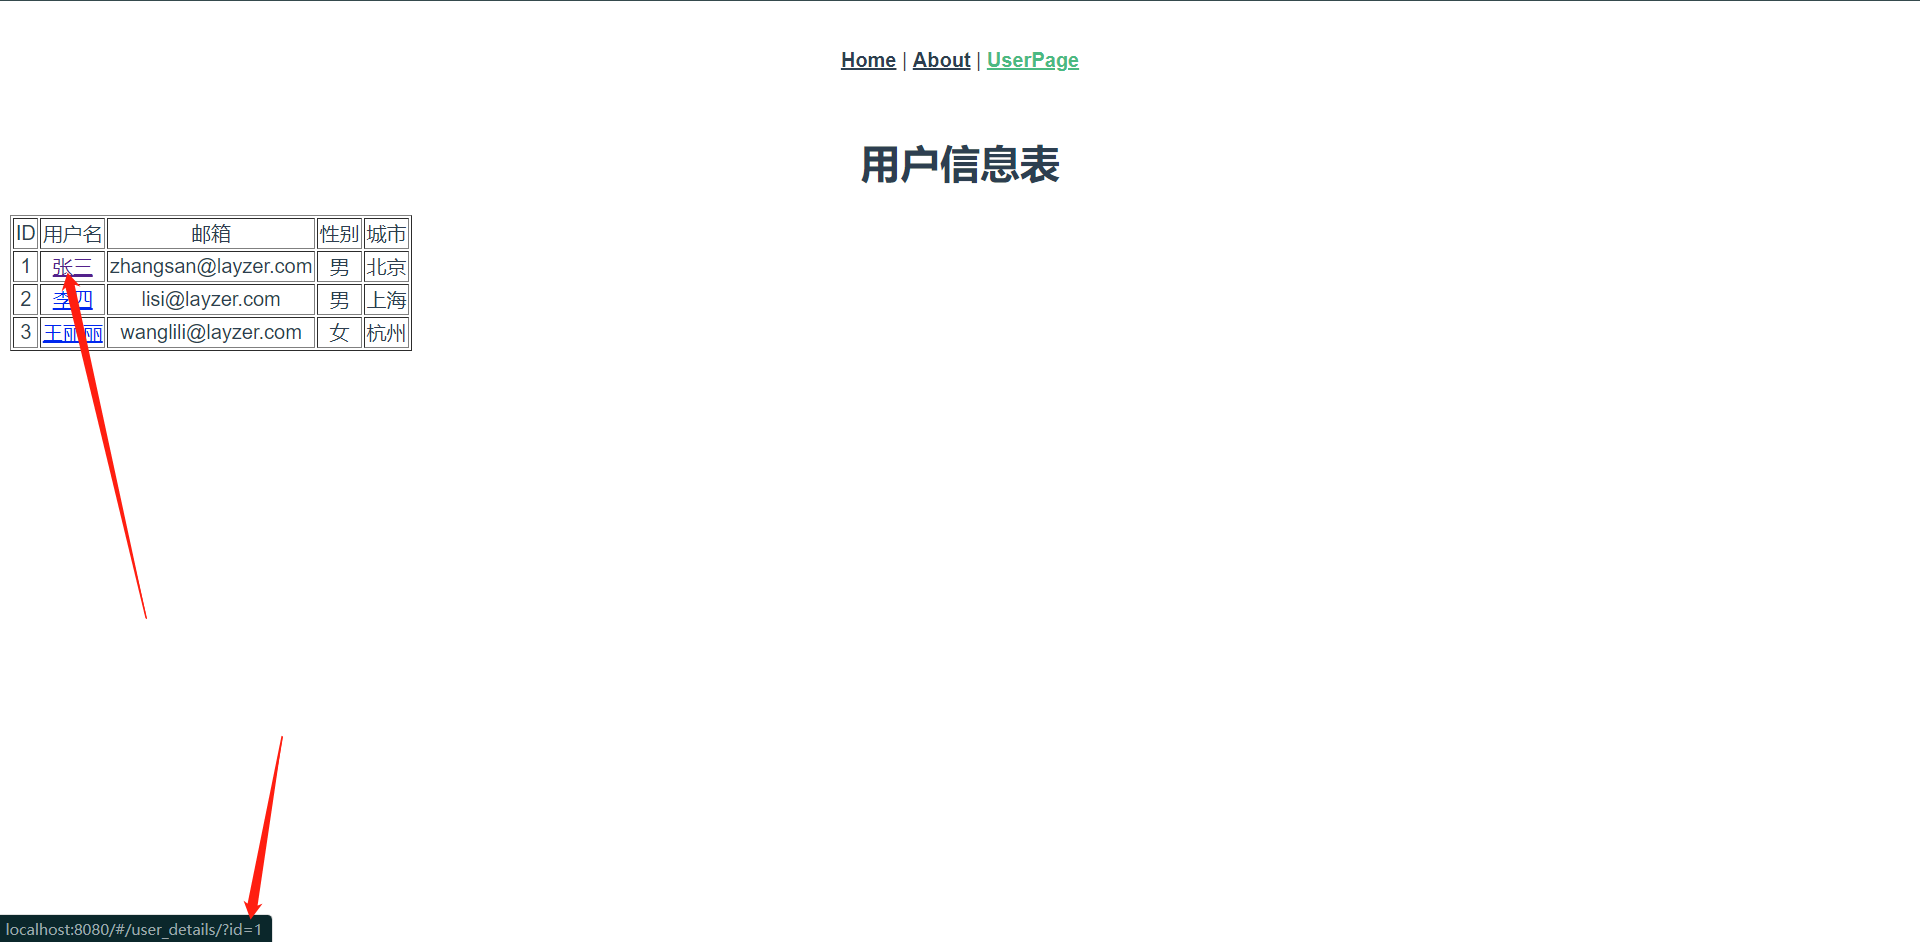
这个时候我们再去看链接,发现我们的请求方式就改变了,然后我们去目标页面换个方式去获取值就OK了
<template>
  <!--无非是换了个变量去获取值-->
  <h1>用户详情,用户ID是:{{$route.query.id}}</h1>
</template>

<script>
  export default {
    data() {
      return {

      }
    },
    methods: {
      getData() {
        console.log(this.$route.params.id)
        // this.$http.get('/info.json/1').then(res => {
        //   console.log(res.data)
        // }).catch(err => {  // 相应失败的信息会保存在这里
        //   console.log(err)
        // })
      },
    },
    created() {
      this.getData();
    }
  }
</script>
我们此刻观察URL会发现两种方式的区别了
8.5:Vue Router导航守卫
正如其名,vue-router提供的导航守卫主要用来通过跳转取消的方式守卫导航,简单来说,就是在跳转的时候的一些钩子,从一个页面跳转到另一个页面时,可以在跳转前、中、后做一些事情。


可以使用router.beforeEach来注册一个全局前置守卫,然后当一个导航触发时,就会异步执行这个回调函数。
加在router/index.js内

router.beforeEach((to, from) => {
    // 这里就是做跳转前的拦截处理,后面就会拿Token来和服务端比较进行认证交互
    console.log("to", to);
    console.log("from", from);
});

每个方法接收参数:

1:to:即将要进入的目标,是一个路由对象
2:from:当前导航正要离开的路由,也是一个路由对象
3:next:可选,是一个方法


可以返回的值如下:

1:false:取消当前导航,如果浏览器的URL改变了(可能是用户手动或者浏览器后退按钮),那么URL地址会重置到from路由对应的地址
2:一个路由地址:通过一个路由地址跳转到一个不同的地址。
这里面包含了我们条赚前和跳转后的路径都会被记录下来。


这里我们就是做了一个基本的访问控制,可以判断用户不在登录的情况下无法访问某些页面
router.beforeEach((to, from, next) => {
    // 这里就是做跳转前的拦截处理,后面就会拿Token来和服务端比较进行认证交互
    if (to.path === '/login') {
      return next();
    }
    const token = '666'  // 从本地获取Token
    // 判断token是否存在,如果存在则正常跳转
    if (token) {
      next();
    } else {
      next('/login');
    }
});
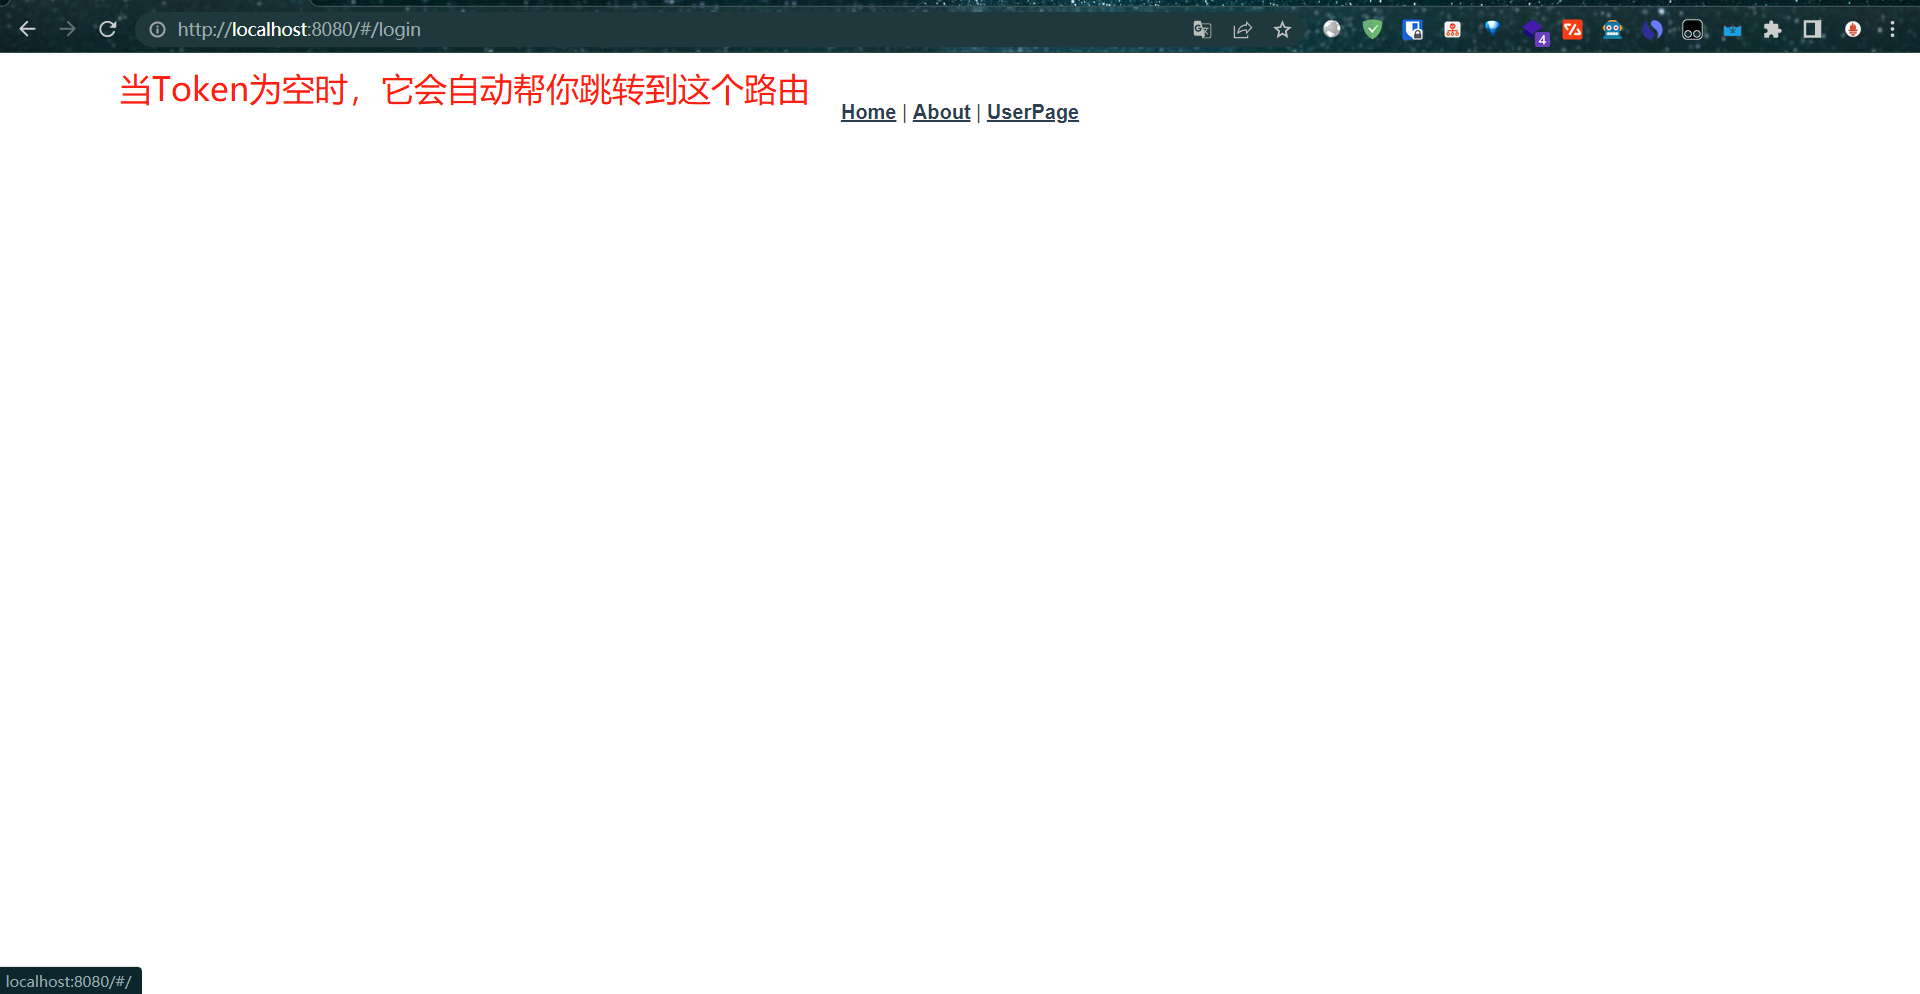
这个时候你点击其他东西也是无效的,因为都会被导航守卫强制跳回`/login`页面
10:Element Plus组件库
1:认识Element Plus
2:Element Plus基础组件
3:Element Plus表单组件
4:Element Plus数据表格
5:Element Plus反馈组件
10.1:认识Element Plus
1:Element Plus介绍
2:引入Element Plus
3:Vue3 setup
Element UI是基于Vue实现的一套不依赖业务的UI组件库,提供了丰富的PC端组件,减少用户对常用组件的封装,降低了开发的难易程度。

Element UI:基于Vue2
Element Plus:基于Vue3

官网:https://element-plus.gitee.io/zh-CN/

10.2:Vue导入Element Plus
使用 Element Plus的三种方式:
1:在HTML中以CDN包的方式导入
2:下载JS文件保存到本地再导入
3:使用npm安装,Vue项目使用方法

详情请看:https://element-plus.gitee.io/zh-CN/guide/installation.html
我们这边就使用npm的方式去安装它,首先我们在项目目录中运行如下操作:

npm install element-plus
在项目中的main.js引入element plus

import { createApp } from "vue";
import App from "./App.vue";
import router from "./router";
import store from "./store";
import TestPage from "@/components/TestPage"; // 引入组件
import axios from "axios"; // 引入axios
import http from "./api/http"; // 引入axios封装的方法
import Element from "element-plus"; // 引入element-Plus
import 'element-plus/dist/index.css' // 引入element-Plus样式

const app = createApp(App);

// 这个时候这两个就可以注释掉了
// axios.defaults.baseURL = "http://api.layzer.com"; // 设置默认的请求地址
// axios.defaults.timeout = 5000; // 设置请求超时时间

// 注册axios新的注册
app.config.globalProperties.$http = http; // 新版注册方法

app.use(router).use(router).mount("#app") // 改造下面的创建注册语句,这样写的意思时方便注册js组件使用

// createApp(App).use(store).use(router).mount("#app"); // 改造前

app.component("TestPage", TestPage); // 注册我们的组件
下面就是在Vue中使用Element Plus
我们下面从初始化一个项目开始使用Element Plus
1:初始化项目
vue create kubemanager

Vue CLI v5.0.8
✨  Creating project in E:\code\kubemanager.
🗃  Initializing git repository...
⚙️  Installing CLI plugins. This might take a while...


added 849 packages in 18s
🚀  Invoking generators...
📦  Installing additional dependencies...


added 95 packages in 3s
⚓  Running completion hooks...

📄  Generating README.md...

🎉  Successfully created project kubemanager.
👉  Get started with the following commands:

 $ cd kubemanager
 $ npm run serve

 WARN  Skipped git commit due to missing username and email in git config, or failed to sign commit.
       You will need to perform the initial commit yourself.


2:安装软件包element-plus
npm install element-plus


3:检查项目目录下package.json下的包

  "dependencies": {
    "core-js": "^3.8.3",
    "element-plus": "^2.2.15",
    "vue": "^3.2.13"
  },


4:导入Element Plus,在main.js内
import { createApp } from 'vue'
import App from './App.vue'
// 导入Element Plus和CSS
import ElementPlus from 'element-plus';
import 'element-plus/dist/index.css';

// 重写注册方法
const app = createApp(App)
// 注册Element Plus
app.use(ElementPlus)

app.mount('#app')
10.3:Vue3-setup
那么我们首先要知道的是setup的生命周期在beforecrete之前,它是用于代提created和beforecreated,它其实就是Vue3的一个新的语法。主要是分为选项式API和组合式API。这个其实目前我们还是用第二种选项式API来写,这个有兴趣可以去学学组合式API的写法
11:Element Plus基础组件
1:组件介绍
2:Button组件
3:card卡片
4:Container容器布局
5:Menu导航栏
6:Layout布局
11.1:组件介绍
Element Plus组件:带有el-前缀的标签

使用方法:

1:Vue导入Element Plus
2:在官方文档找到需要的样式组件
3:复制代码到对应的.vue中
4:修改为对应的数据
1:导入element plus前面讲过了,直接在项目目录npm install element-plus就可以了,然后注册到路由内就OK了
2:在官方文档找到需要的样式:https://element-plus.gitee.io/zh-CN/component/button.html
在src下创建views下创建basic目录下创建tag.vue,内容如下


<template>
  <el-tag>Tag 1</el-tag>
  <el-tag class="ml-2" type="success">Tag 2</el-tag>
  <el-tag class="ml-2" type="info">Tag 3</el-tag>
  <el-tag class="ml-2" type="warning">Tag 4</el-tag>
  <el-tag class="ml-2" type="danger">Tag 5</el-tag>
</template>
然后在src下创建router的目录,然后创建index.js

内容如下:

// 引入路由:可能需要npm安装一下 npm install vue-router
import { createRouter, createWebHistory } from 'vue-router'

// 定义路由规则

const routes = [
    {
        path: '/tag',
        component: () => import(/* webpackChunkName: "tag" */ '@/views/basic/tag.vue')
    }
]

// 初始化路由实例
const router = new createRouter({
    // history模式:createWebHistory()
    // hash模式:createHashHistory()
    history: createWebHistory(),
    routes
})

export default router
我们还需要在main.js内导入路由的规则

import { createApp } from 'vue'
import App from './App.vue'
// 导入Element Plus和CSS
import ElementPlus from 'element-plus';
import 'element-plus/dist/index.css';
// 导入路由规则
import router from './router/index.js'

// 重写注册方法
const app = createApp(App)
// 注册Element Plus
app.use(ElementPlus)
app.use(router)
app.mount('#app')
然后我们去修改首页看看我们的想要的一些东西,也就是App.vue

<template>
  <!--我们访问的router资源都会替换下面的标签去显示-->
  <router-view></router-view>
</template>

<style>
  .html, body {
    width: 100vw;
    height: 100vh;
  }
</style>

其实没什么东西,只是一个占位符,访问测试:http://localhost:8080/tag
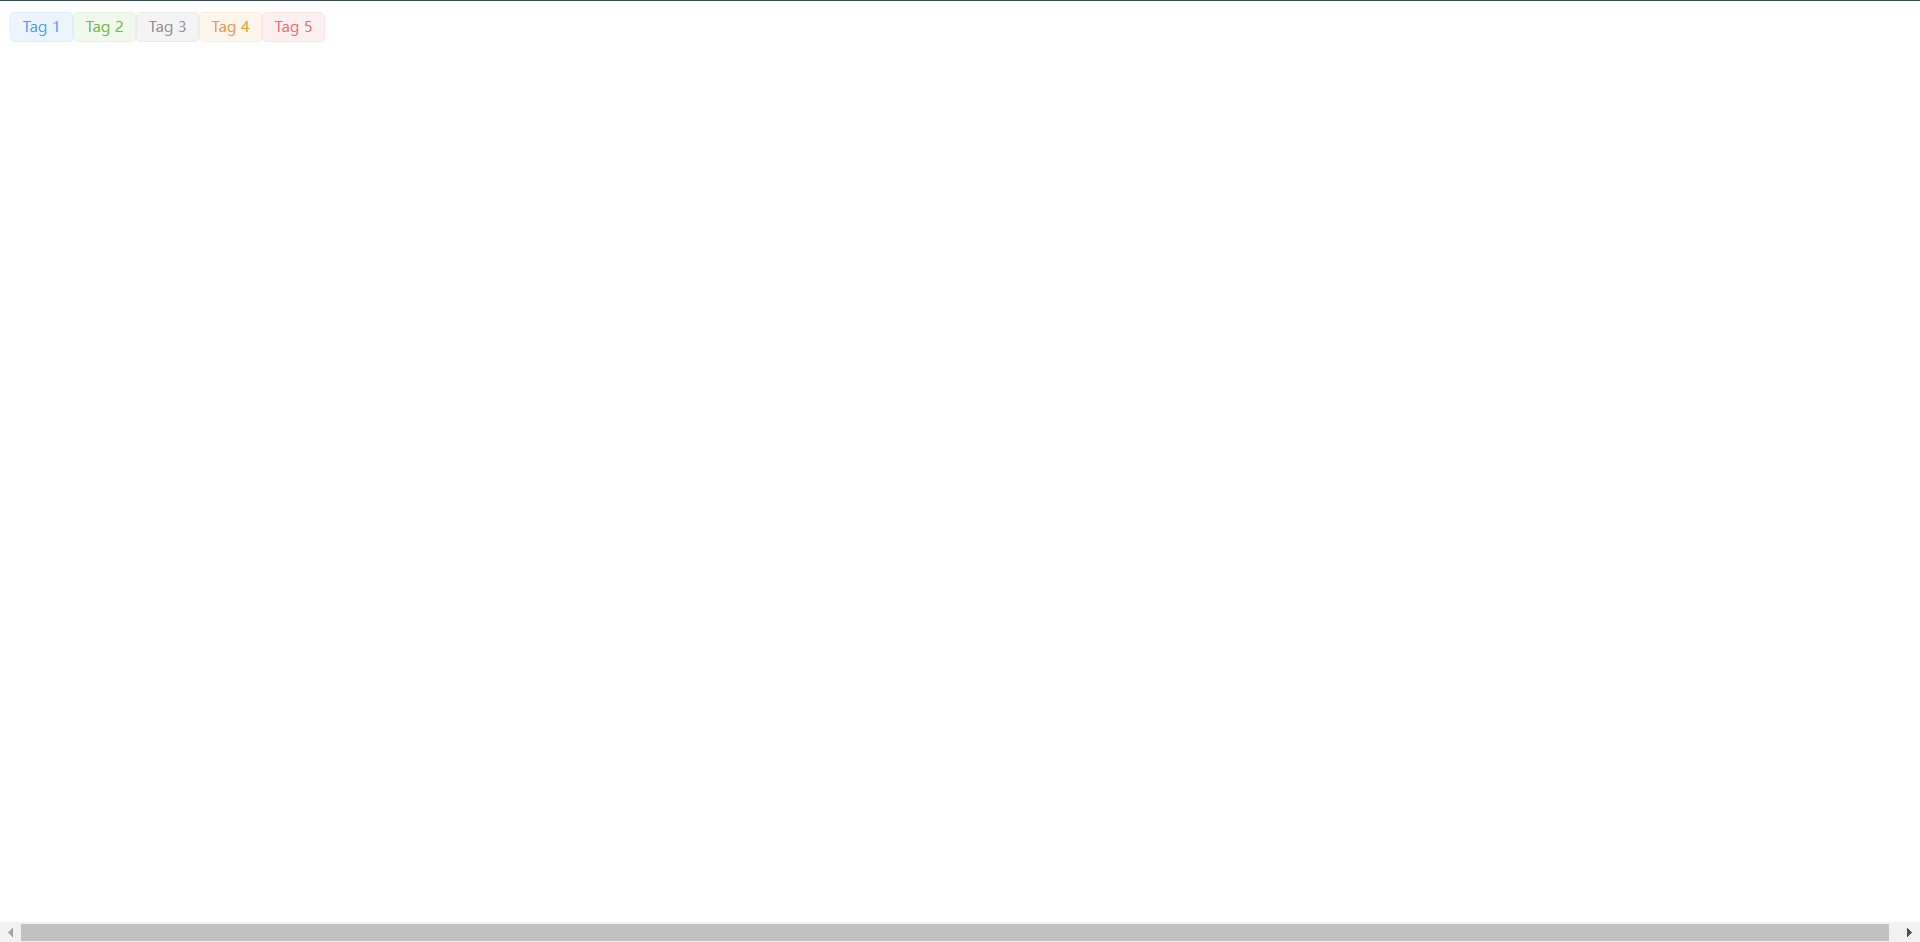
el-tag解释:
从上面的html代码中我们可以看到它默认带了五个主题分别为:

<el-tag>Tag 1</el-tag>
<el-tag class="ml-2" type="success">Tag 2</el-tag>
<el-tag class="ml-2" type="info">Tag 3</el-tag>
<el-tag class="ml-2" type="warning">Tag 4</el-tag>
<el-tag class="ml-2" type="danger">Tag 5</el-tag>

这里就应用了我们的第一个element的标签
el-button与button标签用法一致,区别是el-button拥有默认样式属性,使用type,plain,round和circle来定义按钮的样式。

参考链接:https://element-plus.gitee.io/zh-CN/component/button.html
在src/views/button.vue

<template>
  <el-button>Default</el-button>
  <el-button type="primary">Primary</el-button>
  <el-button type="success">Success</el-button>
  <el-button type="info">Info</el-button>
  <el-button type="warning">Warning</el-button>
  <el-button type="danger">Danger</el-button>
</template>
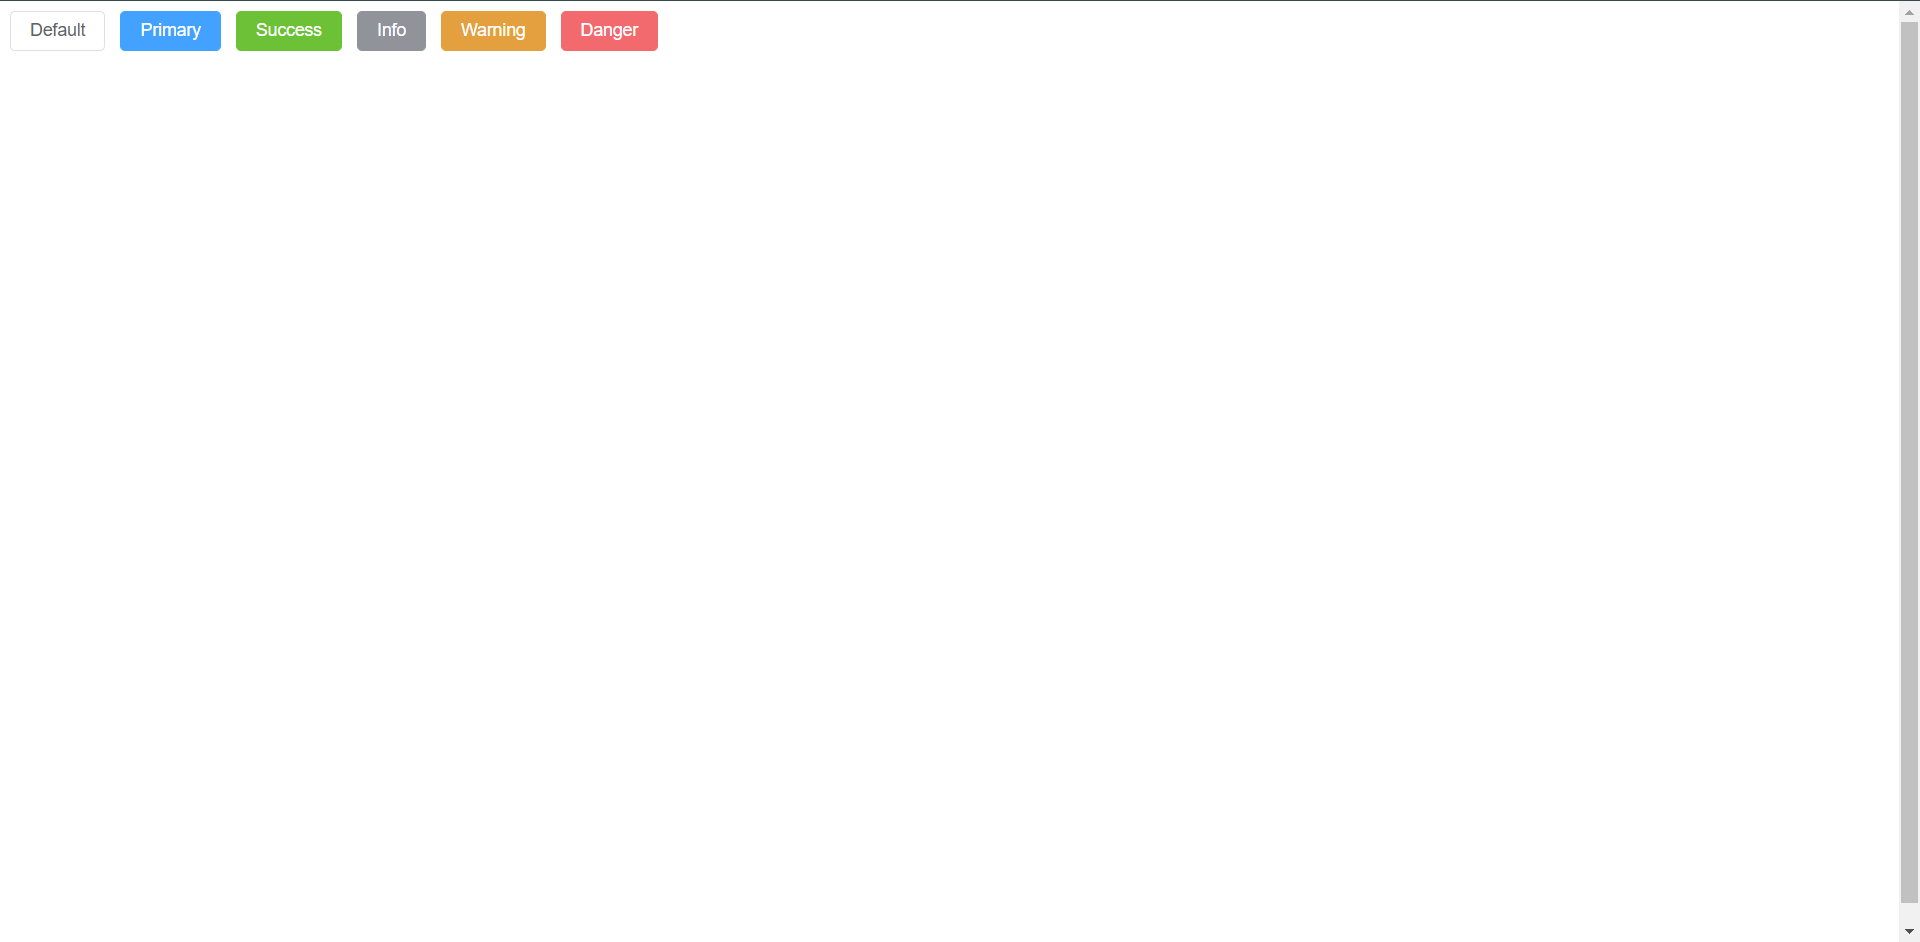
它其实看起来和tag并没有特别大的区别type引用都是一样的,并且样式也都是一样的,后面还有
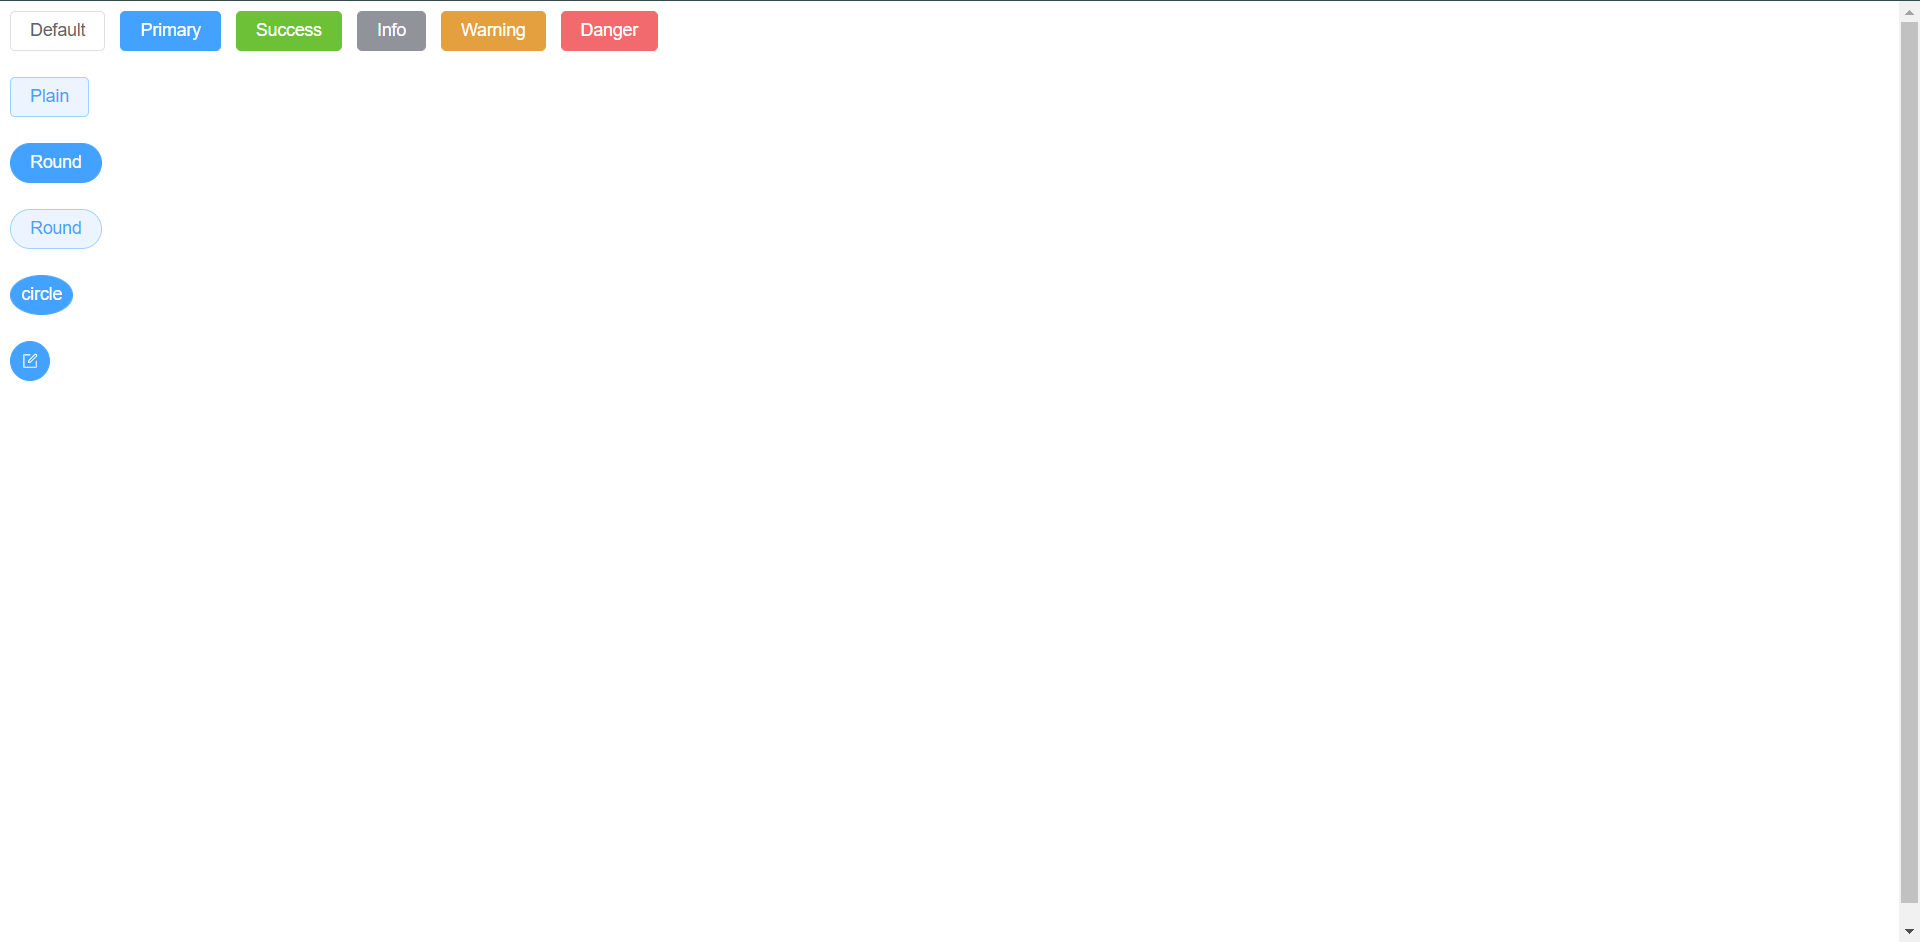
<template>
  <el-button>Default</el-button>
  <el-button type="primary">Primary</el-button>
  <el-button type="success">Success</el-button>
  <el-button type="info">Info</el-button>
  <el-button type="warning">Warning</el-button>
  <el-button type="danger">Danger</el-button>
  <br><br>
  <el-button type="primary" plain>Plain</el-button>
  <br><br>
  <el-button type="primary" round>Round</el-button>
  <br><br>
  <el-button type="primary" round plain>Round</el-button>
  <br><br>
  <el-button type="primary" circle>circle</el-button>
  <br><br>
  <!--使用这个需要导入图标库-->
  <el-button type="primary" :icon="Edit" circle />
</template>

导入图标库
import { createApp } from 'vue'
import App from './App.vue'
// 导入Element Plus和CSS
import ElementPlus from 'element-plus';
import 'element-plus/dist/index.css';
// 导入路由规则
import router from './router/index.js'
// 导入图标
import * as ELIcons from '@element-plus/icons-vue'

// 重写注册方法
const app = createApp(App)
// 注册Element Plus
// 注册图标
for (let iconName in ELIcons) {
    app.component(iconName, ELIcons[iconName])
}

app.use(ElementPlus)
app.use(router)
app.mount('#app')
大家可以根据自己的需求去处理这个自己想要的图标
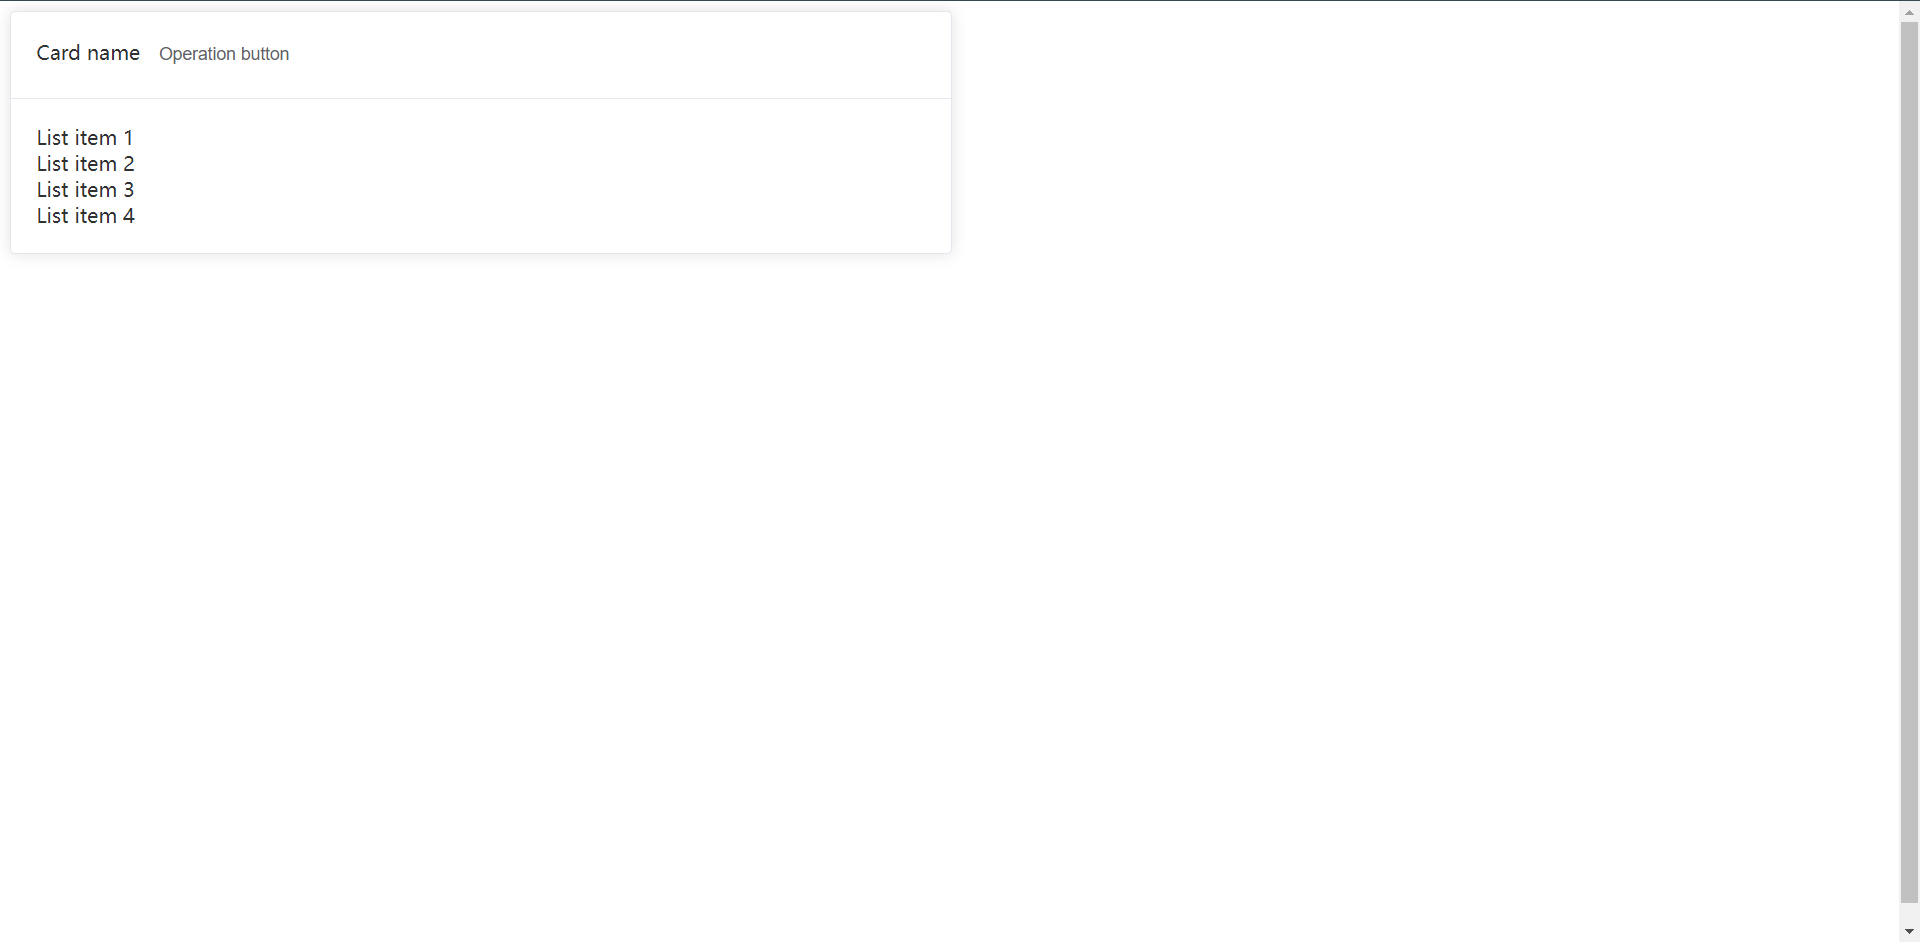
11.3:el-card
卡片包含标题,内容及操作区域。
卡片组件有header和body组成,header是可选的,其内容取决于一个具名的slot。

参考链接:https://element-plus.gitee.io/zh-CN/component/card.html

和上面的操作一样,先创建一个.vue的组件,然后注册路由,然后内容如下:
<template>
  <el-card class="box-card">
    <template #header>
      <div class="card-header">
        <span>Card name</span>
        <el-button class="button" text>Operation button</el-button>
      </div>
    </template>
    <div v-for="o in 4" :key="o" class="text item">{{ 'List item ' + o }}</div>
  </el-card>
</template>
<template>
  <el-card class="box-card">
    <template #header>
      <div class="card-header">
        <span>Card name</span>
        <el-button class="button" text>Operation button</el-button>
      </div>
    </template>
    <div v-for="o in 4" :key="o" class="text item">{{ 'List item ' + o }}</div>
  </el-card>
  <br><br>
  <el-card class="box-card">
    <div v-for="o in 4" :key="o" class="text item">{{ 'List item ' + o }}</div>
  </el-card>
</template>
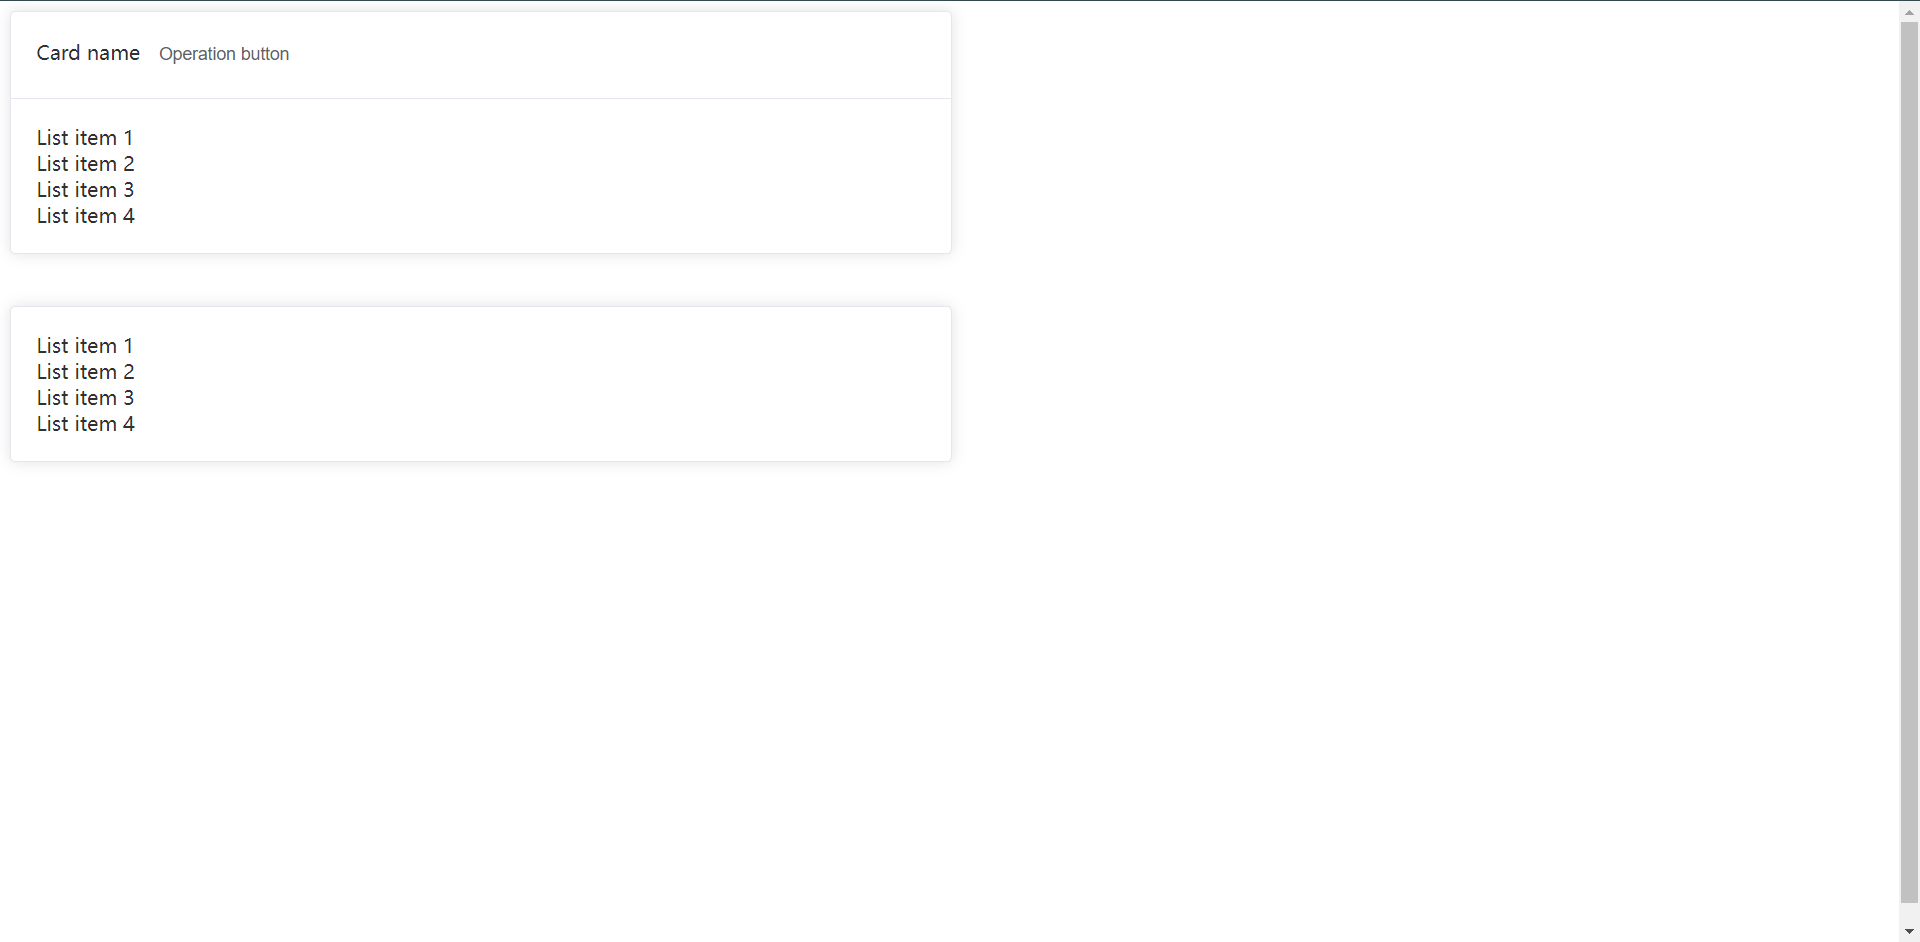
两者的区别就是一个带了插槽,另一个不带插槽,

下面其实它还有个参数叫`shadow`,并且它有三个值,我们来看下
<template>
  <el-card class="box-card">
    <template #header>
      <div class="card-header">
        <span>Card name</span>
        <el-button class="button" text>Operation button</el-button>
      </div>
    </template>
    <div v-for="o in 4" :key="o" class="text item">{{ 'List item ' + o }}</div>
  </el-card>
  <br><br>
  <!--默认shadow-->
  <el-card class="box-card" shadow="always">
    <div v-for="o in 4" :key="o" class="text item">{{ 'List item ' + o }}</div>
  </el-card>
  <!--鼠标悬停shadow-->
  <el-card class="box-card" shadow="hover">
    <div v-for="o in 4" :key="o" class="text item">{{ 'List item ' + o }}</div>
  </el-card>
  <!--什么也不显示的shadow-->
  <el-card class="box-card" shadow="never">
    <div v-for="o in 4" :key="o" class="text item">{{ 'List item ' + o }}</div>
  </el-card>
</template>
下面还有一个参数是`body-style`,它主要是可以去加css的样式,使用方法如下
<template>
  <el-card class="box-card">
    <template #header>
      <div class="card-header">
        <span>Card name</span>
        <el-button class="button" text>Operation button</el-button>
      </div>
    </template>
    <div v-for="o in 4" :key="o" class="text item">{{ 'List item ' + o }}</div>
  </el-card>
  <br><br>
  <!--默认shadow-->
  <el-card class="box-card" shadow="always">
    <div v-for="o in 4" :key="o" class="text item">{{ 'List item ' + o }}</div>
  </el-card>
  <!--鼠标悬停shadow-->
  <el-card class="box-card" shadow="hover">
    <div v-for="o in 4" :key="o" class="text item">{{ 'List item ' + o }}</div>
  </el-card>
  <!--什么也不显示的shadow-->
  <el-card class="box-card" shadow="never">
    <div v-for="o in 4" :key="o" class="text item">{{ 'List item ' + o }}</div>
  </el-card>
  <!--body-style参数-->
  <el-card class="box-card" body-style="padding: 0px; color: red;">
    <div v-for="o in 4" :key="o" class="text item">{{ 'List item ' + o }}</div>
  </el-card>
</template>
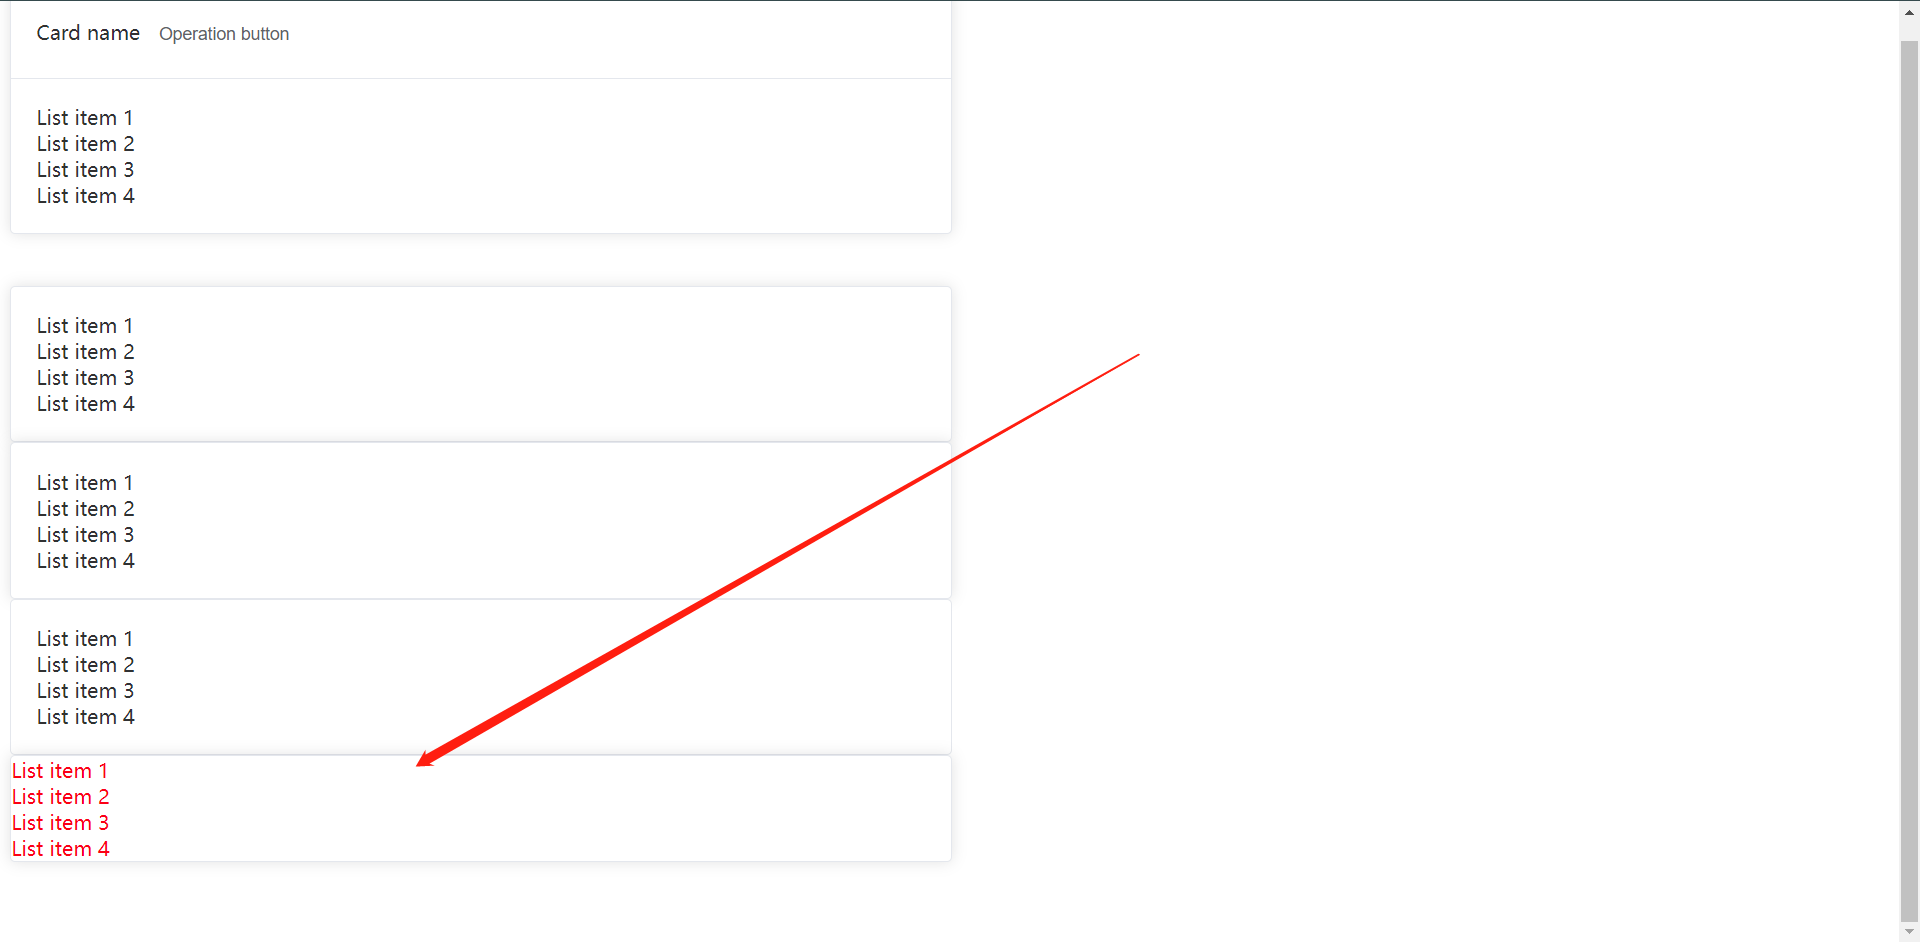
应该是可以看的很明白的,就是可以做css的渲染
11.4:Container容器布局
用于布局容器组件,方便快速搭建页面的基本结构。
由以下部分组成:
1:<el-container>:外部容器,当子元素包含<el-header>或<el-footer>时,全部子元素会垂直上下排列,否则会水平左右排列
2:<el-header>:顶部容器
3:<el-aside>:侧边栏容器
4:<el-main>:主要区域容器
5:<el-footer>:底栏容器

参考文档:https://element-plus.gitee.io/zh-CN/component/container.html
下面的实操步骤我就不详细写了,我我们世界上代码
<template>
  <div class="common-layout">
    <el-container>
      <el-header>Header</el-header>
      <el-container>
        <el-aside width="200px">Aside</el-aside>
        <el-container>
          <el-main>Main</el-main>
          <el-footer>Footer</el-footer>
        </el-container>
      </el-container>
    </el-container>
  </div>
</template>
<style>
  .el-header {
    text-align: center;
    background-color: darkgreen;
  }
  .el-aside {
    text-align: center;
    background-color: limegreen;
  }
  .el-main {
    text-align: center;
    background-color: lawngreen;
  }
  .el-footer {
    text-align: center;
    background-color: darkseagreen;
  }
  .el-container {
    height: 100vh;
  }
</style>
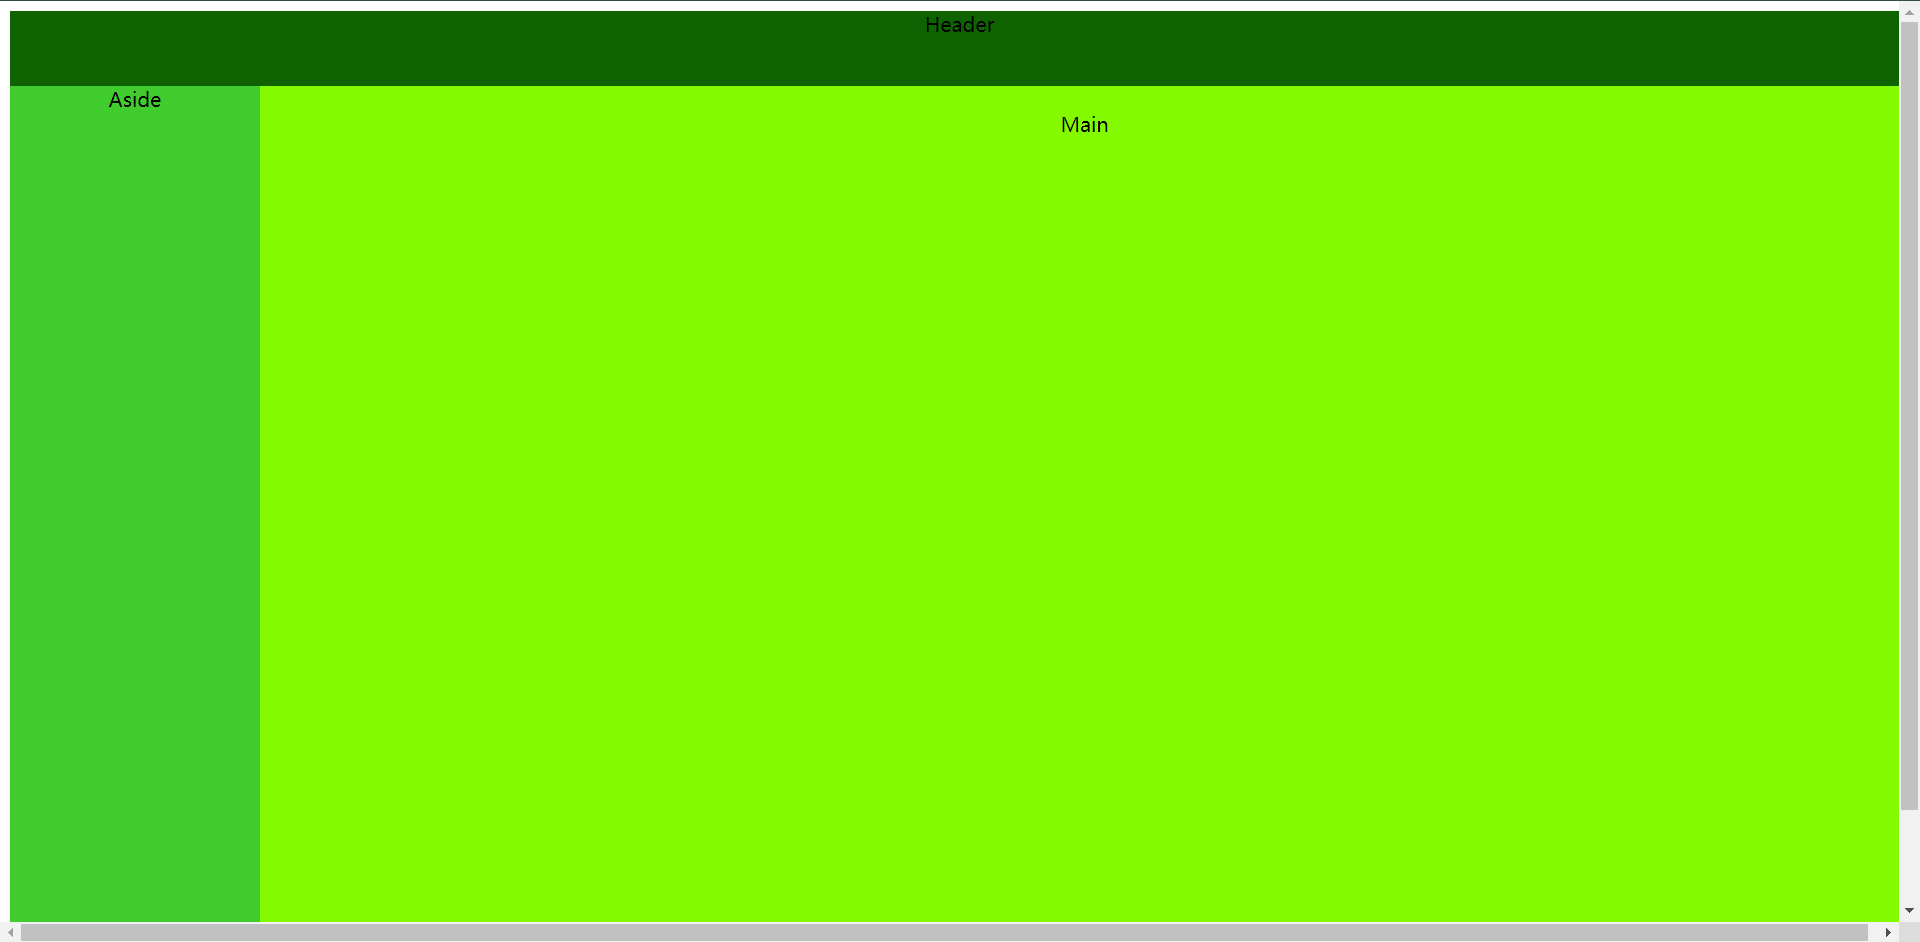
导航栏分为两种,
1:顶部菜单栏
2:侧边垂直栏

参考文档:https://element-plus.gitee.io/zh-CN/component/menu.html
<template>
  <el-row class="tac">
    <el-col :span="12">
      <h5 class="mb-2">Custom colors</h5>
      <el-menu
          active-text-color="#ffd04b"
          background-color="#545c64"
          class="el-menu-vertical-demo"
          default-active="2"
          text-color="#fff"
      >
        <el-sub-menu index="1">
          <template #title>
            <el-icon><location /></el-icon>
            <span>Navigator One</span>
          </template>
            <el-menu-item index="1-1">item one</el-menu-item>
            <el-menu-item index="1-2">item two</el-menu-item>
            <el-menu-item index="1-3">item three</el-menu-item>
          <el-sub-menu index="1-4">
            <template #title>item four</template>
            <el-menu-item index="1-4-1">item one</el-menu-item>
          </el-sub-menu>
        </el-sub-menu>
        <el-menu-item index="2">
          <el-icon><icon-menu /></el-icon>
          <span>Navigator Two</span>
        </el-menu-item>
        <el-menu-item index="3" disabled>
          <el-icon><document /></el-icon>
          <span>Navigator Three</span>
        </el-menu-item>
        <el-menu-item index="4">
          <el-icon><setting /></el-icon>
          <span>Navigator Four</span>
        </el-menu-item>
      </el-menu>
    </el-col>
  </el-row>
</template>
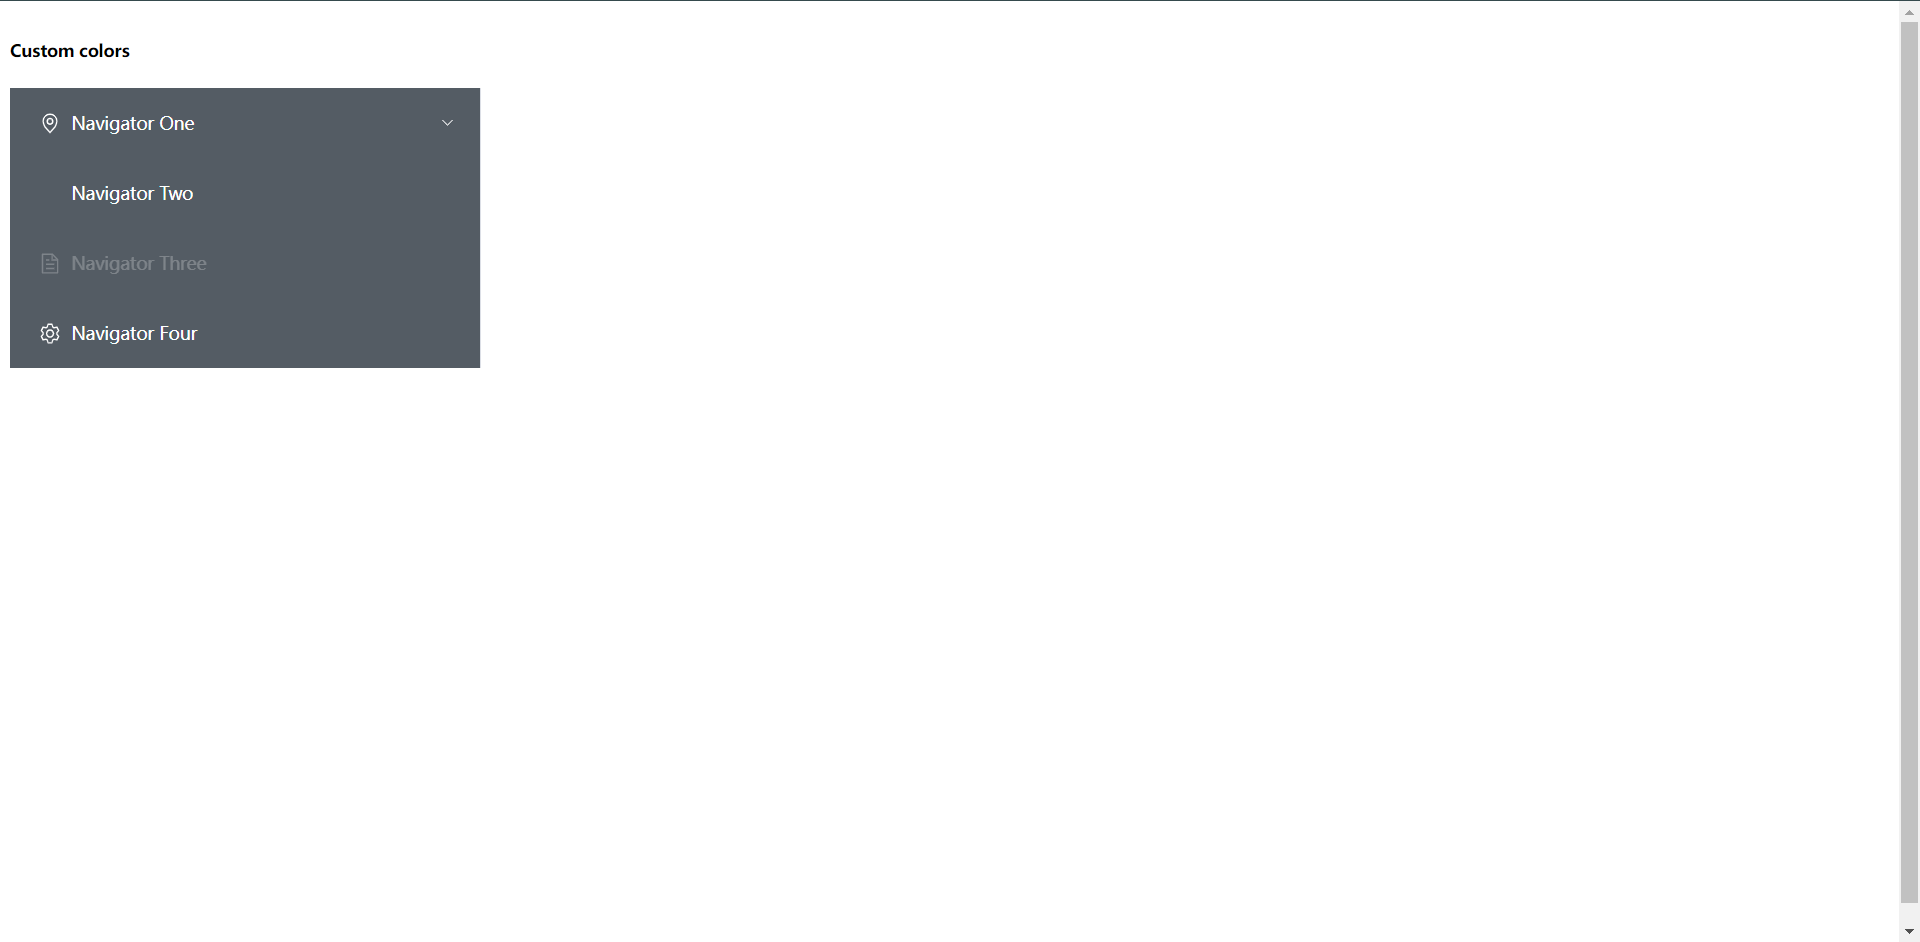
menu语法介绍:
最外侧:el-menu标签:里面写的是一些属性
下面:el-sub-menu标签:有子菜单的时候会使用到,子menu使用标签是el-menu-item

然后我们结合container的用法来做一下
<template>
  <div class="common-layout">
    <el-container>
      <el-header>Header</el-header>
      <el-container>
        <el-aside width="200px">
              <h5 class="mb-2">Custom colors</h5>
              <el-menu
                  active-text-color="#ffd04b"
                  background-color="#545c64"
                  class="el-menu-vertical-demo"
                  default-active="2"
                  text-color="#fff"
              >
                <el-sub-menu index="1">
                  <template #title>
                    <el-icon><location /></el-icon>
                    <span>Navigator One</span>
                  </template>
                  <el-menu-item index="1-1">item one</el-menu-item>
                  <el-menu-item index="1-2">item two</el-menu-item>
                  <el-menu-item index="1-3">item three</el-menu-item>
                  <el-sub-menu index="1-4">
                    <template #title>item four</template>
                    <el-menu-item index="1-4-1">item one</el-menu-item>
                  </el-sub-menu>
                </el-sub-menu>
                <el-menu-item index="2">
                  <el-icon><icon-menu /></el-icon>
                  <span>Navigator Two</span>
                </el-menu-item>
                <el-menu-item index="3" disabled>
                  <el-icon><document /></el-icon>
                  <span>Navigator Three</span>
                </el-menu-item>
                <el-menu-item index="4">
                  <el-icon><setting /></el-icon>
                  <span>Navigator Four</span>
                </el-menu-item>
              </el-menu>
        </el-aside>
        <el-container>
          <el-main>Main</el-main>
          <el-footer>Footer</el-footer>
        </el-container>
      </el-container>
    </el-container>
  </div>
</template>
<style>
.el-header {
  text-align: center;
  background-color: darkgreen;
}
.el-aside {
  text-align: center;
  background-color: limegreen;
}
.el-main {
  text-align: center;
  background-color: lawngreen;
}
.el-footer {
  text-align: center;
  background-color: darkseagreen;
}
.el-container {
  height: 100vh;
}
</style>
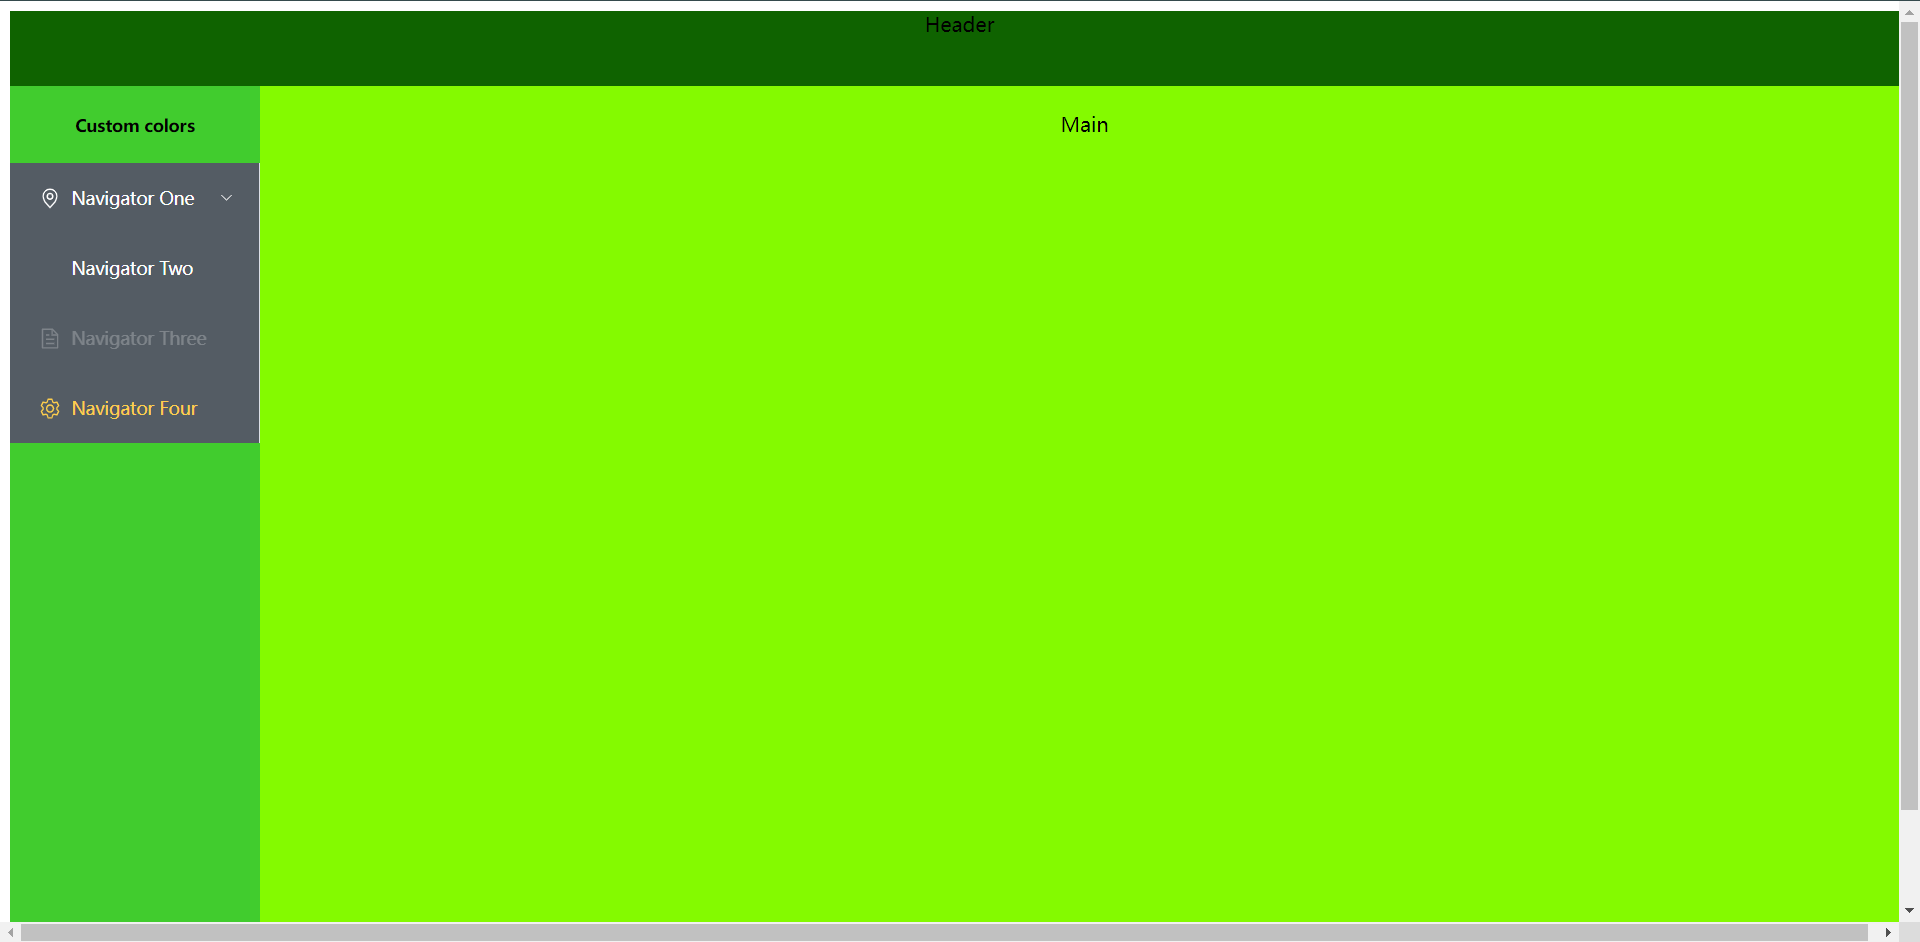
这个时候我们就把状态栏镶嵌到了container的容器内了
11.6:Layout布局
通过基础的24分栏,迅速简便的创建布局,使用行和列创建基础网格布局,通过row和col组件,并通过col组件的span属性,就可以自由的结合布局,
参考文档:https://element-plus.gitee.io/zh-CN/component/layout.html
<template>
  <el-row :gutter="20">
    <el-col :span="6"><div class="grid-content ep-bg-purple">1</div></el-col>
    <el-col :span="6"><div class="grid-content ep-bg-purple">2</div></el-col>
    <el-col :span="6"><div class="grid-content ep-bg-purple">3</div></el-col>
    <el-col :span="6"><div class="grid-content ep-bg-purple">4</div></el-col>
    <el-col :span="24"><div class="grid-content ep-bg-purple">4</div></el-col>
  </el-row>
</template>

<style>
  .ep-bg-purple {
    text-align: center;
    background-color: aqua;
    margin-bottom: 10px;
  }
</style>
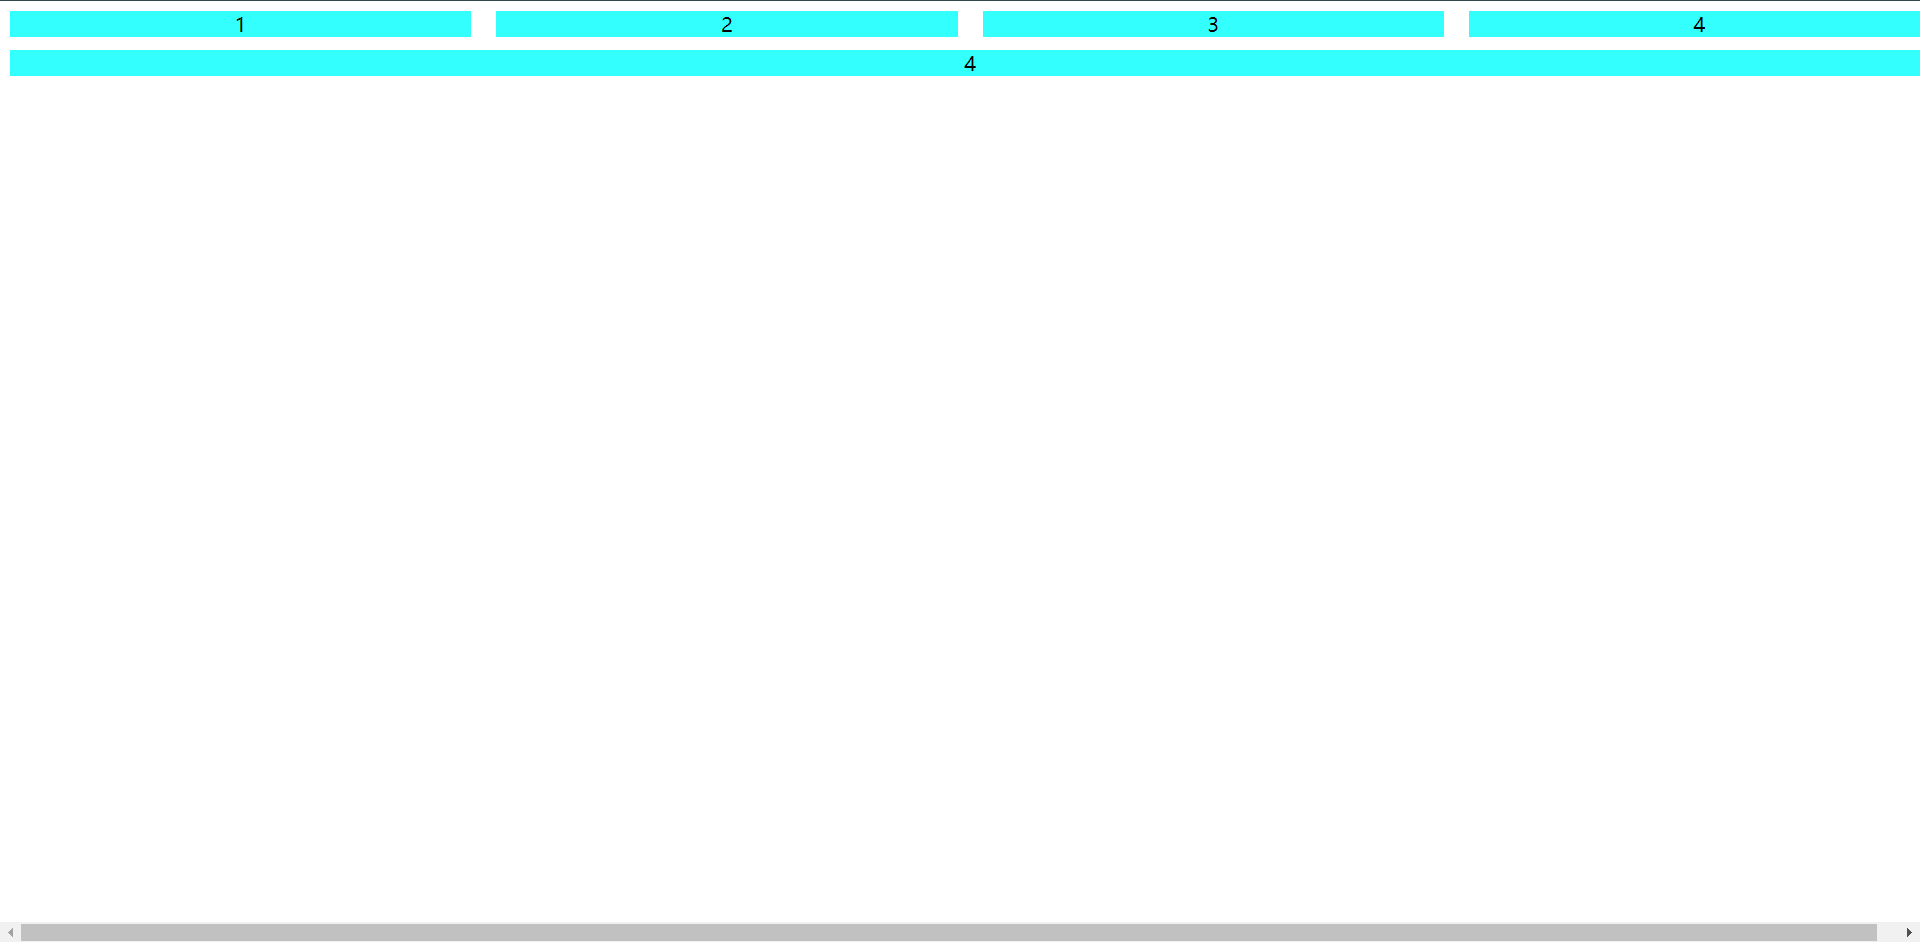
这个就是效果,解释如下:

el-row:每个块之间的间距
el-col:一个块,span的意思就是它占几个栏位(共24个),只要超出一个它都会换行

 浙公网安备 33010602011771号