一文搞定 Windows Terminal 设置与 zsh 安装【非WSL】
为 Windows Terminal 添加标签页
添加 Anaconda 标签页
在settings.json文件中的list列表中添加设置项:
{
    // Make changes here to the cmd.exe profile.
    "guid": "{0caa0dad-35be-5f56-a8ff-afceee452369}",
    "name": "Anaconda",
    "icon": "D:/laugh/Programs/Anaconda3/Menu/anaconda-navigator.ico",
    "commandline": "cmd.exe /K D:/laugh/Programs/Anaconda3/Scripts/activate.bat",
    "hidden": false
}
添加管理员 PowerShell 标签页
安装 Gsudo
在gerardog/gsudo下载最新的.msi文件进行安装。(安装位置自定,安装完成后自动添加环境变量)
配置
在settings.json文件中的list列表中添加设置项:
{
    "guid": "{41dd7a51-f0e1-4420-a2ec-1a7130b7e950}",
    "name": "Windows PowerShell Elevated",
    "commandline": "gsudo.exe powershell.exe",
    "hidden": false,
    // "colorScheme": "Solarized Dark",
    // "fontFace": "Fira Code",
    // "icon" : "https://i.imgur.com/Giuj3FT.png"
    "icon" : "E:/laugh/Pictures/Camera Roll/pws.png"
}
添加 Git Bash 标签页
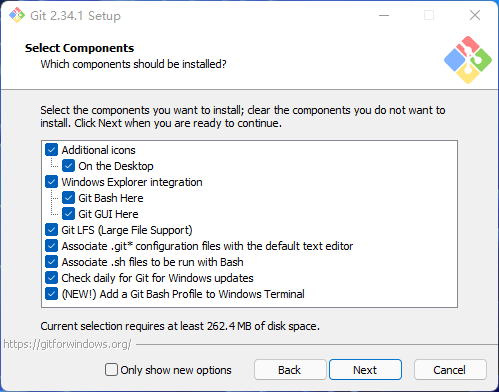
下载Git for Windows,安装时注意勾选Add a Git Bash Profile to Windows Terminal即可,安装完成自动添加标签页。
在 Windows 环境下为 Git Bash 安装 zsh 【非WSL】
安装zsh
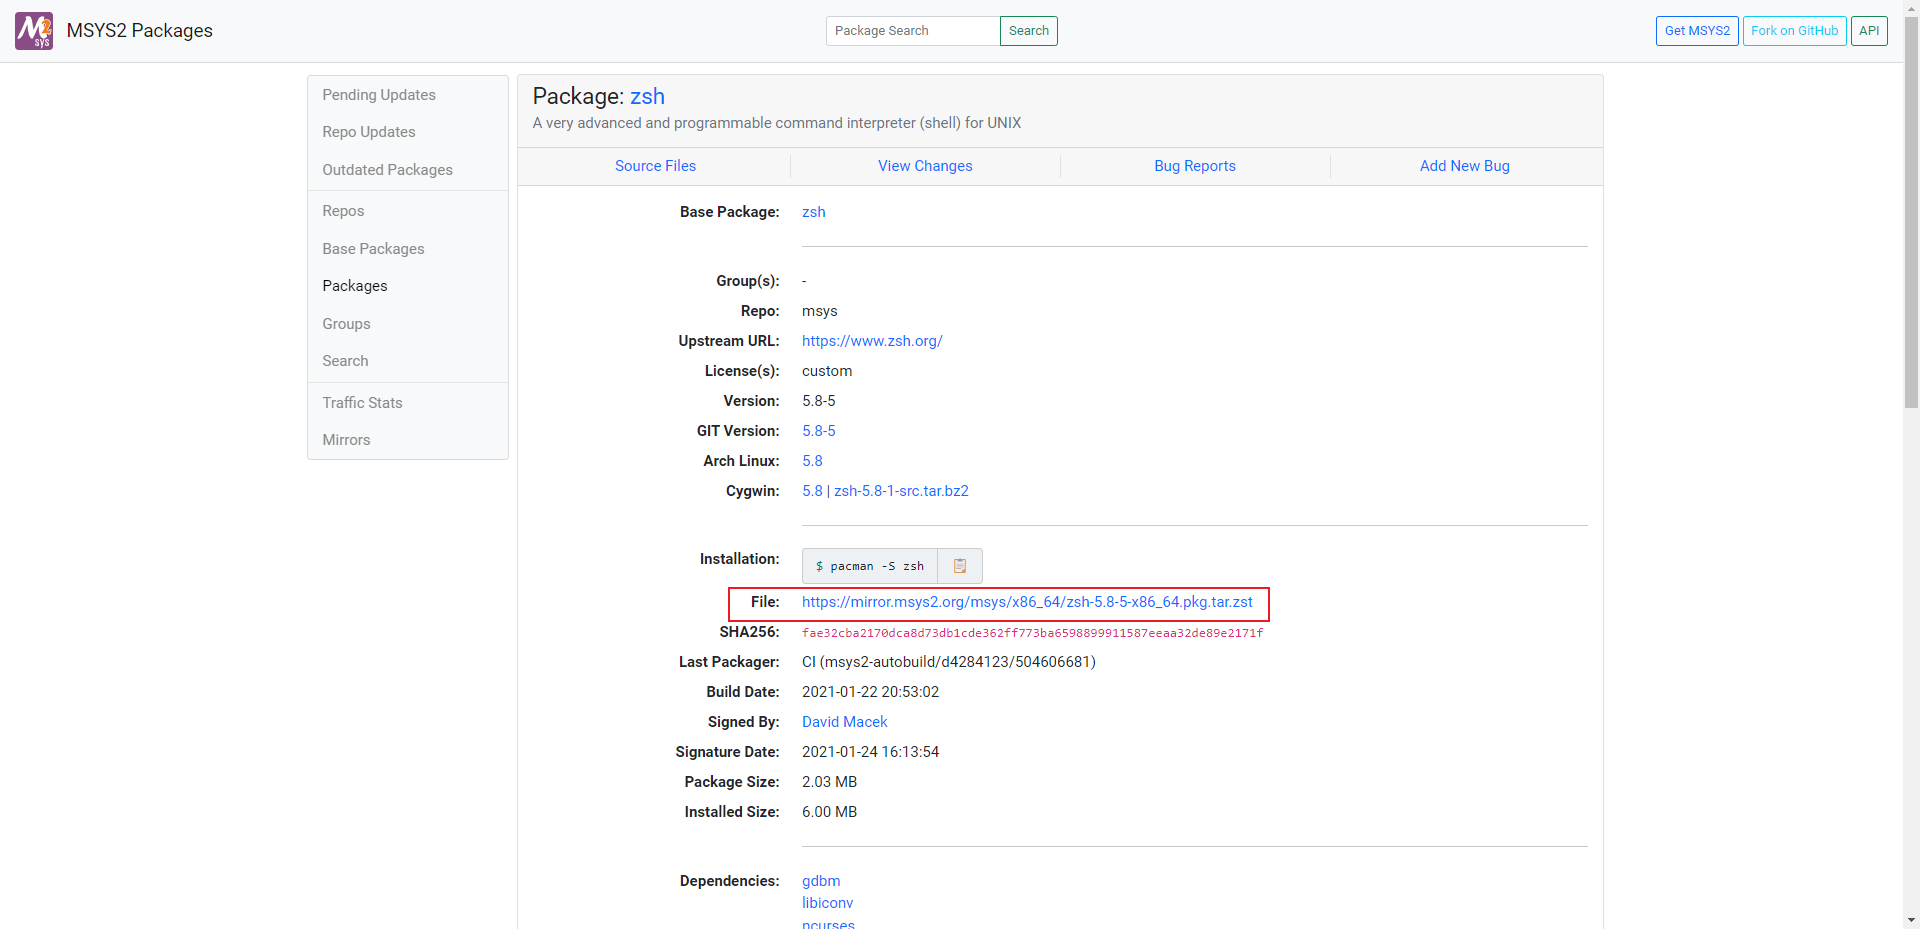
进入MSYS2 Packages点击File下载 .zst压缩包,如图所示:
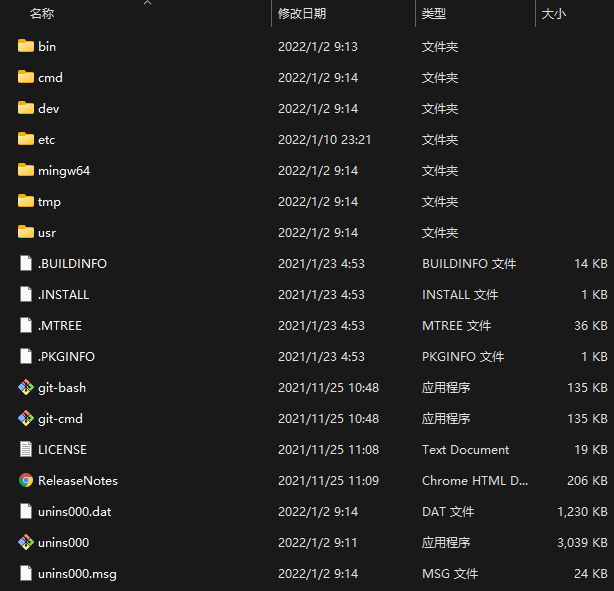
直接解压至Git根目录下(重点),可使用7-Zip-zstd解压,解压后文件结构如图所示:
打开Git Bash 标签页输入zsh,出现下图则代表安装成功,否则检查是否解压至Git根目录下
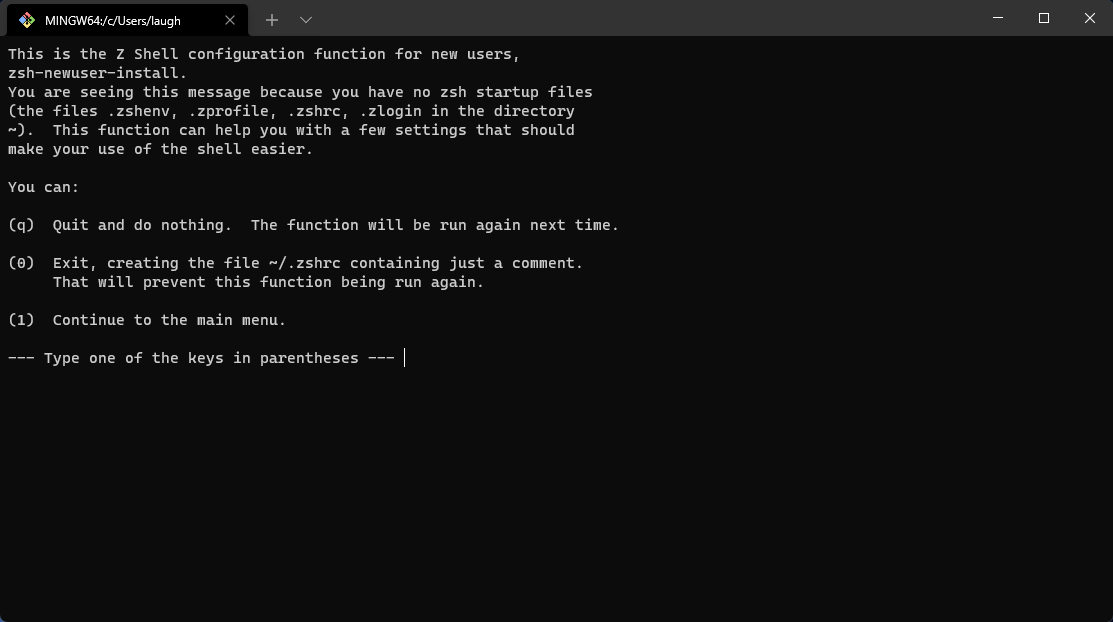
出现上图,则代表需要进行初始化配置(具体配置可自行百度),在终端输入1后如图:
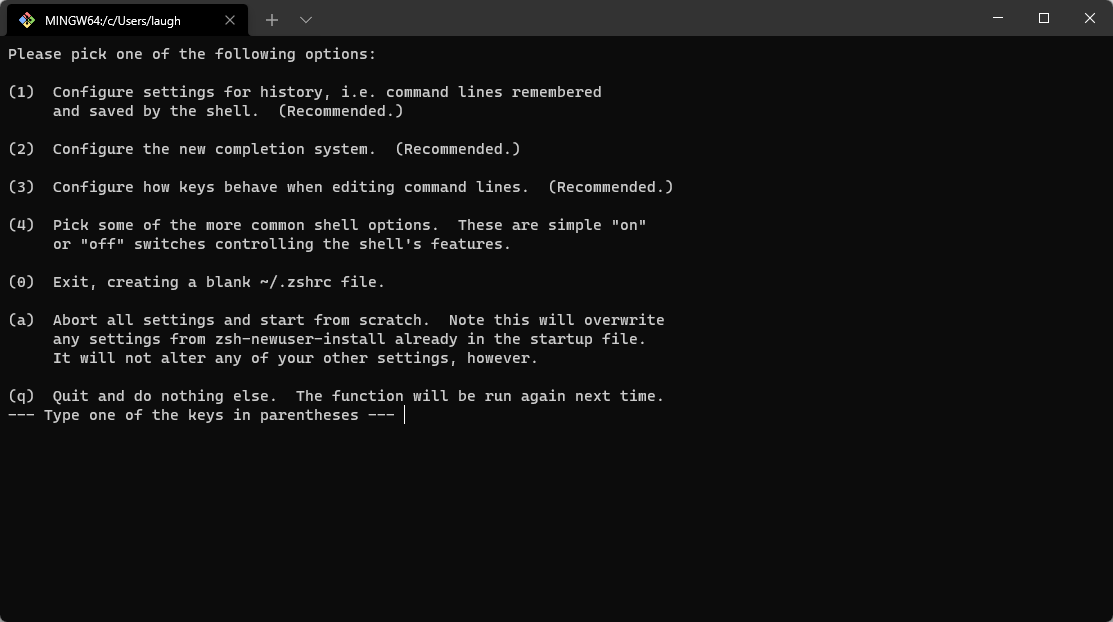
依次设置好Recommended.项后,输入0退出(务必生成.zshrc文件),之后在终端输入zsh,出下图即可。
Oh My Zsh
安装 Oh My Zsh
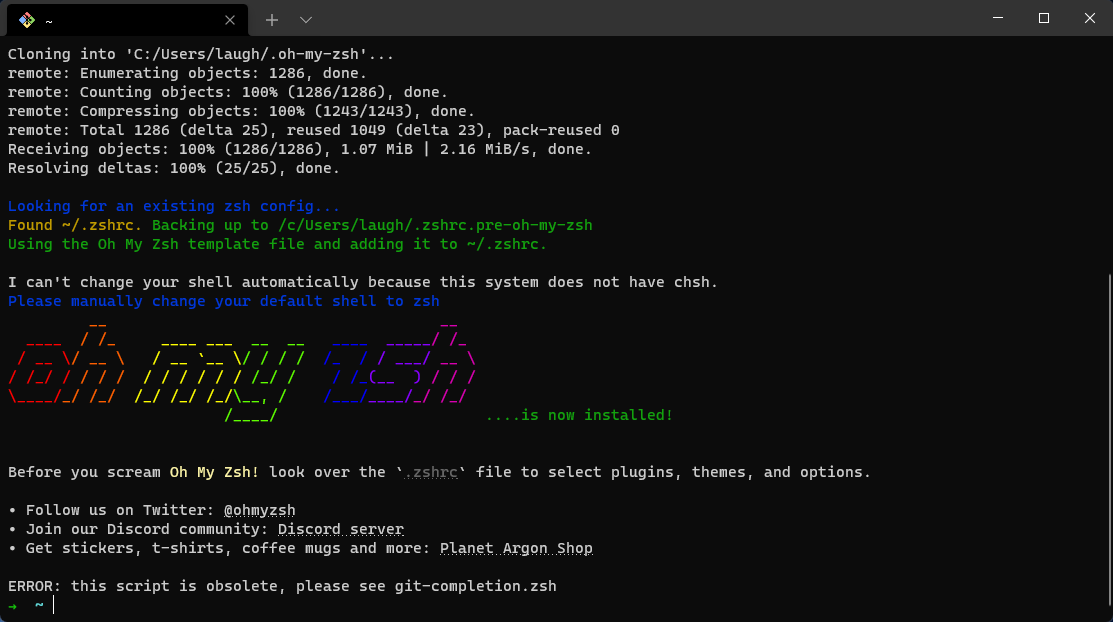
进入官网,复制首页命令进行安装。
sh -c "$(curl -fsSL https://raw.github.com/ohmyzsh/ohmyzsh/master/tools/install.sh)"
若出现curl: (6) Could not resolve host: raw.githubusercontent.com报错,则在hosts下添加一下内容,重试即可。
199.232.68.133 raw.githubusercontent.com
安装完成后出现下图内容代表安装成功(若出现ERROR忽略即可)
配置 Oh My Zsh 主题
Oh My Zsh主题文件在~/.oh-my-zsh/themes下,各个主题预览可参见官方WiKi,默认主题为robbyrussell。
想更换主题在~/.zshrc文件中新增/修改ZSH_THEME字段的配置。
安装 powerlevel10k 主题
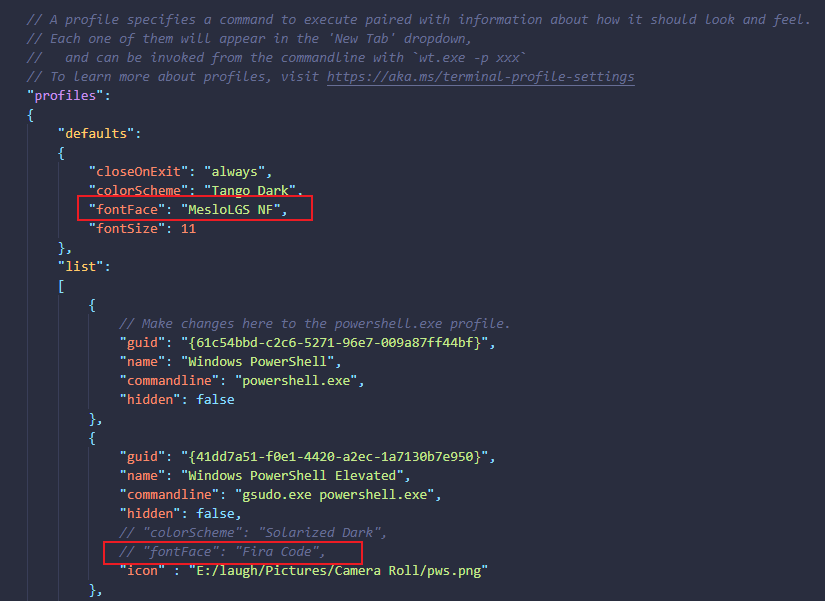
在安装powerlevel10k主题前需要安装需要推荐的字体, 字体安装完成后分别在Windows Terminal与Git Bash配置字体。
在Windows Terminal中打开settings.json,在profiles → defaults设置"fontFace": "MesloLGS NF"。
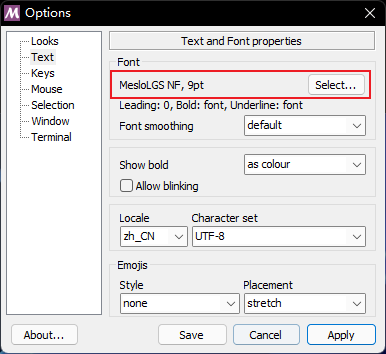
在Git Bash右键选项(Options),点击文本(Text)配置字体。
配置好字体后,在终端输入以下命令进行安装:
git clone --depth=1 https://gitee.com/romkatv/powerlevel10k.git ${ZSH_CUSTOM:-$HOME/.oh-my-zsh/custom}/themes/powerlevel10k
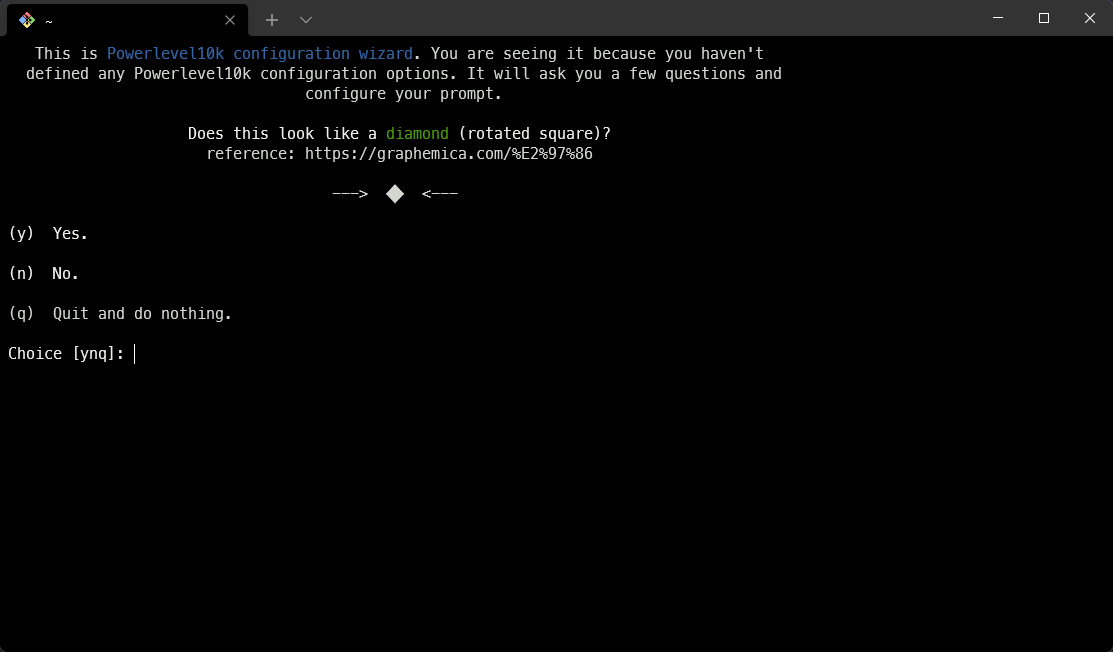
安装完成后在~/.zshrc文件中设置 ZSH_THEME="powerlevel10k/powerlevel10k",并在终端输入以下命令更新.zshrc配置文件:
source ~/.zshrc
之后会显示下图信息进行配置,输入y后根据个人喜好配置。若之后觉得配置不合适,可在终端输入p10k configure重新配置。
如果觉得终端显示的文件路径过长,只想显示最后一个文件夹,可在~/.p10k.zsh文件中将POWERLEVEL9K_SHORTEN_STRATEGY的参数改为truncate_to_last。
typeset -g POWERLEVEL9K_SHORTEN_STRATEGY=truncate_to_last
配置默认启动zsh
在../Git/etc/bash.bashrc文件末尾追加以下内容:
# Launch Zsh
if [ -t 1 ]; then
exec zsh
fi
之后每次启动/新建Git Bash,都会是zsh。
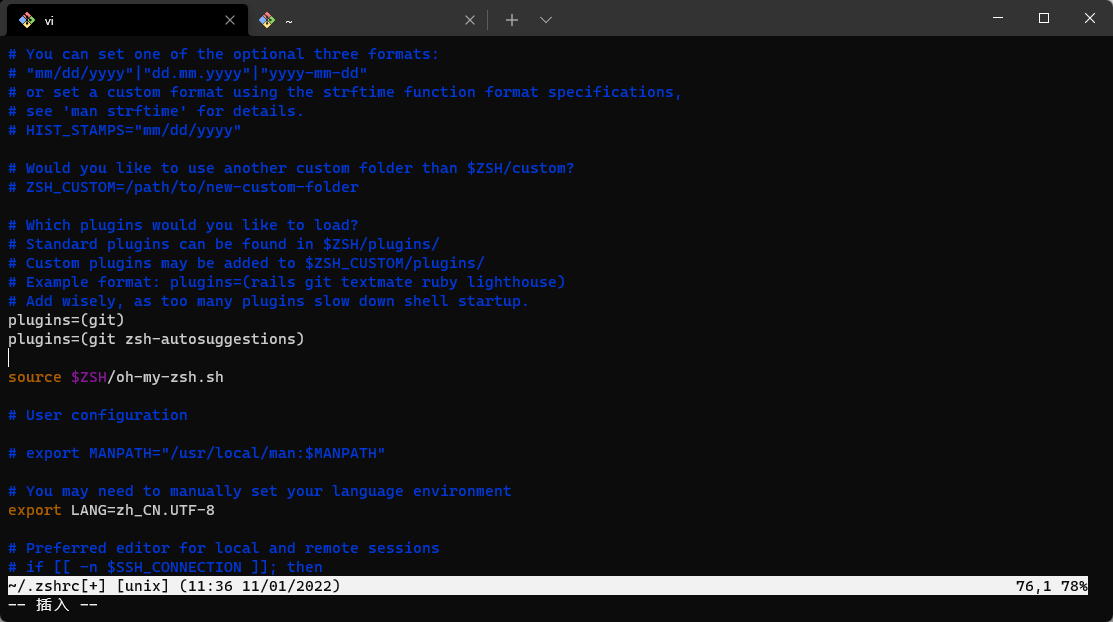
安装 zsh-autosuggestions 插件
zsh-autosuggestions可以快速将历史命令呈现出来,具体可参考官方说明。
安装
cd ~/.oh-my-zsh/custom/plugins

git clone https://github.com/zsh-users/zsh-autosuggestions ${ZSH_CUSTOM:-~/.oh-my-zsh/custom}/plugins/zsh-autosuggestions
配置
在终端输入以下命令,或直接用文本编辑器打开.zshrc文件:
vi ~/.zshrc
添加以下内容,表示新增zsh-autosuggestions插件:
plugins=(git zsh-autosuggestions)
在终端输入以下命令更新~/.zshrc配置文件,或新建终端:
source ~/.zshrc
更改 zsh-autosuggestions 提示颜色
在~/.zshrc文件中新增/修改ZSH_AUTOSUGGEST_HIGHLIGHT_STYLE字段的配置,具体可参考官方文档。
ZSH_AUTOSUGGEST_HIGHLIGHT_STYLE="fg=#9fc5e8"
参考:

 浙公网安备 33010602011771号