Centos7安装mysql8(tar)
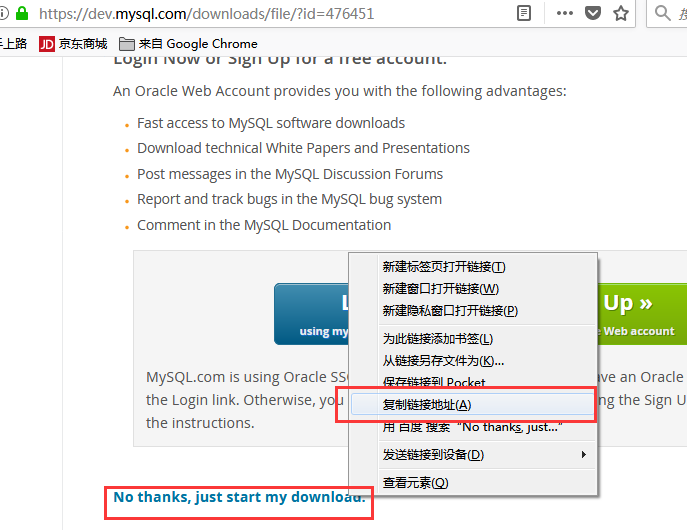
一. 官网下载linux-generic通版本
执行:wget https://dev.mysql.com/get/Downloads/MySQL-8.0/mysql-8.0.11-linux-glibc2.12-x86_64.tar.gz

二. 解压安装以及相关细节
 1     //如果觉得比较麻烦可以yum安装(另一篇博文):https://www.cnblogs.com/laoyin666/p/10171095.html
       //MySQL has a dependency on the libaio library
 2     //检查依赖包
 3     yum search libaio  # search for info
 4     yum install libaio # install library
 5     // 添加一个用户组
 6     groupadd mysql
 7     //创建mysql用户并加入mysql组
 8     useradd -r -g mysql -s /bin/false mysql
    (注意:Because the user is required only for ownership purposes, not login purposes,
     the useradd command uses the -r and -s /bin/false options to create a user that
     does not have login permissions to your server host.
     Omit these options if your useradd does not support them.)
 9     // 解压文件
10     cd /usr/local
11     tar zxvf mysql-VERSION-OS.tar.gz
12     mv mysql-VERSION-OS.tar.gz mysql
13     // 创建一个连接,(可选)
14     ln -s full-path-to-mysql-VERSION-OS mysql
15     // chown命令改变某个文件或目录的所有者和所属的组
16     cd mysql
17     chown -R root:root ./
18     chown -R mysql:mysql data
    chmod 755 ./data
19     // 初始化
20     bin/mysqld --initialize --user=mysql(配置好my.cnf后,这里就不需要过多的参数了,初始化成功,后给一个临时的密码)
21     // 开启加密连接
22     bin/mysql_ssl_rsa_setup
23     // 启动
24     /usr/local/mysql/support-files/mysql.server start (未更新pid文件,可以自己制定pid文件,然后重新初始化一下-确保初始化时存放mysql数据的data目录为空)
三.配置文件(根据需要配置)
发现没有my.cnf可以自己创建,并放在/etc中
1   user=mysql
2   character_set_server = utf8
3   basedir=/usr/local/mysql
4   datadir=/usr/local/mysql/data
5   pid-file=/usr/local/mysql/data/iz2ze2t0ob6ppkgpmww0unz.pid
6   log-error=iz2ze2t0ob6ppkgpmww0unz.err
四. 问题解决
1).root无法登陆
原因:mysql8使用新的加密规则caching_sha2_password (之前使用的是mysql_native_password) 同事废弃了密码字段password改用authentication_string
解决:启动时跳过验证: ./mysqld_safe --skip-grant-tables &(不是后台程序) ,然后回车后登陆root(无密码) ,置空root的authentication_string字段,再修改密码
> windows mysql8 忘记密码,跳过登录
> 设置跳过验证,cmd中输入命令:“mysqld --shared-memory --skip-grant-tables”,(注意:一定要有–shared-memory,否则无法正常设置–skip-grant-tables并启动mysql服>>务),正常情况下,输完这条命令,该命令行窗口应该卡住不动
1   update user set authentication_string='' where user='root';
2
3     ALTER user 'root'@'localhost' IDENTIFIED BY 'Admin123#';
4
5   (修改密码时,不要用update,因为authentication_string字段下只能是mysql加密后的41位字符串密码)
6
7   (或者在my.cnf中加入skip-grant-tables登陆root)
2)客服端远程连接错误: authentication plugin 'caching_sha2_password'
原因:mysql8新的加密规则
解决:第一种 修改配置文件my.cnf 加入
default_authentication_plugin=mysql_native_password
第二种专门创建一个以前版本的规则的账号,用于远程连接(官方推荐)
1             create user 'your username'@'%' identified with mysql_native_password by 'pwd'
2
3        grant all privileges on *.* to yourUsername@'%' with grant option;
4
5        flush privileges
第三种,加入参数 jdbc.url 中 ,allowPublicKeyRetrieval=true
备注:select host, user, authentication_string, plugin from user; // 查看系统user表信息
3)删除用户之后,重新创建失败
delete之后,flush privileges。不行的话,重新drop一遍,再flush privileges
另:新的连接url方式参考:
// 驱动包升级: mysql-connector-java-8.0.11.jar
// JDBC driver 由“com.mysql.jdbc.Driver”改为“com.mysql.cj.jdbc.Driver”
jdbc.url=jdbc:mysql://127.0.0.1:3306?characterEncoding=utf8&useUnicode=true&useSSL=false&serverTimezone=UTC


