动手学深度学习--2、预备知识
第二章 预备知识
2.0 环境配置
家里电脑是2014年买的,时间比较久了。加上之前重装系统的时候出了点故障,电脑一直不太好用,很多软件无法安装,所以就尝试购买了一个比较便宜的腾讯云,先试着使用。
我使用的环境是腾讯云+anaconda3+jupyter+tensorflow2.0。由于第一次使用云服务器,且本身对操作系统不太熟悉,中间遇到了一些挫折,记录下来以便后续再次遇到这些情况的时候也能够顺手拈来,不用浪费大量的时间用于查找各种资料。
2.0.1 购买和使用腾讯云
地址:https://cloud.tencent.com/?fromSource=gwzcw.2212127.2212127.2212127&utm_medium=cpd&utm_id=gwzcw.2212127.2212127.2212127

登陆账号之后,在首页右上角,点击控制台

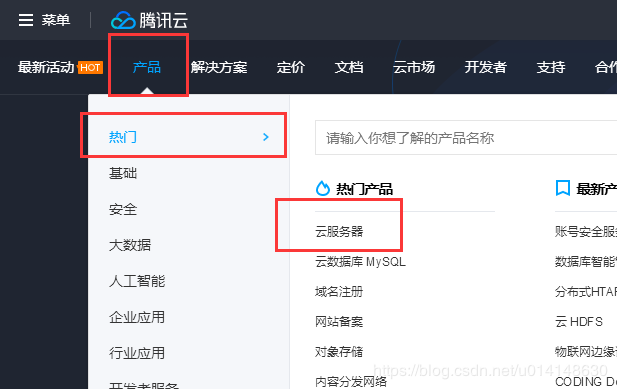
从云产品中找到“云服务器1台”这一项

点击进入就可以进入以下页面

点击右边“操作”中的“登录”选项,出二维码

扫描二维码确认登录,进入登录ssh终端的命令,先点击“登录不上”按钮,去设置登录密码;之后再回到该页面选择“立即登录”

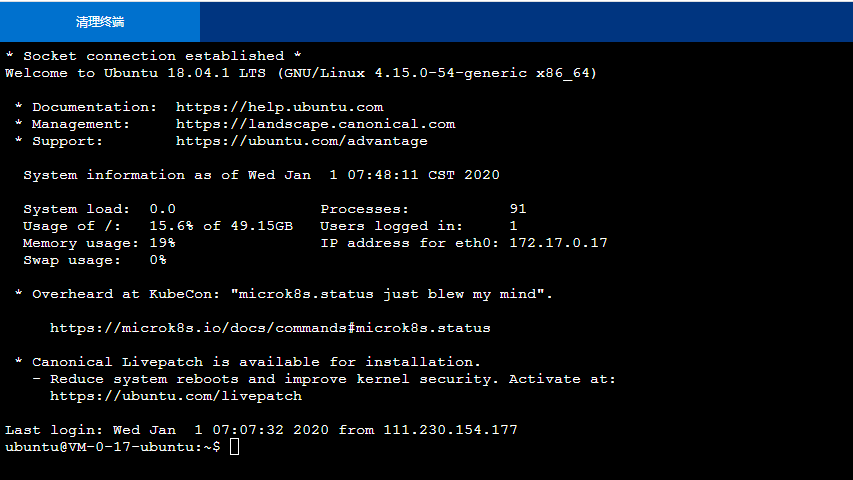
登录页面如下,输入设置的密码,进入ssh终端

2.0.2 安装anaconda3
第一步:下载anaconda
$wget https://repo.anaconda.com/archive/Anaconda3-2019.10-Linux-x86_64.sh
第二步:设置anaconda文件的可读权限,并安装anaconda
chmod +x Anaconda3-2019.10-Linux-x86_64.sh
./Anaconda3-2019.10-Linux-x86_64.sh
按照提示进行安装
第三步:配置anaconda的环境,并重启服务器
1.修改~/.bashrc
2.添加export PATH=/home/ubuntu/anaconda3/bin:$PATH"
3.source ~/.bashrc
2.0.3 安装jupyter
第一步:安装ipython, jupyter
pip install ipython
pip install jupyter
第二步:生成配置文件
[root@50eb5057baac /]# jupyter notebook --generate-config
Writing default config to: /root/.jupyter/jupyter_notebook_config.py
第三步:输入密码生成密钥
root@50eb5057baac /]# ipython
In [1]: from notebook.auth import passwd
In [2]: passwd()
Enter password:
Verify password:
Out[2]: 'sha1:43b95b731276:5d330ee6f6054613b3ab4cc59c5048ff7c70f549'
第四步:修改默认配置文件
vi /.jupyter/jupyter_notebook_config.py
c.NotebookApp.ip='' #设置访问notebook的ip,表示所有IP,这里设置ip为都可访问
c.NotebookApp.password = u'sha1:5df252f58b7f:bf65d53125bb36c085162b3780377f66d73972d1' #填写刚刚生成的密文
c.NotebookApp.open_browser = False # 禁止notebook启动时自动打开浏览器(在linux服务器一般都是ssh命令行访问,没有图形界面的。所以,启动也没啥用)
c.NotebookApp.port =8889 #指定访问的端口,默认是8888。
第五步:启动jupyter notebook
ssh终端输入 jupyter notebook 进入jupyter后台
找到云服务器上自己的公网ip:如 111.229.128.108
打开网页输入网址111.229.128.108:8889即可进入jupyter

2.0.3 安装tensorflow
在不指定tensorflow的情况下,默认安装的是tensorflow2.0;另外anaconda中最新的python是3.7版本的,而3.7版本的python好像只支持tensorflow2.0,不再支持tensorflow1.X
在jupyter打开一个terminal或者在ssh终端输入conda(或pip) install tensorflow
等待安装结束,就可以使用了
2.1
2.2 数据操作
在深度学习中,我们通常会频繁地对数据进行操作。做为动手学深度学习的基础,本节将介绍如何对内存中的数据进行操作。
在TensorFlow中,tensor是一个类,也是存储和变换数据的主要工具。如果你之前用过NumPy,你会发现tensor和NumPy的多维数组非常类似。然而,tensor提供GPU计算和自动求梯度等更多功能,这些使tensor更加适合深度学习。
import tensorflow as tf
print(tf.version)
1.12.0
2.2.1 创建tensor
我们先介绍tensor的最基本功能,我们用arange函数创建一个行向量
x = tf.constant(range(12))
我们可以通过shape属性来获取tensor实例的形状。
print(x.shape)
(12,)
这时返回了一个tensor实例,包含了从0开始的12个连续整数。
print(x)
Tensor("Const_9:0", shape=(12,), dtype=int32)
我们也能够通过len得到tensor实例中元素(element)的总数。(注:tf1.0没有len函数)
下面使用reshape函数把行向量x的形状改为(3,4),页就是一个3行4列的矩阵,并记作X。除了形状改变之外,X中的元素保持不变。
X=tf.reshape(x,(3,4))
print(X)
Tensor("Reshape_5:0", shape=(3, 4), dtype=int32)
注意X属性中的形状发生了变化,上面x.reshape(3,4))也可写成x.reshape((-1,4))或x.reshape((3,-1))。由于元素个数是已知的,这里的-1是能够通过元素个数和其他维度的大小推断出来的。接下来,我们创建一个元素为0,形状为(2,3,4)的张量。实际上,之前创建的向量和矩阵都是特殊的张量。
tf.zeros((2,3,4))
Tensor("zeros_3:0", shape=(2, 3, 4), dtype=float32)
类似地,我们可以创建各元素为1的张量。
tf.ones((3,4))
Tensor("ones_2:0", shape=(3,), dtype=uint8)
我们页可以通过PYthon的列表(list)指定需要创建的tensor中每个元素的值。
Y = tf.constant([[2,1,4,5],[1,2,3,4],[4,3,2,1]])
print(Y)
Tensor("Const_10:0", shape=(3, 4), dtype=int32)
有些情况下,我们需要随机生成tensor中每个元素的值。下面我们创建一个形状为(3,4)的tensor。它的每个元素都随机采样于均值为0、标准差为1的正太分布。
tf.random.normal(shape=[3,4],mean=0,stddev=1)
Tensor("random_normal:0", shape=(3, 4), dtype=float32)
2.2.2 运算
tensor支持大量的运算符(operator)。例如,我们可以对之前创建的两个形状为(3,4)的tensorflow做加法,所得结果形状不变
按元素加法、按元素乘法、按元素除法、按元素做指数运算;
除了按元素计算外,我们还可以使用matmul函数做矩阵乘法,下面将X与Y的转置做矩阵乘法。由于X是3行4列的矩阵,Y转置为4行3列的矩阵,因此两个矩阵相乘得到3行3列的矩阵;
我们也可以将多个tensor连接(concatenate)。下面分别在行上(维度0,即形状的最左边元素)和列上(维度1,即形状左起第二个元素)连接两个矩阵。可以看到,输出的第一个tensor在维度0的长度为两个矩阵在维度0的长度之和,而输出的第二个tensor在维度1的长度为两个输入矩阵在维度1的长度之和。
使用条件判断式可以得到元素为0或1的新的tensor。以X==Y为例,如果X和Y在相同位置的判断条件为真(值相等),那么新的tensor在相同位置的值为1;反之为0。
对tensor中的所有元素求和得到只有一个元素的tensor。
2.2.2 运算;尤其注意运算操作中所需的数据类型
init_op = tf.global_variables_initializer()
with tf.Session() as sess:
sess.run(init_op)
print('X+Y=:\n',sess.run(X+Y))
print('XY=:\n',sess.run(XY))
print('X/Y=:\n',sess.run(X/Y))
Y = tf.cast(Y, tf.float32)
print('exp(Y):\n',sess.run(tf.exp(Y)))
Y = tf.cast(Y, tf.int32)
Z = tf.matmul(X, tf.transpose(Y))
print('matmul:\n',sess.run(Z))
print('concatenate1:\n',sess.run(tf.concat([X,Y],axis = 0)))
print('concatenat2:\n',sess.run(tf.concat([X,Y],axis = 1)))
print('equal:\n',sess.run(tf.equal(X,Y)))
print('sum:\n',sess.run(tf.reduce_sum(X)))
X = tf.cast(X, tf.float32)
print('norm:\n',sess.run(tf.norm(X)))
2.2.3 广播机制
前面我们看到如何对两个形状相同的tensor做按元素运算。当对两个形状不同的tensor按元素运算时,可能会触发广播(broadcasting)机制:先适当复制元素使这两个tensor形状相同后再按元素运算。由于A和B分别是3行1列和1行2列的矩阵,如果要计算A + B,那么A中第一列的3个元素被广播(复制)到了第二列,而B中第一行的2个元素被广播(复制)到了第二行和第三行。如此,就可以对2个3行2列的矩阵按元素相加。
A = tf.reshape(tf.constant(list(range(3))),(3,1)) #定义两个tensor
B = tf.reshape(tf.constant(list(range(2))),(1,2)) #定义两个tensor
init_op = tf.global_variables_initializer()
with tf.Session() as sess:
print('broadcasting:\n',sess.run(A+B))
2.2.4 索引
在tensor中,索引(index)代表了元素的位置。tensor的索引从0开始逐一递增。例如,一个3行2列的矩阵的行索引分别为0、1和2,列索引分别为0和1。在下面的例子中,我们指定了tensor的行索引截取范围[1:3]。依据左闭右开指定范围的惯例,它截取了矩阵X中行索引为1和2的两行。
我们可以指定tensor中需要访问的单个元素的位置,如矩阵中行和列的索引,并为该元素重新赋值。
当然,我们也可以截取一部分元素,并为它们重新赋值。在下面的例子中,我们为行索引为1的每一列元素重新赋值。
X1 = X[1:3]
X = tf.Variable(X)
X[1,2].assign(9)
X = tf.Variable(X)
X[1:2,:].assign(tf.ones(X[1:2,:].shape, dtype = tf.float32)*12)
2.2.5 运算的内存开销
在前面的例子里我们对每个操作新开内存来存储运算结果。举个例子,即使像Y = X + Y这样的运算,我们也会新开内存,然后将Y指向新内存。为了演示这一点,我们可以使用Python自带的id函数:如果两个实例的ID一致,那么它们所对应的内存地址相同;反之则不同。
X = tf.Variable(X)
Y = tf.cast(Y, dtype=tf.float32)
before = id(Y)
Y = Y + X
id(Y) == before
False
如果想指定结果到特定内存,我们可以使用前面介绍的索引来进行替换操作。在下面的例子中,我们先通过zeros_like创建和Y形状相同且元素为0的tensor,记为Z。接下来,我们把X + Y的结果通过[:]写进Z对应的内存中。
Z = tf.Variable(tf.zeros_like(Y))
before = id(Z)
Z[:].assign(X + Y)
id(Z) == before
True
实际上,上例中我们还是为X + Y开了临时内存来存储计算结果,再复制到Z对应的内存。如果想避免这个临时内存开销,我们可以使用运算符全名函数中的out参数。
Z = tf.add(X, Y)
id(Z) == before
False
如果X的值在之后的程序中不会复用,我们也可以用 X[:] = X + Y 或者 X += Y 来减少运算的内存开销。
before = id(X)
X.assign_add(Y)
id(X) == before
True
2.2.6 tensor 和 NumPy 相互变换
我们可以通过array函数和asnumpy函数令数据在NDArray和NumPy格式之间相互变换。下面将NumPy实例变换成tensor实例。
import numpy as np
P = np.ones((2,3))
D = tf.constant(P)
D
<tf.Tensor: id=115, shape=(2, 3), dtype=float64, numpy=
array([[1., 1., 1.],
[1., 1., 1.]])>
再将NDArray实例变换成NumPy实例。
np.array(D)
array([[1., 1., 1.],
[1., 1., 1.]])
import tensorflow as tf
print(tf.version)
import os
os.environ['TF_CPP_MIN_LOG_LEVEL'] = '2'
tf.test.is_gpu_available( cuda_only=False, min_cuda_compute_capability=None )
2.0.0
2.3 自动求梯度
在深度学习中,我们经常需要对函数求梯度(gradient)。本节将介绍如何使用tensorflow2.0提供的GradientTape来自动求梯度。
2.3.1 简单示例
我们先看一个简单例子:对函数 \(y = 2\boldsymbol{x}^{\top}\boldsymbol{x}\) 求关于列向量 \(\boldsymbol{x}\) 的梯度。我们先创建变量x,并赋初值。
x = tf.reshape(tf.Variable(range(4), dtype=tf.float32),(4,1))
x
<tf.Tensor: id=10, shape=(4, 1), dtype=float32, numpy=
array([[0.],
[1.],
[2.],
[3.]], dtype=float32)>
函数 \(y = 2\boldsymbol{x}^{\top}\boldsymbol{x}\) 关于\(\boldsymbol{x}\) 的梯度应为\(4\boldsymbol{x}\)。现在我们来验证一下求出来的梯度是正确的。
with tf.GradientTape() as t:
t.watch(x)
y = 2 * tf.matmul(tf.transpose(x), x)
dy_dx = t.gradient(y, x)
dy_dx
<tf.Tensor: id=30, shape=(4, 1), dtype=float32, numpy=
array([[ 0.],
[ 4.],
[ 8.],
[12.]], dtype=float32)>
2.3.2 训练模式和预测模式
with tf.GradientTape(persistent=True) as g:
g.watch(x)
y = x * x
z = y * y
dz_dx = g.gradient(z, x) # 108.0 (4*x^3 at x = 3)
dy_dx = g.gradient(y, x) # 6.0
dz_dx,dy_dx
WARNING:tensorflow:Calling GradientTape.gradient on a persistent tape inside its context is significantly less efficient than calling it outside the context (it causes the gradient ops to be recorded on the tape, leading to increased CPU and memory usage). Only call GradientTape.gradient inside the context if you actually want to trace the gradient in order to compute higher order derivatives.
WARNING:tensorflow:Calling GradientTape.gradient on a persistent tape inside its context is significantly less efficient than calling it outside the context (it causes the gradient ops to be recorded on the tape, leading to increased CPU and memory usage). Only call GradientTape.gradient inside the context if you actually want to trace the gradient in order to compute higher order derivatives.
(<tf.Tensor: id=41, shape=(4, 1), dtype=float32, numpy=
array([[ 0.],
[ 4.],
[ 32.],
[108.]], dtype=float32)>,
<tf.Tensor: id=47, shape=(4, 1), dtype=float32, numpy=
array([[0.],
[2.],
[4.],
[6.]], dtype=float32)>)
2.3.3 对Python控制流求梯度
即使函数的计算图包含了Python的控制流(如条件和循环控制),我们也有可能对变量求梯度。
考虑下面程序,其中包含Python的条件和循环控制。需要强调的是,这里循环(while循环)迭代的次数和条件判断(if语句)的执行都取决于输入a的值。
def f(a):
b = a * 2
while tf.norm(b) < 1000:
b = b * 2
if tf.reduce_sum(b) > 0:
c = b
else:
c = 100 * b
return c
我们来分析一下上面定义的f函数。事实上,给定任意输入a,其输出必然是 f(a) = x * a的形式,其中标量系数x的值取决于输入a。由于c = f(a)有关a的梯度为x,且值为c / a,我们可以像下面这样验证对本例中控制流求梯度的结果的正确性。
a = tf.random.normal((1,1),dtype=tf.float32)
with tf.GradientTape() as t:
t.watch(a)
c = f(a)
t.gradient(c,a) == c/a
<tf.Tensor: id=201, shape=(1, 1), dtype=bool, numpy=array([[ True]])>
受篇幅所限,本书无法对所有用到的tensorflow2.0函数和类一一详细介绍。读者可以查阅相关文档来做更深入的了解。
import tensorflow as tf
print(tf.version)
2.0.0
2.4.1 search for functions and classes
当我们想知道一个模块里面提供了哪些可以调用的函数和类的时候,可以使用dir函数。下面我们打印dtypes和random模块中所有的成员或属性。
dir(tf.dtypes)
['DType',
'QUANTIZED_DTYPES',
'builtins',
'cached',
'doc',
'file',
'loader',
'name',
'package',
'path',
'spec',
'_sys',
'as_dtype',
'bfloat16',
'bool',
'cast',
'complex',
'complex128',
'complex64',
'double',
'float16',
'float32',
'float64',
'half',
'int16',
'int32',
'int64',
'int8',
'qint16',
'qint32',
'qint8',
'quint16',
'quint8',
'resource',
'saturate_cast',
'string',
'uint16',
'uint32',
'uint64',
'uint8',
'variant']
dir(tf.random)
['builtins',
'cached',
'doc',
'file',
'loader',
'name',
'package',
'path',
'spec',
'_sys',
'all_candidate_sampler',
'categorical',
'experimental',
'fixed_unigram_candidate_sampler',
'gamma',
'learned_unigram_candidate_sampler',
'log_uniform_candidate_sampler',
'normal',
'poisson',
'set_seed',
'shuffle',
'stateless_categorical',
'stateless_normal',
'stateless_truncated_normal',
'stateless_uniform',
'truncated_normal',
'uniform',
'uniform_candidate_sampler']
通常我们可以忽略掉由__开头和结尾的函数(Python的特别对象)或者由_开头的函数(一般为内部函数)。通过其余成员的名字我们大致猜测出这个模块提供了各种随机数的生成方法,包括从均匀分布采样(uniform)、从正态分布采样(normal)、从泊松分布采样(poisson)等。
2.4.2 use of functions
想了解某个函数或者类的具体用法时,可以使用help函数。让我们以ones函数为例,查阅它的用法。更详细的信息,可以通过Tensorflow的API文档版本选择页,选择与自己环境中的 tensorflow 版本一致的 API 版本进行查询。
help(tf.ones)
Help on function ones in module tensorflow.python.ops.array_ops:
ones(shape, dtype=tf.float32, name=None)
Creates a tensor with all elements set to 1.
This operation returns a tensor of type `dtype` with shape `shape` and all
elements set to 1.

For example:

```python
tf.ones([2, 3], tf.int32)  # [[1, 1, 1], [1, 1, 1]]
```

Args:
  shape: A list of integers, a tuple of integers, or a 1-D `Tensor` of type
    `int32`.
  dtype: The type of an element in the resulting `Tensor`.
  name: A name for the operation (optional).

Returns:
  A `Tensor` with all elements set to 1.
从文档信息我们了解到,ones函数会创建和输入tensor形状相同且元素为1的新tensor。我们可以验证一下:
tf.ones([2,3], tf.int32)
<tf.Tensor: id=2, shape=(2, 3), dtype=int32, numpy=
array([[1, 1, 1],
[1, 1, 1]])>


