第十七章.网络编程
Java的基本网络支持:
使用InetAddress:


 1 import java.net.InetAddress;
 2
 3 public class InetAddressTest{
 4     public static void main(String[] args) throws Exception{
 5         //根据主机名来获取对应的InetAddress实例
 6         InetAddress ip = InetAddress.getByName("www.lanshanxiao.cc");
 7         //判断是否可达
 8         System.out.println("lanshanxiao是否可达:" + ip.isReachable(2000));
 9         //获取该InetAddress实例的IP字符串
10         System.out.println(ip.getHostAddress());
11         //根据原始IP地址来获取对应的InetAddress实例
12         InetAddress local = InetAddress.getByAddress(new byte[] {127,0,0,1});
13         System.out.println("本机是否可达:" + local.isReachable(5000));
14         //获取该InetAddress实例对应的权限定域名
15         System.out.println(local.getCanonicalHostName());
16     }
17 }
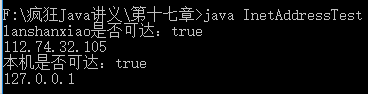
注意上面程序中:InetAddress local = InetAddress.getByAddress(new byte[] {127,0,0,1});大括号中的127,0,0,1之间的符号是逗号
使用URLDecoder和URLEncoder:
URLDecoder和URLEncoder用于完成普通字符串和application/x-www-form-urlencoded MIME字符串之间的相互转换。
 1 import java.net.URLEncoder;
 2 import java.net.URLDecoder;
 3
 4 public class URLDecoderTest{
 5     public static void main(String[] args) throws Exception{
 6         //将application/x-www-form-urlencoded字符串
 7         //转换成普通字符串
 8         String keyWord = URLDecoder.decode("%E7%96%AF%E7%8B%82java", "utf-8");
 9         System.out.println(keyWord);
10         //将普通字符串转换成
11         //application/x-www-form-urlencoded字符串
12         String urlStr = URLEncoder.encode("疯狂Android讲义", "GBK");
13         System.out.println(urlStr);
14     }
15 }

URL、URLConnection、URLPermission:
URL(Uniform Resource Locator)对象代表统一资源定位器,它是指向互联网“资源”的指针。资源可以是简单的文件或目录,也可以是复杂的对象的引用,如:对数据库
或搜索引擎的查询。
URL可以由协议名、主机、端口、资源组成:
protocol://host:port/resourceName
如下:
http://www.crazyit.org/index.php
多线程下载工具类:
  1 import java.io.RandomAccessFile;
  2 import java.io.InputStream;
  3 import java.net.URL;
  4 import java.net.HttpURLConnection;
  5
  6 public class DownUtil{
  7     //定义下载资源的路径
  8     private String path;
  9     //指定所下载的文件的保存位置
 10     private String targetFile;
 11     //定义需要使用多少个线程下载资源
 12     private int threadNum;
 13     //定义下载的线程对象
 14     private DownThread[] threads;
 15     //定义下载的文件的总大小
 16     private int fileSize;
 17
 18     public DownUtil(String path, String targetFile, int threadNum){
 19         this.path = path;
 20         this.threadNum = threadNum;
 21         //初始化threads数组
 22         threads = new DownThread[threadNum];
 23         this.targetFile = targetFile;
 24     }
 25
 26     public void download() throws Exception{
 27         URL url = new URL(path);
 28         HttpURLConnection conn = (HttpURLConnection) url.openConnection();
 29         conn.setConnectTimeout(5 * 1000);
 30         conn.setRequestMethod("GET");
 31         conn.setRequestProperty(
 32             "Accept",
 33             "image/gif, image/jpeg, image/pjpeg, image/pjpeg, "
 34             + "application/x-shockwave-flash, application/xaml+xml, "
 35             + "application/vnd.ms-xpsdocument, application/x-ms-xbap, "
 36             + "application/x-ms-application, application/vnd.ms-excel, "
 37             + "application/vnd.ms-powerpoint, application/msword, */*");
 38         conn.setRequestProperty("Accept-Language", "zh-CN");
 39         conn.setRequestProperty("Charset", "UTF-8");
 40         conn.setRequestProperty("Connection", "Keep-Alive");
 41         //得到文件大小
 42         fileSize = conn.getContentLength();
 43         conn.disconnect();
 44         int currentPartSize = fileSize / threadNum + 1;
 45         RandomAccessFile file = new RandomAccessFile(targetFile, "rw");
 46         //设置本地文件大小
 47         file.setLength(fileSize);
 48         file.close();
 49         for (int i = 0; i < threadNum; i++)
 50         {
 51             // 计算每条线程的下载的开始位置
 52             int startPos = i * currentPartSize;
 53             // 每个线程使用一个RandomAccessFile进行下载
 54             RandomAccessFile currentPart = new RandomAccessFile(targetFile,
 55                 "rw");
 56             // 定位该线程的下载位置
 57             currentPart.seek(startPos);
 58             // 创建下载线程
 59             threads[i] = new DownThread(startPos, currentPartSize,
 60                 currentPart);
 61             // 启动下载线程
 62             threads[i].start();
 63         }
 64     }
 65
 66     // 获取下载的完成百分比
 67     public double getCompleteRate()
 68     {
 69         // 统计多条线程已经下载的总大小
 70         int sumSize = 0;
 71         for (int i = 0; i < threadNum; i++)
 72         {
 73             sumSize += threads[i].length;
 74         }
 75         // 返回已经完成的百分比
 76         return sumSize * 1.0 / fileSize;
 77     }
 78
 79     private class DownThread extends Thread
 80     {
 81         // 当前线程的下载位置
 82         private int startPos;
 83         // 定义当前线程负责下载的文件大小
 84         private int currentPartSize;
 85         // 当前线程需要下载的文件块
 86         private RandomAccessFile currentPart;
 87         // 定义已经该线程已下载的字节数
 88         public int length;
 89
 90         public DownThread(int startPos, int currentPartSize,
 91             RandomAccessFile currentPart)
 92         {
 93             this.startPos = startPos;
 94             this.currentPartSize = currentPartSize;
 95             this.currentPart = currentPart;
 96         }
 97
 98         @Override
 99         public void run()
100         {
101             try
102             {
103                 URL url = new URL(path);
104                 HttpURLConnection conn = (HttpURLConnection)url
105                     .openConnection();
106                 conn.setConnectTimeout(5 * 1000);
107                 conn.setRequestMethod("GET");
108                 conn.setRequestProperty(
109                     "Accept",
110                     "image/gif, image/jpeg, image/pjpeg, image/pjpeg, "
111                     + "application/x-shockwave-flash, application/xaml+xml, "
112                     + "application/vnd.ms-xpsdocument, application/x-ms-xbap, "
113                     + "application/x-ms-application, application/vnd.ms-excel, "
114                     + "application/vnd.ms-powerpoint, application/msword, */*");
115                 conn.setRequestProperty("Accept-Language", "zh-CN");
116                 conn.setRequestProperty("Charset", "UTF-8");
117                 InputStream inStream = conn.getInputStream();
118                 // 跳过startPos个字节,表明该线程只下载自己负责哪部分文件。
119                 inStream.skip(this.startPos);
120                 byte[] buffer = new byte[1024];
121                 int hasRead = 0;
122                 // 读取网络数据,并写入本地文件
123                 while (length < currentPartSize
124                     && (hasRead = inStream.read(buffer)) != -1)
125                 {
126                     currentPart.write(buffer, 0, hasRead);
127                     // 累计该线程下载的总大小
128                     length += hasRead;
129                 }
130                 currentPart.close();
131                 inStream.close();
132             }
133             catch (Exception e)
134             {
135                 e.printStackTrace();
136             }
137         }
138     }
139 }
程序中DownUtil类中的download()方法负责按如下步骤实现多线程下载:
1.创建URL对象
2.获取指定URL对象所指向资源的大小(通过getContentLength()方法获得),此处用到了URLConnection类,该类代表Java应用程序和URL之间的通信链接。
3.在本地磁盘上创建一个与网络资源具有相同大小的空文件。
4.计算每个线程应该下载网络资源的哪个部分(从哪个字节开始,到哪个字节结束)
5.依次创建、启动多个线程来下载网络资源的指定部分
上面程序已经实现了多线程下载的核心代码,若要实现断点下载,则需要额外增加一个配置文件(读者可以发现,所有的断点下载工具都会在下载开始时生成两个文件:一个是与网络资源具有相同大小的空文件,一个是配置文件),该配置文件分别记录每个线程已经下载到哪个字节,当网络断开后再次下载时,每个线程根据配置文件里记录的位置向后下载即可。
 1 public class MultiThreadDown
 2 {
 3     public static void main(String[] args) throws Exception
 4     {
 5         // 初始化DownUtil对象
 6         final DownUtil downUtil = new DownUtil("http://www.crazyit.org/"
 7             + "attachments/month_1403/1403202355ff6cc9a4fbf6f14a.png"
 8             , "ios.png", 4);
 9         // 开始下载
10         downUtil.download();
11         new Thread(() -> {
12                 while(downUtil.getCompleteRate() < 1)
13                 {
14                     // 每隔0.1秒查询一次任务的完成进度,
15                     // GUI程序中可根据该进度来绘制进度条
16                     System.out.println("已完成:"
17                         + downUtil.getCompleteRate());
18                     try
19                     {
20                         Thread.sleep(1000);
21                     }
22                     catch (Exception ex){}
23                 }
24         }).start();
25     }
26 }
通常创建一个和URL的连接,并发送请求、读取此URL引用的资源需要如下几个步骤:
1.通过调用URL对象的openConnection()方法来创建URLConnection对象
2.设置URLConnection的参数和普通请求属性
3.若只是发送GET方式请求,则使用connect()方法建立和远程资源之间的实际连接即可;若要发送POST方式的请求,则需要获取URLConnection实例对应的输出流来发
送请求参数
4.远程资源变为可用,程序可以访问远程资源的头字段或通过输入流读取远程资源的数据
若既要使用输入流读取URLConnection响应的内容又要使用输出流发送请求参数,则一定要先使用输出流,在使用输入流。
下面程序示范了如何向Web站点发送GET请求、POST请求,并从Web站点取得响应:
  1 import java.net.URL;
  2 import java.net.URLConnection;
  3 import java.util.Map;
  4 import java.util.List;
  5 import java.io.BufferedReader;
  6 import java.io.InputStreamReader;
  7 import java.io.PrintWriter;
  8
  9 public class GetPostTest
 10 {
 11     /**
 12      * 向指定URL发送GET方法的请求
 13      * @param url 发送请求的URL
 14      * @param param 请求参数,格式满足name1=value1&name2=value2的形式。
 15      * @return URL所代表远程资源的响应
 16      */
 17     public static String sendGet(String url , String param)
 18     {
 19         String result = "";
 20         String urlName = url + "?" + param;
 21         try
 22         {
 23             URL realUrl = new URL(urlName);
 24             // 打开和URL之间的连接
 25             URLConnection conn = realUrl.openConnection();
 26             // 设置通用的请求属性
 27             conn.setRequestProperty("accept", "*/*");
 28             conn.setRequestProperty("connection", "Keep-Alive");
 29             conn.setRequestProperty("user-agent"
 30                 , "Mozilla/4.0 (compatible; MSIE 6.0; Windows NT 5.1; SV1)");
 31             // 建立实际的连接
 32             conn.connect();
 33             // 获取所有响应头字段
 34             Map<String, List<String>> map = conn.getHeaderFields();
 35             // 遍历所有的响应头字段
 36             for (String key : map.keySet())
 37             {
 38                 System.out.println(key + "--->" + map.get(key));
 39             }
 40             try(
 41                 // 定义BufferedReader输入流来读取URL的响应
 42                 BufferedReader in = new BufferedReader(
 43                     new InputStreamReader(conn.getInputStream() , "utf-8")))
 44             {
 45                 String line;
 46                 while ((line = in.readLine())!= null)
 47                 {
 48                     result += "\n" + line;
 49                 }
 50             }
 51         }
 52         catch(Exception e)
 53         {
 54             System.out.println("发送GET请求出现异常!" + e);
 55             e.printStackTrace();
 56         }
 57         return result;
 58     }
 59     /**
 60      * 向指定URL发送POST方法的请求
 61      * @param url 发送请求的URL
 62      * @param param 请求参数,格式应该满足name1=value1&name2=value2的形式。
 63      * @return URL所代表远程资源的响应
 64      */
 65     public static String sendPost(String url , String param)
 66     {
 67         String result = "";
 68         try
 69         {
 70             URL realUrl = new URL(url);
 71             // 打开和URL之间的连接
 72             URLConnection conn = realUrl.openConnection();
 73             // 设置通用的请求属性
 74             conn.setRequestProperty("accept", "*/*");
 75             conn.setRequestProperty("connection", "Keep-Alive");
 76             conn.setRequestProperty("user-agent",
 77             "Mozilla/4.0 (compatible; MSIE 6.0; Windows NT 5.1; SV1)");
 78             // 发送POST请求必须设置如下两行
 79             conn.setDoOutput(true);
 80             conn.setDoInput(true);
 81             try(
 82                 // 获取URLConnection对象对应的输出流
 83                 PrintWriter out = new PrintWriter(conn.getOutputStream()))
 84             {
 85                 // 发送请求参数
 86                 out.print(param);
 87                 // flush输出流的缓冲
 88                 out.flush();
 89             }
 90             try(
 91                 // 定义BufferedReader输入流来读取URL的响应
 92                 BufferedReader in = new BufferedReader(new InputStreamReader
 93                     (conn.getInputStream() , "utf-8")))
 94             {
 95                 String line;
 96                 while ((line = in.readLine())!= null)
 97                 {
 98                     result += "\n" + line;
 99                 }
100             }
101         }
102         catch(Exception e)
103         {
104             System.out.println("发送POST请求出现异常!" + e);
105             e.printStackTrace();
106         }
107         return result;
108     }
109     // 提供主方法,测试发送GET请求和POST请求
110     public static void main(String args[])
111     {
112         // 发送GET请求
113         String s = GetPostTest.sendGet("http://localhost:8888/abc/a.jsp"
114             , null);
115         System.out.println(s);
116         // 发送POST请求
117         String s1 = GetPostTest.sendPost("http://localhost:8888/abc/login.jsp"
118             , "name=crazyit.org&pass=leegang");
119         System.out.println(s1);
120     }
121 }
这一部分需要创建Web应用,现在我还不会。但是会在接下来学习《轻量级Java EE企业应用实战》的时候创建Web应用。Web应用的代码我上传到GitHub网站(会在文章最后写出),是一个abc的文件夹。
基于TCP协议的网络编程:
使用ServerSocket创建TCP服务器端:
Java中能接收其他通信实体连接请求的类是ServerSocket,ServerSocket对象用于监听来自客户端的Socket连接,若没有连接,它将一直处于等待状态。ServerSocket包含
一个监听来自客户端连接请求的方法。
1.Socket accept():若接收到一个客户端Socket的连接请求,该方法返回一个与客户端Socket对应的Socket;否则该方法一直处于等待状态,线程也被阻塞
使用Socket进行通信:
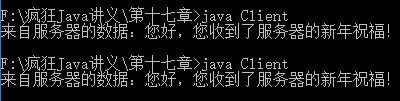
 1 import java.net.ServerSocket;
 2 import java.net.Socket;
 3 import java.io.PrintStream;
 4 import java.io.IOException;
 5
 6 public class Server
 7 {
 8     public static void main(String[] args)
 9         throws IOException
10     {
11         // 创建一个ServerSocket,用于监听客户端Socket的连接请求
12         ServerSocket ss = new ServerSocket(30000);
13         // 采用循环不断接受来自客户端的请求
14         while (true)
15         {
16             // 每当接受到客户端Socket的请求,服务器端也对应产生一个Socket
17             Socket s = ss.accept();
18             // 将Socket对应的输出流包装成PrintStream
19             PrintStream ps = new PrintStream(s.getOutputStream());
20             // 进行普通IO操作
21             ps.println("您好,您收到了服务器的新年祝福!");
22             // 关闭输出流,关闭Socket
23             ps.close();
24             s.close();
25         }
26     }
27 }
 1 import java.net.Socket;
 2 import java.io.BufferedReader;
 3 import java.io.InputStreamReader;
 4 import java.io.IOException;
 5
 6 public class Client
 7 {
 8     public static void main(String[] args)
 9         throws IOException
10     {
11         Socket socket = new Socket("127.0.0.1" , 30000);   // ①
12         // 将Socket对应的输入流包装成BufferedReader
13         BufferedReader br = new BufferedReader(
14         new InputStreamReader(socket.getInputStream()));
15         // 进行普通IO操作
16         String line = br.readLine();
17         System.out.println("来自服务器的数据:" + line);
18         // 关闭输入流、socket
19         br.close();
20         socket.close();
21     }
22 }
在Windows系统下分别用两个cmd,一个运行Server端,一个运行Client端,先运行Server端:

加入多线程:
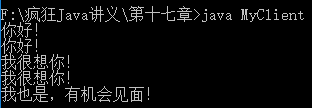
 1 import java.net.Socket;
 2 import java.net.ServerSocket;
 3 import java.io.IOException;
 4 import java.util.ArrayList;
 5 import java.util.Collections;
 6 import java.util.List;
 7
 8 public class MyServer
 9 {
10     // 定义保存所有Socket的ArrayList,并将其包装为线程安全的
11     public static List<Socket> socketList
12         = Collections.synchronizedList(new ArrayList<>());
13     public static void main(String[] args)
14         throws IOException
15     {
16         ServerSocket ss = new ServerSocket(30000);
17         while(true)
18         {
19             // 此行代码会阻塞,将一直等待别人的连接
20             Socket s = ss.accept();
21             socketList.add(s);
22             // 每当客户端连接后启动一条ServerThread线程为该客户端服务
23             new Thread(new ServerThread(s)).start();
24         }
25     }
26 }
 1 import java.io.BufferedReader;
 2 import java.io.InputStreamReader;
 3 import java.io.IOException;
 4 import java.io.PrintStream;
 5 import java.net.Socket;
 6
 7 // 负责处理每个线程通信的线程类
 8 public class ServerThread implements Runnable
 9 {
10     // 定义当前线程所处理的Socket
11     Socket s = null;
12     // 该线程所处理的Socket所对应的输入流
13     BufferedReader br = null;
14     public ServerThread(Socket s)
15     throws IOException
16     {
17         this.s = s;
18         // 初始化该Socket对应的输入流
19         br = new BufferedReader(new InputStreamReader(s.getInputStream()));
20     }
21     public void run()
22     {
23         try
24         {
25             String content = null;
26             // 采用循环不断从Socket中读取客户端发送过来的数据
27             while ((content = readFromClient()) != null)
28             {
29                 // 遍历socketList中的每个Socket,
30                 // 将读到的内容向每个Socket发送一次
31                 for (Socket s : MyServer.socketList)
32                 {
33                     PrintStream ps = new PrintStream(s.getOutputStream());
34                     ps.println(content);
35                 }
36             }
37         }
38         catch (IOException e)
39         {
40             e.printStackTrace();
41         }
42     }
43     // 定义读取客户端数据的方法
44     private String readFromClient()
45     {
46         try
47         {
48             return br.readLine();
49         }
50         // 如果捕捉到异常,表明该Socket对应的客户端已经关闭
51         catch (IOException e)
52         {
53             // 删除该Socket。
54             MyServer.socketList.remove(s);      // ①
55         }
56         return null;
57     }
58 }
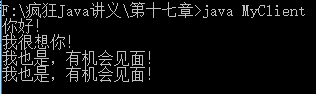
 1 import java.io.PrintStream;
 2 import java.io.BufferedReader;
 3 import java.io.InputStreamReader;
 4 import java.net.Socket;
 5
 6 public class MyClient
 7 {
 8     public static void main(String[] args)throws Exception
 9     {
10         Socket s = new Socket("127.0.0.1" , 30000);
11         // 客户端启动ClientThread线程不断读取来自服务器的数据
12         new Thread(new ClientThread(s)).start();   // ①
13         // 获取该Socket对应的输出流
14         PrintStream ps = new PrintStream(s.getOutputStream());
15         String line = null;
16         // 不断读取键盘输入
17         BufferedReader br = new BufferedReader(
18             new InputStreamReader(System.in));
19         while ((line = br.readLine()) != null)
20         {
21             // 将用户的键盘输入内容写入Socket对应的输出流
22             ps.println(line);
23         }
24     }
25 }
 1 import java.io.IOException;
 2 import java.io.BufferedReader;
 3 import java.io.InputStreamReader;
 4 import java.net.Socket;
 5
 6 public class ClientThread implements Runnable
 7 {
 8     // 该线程负责处理的Socket
 9     private Socket s;
10     // 该线程所处理的Socket所对应的输入流
11     BufferedReader br = null;
12     public ClientThread(Socket s)
13         throws IOException
14     {
15         this.s = s;
16         br = new BufferedReader(
17             new InputStreamReader(s.getInputStream()));
18     }
19     public void run()
20     {
21         try
22         {
23             String content = null;
24             // 不断读取Socket输入流中的内容,并将这些内容打印输出
25             while ((content = br.readLine()) != null)
26             {
27                 System.out.println(content);
28             }
29         }
30         catch (Exception e)
31         {
32             e.printStackTrace();
33         }
34     }
35 }
上面程序ServerSocket服务端MyServer创建了两个线程主线程用来接收每个客户端发送的Socket请求,ServerThread线程用来向每个客户端发送客户端发送的信息
Socket客户端MyClient创建了两个线程主线程用来接收用户键盘输入,ClientThread线程用来接收服务端发送的信息。

记录用户信息:
上面程序的每个客户端不知道显示的每条信息都是谁的。这是因为服务端没有记录用户信息,当客户端使用Socket连接到服务器端后,程序只是使用socketList集合保存了服
务器端对应生成的Socket,并没有保存该Socket关联的用户信息。
 1 import java.net.ServerSocket;
 2 import java.net.Socket;
 3 import java.io.IOException;
 4 import java.io.PrintStream;
 5
 6 public class Server
 7 {
 8     private static final int SERVER_PORT = 30000;
 9     // 使用CrazyitMap对象来保存每个客户名字和对应输出流之间的对应关系。
10     public static CrazyitMap<String , PrintStream> clients
11         = new CrazyitMap<>();
12     public void init()
13     {
14         try(
15             // 建立监听的ServerSocket
16             ServerSocket ss = new ServerSocket(SERVER_PORT))
17         {
18             // 采用死循环来不断接受来自客户端的请求
19             while(true)
20             {
21                 Socket socket = ss.accept();
22                 new ServerThread(socket).start();
23             }
24         }
25         // 如果抛出异常
26         catch (IOException ex)
27         {
28             System.out.println("服务器启动失败,是否端口"
29                 + SERVER_PORT + "已被占用?");
30         }
31     }
32     public static void main(String[] args)
33     {
34         Server server = new Server();
35         server.init();
36     }
37 }
  1 import java.net.Socket;
  2 import java.io.BufferedReader;
  3 import java.io.PrintStream;
  4 import java.io.InputStreamReader;
  5 import java.io.IOException;
  6
  7 public class ServerThread extends Thread
  8 {
  9     private Socket socket;
 10     BufferedReader br = null;
 11     PrintStream ps = null;
 12     // 定义一个构造器,用于接收一个Socket来创建ServerThread线程
 13     public ServerThread(Socket socket)
 14     {
 15         this.socket = socket;
 16     }
 17     public void run()
 18     {
 19         try
 20         {
 21             // 获取该Socket对应的输入流
 22             br = new BufferedReader(new InputStreamReader(socket
 23                 .getInputStream()));
 24             // 获取该Socket对应的输出流
 25             ps = new PrintStream(socket.getOutputStream());
 26             String line = null;
 27             while((line = br.readLine())!= null)
 28             {
 29                 // 如果读到的行以CrazyitProtocol.USER_ROUND开始,并以其结束,
 30                 // 可以确定读到的是用户登录的用户名
 31                 if (line.startsWith(CrazyitProtocol.USER_ROUND)
 32                     && line.endsWith(CrazyitProtocol.USER_ROUND))
 33                 {
 34                     // 得到真实消息
 35                     String userName = getRealMsg(line);
 36                     // 如果用户名重复
 37                     if (Server.clients.map.containsKey(userName))
 38                     {
 39                         System.out.println("重复");
 40                         ps.println(CrazyitProtocol.NAME_REP);
 41                     }
 42                     else
 43                     {
 44                         System.out.println("成功");
 45                         ps.println(CrazyitProtocol.LOGIN_SUCCESS);
 46                         Server.clients.put(userName , ps);
 47                     }
 48                 }
 49                 // 如果读到的行以CrazyitProtocol.PRIVATE_ROUND开始,并以其结束,
 50                 // 可以确定是私聊信息,私聊信息只向特定的输出流发送
 51                 else if (line.startsWith(CrazyitProtocol.PRIVATE_ROUND)
 52                     && line.endsWith(CrazyitProtocol.PRIVATE_ROUND))
 53                 {
 54                     // 得到真实消息
 55                     String userAndMsg = getRealMsg(line);
 56                     // 以SPLIT_SIGN分割字符串,前半是私聊用户,后半是聊天信息
 57                     String user = userAndMsg.split(CrazyitProtocol.SPLIT_SIGN)[0];
 58                     String msg = userAndMsg.split(CrazyitProtocol.SPLIT_SIGN)[1];
 59                     // 获取私聊用户对应的输出流,并发送私聊信息
 60                     Server.clients.map.get(user).println(Server.clients
 61                         .getKeyByValue(ps) + "悄悄地对你说:" + msg);
 62                 }
 63                 // 公聊要向每个Socket发送
 64                 else
 65                 {
 66                     // 得到真实消息
 67                     String msg = getRealMsg(line);
 68                     // 遍历clients中的每个输出流
 69                     for (PrintStream clientPs : Server.clients.valueSet())
 70                     {
 71                         clientPs.println(Server.clients.getKeyByValue(ps)
 72                             + "说:" + msg);
 73                     }
 74                 }
 75             }
 76         }
 77         // 捕捉到异常后,表明该Socket对应的客户端已经出现了问题
 78         // 所以程序将其对应的输出流从Map中删除
 79         catch (IOException e)
 80         {
 81             Server.clients.removeByValue(ps);
 82             System.out.println(Server.clients.map.size());
 83             // 关闭网络、IO资源
 84             try
 85             {
 86                 if (br != null)
 87                 {
 88                     br.close();
 89                 }
 90                 if (ps != null)
 91                 {
 92                     ps.close();
 93                 }
 94                 if (socket != null)
 95                 {
 96                     socket.close();
 97                 }
 98             }
 99             catch (IOException ex)
100             {
101                 ex.printStackTrace();
102             }
103         }
104     }
105     // 将读到的内容去掉前后的协议字符,恢复成真实数据
106     private String getRealMsg(String line)
107     {
108         return line.substring(CrazyitProtocol.PROTOCOL_LEN
109             , line.length() - CrazyitProtocol.PROTOCOL_LEN);
110     }
111 }
 1 import java.util.Collections;
 2 import java.util.Map;
 3 import java.util.HashMap;
 4 import java.util.HashSet;
 5 import java.util.Set;
 6
 7 // 通过组合HashMap对象来实现CrazyitMap,CrazyitMap要求value也不可重复
 8 public class CrazyitMap<K,V>
 9 {
10     // 创建一个线程安全的HashMap
11     public Map<K ,V> map = Collections.synchronizedMap(new HashMap<K,V>());
12     // 根据value来删除指定项
13     public synchronized void removeByValue(Object value)
14     {
15         for (Object key : map.keySet())
16         {
17             if (map.get(key) == value)
18             {
19                 map.remove(key);
20                 break;
21             }
22         }
23     }
24     // 获取所有value组成的Set集合
25     public synchronized Set<V> valueSet()
26     {
27         Set<V> result = new HashSet<V>();
28         // 将map中所有value添加到result集合中
29         map.forEach((key , value) -> result.add(value));
30         return result;
31     }
32     // 根据value查找key。
33     public synchronized K getKeyByValue(V val)
34     {
35         // 遍历所有key组成的集合
36         for (K key : map.keySet())
37         {
38             // 如果指定key对应的value与被搜索的value相同,则返回对应的key
39             if (map.get(key) == val || map.get(key).equals(val))
40             {
41                 return key;
42             }
43         }
44         return null;
45     }
46     // 实现put()方法,该方法不允许value重复
47     public synchronized V put(K key,V value)
48     {
49         // 遍历所有value组成的集合
50         for (V val : valueSet() )
51         {
52             // 如果某个value与试图放入集合的value相同
53             // 则抛出一个RuntimeException异常
54             if (val.equals(value)
55                 && val.hashCode()== value.hashCode())
56             {
57                 throw new RuntimeException("MyMap实例中不允许有重复value!");
58             }
59         }
60         return map.put(key , value);
61     }
62 }
 1 public interface CrazyitProtocol
 2 {
 3     // 定义协议字符串的长度
 4     int PROTOCOL_LEN = 2;
 5     // 下面是一些协议字符串,服务器和客户端交换的信息
 6     // 都应该在前、后添加这种特殊字符串。
 7     String MSG_ROUND = "§γ";
 8     String USER_ROUND = "∏∑";
 9     String LOGIN_SUCCESS = "1";
10     String NAME_REP = "-1";
11     String PRIVATE_ROUND = "★【";
12     String SPLIT_SIGN = "※";
13 }
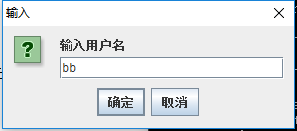
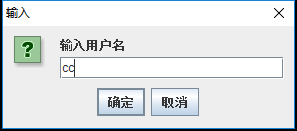
  1 import java.net.Socket;
  2 import java.net.UnknownHostException;
  3 import java.io.BufferedReader;
  4 import java.io.InputStreamReader;
  5 import java.io.PrintStream;
  6 import java.io.IOException;
  7 import javax.swing.JOptionPane;
  8
  9 public class Client
 10 {
 11     private static final int SERVER_PORT = 30000;
 12     private Socket socket;
 13     private PrintStream ps;
 14     private BufferedReader brServer;
 15     private BufferedReader keyIn;
 16     public void init()
 17     {
 18         try
 19         {
 20             // 初始化代表键盘的输入流
 21             keyIn = new BufferedReader(
 22                 new InputStreamReader(System.in));
 23             // 连接到服务器
 24             socket = new Socket("127.0.0.1", SERVER_PORT);
 25             // 获取该Socket对应的输入流和输出流
 26             ps = new PrintStream(socket.getOutputStream());
 27             brServer = new BufferedReader(
 28                 new InputStreamReader(socket.getInputStream()));
 29             String tip = "";
 30             // 采用循环不断地弹出对话框要求输入用户名
 31             while(true)
 32             {
 33                 String userName = JOptionPane.showInputDialog(tip
 34                     + "输入用户名");    //①
 35                 // 将用户输入的用户名的前后增加协议字符串后发送
 36                 ps.println(CrazyitProtocol.USER_ROUND + userName
 37                     + CrazyitProtocol.USER_ROUND);
 38                 // 读取服务器的响应
 39                 String result = brServer.readLine();
 40                 // 如果用户重复,开始下次循环
 41                 if (result.equals(CrazyitProtocol.NAME_REP))
 42                 {
 43                     tip = "用户名重复!请重新";
 44                     continue;
 45                 }
 46                 // 如果服务器返回登录成功,结束循环
 47                 if (result.equals(CrazyitProtocol.LOGIN_SUCCESS))
 48                 {
 49                     break;
 50                 }
 51             }
 52         }
 53         // 捕捉到异常,关闭网络资源,并退出该程序
 54         catch (UnknownHostException ex)
 55         {
 56             System.out.println("找不到远程服务器,请确定服务器已经启动!");
 57             closeRs();
 58             System.exit(1);
 59         }
 60         catch (IOException ex)
 61         {
 62             System.out.println("网络异常!请重新登录!");
 63             closeRs();
 64             System.exit(1);
 65         }
 66         // 以该Socket对应的输入流启动ClientThread线程
 67         new ClientThread(brServer).start();
 68     }
 69     // 定义一个读取键盘输出,并向网络发送的方法
 70     private void readAndSend()
 71     {
 72         try
 73         {
 74             // 不断读取键盘输入
 75             String line = null;
 76             while((line = keyIn.readLine()) != null)
 77             {
 78                 // 如果发送的信息中有冒号,且以//开头,则认为想发送私聊信息
 79                 if (line.indexOf(":") > 0 && line.startsWith("//"))
 80                 {
 81                     line = line.substring(2);
 82                     ps.println(CrazyitProtocol.PRIVATE_ROUND +
 83                     line.split(":")[0] + CrazyitProtocol.SPLIT_SIGN
 84                         + line.split(":")[1] + CrazyitProtocol.PRIVATE_ROUND);
 85                 }
 86                 else
 87                 {
 88                     ps.println(CrazyitProtocol.MSG_ROUND + line
 89                         + CrazyitProtocol.MSG_ROUND);
 90                 }
 91             }
 92         }
 93         // 捕捉到异常,关闭网络资源,并退出该程序
 94         catch (IOException ex)
 95         {
 96             System.out.println("网络通信异常!请重新登录!");
 97             closeRs();
 98             System.exit(1);
 99         }
100     }
101     // 关闭Socket、输入流、输出流的方法
102     private void closeRs()
103     {
104         try
105         {
106             if (keyIn != null)
107             {
108                 ps.close();
109             }
110             if (brServer != null)
111             {
112                 ps.close();
113             }
114             if (ps != null)
115             {
116                 ps.close();
117             }
118             if (socket != null)
119             {
120                 keyIn.close();
121             }
122         }
123         catch (IOException ex)
124         {
125             ex.printStackTrace();
126         }
127     }
128     public static void main(String[] args)
129     {
130         Client client = new Client();
131         client.init();
132         client.readAndSend();
133     }
134 }
 1 import java.io.BufferedReader;
 2 import java.io.IOException;
 3
 4 public class ClientThread extends Thread
 5 {
 6     // 该客户端线程负责处理的输入流
 7     BufferedReader br = null;
 8     // 使用一个网络输入流来创建客户端线程
 9     public ClientThread(BufferedReader br)
10     {
11         this.br = br;
12     }
13     public void run()
14     {
15         try
16         {
17             String line = null;
18             // 不断从输入流中读取数据,并将这些数据打印输出
19             while((line = br.readLine())!= null)
20             {
21                 System.out.println(line);
22                 /*
23                 本例仅打印了从服务器端读到的内容。实际上,此处的情况可以更复杂:
24                 如果希望客户端能看到聊天室的用户列表,则可以让服务器在
25                 每次有用户登录、用户退出时,将所有用户列表信息都向客户端发送一遍。
26                 为了区分服务器发送的是聊天信息,还是用户列表,服务器也应该
27                 在要发送的信息前、后都添加一定的协议字符串,客户端此处则根据协议
28                 字符串的不同而进行不同的处理!
29                 更复杂的情况:
30                 如果两端进行游戏,则还有可能发送游戏信息,例如两端进行五子棋游戏,
31                 则还需要发送下棋坐标信息等,服务器同样在这些下棋坐标信息前、后
32                 添加协议字符串后再发送,客户端就可以根据该信息知道对手的下棋坐标。
33                 */
34             }
35         }
36         catch (IOException ex)
37         {
38             ex.printStackTrace();
39         }
40         // 使用finally块来关闭该线程对应的输入流
41         finally
42         {
43             try
44             {
45                 if (br != null)
46                 {
47                     br.close();
48                 }
49             }
50             catch (IOException ex)
51             {
52                 ex.printStackTrace();
53             }
54         }
55     }
56 }


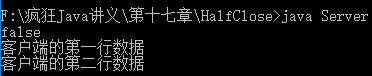
半关闭的Socket:
Socket提供如下两个半关闭方法,只关闭Socket的输入流或输出流,用来表示输出数据已经发送完成
1.shutdownInput():关闭该Socket的输入流,程序还可以通过该Socket的输出流输出数据
2.shutdownOutput():关闭该Socket的输出流,程序还可以通过该Socket的输入流读取数据
即使同一个Socket实例先后调用shutdownInput()、shutdownOutput()方法,该Socket实例依然没有关闭,只是Socket既不能输出数据,也不能读取数据而已。
 1 import java.io.PrintStream;
 2 import java.net.Socket;
 3 import java.net.ServerSocket;
 4 import java.util.Scanner;
 5
 6 public class Server
 7 {
 8     public static void main(String[] args)
 9         throws Exception
10     {
11         ServerSocket ss = new ServerSocket(30000);
12         Socket socket = ss.accept();
13         PrintStream ps = new PrintStream(socket.getOutputStream());
14         ps.println("服务器的第一行数据");
15         ps.println("服务器的第二行数据");
16         // 关闭socket的输出流,表明输出数据已经结束
17         socket.shutdownOutput();
18         // 下面语句将输出false,表明socket还未关闭。
19         System.out.println(socket.isClosed());
20         Scanner scan = new Scanner(socket.getInputStream());
21         while (scan.hasNextLine())
22         {
23             System.out.println(scan.nextLine());
24         }
25         scan.close();
26         socket.close();
27         ss.close();
28     }
29 }
 1 import java.io.PrintStream;
 2 import java.net.Socket;
 3 import java.util.Scanner;
 4
 5 public class Client
 6 {
 7     public static void main(String[] args)
 8         throws Exception
 9     {
10         Socket s = new Socket("localhost" , 30000);
11         Scanner scan = new Scanner(s.getInputStream());
12         while (scan.hasNextLine())
13         {
14             System.out.println(scan.nextLine());
15         }
16         PrintStream ps = new PrintStream(s.getOutputStream());
17         ps.println("客户端的第一行数据");
18         ps.println("客户端的第二行数据");
19         ps.close();
20         scan.close();
21         s.close();
22     }
23 }

使用NIO实现非阻塞Socket通信:
  1 import java.net.*;
  2 import java.io.*;
  3 import java.nio.*;
  4 import java.nio.channels.*;
  5 import java.nio.charset.*;
  6
  7 public class NServer
  8 {
  9     // 用于检测所有Channel状态的Selector
 10     private Selector selector = null;
 11     static final int PORT = 30000;
 12     // 定义实现编码、解码的字符集对象
 13     private Charset charset = Charset.forName("UTF-8");
 14     public void init()throws IOException
 15     {
 16         selector = Selector.open();
 17         // 通过open方法来打开一个未绑定的ServerSocketChannel实例
 18         ServerSocketChannel server = ServerSocketChannel.open();
 19         InetSocketAddress isa = new InetSocketAddress("127.0.0.1", PORT);
 20         // 将该ServerSocketChannel绑定到指定IP地址
 21         server.bind(isa);
 22         // 设置ServerSocket以非阻塞方式工作
 23         server.configureBlocking(false);
 24         // 将server注册到指定Selector对象
 25         server.register(selector, SelectionKey.OP_ACCEPT);
 26         while (selector.select() > 0)
 27         {
 28             // 依次处理selector上的每个已选择的SelectionKey
 29             for (SelectionKey sk : selector.selectedKeys())
 30             {
 31                 // 从selector上的已选择Key集中删除正在处理的SelectionKey
 32                 selector.selectedKeys().remove(sk);      // ①
 33                 // 如果sk对应的Channel包含客户端的连接请求
 34                 if (sk.isAcceptable())        // ②
 35                 {
 36                     // 调用accept方法接受连接,产生服务器端的SocketChannel
 37                     SocketChannel sc = server.accept();
 38                     // 设置采用非阻塞模式
 39                     sc.configureBlocking(false);
 40                     // 将该SocketChannel也注册到selector
 41                     sc.register(selector, SelectionKey.OP_READ);
 42                     // 将sk对应的Channel设置成准备接受其他请求
 43                     sk.interestOps(SelectionKey.OP_ACCEPT);
 44                 }
 45                 // 如果sk对应的Channel有数据需要读取
 46                 if (sk.isReadable())     // ③
 47                 {
 48                     // 获取该SelectionKey对应的Channel,该Channel中有可读的数据
 49                     SocketChannel sc = (SocketChannel)sk.channel();
 50                     // 定义准备执行读取数据的ByteBuffer
 51                     ByteBuffer buff = ByteBuffer.allocate(1024);
 52                     String content = "";
 53                     // 开始读取数据
 54                     try
 55                     {
 56                         while(sc.read(buff) > 0)
 57                         {
 58                             buff.flip();
 59                             content += charset.decode(buff);
 60                         }
 61                         // 打印从该sk对应的Channel里读取到的数据
 62                         System.out.println("读取的数据:" + content);
 63                         // 将sk对应的Channel设置成准备下一次读取
 64                         sk.interestOps(SelectionKey.OP_READ);
 65                     }
 66                     // 如果捕捉到该sk对应的Channel出现了异常,即表明该Channel
 67                     // 对应的Client出现了问题,所以从Selector中取消sk的注册
 68                     catch (IOException ex)
 69                     {
 70                         // 从Selector中删除指定的SelectionKey
 71                         sk.cancel();
 72                         if (sk.channel() != null)
 73                         {
 74                             sk.channel().close();
 75                         }
 76                     }
 77                     // 如果content的长度大于0,即聊天信息不为空
 78                     if (content.length() > 0)
 79                     {
 80                         // 遍历该selector里注册的所有SelectionKey
 81                         for (SelectionKey key : selector.keys())
 82                         {
 83                             // 获取该key对应的Channel
 84                             Channel targetChannel = key.channel();
 85                             // 如果该channel是SocketChannel对象
 86                             if (targetChannel instanceof SocketChannel)
 87                             {
 88                                 // 将读到的内容写入该Channel中
 89                                 SocketChannel dest = (SocketChannel)targetChannel;
 90                                 dest.write(charset.encode(content));
 91                             }
 92                         }
 93                     }
 94                 }
 95             }
 96         }
 97     }
 98     public static void main(String[] args)
 99         throws IOException
100     {
101         new NServer().init();
102     }
103 }
 1 import java.util.*;
 2 import java.net.*;
 3 import java.io.*;
 4 import java.nio.*;
 5 import java.nio.channels.*;
 6 import java.nio.charset.*;
 7
 8 public class NClient
 9 {
10     // 定义检测SocketChannel的Selector对象
11     private Selector selector = null;
12     static final int PORT = 30000;
13     // 定义处理编码和解码的字符集
14     private Charset charset = Charset.forName("UTF-8");
15     // 客户端SocketChannel
16     private SocketChannel sc = null;
17     public void init()throws IOException
18     {
19         selector = Selector.open();
20         InetSocketAddress isa = new InetSocketAddress("127.0.0.1", PORT);
21         // 调用open静态方法创建连接到指定主机的SocketChannel
22         sc = SocketChannel.open(isa);
23         // 设置该sc以非阻塞方式工作
24         sc.configureBlocking(false);
25         // 将SocketChannel对象注册到指定Selector
26         sc.register(selector, SelectionKey.OP_READ);
27         // 启动读取服务器端数据的线程
28         new ClientThread().start();
29         // 创建键盘输入流
30         Scanner scan = new Scanner(System.in);
31         while (scan.hasNextLine())
32         {
33             // 读取键盘输入
34             String line = scan.nextLine();
35             // 将键盘输入的内容输出到SocketChannel中
36             sc.write(charset.encode(line));
37         }
38     }
39     // 定义读取服务器数据的线程
40     private class ClientThread extends Thread
41     {
42         public void run()
43         {
44             try
45             {
46                 while (selector.select() > 0)    // ①
47                 {
48                     // 遍历每个有可用IO操作Channel对应的SelectionKey
49                     for (SelectionKey sk : selector.selectedKeys())
50                     {
51                         // 删除正在处理的SelectionKey
52                         selector.selectedKeys().remove(sk);
53                         // 如果该SelectionKey对应的Channel中有可读的数据
54                         if (sk.isReadable())
55                         {
56                             // 使用NIO读取Channel中的数据
57                             SocketChannel sc = (SocketChannel)sk.channel();
58                             ByteBuffer buff = ByteBuffer.allocate(1024);
59                             String content = "";
60                             while(sc.read(buff) > 0)
61                             {
62                                 sc.read(buff);
63                                 buff.flip();
64                                 content += charset.decode(buff);
65                             }
66                             // 打印输出读取的内容
67                             System.out.println("聊天信息:" + content);
68                             // 为下一次读取作准备
69                             sk.interestOps(SelectionKey.OP_READ);
70                         }
71                     }
72                 }
73             }
74             catch (IOException ex)
75             {
76                 ex.printStackTrace();
77             }
78         }
79     }
80     public static void main(String[] args)
81         throws IOException
82     {
83         new NClient().init();
84     }
85 }


上面这段程序不太好理解,可以参考结果和注释。一定要吃透。
使用Java7的AIO实现非阻塞通信:
 1 import java.nio.channels.AsynchronousServerSocketChannel;
 2 import java.nio.channels.AsynchronousSocketChannel;
 3 import java.net.InetSocketAddress;
 4 import java.util.concurrent.Future;
 5 import java.nio.ByteBuffer;
 6
 7
 8 public class SimpleAIOServer{
 9     static final int PORT = 30000;
10     public static void main(String[] args) throws Exception{
11         try(
12             //创建AsynchronousServerSocketChannel对象
13             AsynchronousServerSocketChannel serverChannel = AsynchronousServerSocketChannel.open()
14         ){
15             //指定在指定地址、端口监听
16             serverChannel.bind(new InetSocketAddress(PORT));
17             while(true){
18                 //采用循环接受来自客户端的连接
19                 Future<AsynchronousSocketChannel> future = serverChannel.accept();
20                 //获取连接完成后返回的AsynchronousSocketChannel
21                 AsynchronousSocketChannel socketChannel = future.get();
22                 //执行输出
23                 socketChannel.write(ByteBuffer.wrap("欢迎你来到AIO的世界!".getBytes("UTF-8"))).get();
24             }
25         }
26     }
27 }
 1 import java.nio.channels.AsynchronousSocketChannel;
 2 import java.nio.charset.Charset;
 3 import java.net.InetSocketAddress;
 4 import java.util.concurrent.Future;
 5 import java.nio.ByteBuffer;
 6
 7 public class SimpleAIOClient{
 8     static final int PORT = 30000;
 9     public static void main(String[] args) throws Exception{
10         //用于读取数据的ByteBuffer
11         ByteBuffer buff = ByteBuffer.allocate(1024);
12         Charset utf = Charset.forName("utf-8");
13         try(
14             //创建AsynchronousSocketChannel对象
15             AsynchronousSocketChannel clientChannel = AsynchronousSocketChannel.open()
16         ){
17             //连接远程服务器
18             clientChannel.connect(new InetSocketAddress("127.0.0.1", PORT)).get();
19             buff.clear();
20             //从clientChannel中读取数据
21             clientChannel.read(buff).get();
22             buff.flip();
23             //将buff中的内容转换为字符串
24             String content = utf.decode(buff).toString();
25             System.out.println("服务器信息:" + content);
26         }
27     }
28 }


  1 import java.net.*;
  2 import java.io.*;
  3 import java.util.*;
  4 import java.nio.*;
  5 import java.nio.channels.*;
  6 import java.nio.charset.*;
  7 import java.util.concurrent.*;
  8
  9 public class AIOServer
 10 {
 11     static final int PORT = 30000;
 12     final static String UTF_8 = "utf-8";
 13     static List<AsynchronousSocketChannel> channelList
 14         = new ArrayList<>();
 15     public void startListen() throws InterruptedException,
 16         Exception
 17     {
 18         // 创建一个线程池
 19         ExecutorService executor = Executors.newFixedThreadPool(20);
 20         // 以指定线程池来创建一个AsynchronousChannelGroup
 21         AsynchronousChannelGroup channelGroup = AsynchronousChannelGroup
 22             .withThreadPool(executor);
 23         // 以指定线程池来创建一个AsynchronousServerSocketChannel
 24         AsynchronousServerSocketChannel serverChannel
 25             = AsynchronousServerSocketChannel.open(channelGroup)
 26             // 指定监听本机的PORT端口
 27             .bind(new InetSocketAddress(PORT));
 28         // 使用CompletionHandler接受来自客户端的连接请求
 29         serverChannel.accept(null, new AcceptHandler(serverChannel));  // ①
 30         Thread.sleep(5000);
 31     }
 32     public static void main(String[] args)
 33         throws Exception
 34     {
 35         AIOServer server = new AIOServer();
 36         server.startListen();
 37     }
 38 }
 39 // 实现自己的CompletionHandler类
 40 class AcceptHandler implements
 41     CompletionHandler<AsynchronousSocketChannel, Object>
 42 {
 43     private AsynchronousServerSocketChannel serverChannel;
 44     public AcceptHandler(AsynchronousServerSocketChannel sc)
 45     {
 46         this.serverChannel = sc;
 47     }
 48     // 定义一个ByteBuffer准备读取数据
 49     ByteBuffer buff = ByteBuffer.allocate(1024);
 50     // 当实际IO操作完成时候触发该方法
 51     @Override
 52     public void completed(final AsynchronousSocketChannel sc
 53         , Object attachment)
 54     {
 55         // 记录新连接的进来的Channel
 56         AIOServer.channelList.add(sc);
 57         // 准备接受客户端的下一次连接
 58         serverChannel.accept(null , this);
 59         sc.read(buff , null
 60             , new CompletionHandler<Integer,Object>()  // ②
 61         {
 62             @Override
 63             public void completed(Integer result
 64                 , Object attachment)
 65             {
 66                 buff.flip();
 67                 // 将buff中内容转换为字符串
 68                 String content = StandardCharsets.UTF_8
 69                     .decode(buff).toString();
 70                 // 遍历每个Channel,将收到的信息写入各Channel中
 71                 for(AsynchronousSocketChannel c : AIOServer.channelList)
 72                 {
 73                     try
 74                     {
 75                         c.write(ByteBuffer.wrap(content.getBytes(
 76                             AIOServer.UTF_8))).get();
 77                     }
 78                     catch (Exception ex)
 79                     {
 80                         ex.printStackTrace();
 81                     }
 82                 }
 83                 buff.clear();
 84                 // 读取下一次数据
 85                 sc.read(buff , null , this);
 86             }
 87             @Override
 88             public void failed(Throwable ex, Object attachment)
 89             {
 90                 System.out.println("读取数据失败: " + ex);
 91                 // 从该Channel读取数据失败,就将该Channel删除
 92                 AIOServer.channelList.remove(sc);
 93             }
 94         });
 95     }
 96     @Override
 97     public void failed(Throwable ex, Object attachment)
 98     {
 99         System.out.println("连接失败: " + ex);
100     }
101 }
  1 import java.awt.*;
  2 import java.awt.event.*;
  3 import javax.swing.*;
  4 import java.net.*;
  5 import java.nio.*;
  6 import java.nio.channels.*;
  7 import java.nio.charset.*;
  8 import java.util.concurrent.*;
  9
 10 public class AIOClient
 11 {
 12     final static String UTF_8 = "utf-8";
 13     final static int PORT = 30000;
 14     // 与服务器端通信的异步Channel
 15     AsynchronousSocketChannel clientChannel;
 16     JFrame mainWin = new JFrame("多人聊天");
 17     JTextArea jta = new JTextArea(16 , 48);
 18     JTextField jtf = new JTextField(40);
 19     JButton sendBn = new JButton("发送");
 20     public void init()
 21     {
 22         mainWin.setLayout(new BorderLayout());
 23         jta.setEditable(false);
 24         mainWin.add(new JScrollPane(jta), BorderLayout.CENTER);
 25         JPanel jp = new JPanel();
 26         jp.add(jtf);
 27         jp.add(sendBn);
 28         // 发送消息的Action,Action是ActionListener的子接口
 29         Action sendAction = new AbstractAction()
 30         {
 31             public void actionPerformed(ActionEvent e)
 32             {
 33                 String content = jtf.getText();
 34                 if (content.trim().length() > 0)
 35                 {
 36                     try
 37                     {
 38                         // 将content内容写入Channel中
 39                         clientChannel.write(ByteBuffer.wrap(content
 40                             .trim().getBytes(UTF_8))).get();    //①
 41                     }
 42                     catch (Exception ex)
 43                     {
 44                         ex.printStackTrace();
 45                     }
 46                 }
 47                 // 清空输入框
 48                 jtf.setText("");
 49             }
 50         };
 51         sendBn.addActionListener(sendAction);
 52         // 将Ctrl+Enter键和"send"关联
 53         jtf.getInputMap().put(KeyStroke.getKeyStroke('\n'
 54             , java.awt.event.InputEvent.CTRL_MASK) , "send");
 55         // 将"send"和sendAction关联
 56         jtf.getActionMap().put("send", sendAction);
 57         mainWin.setDefaultCloseOperation(JFrame.EXIT_ON_CLOSE);
 58         mainWin.add(jp , BorderLayout.SOUTH);
 59         mainWin.pack();
 60         mainWin.setVisible(true);
 61     }
 62     public void connect()
 63         throws Exception
 64     {
 65         // 定义一个ByteBuffer准备读取数据
 66         final ByteBuffer buff = ByteBuffer.allocate(1024);
 67         // 创建一个线程池
 68         ExecutorService executor = Executors.newFixedThreadPool(80);
 69         // 以指定线程池来创建一个AsynchronousChannelGroup
 70         AsynchronousChannelGroup channelGroup =
 71             AsynchronousChannelGroup.withThreadPool(executor);
 72         // 以channelGroup作为组管理器来创建AsynchronousSocketChannel
 73         clientChannel = AsynchronousSocketChannel.open(channelGroup);
 74         // 让AsynchronousSocketChannel连接到指定IP、指定端口
 75         clientChannel.connect(new InetSocketAddress("127.0.0.1"
 76             , PORT)).get();
 77         jta.append("---与服务器连接成功---\n");
 78         buff.clear();
 79         clientChannel.read(buff, null
 80             , new CompletionHandler<Integer,Object>()   //②
 81         {
 82             @Override
 83             public void completed(Integer result, Object attachment)
 84             {
 85                 buff.flip();
 86                 // 将buff中内容转换为字符串
 87                 String content = StandardCharsets.UTF_8
 88                     .decode(buff).toString();
 89                 // 显示从服务器端读取的数据
 90                 jta.append("某人说:" + content + "\n");
 91                 buff.clear();
 92                 clientChannel.read(buff , null , this);
 93             }
 94             @Override
 95             public void failed(Throwable ex, Object attachment)
 96             {
 97                 System.out.println("读取数据失败: " + ex);
 98             }
 99         });
100     }
101     public static void main(String[] args)
102         throws Exception
103     {
104         AIOClient client = new AIOClient();
105         client.init();
106         client.connect();
107     }
108 }


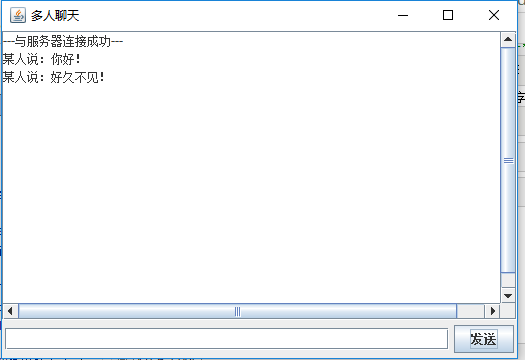
这里运行先运行AIOServer.java代码的时候,过5S后会自动关闭,因为程序中有Thread.sleep(5000);这么一行代码导致的。
基于UDP协议的网络编程:
UDP是一种不可靠的网络协议,它在通信实例的两端各建立一个Socket,但这两个Socket之间并没有虚链路,这两个Socket只是发送、接收数据报的对象。Java提供
了DatagramSocket对象作为基于UDP协议的Socket,使用DatagramSocket发送、接收的数据报。
对于UDP协议的通信双方而言,没有所谓的客户端和服务器端的概念。
TCP协议:可靠,传输大小无限制,但是需要连接建立时间,差错控制开销大
UDP协议:不可靠,差错控制开销小,传输大小限制在64KB以下,不需要建立连接。
Java中使用DatagramSocket来接收和发送数据报,使用DatagramPacket来代表数据报。
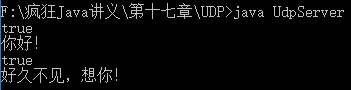
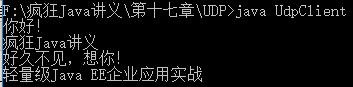
 1 import java.net.*;
 2 import java.io.*;
 3
 4 public class UdpServer
 5 {
 6     public static final int PORT = 30000;
 7     // 定义每个数据报的最大大小为4K
 8     private static final int DATA_LEN = 4096;
 9     // 定义接收网络数据的字节数组
10     byte[] inBuff = new byte[DATA_LEN];
11     // 以指定字节数组创建准备接受数据的DatagramPacket对象
12     private DatagramPacket inPacket =
13         new DatagramPacket(inBuff , inBuff.length);
14     // 定义一个用于发送的DatagramPacket对象
15     private DatagramPacket outPacket;
16     // 定义一个字符串数组,服务器发送该数组的的元素
17     String[] books = new String[]
18     {
19         "疯狂Java讲义",
20         "轻量级Java EE企业应用实战",
21         "疯狂Android讲义",
22         "疯狂Ajax讲义"
23     };
24     public void init()throws IOException
25     {
26         try(
27             // 创建DatagramSocket对象
28             DatagramSocket socket = new DatagramSocket(PORT))
29         {
30             // 采用循环接受数据
31             for (int i = 0; i < 1000 ; i++ )
32             {
33                 // 读取Socket中的数据,读到的数据放入inPacket封装的数组里。
34                 socket.receive(inPacket);
35                 // 判断inPacket.getData()和inBuff是否是同一个数组
36                 System.out.println(inBuff == inPacket.getData());
37                 // 将接收到的内容转成字符串后输出
38                 System.out.println(new String(inBuff
39                     , 0 , inPacket.getLength()));
40                 // 从字符串数组中取出一个元素作为发送的数据
41                 byte[] sendData = books[i % 4].getBytes();
42                 // 以指定字节数组作为发送数据、以刚接受到的DatagramPacket的
43                 // 源SocketAddress作为目标SocketAddress创建DatagramPacket。
44                 outPacket = new DatagramPacket(sendData
45                     , sendData.length , inPacket.getSocketAddress());
46                 // 发送数据
47                 socket.send(outPacket);
48             }
49         }
50     }
51     public static void main(String[] args)
52         throws IOException
53     {
54         new UdpServer().init();
55     }
56 }
 1 import java.net.*;
 2 import java.io.*;
 3 import java.util.*;
 4
 5 public class UdpClient
 6 {
 7     // 定义发送数据报的目的地
 8     public static final int DEST_PORT = 30000;
 9     public static final String DEST_IP = "127.0.0.1";
10     // 定义每个数据报的最大大小为4K
11     private static final int DATA_LEN = 4096;
12     // 定义接收网络数据的字节数组
13     byte[] inBuff = new byte[DATA_LEN];
14     // 以指定字节数组创建准备接受数据的DatagramPacket对象
15     private DatagramPacket inPacket =
16         new DatagramPacket(inBuff , inBuff.length);
17     // 定义一个用于发送的DatagramPacket对象
18     private DatagramPacket outPacket = null;
19     public void init()throws IOException
20     {
21         try(
22             // 创建一个客户端DatagramSocket,使用随机端口
23             DatagramSocket socket = new DatagramSocket())
24         {
25             // 初始化发送用的DatagramSocket,它包含一个长度为0的字节数组
26             outPacket = new DatagramPacket(new byte[0] , 0
27                 , InetAddress.getByName(DEST_IP) , DEST_PORT);
28             // 创建键盘输入流
29             Scanner scan = new Scanner(System.in);
30             // 不断读取键盘输入
31             while(scan.hasNextLine())
32             {
33                 // 将键盘输入的一行字符串转换字节数组
34                 byte[] buff = scan.nextLine().getBytes();
35                 // 设置发送用的DatagramPacket里的字节数据
36                 outPacket.setData(buff);
37                 // 发送数据报
38                 socket.send(outPacket);
39                 // 读取Socket中的数据,读到的数据放在inPacket所封装的字节数组里。
40                 socket.receive(inPacket);
41                 System.out.println(new String(inBuff , 0
42                     , inPacket.getLength()));
43             }
44         }
45     }
46     public static void main(String[] args)
47         throws IOException
48     {
49         new UdpClient().init();
50     }
51 }
使用MulticastSocket实现多点广播:
DatagramSocket只允许数据报发送给指定的目标地址,而MulticastSocket可以将数据报以广播的方式发送到多个客户端。
若要使用多点广播,则需要让一个数据报有一组目标主机地址,当数据报发出后,整个组的所有主机都能收到该数据报。
局域网聊天软件:
1 public interface YeekuProtocol
2 {
3     String PRESENCE = "⊿⊿";
4     String SPLITTER = "▓";
5 }
 1 import java.net.*;
 2
 3 public class UserInfo
 4 {
 5     // 该用户的图标
 6     private String icon;
 7     // 该用户的名字
 8     private String name;
 9     // 该用户的MulitcastSocket所在的IP和端口
10     private SocketAddress address;
11     // 该用户失去联系的次数
12     private int lost;
13     // 该用户对应的交谈窗口
14     private ChatFrame chatFrame;
15     public UserInfo(){}
16     // 有参数的构造器
17     public UserInfo(String icon , String name
18         , SocketAddress address , int lost)
19     {
20         this.icon = icon;
21         this.name = name;
22         this.address = address;
23         this.lost = lost;
24     }
25
26     // 省略所有成员变量的setter和getter方法
27
28     // icon的setter和getter方法
29     public void setIcon(String icon)
30     {
31         this.icon = icon;
32     }
33     public String getIcon()
34     {
35         return this.icon;
36     }
37
38     // name的setter和getter方法
39     public void setName(String name)
40     {
41         this.name = name;
42     }
43     public String getName()
44     {
45         return this.name;
46     }
47
48     // address的setter和getter方法
49     public void setAddress(SocketAddress address)
50     {
51         this.address = address;
52     }
53     public SocketAddress getAddress()
54     {
55         return this.address;
56     }
57
58     // lost的setter和getter方法
59     public void setLost(int lost)
60     {
61         this.lost = lost;
62     }
63     public int getLost()
64     {
65         return this.lost;
66     }
67
68     // chatFrame的setter和getter方法
69     public void setChatFrame(ChatFrame chatFrame)
70     {
71         this.chatFrame = chatFrame;
72     }
73     public ChatFrame getChatFrame()
74     {
75         return this.chatFrame;
76     }
77
78     // 使用address作为该用户的标识,所以根据address作为
79     // 重写hashCode()和equals方法的标准
80     public int hashCode()
81     {
82         return address.hashCode();
83     }
84     public boolean equals(Object obj)
85     {
86         if (obj != null && obj.getClass() == UserInfo.class)
87         {
88             UserInfo target = (UserInfo)obj;
89             if (address != null)
90             {
91                 return address.equals(target.getAddress());
92             }
93         }
94         return false;
95     }
96 }
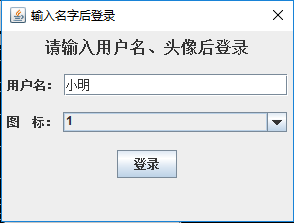
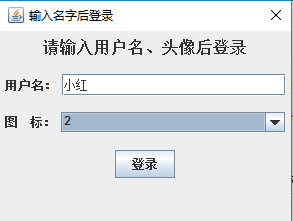
 1 import java.util.*;
 2 import java.awt.*;
 3 import java.awt.event.*;
 4 import javax.swing.*;
 5 import javax.swing.event.*;
 6
 7 // 登录用的对话框
 8 public class LoginFrame extends JDialog
 9 {
10     public JLabel tip;
11     public JTextField userField = new JTextField("李刚" , 20);
12     public JComboBox<Integer> iconList = new JComboBox<>(
13         new Integer[]{1, 2, 3, 4, 5 , 6, 7, 8 ,9 ,10});
14     private JButton loginBn = new JButton("登录");
15     // 聊天的主界面
16     private LanTalk chatFrame;
17     // 聊天通信的工具实例
18     public static ComUtil comUtil;
19     // 构造器,用于初始化的登录对话框
20     public LoginFrame(LanTalk parent , String msg)
21     {
22         super(parent , "输入名字后登录" , true);
23         this.chatFrame = parent;
24         setLayout(new GridLayout(5, 1));
25         JPanel jp = new JPanel();
26         tip = new JLabel(msg);
27         tip.setFont(new Font("Serif" , Font.BOLD , 16));
28         jp.add(tip);
29         add(jp);
30         add(getPanel("用户名" , userField));
31         iconList.setPreferredSize(new Dimension(224, 20));
32         add(getPanel("图    标" , iconList));
33         JPanel bp = new JPanel();
34         loginBn.addActionListener(new MyActionListener(this));
35         bp.add(loginBn);
36         add(bp);
37         pack();
38         setVisible(true);
39     }
40     // 工具方法,该方法将一个字符串和组件组合成JPanel对象
41     private JPanel getPanel(String name , JComponent jf)
42     {
43         JPanel jp = new JPanel();
44         jp.add(new JLabel(name + ":"));
45         jp.add(jf);
46         return jp;
47     }
48     // 该方法用于改变登录窗口最上面的提示信息
49     public void setTipMsg(String tip)
50     {
51         this.tip.setText(tip);
52     }
53     // 定义一个事件监听器
54     class MyActionListener implements ActionListener
55     {
56         private LoginFrame loginFrame;
57         public MyActionListener(LoginFrame loginFrame)
58         {
59             this.loginFrame = loginFrame;
60         }
61         // 当鼠标单击事件发生时
62         public void actionPerformed(ActionEvent evt)
63         {
64             try
65             {
66                 // 初始化聊天通信类
67                 comUtil = new ComUtil(chatFrame);
68                 final String loginMsg = YeekuProtocol.PRESENCE + userField.getText()
69                     + YeekuProtocol.SPLITTER + iconList.getSelectedObjects()[0]
70                     + YeekuProtocol.PRESENCE;
71                 comUtil.broadCast(loginMsg);
72                 // 启动定时器每20秒广播一次在线信息
73                 javax.swing.Timer timer = new javax.swing.Timer(1000 * 10
74                     , event-> comUtil.broadCast(loginMsg));
75                 timer.start();
76                 loginFrame.setVisible(false);
77                 chatFrame.setVisible(true);
78             }
79             catch (Exception ex)
80             {
81                 loginFrame.setTipMsg("确认30001端口空闲,且网络正常!");
82             }
83         }
84     }
85 }
  1 import java.text.*;
  2 import java.util.Date;
  3 import java.awt.*;
  4 import java.awt.event.*;
  5 import javax.swing.*;
  6 import java.net.*;
  7
  8 public class LanTalk extends JFrame
  9 {
 10     private DefaultListModel<UserInfo> listModel
 11         = new DefaultListModel<>();
 12     // 定义一个JList对象
 13     private JList<UserInfo> friendsList = new JList<>(listModel);
 14     // 定义一个用于格式化日期的格式器
 15     private DateFormat formatter = DateFormat.getDateTimeInstance();
 16     public LanTalk()
 17     {
 18         super("局域网聊天");
 19         // 设置该JList使用ImageCellRenderer作为单元格绘制器
 20         friendsList.setCellRenderer(new ImageCellRenderer());
 21         listModel.addElement(new UserInfo("all" , "所有人"
 22             , null , -2000));
 23         friendsList.addMouseListener(new ChangeMusicListener());
 24         add(new JScrollPane(friendsList));
 25         setDefaultCloseOperation(JFrame.EXIT_ON_CLOSE);
 26         setBounds(2, 2, 160 , 600);
 27     }
 28     // 根据地址来查询用户
 29     public UserInfo getUserBySocketAddress(SocketAddress address)
 30     {
 31         for (int i = 1 ; i < getUserNum() ; i++)
 32         {
 33             UserInfo user = getUser(i);
 34             if (user.getAddress() != null
 35                 && user.getAddress().equals(address))
 36             {
 37                 return user;
 38             }
 39         }
 40         return null;
 41     }
 42     // ------下面四个方法是对ListModel的包装------
 43     // 向用户列表中添加用户
 44     public void addUser(UserInfo user)
 45     {
 46         listModel.addElement(user);
 47     }
 48     // 从用户列表中删除用户
 49     public void removeUser(int pos)
 50     {
 51         listModel.removeElementAt(pos);
 52     }
 53     // 获取该聊天窗口的用户数量
 54     public int getUserNum()
 55     {
 56         return listModel.size();
 57     }
 58     // 获取指定位置的用户
 59     public UserInfo getUser(int pos)
 60     {
 61         return listModel.elementAt(pos);
 62     }
 63     // 实现JList上的鼠标双击事件的监听器
 64     class ChangeMusicListener extends MouseAdapter
 65     {
 66         public void mouseClicked(MouseEvent e)
 67         {
 68             // 如果鼠标的击键次数大于2
 69             if (e.getClickCount() >= 2)
 70             {
 71                 // 取出鼠标双击时选中的列表项
 72                 UserInfo user = (UserInfo)friendsList.getSelectedValue();
 73                 // 如果该列表项对应用户的交谈窗口为null
 74                 if (user.getChatFrame() == null)
 75                 {
 76                     // 为该用户创建一个交谈窗口,并让该用户引用该窗口
 77                     user.setChatFrame(new ChatFrame(null , user));
 78                 }
 79                 // 如果该用户的窗口没有显示,则让该用户的窗口显示出来
 80                 if (!user.getChatFrame().isShowing())
 81                 {
 82                     user.getChatFrame().setVisible(true);
 83                 }
 84             }
 85         }
 86     }
 87     /**
 88      * 处理网络数据报,该方法将根据聊天信息得到聊天者,
 89      * 并将信息显示在聊天对话框中。
 90      * @param packet 需要处理的数据报
 91      * @param single 该信息是否为私聊信息
 92      */
 93     public void processMsg(DatagramPacket packet , boolean single)
 94     {
 95         // 获取该发送该数据报的SocketAddress
 96         InetSocketAddress srcAddress = (InetSocketAddress)
 97             packet.getSocketAddress();
 98         // 如果是私聊信息,则该Packet获取的是DatagramSocket的地址,
 99         // 将端口减1才是对应的MulticastSocket的地址
100         if (single)
101         {
102             srcAddress = new InetSocketAddress(srcAddress.getHostName()
103                 , srcAddress.getPort() - 1);
104         }
105         UserInfo srcUser = getUserBySocketAddress(srcAddress);
106         if (srcUser != null)
107         {
108             // 确定消息将要显示到哪个用户对应窗口上。
109             UserInfo alertUser = single ? srcUser : getUser(0);
110             // 如果该用户对应的窗口为空,显示该窗口
111             if (alertUser.getChatFrame() == null)
112             {
113                 alertUser.setChatFrame(new ChatFrame(null , alertUser));
114             }
115             // 定义添加的提示信息
116             String tipMsg = single ? "对您说:" : "对大家说:";
117             try{
118                 // 显示提示信息
119                 alertUser.getChatFrame().addString(srcUser.getName()
120                     + tipMsg + "......................("
121                     + formatter.format(new Date()) + ")\n"
122                     + new String(packet.getData() , 0 , packet.getLength()
123                     , ComUtil.CHARSET) + "\n");
124             } catch (Exception ex) { ex.printStackTrace(); }
125             if (!alertUser.getChatFrame().isShowing())
126             {
127                 alertUser.getChatFrame().setVisible(true);
128             }
129         }
130     }
131     // 主方法,程序的入口
132     public static void main(String[] args)
133     {
134         LanTalk lanTalk = new LanTalk();
135         new LoginFrame(lanTalk , "请输入用户名、头像后登录");
136     }
137 }
138 // 定义用于改变JList列表项外观的类
139 class ImageCellRenderer extends JPanel
140     implements ListCellRenderer<UserInfo>
141 {
142     private ImageIcon icon;
143     private String name;
144     // 定义绘制单元格时的背景色
145     private Color background;
146     // 定义绘制单元格时的前景色
147     private Color foreground;
148     @Override
149     public Component getListCellRendererComponent(JList list
150         , UserInfo userInfo , int index
151         , boolean isSelected , boolean cellHasFocus)
152     {
153         // 设置图标
154         icon = new ImageIcon("ico/" + userInfo.getIcon() + ".gif");
155         name = userInfo.getName();
156         // 设置背景色、前景色
157         background = isSelected ? list.getSelectionBackground()
158             : list.getBackground();
159         foreground = isSelected ? list.getSelectionForeground()
160             : list.getForeground();
161         // 返回该JPanel对象作为单元格绘制器
162         return this;
163     }
164     // 重写paintComponent方法,改变JPanel的外观
165     public void paintComponent(Graphics g)
166     {
167         int imageWidth = icon.getImage().getWidth(null);
168         int imageHeight = icon.getImage().getHeight(null);
169         g.setColor(background);
170         g.fillRect(0, 0, getWidth(), getHeight());
171         g.setColor(foreground);
172         // 绘制好友图标
173         g.drawImage(icon.getImage() , getWidth() / 2 - imageWidth / 2
174             , 10 , null);
175         g.setFont(new Font("SansSerif" , Font.BOLD , 18));
176         // 绘制好友用户名
177         g.drawString(name, getWidth() / 2 - name.length() * 10
178             , imageHeight + 30 );
179     }
180     // 通过该方法来设置该ImageCellRenderer的最佳大小
181     public Dimension getPreferredSize()
182     {
183         return new Dimension(60, 80);
184     }
185 }
  1 import java.util.*;
  2 import java.net.*;
  3 import java.io.*;
  4 import javax.swing.*;
  5
  6 // 聊天交换信息的工具类
  7 public class ComUtil
  8 {
  9     // 定义本程序通信所使用的字符集
 10     public static final String CHARSET = "utf-8";
 11     // 使用常量作为本程序的多点广播IP地址
 12     private static final String BROADCAST_IP
 13         = "230.0.0.1";
 14     // 使用常量作为本程序的多点广播目的的端口
 15     // DatagramSocket所用的的端口为该端口+1。
 16     public static final int BROADCAST_PORT = 30000;
 17     // 定义每个数据报的最大大小为4K
 18     private static final int DATA_LEN = 4096;
 19     // 定义本程序的MulticastSocket实例
 20     private MulticastSocket socket = null;
 21     // 定义本程序私聊的Socket实例
 22     private DatagramSocket singleSocket = null;
 23     // 定义广播的IP地址
 24     private InetAddress broadcastAddress = null;
 25     // 定义接收网络数据的字节数组
 26     byte[] inBuff = new byte[DATA_LEN];
 27     // 以指定字节数组创建准备接受数据的DatagramPacket对象
 28     private DatagramPacket inPacket =
 29         new DatagramPacket(inBuff , inBuff.length);
 30     // 定义一个用于发送的DatagramPacket对象
 31     private DatagramPacket outPacket = null;
 32     // 聊天的主界面程序
 33     private LanTalk lanTalk;
 34     // 构造器,初始化资源
 35     public ComUtil(LanTalk lanTalk) throws Exception
 36     {
 37         this.lanTalk = lanTalk;
 38         // 创建用于发送、接收数据的MulticastSocket对象
 39         // 因为该MulticastSocket对象需要接收,所以有指定端口
 40         socket = new MulticastSocket(BROADCAST_PORT);
 41         // 创建私聊用的DatagramSocket对象
 42         singleSocket = new DatagramSocket(BROADCAST_PORT + 1);
 43         broadcastAddress = InetAddress.getByName(BROADCAST_IP);
 44         // 将该socket加入指定的多点广播地址
 45         socket.joinGroup(broadcastAddress);
 46         // 设置本MulticastSocket发送的数据报被回送到自身
 47         socket.setLoopbackMode(false);
 48         // 初始化发送用的DatagramSocket,它包含一个长度为0的字节数组
 49         outPacket = new DatagramPacket(new byte[0]
 50             , 0 , broadcastAddress , BROADCAST_PORT);
 51         // 启动两个读取网络数据的线程
 52         new ReadBroad().start();
 53         Thread.sleep(1);
 54         new ReadSingle().start();
 55     }
 56     // 广播消息的工具方法
 57     public void broadCast(String msg)
 58     {
 59         try
 60         {
 61             // 将msg字符串转换字节数组
 62             byte[] buff = msg.getBytes(CHARSET);
 63             // 设置发送用的DatagramPacket里的字节数据
 64             outPacket.setData(buff);
 65             // 发送数据报
 66             socket.send(outPacket);
 67         }
 68         // 捕捉异常
 69         catch (IOException ex)
 70         {
 71             ex.printStackTrace();
 72             if (socket != null)
 73             {
 74                 // 关闭该Socket对象
 75                 socket.close();
 76             }
 77             JOptionPane.showMessageDialog(null
 78                 , "发送信息异常,请确认30000端口空闲,且网络连接正常!"
 79                 , "网络异常", JOptionPane.ERROR_MESSAGE);
 80             System.exit(1);
 81         }
 82     }
 83     // 定义向单独用户发送消息的方法
 84     public void sendSingle(String msg , SocketAddress dest)
 85     {
 86         try
 87         {
 88             // 将msg字符串转换字节数组
 89             byte[] buff = msg.getBytes(CHARSET);
 90             DatagramPacket packet = new DatagramPacket(buff
 91                 , buff.length , dest);
 92             singleSocket.send(packet);
 93         }
 94         // 捕捉异常
 95         catch (IOException ex)
 96         {
 97             ex.printStackTrace();
 98             if (singleSocket != null)
 99             {
100                 // 关闭该Socket对象
101                 singleSocket.close();
102             }
103             JOptionPane.showMessageDialog(null
104                 , "发送信息异常,请确认30001端口空闲,且网络连接正常!"
105                 , "网络异常", JOptionPane.ERROR_MESSAGE);
106             System.exit(1);
107         }
108     }
109     // 不断从DatagramSocket中读取数据的线程
110     class ReadSingle extends Thread
111     {
112         // 定义接收网络数据的字节数组
113         byte[] singleBuff = new byte[DATA_LEN];
114         private DatagramPacket singlePacket =
115             new DatagramPacket(singleBuff , singleBuff.length);
116         public void run()
117         {
118             while (true)
119             {
120                 try
121                 {
122                     // 读取Socket中的数据。
123                     singleSocket.receive(singlePacket);
124                     // 处理读到的信息
125                     lanTalk.processMsg(singlePacket , true);
126                 }
127                 // 捕捉异常
128                 catch (IOException ex)
129                 {
130                     ex.printStackTrace();
131                     if (singleSocket != null)
132                     {
133                         // 关闭该Socket对象
134                         singleSocket.close();
135                     }
136                     JOptionPane.showMessageDialog(null
137                         , "接收信息异常,请确认30001端口空闲,且网络连接正常!"
138                         , "网络异常", JOptionPane.ERROR_MESSAGE);
139                     System.exit(1);
140                 }
141             }
142         }
143     }
144     // 持续读取MulticastSocket的线程
145     class ReadBroad extends Thread
146     {
147         public void run()
148         {
149             while (true)
150             {
151                 try
152                 {
153                     // 读取Socket中的数据。
154                     socket.receive(inPacket);
155                     // 打印输出从socket中读取的内容
156                     String msg = new String(inBuff , 0
157                         , inPacket.getLength() , CHARSET);
158                     // 读到的内容是在线信息
159                     if (msg.startsWith(YeekuProtocol.PRESENCE)
160                         && msg.endsWith(YeekuProtocol.PRESENCE))
161                     {
162                         String userMsg = msg.substring(2
163                             , msg.length() - 2);
164                         String[] userInfo = userMsg.split(YeekuProtocol
165                             .SPLITTER);
166                         UserInfo user = new UserInfo(userInfo[1]
167                             , userInfo[0] , inPacket.getSocketAddress(), 0);
168                         // 控制是否需要添加该用户的旗标
169                         boolean addFlag = true;
170                         ArrayList<Integer> delList = new ArrayList<>();
171                         // 遍历系统中已有的所有用户,该循环必须循环完成
172                         for (int i = 1 ; i < lanTalk.getUserNum() ; i++ )
173                         {
174                             UserInfo current = lanTalk.getUser(i);
175                             // 将所有用户失去联系的次数加1
176                             current.setLost(current.getLost() + 1);
177                             // 如果该信息由指定用户发送过来
178                             if (current.equals(user))
179                             {
180                                 current.setLost(0);
181                                 // 设置该用户无须添加
182                                 addFlag = false;
183                             }
184                             if (current.getLost() > 2)
185                             {
186                                 delList.add(i);
187                             }
188                         }
189                         // 删除delList中的所有索引对应的用户
190                         for (int i = 0; i < delList.size() ; i++)
191                         {
192                             lanTalk.removeUser(delList.get(i));
193                         }
194                         if (addFlag)
195                         {
196                             // 添加新用户
197                             lanTalk.addUser(user);
198                         }
199                     }
200                     // 读到的内容是公聊信息
201                     else
202                     {
203                         // 处理读到的信息
204                         lanTalk.processMsg(inPacket , false);
205                     }
206                 }
207                 // 捕捉异常
208                 catch (IOException ex)
209                 {
210                     ex.printStackTrace();
211                     if (socket != null)
212                     {
213                         // 关闭该Socket对象
214                         socket.close();
215                     }
216                     JOptionPane.showMessageDialog(null
217                         , "接收信息异常,请确认30000端口空闲,且网络连接正常!"
218                         , "网络异常", JOptionPane.ERROR_MESSAGE);
219                     System.exit(1);
220                 }
221             }
222         }
223     }
224 }
 1 import java.util.*;
 2 import java.awt.*;
 3 import java.awt.event.*;
 4 import javax.swing.*;
 5 import javax.swing.event.*;
 6 import java.net.InetSocketAddress;
 7
 8 // 定义交谈的对话框
 9 public class ChatFrame extends JDialog
10 {
11     // 聊天信息区
12     JTextArea msgArea = new JTextArea(12 , 45);
13     // 聊天输入区
14     JTextField chatField = new JTextField(30);
15     // 发送聊天信息的按钮
16     JButton sendBn = new JButton("发送");
17     // 该交谈窗口对应的用户
18     UserInfo user;
19     // 构造器,用于初始化交谈对话框的界面
20     public ChatFrame(LanTalk parent , final UserInfo user)
21     {
22         super(parent , "和" + user.getName() + "聊天中" , false);
23         this.user = user;
24         msgArea.setEditable(false);
25         add(new JScrollPane(msgArea));
26         JPanel buttom = new JPanel();
27         buttom.add(new JLabel("输入信息:"));
28         buttom.add(chatField);
29         buttom.add(sendBn);
30         add(buttom , BorderLayout.SOUTH);
31         // 发送消息的Action,Action是ActionListener的子接口
32         Action sendAction = new AbstractAction()
33         {
34             @Override
35             public void actionPerformed(ActionEvent evt)
36             {
37                 InetSocketAddress dest = (InetSocketAddress)user.getAddress();
38                 // 在聊友列表中,所有人项的SocketAddress是null
39                 // 这表明是向所有人发送消息
40                 if (dest == null)
41                 {
42                     LoginFrame.comUtil.broadCast(chatField.getText());
43                     msgArea.setText("您对大家说:"
44                         + chatField.getText() + "\n" + msgArea.getText());
45                 }
46                 // 向私人发送信息
47                 else
48                 {
49                     // 获取发送消息的目的
50                     dest = new InetSocketAddress(dest.getHostName(),
51                         dest.getPort() + 1);
52                     LoginFrame.comUtil.sendSingle(chatField.getText(), dest);
53                     msgArea.setText("您对" + user.getName() +  "说:"
54                         + chatField.getText() + "\n" + msgArea.getText());
55
56                 }
57                 chatField.setText("");
58             }
59         };
60         sendBn.addActionListener(sendAction);
61         // 将Ctrl+Enter键和"send"关联
62         chatField.getInputMap().put(KeyStroke.getKeyStroke('\n'
63             , java.awt.event.InputEvent.CTRL_MASK) , "send");
64         // 将"send"与sendAction关联
65         chatField.getActionMap().put("send", sendAction);
66         pack();
67     }
68     // 定义向聊天区域添加消息的方法
69     public void addString(String msg)
70     {
71         msgArea.setText(msg + "\n" + msgArea.getText());
72     }
73 }
由于实现这个局域网组播的聊天软件,必须在两台电脑之间有一台支持组播通信的路由器,查看自己电脑连接的路由器是否支持组播:
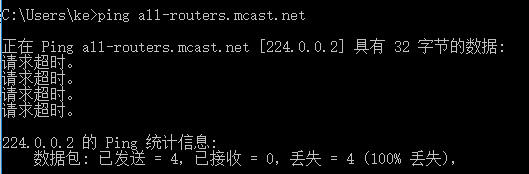
因为我电脑所连接的路由器不支持组播通信,所以没有看到局域网组播通信。这里就没有结果的截图。
但是代码一定是对的。
