CentOS 7 安装 mysql 5.7
之前安装mysql 都是网上各种找教程,装完下次继续找, 这次自己写一个
1、下载安装包到 /usr/local 并解压
cd /usr/local
wget https://cdn.mysql.com/archives/mysql-5.7/mysql-5.7.35-linux-glibc2.12-x86_64.tar.gz
2、解压到当前目录,并重命名为mysql
tar -zxvf mysql-5.7.35-linux-glibc2.12-x86_64.tar.gz
mv mysql-5.7.35-linux-glibc2.12-x86_64/  mysql
3、创建mysql用户组、用户
groupadd mysql
useradd -r -g mysql mysql
4、将安装目录所有者及所属组改为mysql
chown -R mysql:mysql /usr/local/mysql
5、在 /usr/local/mysql 目录创建mysql存放数据的data文件夹
mkdir -p /usr/local/mysql/data
6、初始化mysql
/usr/local/mysql/bin/mysqld --user=mysql --basedir=/usr/local/mysql/ --datadir=/usr/local/mysql/data --initialize
7、编辑/etc/my.cnf
[mysqld]
datadir=/usr/local/mysql/data
basedir=/usr/local/mysql
socket=/tmp/mysql.sock
user=mysql
port=3306
character-set-server=utf8
# 取消密码验证
skip-grant-tables
# Disabling symbolic-links is recommended to prevent assorted security risks
symbolic-links=0
[mysqld_safe]
log-error=/var/log/mysqld.log
pid-file=/var/run/mysqld/mysqld.pid
8、将mysql加到服务中
cp /usr/local/mysql/support-files/mysql.server /etc/init.d/mysql
9、设置mysql开机启动
chkconfig mysql on
10、启动mysql,如果出现以下提示,说明已经有mysql服务,直接ps找出mysql进程杀死即可,
service mysql start
[root@ecs-c405 mysql]# service mysql start
Starting MySQL... ERROR! The server quit without updating PID file (/usr/local/mysql/data/ecs-c405.pid).
11、查看mysql状态,如果出现如下提示,直接删除 /var/lock/subsys/mysql 即可
[root@ecs-c405 data]# service mysql status
 ERROR! MySQL is not running, but lock file (/var/lock/subsys/mysql) exists
12启动成功后即可访问
[root@ecs-c405 data]# service mysql start
Starting MySQL. SUCCESS!
13、将mysql加入环境变量,使可在任意目录使用mysql命令
##在/etc/profile最后一行加入
export PATH=$PATH:/usr/local/mysql/bin
##使修改生效
source /etc/profile
14、登录数据库,此时可在任意目录下使用mysql进入数据库,my.cnf中配置的免密码登录
[root@ecs-c405 data]# mysql
Welcome to the MySQL monitor.  Commands end with ; or \g.
Your MySQL connection id is 3
Server version: 5.7.35 MySQL Community Server (GPL)
Copyright (c) 2000, 2021, Oracle and/or its affiliates.
Oracle is a registered trademark of Oracle Corporation and/or its
affiliates. Other names may be trademarks of their respective
owners.
Type 'help;' or '\h' for help. Type '\c' to clear the current input statement.
mysql>
15、免密码登录后修改root密码
mysql> use mysql;
Reading table information for completion of table and column names
You can turn off this feature to get a quicker startup with -A
Database changed

mysql> update user set authentication_string=password('你的密码') where user='root';
Query OK, 1 row affected, 1 warning (0.00 sec)
Rows matched: 1  Changed: 1  Warnings: 1

mysql> flush privileges;
Query OK, 0 rows affected (0.00 sec)
16、去掉/etc/my.cnf中的免密码登录
#skip-grant-tables
17、无需重启mysql,再次登录即需要密码才可登录
[root@ecs-c405 data]# mysql
ERROR 1045 (28000): Access denied for user 'root'@'localhost' (using password: NO)
[root@ecs-c405 data]# mysql -uroot -p
Enter password:
Welcome to the MySQL monitor.  Commands end with ; or \g.
Your MySQL connection id is 6
Server version: 5.7.35
Copyright (c) 2000, 2021, Oracle and/or its affiliates.
Oracle is a registered trademark of Oracle Corporation and/or its
affiliates. Other names may be trademarks of their respective
owners.
Type 'help;' or '\h' for help. Type '\c' to clear the current input statement.

mysql>
18、设置数据库所有地址都可访问,重启mysql(我重启了才生效了)。
mysql> use mysql;
Reading table information for completion of table and column names
You can turn off this feature to get a quicker startup with -A
Database changed

mysql> update user set host='%' where user='root';
Query OK, 1 row affected (0.00 sec)
Rows matched: 1  Changed: 1  Warnings: 0
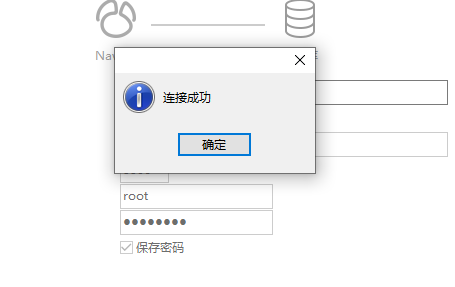
19、客户端链接成功


