

1、微服务下的分布式配置中心
简介:讲解什么是配置中心及使用前后的好处 (画图)
什么是配置中心:
一句话:统一管理配置, 快速切换各个环境的配置
相关产品:
百度的disconf
地址:https://github.com/knightliao/disconf
阿里的diamand
地址:https://github.com/takeseem/diamond
springcloud的configs-server:
地址:http://cloud.spring.io/spring-cloud-config/
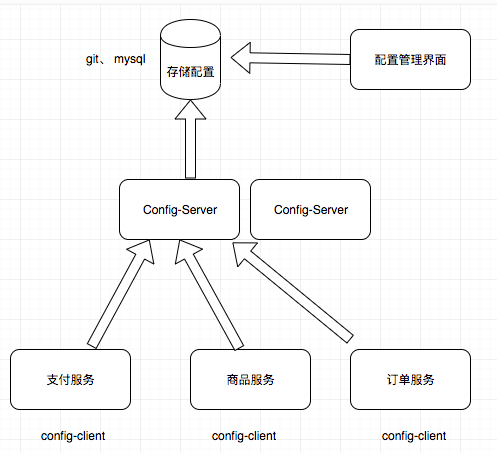
总结:服务启动时主动去配置中心config-Server拿到相应的配置,config-client就是一个jar包
配置中心说明的好文章
推荐干货文章:http://jm.taobao.org/2016/09/28/an-article-about-config-center/
2、SpringCloud的配置中心组件config-server实战
简介:讲解SpringCloud配置中心config-server实战
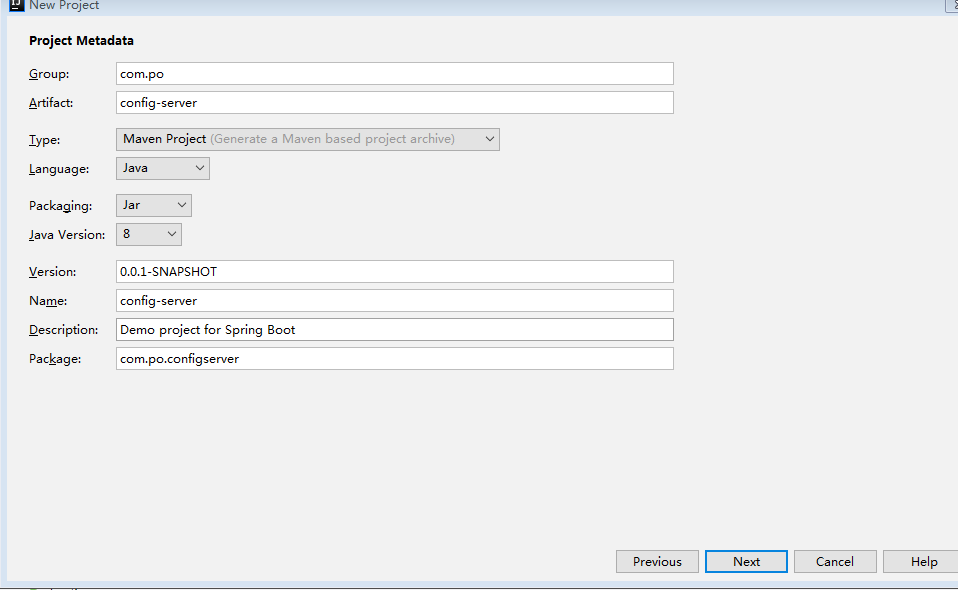
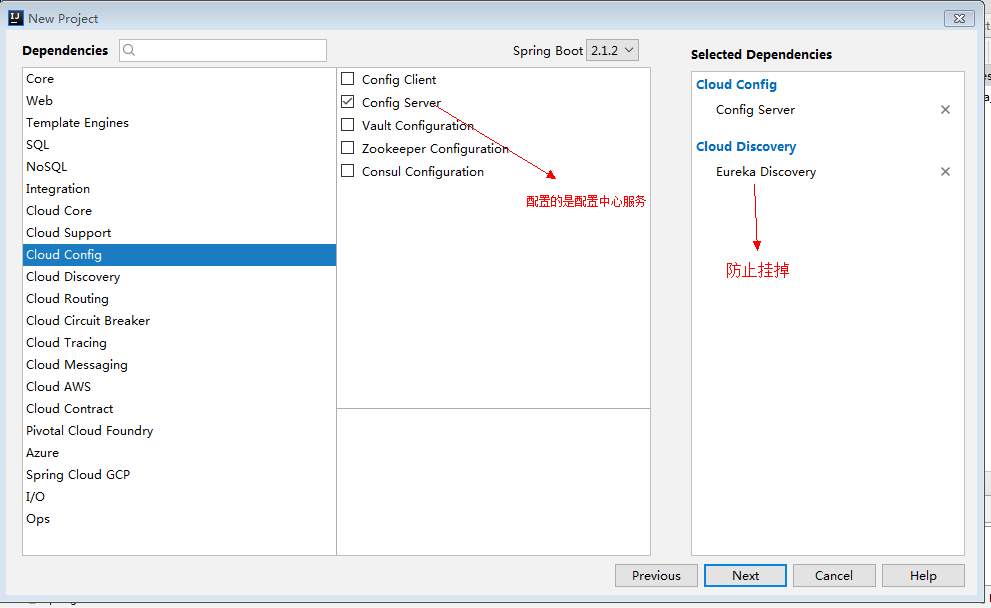
1、新建项目,创建config-server
1)同其他服务一样
2)
Pom
 1 <?xml version="1.0" encoding="UTF-8"?>
 2 <project xmlns="http://maven.apache.org/POM/4.0.0" xmlns:xsi="http://www.w3.org/2001/XMLSchema-instance"
 3     xsi:schemaLocation="http://maven.apache.org/POM/4.0.0 http://maven.apache.org/xsd/maven-4.0.0.xsd">
 4     <modelVersion>4.0.0</modelVersion>
 5     <parent>
 6         <groupId>org.springframework.boot</groupId>
 7         <artifactId>spring-boot-starter-parent</artifactId>
 8         <version>2.0.4.RELEASE</version>
 9         <relativePath/> <!-- lookup parent from repository -->
10     </parent>
11     <groupId>com.po</groupId>
12     <artifactId>config-server</artifactId>
13     <version>0.0.1-SNAPSHOT</version>
14     <name>config-server</name>
15     <description>Demo project for Spring Boot</description>
16
17      <properties>
18     <project.build.sourceEncoding>UTF-8</project.build.sourceEncoding>
19     <project.reporting.outputEncoding>UTF-8</project.reporting.outputEncoding>
20     <java.version>1.8</java.version>
21     <spring-cloud.version>Finchley.SR1</spring-cloud.version>
22     </properties>
23
24     <dependencies>
25         <dependency>
26             <groupId>org.springframework.cloud</groupId>
27             <artifactId>spring-cloud-config-server</artifactId>
28         </dependency>
29         <dependency>
30             <groupId>org.springframework.cloud</groupId>
31             <artifactId>spring-cloud-starter-netflix-eureka-client</artifactId>
32         </dependency>
33
34         <dependency>
35             <groupId>org.springframework.boot</groupId>
36             <artifactId>spring-boot-starter-test</artifactId>
37             <scope>test</scope>
38         </dependency>
39     </dependencies>
40
41     <dependencyManagement>
42         <dependencies>
43             <dependency>
44                 <groupId>org.springframework.cloud</groupId>
45                 <artifactId>spring-cloud-dependencies</artifactId>
46                 <version>${spring-cloud.version}</version>
47                 <type>pom</type>
48                 <scope>import</scope>
49             </dependency>
50         </dependencies>
51     </dependencyManagement>
52
53     <build>
54         <plugins>
55             <plugin>
56                 <groupId>org.springframework.boot</groupId>
57                 <artifactId>spring-boot-maven-plugin</artifactId>
58             </plugin>
59         </plugins>
60     </build>
61
62
63 </project>
2、启动类增加注解
@EnableConfigServer
yml
spring:
  application:
    name: config-server
#端口号
server:
  port: 9100

eureka:
  client:
    serviceUrl:
      defaultZone: http://localhost:8761/eureka/
现在启动config-server服务会报错,原因是我们还要配置仓库
3、使用git服务器结合Config搭建分布式配置中心
简介:讲解使用git服务器结合Config搭建分布式配置中心
1、默认使用git存储配置中心
使用git服务器,可以自己搭建gitlab服务器
或者使用github、开源中国git、阿里云git
794666918@qq.com
https://gitee.com/waitforxy/config_cloud.git
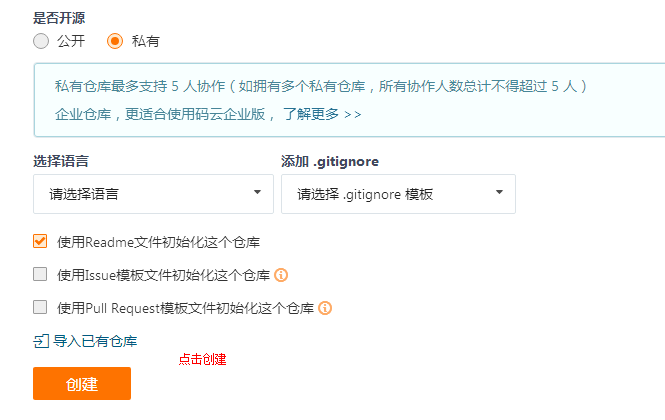
开发前的准备:这里用码云
1) 在码云上新建仓库
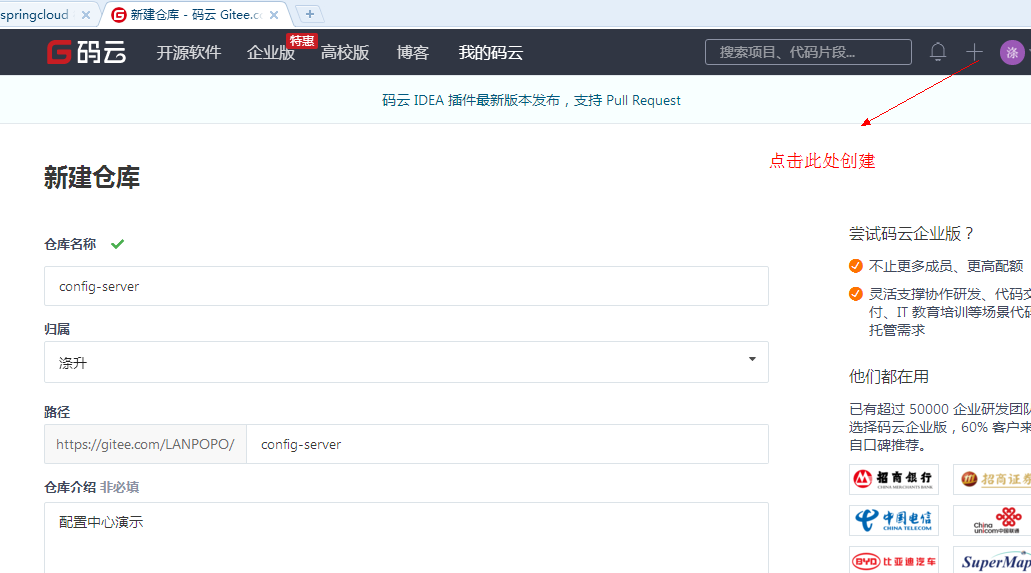
2)获取地址
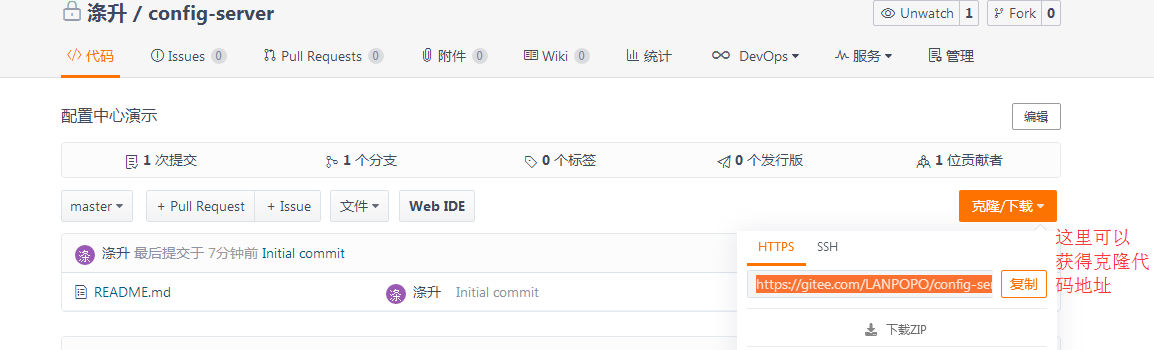
https://gitee.com/LANPOPO/config-server.git
3)config-service服务配置
 1 spring:
 2   application:
 3     name: config-server
 4   cloud:
 5     config:
 6       server:
 7         git:
 8           uri: https://gitee.com/LANPOPO/config-server
 9           username: LANPOPO
10           password: llj152443
11
12 #端口号
13 server:
14   port: 9100
15
16 eureka:
17   client:
18     serviceUrl:
19       defaultZone: http://localhost:8761/eureka/
4)
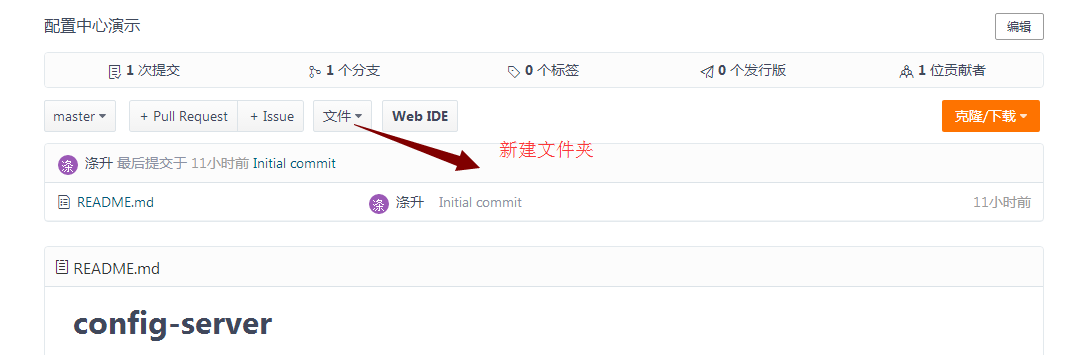
5)然后提交
6)多出来的配置文件
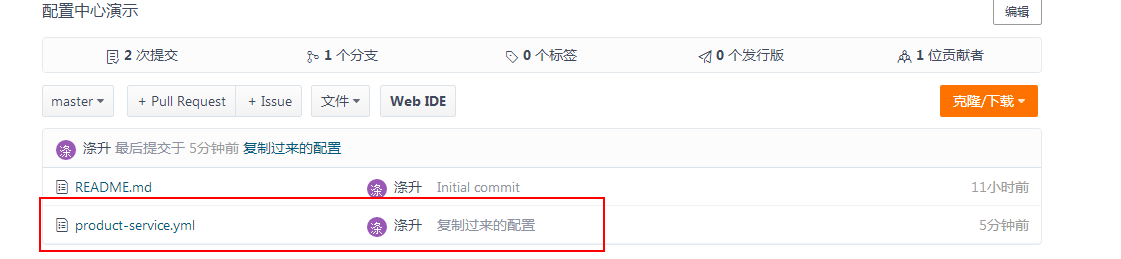
现在我们的config-server可以启动了
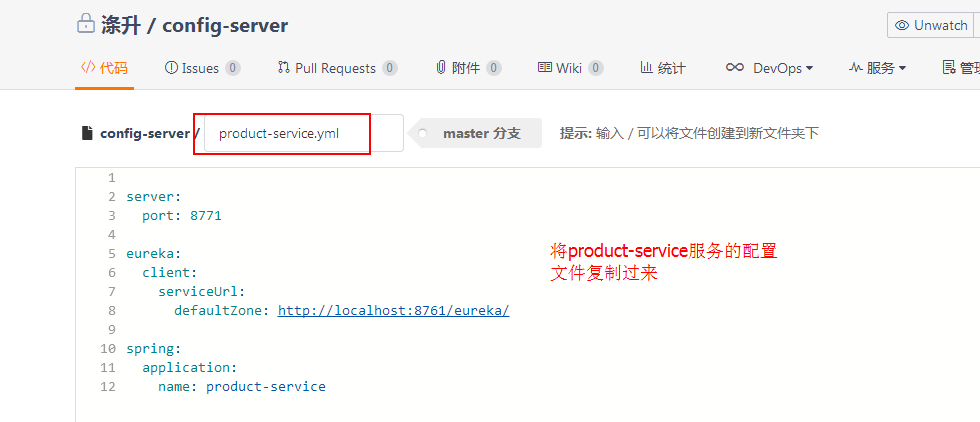
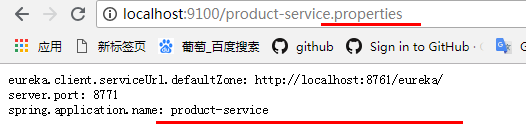
2.我们访问一下仓库的配置文件product-service.yml
http://localhost:9100/product-service.yml
结果如下
1 eureka:
2   client:
3     serviceUrl:
4       defaultZone: http://localhost:8761/eureka/
5 server:
6   port: 8771
7 spring:
8   application:
9     name: product-service
3、访问方式(一定要注意语法,如果有问题,会出错)
多种访问路径,可以通过启动日志去查看

例子 http://localhost:9100/product-service.yml
/{name}-{profiles}.properties
/{name}-{profiles}.yml
/{name}-{profiles}.json
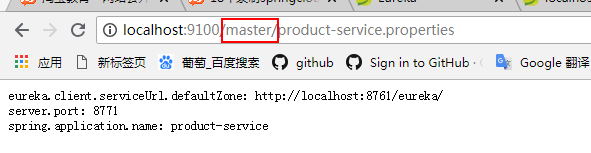
/{label}/{name}-{profiles}.yml
name :服务器名称
profile: 环境名称,开发、测试、生产
lable :仓库分支、默认master分支(我们选的也是master)
1)yml 》》》properties
2)加master分支
4)继续在仓库上新建文件,访问
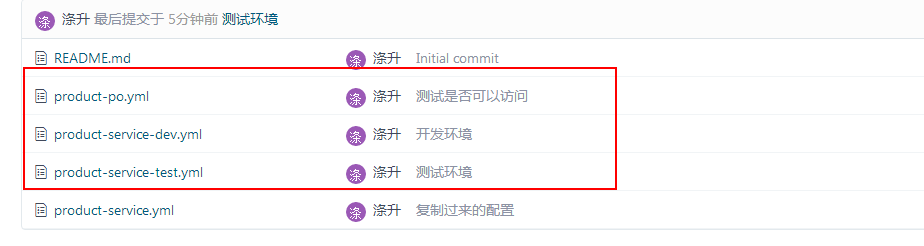
5)点击分支》》 管理 新建一些分支
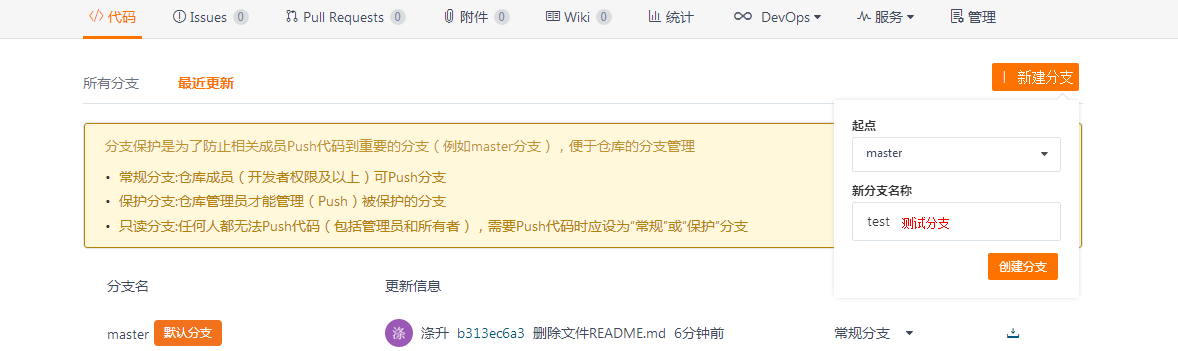
6)然后我们分别修改master和test分支下的配置文件
同理其他分拣也是如此
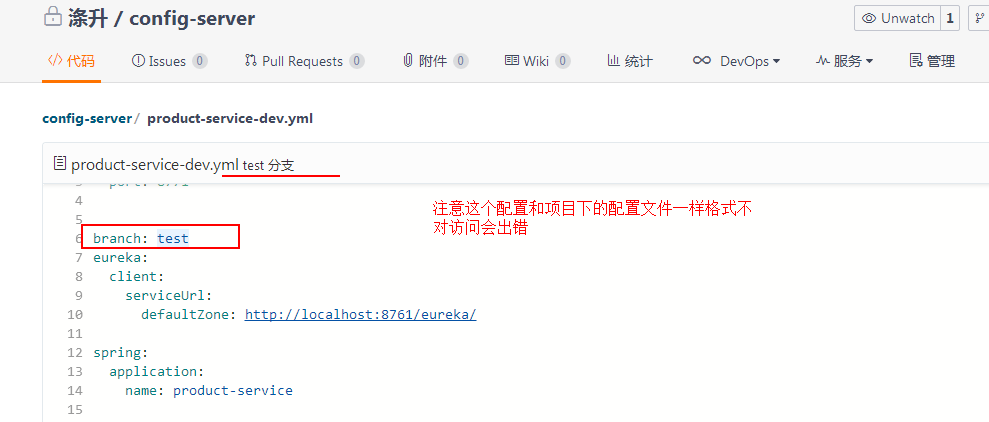
访问
http://localhost:9100/test/product-service-dev.yml
 1 branch: test
 2 env: dev
 3 eureka:
 4   client:
 5     serviceUrl:
 6       defaultZone: http://localhost:8761/eureka/
 7 server:
 8   port: 8771
 9 spring:
10   application:
11     name: product-service
http://localhost:9100/master/product-service-dev.yml
 1 branch: master
 2 env: dev
 3 eureka:
 4   client:
 5     serviceUrl:
 6       defaultZone: http://localhost:8761/eureka/
 7 server:
 8   port: 8771
 9 spring:
10   application:
11     name: product-service
http://localhost:9100/test/product-service-test.yml
 1 branch: test
 2 env: test
 3 eureka:
 4   client:
 5     serviceUrl:
 6       defaultZone: http://localhost:8761/eureka/
 7 server:
 8   port: 8771
 9 spring:
10   application:
11     name: product-service
http://localhost:9100/master/product-service-test.yml
 1 branch: master
 2 env: test
 3 eureka:
 4   client:
 5     serviceUrl:
 6       defaultZone: http://localhost:8761/eureka/
 7 server:
 8   port: 8771
 9 spring:
10   application:
11     name: product-service
我们的配置还是改一下
 1 spring:
 2   application:
 3     name: config-server
 4   cloud:
 5     config:
 6       server:
 7         git:
 8           uri: https://gitee.com/LANPOPO/config-server
 9           username: LANPOPO
10           password: llj152443
11           timeout: 5
12           default-label: master
13 #端口号
14 server:
15   port: 9100
16
17 eureka:
18   client:
19     serviceUrl:
20       defaultZone: http://localhost:8761/eureka/
4、分布式配置中心客户端使用实战
简介:微服务里面客户端接入配置中心实战
官方文档:http://cloud.spring.io/spring-cloud-config/single/spring-cloud-config.html#_spring_cloud_config_client
1、加入依赖到product-service
<dependency>
<groupId>org.springframework.cloud</groupId>
<artifactId>spring-cloud-config-client</artifactId>
</dependency>
2、修改对应服务的配置文件,把application.yml 改为 bootstrap.yml
 1 #服务注册中心
 2 eureka:
 3   client:
 4     serviceUrl:
 5       defaultZone: http://localhost:8761/eureka/
 6 #服务名
 7 spring:
 8   application:
 9     name: product-service
10   cloud:
11     config:
12       discovery:
13         service-id: config-server  #指定配置中心
14         enabled: true  #开启发现的功能
15       profile: test    #配置环境 默认是master分支
#建议用lable去区分环境,默认是lable是master分支
#label: test
此时启动product-server服务报错,找不到port端口号
音因为controller下面配置了
1 @Value("${server.port}")
2 private String port;
将配置文件改为bootstrap.yml启动成功
这样服务启动时先去配置中心拿到配置
如何证明访问的是仓库中哪一个分支呢?
我们改一下test分支再启动product-server服务


注意点:
1.配置文件要用bootstrap.yml
2.默认读取文件名是 服务名称
3,。实际开发中用lable去区分环境好,profile容易有坑

 浙公网安备 33010602011771号