ubuntu 安装zabbix
1、初始化环境
apt install iproute2 ntpdate tcpdump telnet traceroute nfs-kernel-server nfs-common lrzsz tree openssl libssl-dev libpcre3 libpcre3-dev zlib1g-dev ntpdate tcpdump telnet traceroute gcc openssh-server iotop unzip zip
2、下载deb包安装
# wget https://repo.zabbix.com/zabbix/4.0/ubuntu/pool/main/z/zabbix-release/zabbix-release_4.0-3+bionic_all.deb
# dpkg -i zabbix-release_4.0-3+bionic_all.deb
# apt update
# apt install zabbix-server-mysql zabbix-frontend-php zabbix-agent zabbix-get
3、安装数据库
apt update
# apt install mariadb-server mariadb-client
 systemctl restart mysql
4、创建账户和数据库并授权
[root@zabbix-mysql-master ~]#mysql #进入数据库创建账户并授权
Welcome to the MySQL monitor.  Commands end with ; or \g.
Your MySQL connection id is 2
Server version: 5.7.31-0ubuntu0.18.04.1 (Ubuntu)
Copyright (c) 2000, 2020, Oracle and/or its affiliates. All rights reserved.
Oracle is a registered trademark of Oracle Corporation and/or its
affiliates. Other names may be trademarks of their respective
owners.
Type 'help;' or '\h' for help. Type '\c' to clear the current input statement.

mysql> create database zabbix_server_apt character set utf8 collate utf8_bin;
Query OK, 1 row affected (0.00 sec)

mysql> grant all privileges on zabbix_server_apt.* to zabbix@"10.0.58.%" identified by 'qinghe.zabbix';
Query OK, 0 rows affected, 1 warning (0.00 sec)
5、导入数据库
[root@zabbix-proxy-active ~]#zcat /usr/share/doc/zabbix-server-mysql/create.sql.gz | mysql -uzabbix -pqinghe.zabbix -h10.0.58.104 zabbix_server_apt #初始化数据库
6、
vim /etc/zabbix/zabbix_server.conf
DBHost=10.0.58.104
DBName=zabbix_server_apt
DBUser=zabbix
DBPassword=qinghe.zabbix
DBPort=3306
7、
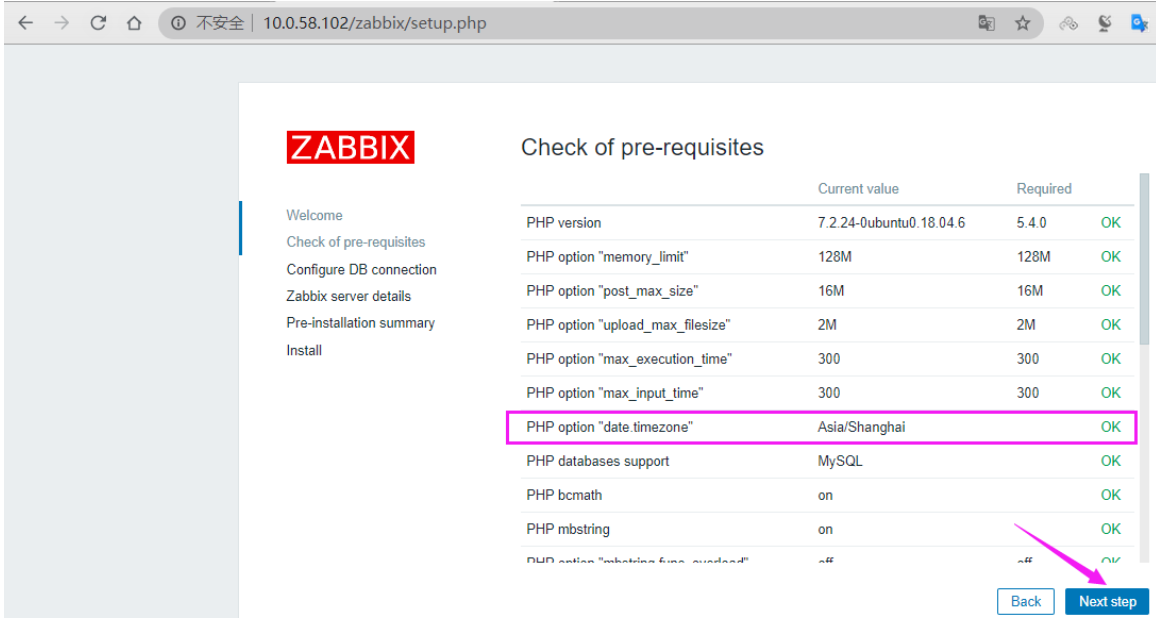
vim /etc/zabbix/apache.conf
php_value date.timezone Asia/Shanghai
vim /etc/php/7.2/apache2/php.ini
date.timezone = Asia/Shanghai

systemctl restart zabbix-server zabbix-agent apache2
systemctl enable zabbix-server zabbix-agent apache2

启动之后,zabbix server端口10051开启
###################################
web界面文件的路径  /usr/share/zabbix  (里面有很多php文件)
root@ubuntu1804:~# grep Alias /etc/zabbix/apache.conf
    Alias /zabbix /usr/share/zabbix
#######################################
查看版本
root@ubuntu1804:~# apt-cache madison zabbix-agent
zabbix-agent | 1:4.0.27-1+bionic | http://repo.zabbix.com/zabbix/4.0/ubuntu bionic/main amd64 Packages
zabbix-agent | 1:3.0.12+dfsg-1 | http://hk.archive.ubuntu.com/ubuntu bionic/universe amd64 Packages
    zabbix | 1:4.0.27-1+bionic | http://repo.zabbix.com/zabbix/4.0/ubuntu bionic/main Sources
之后就可以进入web界面了
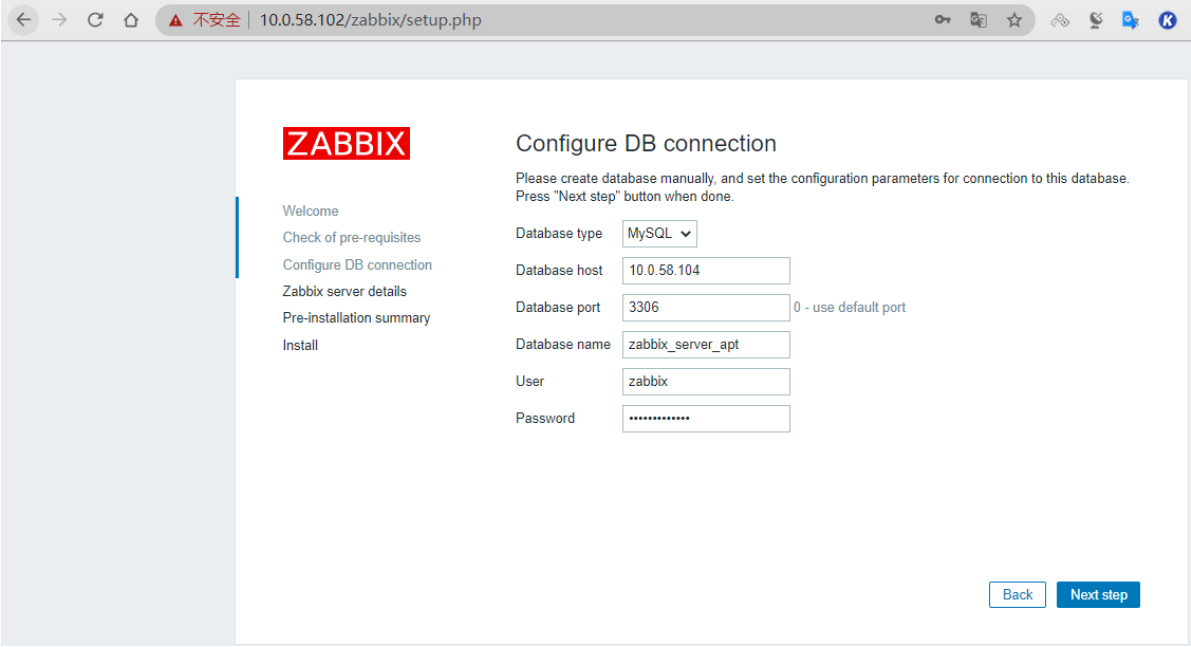
数据库配置
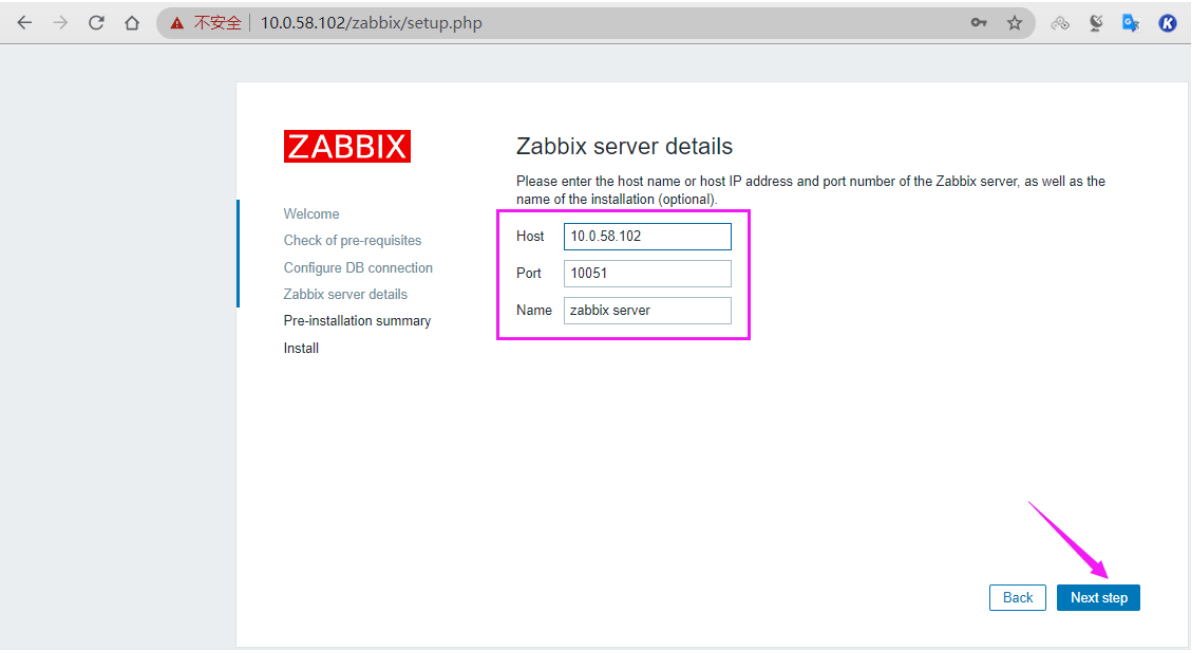
zabbix server配置
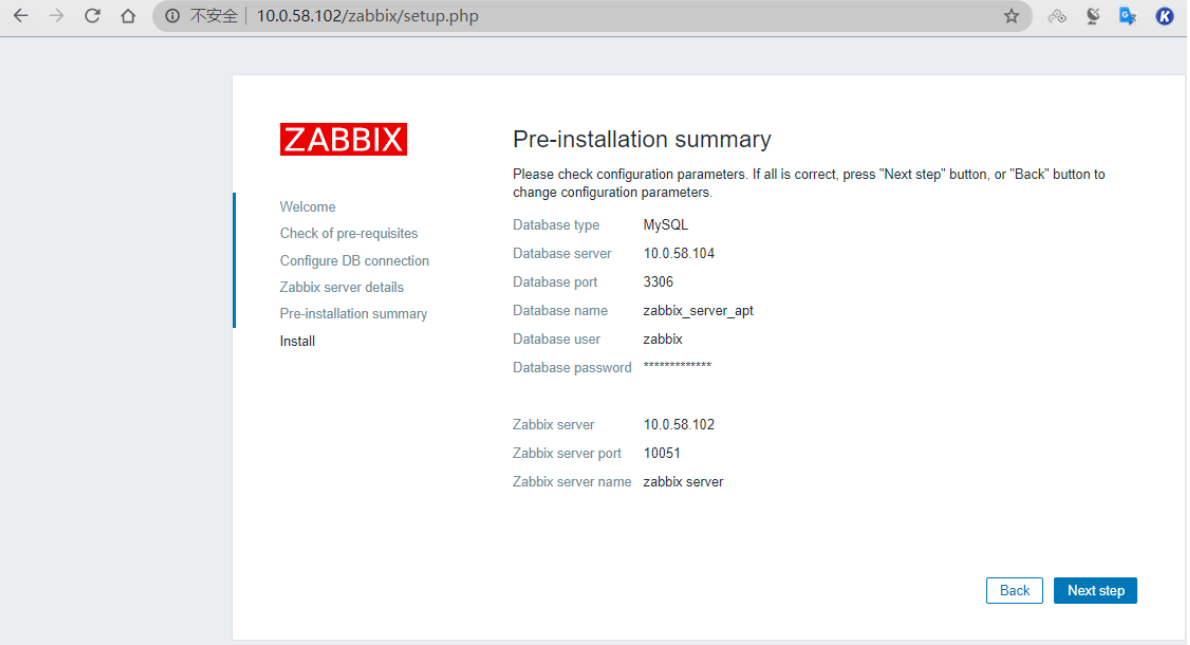
说明:数据库配置和zabbix server配置最终会写在配置文件里,若不小心配错了,可以去配置文件里去改
[root@zabbix-proxy-active ~]#vim /usr/share/zabbix/conf/zabbix.conf.php
<?php
// Zabbix GUI configuration file.
global $DB;

$DB['TYPE']     = 'MYSQL';
$DB['SERVER']   = '10.0.58.104';
$DB['PORT']     = '3306';
$DB['DATABASE'] = 'zabbix_server_apt';
$DB['USER']     = 'zabbix';
$DB['PASSWORD'] = 'qinghe.zabbix';

// Schema name. Used for IBM DB2 and PostgreSQL.
$DB['SCHEMA'] = '';

$ZBX_SERVER      = '10.0.58.102';
$ZBX_SERVER_PORT = '10051';
$ZBX_SERVER_NAME = 'zabbix server';

$IMAGE_FORMAT_DEFAULT = IMAGE_FORMAT_PNG;

#修改后重启
[root@zabbix-proxy-active ~]#systemctl restart apache2
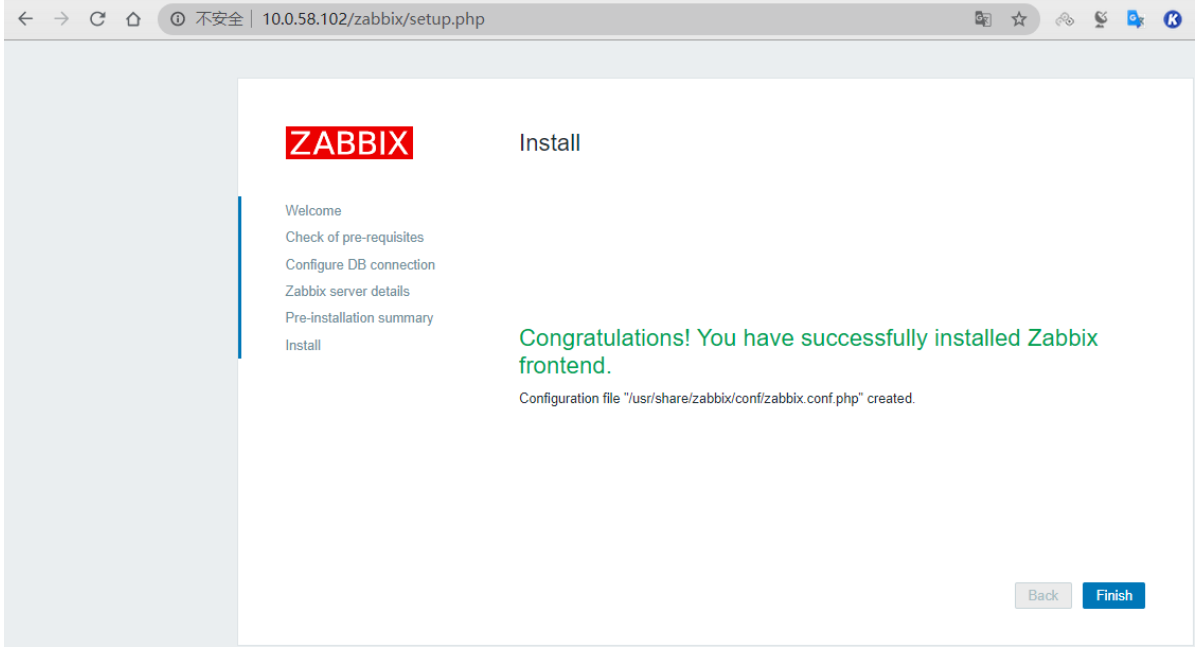
配置完成
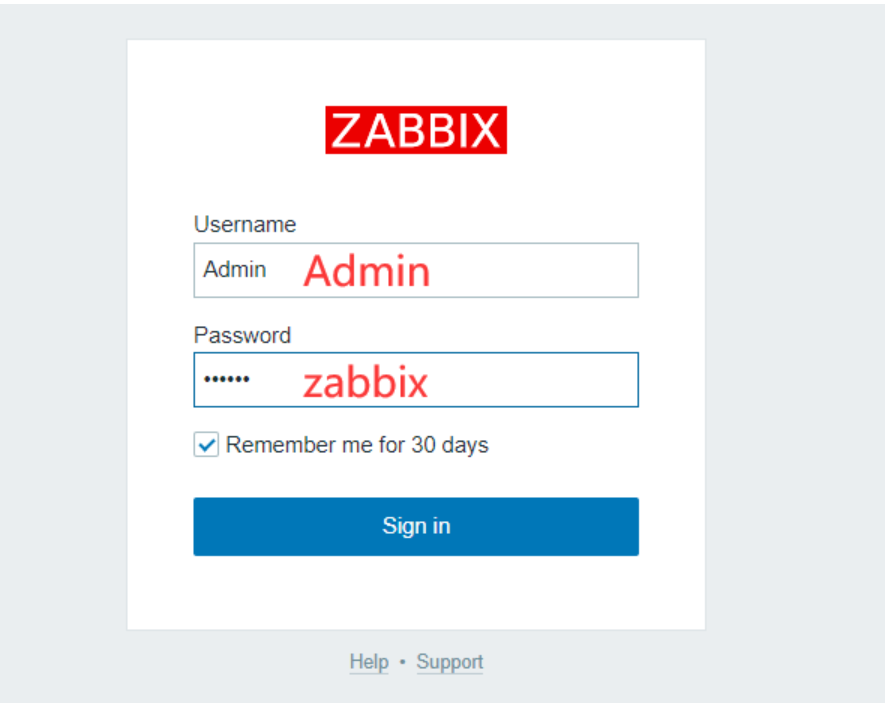
登录界面及默认登录名及密码
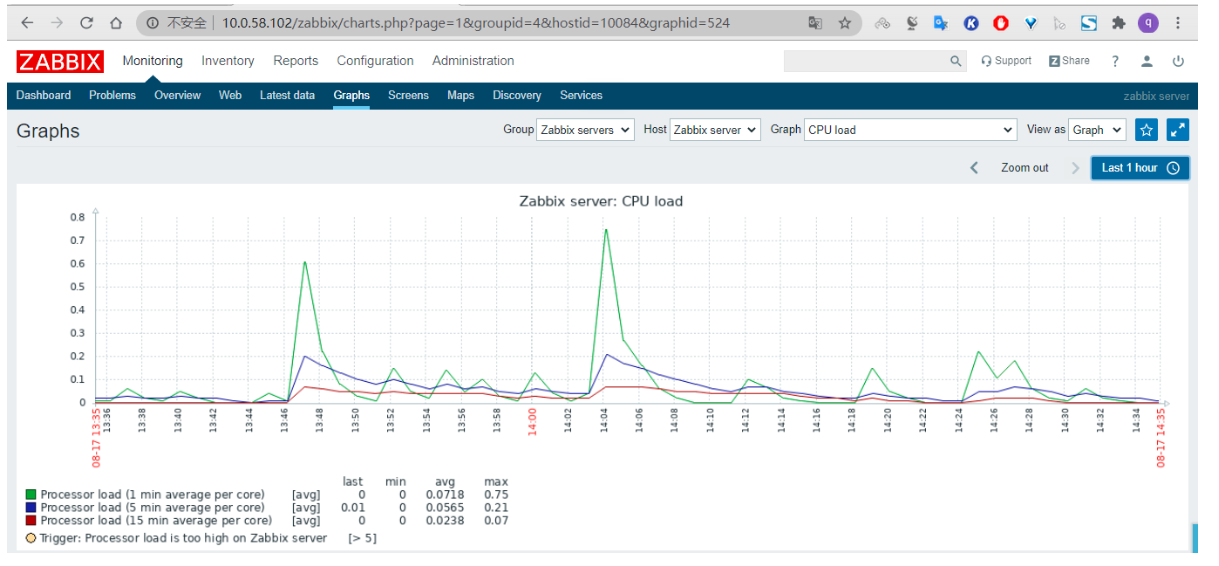
zabbix登录后的监控图形界面
加入agent节点(10.0.0.204)
wget https://repo.zabbix.com/zabbix/4.0/ubuntu/pool/main/z/zabbix-release/zabbix-release_4.0-3+bionic_all.deb
dpkg -i zabbix-release_4.0-3+bionic_all.deb
apt update
#agent节点只安装这个就行
apt install zabbix-agent

vim  /etc/zabbix/zabbix_agentd.conf
#修改
Server=10.0.0.184
Hostname=10.0.0.204
#重启zabbix-agent
systemctl restart zabbix-agent
之后再zabbix WEB界面点击 配置 > 主机> 创建主机
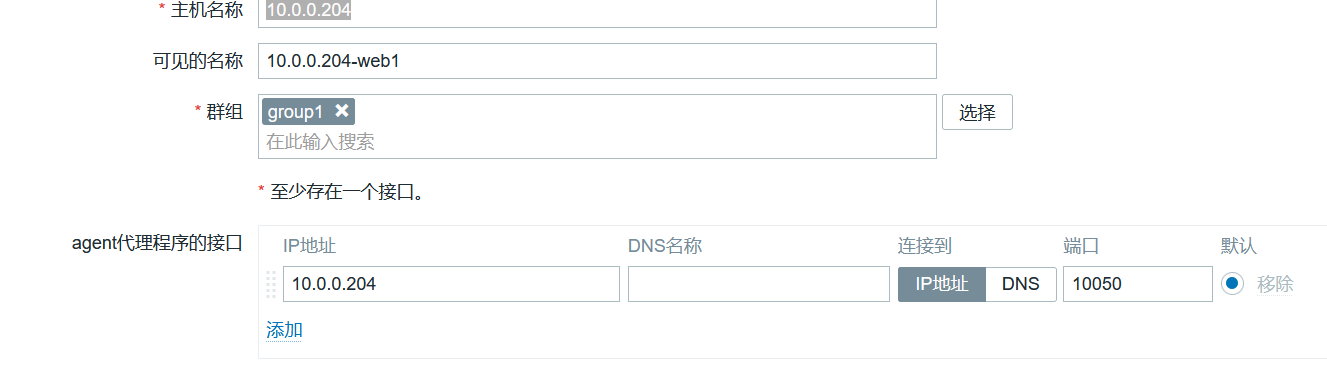
再点击最下方添加

 浙公网安备 33010602011771号