redis主从及哨兵和cluster集群
1、RDB和AOF的优缺点
RDB 模式优点
- RDB快照保存了某个时间点的数据,可以通过脚本执行redis指令bgsave(非阻塞,后台执行)或者save(会阻塞写操作,不推荐)命令自定义时间点备份,可以保留多个备份,当出现问题可以恢复到不同时间点的版本,很适合备份,并且此文件格式也支持有不少第三方工具可以进行后续的数据分析。。比如: 可以在最近的24小时内,每小时备份一次RDB文件,并且在每个月的每一天,也备份一个ROB文件。这样的话,即使遇上问题,也可以随时将数据集还原到不同的版本。
- RDB可以最大化Redis的性能,父进程在保存 RDB文件时唯一要做的就是fork出一个子进程,然后这个子进程就会处理接下来的所有保存工作,父进程无须执行任何磁盘工/0操作。
- RDB在大量数据,比如几个G的数据,恢复的速度比AOF的快
RDB 模式缺点
- 不能实时保存数据,可能会丢失自上一次执行RDB备份到当前的内存数据
如果你需要尽量避免在服务器故障时丢失数据,那么RDB不适合你。虽然Redis允许你设置不同的
保存点(save point)来控制保存RDB文件的频率,但是,因为ROB文件需要保存整个数据集的状
态,所以它并不是一个轻松的操作。因此你可能会至少5分钟才保存一次RDB文件。在这种情况
下,一旦发生故障停机,你就可能会丢失好几分钟的数据。
- 当数据量非常大的时候,从父进程fork子进程进行保存至RDB文件时需要一点时间,可能是毫秒或者秒,取决于磁盘IO性能
- 在数据集比较庞大时,fork()可能会非常耗时,造成服务器在一定时间内停止处理客户端﹔如果数据集非常巨大,并且CPU时间非常紧张的话,那么这种停止时间甚至可能会长达整整一秒或更久。虽然 AOF重写也需要进行fork(),但无论AOF重写的执行间隔有多长,数据的持久性都不会有任何损失。
AOF 模式优点
- 数据安全性相对较高,根据所使用的fsync策略(fsync是同步内存中redis所有已经修改的文件到存储设备),默认是appendfsync everysec,即每秒执行一次 fsync,在这种配置下,Redis 仍然可以保持良好的性能,并且就算发生故障停机,也最多只会丢失一秒钟的数据( fsync会在后台线程执行,所以主线程可以继续努力地处理命令请求)
- 由于该机制对日志文件的写入操作采用的是append模式,因此在写入过程中不需要seek, 即使出现宕机现象,也不会破坏日志文件中已经存在的内容。然而如果本次操作只是写入了一半数据就出现了系统崩溃问题,不用担心,在Redis下一次启动之前,可以通过 redis-check-aof 工具来解决数据一致性的问题
- Redis可以在 AOF文件体积变得过大时,自动地在后台对AOF进行重写:重写后的新AOF文件包含了恢复当前数据集所需的最小命令集合。整个重写操作是绝对安全的,因为Redis在创建新 AOF文件的过程中,append模式不断的将修改数据追加到现有的 AOF文件里面,即使重写过程中发生停机,现有的 AOF文件也不会丢失。而一旦新AOF文件创建完毕,Redis就会从旧AOF文件切换到新AOF文件,并开始对新AOF文件进行追加操作。
- AOF包含一个格式清晰、易于理解的日志文件用于记录所有的修改操作。事实上,也可以通过该文件完成数据的重建
- AOF文件有序地保存了对数据库执行的所有写入操作,这些写入操作以Redis协议的格式保存,因此 AOF文件的内容非常容易被人读懂,对文件进行分析(parse)也很轻松。导出(export)AOF文件也非常简单:举个例子,如果你不小心执行了FLUSHALL.命令,但只要AOF文件未被重写,那么只要停止服务器,移除 AOF文件末尾的FLUSHAL命令,并重启Redis ,就可以将数据集恢复到FLUSHALL执行之前的状态。
AOF 模式缺点
- 即使有些操作是重复的也会全部记录,AOF 的文件大小要大于 RDB 格式的文件
- AOF 在恢复大数据集时的速度比 RDB 的恢复速度要慢
- 根据fsync策略不同,AOF速度可能会慢于RDB
- bug 出现的可能性更多
2、master和slave同步过程
#主节点
设置连接密码
127.0.0.1:6379> CONFIG SET requirepass 123456
OK
查看不到
127.0.0.1:6379> config get requirepass
(error) NOAUTH Authentication required.
输入密码才行
127.0.0.1:6379> auth 123456
OK
查看连接密码,这回就能看到了
127.0.0.1:6379> CONFIG GET requirepass
1) "requirepass"
2) "123456"
查看master所有slave信息(现在是没有slave)
127.0.0.1:6379> INFO replication
# Replication
role:master
connected_slaves:0
master_replid:a3504cab4d33e9723a7bc988ff8e022f6d9325bf
master_replid2:0000000000000000000000000000000000000000
master_repl_offset:0
second_repl_offset:-1
repl_backlog_active:0
repl_backlog_size:1048576
repl_backlog_first_byte_offset:0
repl_backlog_histlen:0
#可以看到现在master有一个key
127.0.0.1:6379> KEYS *
1) "key1"
127.0.0.1:6379> GET key1
"v1-master"
#在slave上执行,登录
可以看到这个机器上key值
127.0.0.1:6379> KEYS *
1) "key11"
127.0.0.1:6379> GET key11
"v1-slave-28"
查看当前角色默认为master
127.0.0.1:6379> INFO replication
# Replication
role:master
connected_slaves:0
master_replid:a3504cab4d33e9723a7bc988ff8e022f6d9325bf
master_replid2:0000000000000000000000000000000000000000
master_repl_offset:0
second_repl_offset:-1
repl_backlog_active:0
repl_backlog_size:1048576
repl_backlog_first_byte_offset:0
repl_backlog_histlen:0
v>
#在slave上设置master的IP和端口,4.0版之前的指令为slaveof
127.0.0.1:6379> REPLICAOF 10.0.0.8 6379 #仍可使用SLAVEOF MasterIP Port
OK
role:master
connected_slaves:1
slave0:ip=10.0.0.28,port=6379,state=online,offset=2462,lag=0
master_replid:3a865123d7d45c64eb4ad170d83c0b3f37815dcd
master_replid2:0000000000000000000000000000000000000000
master_repl_offset:2462
second_repl_offset:-1
repl_backlog_active:1
repl_backlog_size:1048576
repl_backlog_first_byte_offset:1
repl_backlog_histlen:2462
#在slave上设置master的密码,才可以同步
127.0.0.1:6379> CONFIG SET masterauth 123456
OK
127.0.0.1:6379> INFO replication
# Replication #角色变为slave
role:slave
master_host:10.0.0.8 #指向master
master_port:6379
master_link_status:up
master_last_io_seconds_ago:8
master_sync_in_progress:0
slave_repl_offset:42
slave_priority:100
slave_read_only:1
connected_slaves:0
master_replid:b69908f23236fb20b810d198f7f4539f795e0ee5
master_replid2:0000000000000000000000000000000000000000
master_repl_offset:42
second_repl_offset:-1
repl_backlog_active:1
repl_backlog_size:1048576
repl_backlog_first_byte_offset:1
repl_backlog_histlen:42
#查看已经同步成功
127.0.0.1:6379> GET key1
"v1-master"
#在master上可以看到所有slave信息
127.0.0.1:6379> INFO replication
# Replicationrole:master
connected_slaves:1
slave0:ip=10.0.0.28,port=6379,state=online,offset=2462,lag=0
master_replid:3a865123d7d45c64eb4ad170d83c0b3f37815dcd
master_replid2:0000000000000000000000000000000000000000
master_repl_offset:2462
second_repl_offset:-1
repl_backlog_active:1
repl_backlog_size:1048576
repl_backlog_first_byte_offset:1
repl_backlog_histlen:2462
#取消复制,在slave上执行,会断开和master的连接不再主从复制, 但不会清除slave上已有的数据
127.0.0.1:6379> REPLICAOF no one
3、哨兵的使用和实现机制
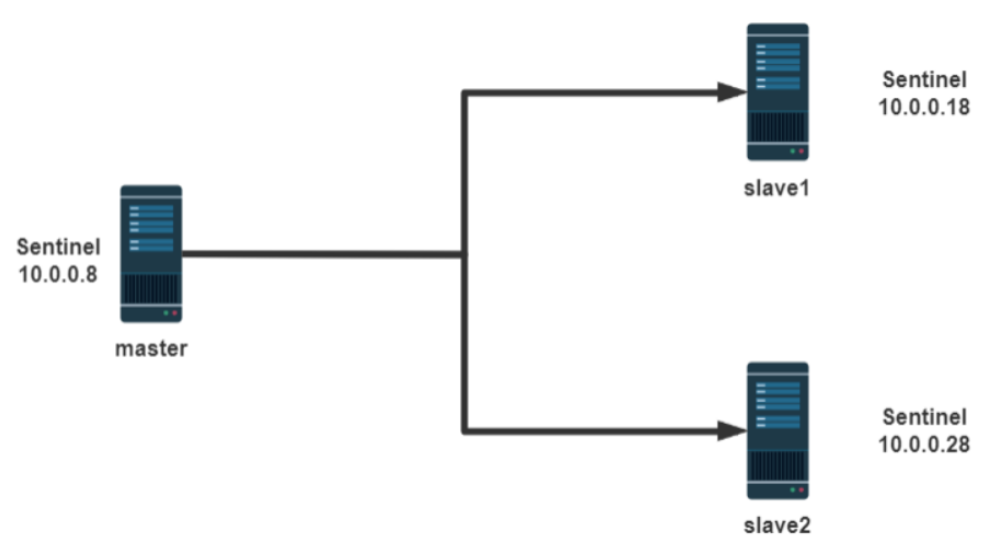
实现哨兵的前已经实现了一个redis的主从复制 在所有主从节点上执行 [root@centos8 ~]#vim /etc/redis.conf bind 0.0.0.0 masterauth 123456 requirepass 123456
[root@centos8 ~]#systemctl enable --now redis
三个哨兵服务器的配置都如下
[root@centos8 ~]#grep -vE '^#|^$' /etc/redis-sentinel.conf
port 26379
daemonize no
pidfile /var/run/redis-sentinel.pid
logfile "/var/log/redis/sentinel.log"
dir /tmp
sentinel monitor mymaster 10.0.0.8 6379 2
sentinel auth-pass mymaster 123456
sentinel down-after-milliseconds mymaster 3000
sentinel parallel-syncs mymaster 1
sentinel failover-timeout mymaster 180000
sentinel deny-scripts-reconfig yes
logfile /var/log/redis/sentinel.log
启动哨兵
[root@centos8 ~]#systemctl enable --now redis-sentinel.service
[root@centos18 ~]#systemctl enable --now redis-sentinel.service
[root@centos28 ~]#systemctl enable --now redis-sentinel.service
[root@centos8 ~]#redis-sentinel /apps/redis/etc/sentinel.conf
查看哨兵端口
[root@centos8 ~]#ss -ntl
State Recv-Q Send-Q Local Address:Port Peer Address:Port
LISTEN 0 128 0.0.0.0:111 0.0.0.0:*
LISTEN 0 128 0.0.0.0:22 0.0.0.0:*
LISTEN 0 128 0.0.0.0:26379 0.0.0.0:*
LISTEN 0 128 0.0.0.0:6379 0.0.0.0:*
LISTEN 0 128 [::]:22 [::]:*
LISTEN 0 5 [::1]:631 [::]:*
LISTEN 0 128 [::]:26379 [::]:*
确保每个主机myid不同执行 grep "^sentinel myid" /apps/redis/etc/sentinel.conf
查看状态
127.0.0.1:26379> info sentinel
# Sentinel
sentinel_masters:1
sentinel_tilt:0
sentinel_running_scripts:0
sentinel_scripts_queue_length:0
sentinel_simulate_failure_flags:0
master0:name=mymaster,status=ok,address=10.0.0.8:6379,slaves=2,sentinels=3
停止redis master测试故障转移
[root@centos8 ~]#killall redis-server
新的master状态
[root@centos28 ~]#redis-cli -a 123456
Warning: Using a password with '-a' or '-u' option on the command line interface may not be safe.
127.0.0.1:6379> info replication
# Replication
role:master
connected_slaves:1
slave0:ip=10.0.0.18,port=6379,state=online,offset=337121,lag=1
master_replid:81e4aae2b4643238b217767db618daebbc8f4c2f
master_replid2:ab2c58ecd006c17d7aedf055b91daf68a84f53f7
master_repl_offset:337386
second_repl_offset:174767
repl_backlog_active:1
repl_backlog_size:1048576
repl_backlog_first_byte_offset:99
repl_backlog_histlen:337288
另一个slave指向新的master
[root@centos18 ~]#redis-cli -a 123456
Warning: Using a password with '-a' or '-u' option on the command line interface
may not be safe.
127.0.0.1:6379> INFO replication
# Replication
role:slave
master_host:10.0.0.18
master_port:6379
master_link_status:up
master_last_io_seconds_ago:0
master_sync_in_progress:0
slave_repl_offset:61029
slave_priority:100
slave_read_only:1
connected_slaves:0
master_replid:75e3f205082c5a10824fbe6580b6ad4437140b94
master_replid2:b2fb4653bdf498691e5f88519ded65b6c000e25c
master_repl_offset:61029
second_repl_offset:46451
repl_backlog_active:1
repl_backlog_size:1048576
repl_backlog_first_byte_offset:1
repl_backlog_histlen:61029
=====================================================================================
哨兵机制的存在,是为了实现redis故障转移的自动化,自动发现,自动转移,不需要人工参与
哨兵机制的部署也就是为了监控主从数据节点的状态,一旦出现主节点down后,哨兵就会进行各种判断,完成后最终进行主从切换
当一个哨兵节点判断主节点down掉是主观下线,超过半数的哨兵节点认为主节点下线后,这时候才会判定为主节点客观下线
4、redis cluster集群创建和使用
###创建redis cluster集群的环境准备
每个redis节点采用相同的硬件配置、相同的密码、相同的redis版本
所有redis 服务器必须没有任何数据
先启动为单机redis且没有任何key value
主备6台主机,地址如下
10.0.0.18、10.0.0.28、10.0.0.38、10.0.0.48、10.0.0.58、10.0.0.68
修改redis的配置文件/etc/redis.conf(六台都执行该命令)
#sed -i.bak -e 's/bind 127.0.0.1/bind 0.0.0.0/' -e '/masterauth/a masterauth 123456' -e '/# requirepass/a requirepass 123456' -e '/# cluster-enabled yes/a cluster-enabled yes' -e '/# cluster-config-file nodes-6379.conf/a cluster-config-file nodes-6379.conf' -e '/cluster-require-full-coverage yes/c cluster-require-full-coverage no' /etc/redis.conf
#systemctl restart redis
###创建集群
[root@centos8  ~]#redis-cli -a 123456 --cluster  create  10.0.0.18:6379 10.0.0.28:6379 10.0.0.38:6379 10.0.0.48:6379  10.0.0.58:6379 10.0.0.68:6379  --cluster-replicas 1
Warning: Using a password with '-a' or '-u' option on the command line interface may not be safe.
>>> Performing hash slots allocation on 6 nodes...
Master[0] -> Slots 0 - 5460
Master[1] -> Slots 5461 - 10922
Master[2] -> Slots 10923 - 16383
Adding replica 10.0.0.48:6379 to 10.0.0.18:6379
Adding replica 10.0.0.58:6379 to 10.0.0.28:6379
Adding replica 10.0.0.68:6379 to 10.0.0.38:6379
M: 08da9eb03abff895db97391593ef3a30df0c71dc 10.0.0.18:6379   #带M的为master
   slots:[0-5460] (5461 slots) master   #当前master槽位起始位和结束位
M: b6a81babbde1118f490d40ddf7d15f910d0d8e55 10.0.0.28:6379
   slots:[5461-10922] (5462 slots) master
M: ce0d7ac851e8ff829246bc185c9f2c9eef0907d1 10.0.0.38:6379
   slots:[10923-16383] (5461 slots) master
S: b10a16e9aa5ff45d5aecfc101f275ad80779a252 10.0.0.48:6379    #带S的slave
   replicates 08da9eb03abff895db97391593ef3a30df0c71dc
S: 1d60d150030f349ddfec267b5e33fe7b930e3501 10.0.0.58:6379
   replicates b6a81babbde1118f490d40ddf7d15f910d0d8e55
S: f2cedb37c6a337f4f7edda5919e24c3ddab262ff 10.0.0.68:6379
   replicates ce0d7ac851e8ff829246bc185c9f2c9eef0907d1
Can I set the above configuration? (type 'yes' to accept): yes   #输入yes自动创建集群
>>> Nodes configuration updated
>>> Assign a different config epoch to each node
>>> Sending CLUSTER MEET messages to join the cluster
Waiting for the cluster to join
..
>>> Performing Cluster Check (using node 10.0.0.18:6379)
M: 08da9eb03abff895db97391593ef3a30df0c71dc 10.0.0.18:6379
   slots:[0-5460] (5461 slots) master  #已经分配的槽位
   1 additional replica(s)  #分配了一个slave
S: b10a16e9aa5ff45d5aecfc101f275ad80779a252 10.0.0.48:6379
   slots: (0 slots) slave  #slave没有分配槽位
   replicates 08da9eb03abff895db97391593ef3a30df0c71dc  #对应的master的10.0.0.18的ID
M: b6a81babbde1118f490d40ddf7d15f910d0d8e55 10.0.0.28:6379
   slots:[5461-10922] (5462 slots) master
   1 additional replica(s)
M: ce0d7ac851e8ff829246bc185c9f2c9eef0907d1 10.0.0.38:6379
   slots:[10923-16383] (5461 slots) master
   1 additional replica(s)
S: f2cedb37c6a337f4f7edda5919e24c3ddab262ff 10.0.0.68:6379
   slots: (0 slots) slave
   replicates ce0d7ac851e8ff829246bc185c9f2c9eef0907d1  #对应的master的10.0.0.38的ID
S: 1d60d150030f349ddfec267b5e33fe7b930e3501 10.0.0.58:6379
   slots: (0 slots) slave
   replicates b6a81babbde1118f490d40ddf7d15f910d0d8e55
   #对应的master的10.0.0.28的ID
[OK] All nodes agree about slots configuration.
>>> Check for open slots...  #检查打开的槽位
>>> Check slots coverage...  #检查插槽覆盖范围
[OK] All 16384 slots covered.  #所有槽位(16384个)分配完成
###验证集群状态
[root@centos18  ~]#redis-cli -a 123456 cluster info
cluster_state:ok
cluster_slots_assigned:16384
cluster_slots_ok:16384
cluster_slots_pfail:0
cluster_slots_fail:0
cluster_known_nodes:6    #节点数6个
cluster_size:3           #集群数3个
cluster_current_epoch:6
cluster_my_epoch:2
cluster_stats_messages_ping_sent:1175
cluster_stats_messages_pong_sent:1154
cluster_stats_messages_meet_sent:4
cluster_stats_messages_sent:2333
cluster_stats_messages_ping_received:1153
cluster_stats_messages_pong_received:1179
cluster_stats_messages_meet_received:1
cluster_stats_messages_received:2333
###验证集群写入key
#经过算法计算,当前key的槽位需要写入指定的node
[root@centos28  ~]#redis-cli -a 123456 -h 10.0.0.18 set key1 values1
(error) MOVED 9189 10.0.0.28:6379    #槽位不在当前node所以无法写入
[root@centos28  ~]#redis-cli -a 123456 -h 10.0.0.28 set key1 values1
OK
#指定node可写入
[root@centos28  ~]#redis-cli -a 123456 -h 10.0.0.28 get key1
"values1"
###python 脚本实现redis cluster集群写入
[root@centos28  ~]#dnf -y install python3
[root@centos28  ~]#pip3 install redis-py-cluster
[root@centos28  ~]#cat redis_cluster_test.py
#!/usr/bin/env python3
from rediscluster  import RedisCluster
startup_nodes = [
    {"host":"10.0.0.18","port":6379},
    {"host":"10.0.0.28","port":6379},
    {"host":"10.0.0.38","port":6379},
    {"host":"10.0.0.48","port":6379},
    {"host":"10.0.0.58","port":6379},
    {"host":"10.0.0.68","port":6379},
    {"host":"10.0.0.78","port":6379},
]
redis_conn= RedisCluster(startup_nodes=startup_nodes,password='123456',decode_responses=True)
for i in range(0,10000):
    redis_conn.set('key'+str(i),'value'+str(i))
    print('key'+str(i)+':',redis_conn.get('key'+str(i)))
[root@centos28  ~]#chmod +x redis_cluster_test.py
[root@centos28  ~]#./redis_cluster_test.py
[root@centos28  ~]#redis-cli -a 123456 -h 10.0.0.28
10.0.0.28:6379> dbsize
(integer) 3341
10.0.0.28:6379> get key1
"value1"
10.0.0.28:6379> get key2
(error) MOVED 4998 10.0.0.18:6379
10.0.0.28:6379> keys *
3329) "key7832"
3330) "key2325"
3331) "key2880"
10.0.0.8:6379>
[root@centos28  ~]#redis-cli -a 123456 -h 10.0.0.28 dbsize
(integer) 3340
[root@centos28  ~]#redis-cli -a 123456 -h 10.0.0.28 --no-auth-warning get key1
"value1"
[root@centos28  ~]#redis-cli -a 123456 -h 10.0.0.18 --no-auth-warning dbsize
(integer) 3329
[root@centos28  ~]#redis-cli -a 123456 -h 10.0.0.18 --no-auth-warning  get key5
(error) MOVED 9057 10.0.0.28:6379
[root@centos28  ~]#redis-cli -a 123456 -h 10.0.0.28 --no-auth-warning  get key5
"value5"
###模拟master故障,对应节点的slave节点自动提升为新master

#模拟节点2,10.0.0.28出故障,需要相应的数秒故障转移时间
[root@centos28  ~]#tail -f /var/log/redis/redis.log
[root@centos28  ~]#redis-cli -a 123456
127.0.0.1:6379> shutdown
not connected> exit
[root@centos28  ~]#ss -ntl
State   Recv-Q   Send-Q        Local Address:Port                     Peer Address:Port
LISTEN  0        128                 0.0.0.0:22                            0.0.0.0:*
LISTEN  0        128                    [::]:22                               [::]:*
[root@centos18  ~]#redis-cli -a 123456 --cluster info 10.0.0.18:6379
Could not connect to Redis at 10.0.0.28:6379: Connection refused
10.0.0.18:6379 (08da9eb0...) -> 3332 keys | 5461 slots | 1 slaves.
10.0.0.38:6379 (ce0d7ac8...) -> 3329 keys | 5461 slots | 1 slaves.
10.0.0.58:6379 (1d60d150...) -> 3341 keys | 5462 slots | 0 slaves.  #10.0.0.58为新master
[OK] 10002 keys in 3 masters.
0.61 keys per slot on average.
[root@centos18  ~]#redis-cli -a 123456 --cluster check 10.0.0.18:6379
Warning: Using a password with '-a' or '-u' option on the command line interface may not be safe.
Could not connect to Redis at 10.0.0.28:6379: Connection refused
10.0.0.18:6379 (08da9eb0...) -> 3332 keys | 5461 slots | 1 slaves.
10.0.0.38:6379 (ce0d7ac8...) -> 3329 keys | 5461 slots | 1 slaves.
10.0.0.58:6379 (1d60d150...) -> 3341 keys | 5462 slots | 0 slaves.
[OK] 10002 keys in 3 masters.
0.61 keys per slot on average.
>>> Performing Cluster Check (using node 10.0.0.18:6379)
M: 08da9eb03abff895db97391593ef3a30df0c71dc 10.0.0.18:6379
   slots:[0-5460] (5461 slots) master
   1 additional replica(s)
S: b10a16e9aa5ff45d5aecfc101f275ad80779a252 10.0.0.48:6379
   slots: (0 slots) slave
   replicates 08da9eb03abff895db97391593ef3a30df0c71dc
M: ce0d7ac851e8ff829246bc185c9f2c9eef0907d1 10.0.0.38:6379
   slots:[10923-16383] (5461 slots) master
   1 additional replica(s)
S: f2cedb37c6a337f4f7edda5919e24c3ddab262ff 10.0.0.68:6379
   slots: (0 slots) slave
   replicates ce0d7ac851e8ff829246bc185c9f2c9eef0907d1
M: 1d60d150030f349ddfec267b5e33fe7b930e3501 10.0.0.58:6379
   slots:[5461-10922] (5462 slots) master
[OK] All nodes agree about slots configuration.
>>> Check for open slots...
>>> Check slots coverage...
[OK] All 16384 slots covered.
[root@centos18  ~]#redis-cli -a 123456 -h 10.0.0.58
10.0.0.58:6379> info replication
# Replication
role:master
connected_slaves:0
master_replid:b07a9d330cb31da18b5c47d44ec2125b9493e3b6
master_replid2:ab2f4c2aa0adcd9a9296fe4131613427ded6f8f8
master_repl_offset:146681
second_repl_offset:146682
repl_backlog_active:1
repl_backlog_size:1048576
repl_backlog_first_byte_offset:1
repl_backlog_histlen:146681
#恢复10.0.0.28故障节点2
[root@centos28  ~]#systemctl start redis
#查看自动生成的配置文件,可以查看node2自动生成slave节点
[root@centos28  ~]#cat   /var/log/redis/redis.log
2488:M 24 Oct 2020 19:40:56.538 * DB loaded from disk: 0.005 seconds
2488:M 24 Oct 2020 19:40:56.538 * Ready to accept connections
2488:M 24 Oct 2020 19:40:56.541 # Configuration change detected. Reconfiguring myself as a replica of 1d60d150030f349ddfec267b5e33fe7b930e3501
2488:S 24 Oct 2020 19:40:56.541 * Before turning into a replica, using my master parameters to synthesize a cached master: I may be able to synchronize with the new master with just a partial transfer.
2488:S 24 Oct 2020 19:40:56.541 # Cluster state changed: ok
2488:S 24 Oct 2020 19:40:57.556 * Connecting to MASTER 10.0.0.58:6379
2488:S 24 Oct 2020 19:40:57.557 * MASTER <-> REPLICA sync started
2488:S 24 Oct 2020 19:40:57.558 * Non blocking connect for SYNC fired the event.
2488:S 24 Oct 2020 19:40:57.559 * Master replied to PING, replication can continue...
2488:S 24 Oct 2020 19:40:57.564 * Trying a partial resynchronization (request 3bfc827ac3a3d9070e26081fece2a52978505b4b:1).
2488:S 24 Oct 2020 19:40:57.567 * Full resync from master: b07a9d330cb31da18b5c47d44ec2125b9493e3b6:146681
2488:S 24 Oct 2020 19:40:57.567 * Discarding previously cached master state.
2488:S 24 Oct 2020 19:40:57.627 * MASTER <-> REPLICA sync: receiving 62908 bytes from master
2488:S 24 Oct 2020 19:40:57.628 * MASTER <-> REPLICA sync: Flushing old data
2488:S 24 Oct 2020 19:40:57.632 * MASTER <-> REPLICA sync: Loading DB in memory
2488:S 24 Oct 2020 19:40:57.649 * MASTER <-> REPLICA sync: Finished with success
[root@centos8 ~]# redis-cli -a 123456 -h 10.0.0.58
10.0.0.58:6379> info replication
# Replication
role:master
connected_slaves:1
slave0:ip=10.0.0.28,port=6379,state=online,offset=147199,lag=1
master_replid:b07a9d330cb31da18b5c47d44ec2125b9493e3b6
master_replid2:ab2f4c2aa0adcd9a9296fe4131613427ded6f8f8
master_repl_offset:147199
second_repl_offset:146682
repl_backlog_active:1
repl_backlog_size:1048576
repl_backlog_first_byte_offset:1
repl_backlog_histlen:147199

 浙公网安备 33010602011771号