三角形变形记之纯css实现的分布导航条效果

三角形变形记,用纯css实现的分布导航条效果
<style type="text/css">
ul,li { list-style-type:none; font-size:13px; font-weight:bold; }
li { float:left; position:relative; line-height:30px; background:#9BBB38; color:#fff; width:100px; height:30px;   text-align:center; padding-right:10px;  }
.arrow { width:0px; height:0px; font-size:0px; line-height:0px; }
s {  border:15px solid #9BBB38; border-left-color:transparent; position:absolute; left:-15px; top:0px; }
g { border:15px solid #fff; border-left-color:#9BBB38;  position:absolute; right:-12px; top:0px; }
li.on { background:#E58712; }
li.on s{ border:15px solid #E58712; border-left-color:transparent;}
li.on g {  border-left-color:#E58712; }
li.first s{ border-left-color:#9BBB38;  }
li.last g {  border:15px solid #9BBB38; right:0px;  }
</style>
</head>
<body>
<ul>
         <li class="first"><s></s>注册<g></g></li>
         <li class="on"><s></s>登录<g></g></li>
         <li><s></s>下单<g></g></li>
         <li class="last"><s></s>付款<g></g></li>
</ul>
</body>
一、border边框变形记:

如果你要问这些是如何实现的呢?其实比较简单,只是平时大家很少关注罢了。我们习惯了用border定义边框,因为设计图的原因,大多是定义“1-5”像 素的图形,并没有进行过深入的研究,比如border-left与border-top之间的衔接是怎样的呢?想要知道答案很简单,我们只需要将border-width的值增大就可以了,增大后我们会看到border之间的衔接是一条斜线。如上图所示了,下面贴上面部分的代码:
<div style="width: 20px; height: 20px; display: inline-block; border: 40px solid #0f0;  float: left;"></div>
<div style="width: 20px; height: 20px; display: inline-block; margin-left: 20px; border-left: 40px solid #f00; border-top: 40px solid #0f0; border-right: 40px solid #03f; border-bottom: 40px solid #f70;  float: left;"></div>
<div style="width: 0px; height: 0px; display: inline-block; margin-left: 20px; border-left: 40px solid #f00; border-top: 40px solid #0f0; border-right: 40px solid #03f; border-bottom: 40px solid #f70; font-size: 0; float: left;"></div>
<div style="width: 0px; height: 0px; display: inline-block; margin-left: 20px; border-left: 40px solid #f00; border-top: 40px solid #0f0; border-right: 80px solid #03f; border-bottom: 40px solid #f70; font-size: 0; float: left;"></div>
你一定很想了解上面的图形的变形原理了。这里我分步骤解析代码:
首先我们研究图一的代码,发现就是我们平常使用的定义边框的方式:border:40px solid #0f0;这样我们就可以得到一个宽高均为20像素,边框为40像素的正方形;
继续,研究图二的 代码,也是很简单实现,只不过给各个边框添加了颜色罢了,不过我们却发现了惊人的变化,每个边框与边框之间竟然是产生了斜线,并且这个时候产生了4个梯 形,聪明的你一定会有一种原来如此的感觉,并且同时联想到如果没有中间的空白那样不就产生了三角形了吗...
是的,如你所想,图三就是你脑子中的东西,我们看到代码“width: 0px; height: 0px;”这样空白部分就没有了,不过这时你可能还需要注意一个细节(加粗显示的部分),“font-size: 0”,是的就是这里,为了兼容ie6,去除ie610像素高度的bug(必要的时候需要用到line-height:0;)。至此,我们再告一段落,接下来你是不是想要告诉我,将其他的三个边框颜色转化成背景色就变成了一个三角形呢?是的,的确是这个样子。但是不要着急,我们接下来研究下图四。
同图三只有细微的不同,右边边框的宽度增加了,变成了80像素,然后你看到了产生了4个非直角的三角形,但是这个又有神马用呢?我可以肯定的说,只要用心思考,这个还是比较好玩的,因为我们三角形的领域已经不再局限于直角的了...呵呵,各位看官请继续给下看
贴上面图形代码:

<div style="width: 0px; height: 0px; display: inline-block; border: 40px solid #fff; border-left-color: #f00; border-right-color: #03f; font-size: 0; float: left;"></div>
<div style="width: 0px; height: 0px; display: inline-block; margin-left: 20px; border: 40px solid #fff; border-left-color: #f00; border-top-color: #0f0; font-size: 0; float: left;"></div>
<div style="width: 0px; height: 0px; display: inline-block; margin-left: 20px; border: 40px solid #fff; border-bottom-color: #f70; font-size: 0; float: left;"></div>
定义了一个“border:40px solid #fff ;”,然后给边框定义不同的颜色值就行了,如果想要显示下面的三角形,只给下面的图形定义颜色即可。
二、border变形记之高级进阶

<div style="width: 0px; height: 0px; display: inline-block; border: 40px solid #fff; border-left-color: #f00; font-size: 0; float: left;"></div>
<div style="width: 0px; height: 0px; display: inline-block; margin-left: -70px; border: 40px solid #0f0; border-left-color: #fff;font-size: 0; float: left;"></div>
<div style="width: 0px; height: 0px; display: inline-block; margin-left: 20px; border: 40px solid #fff; border-left-color: #f00; font-size: 0; float: left;"></div>
<div style="width: 0px; height: 0px; display: inline-block; margin-left: -70px; border: 40px solid #0f0; border-left-color: transparent; _border-left-color: snow; _filter: chroma(color=snow); font-size: 0; float: left;"></div>
<div style="width: 0px; height: 0px; display: inline-block; margin-left: 20px; border: 40px solid #03f; border-left-color: #f00; font-size: 0; float: left;"></div>
<div style="width: 0px; height: 0px; display: inline-block; margin-left: -70px; border: 40px solid #0f0; border-left-color: transparent; _border-left-color: snow; _filter: chroma(color=snow); font-size: 0; float: left;"></div>
三、border变形记之分步导航效果(火箭组装法)

<style type="text/css">
#step{margin:50px;font-size:16px;color:#fff;letter-spacing:0.5em;}
#step a{width:100px;height:30px;background:#9BBB38;text-align:center;display:inline-block;line-height:30px;position:relative;margin-right:20px;}
#step a s{width:0px;height:0px;border:15px solid #9BBB38;border-left-color: transparent; _border-left-color: snow; _filter: chroma(color=snow);font-size:0;line-height:0;position:absolute;left:-30px;top:0px;}
#step a b{width:0px;height:0px;border:15px solid #fff;border-left-color:#9BBB38;font-size:0;line-height:0;position:absolute;top:0px;right:-30px;}
#step .first{border-left-color:#9BBB38}
#step .last{border-color:#9BBB38;right:-15px;}
#step .on{background:#E58712;}
#step .on s{border:15px solid #E58712;border-left-color: transparent; _border-left-color: snow; _filter: chroma(color=snow);}
#step .on b{border-left-color:#E58712;}
</style>
<div id="step">
         <a><s class="first"></s>注册<b></b></a>
         <a class="on"><s></s>登录<b></b></a>
         <a><s></s>下单<b></b></a>
         <a><s></s>付款<b class="last"></b></a>
</div>

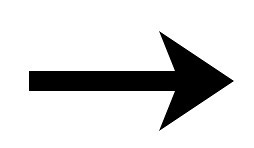
四、border变形记之变态版

每个技术人员都在追求是技术的更高层次,更深层次。所以当你以为某个技术点已经结束了的时候,或许之前你所领悟到的仅仅是个开始。关键在于你是否能够利用你掌握的知识去探索并创造。下面一个简单的border变形记的变态版,技术内容很低级,想法还是可以的。欢迎重口味!
<style type="text/css">
#arr{position:relative;margin-top:100px;margin-left:100px;}
#arr a{width:0px;height:0px;border-width:50px 75px;border-style:solid;border-color:transparent;_border-color:snow; _filter:chroma(color=snow);border-left-color:#000;position:absolute;left:200px;top:0px;line-height:0;}
#arr s{width:0px;height:0px;border-color:transparent;_border-color:snow; _filter:chroma(color=snow);border-left-color:#fff;border-width:50px 20px;border-style:solid;position:absolute;top:0px;left:200px;line-height:0;}
#arr b{width:150px;height:20px;background:#000;display:block;position:absolute;left:70px;top:40px;}
</style>
<div id="arr">
         <a></a>
         <s></s>
         <b></b>
</div>


 浙公网安备 33010602011771号