TestNG 运行Webdriver测试用例
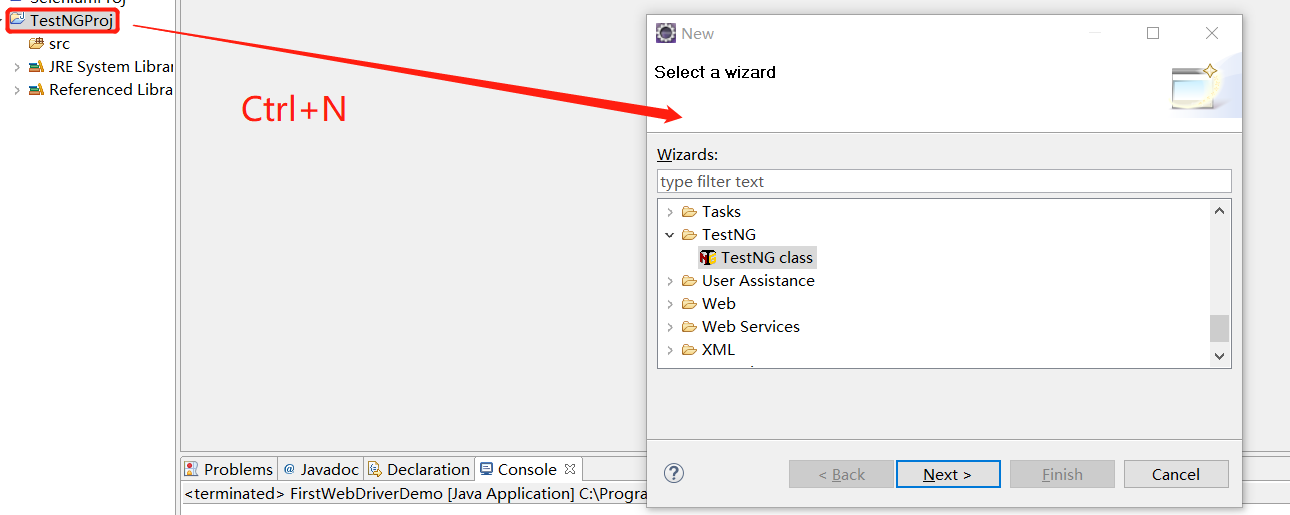
1.单击选中的新建工程的名称,按Ctrl+N组合键,弹出对话框选择"TestNG"下的"TestNG class"选项,点击“next”

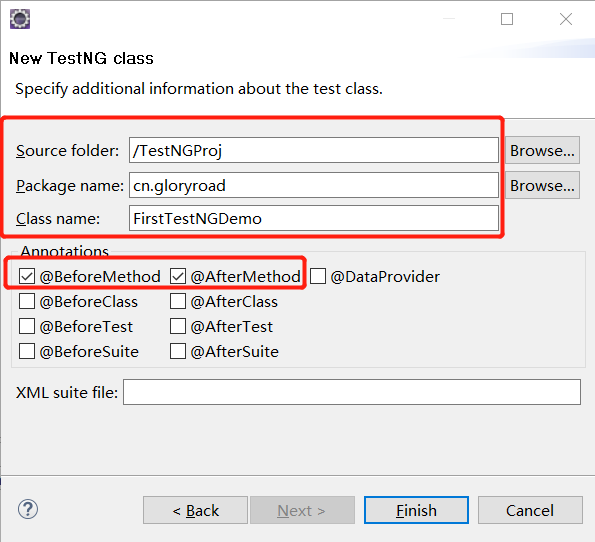
2.如下图填写完成后,点击“Finish”

3.eclipse会自动生成如下代码:
package cn.gloryroad;

import org.testng.annotations.Test;
import org.testng.annotations.BeforeMethod;
import org.testng.annotations.AfterMethod;

public class FirstTestNGDemo {
  @Test
  public void f() {
  }
  @BeforeMethod
  public void beforeMethod() {
  }

  @AfterMethod
  public void afterMethod() {
  }

}
4.补充测试用例后,脚本如下:
package cn.gloryroad;

import java.sql.Driver;

import org.openqa.selenium.By;
import org.openqa.selenium.WebDriver;
import org.openqa.selenium.firefox.FirefoxDriver;
import org.testng.annotations.Test;
import org.testng.annotations.BeforeMethod;
import org.testng.annotations.AfterMethod;

public class FirstTestNGDemo {

    public WebDriver driver;
    String baseUrl= "http://baidu.com/";
  @Test
  public void test() {

      driver.get(baseUrl+'/');
      driver.findElement(By.id("kw")).sendKeys("selenium");
      driver.findElement(By.id("su")).click();
  }
  @BeforeMethod
  public void beforeMethod() {

      System.setProperty("webdriver.firefox.bin", "C:\\Program Files (x86)\\Mozilla Firefox\\firefox.exe");
      driver = new FirefoxDriver();
  }

  @AfterMethod
  public void afterMethod() {
      driver.quit();
  }

}
5.运用testNG运行脚本,运行结果如下:

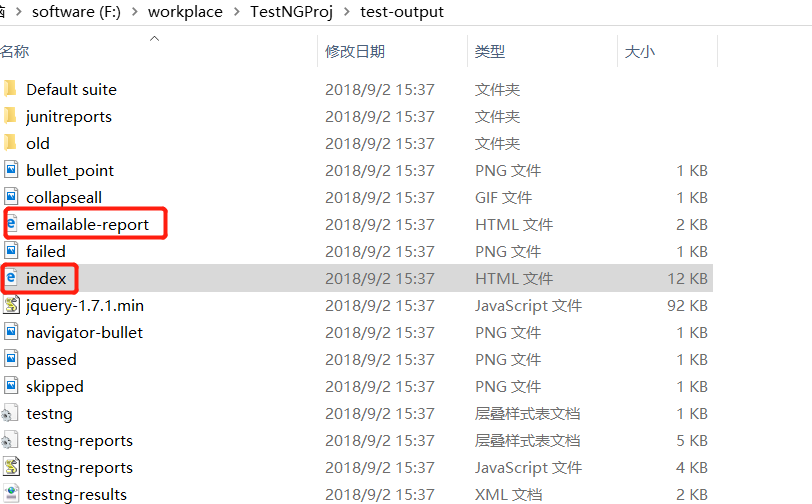
6.testNG也会输出HTML格式的测试报告,访问工程目录下的“test-output”目录下


