微信小程序 实现上传图片功能
1、制作一个微信上传图片的功能
<!-- index.wxml -->
<view class="con">
    <text class="title">上传照片</text>

    <view class="img_list">
        <block wx:for="{{imgList}}" wx:key="index">
          <view class="item_img">
            <image src="{{item}}" class="img_item" mode="aspectFill" catchtap="previewImg"  data-src="{{item}}" ></image>
            <image src="../../assets/img/close1.png" class="close" catchtap="deleteUpload" data-index="{{index}} "></image>
          </view>
        </block>

        <view class="item_img1 flex-column" catchtap="chooseImg"  wx:if="{{show}}">
          <image src="../../assets/img/good_cart03.png" class="add_img" mode="aspectFill"></image>
          <text>{{imgList.length}}/{{maxPhoto}}</text>
        </view>

    </view>

</view>
index.wxss
.con {
  margin: 0 20rpx;
}

.title {
  padding-left: 31rpx;
  font-size: 28rpx;
  font-weight: bold;
  color: #333333;
}


.img_list {
  display: flex;
  flex-wrap: wrap;
  margin-top: 24rpx;
}

.item_img {
  width: 220rpx;
  height: 220rpx;
  margin-right: 23rpx;
  margin-bottom: 23rpx;
  position: relative;
  /* border: 1px solid #ccc; */
}

.img_item {
  width: 220rpx;
  height: 220rpx;
}

.item_img:nth-child(3n) {
  margin-right: 0;
}

.item_img1 {
  width: 220rpx;
  height: 220rpx;
  margin-bottom: 23rpx;
  border: 1px solid #ccc;
  display: flex;
  flex-direction: column;
  align-items: center;
  justify-content: center;
}

.item_img1 text {
  font-size: 26rpx;
  /* font-weight: bold; */
  color: #999999;
}

.add_img {
  width: 60rpx;
  height: 60rpx;
  margin-bottom: 30rpx;
}

.close {
  width: 30rpx;
  height: 30rpx;
  position: absolute;
  top: -15rpx;
  right: -15rpx;
}
index.js
// pages/photoDoor/index.js
Page({

  /**
   * 页面的初始数据
   */
  data: {
    show: true, //显示选择图片的按钮
    imgList: [

    ],
    maxPhoto: 10, //最大上传10张图片
  },


  onLoad: function (options) {},

  onShow: function () {

  },
  /**
   * 选择上传方式
   * @param {*} e
   */
  chooseImg(e) {
    if (this.NextTap) {
      return;
    }
    this.NextTap = true;
    setTimeout(() => {
      this.NextTap = false;
    }, 1500) //1.5秒之后可以再次点击,防止用户重复点击
    wx.showActionSheet({
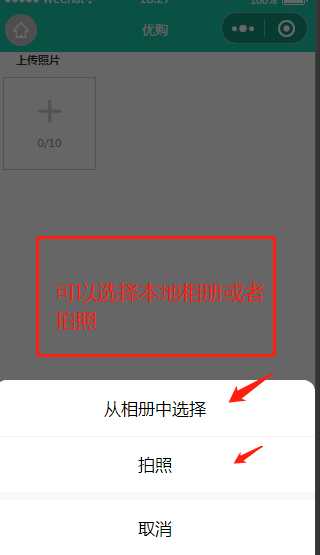
      itemList: ['从相册中选择', '拍照'],
      success: (res) => {
        if (!res.cancel) {
          if (res.tapIndex == 0) {
            this.chooseWxImage('album') //相册
          } else if (res.tapIndex == 1) {
            this.chooseWxImage('camera') //拍照
          }
        }
      }
    })
  },
  /**
   * 上传照片
   * @param {*} type
   */
  chooseWxImage: function (type) {
    let {  imgList, maxPhoto } = this.data
    if (imgList.length > 10) {
      wx.showToast({
        title: '最多上传10张',
        icon: 'none',
        duration: 2000
      })
      return
    }
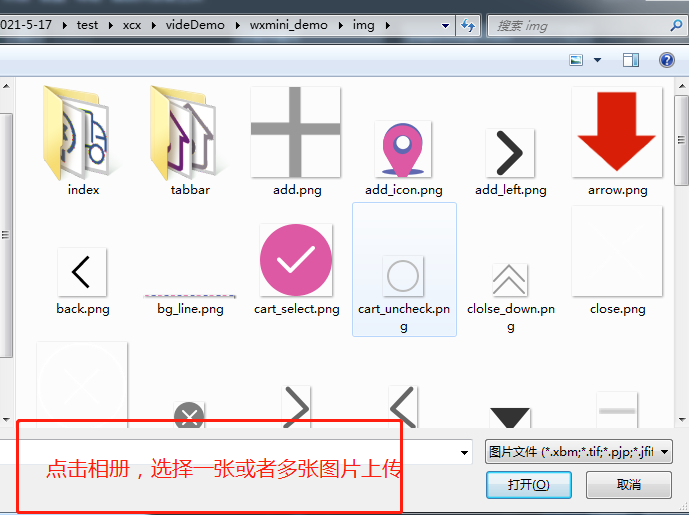
    wx.chooseImage({

      count: maxPhoto - imgList.length, // 最多可以选择多少张图片
      sizeType: ['original', 'compressed'], //所选的图片的尺寸
      sourceType: [type], //图片来源
      success: (res) => {
        console.log(res)
        let tempFilePaths = res.tempFilePaths //成功后返回的的路径
        console.log(tempFilePaths)
        //把图片对应的路径都追加到数组中
        tempFilePaths.forEach(item => {
          imgList.push(item)
        })
        this.setData({
          imgList: imgList,
          show: imgList.length >= 10 ? false : true
        })
      }
    })
  },
  /*
   * 图片预览
   * @param e
   */
  previewImg(e) {
    let currentUrl = e.currentTarget.dataset.src;
    let urls = this.data.imgList
    wx.previewImage({
      current: currentUrl, // 当前显示图片的http链接
      urls: urls // 需要预览的图片http链接列表
    })
  },
  /**
   * 删除上传的图片
   * @param e
   */
  deleteUpload(e) {
    console.log(e)
    let {index} = e.currentTarget.dataset;

    let {imgList} = this.data;
    imgList.splice(index, 1)
    this.setData({
      imgList: imgList,
      show: imgList.length >= 10 ? false : true
    })
  }

})
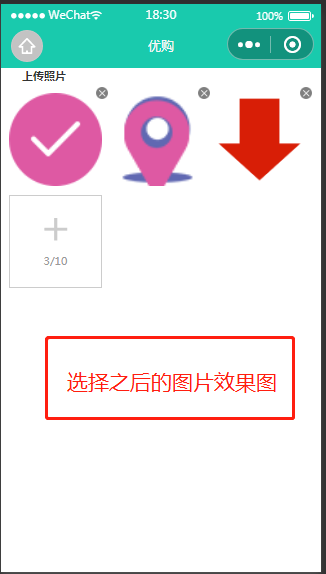
2、效果图如下:


 浙公网安备 33010602011771号