
使用Android Glide,需要先下载Android Glide的库,Android Glide在github上的项目主页:
https://github.com/bumptech/glide 。
实际的项目使用只需要到Glide的releases页面把jar包下载后导入到本地的libs里面即可直接使用。Glide的releases的页面地址:https://github.com/bumptech/glide/releases ,在此页面找到最新的jar包,下载后放到自己项目的libs中,比如glide 3.6.0库的jar包下载地址:https://github.com/bumptech/glide/releases/download/v3.6.0/glide-3.6.0.jar
接下来是在自己的项目中使用,现在给出一个具体的使用例子加以简单说明(通过网络加载图片然后在ImageView中显示出来):
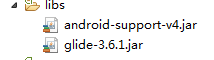
将下载下来的jar文件复制到这里:
 1 package com.example.testglide;
 2
 3 import com.bumptech.glide.Glide;
 4
 5 import android.app.Activity;
 6 import android.content.Context;
 7 import android.os.Bundle;
 8 import android.view.LayoutInflater;
 9 import android.view.View;
10 import android.view.ViewGroup;
11 import android.widget.ArrayAdapter;
12 import android.widget.ImageView;
13 import android.widget.ListView;
14 import android.widget.TextView;
15
16 public class MainActivity extends Activity {
17     // 网络图片地址
18     private String Url = "http://img3.imgtn.bdimg.com/it/u=1183223528,3058066243&fm=21&gp=0.jpg";
19     private MyAdapter mMyAdapter;
20
21     @Override
22     protected void onCreate(Bundle savedInstanceState) {
23         super.onCreate(savedInstanceState);
24         setContentView(R.layout.activity_main);
25
26         ListView lv = (ListView) findViewById(R.id.lv);
27         mMyAdapter = new MyAdapter(this, -1);
28
29         lv.setAdapter(mMyAdapter);
30
31     }
32
33     private class MyAdapter extends ArrayAdapter {
34         private Context context;
35         LayoutInflater flater;
36
37         public MyAdapter(Context context, int resource) {
38             super(context, resource);
39             this.context = context;
40             flater = LayoutInflater.from(context);
41         }
42
43         @Override
44         public int getCount() {
45             return 100;
46         }
47
48         @Override
49         public View getView(int position, View convertView, ViewGroup parent) {
50             if (convertView == null)
51                 convertView = flater.inflate(R.layout.list, null);
52
53             ImageView iv = (ImageView) convertView.findViewById(R.id.iv);
54
55             TextView tv = (TextView) convertView.findViewById(R.id.tv);
56
57             tv.setText(position + "");
58             // placeholder(R.drawable.jinchengtu)这个是加载本地图片 实现加载网络图片过渡用 优化用户体验
59             // crossFade(1000) 设置显示图片淡出时间
60
61             Glide.with(context).load(Url).placeholder(R.drawable.jinchengtu).crossFade(1000).into(iv);
62
63             return convertView;
64         }
65
66     }
67
68 }
xml文件:
 1 <RelativeLayout xmlns:android="http://schemas.android.com/apk/res/android"
 2     xmlns:tools="http://schemas.android.com/tools"
 3     android:layout_width="match_parent"
 4     android:layout_height="match_parent"
 5     tools:context="com.example.testglide.MainActivity" >
 6
 7     <ListView
 8         android:id="@+id/lv"
 9         android:layout_width="wrap_content"
10         android:layout_height="wrap_content"
11         android:layout_centerInParent="true" />
12
13 </RelativeLayout>
 1 <?xml version="1.0" encoding="utf-8"?>
 2 <LinearLayout xmlns:android="http://schemas.android.com/apk/res/android"
 3     android:layout_width="match_parent"
 4     android:layout_height="match_parent"
 5     android:orientation="vertical" >
 6
 7     <ImageView
 8         android:id="@+id/iv"
 9         android:layout_width="match_parent"
10         android:layout_height="wrap_content" />
11
12     <TextView
13         android:id="@+id/tv"
14         android:layout_width="match_parent"
15         android:layout_height="wrap_content"
16         android:background="#00ff00" />
17
18 </LinearLayout>
运行效果图:


 浙公网安备 33010602011771号