安装篇九:安装wordpress(5.4版本)
#1、下载wordpress程序
下载部署wordpress博客程序(https://cn.wordpress.org/   英文官网:https://www.wordpress.org/ )
[root@TEST ~]# yum install unzip
[root@TEST ~]# cd /server/tools/
[root@TEST tools]# unzip wordpress-5.4-zh_CN.zip
#2、移除html下的数据
[root@TEST tools]# mv  /application/nginx/html/* /tmp/
#复制源码到html下面
[root@TEST tools]# mv wordpress/* /application/nginx/html/
#3、创建文件上传目录
#让我们首先在文档根目录的 wp-content 目录下手动创建上传目录,使其成为我们内容的父目录:
[root@TEST html]# mkdir /application/nginx/html/wp-content/uploads
#4、修改代码文件权限
#目前,权限非常受限,修改权限
[root@TEST html]# chown -R www.www /application/nginx/html/   <——说明:这里是www,必须要和执行nginx命令的的权限一样
#5、hosts文件解析
[root@TEST thems]# cat /etc/hosts
127.0.0.1    localhost    localhost.localdomain    localhost4    localhost4.localdomain4
::1         localhost    localhost.localdomain    localhost6    localhost6.localdomain6
47.108.xx.xx   www.xx.com
#6、修改wp-config.php文件
## 拷贝配置文件
[root@TEST thems]# cp /application/nginx/html/wp-config-sample.php /application/nginx/html/wp-config.php
## 修改配置文件信息
[root@TEST thems]# vim /application/nginx/html/wp-config.php
// ** MySQL 设置 - 具体信息来自您正在使用的主机 ** //
define( 'DB_NAME', 'wordpress' );       /** WordPress数据库的名称 */
define( 'DB_USER', 'wordpress' );       /** MySQL数据库用户名 */
define( 'DB_PASSWORD', '' );          /** MySQL数据库密码 */
define( 'DB_HOST', 'localhost' );       /** MySQL主机 */
define( 'DB_CHARSET', 'utf8' );        /** 创建数据表时默认的文字编码 */
define( 'DB_COLLATE', '' );           /** 数据库整理类型。如不确定请勿更改 */

$table_prefix = 'wordpress__';                    <————表前缀
#7、网页端部署网站
## 网页访问改地址:http://47.108.XX.XX
## 填写如下信息

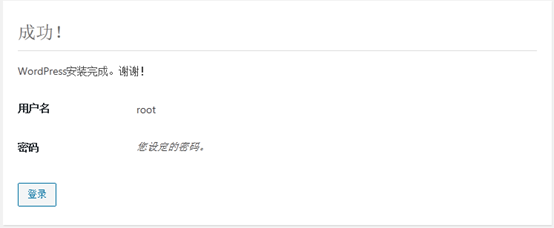
## 进行登录

登录信息:
用户名:root
密码:上面填写的密码
后台界面地址:www.IP地址/wp-admin
至此,基于LNMP架构的wordpress已经安装成功了,大家可以登录进行模板设置

