esp32使用lvgl界面来获得DH11的温湿度并显示出来
因为lvgl本身的定时任务就是个死循环,读取dh11又是个很慢的过程,为了不让gui卡主。就得使用多任务来。esp32的arduino 本身就是运行在free rtos里的 。可以直接新建任务
这里使用的库是 DHT sensor library for ESPx 这个库只能用于esp
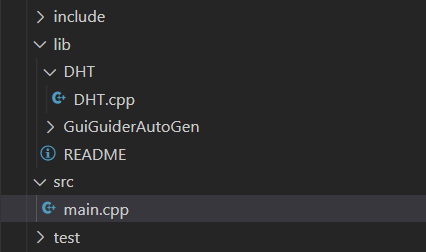
直接运行它的例子当然可以。这里改造下程序适配gui显示。为了尽量不让main。c显得混乱。这里把例程当做库使用。在lib文件夹下新建文件夹DHT,里边新建一个cpp文件
把例子中的除了setup跟loop的都靠过来,并添加lvlg跟main.c里声明的变量的引用
这里是DHT。cpp的全文
#include "DHTesp.h" // Click here to get the library: http://librarymanager/All#DHTesp
#include <Ticker.h> //引入定时中断库

#ifndef ESP32
#pragma message(THIS EXAMPLE IS FOR ESP32 ONLY !)
#error Select ESP32 board.
#endif

/**************************************************************/
/* Example how to read DHT sensors from an ESP32 using multi- */
/* tasking.                                                   */
/* This example depends on the Ticker library to wake up      */
/* the task every 20 seconds                                  */
/**************************************************************/
/************************************************* *************/
/* 示例如何使用 从 ESP32 读取 DHT 传感器 */
/* 多任务。 */
/* 这个例子依赖于 Ticker 库来唤醒 */
/* 每 20 秒执行一次任务 */
/************************************************* *************/

#include "gui_guider.h" //需要引用lv_ui的定义文件 ,在这个文件里不认识lv-ui结构体
extern lv_ui guider_ui; // ectern表示从外部的定义引用,这里是引用main文件里的定义,

DHTesp dht;

void tempTask(void *pvParameters);
bool getTemperature();
void triggerGetTemp();

/** Task handle for the light value read task */
/** 值读取任务的任务句柄 */
TaskHandle_t tempTaskHandle = NULL;

/** Ticker for temperature reading */
/** 温度读数的代码 */
Ticker tempTicker;

/** Comfort profile */
/** 舒适度配置文件 */
ComfortState cf;

/** Flag if task should run */
/** 标记任务是否应该运行 */
bool tasksEnabled = false;

/** Pin number for DHT11 data pin */
/** DHT11 数据引脚的引脚号 */
int dhtPin = 25;

/**
 * initTemp
 * Setup DHT library
 * Setup task and timer for repeated measurement
 * * 初始化温度
 * 设置 DHT 库
 * 为重复测量设置任务和计时器
 * @return bool
 *    true if task and timer are started
 *    false if task or timer couldn't be started
 * * 如果任务和计时器启动则为真
 * false 如果任务或计时器无法启动
 */
bool initTemp()
{
    byte resultValue = 0;
    // Initialize temperature sensor 初始化温度传感器
    dht.setup(dhtPin, DHTesp::DHT11);
    Serial.println("DHT initiated");

    // Start task to get temperature 开始任务
    xTaskCreatePinnedToCore(
        tempTask,        /* Function to implement the task任务要运行的函数*/
        "tempTask ",     /* Name of the task 任务的名字*/
        4000,            /* Stack size in words 分配的堆栈大小*/
        NULL,            /* Task input parameter 给任务传递的参数*/
        5,               /* Priority of the task 优先级*/
        &tempTaskHandle, /* Task handle.任务勾柄 */
        1);              /* Core where the task should run 运行在那个核心*/

    if (tempTaskHandle == NULL)
    {
        Serial.println("Failed to start task for temperature update");
        return false;
    }
    else
    {
        // Start update of environment data every 20 seconds每20秒运行一次测量温度
        tempTicker.attach(20, triggerGetTemp);
    }
    return true;
}

/**
 * triggerGetTemp
 * Sets flag dhtUpdated to true for handling in loop()
 * called by Ticker getTempTimer
 * * 触发GetTemp
 * 将标志 dhtUpdated 设置为 true 以便在 loop() 中处理
 * 由 Ticker getTempTimer 调用
 */
void triggerGetTemp()
{
    if (tempTaskHandle != NULL)
    {
        xTaskResumeFromISR(tempTaskHandle);
    }
}

/**
 * Task to reads temperature from DHT11 sensor 读传感器的任务
 * @param pvParameters
 *    pointer to task parameters 任务指针
 */
void tempTask(void *pvParameters)
{
    Serial.println("tempTask loop started");
    while (1) // tempTask loop  任务无限循环
    {
        if (tasksEnabled)
        {
            // Get temperature values获得温度
            getTemperature();
        }
        // Got sleep again 睡眠
        vTaskSuspend(NULL);
    }
}

/**
 * getTemperature
 * Reads temperature from DHT11 sensor
 * * 获取温度
 * 从 DHT11 传感器读取温度
 * @return bool
 *    true if temperature could be aquired
 *    false if aquisition failed
 * * 如果可以获取温度,则为 true * 如果获取失败,则为 false
 */
bool getTemperature()
{
    // Reading temperature for humidity takes about 250 milliseconds!
    // Sensor readings may also be up to 2 seconds 'old' (it's a very slow sensor)
    // 读取湿度的温度大约需要 250 毫秒!
    // 传感器读数也可能长达 2 秒“旧”(这是一个非常慢的传感器)
    TempAndHumidity newValues = dht.getTempAndHumidity();
    // Check if any reads failed and exit early (to try again).
    // 检查是否有任何读取失败并提前退出(重试)。
    if (dht.getStatus() != 0)
    {
        Serial.println("DHT11 error status: " + String(dht.getStatusString()));
        return false;
    }
    //计算体感温度,凝露点,舒适度
    float heatIndex = dht.computeHeatIndex(newValues.temperature, newValues.humidity);
    float dewPoint = dht.computeDewPoint(newValues.temperature, newValues.humidity);
    float cr = dht.getComfortRatio(cf, newValues.temperature, newValues.humidity);

    String comfortStatus;
    switch (cf)
    {
    case Comfort_OK:
        comfortStatus = "Comfort_OK";
        break;
    case Comfort_TooHot:
        comfortStatus = "Comfort_TooHot";
        break;
    case Comfort_TooCold:
        comfortStatus = "Comfort_TooCold";
        break;
    case Comfort_TooDry:
        comfortStatus = "Comfort_TooDry";
        break;
    case Comfort_TooHumid:
        comfortStatus = "Comfort_TooHumid";
        break;
    case Comfort_HotAndHumid:
        comfortStatus = "Comfort_HotAndHumid";
        break;
    case Comfort_HotAndDry:
        comfortStatus = "Comfort_HotAndDry";
        break;
    case Comfort_ColdAndHumid:
        comfortStatus = "Comfort_ColdAndHumid";
        break;
    case Comfort_ColdAndDry:
        comfortStatus = "Comfort_ColdAndDry";
        break;
    default:
        comfortStatus = "Unknown:";
        break;
    };
    String TempHumTodisplay = " 温度:" + String(newValues.temperature) + " 湿度:" + String(newValues.humidity) + " 体感温度:" + String(heatIndex) + " 凝露点:" + String(dewPoint) + " " + comfortStatus;
    Serial.println(TempHumTodisplay);

    /*把测量结果显示到屏幕ta对象上*/
    lv_textarea_set_text((&guider_ui)->screen_ta_1, TempHumTodisplay.c_str()); // guider_ui是结构体的名字不能直接当指针用,当然用.也是可以的

    return true;
}
main.cpp里加入对dht。cpp的引用,并把setup跟loop里的代码复制过来。(如果是典型的arduino文件夹,会是一个跟文件夹同名的ino文件,arduo是会把这个文件内所用。ino的文件都合并成一个文件的)
#include "DHTesp.h" // Click here to get the library: http://librarymanager/All#DHTesp
#include <Ticker.h> //引入定时中断库

#ifndef ESP32
#pragma message(THIS EXAMPLE IS FOR ESP32 ONLY !)
#error Select ESP32 board.
#endif

/**************************************************************/
/* Example how to read DHT sensors from an ESP32 using multi- */
/* tasking.                                                   */
/* This example depends on the Ticker library to wake up      */
/* the task every 20 seconds                                  */
/**************************************************************/
/************************************************* *************/
/* 示例如何使用 从 ESP32 读取 DHT 传感器 */
/* 多任务。 */
/* 这个例子依赖于 Ticker 库来唤醒 */
/* 每 20 秒执行一次任务 */
/************************************************* *************/

#include "gui_guider.h" //需要引用lv_ui的定义文件 ,在这个文件里不认识lv-ui结构体
extern lv_ui guider_ui; // ectern表示从外部的定义引用,这里是引用main文件里的定义,

DHTesp dht;

void tempTask(void *pvParameters);
bool getTemperature();
void triggerGetTemp();

/** Task handle for the light value read task */
/** 值读取任务的任务句柄 */
TaskHandle_t tempTaskHandle = NULL;

/** Ticker for temperature reading */
/** 温度读数的代码 */
Ticker tempTicker;

/** Comfort profile */
/** 舒适度配置文件 */
ComfortState cf;

/** Flag if task should run */
/** 标记任务是否应该运行 */
bool tasksEnabled = false;

/** Pin number for DHT11 data pin */
/** DHT11 数据引脚的引脚号 */
int dhtPin = 25;

/**
 * initTemp
 * Setup DHT library
 * Setup task and timer for repeated measurement
 * * 初始化温度
 * 设置 DHT 库
 * 为重复测量设置任务和计时器
 * @return bool
 *    true if task and timer are started
 *    false if task or timer couldn't be started
 * * 如果任务和计时器启动则为真
 * false 如果任务或计时器无法启动
 */
bool initTemp()
{
    byte resultValue = 0;
    // Initialize temperature sensor 初始化温度传感器
    dht.setup(dhtPin, DHTesp::DHT11);
    Serial.println("DHT initiated");

    // Start task to get temperature 开始任务
    xTaskCreatePinnedToCore(
        tempTask,        /* Function to implement the task任务要运行的函数*/
        "tempTask ",     /* Name of the task 任务的名字*/
        4000,            /* Stack size in words 分配的堆栈大小*/
        NULL,            /* Task input parameter 给任务传递的参数*/
        5,               /* Priority of the task 优先级*/
        &tempTaskHandle, /* Task handle.任务勾柄 */
        1);              /* Core where the task should run 运行在那个核心*/

    if (tempTaskHandle == NULL)
    {
        Serial.println("Failed to start task for temperature update");
        return false;
    }
    else
    {
        // Start update of environment data every 20 seconds每20秒运行一次测量温度
        tempTicker.attach(20, triggerGetTemp);
    }
    return true;
}

/**
 * triggerGetTemp
 * Sets flag dhtUpdated to true for handling in loop()
 * called by Ticker getTempTimer
 * * 触发GetTemp
 * 将标志 dhtUpdated 设置为 true 以便在 loop() 中处理
 * 由 Ticker getTempTimer 调用
 */
void triggerGetTemp()
{
    if (tempTaskHandle != NULL)
    {
        xTaskResumeFromISR(tempTaskHandle);
    }
}

/**
 * Task to reads temperature from DHT11 sensor 读传感器的任务
 * @param pvParameters
 *    pointer to task parameters 任务指针
 */
void tempTask(void *pvParameters)
{
    Serial.println("tempTask loop started");
    while (1) // tempTask loop  任务无限循环
    {
        if (tasksEnabled)
        {
            // Get temperature values获得温度
            getTemperature();
        }
        // Got sleep again 睡眠
        vTaskSuspend(NULL);
    }
}

/**
 * getTemperature
 * Reads temperature from DHT11 sensor
 * * 获取温度
 * 从 DHT11 传感器读取温度
 * @return bool
 *    true if temperature could be aquired
 *    false if aquisition failed
 * * 如果可以获取温度,则为 true * 如果获取失败,则为 false
 */
bool getTemperature()
{
    // Reading temperature for humidity takes about 250 milliseconds!
    // Sensor readings may also be up to 2 seconds 'old' (it's a very slow sensor)
    // 读取湿度的温度大约需要 250 毫秒!
    // 传感器读数也可能长达 2 秒“旧”(这是一个非常慢的传感器)
    TempAndHumidity newValues = dht.getTempAndHumidity();
    // Check if any reads failed and exit early (to try again).
    // 检查是否有任何读取失败并提前退出(重试)。
    if (dht.getStatus() != 0)
    {
        Serial.println("DHT11 error status: " + String(dht.getStatusString()));
        return false;
    }
    //计算体感温度,凝露点,舒适度
    float heatIndex = dht.computeHeatIndex(newValues.temperature, newValues.humidity);
    float dewPoint = dht.computeDewPoint(newValues.temperature, newValues.humidity);
    float cr = dht.getComfortRatio(cf, newValues.temperature, newValues.humidity);

    String comfortStatus;
    switch (cf)
    {
    case Comfort_OK:
        comfortStatus = "Comfort_OK";
        break;
    case Comfort_TooHot:
        comfortStatus = "Comfort_TooHot";
        break;
    case Comfort_TooCold:
        comfortStatus = "Comfort_TooCold";
        break;
    case Comfort_TooDry:
        comfortStatus = "Comfort_TooDry";
        break;
    case Comfort_TooHumid:
        comfortStatus = "Comfort_TooHumid";
        break;
    case Comfort_HotAndHumid:
        comfortStatus = "Comfort_HotAndHumid";
        break;
    case Comfort_HotAndDry:
        comfortStatus = "Comfort_HotAndDry";
        break;
    case Comfort_ColdAndHumid:
        comfortStatus = "Comfort_ColdAndHumid";
        break;
    case Comfort_ColdAndDry:
        comfortStatus = "Comfort_ColdAndDry";
        break;
    default:
        comfortStatus = "Unknown:";
        break;
    };
    String TempHumTodisplay = " 温度:" + String(newValues.temperature) + " 湿度:" + String(newValues.humidity) + " 体感温度:" + String(heatIndex) + " 凝露点:" + String(dewPoint) + " " + comfortStatus;
    Serial.println(TempHumTodisplay);

    /*把测量结果显示到屏幕ta对象上*/
    lv_textarea_set_text((&guider_ui)->screen_ta_1, TempHumTodisplay.c_str()); // guider_ui是结构体的名字不能直接当指针用,当然用.也是可以的

    return true;
}
图形界面就是用gui guider 简单添加一个textarea就行
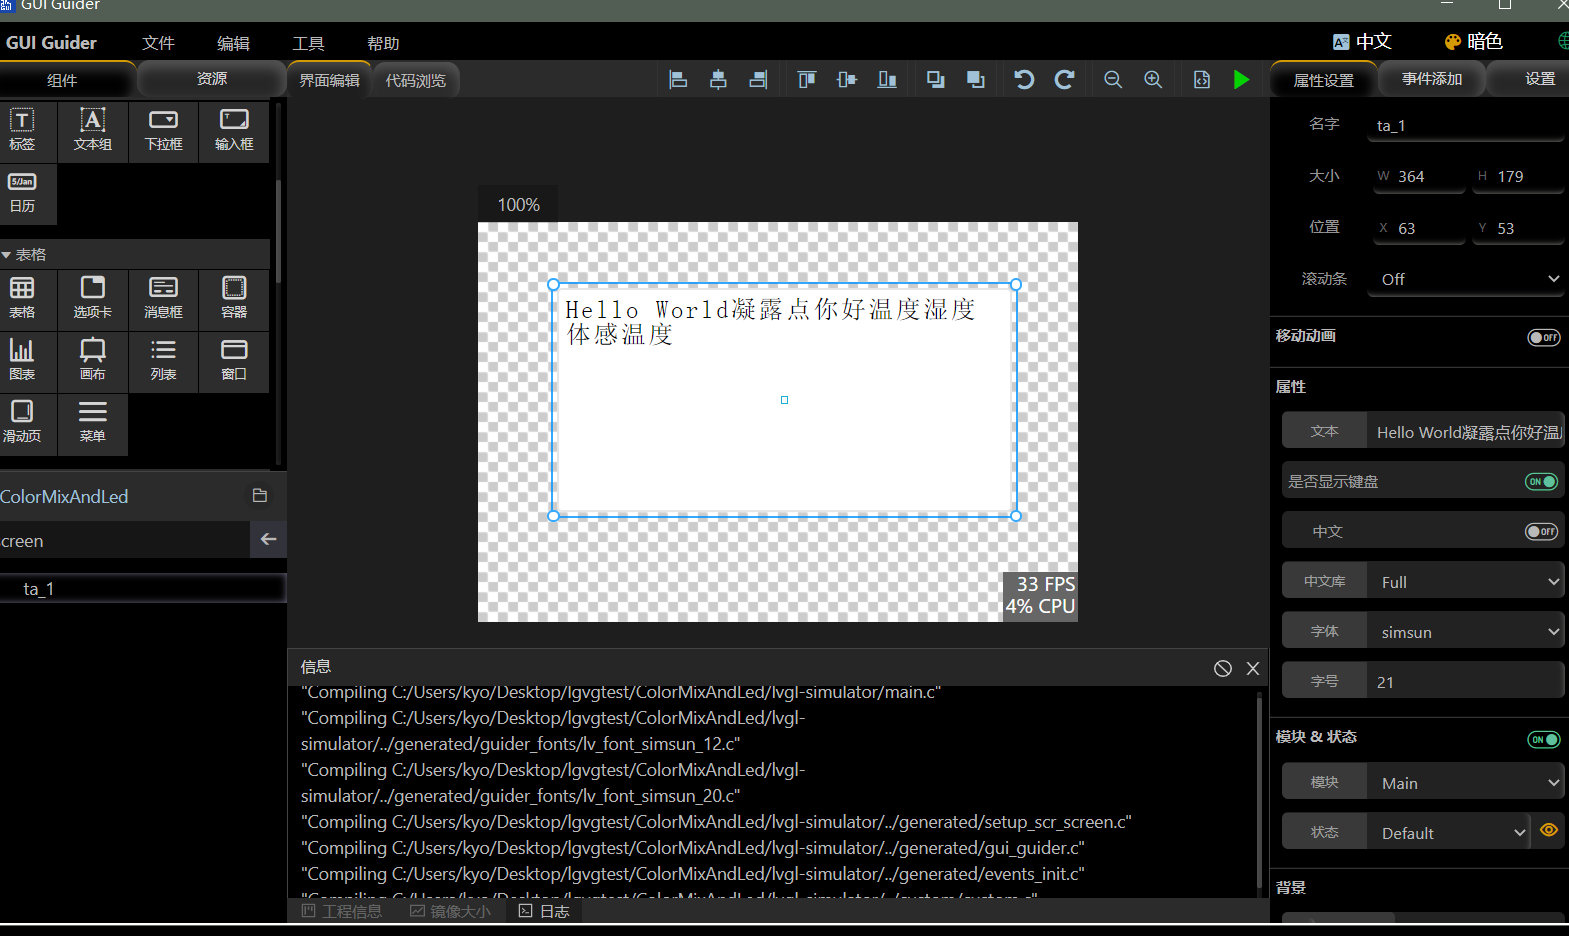
实际运行效果
9.79 OxS:/ c语言坑各踩一遍,给找不变量定义的程序加引用 显示中文 https://v.douyin.com/jqFYFMy/ 复制此链接,打开Dou音搜索,直接观看视频!

 浙公网安备 33010602011771号