使用Nexus配置Maven私有仓库
一、 安装配置Nexus
1、 下载nexus
https://www.sonatype.com/download-oss-sonatype
2、 解压:tar -zxf nexus-3.5.2-01-unix.tar.gz
3、 进入bin目录启动:./nexus run &
出现如下界面启动成功
-------------------------------------------------
Started Sonatype Nexus OSS 3.5.2-01
-------------------------------------------------
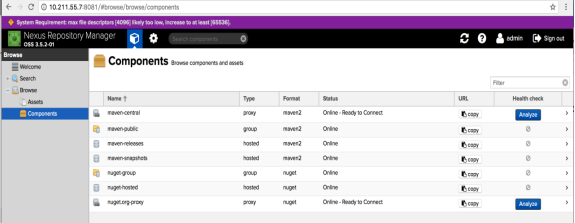
4、 访问http://10.211.55.7:8081/ 可以登录
默认端口号:8081
默认账号:admin
默认密码:admin123
5、 配置修改
5.1、修改运行nexus3所使用的用户:
[root@bigdata1 bin]#vi nexus.rc
run_as_user=”root”
5.2、修改nexus3启动所使用的jdk版本
[root@bigdata1 bin]#vi nexus
INSTALL4J_JAVA_HOME_OVERRIDE=/data/program/software/java8
5.3、修改nexus3默认端口
[root@bigdata1 etc]# vi nexus-default.properties
application-port=8282
5.4、修改nexus3数据以及相关日志的存储位置
[root@bigdata1 etc]# vi nexus.vmoptions
-XX:LogFile=./sonatype-work/nexus3/log/jvm.log
-Dkaraf.data=./sonatype-work/nexus3
-Djava.io.tmpdir=./sonatype-work/nexus3/tmp
二、 修改settings.xml配置,使用nexus私有库
<?xml version="1.0" encoding="UTF-8"?>
<settings xmlns="http://maven.apache.org/SETTINGS/1.0.0"
xmlns:xsi="http://www.w3.org/2001/XMLSchema-instance"
xsi:schemaLocation="http://maven.apache.org/SETTINGS/1.0.0 http://maven.apache.org/xsd/settings-1.0.0.xsd">
<localRepository>${user.home}/.m2/repository</localRepository>
<interactiveMode>true</interactiveMode>
<offline>false</offline>
<pluginGroups>
<pluginGroup>org.mortbay.jetty</pluginGroup>
<pluginGroup>org.jenkins-ci.tools</pluginGroup>
</pluginGroups>
<servers>
<server>
<id>nexus-releases</id>
<username>admin</username>
<password>admin123</password>
</server>
<server>
<id>nexus-snapshots</id>
<username>admin</username>
<password>admin123</password>
</server>
</servers>
这是Server的ID(不是登录进来的user),与Maven想要连接上的repository/mirror中的id元素相匹配。username,password:这两个元素成对出现,表示连接这个server需要验证username和password。在nexus中,默认管理员用户名为admin,密码为admin123。这里使用两个服务器配置,分别对应release和snapshot。
<mirrors>
<mirror>
<id>nexus-releases</id>
<mirrorOf>*</mirrorOf>
<url>http://10.211.55.7:8081/repository/maven-public/</url>
</mirror>
<mirror>
<id>nexus-snapshots</id>
<mirrorOf>*</mirrorOf>
<url>http://10.211.55.7:8081/repository/maven-snapshots/</url>
</mirror>
</mirrors>
id,name:唯一的镜像标识和用户友好的镜像名称。id被用来区分mirror元素,并且当连接时候被用来获得相应的证书。
mirrorOf:镜像所包含的仓库的Id。例如,指向Maven central仓库的镜像(http://repo1.maven.org/maven2/),设置这个元素为central。更多的高级映射例如repo1,repo2 或者*,!inhouse都是可以的。没必要一定和mirror的id相匹配。在这里mirrorOf项当然应该使用*,以表明是所有仓库都会被镜像到指定的地址。
url:镜像基本的URL,构建系统将使用这个URL来连接仓库。这里应该添nexus仓库的地址,地址可以在nexus仓库页面中找到。
<profiles>
<profile>
<id>nexus</id>
<repositories>
<repository>
<id>nexus-releases</id>
<url>http://nexus-releases</url>
<releases><enabled>true</enabled></releases>
<snapshots><enabled>true</enabled></snapshots>
</repository>
<repository>
<id>nexus-snapshots</id>
<url>http://nexus-snapshots</url>
<releases><enabled>true</enabled></releases>
<snapshots><enabled>true</enabled></snapshots>
</repository>
</repositories>
<pluginRepositories>
<pluginRepository>
<id>nexus-releases</id>
<url>http://nexus-releases</url>
<releases><enabled>true</enabled></releases>
<snapshots><enabled>true</enabled></snapshots>
</pluginRepository>
<pluginRepository>
<id>nexus-snapshots</id>
<url>http://nexus-snapshots</url>
<releases><enabled>true</enabled></releases>
<snapshots><enabled>true</enabled></snapshots>
</pluginRepository>
</pluginRepositories>
</profile>
</profiles>
profile项代表maven的基本配置。按照maven的一贯尿性,很多xml的配置项都会有一个配置项的复数形式作为父节点,以保证该配置项可以配置多个。在profiles项中,当然也可以配置多个profile,不过在这里配一个就够了。下面介绍profile项的各个子节点。
id:用来确定该profile的唯一标识。
repositories/repository:用以规定依赖包仓库的相关信息。在下属节点中,id就不用多说了;URL是指仓库地址,这里使用伪造的地址,否则即使设置了mirror,maven也有可能会直接从中央仓库下载包;releases和snapshots放在一块说吧,这两个节点下属的enable节点用以规定对应的依赖包是否对当前策略有效,假如将snapshot的enable项设为disable,则不会下载snapshot包。
<activeProfiles>
<activeProfile>nexus</activeProfile>
</activeProfiles>
</settings>
用以规定当前启用的配置,将对应profile的ID加入到这一项即可使profile生效。
三、 上传jar到nexus
第一种方式:
mvn deploy:deploy-file -DgroupId=com.alibaba -DartifactId=dubbo -Dversion=2.8.4 -Dpackaging=jar -Dfile=/Users/zhangyong/Documents/software/dubbo-2.8.4.jar -Durl=http://10.211.55.7:8081/repository/maven-releases/ -DrepositoryId=nexus-releases
DrepositoryId和settings.xml里配置的id一样
第二种方式:
代码的pom.xml中直接接入
<distributionManagement>
<repository>
<id>nexus-releases</id>
<name>maven-releases</name>
<url>http://10.211.55.7:8081/repository/maven-releases/</url>
</repository>
</distributionManagement>
mvn deploy
