OpenStack RedHat搭建
一、准备环境
控制节点及计算节点必须开启虚拟化引擎Intel VT-x或AMD-V,且控制节点未来将被复用为计算节点;虚拟机配置可根据实际情况进行调整;务必配置 DNS,否则安装过程会出错
| 主机名 | IP | 网关/DNS | CPU/内存 | 磁盘 | 角色 |
|---|---|---|---|---|---|
| controller | 192.168.100.10/24 | 192.168.100.254 | 4核 8G | 100G | 控制节点 |
| compute | 192.168.100.20/24 | 192.168.100.254 | 4核 4G | 100G | 计算节点 |
| ntp | 192.168.100.30/24 | 192.168.100.254 | 4核 2G | 50G | NTP时钟源 |
CPU内存配置按自己电脑的性能配置
二、环境配置
2.1 配置主机名
#192.168.100.10
[root@localhost ~]# hostnamectl set-hostname controller
[root@localhost ~]# bash
[root@controller ~]#
#192.168.100.20
[root@localhost ~]# hostnamectl set-hostname compute
[root@localhost ~]# bash
[root@compute ~]#
#192.168.100.30
[root@localhost ~]# hostnamectl set-hostname ntp
[root@localhost ~]# bash
[root@ntp ~]#
2.2 配置主机解析
[root@controller ~]# vi /etc/hosts
127.0.0.1   localhost localhost.localdomain localhost4 localhost4.localdomain4
::1         localhost localhost.localdomain localhost6 localhost6.localdomain6
192.168.100.10 controller
192.168.100.20 compute
192.168.100.30 ntp
[root@compute ~]# vi /etc/hosts
127.0.0.1   localhost localhost.localdomain localhost4 localhost4.localdomain4
::1         localhost localhost.localdomain localhost6 localhost6.localdomain6
192.168.100.10 controller
192.168.100.20 compute
192.168.100.30 ntp
[root@ntp ~]# vi /etc/hosts
127.0.0.1   localhost localhost.localdomain localhost4 localhost4.localdomain4
::1         localhost localhost.localdomain localhost6 localhost6.localdomain6
192.168.100.10 controller
192.168.100.20 compute
192.168.100.30 ntp
2.3 关闭DNS反向解析
实验测试环境建议关闭主机名的反向解析,加速三方工具连接
[root@controller ~]# vi /etc/ssh/sshd_config
[root@compute ~]# vi /etc/ssh/sshd_config
[root@ntp ~]# vi /etc/ssh/sshd_config
查找行 #UseDNS yes,修改为 UseDNS no,保存退出并重启服务
[root@controller ~]# systemctl restart sshd
[root@compute ~]# systemctl restart sshd
[root@ntp ~]# systemctl restart sshd
2.4 配置YUM源
controller 控制节点
[root@controller ~]# rm -rf /etc/yum.repos.d/*
[root@controller ~]# vi /etc/yum.repos.d/osp.repo
[root@controller ~]# cat /etc/yum.repos.d/osp.repo
[osp]
name=osp
baseurl=file:///mnt/
enabled=1
gpgcheck=0
[root@controller ~]# mount /dev/cdrom /mnt/
[root@controller ~]# yum clean all
[root@controller ~]# yum repolist
compute 计算节点
[root@compute ~]# rm -rf /etc/yum.repos.d/*
[root@compute ~]# vi /etc/yum.repos.d/osp.repo
[root@compute ~]# cat /etc/yum.repos.d/osp.repo
[osp]
name=osp
baseurl=file:///mnt/
enabled=1
gpgcheck=0
[root@compute ~]# mount /dev/cdrom /mnt/
[root@compute ~]# yum clean all
[root@compute ~]# yum repolist
ntp 时钟源节点
[root@ntp ~]# rm -rf /etc/yum.repos.d/*
[root@ntp ~]# vi /etc/yum.repos.d/osp.repo
[root@ntp ~]# cat /etc/yum.repos.d/osp.repo
[osp]
name=osp
baseurl=file:///mnt/
enabled=1
gpgcheck=0
[root@ntp ~]# mount /dev/cdrom /mnt/
[root@ntp ~]# yum clean all
[root@ntp ~]# yum repolist
2.5 安装所需包
controller / compute / ntp 分别执行
yum install -y lrzsz \
vim \
bash-completion \
net-tools \
openssl \
openssl-devel \
chrony.x86_64 \
zip \
unzip \
ntpdate \
telnet
加载新的环境变量以实现自动补全
source /etc/profile.d/bash_completion.sh
2.6 关闭防火墙
[root@controller ~]# systemctl stop firewalld.service
[root@controller ~]# systemctl disable firewalld.service

[root@compute ~]# systemctl stop firewalld.service
[root@compute ~]# systemctl disable firewalld.service

[root@ntp ~]# systemctl stop firewalld.service
[root@ntp ~]# systemctl disable firewalld.service
2.7 关闭NetworkManager
[root@controller ~]# systemctl stop NetworkManager.service
[root@controller ~]# systemctl disable NetworkManager.service

[root@compute ~]# systemctl stop NetworkManager.service
[root@compute ~]# systemctl disable NetworkManager.service

[root@ntp ~]# systemctl stop NetworkManager.service
[root@ntp ~]# systemctl disable NetworkManager.service
2.8 关闭SELinux
[root@controller ~]# setenforce 0
[root@controller ~]# vim /etc/selinux/config
SELINUX=enforcing 改成 SELINUX=disabled

[root@compute ~]# setenforce 0
[root@compute ~]# vim /etc/selinux/config
SELINUX=enforcing 改成 SELINUX=disabled

[root@ntp ~]# setenforce 0
[root@ntp ~]# vim /etc/selinux/config
SELINUX=enforcing 改成 SELINUX=disabled
2.9 NTP节点配置 OpenStack YUM 源
创建目录并上传 iso
[root@ntp ~]# mkdir /iso_images
[root@ntp ~]# cd /iso_images/
[root@ntp iso_images]# ls
rhel-server-7.1-x86_64-dvd.iso
RHEL7OSP-6.0-2015-02-23.2-x86_64.iso
安装httpd并启动服务
[root@ntp ~]# yum -y install httpd
[root@ntp ~]# systemctl start httpd
[root@ntp ~]# systemctl enable httpd
创建目录挂载镜像
[root@ntp ~]# cd /var/www/html/
[root@ntp html]# mkdir dvd
[root@ntp html]# mkdir openstack
[root@ntp html]# ls
dvd  openstack
[root@ntp html]# vim /etc/fstab
#
# /etc/fstab
# Created by anaconda on Tue Aug 23 21:57:25 2022
#
# Accessible filesystems, by reference, are maintained under '/dev/disk'
# See man pages fstab(5), findfs(8), mount(8) and/or blkid(8) for more info
#
/dev/mapper/rhel-root   /                       xfs     defaults        0 0
UUID=8d95dffb-d8e0-48fa-a94e-a19c198b7ca1 /boot                   xfs     defaults        0 0
/dev/mapper/rhel-swap   swap                    swap    defaults        0 0
/iso_images/rhel-server-7.1-x86_64-dvd.iso /var/www/html/dvd iso9660 defaults 0 0
/iso_images/RHEL7OSP-6.0-2015-02-23.2-x86_64.iso /var/www/html/openstack iso9660  defaults  0 0
[root@ntp html]# mount -a
mount: /dev/loop0 is write-protected, mounting read-only
mount: /dev/loop1 is write-protected, mounting read-only
配置OpenStack yum源
[root@ntp ~]# vim /etc/yum.repos.d/openstack.repo
[rheliso]
name = rheliso
baseurl = http://192.168.100.30/dvd/
gpgcheck = 0
enabled = 1
[RH7-RHOS-6.0]
name = RH7-RHOS-6.0
baseurl = http://192.168.100.30/openstack/RH7-RHOS-6.0
gpgcheck = 0
enabled = 1
[RH7-RHOS-6.0-Installer]
name = RH7-RHOS-6.0-Installer
baseurl = http://192.168.100.30/openstack/RH7-RHOS-6.0-Installer
gpgcheck = 0
enabled = 1
[RHEL7-Errata]
name = RHEL7-Errata
baseurl = http://192.168.100.30/openstack/RHEL7-Errata
gpgcheck = 0
enabled = 1
[RHEL-7-RHSCL-1.2]
name = RHEL-7-RHSCL-1.2
baseurl = http://192.168.100.30/openstack/RHEL-7-RHSCL-1.2
gpgcheck = 0
enabled = 1
[root@ntp ~]# yum repolist
Loaded plugins: product-id, subscription-manager
This system is not registered to Red Hat Subscription Management. You can use subscription-manager to register.
RH7-RHOS-6.0                                          | 1.3 kB     00:00
RH7-RHOS-6.0-Installer                                | 1.2 kB     00:00
RHEL-7-RHSCL-1.2                                      | 3.3 kB     00:00
RHEL7-Errata                                          | 2.9 kB     00:00
rheliso                                               | 4.1 kB     00:00
(1/6): RH7-RHOS-6.0/primary                             | 117 kB   00:00
(2/6): RH7-RHOS-6.0-Installer/primary                   |  47 kB   00:00
(3/6): rheliso/primary_db                               | 3.4 MB   00:00
(4/6): RHEL-7-RHSCL-1.2/primary_db                      | 776 kB   00:00
(5/6): RHEL7-Errata/primary_db                          |  10 kB   00:00
(6/6): rheliso/group_gz                                 | 134 kB   00:00
RH7-RHOS-6.0                                                         393/393
RH7-RHOS-6.0-Installer                                               194/194
repo id                            repo name                           status
RH7-RHOS-6.0                       RH7-RHOS-6.0                          393
RH7-RHOS-6.0-Installer             RH7-RHOS-6.0-Installer                194
RHEL-7-RHSCL-1.2                   RHEL-7-RHSCL-1.2                    1,766
RHEL7-Errata                       RHEL7-Errata                           11
osp                                osp                                 4,371
rheliso                            rheliso                             4,371
repolist: 11,106
将repo文件拷贝到controller节点及compute节点
[root@ntp ~]# scp /etc/yum.repos.d/openstack.repo controller:/etc/yum.repos.d
The authenticity of host 'controller (192.168.100.10)' can't be established.
ECDSA key fingerprint is eb:b1:49:eb:23:17:83:01:89:cd:57:33:07:d6:3d:c2.
Are you sure you want to continue connecting (yes/no)? yes
Warning: Permanently added 'controller,192.168.100.10' (ECDSA) to the list of known hosts.
root@controller's password:
openstack.repo                             100%  589     0.6KB/s   00:00
[root@ntp ~]# scp /etc/yum.repos.d/openstack.repo compute:/etc/yum.repos.d
The authenticity of host 'compute (192.168.100.20)' can't be established.
ECDSA key fingerprint is d6:b3:9e:eb:3c:c2:9c:c1:96:52:c8:c2:b2:f3:f7:d4.
Are you sure you want to continue connecting (yes/no)? yes
Warning: Permanently added 'compute,192.168.100.20' (ECDSA) to the list of known hosts.
root@compute's password:
openstack.repo                             100%  589     0.6KB/s   00:00
3.0 配置NTP服务
配置ntp服务端
[root@ntp ~]# systemctl restart chronyd.service
[root@ntp ~]# vim /etc/chrony.conf
# Please consider joining the pool (http://www.pool.ntp.org/join.html).
#server 0.rhel.pool.ntp.org iburst
#server 1.rhel.pool.ntp.org iburst
#server 2.rhel.pool.ntp.org iburst
#server 3.rhel.pool.ntp.org iburst

# Allow NTP client access from local network.
allow 192.168.100/24

# Serve time even if not synchronized to any NTP server.
local stratum 10
[root@ntp ~]# systemctl restart chronyd.service
配置ntp客户端
[root@controller ~]# vim /etc/chrony.conf
# Use public servers from the pool.ntp.org project.
# Please consider joining the pool (http://www.pool.ntp.org/join.html).
#server 0.rhel.pool.ntp.org iburst
#server 1.rhel.pool.ntp.org iburst
#server 2.rhel.pool.ntp.org iburst
#server 3.rhel.pool.ntp.org iburst
server ntp iburst
[root@controller ~]# systemctl restart chronyd.service
[root@controller ~]# ntpdate ntp
24 Aug 21:15:18 ntpdate[2057]: adjust time server 192.168.100.30 offset -0.004055 sec

[root@compute ~]# vim /etc/chrony.conf
# Use public servers from the pool.ntp.org project.
# Please consider joining the pool (http://www.pool.ntp.org/join.html).
#server 0.rhel.pool.ntp.org iburst
#server 1.rhel.pool.ntp.org iburst
#server 2.rhel.pool.ntp.org iburst
#server 3.rhel.pool.ntp.org iburst
server ntp iburst
[root@compute ~]# systemctl restart chronyd.service
[root@compute ~]# ntpdate ntp
24 Aug 21:15:45 ntpdate[2019]: adjust time server 192.168.100.30 offset -0.000976 sec
手动配置时间 date -s
三、安装配置
3.1 controller控制节点安装PackStack
[root@controller ~]# yum -y install openstack-packstack
3.2 生成应答文件
[root@controller ~]# packstack -h |grep ans
  --gen-answer-file=GEN_ANSWER_FILE
                        Generate a template of an answer file, using this
  --answer-file=ANSWER_FILE
                        answerfile will also be generated and should be used
  -o, --options         Print details on options available in answer file(rst
                        second time with the same answer file and don't want
[root@controller ~]# packstack --gen-answer-file=/root/cloudcs.txt
Packstack changed given value  to required value /root/.ssh/id_rsa.pub
[root@controller ~]# ls
anaconda-ks.cfg  cloudcs.txt
如在执行 packstack 出现如下错误,请维护 DNS,并重启网卡
ERROR : Local IP address discovery failed. Please set nameserver correctly.
3.3 编辑应答文件
[root@controller ~]# vim cloudcs.txt
CONFIG_NTP_SERVERS=192.168.100.30
CONFIG_CONTROLLER_HOST=192.168.100.10
CONFIG_COMPUTE_HOSTS=192.168.100.10,192.168.100.20
CONFIG_KEYSTONE_REGION=WuHan
CONFIG_KEYSTONE_ADMIN_PW=redhat
CONFIG_HORIZON_SSL=y
CONFIG_PROVISION_DEMO=n
3.4 仅 Server With GUI)重装 MariaDB
[root@controller ~]# yum remove -y mariadb
[root@controller ~]# yum install -y mariadb mariadb-server
Server with GUI 环境会自动安装 mariadb 组件,因依赖关系会导致安装时出现如下错误,解决方案重新安装 mariadb 即可
ERROR : Error appeared during Puppet run: 192.168.100.10_mariadb.pp
Error: Execution of '/usr/bin/rpm -e mariadb-server-5.5.41-2.el7_0.x86_64'
returned 1: error: Failed dependencies
3.5 执行应答文件安装
指定应答文件回⻋,输入两次密码开始安装
[root@controller ~]# packstack --answer-file=/root/cloudcs.txt
Welcome to the Packstack setup utility

The installation log file is available at: /var/tmp/packstack/20220824-212618-SphO8b/openstack-setup.log

Installing:
Clean Up                                             [ DONE ]
root@192.168.100.10's password:
root@192.168.100.20's password:
Setting up ssh keys                                  [ DONE ]
Discovering hosts' details                           [ DONE ]
Adding pre install manifest entries                  [ DONE ]
Installing time synchronization via NTP              [ DONE ]
Preparing servers                                    [ DONE ]
Adding AMQP manifest entries                         [ DONE ]
Adding MariaDB manifest entries                      [ DONE ]
Adding Keystone manifest entries                     [ DONE ]
Adding Glance Keystone manifest entries              [ DONE ]
Adding Glance manifest entries                       [ DONE ]
Adding Cinder Keystone manifest entries              [ DONE ]
Checking if the Cinder server has a cinder-volumes vg[ DONE ]
Adding Cinder manifest entries                       [ DONE ]
Adding Nova API manifest entries                     [ DONE ]
Adding Nova Keystone manifest entries                [ DONE ]
Adding Nova Cert manifest entries                    [ DONE ]
Adding Nova Conductor manifest entries               [ DONE ]
Creating ssh keys for Nova migration                 [ DONE ]
Gathering ssh host keys for Nova migration           [ DONE ]
Adding Nova Compute manifest entries                 [ DONE ]
Adding Nova Scheduler manifest entries               [ DONE ]
Adding Nova VNC Proxy manifest entries               [ DONE ]
Adding OpenStack Network-related Nova manifest entries[ DONE ]
Adding Nova Common manifest entries                  [ DONE ]
Adding Neutron API manifest entries                  [ DONE ]
Adding Neutron Keystone manifest entries             [ DONE ]
Adding Neutron L3 manifest entries                   [ DONE ]
Adding Neutron L2 Agent manifest entries             [ DONE ]
Adding Neutron DHCP Agent manifest entries           [ DONE ]
Adding Neutron LBaaS Agent manifest entries          [ DONE ]
Adding Neutron Metering Agent manifest entries       [ DONE ]
Adding Neutron Metadata Agent manifest entries       [ DONE ]
Checking if NetworkManager is enabled and running    [ DONE ]
Adding OpenStack Client manifest entries             [ DONE ]
Adding Horizon manifest entries                      [ DONE ]
Adding Swift Keystone manifest entries               [ DONE ]
Adding Swift builder manifest entries                [ DONE ]
Adding Swift proxy manifest entries                  [ DONE ]
Adding Swift storage manifest entries                [ DONE ]
Adding Swift common manifest entries                 [ DONE ]
Adding MongoDB manifest entries                      [ DONE ]
Adding Redis manifest entries                        [ DONE ]
Adding Ceilometer manifest entries                   [ DONE ]
Adding Ceilometer Keystone manifest entries          [ DONE ]
Adding Nagios server manifest entries                [ DONE ]
Adding Nagios host manifest entries                  [ DONE ]
Adding post install manifest entries                 [ DONE ]
Installing Dependencies                              [ DONE ]
Copying Puppet modules and manifests                 [ DONE ]
Applying 192.168.100.10_prescript.pp
Applying 192.168.100.20_prescript.pp
192.168.100.20_prescript.pp:                         [ DONE ]
192.168.100.10_prescript.pp:                         [ DONE ]
Applying 192.168.100.10_chrony.pp
Applying 192.168.100.20_chrony.pp
192.168.100.10_chrony.pp:                            [ DONE ]
192.168.100.20_chrony.pp:                            [ DONE ]
Applying 192.168.100.10_amqp.pp
Applying 192.168.100.10_mariadb.pp
192.168.100.10_amqp.pp:                              [ DONE ]
192.168.100.10_mariadb.pp:                           [ DONE ]
Applying 192.168.100.10_keystone.pp
Applying 192.168.100.10_glance.pp
Applying 192.168.100.10_cinder.pp
192.168.100.10_keystone.pp:                          [ DONE ]
192.168.100.10_cinder.pp:                            [ DONE ]
192.168.100.10_glance.pp:                            [ DONE ]
Applying 192.168.100.10_api_nova.pp
192.168.100.10_api_nova.pp:                          [ DONE ]
Applying 192.168.100.10_nova.pp
Applying 192.168.100.20_nova.pp
192.168.100.20_nova.pp:                              [ DONE ]
192.168.100.10_nova.pp:                              [ DONE ]
Applying 192.168.100.10_neutron.pp
Applying 192.168.100.20_neutron.pp
192.168.100.20_neutron.pp:                           [ DONE ]
192.168.100.10_neutron.pp:                           [ DONE ]
Applying 192.168.100.10_osclient.pp
Applying 192.168.100.10_horizon.pp
192.168.100.10_osclient.pp:                          [ DONE ]
192.168.100.10_horizon.pp:                           [ DONE ]
Applying 192.168.100.10_ring_swift.pp
192.168.100.10_ring_swift.pp:                        [ DONE ]
Applying 192.168.100.10_swift.pp
192.168.100.10_swift.pp:                             [ DONE ]
Applying 192.168.100.10_mongodb.pp
Applying 192.168.100.10_redis.pp
192.168.100.10_mongodb.pp:                           [ DONE ]
192.168.100.10_redis.pp:                             [ DONE ]
Applying 192.168.100.10_ceilometer.pp
192.168.100.10_ceilometer.pp:                        [ DONE ]
Applying 192.168.100.10_nagios.pp
Applying 192.168.100.10_nagios_nrpe.pp
Applying 192.168.100.20_nagios_nrpe.pp
192.168.100.20_nagios_nrpe.pp:                       [ DONE ]
192.168.100.10_nagios.pp:                            [ DONE ]
192.168.100.10_nagios_nrpe.pp:                       [ DONE ]
Applying 192.168.100.10_postscript.pp
Applying 192.168.100.20_postscript.pp
192.168.100.10_postscript.pp:                        [ DONE ]
192.168.100.20_postscript.pp:                        [ DONE ]
Applying Puppet manifests                            [ DONE ]
Finalizing                                           [ DONE ]

 **** Installation completed successfully ******


Additional information:
 * File /root/keystonerc_admin has been created on OpenStack client host 192.168.100.10. To use the command line tools you need to source the file.
 * NOTE : A certificate was generated to be used for ssl, You should change the ssl certificate configured in /etc/httpd/conf.d/ssl.conf on 192.168.100.10 to use a CA signed cert.
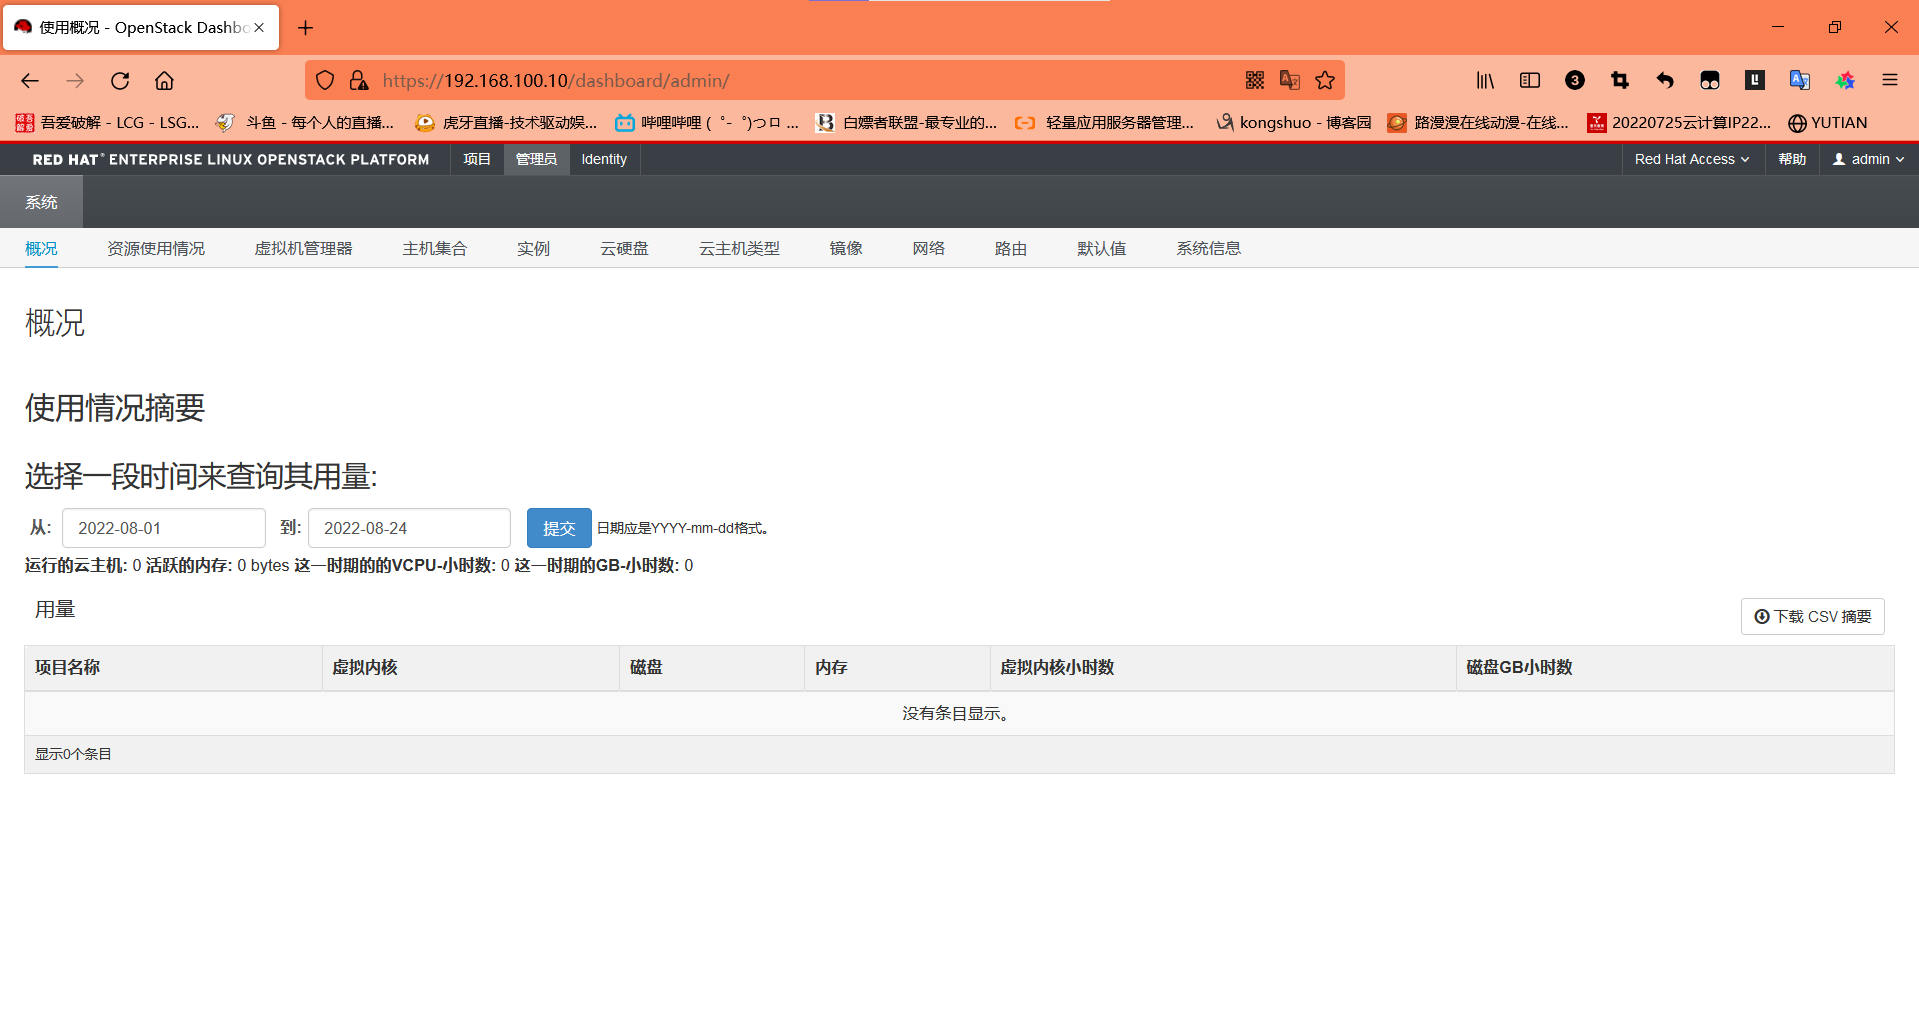
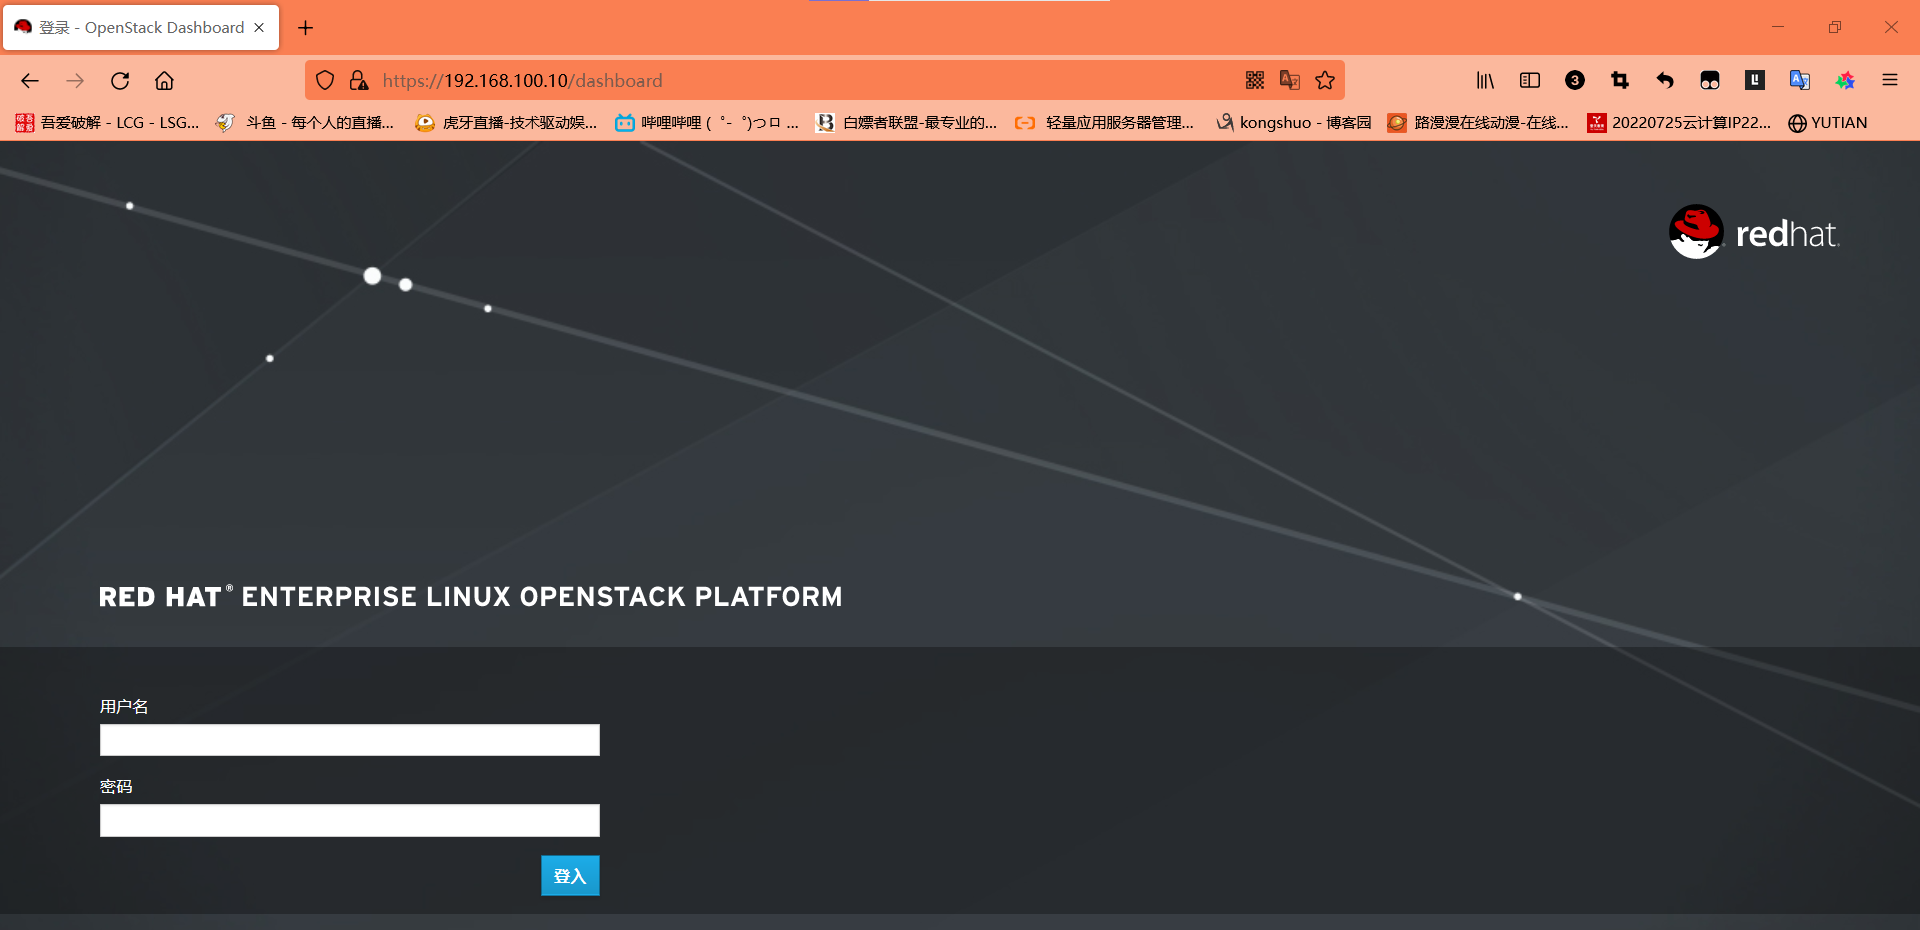
 * To access the OpenStack Dashboard browse to https://192.168.100.10/dashboard .
Please, find your login credentials stored in the keystonerc_admin in your home directory.
 * To use Nagios, browse to http://192.168.100.10/nagios username: nagiosadmin, password: 5fbeae9b629948a6
 * The installation log file is available at: /var/tmp/packstack/20220824-214209-ub0Tfy/openstack-setup.log
 * The generated manifests are available at: /var/tmp/packstack/20220824-214209-ub0Tfy/manifests
3.6 配置网卡信息OVS
[root@controller ~]# cd /etc/sysconfig/network-scripts/
[root@controller network-scripts]# cp ifcfg-eno16777728 ifcfg-br-ex
[root@controller network-scripts]# vim ifcfg-br-ex
把所有IPV4和IPV6开头的都删除掉
TYPE=Ethernet 更改为 TYPE=OVSBridge
NAME=eno16777728 更改为 NAME=br-ex
DEVICE=eno16777728 更改为 DEVICE=br-ex
手动添加 DEVICETYPE=ovs

[root@controller network-scripts]# vim ifcfg-eno16777728
删除所有IPV4和IPV6,以及IP地址、子网掩码、DNS
TYPE=Ethernet 更改为 TYPE=OVSPort
手动添加 DEVICETYPE=ovs
手动添加 OVS_BRIDGE=br-ex

[root@controller network-scripts]# systemctl restart network
[root@controller network-scripts]# ovs-vsctl show
e5837374-b913-4c29-b42d-2d668ac2b291
    Bridge br-ex
        Port br-ex
            Interface br-ex
                type: internal
    Bridge br-tun
        fail_mode: secure
        Port "vxlan-c0a86414"
            Interface "vxlan-c0a86414"
                type: vxlan
                options: {df_default="true", in_key=flow, local_ip="192.168.100.10", out_key=flow, remote_ip="192.168.100.20"}
        Port patch-int
            Interface patch-int
                type: patch
                options: {peer=patch-tun}
        Port br-tun
            Interface br-tun
                type: internal
    Bridge br-int
        fail_mode: secure
        Port patch-tun
            Interface patch-tun
                type: patch
                options: {peer=patch-int}
        Port br-int
            Interface br-int
                type: internal
    ovs_version: "2.1.3"
四、完成安装
用户名: admin 密码: redhat (密码由你应答文件设置为准)

本文作者:kongshuo
本文链接:https://www.cnblogs.com/kongshuo/p/16618008.html
版权声明:本作品采用知识共享署名-非商业性使用-禁止演绎 2.5 中国大陆许可协议进行许可。


【推荐】国内首个AI IDE,深度理解中文开发场景,立即下载体验Trae
【推荐】编程新体验,更懂你的AI,立即体验豆包MarsCode编程助手
【推荐】抖音旗下AI助手豆包,你的智能百科全书,全免费不限次数
【推荐】轻量又高性能的 SSH 工具 IShell:AI 加持,快人一步