两个APK间通过AIDL进行binder通信
参考文章:两个APK间通过AIDL进行binder通信
server端
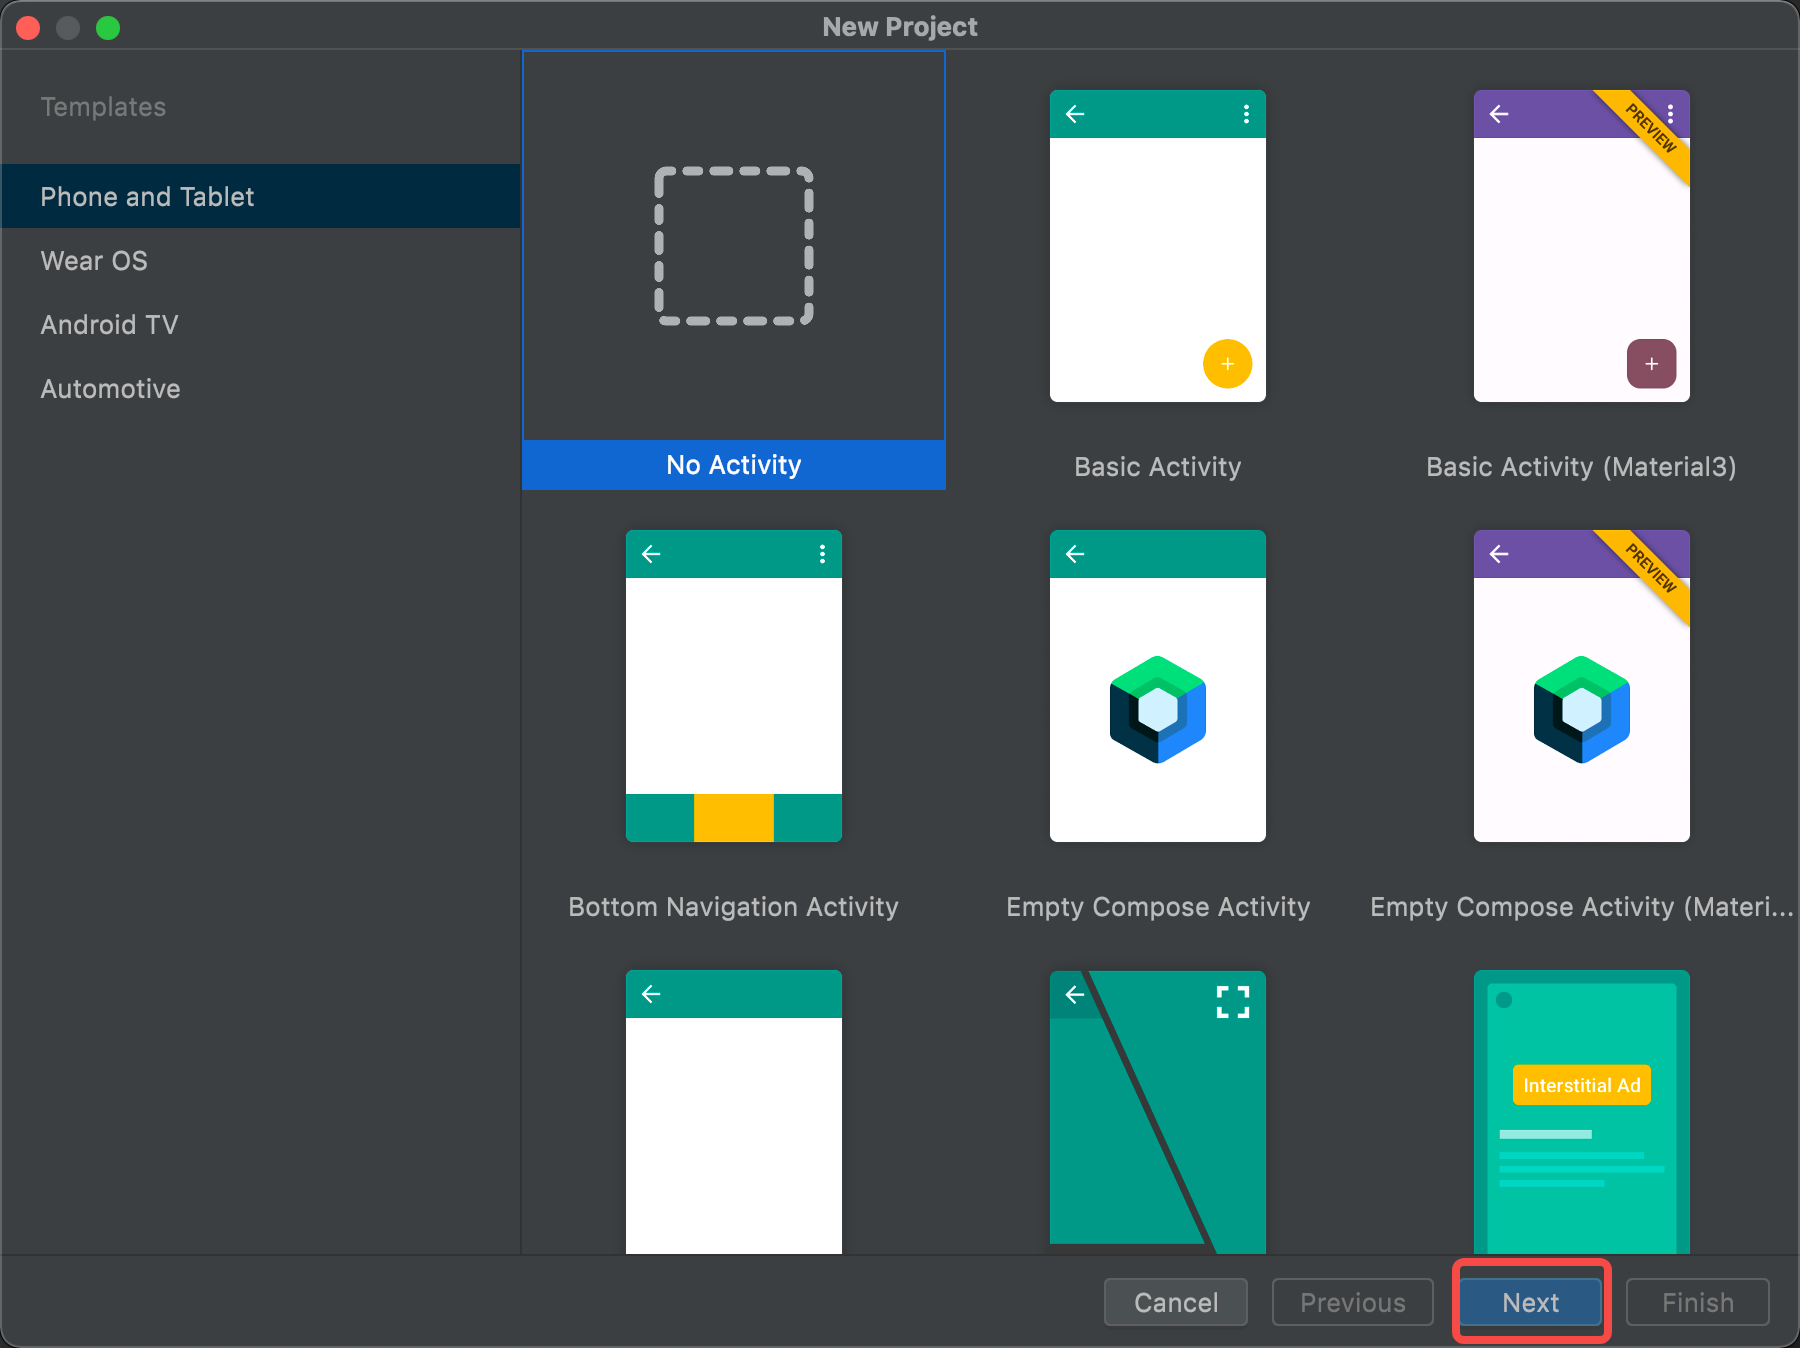
创建一个空项目,在项目里面添加如下内容
//MyService.java
package com.example.binderserver;
import android.app.Service;
import android.content.Intent;
import android.os.IBinder;
import android.os.RemoteException;

public class MyService extends Service {
    private class MyBinder extends MyInterface.Stub {
        @Override
        public int add(int a, int b) throws RemoteException {
            return a + b;
        }
    }
    private IBinder mBinder = new MyBinder();

    public MyService() {

    }
    @Override
    public IBinder onBind(Intent intent) {
        return mBinder;
    }
}
// MyInterface.aidl
package com.example.binderserver;

// Declare any non-default types here with import statements

interface MyInterface {
    /**
     * Demonstrates some basic types that you can use as parameters
     * and return values in AIDL.
     */
    int add(int a, int b);
}
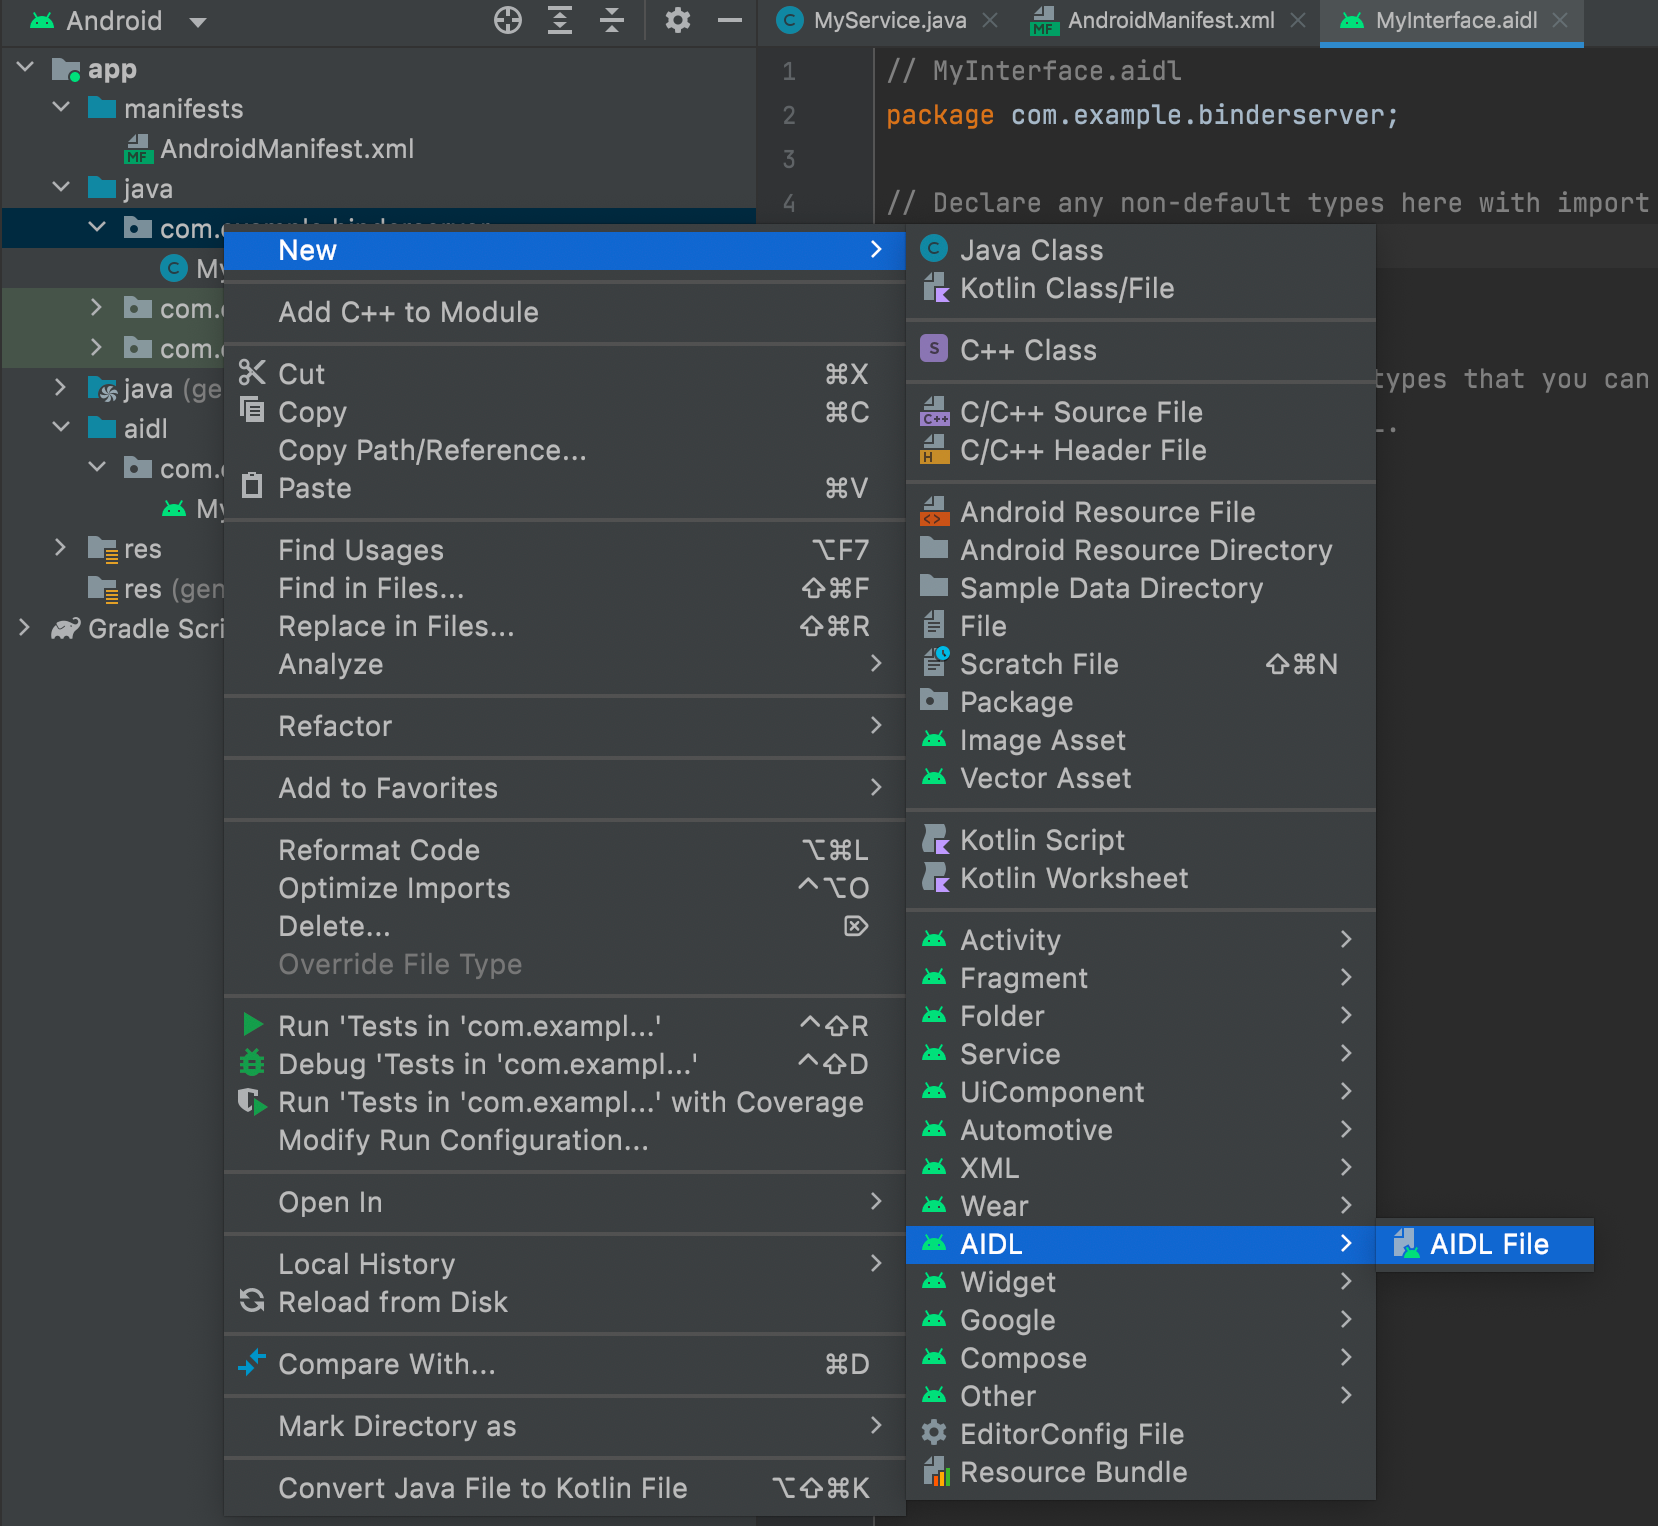
aidl文件的创建如下(aidl文件并不会创建在你指定的目录,AS会为aidl文件生成专门的目录):
//AndroidManifest.xml
<?xml version="1.0" encoding="utf-8"?>
<manifest xmlns:android="http://schemas.android.com/apk/res/android"
    xmlns:tools="http://schemas.android.com/tools"
    package="com.example.binderserver">

    <application
        android:allowBackup="true"
        android:dataExtractionRules="@xml/data_extraction_rules"
        android:fullBackupContent="@xml/backup_rules"
        android:icon="@mipmap/ic_launcher"
        android:label="@string/app_name"
        android:roundIcon="@mipmap/ic_launcher_round"
        android:supportsRtl="true"
        android:theme="@style/Theme.BinderServer"
        tools:targetApi="31" >

        <service android:name=".MyService"
            android:enabled="true"
            android:exported="true">

            <intent-filter>
                <action android:name="com.example.binderserver.MyService"/>
            </intent-filter>

        </service>


    </application>

</manifest>
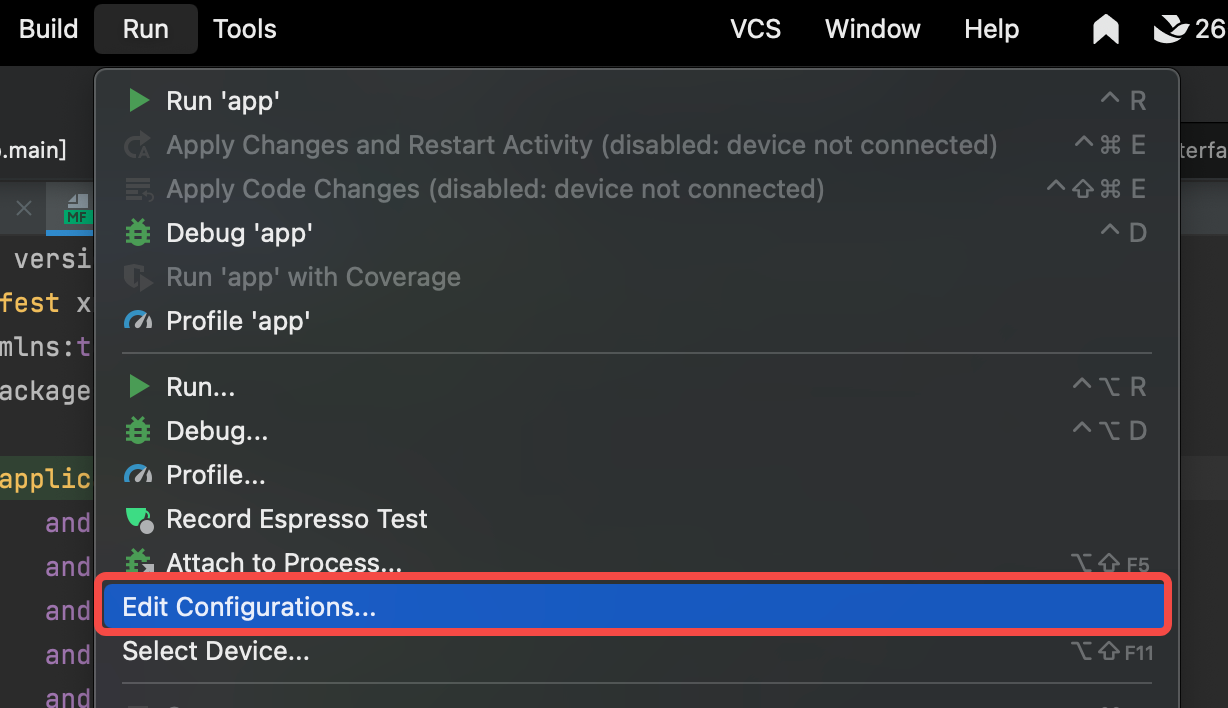
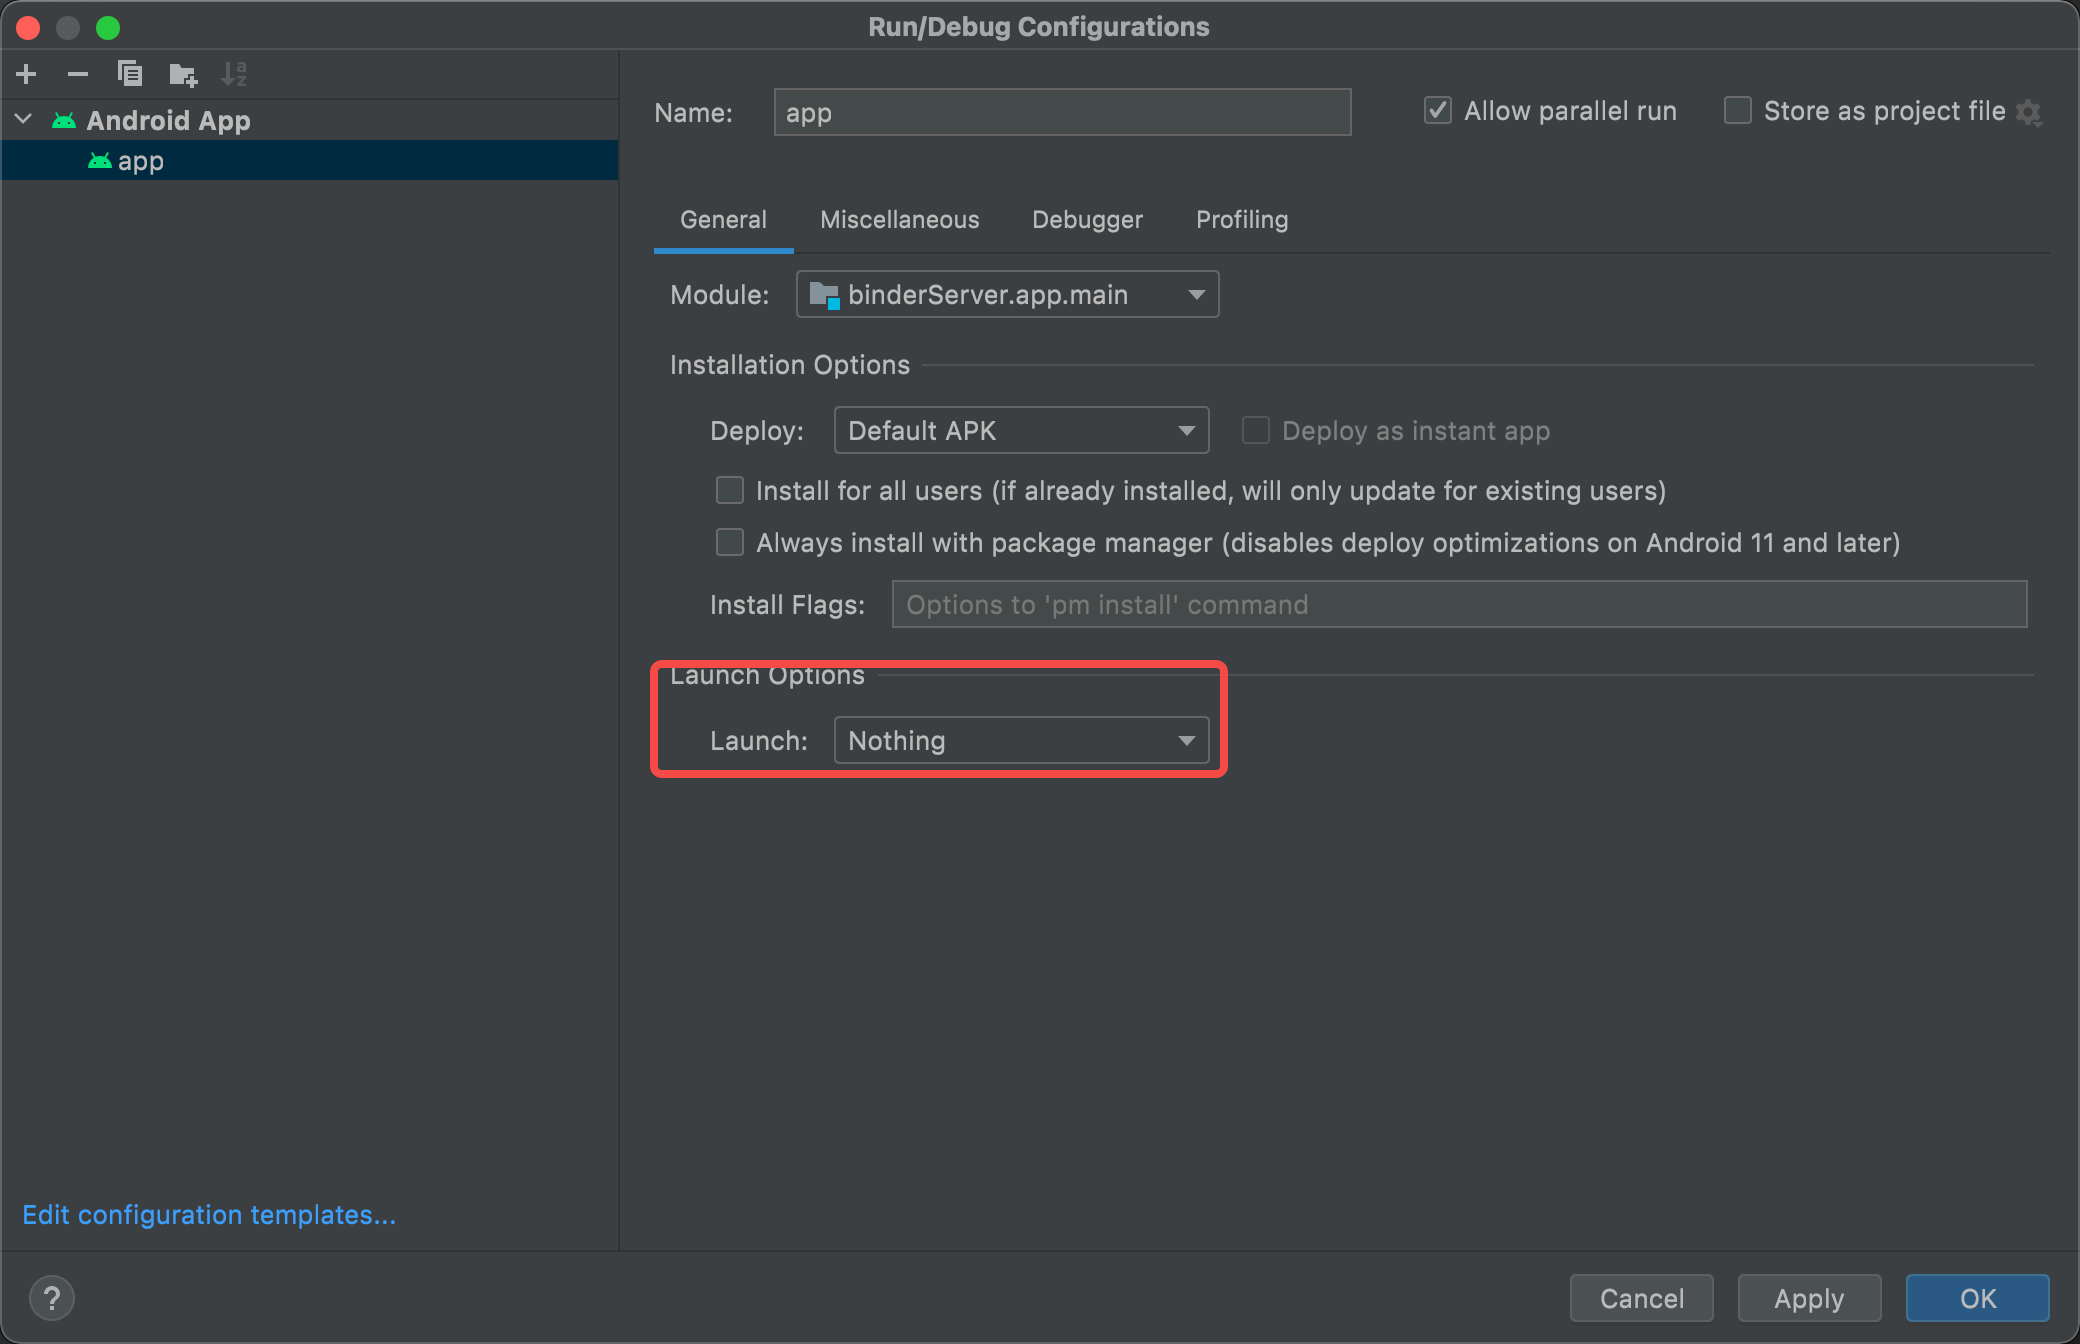
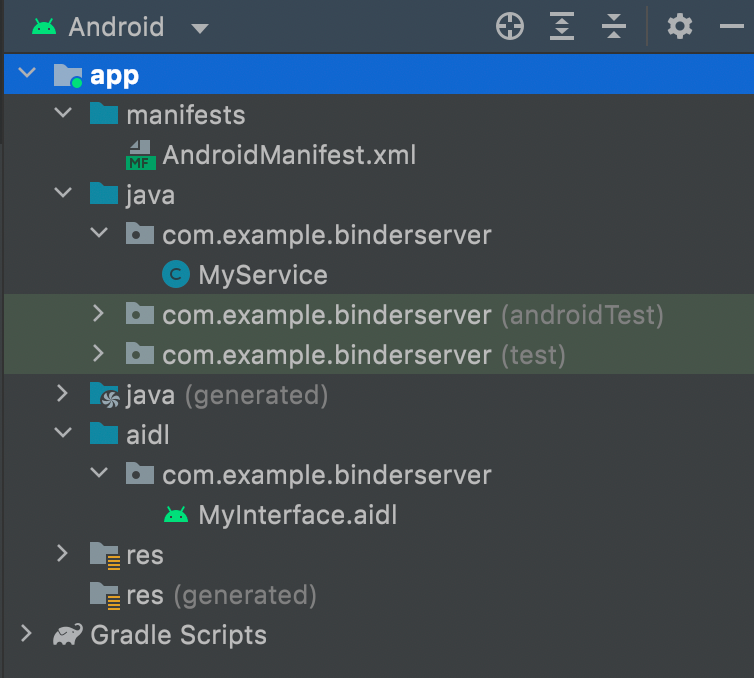
需要注意的是server没有activity,只有service,所以我们在配置工程的时候配置没有activity启动
目录结构如下:
Client端
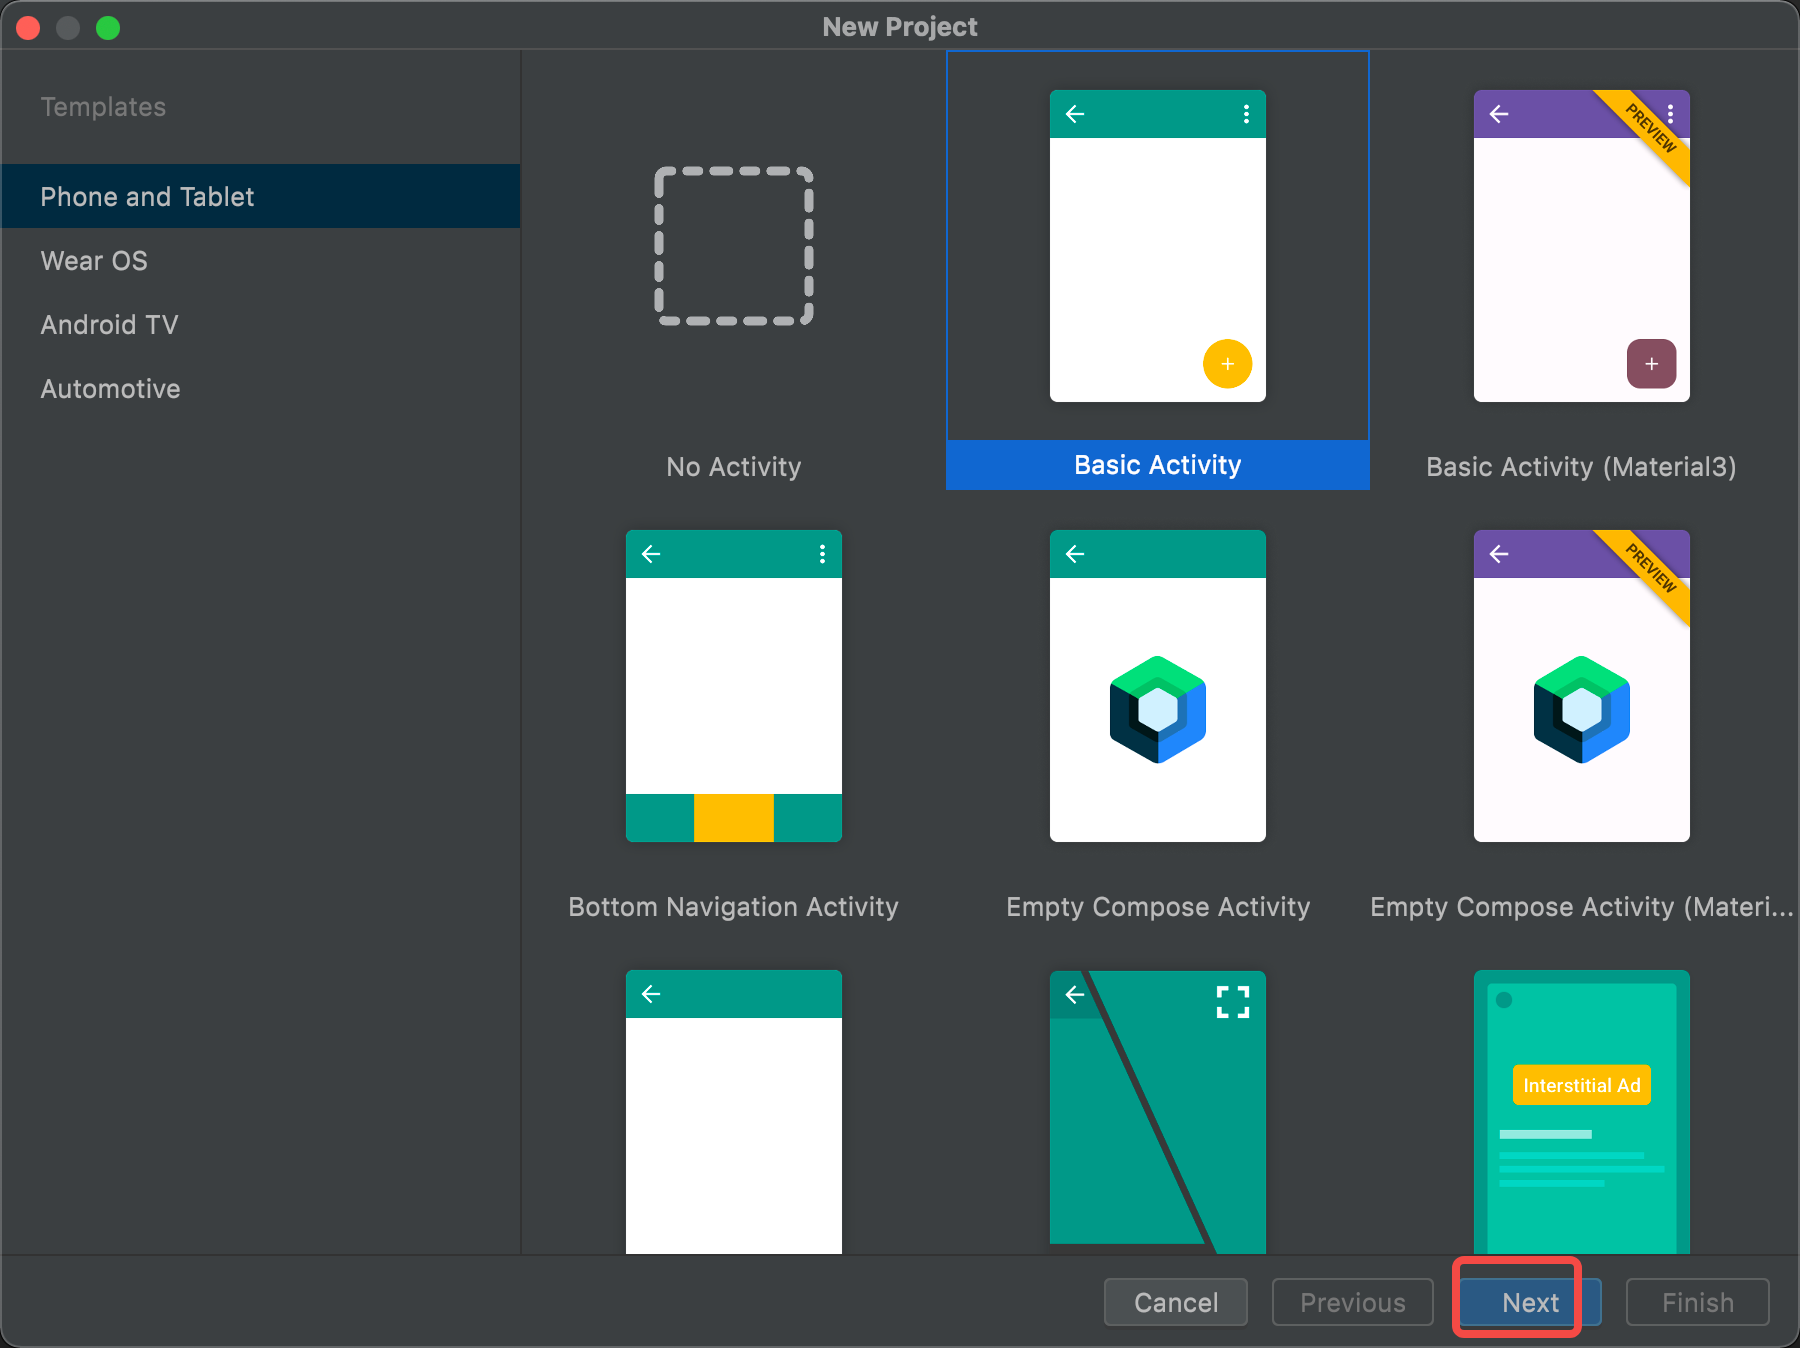
创建项目
//MainActivity.java
package com.example.binderclient;

import android.content.ComponentName;
import android.content.Context;
import android.content.Intent;
import android.content.ServiceConnection;
import android.os.Bundle;

import com.google.android.material.snackbar.Snackbar;

import androidx.appcompat.app.AppCompatActivity;

import android.os.IBinder;
import android.os.RemoteException;
import android.util.Log;
import android.view.View;

import androidx.navigation.NavController;
import androidx.navigation.Navigation;
import androidx.navigation.ui.AppBarConfiguration;
import androidx.navigation.ui.NavigationUI;

import com.example.binderclient.databinding.ActivityMainBinding;

import android.view.Menu;
import android.view.MenuItem;
import android.widget.Button;

import com.example.binderserver.MyInterface;

public class MainActivity extends AppCompatActivity {
    private String TAG = "QMH";
    private AppBarConfiguration appBarConfiguration;
    private ActivityMainBinding binding;
    private MyInterface myInterface;
    Button button2;
    private ServiceConnection mConnection = new ServiceConnection() {
        @Override
        public void onServiceConnected(ComponentName componentName, IBinder iBinder) {
            Log.i(TAG, "onServiceConnection");
            myInterface = MyInterface.Stub.asInterface(iBinder);
            try {
                int result = myInterface.add(2, 3);
                Log.i(TAG, "result1111:" + result);
            } catch (RemoteException e) {
                e.printStackTrace();
            }
        }

        @Override
        public void onServiceDisconnected(ComponentName componentName) {
            Log.i(TAG, "onServiceDisconnected");
        }
    };

    @Override
    protected void onCreate(Bundle savedInstanceState) {
        super.onCreate(savedInstanceState);
        binding = ActivityMainBinding.inflate(getLayoutInflater());
        setContentView(binding.getRoot());

        setSupportActionBar(binding.toolbar);

        NavController navController = Navigation.findNavController(this, R.id.nav_host_fragment_content_main);
        appBarConfiguration = new AppBarConfiguration.Builder(navController.getGraph()).build();
        NavigationUI.setupActionBarWithNavController(this, navController, appBarConfiguration);

        Intent intent = new Intent("com.example.binderserver.MyService");
        intent.setPackage("com.example.binderserver");
        boolean b = bindService(intent, mConnection, Context.BIND_AUTO_CREATE);
        Log.i(TAG, "onCreate : " + b );

        binding.fab.setOnClickListener(new View.OnClickListener() {
            @Override
            public void onClick(View view) {
                Snackbar.make(view, "Replace with your own action", Snackbar.LENGTH_LONG)
                        .setAction("Action", null).show();
            }
        });
        button2 = (Button) findViewById(R.id.button);

        button2.setOnClickListener(new View.OnClickListener(){
            @Override
            public void onClick(View view) {
                try {
                    int result = myInterface.add(2, 3);
                    Log.i(TAG, "result1111:" + result);
                } catch (RemoteException e) {
                    Log.i(TAG, "111111111" + e.toString());
                }

            }
        });
    }

    @Override
    public boolean onCreateOptionsMenu(Menu menu) {
        // Inflate the menu; this adds items to the action bar if it is present.
        getMenuInflater().inflate(R.menu.menu_main, menu);
        return true;
    }

    @Override
    public boolean onOptionsItemSelected(MenuItem item) {
        // Handle action bar item clicks here. The action bar will
        // automatically handle clicks on the Home/Up button, so long
        // as you specify a parent activity in AndroidManifest.xml.
        int id = item.getItemId();

        //noinspection SimplifiableIfStatement
        if (id == R.id.action_settings) {
            return true;
        }

        return super.onOptionsItemSelected(item);
    }

    @Override
    public boolean onSupportNavigateUp() {
        NavController navController = Navigation.findNavController(this, R.id.nav_host_fragment_content_main);
        return NavigationUI.navigateUp(navController, appBarConfiguration)
                || super.onSupportNavigateUp();
    }
}
//activity_main.xml   就只多添加了一个按钮button
<?xml version="1.0" encoding="utf-8"?>
<androidx.coordinatorlayout.widget.CoordinatorLayout xmlns:android="http://schemas.android.com/apk/res/android"
    xmlns:app="http://schemas.android.com/apk/res-auto"
    xmlns:tools="http://schemas.android.com/tools"
    android:layout_width="match_parent"
    android:layout_height="match_parent"
    tools:context=".MainActivity">

    <com.google.android.material.appbar.AppBarLayout
        android:layout_width="match_parent"
        android:layout_height="wrap_content"
        android:theme="@style/Theme.BinderClient.AppBarOverlay">

    </com.google.android.material.appbar.AppBarLayout>

    <include layout="@layout/content_main" />

    <com.google.android.material.floatingactionbutton.FloatingActionButton
        android:id="@+id/fab"
        android:layout_width="wrap_content"
        android:layout_height="wrap_content"
        android:layout_gravity="bottom|end"
        android:layout_marginEnd="@dimen/fab_margin"
        android:layout_marginBottom="16dp"
        app:srcCompat="@android:drawable/ic_dialog_email" />

    <Button
        android:id="@+id/button"
        android:layout_width="wrap_content"
        android:layout_height="wrap_content"
        android:text="Button11111" />

    <androidx.appcompat.widget.Toolbar
        android:id="@+id/toolbar"
        android:layout_width="match_parent"
        android:layout_height="?attr/actionBarSize"
        android:background="?attr/colorPrimary"
        app:popupTheme="@style/Theme.BinderClient.PopupOverlay" />

</androidx.coordinatorlayout.widget.CoordinatorLayout>
//注意添加queries    Android 11 之后启动service需要权限
//AndroidManifest.xml
<?xml version="1.0" encoding="utf-8"?>
<manifest xmlns:android="http://schemas.android.com/apk/res/android"
    xmlns:tools="http://schemas.android.com/tools"
    package="com.example.binderclient">

    <queries>
        <package android:name="com.example.binderserver" />
        <package android:name="com.example.binderclient" />
    </queries>

    <application
        android:allowBackup="true"
        android:dataExtractionRules="@xml/data_extraction_rules"
        android:fullBackupContent="@xml/backup_rules"
        android:icon="@mipmap/ic_launcher"
        android:label="@string/app_name"
        android:roundIcon="@mipmap/ic_launcher_round"
        android:supportsRtl="true"
        android:theme="@style/Theme.BinderClient"
        tools:targetApi="31">
        <activity
            android:name=".MainActivity"
            android:exported="true"
            android:label="@string/app_name"
            android:theme="@style/Theme.BinderClient.NoActionBar">
            <intent-filter>
                <action android:name="android.intent.action.MAIN" />

                <category android:name="android.intent.category.LAUNCHER" />
            </intent-filter>
        </activity>
    </application>

</manifest>
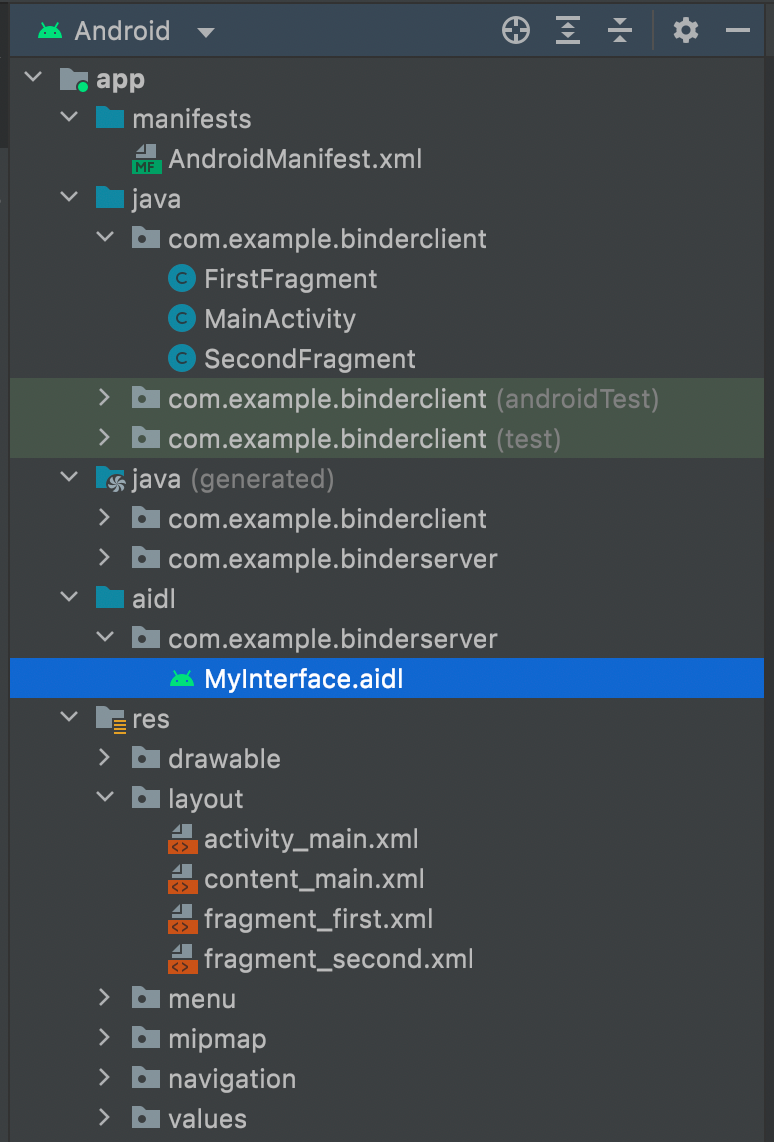
把server端的aidl文件移动过来,注意包名,类名,接口名,及其里面的代码需要保证完全一致,否则会报错
// MyInterface.aidl
package com.example.binderserver;

// Declare any non-default types here with import statements

interface MyInterface {
    /**
     * Demonstrates some basic types that you can use as parameters
     * and return values in AIDL.
     */
    int add(int a, int b);
}
目录结构如下:
异常
异常1
Client端启动Server端之后调用add方法报错:Binder invocation to an incorrect interface
当进行AIDL跨进程通讯时,如果抛出 Binder invocation to an incorrect interface ,则主要是因为2种情况。
1、最普遍的,客户端 VS 服务端 的AIDL必须保证完全一样,包括包名,类名,接口名,及其里面的代码。否则会抛出以上异常
2、如果第一条符合,则检查下调用的服务是否正确,如果调用的服务不一致或者 服务中返回给客户端的Binder不是客户端想要的,则也会抛出以上异常。
3、如果以上2点,确定没问题,请参考第2点,必定是客户端和服务端的AIDL某处相关代码不一致导致。
我出现这个问题是因为我在Client端创建的aidl文件,然后把server端的aidl文件内容拷贝过来。但是两个文件的包名是不一样的,所以出错了
异常2
通过am startservice -n 启动server端的时候报错。

这好像不是一个异常,服务好像就是启动不起来。我把client端打开之后,server端就可以起来了。
异常3
AppsFilter: interaction: ***BLOCKED 错误
//启动client的时候出现下面log,表示无法启动server端
03-20 16:52:31.209  1371  2038 I AppsFilter: interaction: PackageSetting{524890e com.example.binderclient/10088} -> PackageSetting{5ebfadb com.example.binderserver/10087} BLOCKED
03-20 16:52:31.209  1371  2038 W ActivityManager: Unable to start service Intent { act=com.example.binderserver.MyService pkg=com.example.binderserver } U=0: not found
在 Android 11 ® 上有时跨APP 访问别的进程里面的数据,或者绑定服务的时候会出现这样的问题
这是 Android 11 增加了安全限制,需要在AndroidManifest.xml清单文件中加入query权限申请,才能检测到手机上安装的三方应用包安装状态
解决办法:
1) 降低SDK版本
修改build.gradle,降低SDK版本为Android 29
或者
2)修改目标软件可见性
在AndroidManifest.xml中添加queries标签声明需要用到的应用包名
<manifest package="com.example.test">
    <queries>
        <package android:name="com.example.service" />
        <package android:name="com.example.client" />
    </queries>
    ...
</manifest>


【推荐】国内首个AI IDE,深度理解中文开发场景,立即下载体验Trae
【推荐】编程新体验,更懂你的AI,立即体验豆包MarsCode编程助手
【推荐】抖音旗下AI助手豆包,你的智能百科全书,全免费不限次数
【推荐】轻量又高性能的 SSH 工具 IShell:AI 加持,快人一步
· 10年+ .NET Coder 心语 ── 封装的思维:从隐藏、稳定开始理解其本质意义
· 地球OL攻略 —— 某应届生求职总结
· 提示词工程——AI应用必不可少的技术
· Open-Sora 2.0 重磅开源!
· 周边上新:园子的第一款马克杯温暖上架
2019-03-20 简单数学题(杭电)