WPF 笔记1
.Net6 WPF 笔记1
前置知识
下面这些关于C#语言的编程知识是必须掌握的。
- 熟悉 OOP 面向对象编程思维,掌握抽象、继承、多态、封装的概念和应用;
- 掌握 C# 的基本语法、数据类型、程序结构、类型定义、方法成员、常量、变量、数组等基础知识;
- 掌握 C# 的特性(Attribute)、 反射(Reflection)、 属性(Property)、 索引器(Indexer);
- 掌握 C# 的委托(Delegate)、 事件(Event)、 集合(Collection)、 泛型(Generic);
- 了解 XML 或 HTML 语义结构;
学习路线
要论学习路线,无外呼两种,一是先学整体知识框架,再逐一学习各项细节知识;二是反过来,先从细节入手,一点一滴的啃,最终学完所有细节,从而形成对整体知识框架的认知。在这里我推荐第一种方法,所以我将WPF的学习路线安排如下:
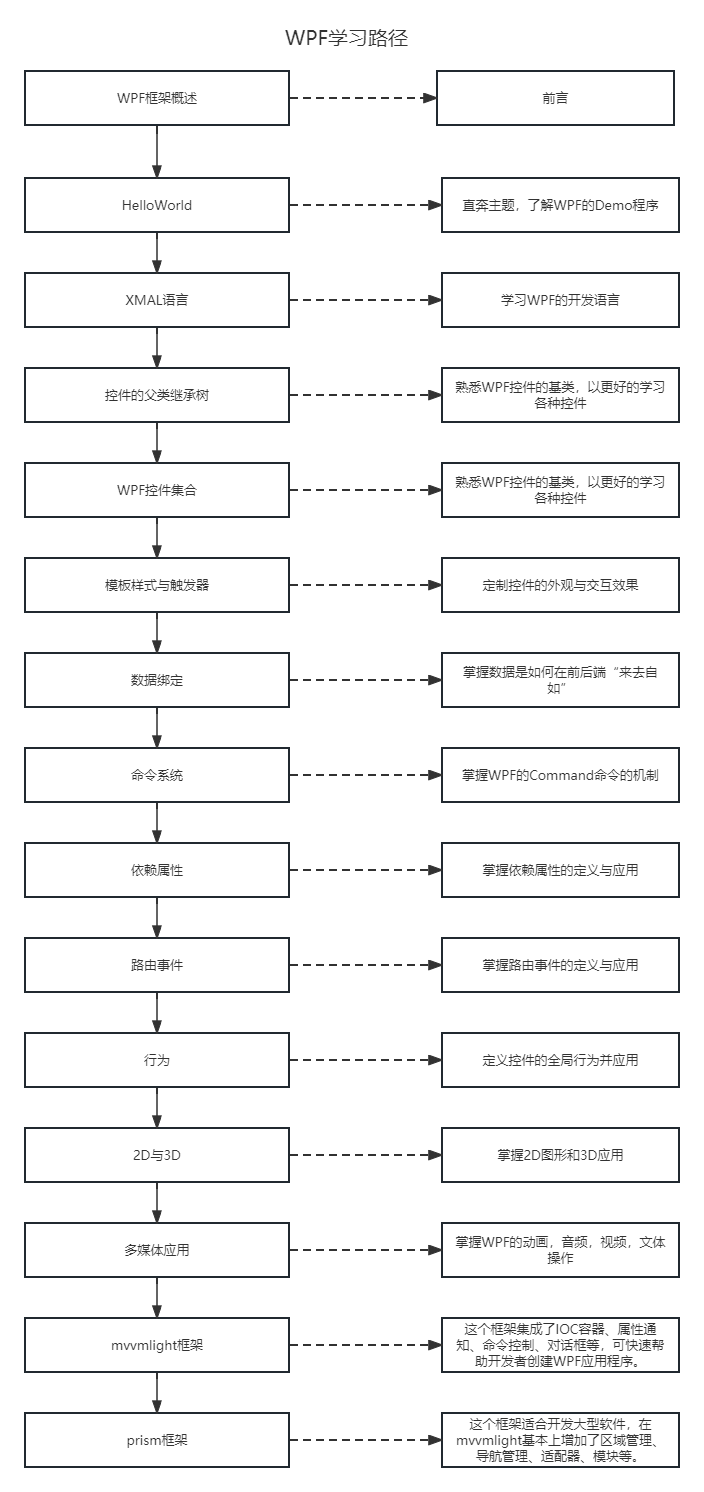
环境配置
- 安装 Visual Studio 的 C# 桌面应用开发环境。
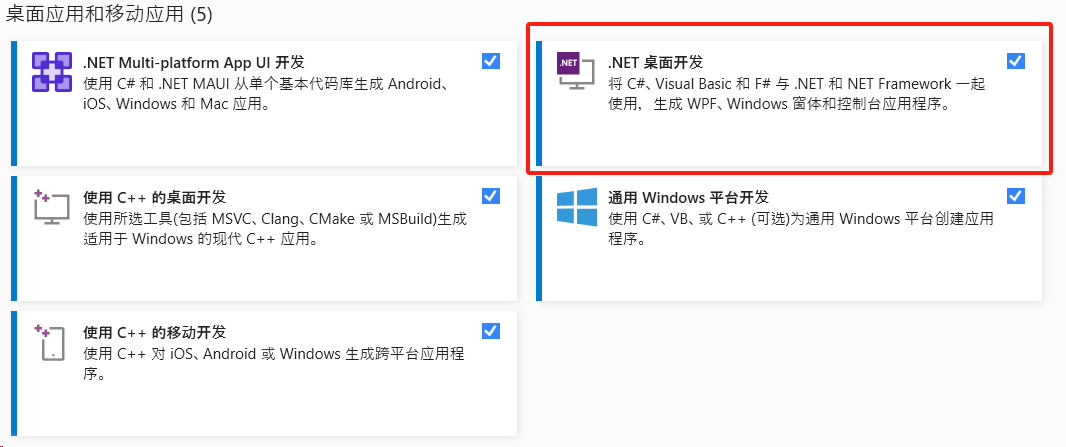
学习须知:
- 不要过度依赖源代码
- 动手去写,多写几次
- 不要去拖控件
1. XAML 解析
Extensible Application Markup Language (Extensible Application Markup Language, XAML) 是一种声明性语言。在 WPF 中使用 XAML 来描述窗口或者UI的包含关系。
界面如下:
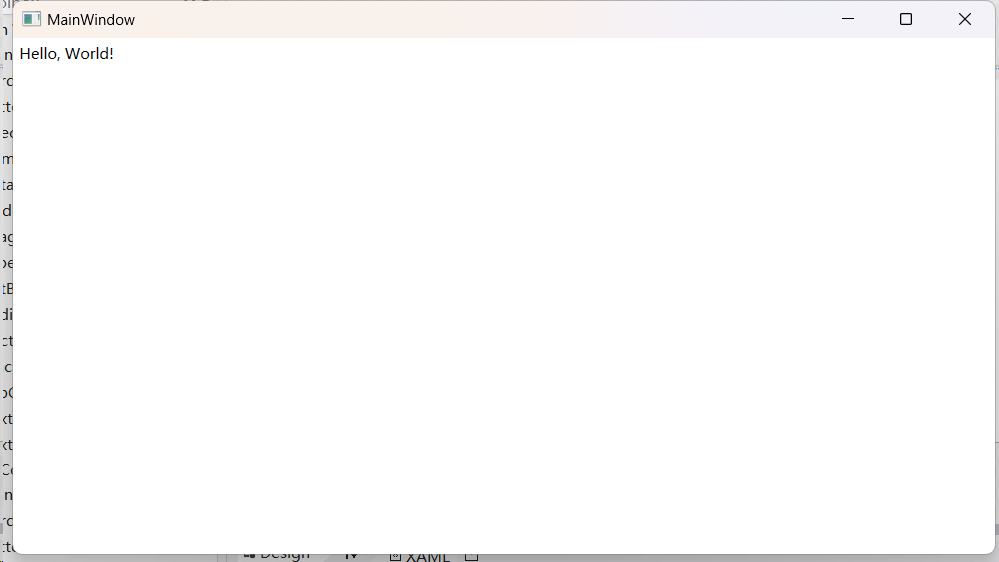
MainWindow.xmal
<Window x:Class="_1_1_Hello.MainWindow"
        xmlns="http://schemas.microsoft.com/winfx/2006/xaml/presentation"
        xmlns:x="http://schemas.microsoft.com/winfx/2006/xaml"
        xmlns:d="http://schemas.microsoft.com/expression/blend/2008"
        xmlns:mc="http://schemas.openxmlformats.org/markup-compatibility/2006"
        xmlns:local="clr-namespace:_1_1_Hello"
        mc:Ignorable="d"
        Title="MainWindow" Height="450" Width="800">
    <Grid>
        <Label Content="Hello, World!"></Label>
    </Grid>
</Window>
1.1 简单工程示例
新建一个项目,类型选择如下:
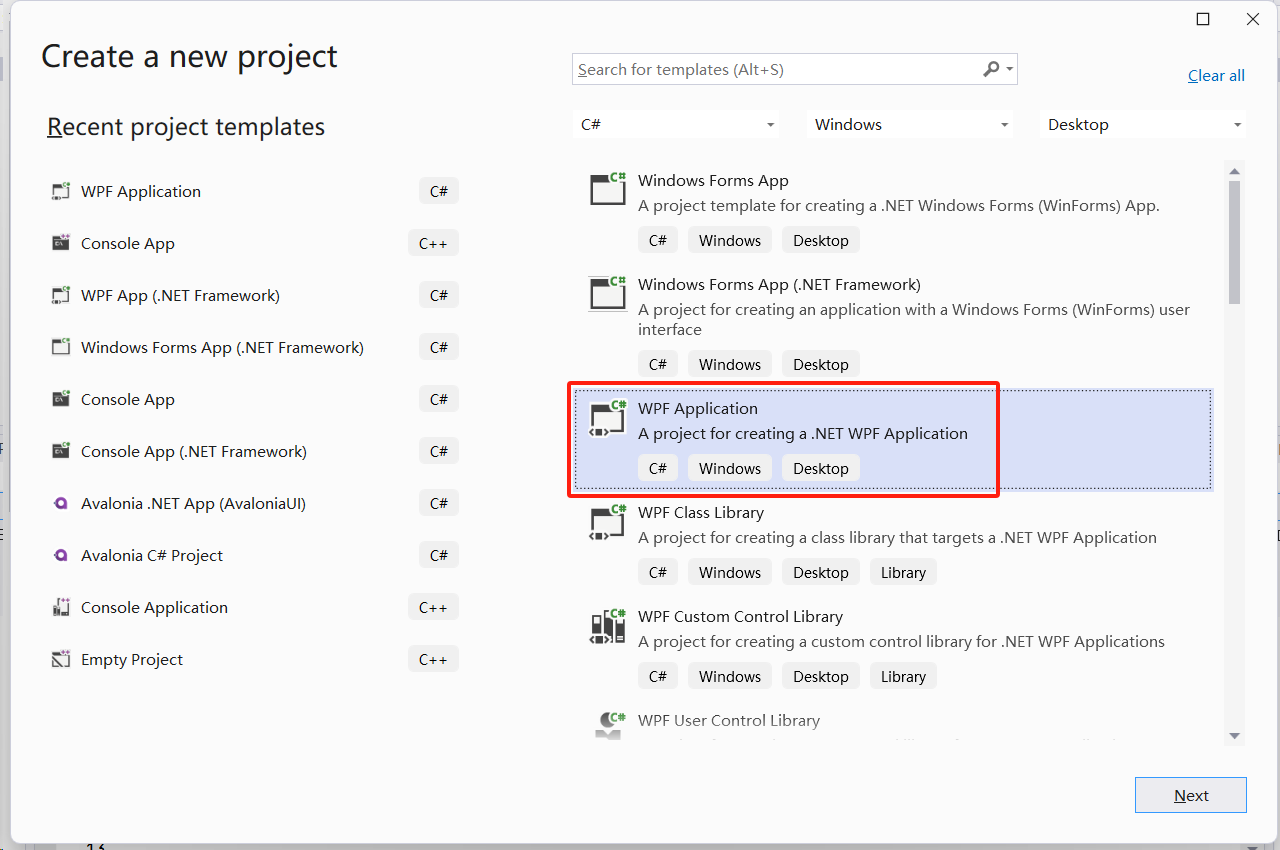
注意:.Net Framework 为较老的技术,目前已经停止在了 4.8 版本,并不再发布新版本,且只对以前版本进行维护。新建的 WPF 工程底层使用 .Net 6 技术。
1.1.1 解决方案工程结构讲解
解决方案目录如下:
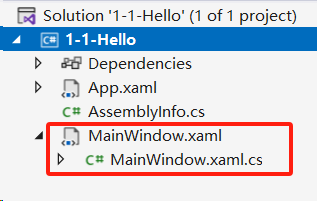
-
AssemblyInfo.cs为Visual Studio 生成,不需要手动修改 -
MainWindow.xaml为界面描述文件,可以使用它来开发UI界面(相当于前端中的 HTML + CSS),既能写结构,也能修改样式<Window x:Class="_1_1_Hello.MainWindow" xmlns="http://schemas.microsoft.com/winfx/2006/xaml/presentation" xmlns:x="http://schemas.microsoft.com/winfx/2006/xaml" xmlns:d="http://schemas.microsoft.com/expression/blend/2008" xmlns:mc="http://schemas.openxmlformats.org/markup-compatibility/2006" xmlns:local="clr-namespace:_1_1_Hello" mc:Ignorable="d" Title="MainWindow" Height="450" Width="800"> <Grid> <!-- Name 在整个 xaml 中必须是唯一的--> <Label Name ="myLabel" Content="Hello, World!"></Label> </Grid> </Window>XAML 源于 XML,它们都和 HTML 很相似。该XMAL文件最终会被编译成 C# 代码,不过这个步骤是 XAML 编译器执行。可以将该文件看作
MainWindow这个 partial 类的主体部分。这段代码中,第 2~8 行代码部分先不讲,后面会详细讲解。
Grid在这里是Window的一个子模块。 -
MainWindow.xaml.cs界面描述文件的逻辑代码,可以在里面对界面添加新的功能方法等(功能相当于前端三件套中的JavaScript)MainWindow.xmal.csusing System.Text; using System.Windows; using System.Windows.Controls; using System.Windows.Data; using System.Windows.Documents; using System.Windows.Input; using System.Windows.Media; using System.Windows.Media.Imaging; using System.Windows.Navigation; using System.Windows.Shapes; namespace _1_1_Hello { /// <summary> /// Interaction logic for MainWindow.xaml /// </summary> public partial class MainWindow : Window { public MainWindow() { // 运行初始化函数 InitializeComponent(); // xaml 可以看作C#代码,后台 C# 可以操作xmal,同样 xmal 也能调用C# myLabel.Content = "Hello, WPF!"; // 修改名称为 myLabel 对象中的 Content 属性 } } }-
InitializeComponent的作用:执行生成的MainWindow.g.i.cs文件中的方法,按照MainWindow.xaml文件的描述完成界面初始化。 -
myLabel.Content = "Hello, WPF!"作用:将名称为myLabel的部件的Content属性值改为Hello, WPF! -
App.xaml为该项目的配置文件,通过该文件,我们可以配置启动项<Application x:Class="SharedSizeGroup.App" xmlns="http://schemas.microsoft.com/winfx/2006/xaml/presentation" xmlns:x="http://schemas.microsoft.com/winfx/2006/xaml" xmlns:local="clr-namespace:SharedSizeGroup" StartupUri="MainWindow.xaml"> <Application.Resources> </Application.Resources> </Application>WPF 项目的启动方式:先加载 App.xaml,然后设置 App.xaml 中 StartupUri 的加载项,如在这里加载
MainWindow.xmal
注意:
- XAML 文件对应的
.cs文件命名是有规范要求的:
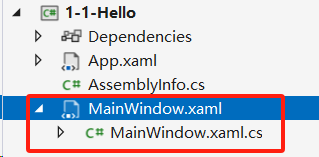
xxx.xmal对应的.cs文件名一定要为xxx.xaml.cs,如:
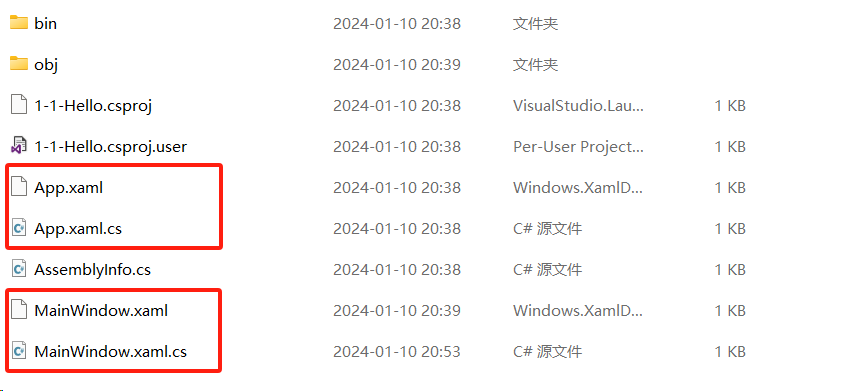
在 Visual Studio 中它们的展示会被绑定在一起:
-
MainWindow.xmal的编译:当在 WPF 应用程序中创建一个主窗口(MainWindow)并使用 XAML 定义其布局和样式时,XAML 编译器会将这些 XAML 文件转换为等效的 C# 代码。 该文件不要手动修改。MainWindow.g.i.cs文件就是其中之一(通过MainWindow.xaml.cs可以找到该 aprtial 类的定义,从而找到该文件),其中的 “g” 表示 “generated”(生成的),而 “i” 表示 “internal”(内部)。这个文件包含了 XAML 代码的编译结果,其中定义了窗口的各种元素和其属性。
-
MainWindow.xaml和MainWindow.xaml.cs中的类名始终要保持一致<Window x:Class="_1_1_Hello.MainWindow" ... ></Window>MainWindow.xaml中,x:Class='_1_1_Hello.MainWindow'中后面MainWindow部分就是类名,前面是名称空间名public partial class MainWindow : WindowMainWindow.xaml.cs中,类名也要为MainWindow一般不建议修改类名,但如果要修改,就必须保证两个文件中类名一致。
-
后台 C# 可以操作 XMAL 文件,同样 XAML 也能调用 C# 代码
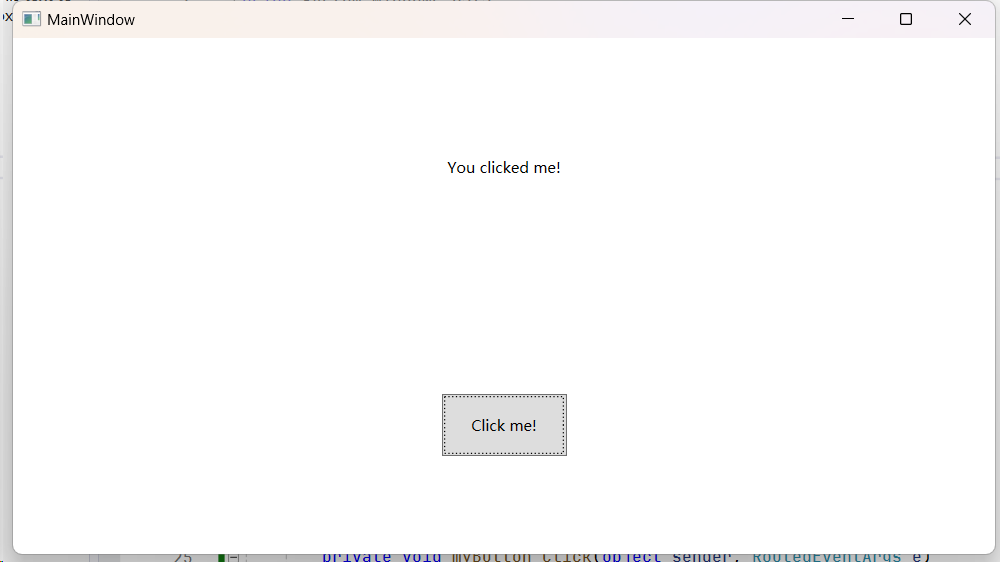
示例:在界面上新增两个 Grid,将 Label 放在第一个,Button 放在第二个:
MainWindow.xaml<Window x:Class="_1_1_Hello.MainWindow" xmlns="http://schemas.microsoft.com/winfx/2006/xaml/presentation" xmlns:x="http://schemas.microsoft.com/winfx/2006/xaml" xmlns:d="http://schemas.microsoft.com/expression/blend/2008" xmlns:mc="http://schemas.openxmlformats.org/markup-compatibility/2006" xmlns:local="clr-namespace:_1_1_Hello" mc:Ignorable="d" Title="MainWindow" Height="450" Width="800"> <Grid> <Grid.RowDefinitions> <RowDefinition></RowDefinition> <RowDefinition></RowDefinition> </Grid.RowDefinitions> <!-- Name 在整个 xaml 中必须是唯一的--> <Label Grid.Row="0" Name ="myLabel" Content="Hello, World!" VerticalAlignment="Center" HorizontalAlignment="Center"></Label> <Button Grid.Row="1" Name ="myButton" Width="100" Height="50" Content="Click me!" Click="myButton_Click"></Button> </Grid> </Window>MainWindow.xaml.csusing System.Text; using System.Windows; using System.Windows.Controls; using System.Windows.Data; using System.Windows.Documents; using System.Windows.Input; using System.Windows.Media; using System.Windows.Media.Imaging; using System.Windows.Navigation; using System.Windows.Shapes; namespace _1_1_Hello { /// <summary> /// Interaction logic for MainWindow.xaml /// </summary> public partial class MainWindow : Window { public MainWindow() { InitializeComponent(); myLabel.Content = "Hello, WPF!"; } // 新增一个点击事件 private void myButton_Click(object sender, RoutedEventArgs e) { myLabel.Content = "You clicked me!"; } } }之所以点了之后有响应,是因为在生成的
MainWindow.xaml.g.i.cs中已经绑定了点击事件的处理器:
界面:
-
1.1.2 Application 的生命周期
使用 Visual Studio 创建一个.Net Framework 的 WPF 解决方案,点击查看 App.xaml,然后在文本编辑器界面按 F7,进入对应的 C# 代码中。重写 Application 的 OnStartup 、OnActivated、OnDeactivated 和 OnExit 方法,如下:
App.xaml.cs
using System;
using System.Collections.Generic;
using System.Configuration;
using System.Data;
using System.Linq;
using System.Threading.Tasks;
using System.Windows;

namespace OldWPFSample
{
    /// <summary>
    /// Interaction logic for App.xaml
    /// </summary>
    public partial class App : Application
    {
        protected override void OnStartup(StartupEventArgs e)
        {
            base.OnStartup(e);	// 执行父类 Application 的 OnStartup 方法
            Console.WriteLine("OnStartup执行!");
        }
        protected override void OnActivated(EventArgs e)
        {
            base.OnActivated(e);
            Console.WriteLine("OnActivated执行!");
        }

        protected override void OnDeactivated(EventArgs e)
        {
            base.OnDeactivated(e);
            Console.WriteLine("OnDeactivated执行!");
        }

        protected override void OnExit(ExitEventArgs e)
        {
            base.OnExit(e);
            Console.WriteLine("OnExit执行!");	// 保存当前缓存数据
        }
    }
}
编译运行时候,我们查看 Visual Studio 中的输出窗口:
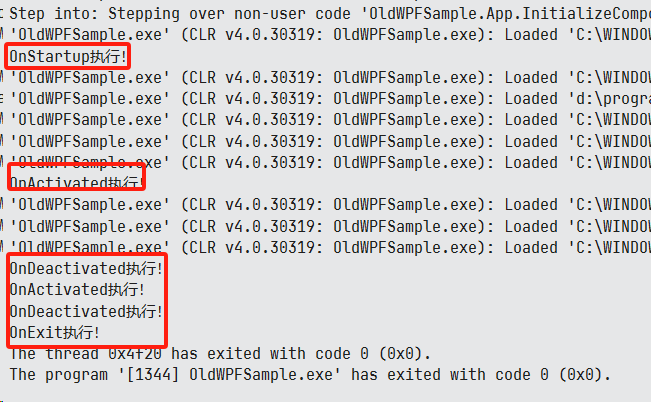
这里显示了当前程序的状态,说明了在窗口实例化、显示的过程中,上述的四个方法会被调用。当将程序在前台和后台切换的时候,程序会分别调用 OnActivated 方法和 OnDeactivated 方法。当关闭当前程序窗口时候, OnExit 方法开始执行。
注意:为了讲解便利,这里只能使用 .Net Framework 的解决方案,使用开源的 .Net 创建的解决方案无法查看到这些状态。
1.1.3 主窗体的生命周期
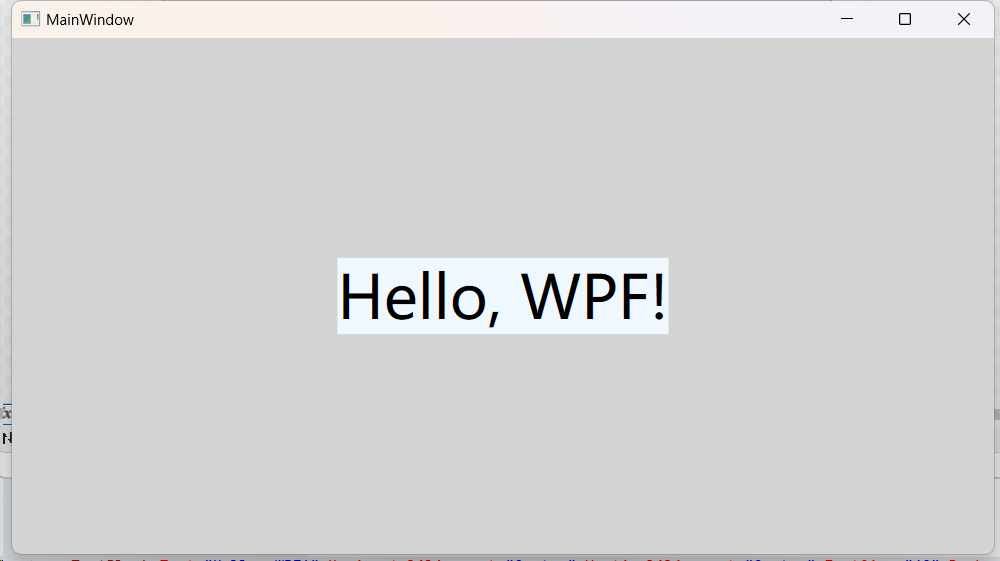
主窗体的 XAML 文件为 MainWindow.xaml,在里面写了个简单的样式:
<Window x:Class="OldWPFSample.MainWindow"
        xmlns="http://schemas.microsoft.com/winfx/2006/xaml/presentation"
        xmlns:x="http://schemas.microsoft.com/winfx/2006/xaml"
        xmlns:d="http://schemas.microsoft.com/expression/blend/2008"
        xmlns:mc="http://schemas.openxmlformats.org/markup-compatibility/2006"
        xmlns:local="clr-namespace:OldWPFSample"
        mc:Ignorable="d"
        Title="MainWindow" Height="450" Width="800">
    <Grid Background="LightGray">
        <TextBlock Text="Hello, WPF!" HorizontalAlignment="Center" VerticalAlignment="Center" FontSize="48" Background="AliceBlue"></TextBlock>
    </Grid>
</Window>
编译运行结果:
下面是主窗体的 C# 代码:
MainWindow.xaml.cs
using System;
using System.Collections.Generic;
using System.Linq;
using System.Text;
using System.Threading.Tasks;
using System.Windows;
using System.Windows.Controls;
using System.Windows.Data;
using System.Windows.Documents;
using System.Windows.Input;
using System.Windows.Media;
using System.Windows.Media.Imaging;
using System.Windows.Navigation;
using System.Windows.Shapes;

namespace OldWPFSample
{
    /// <summary>
    /// Interaction logic for MainWindow.xaml
    /// </summary>
    public partial class MainWindow : Window
    {
        public MainWindow()
        {
            InitializeComponent();
        }
    }
}
先不管接口实现,MainWindow 类的继承关系如下:
为 MainWindow 的构造函数添加如下方法调用:
MainWindow.xaml.cs
using System;
using System.Collections.Generic;
using System.Linq;
using System.Text;
using System.Threading.Tasks;
using System.Windows;
using System.Windows.Controls;
using System.Windows.Data;
using System.Windows.Documents;
using System.Windows.Input;
using System.Windows.Media;
using System.Windows.Media.Imaging;
using System.Windows.Navigation;
using System.Windows.Shapes;

namespace OldWPFSample
{
    /// <summary>
    /// Interaction logic for MainWindow.xaml
    /// </summary>
    public partial class MainWindow : Window
    {
        public MainWindow()
        {
            InitializeComponent();
            this.SourceInitialized += (sender, e) => Console.WriteLine("1. MainWindow.SourceInitialized 被触发");
            this.Activated += (sender, e) => Console.WriteLine("2. MainWindow.Activated 被触发");
            this.Loaded += (sender, e) => Console.WriteLine("3. MainWindow.Loaded 被触发");
            this.ContentRendered += (sender, e) => Console.WriteLine("4. MainWindow.ContentRendered 被触发");
            this.Deactivated += (sender, e) => Console.WriteLine("5. MainWindow.Deactivated 被触发");
            this.Closing += (sender, e) => Console.WriteLine("6. MainWindow.Closing 被触发");
            this.Closed += (sender, e) => Console.WriteLine("7. MainWindow.Closed 被触发");
            this.Unloaded += (sender, e) => Console.WriteLine("8. MainWindow.Unloaded 被触发");
        }
    }
}
运行程序,查看输出窗口:
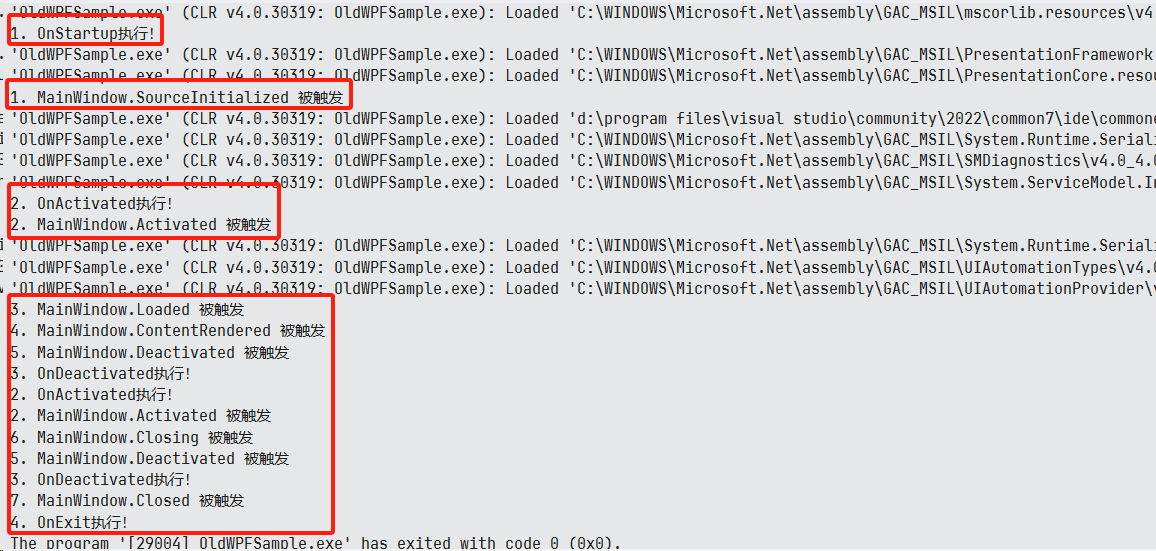
在圈起来的第四部分:当将窗口首次置于后台的时(在此之前为前台状态),OnDeactivated 触发,再次切换到前台,同时触发 OnActivated 事件和 MainWindow.Activated 事件。
观察这些输出结果,与我们订阅事件的代码顺序一致,唯独少了Unloaded的结果输出。因为Unloaded事件没有被触发。下面我们将分析一下这些事件分别代表什么含义。
| 事件名称 | 触发时间 |
|---|---|
| SourceInitialized | 创建窗体源时引发此事件当前窗体成为前台窗体时引发此事件 |
| ActivatedLoaded | 当前窗体成为前台窗体时引发此事件当前窗体内部所有元素完成布局和呈现时引发此事件 |
| LoadedContentRendered | 当前窗体内部所有元素完成布局和呈现时引发此事件当前窗体的内容呈现之后引发此事件 |
| ContentRenderedClosing | 当前窗体的内容呈现之后引发此事件当前窗体关闭之前引发此事件 |
| ClosingDeactivated | 当前窗体关闭之前引发此事件当前窗体成为后台窗体时引发此事件 |
| DeactivatedClosed | 当前窗体成为后台窗体时引发此事件当前窗体关闭之后引发此事件 |
| ClosedUnloaded | 当前窗体关闭之后引发此事件当前窗体从元素树中删除时引发此事件 |
| Unloaded | 当前窗体从元素树中删除时引发此事件 |
可以得知,Window 类窗体生命周期如下:
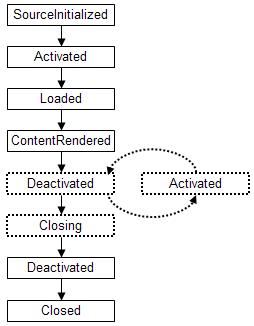
了解窗体的生命周期之后,我们就可以在它不同的生命周期处理一些不同的业务。例如在 Application 或 Window 的创建时加载一些本地设置,在窗体关闭或应用程序退出时保存一些本地设置。
1.1.4 Window 窗体的组成

Window 窗体本质上也是一个控件,只不过它和一般控件有所区别。比如它具有 Closing 和 Closed 事件,而一般控件是不可以关闭的;另外,Window 窗体可以容纳其它控件,最后,窗体由两部分构成,即工作区和非工作区。
非工作区
非工作区主要包含以下几个要素,它们分别是:图标、标题、窗体菜单、最小化按钮、最大化按钮、关闭按钮、窗体边框、右下角鼠标拖动调整窗体尺寸。
工作区
如图所示,我们在窗体中最中心放置了一个TextBlock文字块控件,说明在这个区域内可以容纳和呈现一般控件。具体情况我们先看一下本例中的前端代码。
<Window x:Class="WindowBodyContent.MainWindow"
        xmlns="http://schemas.microsoft.com/winfx/2006/xaml/presentation"
        xmlns:x="http://schemas.microsoft.com/winfx/2006/xaml"
        xmlns:d="http://schemas.microsoft.com/expression/blend/2008"
        xmlns:mc="http://schemas.openxmlformats.org/markup-compatibility/2006"
        xmlns:local="clr-namespace:WindowBodyContent"
        mc:Ignorable="d"
        Title="MainWindow" Height="350" Width="500">
    <Grid>
        <Grid.RowDefinitions>
            <RowDefinition></RowDefinition>
        </Grid.RowDefinitions>
        <TextBlock Text="WPF中文网"
                   Margin="0 50 0 0"
                   Grid.Row="0"
                   VerticalAlignment="Center"
                   HorizontalAlignment="Center"
                   FontSize="48"
                   <!--Foreground="Orchid"-->
                   >
        </TextBlock>
    </Grid>
</Window>
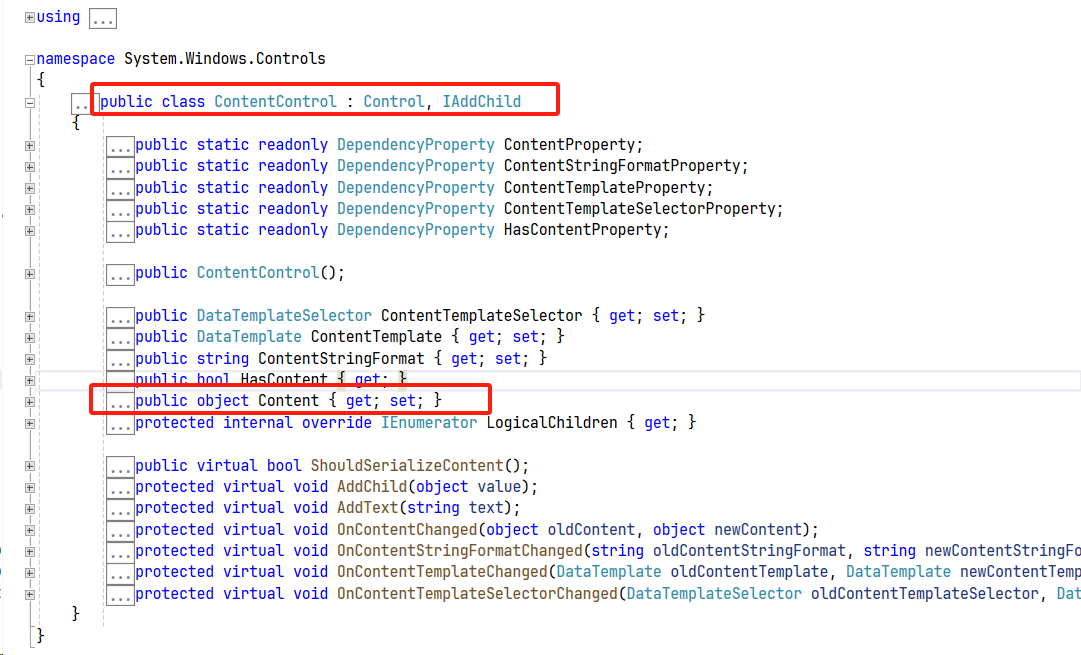
Window 窗体的工作区:本质是指 Window 类的 Content 属性。Content 属性表示窗体的内容,类型位 object,即可以是任意的引用类型。
需要注意的是:Content 属性并不在 Window 类中,而在父类 ContentControl 中(在 Visual Studio 中按 F12,可以跳转到源码定义位置)
技术细节:
默认的
<Window></Window>之中只能存在一个控件,就是因为Content是object类型,意思是只接受一个对象。那如何向窗体中增加多个控件呢?微软给出了示例,就是先放一个 Grid 布局控件,因为 Grid 控件是一个集合控件,我们可以将多个控件放在 Grid 控件中
1.2 XAML 的属性和事件
注意
Attribute和Property之间的区别:
- 在 C# 中,Attribute 只影响类在程序中的用法;而 Property 对应着抽象对象身上的性状。不是一个层面上的东西。
- 标签式语言中,一般把表示一个标签特性的
名称-值对称作 Attribute。而使用标签对象进行面向对象编程,可能导致 Attribute 和 Property 概念的混淆。实际上,使用能够进行面向对象编程的标签式语言只是将标签与对象做了一个映射,同时把 Attribute 和 Property 也做了映射 ———— 针对标签还是叫做 Attribue,针对对象还是叫做 Property。- 标签式OOP编程语言中,标签的 Attribute 和对象的 Property 也不是完全映射的,往往一个标签具有的 Attribue 多于它所代表的对象的 Property。
XAML 编译器会为每个标签创建一个与之对应的对象。对象创建出来之后要对它的属性进行必要的初始化之后才有使用意义。因为 XAML 不能直接编写运行逻辑,所以一份 XAML 文档中除了使用标签声明对象,就是初始化对象的属性了。
XAML 中为对象属性赋赋值共有两种语法:
- 使用字符串进行简单赋值
- 使用属性元素(Property Element)进行复杂赋值
1.2.1 简单属性和转换器
也可以看作使用标签的 Attribute 为对象属性赋值。使用 Key="Value"; 这种方式进行赋值的属性就是简单属性。
几乎所有 XAML 的简单属性,内部都实现了转换器,可以不需要手动添加,如下面的示例:
...
    <Grid>
        <!--定义三行-->
        <Grid.RowDefinitions>
            <RowDefinition Height="0.2*"></RowDefinition>
            <RowDefinition Height="0.4*"></RowDefinition>
            <RowDefinition Height="0.4*"></RowDefinition>
        </Grid.RowDefinitions>
        <!--定义两列-->
        <Grid.ColumnDefinitions>
            <ColumnDefinition></ColumnDefinition>
            <ColumnDefinition></ColumnDefinition>
        </Grid.ColumnDefinitions>
        <StackPanel Grid.Row="1" Grid.Column="1" Orientation="Vertical"></StackPanel>
    </Grid>
...
这里面的 Height="0.2*" 就使用了简单属性简单,同样的 Margin="10" 也是简单属性。
1.2.2 转换器的实现
XAML的键值对中,Value 部分有很多都为阿拉伯数值字符串,如 FontSize=12。我们也可以使用自定义转换器,实现非阿拉伯数字为值的键值对,需要实现 IValueConverter 这个接口:
MainWindow.xaml.cs
using System.Globalization;
using System.Text;
using System.Windows;
using System.Windows.Controls;
using System.Windows.Data;
using System.Windows.Documents;
using System.Windows.Input;
using System.Windows.Media;
using System.Windows.Media.Imaging;
using System.Windows.Navigation;
using System.Windows.Shapes;

namespace _02_02_XAMLPropertyEvent
{
    /// <summary>
    /// Interaction logic for MainWindow.xaml
    /// </summary>
    public partial class MainWindow : Window
    {
        public MainWindow()
        {
            InitializeComponent();
            //this.tbText.FontSize = 20;
        }
    }

    // 需要实现的接口
    public class MyConverter : IValueConverter
    {
        public object Convert(object value, Type targetType, object parameter, CultureInfo culture)
        {
            switch (value)
            {
                case "二十":
                    return 20.0;
                case "十二":
                    return 12.0;
                default:
                    throw new NotImplementedException();
            }
        }

        public object ConvertBack(object value, Type targetType, object parameter, CultureInfo culture)
        {
            throw new NotImplementedException();
        }
    }
MainWindow.xaml
<Window x:Class="_02_02_XAMLPropertyEvent.MainWindow"
        xmlns="http://schemas.microsoft.com/winfx/2006/xaml/presentation"
        xmlns:x="http://schemas.microsoft.com/winfx/2006/xaml"
        xmlns:d="http://schemas.microsoft.com/expression/blend/2008"
        xmlns:mc="http://schemas.openxmlformats.org/markup-compatibility/2006"
        xmlns:local="clr-namespace:_02_02_XAMLPropertyEvent"
        mc:Ignorable="d"
        Title="MainWindow" Height="450" Width="800">
    <!--引入本地自定义的转换器:MyConverter-->
    <Window.Resources>
        <local:MyConverter x:Key="MyConverter"></local:MyConverter>
    </Window.Resources>
    <Grid>
        <!--复杂数据类型-->
        <!--定义三行:每行所占比例为:当前值/总和,如 0.2/(0.2+0.4+0.4)-->
        <Grid.RowDefinitions>
            <RowDefinition Height="0.2*"></RowDefinition>
            <RowDefinition Height="0.4*"></RowDefinition>
            <RowDefinition Height="0.4*"></RowDefinition>
        </Grid.RowDefinitions>
        <Grid.ColumnDefinitions>
            <ColumnDefinition></ColumnDefinition>
            <ColumnDefinition></ColumnDefinition>
        </Grid.ColumnDefinitions>
        <StackPanel Grid.Row="1" Grid.Column="1" Orientation="Vertical">
            <TextBox x:Name="tbInput" Margin="10" Text="十二"></TextBox>
            <!--使用自定义的 Converter:MyConverter
				1. 绑定 Text 对应的内容
				2. 属性元素名称:tbInput
				3. 转换器:静态资源 MyConverter
 			-->
            <TextBlock x:Name="tbText" FontSize="{Binding Path=Text, ElementName=tbInput, Converter={StaticResource MyConverter}}" Text="123"></TextBlock>
        </StackPanel>
    </Grid>
</Window>
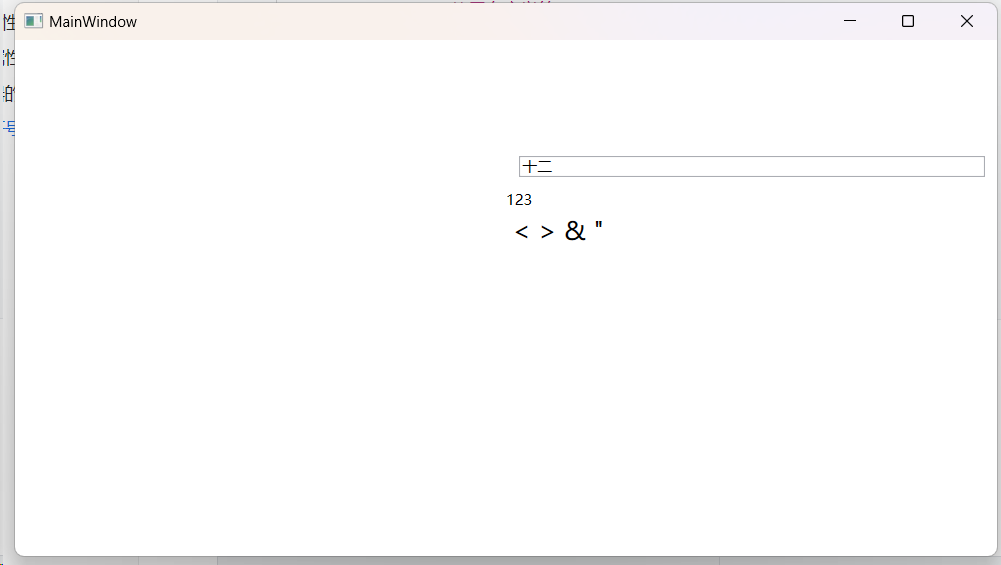
界面为:
1.2.3 特殊符号和空白
XAML 中的特殊符号为:
| 特殊字符 | 字符实体 | 写法 |
|---|---|---|
| 小于号(<) | < | lt; |
| 大于号(>) | > | gt; |
| &符号(&) | & | amp; |
| 引号(") | " | quot; |
1.3 XAML 的名称空间
XAML 和 C# 一样,都有名称空间这一概念。名称空间存在的意义:约定唯一性
1.3.1 C# 中的名称空间
在 VS 中新建一个项目,然后在项目名称上面右键,然后添加一个文件夹,取名为 Model,用来存放各自模型
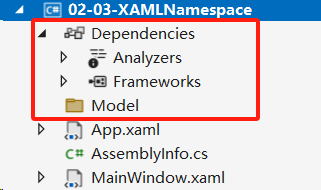
然后在该文件夹上点击右键,新增一个类:Student
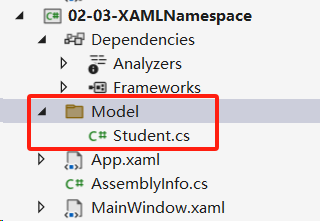
该文件自动生成的代码表示,该类在名称空间 _02_03_XAMLNamespace.Model 下:
using System;
using System.Collections.Generic;
using System.Linq;
using System.Text;
using System.Threading.Tasks;

namespace _02_03_XAMLNamespace.Model
{
    class Student
    {
    }
}
1.3.2 XAML 中的名称空间
如果要在 XAML 中定义名称空间,则是在根元素上定义名称空间
<Window x:Class="_02_03_XAMLNamespace.MainWindow"	<!--x 来自第三行的 xmlns:x="..."-->
        xmlns="http://schemas.microsoft.com/winfx/2006/xaml/presentation"	<!--默认的名称空间-->
        xmlns:x="http://schemas.microsoft.com/winfx/2006/xaml"
        xmlns:d="http://schemas.microsoft.com/expression/blend/2008"
        xmlns:mc="http://schemas.openxmlformats.org/markup-compatibility/2006"
        xmlns:local="clr-namespace:_02_03_XAMLNamespace"
        mc:Ignorable="d"
        Title="MainWindow" Height="450" Width="800">
</Window>
全球能够约定唯一性的就有域名,在 XAML 中,使用这种类似域名的标记约定名称空间,也是为了确定唯一性。
XAML 没有加后缀名的名称空间(即 xmlns="..."),被称为默认名称空间。而 <Window x:Class="..." 则是表示名称空间 x 下的 Attribute,这个 Attribute 来自于 x: 前缀所对应的名称空间。
XAML 引入和使用 C# 定义的名称空间
-
引入
<Window x:Class="_02_03_XAMLNamespace.MainWindow" ... xmlns:local="clr-namespace:_02_03_XAMLNamespace" xmlns:model="clr-namespace:_02_03_XAMLNamespace.Model" <!--引入自定义的名称空间:model--> ...xmlns:XXX中的XXX就是我们自定义名称空间的名称完整的引入语法:
xmlns:Prefix="clr-namesapce:Namespace;assembly=AssemblyName"后面的
assembly为需要使用的程序集的名称- Prefix 是希望在 XAML 中用于指示名称空间的 XAML 前缀,例如,XAML 语言使用 x 前缀
- Namespace 是完全限定的 .NET 名称空间的名称
- AssemblyName 是声明类型的程序集,没有 .dll 扩展名。这个程序集必须在项目中引用。如果希望使用项目程序集,可忽略这一部分
-
使用:在 Window 下
<Window.Resources>
	<model:Student x:Key="myStudent"></model:Student>
</Window.Resources>
注意:这里一定要指定
Key,不能为空字符串。此时需要先编译一遍该项目,否则 VS 会报错。这样,我们就在XAML中使用 C# 中定义的类,生成了一个名为
myStudent的实例。
该部分的完整代码:
<Window x:Class="_02_03_XAMLNamespace.MainWindow"
        xmlns="http://schemas.microsoft.com/winfx/2006/xaml/presentation"
        xmlns:x="http://schemas.microsoft.com/winfx/2006/xaml"
        xmlns:d="http://schemas.microsoft.com/expression/blend/2008"
        xmlns:mc="http://schemas.openxmlformats.org/markup-compatibility/2006"
        xmlns:local="clr-namespace:_02_03_XAMLNamespace"
        xmlns:model="clr-namespace:_02_03_XAMLNamespace.Model"
        mc:Ignorable="d"
        Title="MainWindow" Height="450" Width="800">
    <Window.Resources>
        <model:Student x:Key="myStudent"></model:Student>
    </Window.Resources>
    <Grid>
    </Grid>
</Window>
1.4 XAML 的加载和编译
C# 和 XAML 是可以相互操作的。XAML 之所以能够被运行,是因为它最终被编译为了 C# 文件。其实使用纯 C# 也能写 WPF 程序的界面。
1.4.1 C# 和 XAML 混合的界面
MainWindow.xaml
<Window x:Class="_02_04_XAMLLoadAndCompile.MainWindow"
        xmlns="http://schemas.microsoft.com/winfx/2006/xaml/presentation"
        xmlns:x="http://schemas.microsoft.com/winfx/2006/xaml"
        xmlns:d="http://schemas.microsoft.com/expression/blend/2008"
        xmlns:mc="http://schemas.openxmlformats.org/markup-compatibility/2006"
        xmlns:local="clr-namespace:_02_04_XAMLLoadAndCompile"
        mc:Ignorable="d"
        Title="Code-Only Window" Height="285" Width="285" Left="100" Top="100" >
    <DockPanel>
        <!--margin 为外边距-->
        <Button  x:Name="button1" Click="button1_Click" Margin="10" Content="Please click me!"></Button>

    </DockPanel>

</Window>
MainWindow.xaml.cs
using System.Text;
using System.Windows;
using System.Windows.Controls;
using System.Windows.Data;
using System.Windows.Documents;
using System.Windows.Input;
using System.Windows.Media;
using System.Windows.Media.Imaging;
using System.Windows.Navigation;
using System.Windows.Shapes;

namespace _02_04_XAMLLoadAndCompile
{
    /// <summary>
    /// Interaction logic for MainWindow.xaml
    /// </summary>
    public partial class MainWindow : Window
    {
        public MainWindow()
        {
            InitializeComponent();
        }

        private void button1_Click(object sender, RoutedEventArgs e)
        {
            button1.Content = "Clicked!";
        }
    }


}
界面:
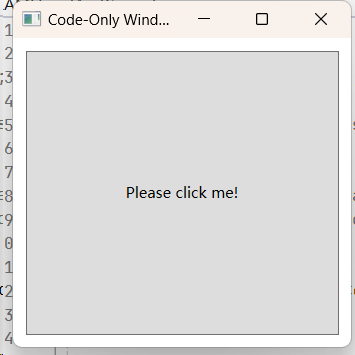
1.4.2 纯 C# 界面
在这里,我们首先先写界面:
界面文件 MainWindow.xaml.cs
using System.Text;
using System.Windows;
using System.Windows.Controls;
using System.Windows.Data;
using System.Windows.Documents;
using System.Windows.Input;
using System.Windows.Markup;
using System.Windows.Media;
using System.Windows.Media.Imaging;
using System.Windows.Navigation;
using System.Windows.Shapes;

namespace PureCSharpUI
{
    /// <summary>
    /// Interaction logic for MainWindow.xaml
    /// </summary>
    public partial class MainWindow : Window
    {
        private Button button1;
        public MainWindow()
        {
            MyInit();
        }

        private void MyInit()
        {
            // 1. 设置窗口相关属性
            this.Width = 285;
            this.Height = this.Width;
            this.Left = 100;
            this.Top = this.Left;
            this.Title = "Code-Only Window";

            // 2. 设置按钮
            button1 = new Button();
            button1.Content = "Click me!";
            button1.Margin = new Thickness(10);	// 设置外边距
            button1.Click += (sender, e) => { button1.Content = "Clicked!"; };

            // 3. 将button 放到容器中
            IAddChild container = new DockPanel();  // IAddChild 被 DockPanel 实现了
            container.AddChild(button1);

            // 4. 将Window的内容设置为 DuckPanel
            this.AddChild(container);

        }
    }
}
因为删除了 MainWindow.xaml,所以配置文件 App.xaml 也不可用了,要手动写入口函数
入口函数:App.xaml.cs
using System.Configuration;
using System.Data;
using System.Windows;

namespace PureCSharpUI
{
    /// <summary>
    /// Interaction logic for App.xaml
    /// </summary>
    public partial class App : Application
    {
        // 删除 App.xaml 文件,需要手动定义入口函数
        [STAThread]
        internal static void Main(string[] args)
        {
            App app = new App();
            // 设置主窗口
            app.MainWindow = new MainWindow();
            // 显示窗口
            app.MainWindow.ShowDialog();
        }
    }

}
编译运行结果:
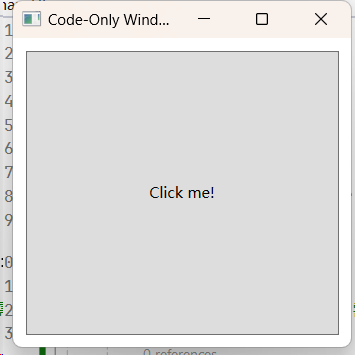
与 XAML 相比,这种使用纯 C# 的方式方式无疑会更加繁琐。
1.4.3 使用代码和未编译的 XAML
新建一个 MyWindow.xaml 文件
<StackPanel xmlns="http://schemas.microsoft.com/winfx/2006/xaml/presentation">
    <Button Content="Please Click me!" Margin="10" Name="button1"></Button>
</StackPanel>
修改 App.xaml.cs 文件:
using System.Configuration;
using System.Data;
using System.Windows;

namespace PureCSharpUI
{
    /// <summary>
    /// Interaction logic for App.xaml
    /// </summary>
    public partial class App : Application
    {
        // 删除 App.xaml 文件,需要手动定义入口函数
        [STAThread]
        internal static void Main(string[] args)
        {
            App app = new App();
            // 设置主窗口
            app.MainWindow = new MainWindow();
            // 显示窗口
            app.MainWindow.ShowDialog();
        }
    }

}
修改 MainWindow.xaml.cs 文件:
using System.IO;
using System.Text;
using System.Windows;
using System.Windows.Controls;
using System.Windows.Data;
using System.Windows.Documents;
using System.Windows.Input;
using System.Windows.Markup;
using System.Windows.Media;
using System.Windows.Media.Imaging;
using System.Windows.Navigation;
using System.Windows.Shapes;

namespace PureCSharpUI
{
    /// <summary>
    /// Interaction logic for MainWindow.xaml
    /// </summary>
    public partial class MainWindow : Window
    {
        private Button? button1;
        public MainWindow()
        {
            //MyInit();
            string filePath = "D:\\Source\\c_sharp_wpf\\02-02-XAMLPropertyEvent\\PureCSharpUI\\MyWindow.xaml";
            MyInit1(filePath);
        }

        // 使用xaml文件进行加载
        private void MyInit1(string xamlFilePath)
        {

            // 1. 设置窗口相关属性
            this.Width = 285;
            this.Height = this.Width;
            this.Left = 100;
            this.Top = this.Left;
            this.Title = "Code-Only Window";

            // 2. 从 xaml 文件中读取
            // using: 调用后关闭资源占用
            using FileStream fs = new FileStream(xamlFilePath, FileMode.Open);
            // XamlReader.Load 返回 object,需要转为 DependencyObject
            DependencyObject dependencyObject = (DependencyObject)XamlReader.Load(fs);

            // 3. 从xaml 中获得节点
            // LogicalTreeHelper 类的 FindLogicalNode 方法返回一个 DependencyObject 类型
            button1 = (Button)LogicalTreeHelper.FindLogicalNode(dependencyObject, "button1");
            button1.Click += (sender, e) => { this.button1.Content = "Clicked!"; };

            // 4. 加载到窗口中
            //this.AddChild(dependencyObject);    // 添加一个子元素
            this.Content = dependencyObject;    // 让 Window 的内容是 dependecyObject
        }
    }
}
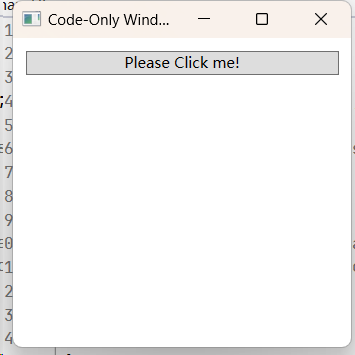
编译运行结果:
注意:
- WPF 类的继承关系:

一切 WPF 类的基类都是
DispatcherObject,次基类为DependencyObject,而DispatcherObject的基类为Object。所以在这才能写为:
// XamlReader.Load 返回一个 object,需要转为 DependencyObject
DependencyObject dependencyObject = (DependencyObject)XamlReader.Load(fs);
- 使用 LogicalTreeHelper 类的方法,可以对 DependencyObject 对象进行访问(获取子节点、父节点、指定名称节点等),下面是 LogicalTreeHelper 的定义:
1.4.4 使用代码和编译后的 XAML
因为 XAML 的读取效率十分低下,所以在打包 WPF 为可执行文件的时候,XAML 文件都会被编译为 BAML 文件,BAML 是 XAML 的二进制版。后面会进行讲解。
// TODO
1.4.5 只使用 XAML
过时,不做讲解
2. WPF 控件的基类
该部分笔记,大多摘自:WPF中文网
在WPF的世界里,DispatcherObject 坐上了头把交椅。这个类位于程序集: WindowsBase.dll 中,根据微软官网资料显示,DispatcherObject 继承于 object。
下面来查看几个常用控件的继承路线:
Button继承路线
StackPanel继承路线
Rectangle继承路线
Grid继承路线
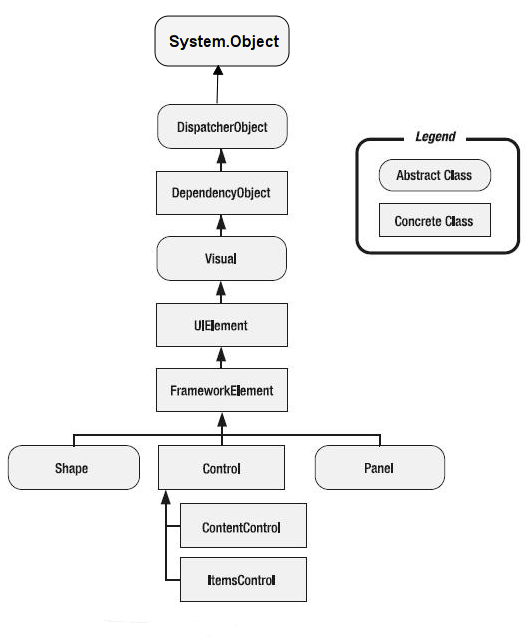
总结:我们发现它们继承路线都在 FrameworkElement 这一层汇合。而 FrameworkElement 又继承了其他的类(UIElement -> Visual -> DependencyObject -> DispatcherObject),至少有如下几个类型:
DispatcherObjectDependencyObjectVisualUIElementFrameworkElement
几乎所有的 WPF 控件都从上面五个父类继承,它们之间的继承关系,形成了一棵树:
2.1 DispatcherObject 类
在 WPF 中,DispatcherObject 是最顶级的类,在此之上就只有 object 类型了。
在 WPF 应用启动时,.Net 给 WPF 准备了两个线程:呈现界面(后台线程)和管理界面(UI线程)。我们唯一能够操作的就是管理界面(UI线程),后台线程则在后台默默运行。
绝大多数对象或者控件都必须在 UI 线程上创建,而且,其它后台子线程不能直接访问 UI 线程上的控件,那么,如果后台线程非要访问 UI 线程的控件或对象,该怎么办?此时微软给出的方案:
在 UI 线程上提供一个调度员(Dispatcher),将 Dispatcher 放到一个抽象类 DispatcherObject 中,然后让所有的控件都从这个 DispatcherObject 类继承。 这样,后台线程要访问控件时,就可以从控件中找到中间商 Dispatcher,由中间商 Dispatcher 完成对控件的操作访问。
下面是一个简单的使用 DispatcherObject 访问UI控件属性的示例:
MainWindow.xaml
<Window x:Class="WindowBodyContent.MainWindow"
        xmlns="http://schemas.microsoft.com/winfx/2006/xaml/presentation"
        xmlns:x="http://schemas.microsoft.com/winfx/2006/xaml"
        xmlns:d="http://schemas.microsoft.com/expression/blend/2008"
        xmlns:mc="http://schemas.openxmlformats.org/markup-compatibility/2006"
        xmlns:local="clr-namespace:WindowBodyContent"
        mc:Ignorable="d"
        Title="MainWindow" Height="350" Width="500">
    <Grid>
        <Grid.RowDefinitions>
            <RowDefinition></RowDefinition>
            <RowDefinition></RowDefinition>
        </Grid.RowDefinitions>
        <TextBlock Text="Hello, WPF!"
                   Margin="0 50 0 0"
                   Grid.Row="0"
                   VerticalAlignment="Center"
                   HorizontalAlignment="Center"
                   FontSize="48">
        </TextBlock>
        <Button Name="button1" Grid.Row="1" Height="35" Width="100" Content="Click Me"></Button>
    </Grid>
</Window>
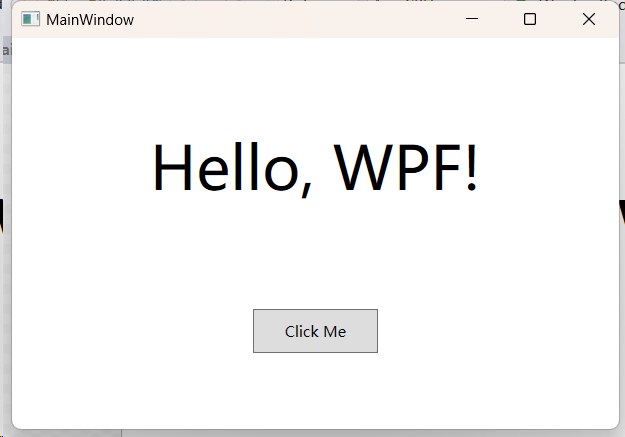
运行界面(不进行 debug):
在 C# 中新建一个匿名线程,访问UI控件 Button 的属性 Content
MainWindow.xaml.cs
using System.Text;
using System.Windows;
using System.Windows.Controls;
using System.Windows.Data;
using System.Windows.Documents;
using System.Windows.Input;
using System.Windows.Media;
using System.Windows.Media.Imaging;
using System.Windows.Navigation;
using System.Windows.Shapes;

namespace WindowBodyContent
{
    /// <summary>
    /// Interaction logic for MainWindow.xaml
    /// </summary>
    public partial class MainWindow : Window
    {
        public MainWindow()
        {
            InitializeComponent();

            // 使用 Loaded 事件
            this.Loaded += MainWindow_Loaded;
        }

        private void MainWindow_Loaded(object sender, RoutedEventArgs e)
        {
            //this.button1.Content = "OK";
            // 创建一个子线程,访问UI界面的的控件属性
            Task.Run(() =>
            {
                this.button1.Content = "OK";
            });
        }
    }
}
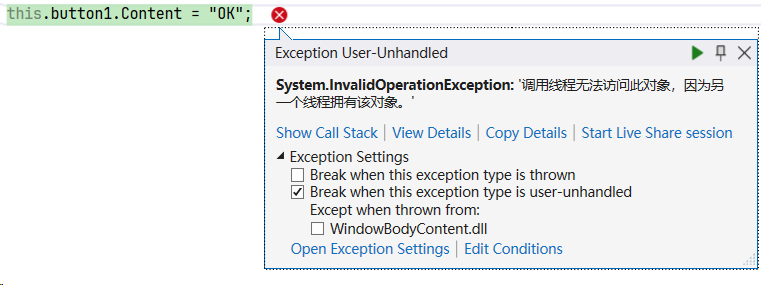
编译通过,但是 Debug 时候会报如下 Exception:线程无法访问此对象,因为另一个线程拥有该对象
使用 DispatcherObject 基类,实现后台线程访问UI控件属性:Dispatcher.Invoke 的作用:将传入方法放到UI线程上去执行,该方法可以是一个 Lambda 表达式,也可以是一个具名方法,实现跨线程调度
 private void MainWindow_Loaded(object sender, RoutedEventArgs e)
 {
     //this.button1.Content = "OK";
     // 创建一个子线程,访问UI界面的的控件属性
     Task.Run(() =>
     {
         // 将匿名方法放到UI线程上去执行
         this.Dispatcher.Invoke(() =>
         {
             this.button1.Content = "OK";
         });
     });
 }
这样,加载之后,Button 上面的内容就是 OK 了:
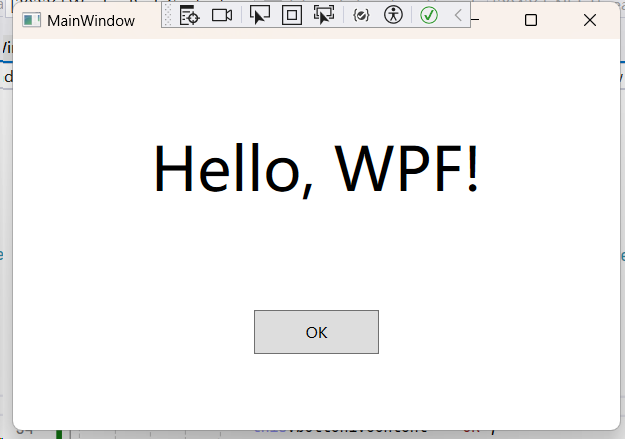
当然也可以在 Dispatcher.Invoke 中传入具名方法:
private void MainWindow_Loaded(object sender, RoutedEventArgs e)
{
    Task.Run(() =>
    {
        this.Dipatcher.Invoke(ChangeButtonContent);
    });
}

private void ChangeButtonContent()
{
    this.button1.Content = "OK";
}
在其它类中创建新线程,访问 UI 线程控件的属性:
MainWindowHelper.cs
using System;
using System.Collections.Generic;
using System.Linq;
using System.Text;
using System.Threading.Tasks;
using System.Windows;
using WindowBodyContent;

namespace MyNamespace
{
    internal class MainWindowHelper
    {
        public void DoSomeWork(MainWindow mainWindow)
        {
            if (mainWindow != null)
            {
                Task.Run(() =>
                {
                    Thread.Sleep(1000);
                    Application.Current.Dispatcher.Invoke(new Action(() =>
                    {
                        mainWindow.button1.Content = "Helper";
                    }));
                });
            }
        }
    }
}
MainWindow.xaml.cs 中代码修改为如下所示:
MainWindow.xaml.cs
using System.Text;
using System.Windows;
using System.Windows.Controls;
using System.Windows.Data;
using System.Windows.Documents;
using System.Windows.Input;
using System.Windows.Media;
using System.Windows.Media.Imaging;
using System.Windows.Navigation;
using System.Windows.Shapes;
using MyNamespace;

namespace WindowBodyContent
{
    /// <summary>
    /// Interaction logic for MainWindow.xaml
    /// </summary>
    public partial class MainWindow : Window
    {
        public MainWindow()
        {
            InitializeComponent();
            this.Loaded += MainWindow_Loaded;

            MainWindowHelper helper = new MainWindowHelper();
            helper.DoSomeWork(this);    // 其他类创建新线程访问UI线程控件的属性
        }

        private void MainWindow_Loaded(object sender, RoutedEventArgs e)
        {
            // Task.Run 创建一个子线程,访问UI界面的的控件属性
            Task.Run(() =>
            {
                this.Dispatcher.Invoke(ChangeButtonContent);
            });
        }

        private void ChangeButtonContent()
        {
            this.button1.Content = "OK";
        }
    }
}
界面效果:按钮上的文字一秒后由 "OK" 变为 "Helper"
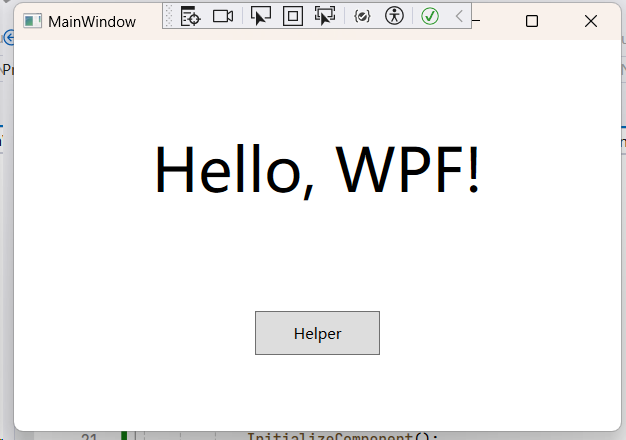
注意:
DispatcherObject 类的主要方针路线到底是什么呢?主要有两个职责:
提供对对象所关联的当前 Dispatcher 的访问权限,意思是说谁继承了它,谁就拥有了Dispatcher。
提供方法以检查 (CheckAccess) 和验证 (VerifyAccess) 某个线程是否有权访问对象(派生于 DispatcherObject)。CheckAccess 与 VerifyAccess 的区别在于 CheckAccess 返回一个布尔值,表示当前线程是否有可以使用的对象,而 VerifyAccess 则在线程无权访问对象的情况下引发异常。
可以在任意类中使用
Application.Current.Dispatcher中访问 UI 线程中的对象。
2.2 DependencyObject 类
DependencyObject 继承了 DispatcherObject 类。Dependency,字面意思为依靠,依赖。为什么会有 DependencyObject 类的存在?这还要从 WPF 的依赖属性系统 说起。
如果您有 Winform 的基础,对于控件属性值的赋值一定不陌生。比如:
button1.Text = "确定"; // 右侧为常量
我们将 “确定” 字符串赋值给一个按钮的 Text 属性,这样前端的 button1 的内容为显示为 ”确定“ 。如果根据某些业务要求,需要将这个 button1 的内容翻译成英语“OK"显示呢?其实也很简单。
button1.Text = "OK"; // 右侧为常量
这种在需要的时候主动去改变控件的值的开发模式,我们称为事件驱动模式。
而比事件驱动模式更方便的,就是数据驱动模式。
数据驱动模式是什么?
控件的属性不再被直接赋值,而是绑定了另一个”变量“,当这个”变量“发生改变时,控件的属性也会跟着改变,这样的属性也被称为依赖属性。
几乎 WPF 控件的所有属性都可以采用这种模式去更新属性的值,为什么?因为所有控件都继承了 DependencyObject 这个基类。换句话说,也只有继承了这个基类 DependencyObject 的控件,才能使用数据驱动模式。其背后的原理是有一个强大的依赖属性系统在提供属性更改通知服务。
提前阅读
DependencyObject类表示参与依赖属性系统的对象。属性系统的主要功能是计算属性的值,并提供有关已更改的值的系统通知。 参与属性系统的另一个类DependencyProperty。DependencyProperty允许将依赖属性注册到属性系统,并提供有关每个依赖属性的标识和信息,而DependencyObject为基类,使对象能够使用此依赖属性。
INotifyPropertyChanged类用于通知 UI 刷新,注重的仅仅是数据更新后的通知。DependencyObject类用于给 UI 添加依赖和附加属性,注重数据与UI的关联。如果简单的数据通知,两者都可以实现的。
我们来看一下 DependencyObject 类的定义,比较常用的是 GetValue 和 SetValue。
-
GetValue表示获取某一个依赖属性的值,由于不确定这个值是什么类型,所以微软把这个函数的返回值设计成object。 -
SetValue表示设置某一个依赖属竹的值,所有它有两个参数,第一个参数dp表示要设置的依赖属性,第二个参数value表示新值。
public class DependencyObject : DispatcherObject
{
    public DependencyObject();

    public DependencyObjectType DependencyObjectType { get; }
    public bool IsSealed { get; }

    public void ClearValue(DependencyProperty dp);
    public void ClearValue(DependencyPropertyKey key);
    public void CoerceValue(DependencyProperty dp);
    public sealed override bool Equals(object obj);
    public sealed override int GetHashCode();
    public LocalValueEnumerator GetLocalValueEnumerator();
    public object GetValue(DependencyProperty dp);
    public void InvalidateProperty(DependencyProperty dp);
    public object ReadLocalValue(DependencyProperty dp);
    public void SetCurrentValue(DependencyProperty dp, object value);
    public void SetValue(DependencyProperty dp, object value);
    public void SetValue(DependencyPropertyKey key, object value);
    protected virtual void OnPropertyChanged(DependencyPropertyChangedEventArgs e);
    protected internal virtual bool ShouldSerializeProperty(DependencyProperty dp);

}
2.3 Visual 类
Visual 类是 WPF 框架中第三个父类,主要是为 WPF 中的呈现提供支持,其中包括命中测试、坐标转换和边界框计算。它位于程序集: PresentationCore.dll 库文件中,它的命名空间: System.Windows.Media。
Button、TextBox、CheckBox、Gird、ListBox 等所有控件都继承了 Visual 类,控件在绘制到界面的过程中,涉及到转换、裁剪、边框计算等功能,都是使用了Visual父类的功能。
#region Assembly PresentationCore, Version=6.0.2.0, Culture=neutral, PublicKeyToken=31bf3856ad364e35
// C:\Program Files\dotnet\packs\Microsoft.WindowsDesktop.App.Ref\6.0.26\ref\net6.0\PresentationCore.dll
#endregion

using System.Windows.Media.Effects;
using System.Windows.Media.Media3D;

namespace System.Windows.Media
{
    public abstract class Visual : DependencyObject
    {
        protected Visual();
        protected virtual int VisualChildrenCount { get; }
        protected DependencyObject VisualParent { get; }
        protected internal CacheMode VisualCacheMode { get; protected set; }
        protected internal ClearTypeHint VisualClearTypeHint { get; set; }
        protected internal Geometry VisualClip { get; protected set; }
        protected internal EdgeMode VisualEdgeMode { get; protected set; }
        protected internal Effect VisualEffect { get; protected set; }
        protected internal Vector VisualOffset { get; protected set; }
        protected internal double VisualOpacity { get; protected set; }
        protected internal Brush VisualOpacityMask { get; protected set; }
        protected internal Rect? VisualScrollableAreaClip { get; protected set; }
        protected internal TextHintingMode VisualTextHintingMode { get; set; }
        protected internal TextRenderingMode VisualTextRenderingMode { get; set; }
        protected internal Transform VisualTransform { get; protected set; }
        [Obsolete("BitmapEffects are deprecated and no longer function.  Consider using Effects where appropriate instead.")]
        protected internal BitmapEffectInput VisualBitmapEffectInput { get; protected set; }
        protected internal DoubleCollection VisualXSnappingGuidelines { get; protected set; }
        protected internal DoubleCollection VisualYSnappingGuidelines { get; protected set; }
        public DependencyObject FindCommonVisualAncestor(DependencyObject otherVisual);
        public bool IsDescendantOf(DependencyObject ancestor);
        public Point PointFromScreen(Point point);
        public Point PointToScreen(Point point);
        public GeneralTransform TransformToAncestor(Visual ancestor);
        public GeneralTransform2DTo3D TransformToAncestor(Visual3D ancestor);
        public GeneralTransform TransformToDescendant(Visual descendant);
        protected void AddVisualChild(Visual child);
        protected virtual Visual GetVisualChild(int index);
        protected virtual HitTestResult HitTestCore(PointHitTestParameters hitTestParameters);
        protected virtual GeometryHitTestResult HitTestCore(GeometryHitTestParameters hitTestParameters);
        protected void RemoveVisualChild(Visual child);
        protected internal virtual void OnVisualChildrenChanged(DependencyObject visualAdded, DependencyObject visualRemoved);
        protected internal virtual void OnVisualParentChanged(DependencyObject oldParent);
    }
}
首先,我们可以看到,Visual类继承了 DependencyObject 类。另外 Visual 类是一个抽象类,不可以被实例。Visual 类提供了一系列的属性和方法。我们在这里捡一些比较重要的分析一下。
-
VisualParent属性:这个属性表示获取一个可视化父对象。因为XAML的代码结构就是一棵xml树,每个控件都对象几乎都有一个可视化父对象。 -
VisualChildrenCount属性:获取当前对象的子元素数量。 -
VisualOffset属性:指当前可视对象的偏移量值。需要注意的是这个属性被声明成protected internal。作用:VisualOffset 属性只能由同一个程序集的其它类访问,或 Visual 的子类访问。protected internal:
protected internal关键字组合是一种成员访问修饰符, 表示受保护的内部成员。该成员既能被程序集内其他类访问(internal),又可以被子类(派生类)访问(protected)。 -
VisualOpacity属性:获取或设置 Visual 的不透明度。 -
VisualEffect属性:获取或设置要应用于 Visual 的位图效果。 -
VisualTransform属性:获取或设置 Transform 的 Visual 值。
这些属性都只读,为了解 Visual 类的基础,因为这些属性都被设计成 protected internal,我们的控件虽然继承了这个 Visual 类,但在实际的使用过程中是感知不到这些属性的,自然也不能实操它们。
我们真正能在继承的控件中直接使用的是Visual类中被声明为public的方法成员。它们有以下几个:
DependencyObject FindCommonVisualAncestor(DependencyObject otherVisual); //返回两个可视对象的公共上级。
bool IsAncestorOf(DependencyObject descendant); //确定可视对象是否为后代可视对象的上级。
bool IsDescendantOf(DependencyObject ancestor); //确定可视对象是否为上级可视对象的后代。
Point PointFromScreen(Point point); //将屏幕坐标中的 Point 转换为表示 Point 的当前坐标系的 Visual。
Point PointToScreen(Point point); //将表示 Point 的当前坐标系的 Visual 转换为屏幕坐标中的 Point。
GeneralTransform2DTo3D TransformToAncestor(Visual3D ancestor); //返回一个转换,该转换可用于将 Visual 中的坐标转换为可视对象的指定 Visual3D 上级。
GeneralTransform TransformToAncestor(Visual ancestor); //返回一个转换,该转换可用于将 Visual 中的坐标转换为可视对象的指定 Visual 上级。
GeneralTransform TransformToDescendant(Visual descendant); //返回一个转换,该转换可用于将 Visual 中的坐标转换为指定的可视对象后代。
GeneralTransform TransformToVisual(Visual visual); //返回一个转换,该转换可用于将 Visual 中的坐标转换为指定的可视对象。
由此可见,Visual 类所做的事情只为控件呈现相关,但还不是去呈现控件,只是提供呈现的基础。那么,谁又去继承了 Visual 类,成为继 Visual 类之后又一个控件的基类呢?答案是 UIElement 类。
2.4 UIElement 类
UIElement 类中,凡是以 Property 作为名称结尾的,都是依赖属性,凡是以 Event 作为名称结尾的,都是依赖事件。
UIElement 类继承了 Visual 类,在WPF框架中排行第四(第 4 个基类)。它位于程序集: PresentationCore.dll 之中,命名空间: System.Windows。
这个基类非常非常重要,理解了这个类,就理解了WPF所有控件1/3的知识与用法。我们先来看一下它的全貌。
public class UIElement : Visual, IAnimatable, IInputElement
{
public static readonly RoutedEvent PreviewMouseDownEvent;
public static readonly DependencyProperty AreAnyTouchesOverProperty;
public static readonly DependencyProperty AreAnyTouchesDirectlyOverProperty;
public static readonly DependencyProperty IsKeyboardFocusedProperty;
public static readonly DependencyProperty IsStylusCaptureWithinProperty;
public static readonly DependencyProperty IsStylusCapturedProperty;
public static readonly DependencyProperty IsMouseCaptureWithinProperty;
public static readonly DependencyProperty IsMouseCapturedProperty;
public static readonly DependencyProperty IsKeyboardFocusWithinProperty;
public static readonly DependencyProperty IsStylusOverProperty;
public static readonly DependencyProperty IsMouseOverProperty;
public static readonly DependencyProperty IsMouseDirectlyOverProperty;
public static readonly RoutedEvent TouchLeaveEvent;
public static readonly RoutedEvent TouchEnterEvent;
public static readonly RoutedEvent LostTouchCaptureEvent;
public static readonly RoutedEvent GotTouchCaptureEvent;
public static readonly RoutedEvent TouchUpEvent;
public static readonly RoutedEvent PreviewTouchUpEvent;
public static readonly RoutedEvent TouchMoveEvent;
public static readonly RoutedEvent PreviewTouchMoveEvent;
public static readonly RoutedEvent TouchDownEvent;
public static readonly RoutedEvent PreviewTouchDownEvent;
public static readonly RoutedEvent DropEvent;
public static readonly RoutedEvent PreviewDropEvent;
public static readonly RoutedEvent DragLeaveEvent;
public static readonly RoutedEvent PreviewDragLeaveEvent;
public static readonly DependencyProperty AreAnyTouchesCapturedProperty;
public static readonly DependencyProperty AreAnyTouchesCapturedWithinProperty;
public static readonly DependencyProperty AllowDropProperty;
public static readonly DependencyProperty RenderTransformProperty;
public static readonly RoutedEvent ManipulationCompletedEvent;
public static readonly RoutedEvent ManipulationBoundaryFeedbackEvent;
public static readonly RoutedEvent ManipulationInertiaStartingEvent;
public static readonly RoutedEvent ManipulationDeltaEvent;
public static readonly RoutedEvent ManipulationStartedEvent;
public static readonly RoutedEvent ManipulationStartingEvent;
public static readonly DependencyProperty IsManipulationEnabledProperty;
public static readonly DependencyProperty FocusableProperty;
public static readonly DependencyProperty IsVisibleProperty;
public static readonly DependencyProperty IsHitTestVisibleProperty;
public static readonly DependencyProperty IsEnabledProperty;
public static readonly DependencyProperty IsFocusedProperty;
public static readonly RoutedEvent DragOverEvent;
public static readonly RoutedEvent LostFocusEvent;
public static readonly DependencyProperty SnapsToDevicePixelsProperty;
public static readonly DependencyProperty ClipProperty;
public static readonly DependencyProperty ClipToBoundsProperty;
public static readonly DependencyProperty VisibilityProperty;
public static readonly DependencyProperty UidProperty;
public static readonly DependencyProperty CacheModeProperty;
public static readonly DependencyProperty BitmapEffectInputProperty;
public static readonly DependencyProperty EffectProperty;
public static readonly DependencyProperty BitmapEffectProperty;
public static readonly DependencyProperty OpacityMaskProperty;
public static readonly DependencyProperty OpacityProperty;
public static readonly DependencyProperty RenderTransformOriginProperty;
public static readonly RoutedEvent GotFocusEvent;
public static readonly RoutedEvent PreviewDragOverEvent;
public static readonly DependencyProperty IsStylusDirectlyOverProperty;
public static readonly RoutedEvent PreviewDragEnterEvent;
public static readonly RoutedEvent StylusMoveEvent;
public static readonly RoutedEvent PreviewStylusMoveEvent;
public static readonly RoutedEvent StylusUpEvent;
public static readonly RoutedEvent PreviewStylusUpEvent;
public static readonly RoutedEvent StylusDownEvent;
public static readonly RoutedEvent PreviewStylusDownEvent;
public static readonly RoutedEvent QueryCursorEvent;
public static readonly RoutedEvent LostMouseCaptureEvent;
public static readonly RoutedEvent GotMouseCaptureEvent;
public static readonly RoutedEvent MouseLeaveEvent;
public static readonly RoutedEvent MouseEnterEvent;
public static readonly RoutedEvent MouseWheelEvent;
public static readonly RoutedEvent PreviewStylusInAirMoveEvent;
public static readonly RoutedEvent PreviewMouseWheelEvent;
public static readonly RoutedEvent PreviewMouseMoveEvent;
public static readonly RoutedEvent MouseRightButtonUpEvent;
public static readonly RoutedEvent PreviewMouseRightButtonUpEvent;
public static readonly RoutedEvent MouseRightButtonDownEvent;
public static readonly RoutedEvent PreviewMouseRightButtonDownEvent;
public static readonly RoutedEvent DragEnterEvent;
public static readonly RoutedEvent PreviewMouseLeftButtonUpEvent;
public static readonly RoutedEvent MouseLeftButtonDownEvent;
public static readonly RoutedEvent PreviewMouseLeftButtonDownEvent;
public static readonly RoutedEvent MouseUpEvent;
public static readonly RoutedEvent PreviewMouseUpEvent;
public static readonly RoutedEvent MouseDownEvent;
public static readonly RoutedEvent MouseMoveEvent;
public static readonly RoutedEvent StylusInAirMoveEvent;
public static readonly RoutedEvent MouseLeftButtonUpEvent;
public static readonly RoutedEvent StylusLeaveEvent;
public static readonly RoutedEvent StylusEnterEvent;
public static readonly RoutedEvent GiveFeedbackEvent;
public static readonly RoutedEvent PreviewGiveFeedbackEvent;
public static readonly RoutedEvent QueryContinueDragEvent;
public static readonly RoutedEvent TextInputEvent;
public static readonly RoutedEvent PreviewTextInputEvent;
public static readonly RoutedEvent LostKeyboardFocusEvent;
public static readonly RoutedEvent PreviewLostKeyboardFocusEvent;
public static readonly RoutedEvent GotKeyboardFocusEvent;
public static readonly RoutedEvent PreviewGotKeyboardFocusEvent;
public static readonly RoutedEvent KeyUpEvent;
public static readonly RoutedEvent PreviewKeyUpEvent;
public static readonly RoutedEvent KeyDownEvent;
public static readonly RoutedEvent PreviewQueryContinueDragEvent;
public static readonly RoutedEvent PreviewStylusButtonUpEvent;
public static readonly RoutedEvent PreviewKeyDownEvent;
public static readonly RoutedEvent StylusInRangeEvent;
public static readonly RoutedEvent PreviewStylusInRangeEvent;
public static readonly RoutedEvent StylusOutOfRangeEvent;
public static readonly RoutedEvent PreviewStylusSystemGestureEvent;
public static readonly RoutedEvent PreviewStylusOutOfRangeEvent;
public static readonly RoutedEvent GotStylusCaptureEvent;
public static readonly RoutedEvent LostStylusCaptureEvent;
public static readonly RoutedEvent StylusButtonDownEvent;
public static readonly RoutedEvent StylusButtonUpEvent;
public static readonly RoutedEvent PreviewStylusButtonDownEvent;
public static readonly RoutedEvent StylusSystemGestureEvent;

public UIElement();

public string Uid { get; set; }
public Visibility Visibility { get; set; }
public bool ClipToBounds { get; set; }
public Geometry Clip { get; set; }
public bool SnapsToDevicePixels { get; set; }
public bool IsFocused { get; }
public bool IsEnabled { get; set; }
public bool IsHitTestVisible { get; set; }
public bool IsVisible { get; }
public bool AreAnyTouchesCapturedWithin { get; }
public int PersistId { get; }
public bool IsManipulationEnabled { get; set; }
public bool AreAnyTouchesOver { get; }
public bool AreAnyTouchesDirectlyOver { get; }
public bool AreAnyTouchesCaptured { get; }
public IEnumerable<TouchDevice> TouchesCaptured { get; }
public IEnumerable<TouchDevice> TouchesCapturedWithin { get; }
public IEnumerable<TouchDevice> TouchesOver { get; }
public CacheMode CacheMode { get; set; }
public bool Focusable { get; set; }
public BitmapEffectInput BitmapEffectInput { get; set; }
public bool IsMouseDirectlyOver { get; }
public BitmapEffect BitmapEffect { get; set; }
public Size RenderSize { get; set; }
public bool IsArrangeValid { get; }
public bool IsMeasureValid { get; }
public Size DesiredSize { get; }
public bool AllowDrop { get; set; }
public CommandBindingCollection CommandBindings { get; }
public InputBindingCollection InputBindings { get; }
public bool HasAnimatedProperties { get; }
public bool IsMouseOver { get; }
public Effect Effect { get; set; }
public bool IsStylusOver { get; }
public bool IsMouseCaptured { get; }
public bool IsMouseCaptureWithin { get; }
public bool IsStylusDirectlyOver { get; }
public bool IsStylusCaptured { get; }
public bool IsStylusCaptureWithin { get; }
public bool IsKeyboardFocused { get; }
public bool IsInputMethodEnabled { get; }
public double Opacity { get; set; }
public Brush OpacityMask { get; set; }
public bool IsKeyboardFocusWithin { get; }
public IEnumerable<TouchDevice> TouchesDirectlyOver { get; }
public Point RenderTransformOrigin { get; set; }
public Transform RenderTransform { get; set; }
protected StylusPlugInCollection StylusPlugIns { get; }
protected virtual bool IsEnabledCore { get; }
protected internal virtual bool HasEffectiveKeyboardFocus { get; }

public event KeyEventHandler KeyUp;
public event EventHandler<TouchEventArgs> TouchMove;
public event EventHandler<TouchEventArgs> PreviewTouchMove;
public event EventHandler<TouchEventArgs> TouchDown;
public event EventHandler<TouchEventArgs> PreviewTouchDown;
public event DragEventHandler Drop;
public event DragEventHandler PreviewDrop;
public event DragEventHandler DragLeave;
public event DragEventHandler PreviewDragLeave;
public event DragEventHandler DragOver;
public event DragEventHandler PreviewDragOver;
public event DragEventHandler DragEnter;
public event DragEventHandler PreviewDragEnter;
public event GiveFeedbackEventHandler GiveFeedback;
public event GiveFeedbackEventHandler PreviewGiveFeedback;
public event QueryContinueDragEventHandler QueryContinueDrag;
public event QueryContinueDragEventHandler PreviewQueryContinueDrag;
public event TextCompositionEventHandler TextInput;
public event EventHandler<TouchEventArgs> PreviewTouchUp;
public event EventHandler<TouchEventArgs> TouchUp;
public event EventHandler<TouchEventArgs> LostTouchCapture;
public event TextCompositionEventHandler PreviewTextInput;
public event EventHandler<ManipulationInertiaStartingEventArgs> ManipulationInertiaStarting;
public event EventHandler<ManipulationDeltaEventArgs> ManipulationDelta;
public event EventHandler<ManipulationStartedEventArgs> ManipulationStarted;
public event EventHandler<ManipulationStartingEventArgs> ManipulationStarting;
public event DependencyPropertyChangedEventHandler FocusableChanged;
public event DependencyPropertyChangedEventHandler IsVisibleChanged;
public event DependencyPropertyChangedEventHandler IsHitTestVisibleChanged;
public event DependencyPropertyChangedEventHandler IsEnabledChanged;
public event RoutedEventHandler LostFocus;
public event EventHandler<TouchEventArgs> GotTouchCapture;
public event RoutedEventHandler GotFocus;
public event DependencyPropertyChangedEventHandler IsKeyboardFocusedChanged;
public event DependencyPropertyChangedEventHandler IsStylusCaptureWithinChanged;
public event DependencyPropertyChangedEventHandler IsStylusDirectlyOverChanged;
public event DependencyPropertyChangedEventHandler IsMouseCaptureWithinChanged;
public event DependencyPropertyChangedEventHandler IsMouseCapturedChanged;
public event DependencyPropertyChangedEventHandler IsKeyboardFocusWithinChanged;
public event DependencyPropertyChangedEventHandler IsMouseDirectlyOverChanged;
public event EventHandler<TouchEventArgs> TouchLeave;
public event EventHandler<TouchEventArgs> TouchEnter;
public event EventHandler LayoutUpdated;
public event KeyboardFocusChangedEventHandler LostKeyboardFocus;
public event KeyboardFocusChangedEventHandler PreviewLostKeyboardFocus;
public event KeyboardFocusChangedEventHandler GotKeyboardFocus;
public event StylusEventHandler PreviewStylusMove;
public event StylusEventHandler StylusMove;
public event StylusEventHandler PreviewStylusInAirMove;
public event StylusEventHandler StylusInAirMove;
public event StylusEventHandler StylusEnter;
public event StylusEventHandler StylusLeave;
public event StylusEventHandler PreviewStylusInRange;
public event StylusEventHandler StylusInRange;
public event StylusEventHandler PreviewStylusOutOfRange;
public event StylusEventHandler StylusOutOfRange;
public event StylusSystemGestureEventHandler PreviewStylusSystemGesture;
public event StylusSystemGestureEventHandler StylusSystemGesture;
public event StylusEventHandler GotStylusCapture;
public event StylusEventHandler LostStylusCapture;
public event StylusButtonEventHandler StylusButtonDown;
public event StylusButtonEventHandler StylusButtonUp;
public event StylusButtonEventHandler PreviewStylusButtonDown;
public event StylusButtonEventHandler PreviewStylusButtonUp;
public event KeyEventHandler PreviewKeyDown;
public event KeyEventHandler KeyDown;
public event KeyEventHandler PreviewKeyUp;
public event StylusEventHandler StylusUp;
public event KeyboardFocusChangedEventHandler PreviewGotKeyboardFocus;
public event StylusEventHandler PreviewStylusUp;
public event StylusDownEventHandler PreviewStylusDown;
public event MouseButtonEventHandler PreviewMouseDown;
public event MouseButtonEventHandler MouseDown;
public event MouseButtonEventHandler PreviewMouseUp;
public event MouseButtonEventHandler MouseUp;
public event MouseButtonEventHandler PreviewMouseLeftButtonDown;
public event MouseButtonEventHandler MouseLeftButtonDown;
public event MouseButtonEventHandler PreviewMouseLeftButtonUp;
public event MouseButtonEventHandler MouseLeftButtonUp;
public event MouseButtonEventHandler PreviewMouseRightButtonDown;
public event MouseButtonEventHandler MouseRightButtonDown;
public event MouseButtonEventHandler PreviewMouseRightButtonUp;
public event MouseButtonEventHandler MouseRightButtonUp;
public event MouseEventHandler PreviewMouseMove;
public event MouseEventHandler MouseMove;
public event MouseWheelEventHandler PreviewMouseWheel;
public event MouseWheelEventHandler MouseWheel;
public event MouseEventHandler MouseEnter;
public event MouseEventHandler MouseLeave;
public event MouseEventHandler GotMouseCapture;
public event MouseEventHandler LostMouseCapture;
public event QueryCursorEventHandler QueryCursor;
public event StylusDownEventHandler StylusDown;
public event DependencyPropertyChangedEventHandler IsStylusCapturedChanged;
public event EventHandler<ManipulationCompletedEventArgs> ManipulationCompleted;
public event EventHandler<ManipulationBoundaryFeedbackEventArgs> ManipulationBoundaryFeedback;

public void AddHandler(RoutedEvent routedEvent, Delegate handler);
public void AddHandler(RoutedEvent routedEvent, Delegate handler, bool handledEventsToo);
public void AddToEventRoute(EventRoute route, RoutedEventArgs e);
public void ApplyAnimationClock(DependencyProperty dp, AnimationClock clock, HandoffBehavior handoffBehavior);
public void ApplyAnimationClock(DependencyProperty dp, AnimationClock clock);
public void Arrange(Rect finalRect);
public void BeginAnimation(DependencyProperty dp, AnimationTimeline animation, HandoffBehavior handoffBehavior);
public void BeginAnimation(DependencyProperty dp, AnimationTimeline animation);
public bool CaptureMouse();
public bool CaptureStylus();
public bool CaptureTouch(TouchDevice touchDevice);
public bool Focus();
public object GetAnimationBaseValue(DependencyProperty dp);
public IInputElement InputHitTest(Point point);
public void InvalidateArrange();
public void InvalidateMeasure();
public void InvalidateVisual();
public void Measure(Size availableSize);
public virtual bool MoveFocus(TraversalRequest request);
public virtual DependencyObject PredictFocus(FocusNavigationDirection direction);
public void RaiseEvent(RoutedEventArgs e);
public void ReleaseAllTouchCaptures();
public void ReleaseMouseCapture();
public void ReleaseStylusCapture();
public bool ReleaseTouchCapture(TouchDevice touchDevice);
public void RemoveHandler(RoutedEvent routedEvent, Delegate handler);
public bool ShouldSerializeCommandBindings();
public bool ShouldSerializeInputBindings();
public Point TranslatePoint(Point point, UIElement relativeTo);
public void UpdateLayout();
protected virtual void ArrangeCore(Rect finalRect);
protected virtual Geometry GetLayoutClip(Size layoutSlotSize);
protected override HitTestResult HitTestCore(PointHitTestParameters hitTestParameters);
protected override GeometryHitTestResult HitTestCore(GeometryHitTestParameters hitTestParameters);
protected virtual Size MeasureCore(Size availableSize);
protected virtual void OnAccessKey(AccessKeyEventArgs e);
protected virtual void OnChildDesiredSizeChanged(UIElement child);
protected virtual AutomationPeer OnCreateAutomationPeer();
protected virtual void OnDragEnter(DragEventArgs e);
protected virtual void OnDragLeave(DragEventArgs e);
protected virtual void OnDragOver(DragEventArgs e);
protected virtual void OnDrop(DragEventArgs e);
protected virtual void OnGiveFeedback(GiveFeedbackEventArgs e);
protected virtual void OnGotFocus(RoutedEventArgs e);
protected virtual void OnGotKeyboardFocus(KeyboardFocusChangedEventArgs e);
protected virtual void OnGotMouseCapture(MouseEventArgs e);
protected virtual void OnGotStylusCapture(StylusEventArgs e);
protected virtual void OnGotTouchCapture(TouchEventArgs e);
protected virtual void OnIsKeyboardFocusedChanged(DependencyPropertyChangedEventArgs e);
protected virtual void OnIsKeyboardFocusWithinChanged(DependencyPropertyChangedEventArgs e);
protected virtual void OnIsMouseCapturedChanged(DependencyPropertyChangedEventArgs e);
protected virtual void OnIsMouseCaptureWithinChanged(DependencyPropertyChangedEventArgs e);
protected virtual void OnIsMouseDirectlyOverChanged(DependencyPropertyChangedEventArgs e);
protected virtual void OnIsStylusCapturedChanged(DependencyPropertyChangedEventArgs e);
protected virtual void OnIsStylusCaptureWithinChanged(DependencyPropertyChangedEventArgs e);
protected virtual void OnIsStylusDirectlyOverChanged(DependencyPropertyChangedEventArgs e);
protected virtual void OnKeyDown(KeyEventArgs e);
protected virtual void OnKeyUp(KeyEventArgs e);
protected virtual void OnLostFocus(RoutedEventArgs e);
protected virtual void OnLostKeyboardFocus(KeyboardFocusChangedEventArgs e);
protected virtual void OnLostMouseCapture(MouseEventArgs e);
protected virtual void OnLostStylusCapture(StylusEventArgs e);
protected virtual void OnLostTouchCapture(TouchEventArgs e);
protected virtual void OnManipulationBoundaryFeedback(ManipulationBoundaryFeedbackEventArgs e);
protected virtual void OnManipulationCompleted(ManipulationCompletedEventArgs e);
protected virtual void OnManipulationDelta(ManipulationDeltaEventArgs e);
protected virtual void OnManipulationInertiaStarting(ManipulationInertiaStartingEventArgs e);
protected virtual void OnManipulationStarted(ManipulationStartedEventArgs e);
protected virtual void OnManipulationStarting(ManipulationStartingEventArgs e);
protected virtual void OnMouseDown(MouseButtonEventArgs e);
protected virtual void OnMouseEnter(MouseEventArgs e);
protected virtual void OnMouseLeave(MouseEventArgs e);
protected virtual void OnMouseLeftButtonDown(MouseButtonEventArgs e);
protected virtual void OnMouseLeftButtonUp(MouseButtonEventArgs e);
protected virtual void OnMouseMove(MouseEventArgs e);
protected virtual void OnMouseRightButtonDown(MouseButtonEventArgs e);
protected virtual void OnMouseRightButtonUp(MouseButtonEventArgs e);
protected virtual void OnMouseUp(MouseButtonEventArgs e);
protected virtual void OnMouseWheel(MouseWheelEventArgs e);
protected virtual void OnPreviewDragEnter(DragEventArgs e);
protected virtual void OnPreviewDragLeave(DragEventArgs e);
protected virtual void OnPreviewDragOver(DragEventArgs e);
protected virtual void OnPreviewDrop(DragEventArgs e);
protected virtual void OnPreviewGiveFeedback(GiveFeedbackEventArgs e);
protected virtual void OnPreviewGotKeyboardFocus(KeyboardFocusChangedEventArgs e);
protected virtual void OnPreviewKeyDown(KeyEventArgs e);
protected virtual void OnPreviewKeyUp(KeyEventArgs e);
protected virtual void OnPreviewLostKeyboardFocus(KeyboardFocusChangedEventArgs e);
protected virtual void OnPreviewMouseDown(MouseButtonEventArgs e);
protected virtual void OnPreviewMouseLeftButtonDown(MouseButtonEventArgs e);
protected virtual void OnPreviewMouseLeftButtonUp(MouseButtonEventArgs e);
protected virtual void OnPreviewMouseMove(MouseEventArgs e);
protected virtual void OnPreviewMouseRightButtonDown(MouseButtonEventArgs e);
protected virtual void OnPreviewMouseRightButtonUp(MouseButtonEventArgs e);
protected virtual void OnPreviewMouseUp(MouseButtonEventArgs e);
protected virtual void OnPreviewMouseWheel(MouseWheelEventArgs e);
protected virtual void OnPreviewQueryContinueDrag(QueryContinueDragEventArgs e);
protected virtual void OnPreviewStylusButtonDown(StylusButtonEventArgs e);
protected virtual void OnPreviewStylusButtonUp(StylusButtonEventArgs e);
protected virtual void OnPreviewStylusDown(StylusDownEventArgs e);
protected virtual void OnPreviewStylusInAirMove(StylusEventArgs e);
protected virtual void OnPreviewStylusInRange(StylusEventArgs e);
protected virtual void OnPreviewStylusMove(StylusEventArgs e);
protected virtual void OnPreviewStylusOutOfRange(StylusEventArgs e);
protected virtual void OnPreviewStylusSystemGesture(StylusSystemGestureEventArgs e);
protected virtual void OnPreviewStylusUp(StylusEventArgs e);
protected virtual void OnPreviewTextInput(TextCompositionEventArgs e);
protected virtual void OnPreviewTouchDown(TouchEventArgs e);
protected virtual void OnPreviewTouchMove(TouchEventArgs e);
protected virtual void OnPreviewTouchUp(TouchEventArgs e);
protected virtual void OnQueryContinueDrag(QueryContinueDragEventArgs e);
protected virtual void OnQueryCursor(QueryCursorEventArgs e);
protected virtual void OnRender(DrawingContext drawingContext);
protected virtual void OnStylusButtonDown(StylusButtonEventArgs e);
protected virtual void OnStylusButtonUp(StylusButtonEventArgs e);
protected virtual void OnStylusDown(StylusDownEventArgs e);
protected virtual void OnStylusEnter(StylusEventArgs e);
protected virtual void OnStylusInAirMove(StylusEventArgs e);
protected virtual void OnStylusInRange(StylusEventArgs e);
protected virtual void OnStylusLeave(StylusEventArgs e);
protected virtual void OnStylusMove(StylusEventArgs e);
protected virtual void OnStylusOutOfRange(StylusEventArgs e);
protected virtual void OnStylusSystemGesture(StylusSystemGestureEventArgs e);
protected virtual void OnStylusUp(StylusEventArgs e);
protected virtual void OnTextInput(TextCompositionEventArgs e);
protected virtual void OnTouchDown(TouchEventArgs e);
protected virtual void OnTouchEnter(TouchEventArgs e);
protected virtual void OnTouchLeave(TouchEventArgs e);
protected virtual void OnTouchMove(TouchEventArgs e);
protected virtual void OnTouchUp(TouchEventArgs e);
protected internal virtual DependencyObject GetUIParentCore();
protected internal virtual void OnRenderSizeChanged(SizeChangedInfo info);
protected internal override void OnVisualParentChanged(DependencyObject oldParent);
}
2.3.1 UIElement类代码分析
第一部分 路由事件
UIElement基类定义了大量的路由事件。什么是路由事件?路由事件和xaml的可视化树概念相关,控件的事件被触发后,会沿着这棵树广播,有两个方向,要么往树的根部广播,要么往树的枝叶广播,如果不广播就是直接事件。
所以,路由事件分为冒泡事件和隧道事件,冒泡,是从触发源为出发点,依次传递到父节点,直到最后的根节点。隧道事件是不管谁是触发源,都是从根节点触发,到子节点,直到触发节点。
从空间上来说,冒泡事件和隧道事件是成对出现的。从时间来说,都是先触发隧道事件,然后是冒泡事件。从命名来说,隧道事件都是以Preview开头的事件。
根据命名规则,我们可以大致猜测出一个结果,带Key的基本都是与键盘相关的事件(如按下键位、抬起键位),带Mouse的基本都是与鼠标相关的事件(如左键单击、双击),带Stylus的基本都是与触摸相关的事件,具体用到哪一类型的事件,再详细查阅一下相关说明文档即可。
重点:关于这些事件的回调函数,即以 On 开头的方法成员,都被声明成了 protected virtual,意思是他们都可以被重载,这使得我们在开发业务时更加方便。
第二部分 依赖属性
UIElement 基类还定义了大量的依赖属性。前面的章节中,在 DependencyObject 类中我们简单提到过依赖属性。在这里我们以 UIElement 基类的 Visibility 属性为例。
public Visibility Visibility { get; set; }

public static readonly DependencyProperty VisibilityProperty;
上面有两个成员,Visibility 是普通的属性成员,VisibilityProperty 是WPF的依赖属性成员,以 Property 结尾的字样作为 WPF的 依赖属性命名规则。而这两个成员合起来,才能被称为一个完整的依赖属性。
这个 Visibility 属性表示设置或获取控件的可见性。当我们要设置控件的可见性时,只需要如下设置即可。
<TextBlock Text="WPF中文网"
                   Visibility="Visible"
                   FontSize="48"
                   HorizontalAlignment="Center"
                   VerticalAlignment="Center">
</TextBlock>
Visibility 实际上是一个枚举,它包含3个值,分别是 Visible、Hidden、Collapsed。其含义分别是显示、隐藏、彻底隐藏(不占布局位置)。
Visibility 状态会影响该元素的所有输入处理。 不可见的元素不会参与命中测试,也不会接收输入事件,即使鼠标位于元素可见时所在的边界上也是如此。
-
Uid 属性:获取或设置控件的唯一标识符,像人们的身份证一样。这个值默认是
string.Empty。 -
Visibility 属性:获取或设置控件的可见性。默认是
Visible。 -
ClipToBounds 属性:如果该值为
true,表示进行裁剪,以适配它的父控件。比如有时候我们外面有一个 Panel,里面的控件尺寸太大,势必会“撑破”外面的父控件,为了布局美观,只好削足适履。 -
Clip 属性:用于剪裁区域大小的几何图形。需要注意的是,这个属性和上面的
ClipToBounds属性是有区别的。ClipToBounds是裁剪控件自身,Clip是裁剪控件里面的内容。比如Image图像控件,我们在显示一张图时,就可以运用Clip进行裁剪后显示,通常在显示用户头像时裁剪成圆形时使用。如下所示<Image Source="sampleImages\Waterlilies.jpg" Width="200" Height="150" HorizontalAlignment="Left"> <Image.Clip> <EllipseGeometry RadiusX="100" RadiusY="75" Center="100,75"/> </Image.Clip> </Image>
-
SnapsToDevicePixels 属性:如果该值为
true,表示控件的呈现是否应使用特定于设备的像素设置。意思是开启后可以最大限度的防锯齿效果,默认为false。 -
IsFocused 属性:这是一个只读属性,表示当前控件是否有焦点。
-
IsEnabled 属性:如果该值为
true,表示禁用控件,反之启用控件。 -
IsHitTestVisible 属性:获取或设置一个值,该值声明是否可以返回此元素作为其呈现内容的某些部分的点击测试结果。
-
IsVisible 属性:这是一个只读属性,表示当前控件是否显示。
-
Focusable 属性:如果该值为
true,表示控件可以得到焦点,大部份内容控件都默认可以获得焦点。 -
IsKeyboardFocused 属性:表示该控件是否具有键盘焦点。
-
IsMouseOver 属性:表示鼠标是否在控件上面。通常在设计控件的样式(Style)时会用到。
-
IsStylusOver 属性:表示触笔指针是否在控件的上方。
-
IsSealed 属性:表示当前类型是否为只读类。
-
Opacity 属性:设置控件的透明度,取值范围是
0-1之间的double值。 -
OpacityMask 属性:设置一个画笔,作为控件的蒙板。比如我们给一张图片设置一个掩码,就可以使用ImageBrush这种图片画笔来实现。
<Image Height="150" Width="200" Source="sampleImages/Waterlilies.jpg" > <Image.OpacityMask> <ImageBrush ImageSource="sampleImages/tornedges.png"/> </Image.OpacityMask> </Image> -
AllowDrop 属性:表示控件是否允许拖拽操作。
-
RenderTransform 属性:(非常重要)如果要设置控件的移动、缩放、旋转,需要这此属性进行设置。
UIElement 类总结
通过上述的代码分析,我们大致可以得出以下结论,
UIElement基类为我们提供了一系列的鼠标、键盘和触摸事件,并提供了一些常用的依赖属性。它可以呈现继承它的所有控件,为控件布局时调整位置和大小,响应用户的输入,引发一系列的路由事件,并继承了IAnimatable动画接口,用于支持动画的某些方面。我们熟悉了
UIElement的这些属性和事件之后,实际上意味着我们也熟悉了WPF所有控件的这些属性。下一节,我们将探讨 UIElement 的子类FrameworkElement。 -
2.5 FrameworkElement 类
FrameworkElement 类继承于 UIElement 类。继承关系是:
Object->DispatcherObject->DependencyObject->Visual->UIElement->FrameworkElement
它也是 WPF 控件的众多父类中最核心的基类,从这里开始,继承树开始分支,分别是 Shape 图形类、Control 控件类和 Panel 布局类三个方向。

FrameworkElement 类本质上也是提供了一系列属性、方法和事件。同时又扩展 UIElement 并添加了以下功能:
官方文档:
1.布局系统定义:
FrameworkElement为中UIElement定义为虚拟成员的某些方法提供特定的 WPF 框架级实现。 最值得注意的是,FrameworkElement会密封某些 WPF 核心级布局替代,并改为提供派生类应替代的 WPF 框架级别的等效项。 例如,密封但FrameworkElementArrangeCore提供ArrangeOverride。 这些更改反映了这样一个事实,即在 WPF 框架级别,有一个可以呈现任何FrameworkElement派生类的完整布局系统。 在 WPF 核心级别,将构建基于 WPF 的常规布局解决方案的某些成员已就位,但未定义布局系统的实际引擎。
2.逻辑树: 常规 WPF 编程模型通常以元素树的方式表示。 支持将元素树表示为逻辑树,以及支持在标记中定义该树的支持是在 级别实现的FrameworkElement。但请注意,FrameworkElement故意不定义内容模型,并将该责任留给派生类。
3.对象生存期事件: 了解何时初始化元素 (调用构造函数) 或首次将元素加载到逻辑树中时,这通常很有用。FrameworkElement定义多个与对象生存期相关的事件,这些事件为涉及元素的代码隐藏操作(例如添加更多子元素)提供有用的挂钩。
4.支持数据绑定和动态资源引用: 对数据绑定和资源的属性级支持由DependencyProperty类实现,并体现在属性系统中,但解析存储为 Expression (数据绑定和动态资源的编程构造) 中存储的成员值的能力由 FrameworkElement实现。
5.风格:FrameworkElement定义Style属性。 但是,FrameworkElement尚未定义对模板的支持或支持修饰器。 这些功能由控件类(如 和ContentControl)Control引入。
6.更多动画支持: 某些动画支持已在 WPF 核心级别定义,但FrameworkElement通过实现BeginStoryboard和相关成员扩展了此支持。
我们来看看这个基类的结构定义:
public class FrameworkElement : UIElement, IFrameworkInputElement, IInputElement, ISupportInitialize, IHaveResources, IQueryAmbient
{
    public static readonly DependencyProperty StyleProperty;
    public static readonly DependencyProperty MaxHeightProperty;
    public static readonly DependencyProperty FlowDirectionProperty;
    public static readonly DependencyProperty MarginProperty;
    public static readonly DependencyProperty HorizontalAlignmentProperty;
    public static readonly DependencyProperty VerticalAlignmentProperty;
    public static readonly DependencyProperty FocusVisualStyleProperty;
    public static readonly DependencyProperty CursorProperty;
    public static readonly DependencyProperty ForceCursorProperty;
    public static readonly RoutedEvent UnloadedEvent;
    public static readonly DependencyProperty ToolTipProperty;
    public static readonly DependencyProperty ContextMenuProperty;
    public static readonly RoutedEvent ToolTipOpeningEvent;
    public static readonly RoutedEvent ToolTipClosingEvent;
    public static readonly RoutedEvent ContextMenuOpeningEvent;
    public static readonly RoutedEvent ContextMenuClosingEvent;
    public static readonly DependencyProperty MinHeightProperty;
    public static readonly DependencyProperty HeightProperty;
    public static readonly RoutedEvent LoadedEvent;
    public static readonly DependencyProperty MinWidthProperty;
    public static readonly DependencyProperty MaxWidthProperty;
    public static readonly DependencyProperty OverridesDefaultStyleProperty;
    public static readonly DependencyProperty UseLayoutRoundingProperty;
    public static readonly DependencyProperty BindingGroupProperty;
    public static readonly DependencyProperty LanguageProperty;
    public static readonly DependencyProperty NameProperty;
    public static readonly DependencyProperty TagProperty;
    public static readonly DependencyProperty DataContextProperty;
    public static readonly RoutedEvent RequestBringIntoViewEvent;
    public static readonly RoutedEvent SizeChangedEvent;
    public static readonly DependencyProperty ActualWidthProperty;
    public static readonly DependencyProperty ActualHeightProperty;
    public static readonly DependencyProperty LayoutTransformProperty;
    public static readonly DependencyProperty InputScopeProperty;
    public static readonly DependencyProperty WidthProperty;
    protected internal static readonly DependencyProperty DefaultStyleKeyProperty;

    public FrameworkElement();

    public Transform LayoutTransform { get; set; }
    public double Width { get; set; }
    public double MinWidth { get; set; }
    public double MaxHeight { get; set; }
    public double Height { get; set; }
    public double MinHeight { get; set; }
    public double ActualHeight { get; }
    public double MaxWidth { get; set; }
    public double ActualWidth { get; }
    public TriggerCollection Triggers { get; }	// 触发器
    public object Tag { get; set; }
    public string Name { get; set; }
    public XmlLanguage Language { get; set; }
    public BindingGroup BindingGroup { get; set; }
    public object DataContext { get; set; }		// 数据上下文
    public ResourceDictionary Resources { get; set; }
    public DependencyObject TemplatedParent { get; }
    public bool UseLayoutRounding { get; set; }
    public FlowDirection FlowDirection { get; set; }
    public InputScope InputScope { get; set; }
    public Thickness Margin { get; set; }
    public Style Style { get; set; }	// 样式
    public VerticalAlignment VerticalAlignment { get; set; }
    public bool OverridesDefaultStyle { get; set; }
    public HorizontalAlignment HorizontalAlignment { get; set; }
    public ContextMenu ContextMenu { get; set; }
    public object ToolTip { get; set; }
    public DependencyObject Parent { get; }
    public bool IsInitialized { get; }
    public bool ForceCursor { get; set; }
    public Cursor Cursor { get; set; }
    public Style FocusVisualStyle { get; set; }
    public bool IsLoaded { get; }
    protected override int VisualChildrenCount { get; }
    protected internal InheritanceBehavior InheritanceBehavior { get; set; }
    protected internal virtual IEnumerator LogicalChildren { get; }
    protected internal object DefaultStyleKey { get; set; }

    public event ToolTipEventHandler ToolTipClosing;
    public event ToolTipEventHandler ToolTipOpening;
    public event RoutedEventHandler Unloaded;
    public event DependencyPropertyChangedEventHandler DataContextChanged;
    public event SizeChangedEventHandler SizeChanged;
    public event RequestBringIntoViewEventHandler RequestBringIntoView;
    public event EventHandler<DataTransferEventArgs> SourceUpdated;
    public event EventHandler<DataTransferEventArgs> TargetUpdated;
    public event RoutedEventHandler Loaded;
    public event EventHandler Initialized;
    public event ContextMenuEventHandler ContextMenuClosing;
    public event ContextMenuEventHandler ContextMenuOpening;

    public static FlowDirection GetFlowDirection(DependencyObject element);
    public static void SetFlowDirection(DependencyObject element, FlowDirection value);
    public bool ApplyTemplate();
    public virtual void BeginInit();
    public void BeginStoryboard(Storyboard storyboard, HandoffBehavior handoffBehavior, bool isControllable);
    public void BeginStoryboard(Storyboard storyboard);
    public void BeginStoryboard(Storyboard storyboard, HandoffBehavior handoffBehavior);
    public void BringIntoView();
    public void BringIntoView(Rect targetRectangle);
    public virtual void EndInit();
    public object FindName(string name);
    public object FindResource(object resourceKey);
    public BindingExpression GetBindingExpression(DependencyProperty dp);
    public sealed override bool MoveFocus(TraversalRequest request);
    public virtual void OnApplyTemplate();
    public sealed override DependencyObject PredictFocus(FocusNavigationDirection direction);
    public void RegisterName(string name, object scopedElement);
    public BindingExpressionBase SetBinding(DependencyProperty dp, BindingBase binding);
    public BindingExpression SetBinding(DependencyProperty dp, string path);
    public void SetResourceReference(DependencyProperty dp, object name);
    public bool ShouldSerializeResources();
    public bool ShouldSerializeStyle();
    public bool ShouldSerializeTriggers();
    public object TryFindResource(object resourceKey);
    public void UnregisterName(string name);
    public void UpdateDefaultStyle();
    protected sealed override void ArrangeCore(Rect finalRect);
    protected virtual Size ArrangeOverride(Size finalSize);
    protected override Geometry GetLayoutClip(Size layoutSlotSize);
    protected override Visual GetVisualChild(int index);
    protected sealed override Size MeasureCore(Size availableSize);
    protected virtual Size MeasureOverride(Size availableSize);
    protected virtual void OnContextMenuClosing(ContextMenuEventArgs e);
    protected virtual void OnContextMenuOpening(ContextMenuEventArgs e);
    protected override void OnGotFocus(RoutedEventArgs e);
    protected virtual void OnInitialized(EventArgs e);
    protected override void OnPropertyChanged(DependencyPropertyChangedEventArgs e);
    protected virtual void OnToolTipClosing(ToolTipEventArgs e);
    protected virtual void OnToolTipOpening(ToolTipEventArgs e);
    protected internal void AddLogicalChild(object child);
    protected internal DependencyObject GetTemplateChild(string childName);
    protected internal override DependencyObject GetUIParentCore();
    protected internal override void OnRenderSizeChanged(SizeChangedInfo sizeInfo);
    protected internal virtual void OnStyleChanged(Style oldStyle, Style newStyle);
    protected internal override void OnVisualParentChanged(DependencyObject oldParent);
    protected internal virtual void ParentLayoutInvalidated(UIElement child);
    protected internal void RemoveLogicalChild(object child);
}
-
LayoutTransform属性:获取或设置在执行布局时应应用于此元素的图形转换。这个属性与UIElement类中的RenderTransform属性有相似之处,所以我们在此将两者进行对比说明一下。两个属性都是Transform类型,而Transform是一个抽象类,这个类可以实现控件在平面中的各种转换,包括-
旋转 (
System.Windows.Media.RotateTransform) -
缩放 (
System.Windows.Media.ScaleTransform)、 -
倾斜 (
System.Windows.Media.SkewTransform) 、 -
平移 (
System.Windows.Media.TranslateTransform)。
虽然两个属性都可以达到控件的变换效果,但是两者还是有区别的。LayoutTransform属性是在控件布局之前对控件进行变换,而RenderTransform属性是在布局结束后执行控件的变换,LayoutTransform开销比RenderTransform要大,所以,尽量使用RenderTransform属性去实现控件的变换。
-
-
Width属性:这是表示控件的宽度。与之相关的还有以下几个属性。-
ActualWidth:获取此元素的呈现宽度。只读属性。 -
MaxWidth:获取或设置一个控件的最大宽度。 -
MinWidth:获取或设置一个控件的最小宽度。
-
-
Height属性:这是表示控件的高度,与之相关的还有以下几个属性。-
ActualHeight:获取此元素的呈现高度。只读属性。 -
MaxHeight:获取或设置一个控件的最大高度。 -
MinHeight:获取或设置一个控件的最小高度。
-
4.Tag 属性:这个属性非常重要,它是 object 类型,意味着可以保存任意类型的对象值。它就像 FrameworkElement 类身上的一个小口袋,但确能容纳万物。我们通常会将一些与控件相关的数据临时存放在 Tag 属性中,当把控件作为参数传递时,小口袋里面的对象也随之传递过去了。
5.Name 属性:获取或设置控件的标识名称。在同一个窗体、页、用户控件中,Name 标识是唯一的。设置了控件的名称后,我们就可以在后端代码直接以这个标识去引用控件。
6.Margin 属性:获取或设置控件的外边距。如下所示,我们定义了一个 button 的 margin,距离左边、上边、右边和下边的像素分别是20、40、60、80。
 <Grid>
     <Button Content="WPF中文网" Margin="20 40 60 80" />
</Grid>
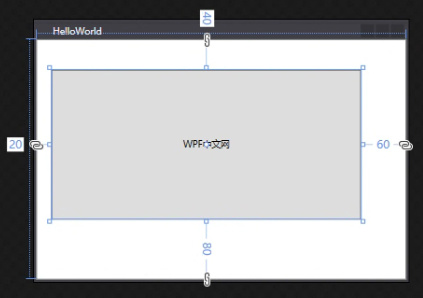
Padding属性说明与
Margin相对应的是Padding,表示设置控件的内边距。但是这个属性并不在FrameworkElement中,而在Control类中,从本节第一张图所示,说明只有内容控件才具有 Padding,而Shape和Panel是没有Padding属性的。
-
HorizontalAlignment属性:设置控件的水平对齐方式。这个对齐方式是相对于父元素而言的,比如我们有一个Button控件,在外面还包裹了一层Grid控件,那么,设置Button控件的HorizontalAlignment属性,可以将Button控件分别显示在Grid控件的左边、中间、右边三个位置。 -
VerticalAlignment属性:设置控件的垂直对齐方式。与HorizontalAlignment属性类似,只是对方的方向不同,可以设置控件在垂直方向上是居于顶部、中间、还是底部三个位置。
总结:上述两个属性的值都是枚举型,它们都有一个共同的值,那就是 stretch,表示是拉伸的方式填充父元素的布局。
-
ToolTip属性:获取或设置用户界面 (UI) 中为此元素显示的工具提示对象。指鼠标移到控件上方时显示的提示内容,它是一个object类型,意味着可以显示任意布局外观。 -
Parent属性:获取此元素的逻辑父元素。它是一个只读属性。
接下来,我们将介绍几个比较重要的属性,这些属性是WPF框架中非常核心的知识概念,需要单独形成章节来学习,在这里,我们只是通过这些属性来引出其概念。
WPF样式(Style):
对于控件而言,同样都是button按钮,有的按钮是方的,有的是圆的,有的是蓝色,有的是红色,有的有文字,有的有图标,如果做到这些不同的样式呢?答案是Style属性。
Style属性:获取或设置此元素呈现时所使用的样式。(关于 Style 样式,会专门拿一章节来探讨)
与 Style 相关的还有一个属性,叫 FocusVisualStyle,顾名思义,控件在获得焦点时的样式。
WPF资源(ResourceDictionary)
什么是资源?资源,也就是资源字典,也就是 ResourceDictionary 类,它提供一个哈希表/字典实现,其中包含组件所使用的 WPF 资源以及 WPF 应用程序的其他元素。
我们可以把 WPF 的控件、窗体、Application 应用所用到的一切资源都放在其中,将多个 ResourceDictionary 元素合并起来形成一个 ResourceDictionary 元素( ResourceDictionary 也是一个隐式集合)。所以 FrameworkElement 类设计一个资源属性。
Resources属性:获取或设置本地定义的资源字典。(关于Resources资源会专门拿一章节来探讨)
WPF 的数据上下文(DataContext)
我们曾经在前面的 DependencyObject 类 部分中提到过数据驱动模式,控件的值绑定某个“变量”,当“变量”的值发生改变,控件的值也跟着改变,反过来说,当控件的值发生改变,“变量”的值也跟着改变。那么这个特指的“变量”是什么?它和我们今天要介绍的数据上下文有什么关系?
答案是,这个“变量”其实也是一个属性,且必须是一个属性(重点),它是谁的属性?在 WPF 中,它是某个 ViewModel 类的属性。
假定我们有一个 View 窗体,窗体有一个 TextBox 控件;又假如我们还有一个 ViewModel 实体,这个实体中有一个叫 Name 的属性。如果我们要将 TextBox 控件的 Text 属性和 ViewModel 实体的 Name 属性成功的建立绑定关系,必备的条件是什么?
首先,由于View窗体继承于 FrameworkElement 类,所以每个窗体(或控件)都有一个叫 ``DataContext` 的数据上下文属性。
所以必备的条件是:ViewModel 实体必须先赋值给 View 窗体的 DataContext,ViewModel 的 Name 属性才能绑定到 TextBox 控件的 Text 属性。换言之,领导之间要先搭好桥,下属和下属才好配合工作。这就是 DataContext 的概念和用途。(关于 DataContext 数据上下文我们会专门拿一章节来探讨)
-
DataContext属性:获取或设置元素参与数据绑定时的数据上下文。 -
ContextMenu属性:设置与获取控件的上下文菜单 ,就是鼠标在控件上右键时弹出来的菜单。 -
Cursor属性:获取或设置在鼠标指针位于此元素上时显示的光标。
友情提示
上述所介绍的属性,是WPF中所有控件都有的属性哦,所以,学一个
FrameworkElement类,就把所有控件都学了30%呢。
事件分析
FrameworkElement 类提供了12个事件,一般比较常用的是:Initialized、Loaded、Unloaded、SizeChanged 等事件。
方法成员
FrameworkElement 类还提供了一些方法成员。
-
FindName(String):表示查找某个元素。比如我们在窗体中要查找某个控件。 -
FindResource(Object):查找某个资源。如果在调用对象上找不到该资源,则接下来搜索逻辑树中的父元素,然后搜索应用程序、主题,最后搜索系统资源。实在找不到就抛出异常。 -
TryFindResource(Object):尝试去找某个资源。建议使用这个方法。 -
RegisterName (string , object)注册控件的名称到父控件上。
button2 = new Button();
button2.Name = "Button2";

// 注册 button2 的名称到 myMainPanel 控件上
myMainPanel.RegisterName(button2.Name, button2);
button2.Content = "Button 2";
button2.Click += new RoutedEventHandler(button2Clicked);
myMainPanel.Children.Add(button2);
SetBinding(DependencyProperty, BindingBase)和SetBinding(DependencyProperty, String),这两个成员都和绑定相关,将在后面做专题介绍。
最后,我们来看哪些类会继承这个 FrameworkElement 基类,以便于了解我们接下来要学哪些内容。
Microsoft.Windows.Themes.BulletChrome
Microsoft.Windows.Themes.ScrollChrome
System.Windows.Controls.AccessText
System.Windows.Controls.AdornedElementPlaceholder
System.Windows.Controls.ContentPresenter
System.Windows.Controls.Control
System.Windows.Controls.Decorator
System.Windows.Controls.Image
System.Windows.Controls.InkCanvas
System.Windows.Controls.ItemsPresenter
System.Windows.Controls.MediaElement
System.Windows.Controls.Page
System.Windows.Controls.Panel
System.Windows.Controls.Primitives.DocumentPageView
System.Windows.Controls.Primitives.GridViewRowPresenterBase
System.Windows.Controls.Primitives.Popup
System.Windows.Controls.Primitives.TickBar
System.Windows.Controls.Primitives.Track
System.Windows.Controls.TextBlock
System.Windows.Controls.ToolBarTray
System.Windows.Controls.Viewport3D
System.Windows.Documents.Adorner
System.Windows.Documents.AdornerLayer
System.Windows.Documents.DocumentReference
System.Windows.Documents.FixedPage
System.Windows.Documents.Glyphs
System.Windows.Documents.PageContent
System.Windows.Interop.HwndHost
System.Windows.Shapes.Shape
3. 布局控件
WPF 中的布局:WPF 布局模型相比于 WinForm 有巨大进步,WinForm 程序对高分屏显示器兼容性极差,而 WPF 则没有这种问题。
WPF 使用类似于 Web 中的流式布局。其中有四个重要原则:
- 不应显式设定元素(如控件)的尺寸
- 不应使用屏幕坐标指定元素的位置
- 布局容器的子元素 “共享” 可用的空间
- 嵌套布局(先做布局规划,再进行逐一布局,有利于模块化布局)
在 WPF 中所有的布局,都依赖布局容器。所有 WPF 布局容器都是派生自 System.Windows.Controls.Panel 抽象类的面板
Panel 类的公有属性:
| 名称 | 说明 |
|---|---|
Background |
该属性用于为面板背景着色的画刷。如果想接收鼠标事件,就必须将该属性设置为非空值(如透明)。 |
Children |
该属性为在面板中存储的条目集合。 |
IsItemHost |
布尔类型,如果面板用于显示与 ItemControl 控件关联的项(例如:TreeView 控件中的节点或者列表框中的列表项),该属性为 true。讲解自定义控件时候会进行详细讲解。 |
核心布局面板:
| 名称 | 说明 |
|---|---|
StackPanel |
栈式面板,在水平或者垂直的栈中放置元素,排成一条直线。这个布局容器通常用于更大、更复杂窗口中的一些小区域。 |
WrapPanel |
自动拆行面板,在一些列可换行的行中放置元素。在水平方向上,WrapPanel 面板从左向右放置条目,然后在随后的行中放置元素。在垂直方向上,WrapPanel 面板在自上而下列中放置元素,并使用附加的列放置剩余的条目。 |
DockPanel |
泊靠式面板,内部元素可以选择泊靠方向。根据容器的整个边界调整元素 |
Grid |
网格,根据不可见的表格在行和列中自定义控件的布局。这是最灵活、最常用的容器之一。 |
UniformGrid |
网格,在不可见但是强制所有单元格具有相同尺寸的表中放置元素(Grid简化版),这个布局容器不常用。 |
Canvas |
画布。使用固定坐标绝对定位元素,这个布局容器与传统 Windows 窗体应用程序最为类似,但没有提供锚定和停靠功能。 |
Border |
装饰的控件,用于绘制边框及背景。在 Border 中只能有一个子控件。 |
这里面除了 Border 控件,其它控件都继承于 Panel 基类
3.1 Panel 基类
Panel其实是一个抽象类,不可以实例化,WPF 所有的布局控件都从 Panel 继承而来,所以我们在学习布局控件之前,要先了解一下这个类。首先看一下它的定义:
#region Assembly PresentationFramework, Version=6.0.2.0, Culture=neutral, PublicKeyToken=31bf3856ad364e35
// C:\Program Files\dotnet\packs\Microsoft.WindowsDesktop.App.Ref\6.0.26\ref\net6.0\PresentationFramework.dll
#endregion

using System.Collections;
using System.ComponentModel;
using System.Windows.Markup;
using System.Windows.Media;

namespace System.Windows.Controls
{
    [ContentProperty("Children")]
    [Localizability(LocalizationCategory.Ignore)]
    public abstract class Panel : FrameworkElement, IAddChild
    {
        public static readonly DependencyProperty BackgroundProperty;
        public static readonly DependencyProperty IsItemsHostProperty;
        public static readonly DependencyProperty ZIndexProperty;
        [Bindable(false)]
        [Category("Behavior")]
        public bool IsItemsHost { get; set; }
[DesignerSerializationVisibility(DesignerSerializationVisibility.Content)]
        public UIElementCollection Children { get; }		//1
        public Orientation LogicalOrientationPublic { get; }

        protected internal virtual bool HasLogicalOrientation { get; }
        protected internal override IEnumerator LogicalChildren { get; }
        protected internal virtual Orientation LogicalOrientation { get; }

        public static int GetZIndex(UIElement element);	// ZIndex 相关
        public static void SetZIndex(UIElement element, int value);	// ZIndex 相关
        [EditorBrowsable(EditorBrowsableState.Never)]
        public bool ShouldSerializeChildren();

        protected virtual UIElementCollection CreateUIElementCollection(FrameworkElement logicalParent);
        protected override Visual GetVisualChild(int index);
        protected virtual void OnIsItemsHostChanged(bool oldIsItemsHost, bool newIsItemsHost);
        protected internal override void OnVisualChildrenChanged(DependencyObject visualAdded, DependencyObject visualRemoved);
    }
}
从它的代码定义来看,它继承于 FrameworkElement 基类和实现了 IAddChild 接口。
所以,所有 Panel 元素都支持 FrameworkElement 定义的基本大小调整和定位属性,包括 Height、Width、HorizontalAlignment、VerticalAlignment、Margin 和 LayoutTransform。
它有一个 Background 属性,意味着所有的布局控件都可以设置背景颜色。
另外,它还有一个 Children 属性,这是一个集合属性,也就是说,所有的布局控件都可以添加多个子元素。这一点从它实现的 IAddChild 接口也能得到印证。
IAddChild 的定义:
namespace System.Windows.Markup
{
    public interface IAddChild
    {
        void AddChild(object value);
        void AddText(string text);
    }
}
Panel 提供了 GetZIndex 和 SetZIndex 方法成员,分别表示获取某个元素的 ZIndex 顺序和设置某个元素的 ZIndex 顺序。 ZIndex 越大的,越在Z轴堆叠的上层,Z昼垂直于显示器。
示例代码:
MainWindow.xaml
<Window x:Class="ZIndexButton.MainWindow"
        xmlns="http://schemas.microsoft.com/winfx/2006/xaml/presentation"
        xmlns:x="http://schemas.microsoft.com/winfx/2006/xaml"
        xmlns:d="http://schemas.microsoft.com/expression/blend/2008"
        xmlns:mc="http://schemas.openxmlformats.org/markup-compatibility/2006"
        xmlns:local="clr-namespace:ZIndexButton"
        mc:Ignorable="d"
        Title="MainWindow" Height="350" Width="500">
    <!--添加Background,否则无法触发点击事件-->
    <Grid Background="Transparent" PreviewMouseUp="Grid_PreviewMouseUp">
        <Grid.RowDefinitions>
            <RowDefinition></RowDefinition>
            <RowDefinition></RowDefinition>
        </Grid.RowDefinitions>
        <!--默认TextBox 的 Grid.Row="0"-->
        <TextBlock
            x:Name="text1"
            VerticalAlignment="Center"
            HorizontalAlignment="Center"
            Margin="10 15 10 15"
            FontSize="32"
        >
            Hello, WPF!
        </TextBlock>
        <Grid Grid.Row="1">
            <Button Margin="10" Content="Button1" Height="50" Width="150" x:Name="button1" Panel.ZIndex="3" Click="button1_Click"></Button>
            <Button Margin="10" Content="Button2" Height="50" Width="150" x:Name="button2" Panel.ZIndex="1" Click="button2_Click"></Button>
        </Grid>
    </Grid>
</Window>
MainWindow.xaml.cs
using System.Text;
using System.Windows;
using System.Windows.Controls;
using System.Windows.Data;
using System.Windows.Documents;
using System.Windows.Input;
using System.Windows.Media;
using System.Windows.Media.Imaging;
using System.Windows.Navigation;
using System.Windows.Shapes;

namespace ZIndexButton
{
    /// <summary>
    /// Interaction logic for MainWindow.xaml
    /// </summary>
    public partial class MainWindow : Window
    {
        public MainWindow()
        {
            InitializeComponent();
        }

        private void button1_Click(object sender, RoutedEventArgs e)
        {
            this.text1.Text = "button1 clicked!";
        }

        private void button2_Click(object sender, RoutedEventArgs e)
        {
            this.text1.Text = "button2 clicked!";
        }

        private void Grid_PreviewMouseUp(object sender, MouseButtonEventArgs e)
        {
            this.text1.Text = "Grid is clicked!";
        }
    }
}
界面(点击前):
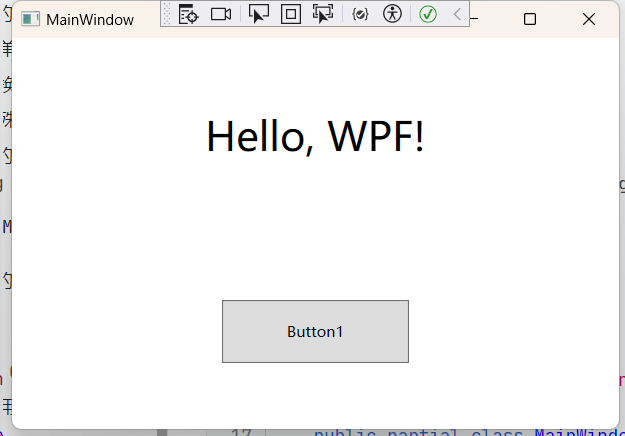
界面(点击按钮后)
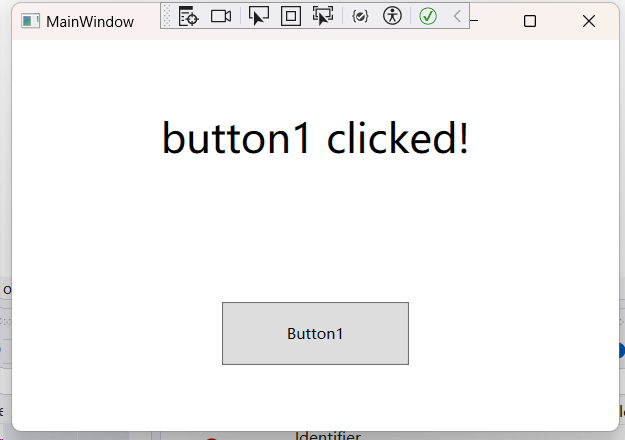
界面(点击空白区域后)
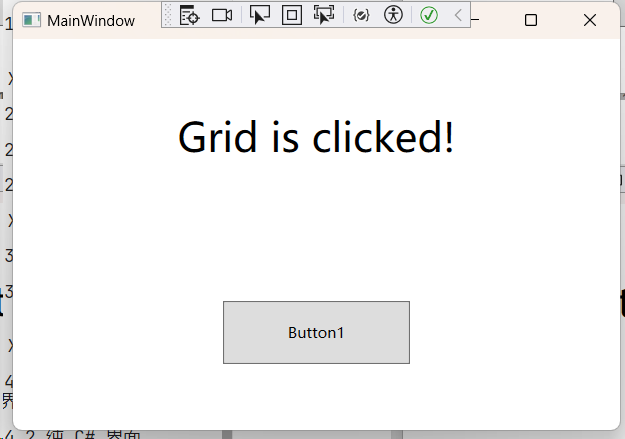
这种方式,可以通过多个控件重叠,通过控制 Panel.ZIndex 的值,来控制启用哪一个控件(哪一个控件在上层)。
注意:
Panel的Background属性。有时候我们希望在布局控件上实现鼠标点击事件的获取,请记得一定要给Background属性设置一个颜色值,如果不希望有具体的颜色,那就设置成Transparent。不然会踩坑的!因为布局控件的
Background属性没有值时,是不能引发鼠标相关事件的。
3.1.1 深入探究 Panel 类
Panel 作为布局控件的基类,拥有一个叫 Children 的属性,这个属性的类型是 UIElementCollection 。我们来看一下它的结构:
public class UIElementCollection : IList, ICollection, IEnumerable
{
    public UIElementCollection(UIElement visualParent, FrameworkElement logicalParent);

    public virtual UIElement this[int index] { get; set; }

    public virtual int Capacity { get; set; }
    public virtual object SyncRoot { get; }
    public virtual bool IsSynchronized { get; }
    public virtual int Count { get; }

    public virtual int Add(UIElement element);
    public virtual void Clear();
    public virtual bool Contains(UIElement element);
    public virtual void CopyTo(UIElement[] array, int index);
    public virtual void CopyTo(Array array, int index);
    public virtual IEnumerator GetEnumerator();
    public virtual int IndexOf(UIElement element);
    public virtual void Insert(int index, UIElement element);
    public virtual void Remove(UIElement element);
    public virtual void RemoveAt(int index);
    public virtual void RemoveRange(int index, int count);
    protected void ClearLogicalParent(UIElement element);
    protected void SetLogicalParent(UIElement element);
}
从它所定义的方法来看,我们会看到一些添加或移除某个元素的方法成员,例如 Add,Insert,Remove,Contains 等等,而这些方法的参数都有一个叫 UIElement 的形参,说明什么问题?
只要继承于 UIElement 的类(或控件),都可以添加到 Panel 或 Panel 子类的 Children 中,从而在前端呈现出来。
WPF 提供了六个用于 UI 布局的 Panel 子类,分别是:Grid、StackPanel、WrapPanel、DockPanel、 VirtualizingStackPanel 和 Canvas。 这些面板元素易于使用、功能齐全并且可扩展,足以适用于大多数应用程序。
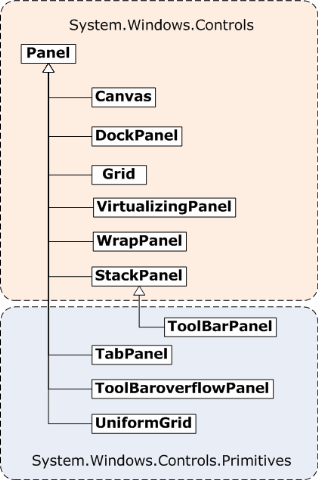
一个 Panel 的呈现就是测量和排列子控件,然后在屏幕上绘制它们。所以在布局的过程中会经过一系列的计算,那么子控件越多,执行的计算次数就越多,则性能就会变差。布局建议:
-
如果不需要进行复杂的布局,则尽量少用复杂布局控件(如
Grid和自定义复杂的Panel); -
如果能简单布局实现就尽量使用构造相对简单的布局(如
Canvas、UniformGrid等),这种布局可带来更好的性能。 -
如果有可能,我们应尽量避免调用
UpdateLayout方法。
布局系统为 Panel 中的每个子控件完成两个处理过程:测量处理过程(Measure)和排列处理过程(Arrange)。每个子 Panel 均提供自己的 MeasureOverride 和 ArrangeOverride 方法,以实现自己特定的布局行为。
每个派生 Panel 元素都以不同方式处理大小调整约束。 了解 Panel 如何处理水平或垂直方向上的约束可以使布局更容易预测。
| 控件名称 | x维度 | y维度 |
|---|---|---|
| Grid | 约束 | 约束,Auto 应用于行和列的情形除外 |
| StackPanel(垂直) | 约束 | 按内容约束 |
| StackPanel(水平) | 按内容约束 | 约束 |
| DockPanel | 约束 | 约束 |
| WrapPanel | 按内容约束 | 按内容约束 |
| Canvas | 按内容约束 | 按内容约束 |
3.2 StackPanel 布局(栈式布局)
StackPanel用于水平或垂直堆叠子元素。也就是说,StackPanel同样也有一个 Children 属性,而 Children 集合中的元素呈现在界面上时,只能是按水平或垂直方式布局。
public class StackPanel : Panel, IScrollInfo, IStackMeasure
{
    public static readonly DependencyProperty OrientationProperty;

    public StackPanel();

    public double HorizontalOffset { get; }
    public double ViewportHeight { get; }
    public double ViewportWidth { get; }
    public double ExtentHeight { get; }
    public double ExtentWidth { get; }
    public bool CanVerticallyScroll { get; set; }
    public bool CanHorizontallyScroll { get; set; }
    public Orientation Orientation { get; set; }
    public double VerticalOffset { get; }
    public ScrollViewer ScrollOwner { get; set; }
    protected internal override Orientation LogicalOrientation { get; }
    protected internal override bool HasLogicalOrientation { get; }

    public void LineDown();
    public void LineLeft();
    public void LineRight();
    public void LineUp();
    public Rect MakeVisible(Visual visual, Rect rectangle);
    public void MouseWheelDown();
    public void MouseWheelLeft();
    public void MouseWheelRight();
    public void MouseWheelUp();
    public void PageDown();
    public void PageLeft();
    public void PageRight();
    public void PageUp();
    public void SetHorizontalOffset(double offset);
    public void SetVerticalOffset(double offset);
    protected override Size ArrangeOverride(Size arrangeSize);
    protected override Size MeasureOverride(Size constraint);

}
StackPanel 提供了一些属性和方法,最常用的是 Orientation 枚举属性,用于设置子控件在 StackPanel 内部的排列方式,分别是水平排列(Horizontal)和垂直排列(Vertical)。默认值是垂直排列(Vertical)。
和 StackPanel 相关的布局属性:
| 名称 | 说明 |
|---|---|
HorizontalAlignment |
当水平方向上有额外的空间时,该属性决定了子元素在布局容器上如何定位。可选用 Center、Left、Right 或 Stretch 等属性值 |
VerticalAlignment |
当垂直方向上有额外的空间时,该属性决定了子元素在布局控件中如何定位,可选用 Center、Top、Buttom 或 Stretch 等属性值 |
Margin |
该属性用于在元素的周围添加一定的空间。Margin 属性是 System.Windows.Thickness 结构的一个实例。该结构具有分别用于顶部、底部、左边、右边添加空间的独立组件。 |
MinWidth 和 MinHeight |
这两个属性用于设置元素的最小尺寸。如果一个元素对于其他元素来说太大,该元素会被裁剪以适应尺寸。 |
MaxWidth 和 MaxHeigt |
这两个属性用于设置元素的最大尺寸。如果有更多可以使用的空间,那么在扩展子元素时就不会超出这一限制,即使 HorizontalAlignment 和 VerticalAlignment 属性设置为 Stretch 也同样如此 |
Width 和 Height |
这两个属性用于显式地设定元素的尺寸。这一设置会重写为 HorizontalAlighment 和 VerticalAlignment 属性设置的 Stretch 值。但不能超出 MinWidth 、MinHeight、MaxWidth 和 MaxHeight属性设置的范围。 |
示例代码:
<Window x:Class="_03_02_Layout.MainWindow"
        xmlns="http://schemas.microsoft.com/winfx/2006/xaml/presentation"
        xmlns:x="http://schemas.microsoft.com/winfx/2006/xaml"
        xmlns:d="http://schemas.microsoft.com/expression/blend/2008"
        xmlns:mc="http://schemas.openxmlformats.org/markup-compatibility/2006"
        xmlns:local="clr-namespace:_03_02_Layout"
        mc:Ignorable="d"
        Title="MainWindow" Height="450" Width="800">
    <Grid>
        <!--Border 不是容器,而是控件,继承自 ContentControl-->
        <!--Border 有内边距:Padding:ContentControl 子类可能有内边距-->
        <Border BorderBrush="Red" BorderThickness="2" HorizontalAlignment="Center" Padding="6">
            <!--默认 HorizontalAlignment/VerticalAlignment 值为 Stretch,决定了子元素在容器上如何定位-->
            <StackPanel Orientation="Vertical" HorizontalAlignment="Stretch" MinWidth="200" MaxWidth="500" Margin="10 20">
                <Label>This is a Label</Label>
                <Button HorizontalAlignment="Center" Margin="2.5">ButtonA</Button>
                <Button HorizontalAlignment="Left" Margin="2.5">ButtonB</Button>
                <Button HorizontalAlignment="Right" Margin="2.5">ButtonC</Button>
                <Button Margin="2.5">ButtonD</Button>
            </StackPanel>
        </Border>
    </Grid>
</Window>
界面:
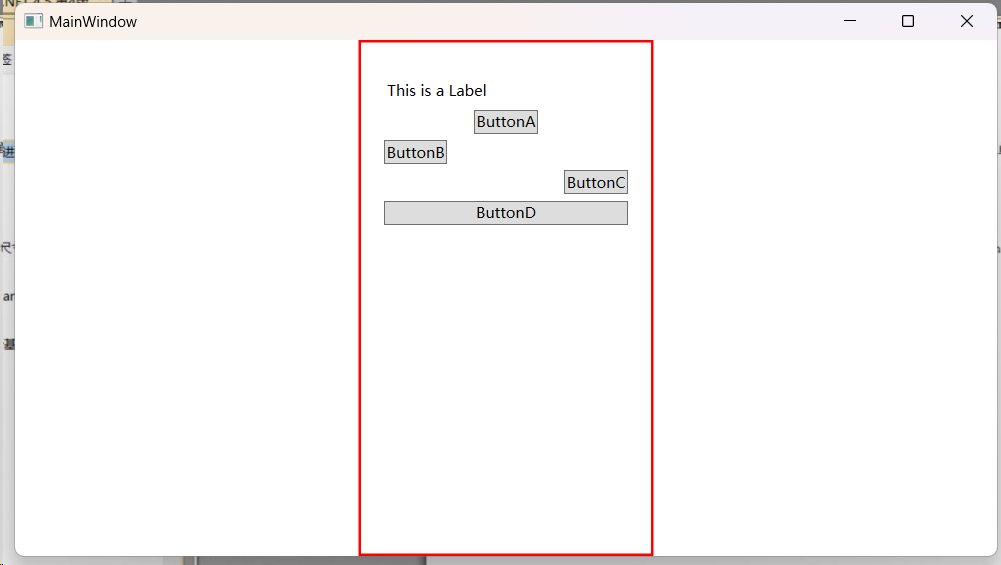
3.3 WrapPanel 和 DockPanel
3.3.1 WrapPanel(瀑布流布局)
WrapPanel 控件表示将其子控件从左到右的顺序排列,如果第一行显示不了,则自动换至第二行,继续显示剩余的子控件。我们来看看它的结构定义:
public class WrapPanel : Panel
{
    // 依赖属性
    public static readonly DependencyProperty ItemWidthProperty;
    public static readonly DependencyProperty ItemHeightProperty;
    public static readonly DependencyProperty OrientationProperty;

    public WrapPanel();

    public double ItemWidth { get; set; }
    public double ItemHeight { get; set; }
    public Orientation Orientation { get; set; }

    protected override Size ArrangeOverride(Size finalSize);
    protected override Size MeasureOverride(Size constraint);

}
WrapPanel 面板在可能的空间中,以一列或者一行的方式排布空间。默认情况下 WrapPanel.Orientation 属性设置为 Horizontal,控件按照从左至右进行排列。而在下一列中排列元素,可以将 WrapPanel.Orientation 设置为 Vertical,从而在多个列中排列元素。
和 StackPanel 相同,WrapPanel 面板主要用来控制用户界面中一小部分的布局细节,并非用于整个窗口布局。如可以使用 WrapPanel 面板以类似工具栏控件的方式将所有按钮保持在一起。
示例:下列一系列工具提供了不同的对齐方式:
<Window x:Class="WrapPanelDemo.MainWindow"
        xmlns="http://schemas.microsoft.com/winfx/2006/xaml/presentation"
        xmlns:x="http://schemas.microsoft.com/winfx/2006/xaml"
        xmlns:d="http://schemas.microsoft.com/expression/blend/2008"
        xmlns:mc="http://schemas.openxmlformats.org/markup-compatibility/2006"
        xmlns:local="clr-namespace:WrapPanelDemo"
        mc:Ignorable="d"
        Title="MainWindow" Height="450" Width="800">
    <Grid>
        <Grid.RowDefinitions>
            <RowDefinition></RowDefinition>
            <RowDefinition></RowDefinition>
        </Grid.RowDefinitions>

        <WrapPanel Grid.Row="0" Margin="3">
            <Button VerticalAlignment="Top" >Top Button</Button>
            <Button MinHeight="60">Tall Button2</Button>
            <Button VerticalAlignment="Bottom">Bottom Button</Button>
            <Button VerticalAlignment="Stretch">Stretch Button</Button>
            <Button VerticalAlignment="Center">Center Button</Button>
        </WrapPanel>
    </Grid>
</Window>
图示:
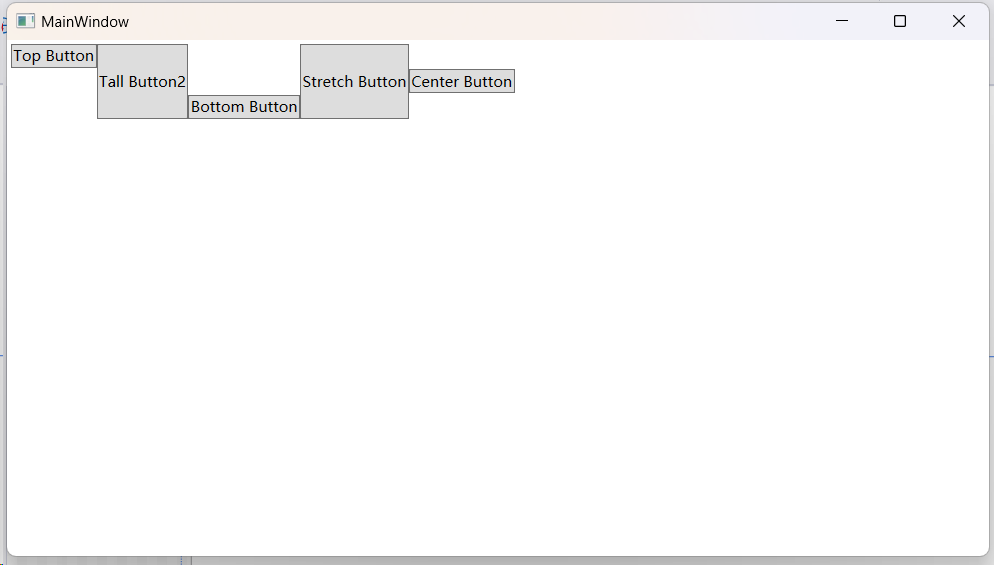
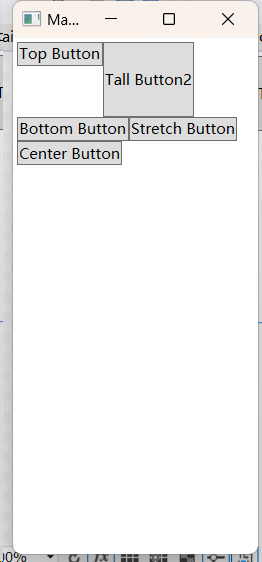
如果缩小宽度,这些控件会自动折行,然后在新的一行里从左向右排布。
另外还能一次指定所有子元素的(最大)宽高属性值:
<Window x:Class="PanalSample.MainWindow"
        xmlns="http://schemas.microsoft.com/winfx/2006/xaml/presentation"
        xmlns:x="http://schemas.microsoft.com/winfx/2006/xaml"
        xmlns:d="http://schemas.microsoft.com/expression/blend/2008"
        xmlns:mc="http://schemas.openxmlformats.org/markup-compatibility/2006"
        xmlns:local="clr-namespace:PanalSample"
        mc:Ignorable="d"
        Title="PanalSample" Height="200" Width="500">
    <Grid>
        <!--(最大)高度统一设为50,(最大)宽度统一设为100,默认排列方向 Horizontal-->
        <WrapPanel ItemHeight="50" ItemWidth="100">
            <Button Margin="10" Content="Button1"></Button>
            <Button Margin="10" Content="Button2"></Button>
            <Button Margin="10" Content="Button3"></Button>
            <Button Margin="10" Content="Button4"></Button>
            <Button Margin="10" Content="Button5"></Button>
            <Button Margin="10" Content="Button6"></Button>
            <Button Margin="10" Content="Button7"></Button>
            <Button Margin="10" Content="Button8"></Button>
            <Button Margin="10" Content="Button9"></Button>
        </WrapPanel>
    </Grid>
</Window>
图示:
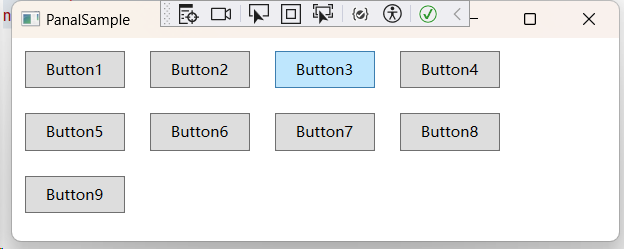
指定 Orientation 为 Vertical:
<Window x:Class="PanalSample.MainWindow"
        xmlns="http://schemas.microsoft.com/winfx/2006/xaml/presentation"
        xmlns:x="http://schemas.microsoft.com/winfx/2006/xaml"
        xmlns:d="http://schemas.microsoft.com/expression/blend/2008"
        xmlns:mc="http://schemas.openxmlformats.org/markup-compatibility/2006"
        xmlns:local="clr-namespace:PanalSample"
        mc:Ignorable="d"
        Title="PanalSample" Height="200" Width="500">
    <Grid>
        <!--(最大)高度统一设为50,(最大)宽度统一设为100,默认排列方向 Horizontal-->
        <WrapPanel ItemHeight="50" ItemWidth="100" Orientation="Vertical">
            <Button Margin="10" Content="Button1"></Button>
            <Button Margin="10" Content="Button2"></Button>
            <Button Margin="10" Content="Button3"></Button>
            <Button Margin="10" Content="Button4"></Button>
            <Button Margin="10" Content="Button5"></Button>
            <Button Margin="10" Content="Button6"></Button>
            <Button Margin="10" Content="Button7"></Button>
            <Button Margin="10" Content="Button8"></Button>
            <Button Margin="10" Content="Button9"></Button>
        </WrapPanel>
    </Grid>
</Window>
图示:
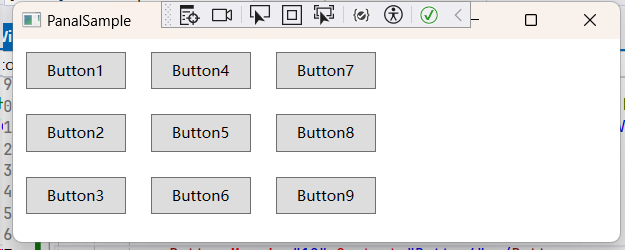
注意:
WrapPanel是唯一一个不能通过灵活使用 Grid 面板代替的面板。是很常用的一个组件。
3.3.2 DockPanel(停靠布局)
DockPanel 沿着一条外边沿来拉伸所包含的控件。理解该面板最简单的方法是:许多 Windows 应用程序窗口顶部的工具栏,这些工具栏停靠到窗口顶部。
和 StackPanel 类似,被停靠的元素选择他们布局的一个方面。例如:
- 如果将一个按钮停靠在
DockPanel面板的顶端,该按钮会被拉伸至DockPanel面板的整个宽度,但根据内容和MinHeight属性为其设置所需的高度。 - 如果将一个按钮停靠在容器的左侧,该按钮的高度将被拉伸以适应容器的高度,而其宽度可以根据需要自由增加。
明显的问题:子元素如何选择需要停靠的边?答案是:使用 DockPanel.Dock 附加属性指定,该属性可设置:Left、Right、Top 和 Bottom。放在 DockPanel 面板的每个元素都会自动捕获该属性。
下面是一个示例:
<Window x:Class="DockPanelDemo.MainWindow"
        xmlns="http://schemas.microsoft.com/winfx/2006/xaml/presentation"
        xmlns:x="http://schemas.microsoft.com/winfx/2006/xaml"
        xmlns:d="http://schemas.microsoft.com/expression/blend/2008"
        xmlns:mc="http://schemas.openxmlformats.org/markup-compatibility/2006"
        xmlns:local="clr-namespace:DockPanelDemo"
        mc:Ignorable="d"
        Title="MainWindow" Height="450" Width="800">
    <!--DockPanel 示例-->
    <DockPanel LastChildFill="True">
        <Button DockPanel.Dock="Top" Margin="3">Top Button</Button>
        <Button DockPanel.Dock="Left" Margin="3">Left Button</Button>
        <Button DockPanel.Dock="Right" Margin="3">Right Button</Button>
        <Button DockPanel.Dock="Bottom" Margin="3">Bottom Button</Button>
        <Button>Remining Button</Button>
    </DockPanel>
</Window>
停靠到每个边缘图示:
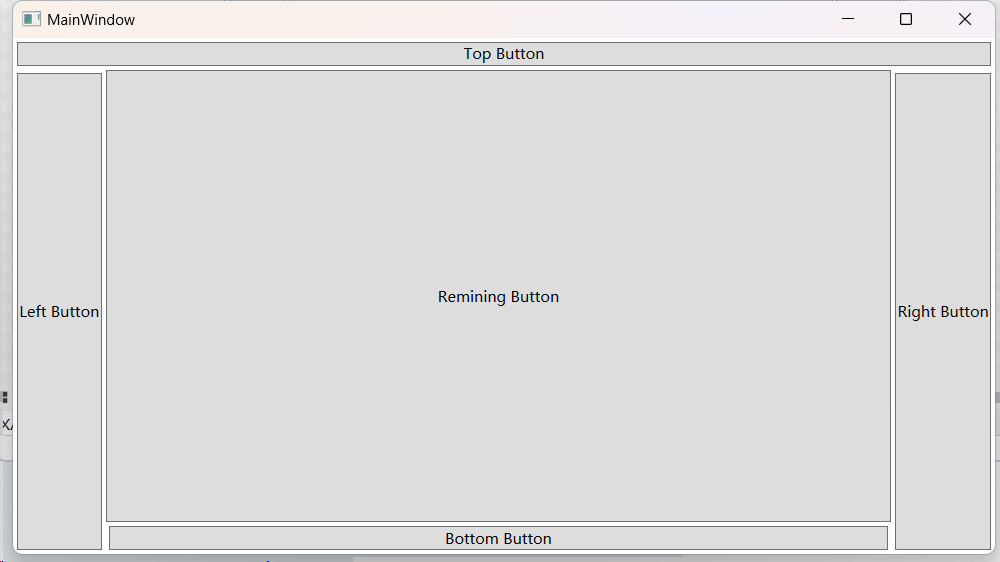
LastChildFill 属性设置为 true,告诉 DockPanel 面板使用最后一个控件占满整个空间。
在停靠的时候,停靠顺序很重要(先停靠先占位,后停靠后占位)。该示例中,顶部和左右两个先占据了整个边缘,所以后续的底部控件只能占领剩下的区域。
在下面的改进示例中,可以在顶部停靠多个元素:
<Window x:Class="DockPanelDemo.MainWindow"
        xmlns="http://schemas.microsoft.com/winfx/2006/xaml/presentation"
        xmlns:x="http://schemas.microsoft.com/winfx/2006/xaml"
        xmlns:d="http://schemas.microsoft.com/expression/blend/2008"
        xmlns:mc="http://schemas.openxmlformats.org/markup-compatibility/2006"
        xmlns:local="clr-namespace:DockPanelDemo"
        mc:Ignorable="d"
        Title="MainWindow" Height="450" Width="800">
    <!--DockPanel 示例-->
    <DockPanel LastChildFill="True">
        <Button DockPanel.Dock="Top" Margin="3">A Stretched Button</Button>
        <Button DockPanel.Dock="Top" HorizontalAlignment="Center" Margin="3">A Centered Top Button</Button>
        <Button DockPanel.Dock="Top" HorizontalAlignment="Left" Margin="3">A Left-Aligned Button</Button>
        <Button DockPanel.Dock="Left" Margin="3">Left Button</Button>
        <Button DockPanel.Dock="Right" Margin="3">Right Button</Button>
        <Button DockPanel.Dock="Bottom" Margin="3">Bottom Button</Button>
        <Button Margin="3">Remining Button</Button>
    </DockPanel>
</Window>
图示:
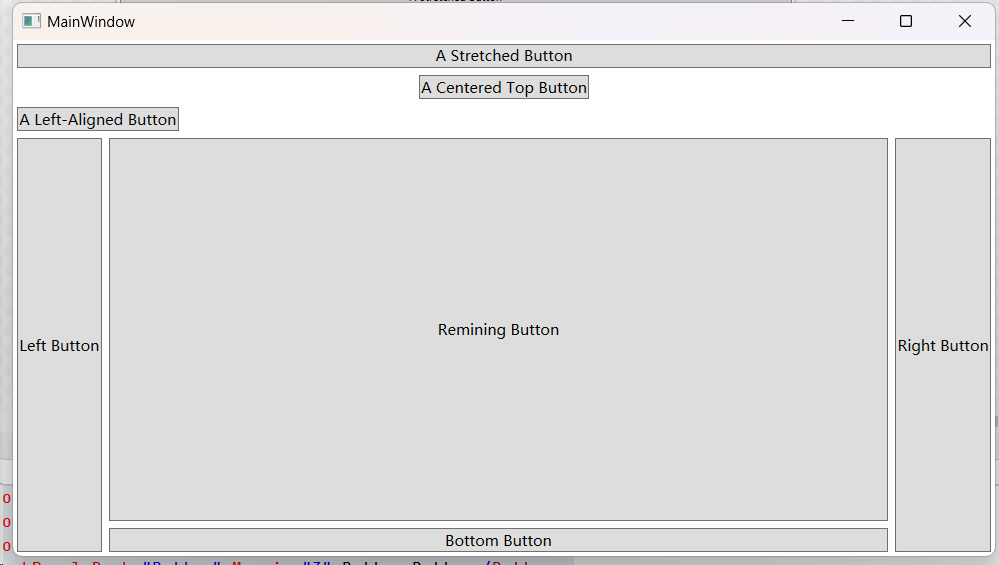
3.3.3 嵌套容器布局
很少单独使用 StackPanel、WrapPanel 和 DockPanel 面板。它们通常被用来设置用户界面的一部分。如可以使用 DockPanel 在窗口的合适区域放置不同的 StackPanel 和 WrapPanel 面板容器。
例如:创建一个标准对话框,在右下角添加 OK 和 Cancel 按钮。并在窗口剩余部分留下一块较大的内容区域。
其中最简单的:
-
创建
StackPanel面板,用于将 OK 按钮和 Cancel 放置在一起; -
在 DockPanel 面板中放置 StackPanel,将其停靠在底部;
-
将
DockPanel.LastChildFill属性设置为 true,使得窗口剩余部分填充其他内容。在此添加另一个布局控件或者普通的 TextBox 控件; -
设置边距,提供一些空白空间。
<Window x:Class="SimpleDialog.MainWindow"
        xmlns="http://schemas.microsoft.com/winfx/2006/xaml/presentation"
        xmlns:x="http://schemas.microsoft.com/winfx/2006/xaml"
        xmlns:d="http://schemas.microsoft.com/expression/blend/2008"
        xmlns:mc="http://schemas.openxmlformats.org/markup-compatibility/2006"
        xmlns:local="clr-namespace:SimpleDialog"
        mc:Ignorable="d"
        Title="SimpleDialog" Height="300" Width="450">
    <DockPanel Margin="10" LastChildFill="true">
        <StackPanel DockPanel.Dock="Bottom" Orientation="Horizontal" HorizontalAlignment="Right" >
            <Button  Width="80" Margin="5" Content="OK" x:Name="OKButton" Click="OKButton_Click"></Button>
            <Button  Width="80" Margin="5" Content="Cancel" Click="cancelButton_Click" x:Name="cancelButton"></Button>
        </StackPanel>
        <TextBox Text="Hello. This is a simple dialog." Padding="5"></TextBox>
    </DockPanel>
</Window>
SimpleDialog 图示:
功能代码:
using System.Text;
using System.Windows;
using System.Windows.Controls;
using System.Windows.Data;
using System.Windows.Documents;
using System.Windows.Input;
using System.Windows.Media;
using System.Windows.Media.Imaging;
using System.Windows.Navigation;
using System.Windows.Shapes;

namespace SimpleDialog
{
    /// <summary>
    /// Interaction logic for MainWindow.xaml
    /// </summary>
    public partial class MainWindow : Window
    {
        public MainWindow()
        {
            InitializeComponent();
        }

        private void cancelButton_Click(object sender, RoutedEventArgs e)
        {
            this.Close();
        }

        private void OKButton_Click(object sender, RoutedEventArgs e)
        {
            // this.Hide();	// 隐藏会导致进程占用
        }
    }
}
3.4 Grid 面板
Grid 控件时窗体的默认控件,我们创建一个 WPF 应用之后,主窗体内默认会有一个 Grid 控件。该类的结构:
public class Grid : Panel, IAddChild
{
    public static readonly DependencyProperty ShowGridLinesProperty;
    public static readonly DependencyProperty ColumnProperty;
    public static readonly DependencyProperty RowProperty;
    public static readonly DependencyProperty ColumnSpanProperty;	// 跨列
    public static readonly DependencyProperty RowSpanProperty;	// 跨行
    public static readonly DependencyProperty IsSharedSizeScopeProperty;

    public Grid();

    public ColumnDefinitionCollection ColumnDefinitions { get; }	// 列集合
    public bool ShowGridLines { get; set; }
    public RowDefinitionCollection RowDefinitions { get; }	// 行集合
    protected override int VisualChildrenCount { get; }
    protected internal override IEnumerator LogicalChildren { get; }

    public static int GetColumn(UIElement element);
    public static int GetColumnSpan(UIElement element);
    public static bool GetIsSharedSizeScope(UIElement element);
    public static int GetRow(UIElement element);
    public static int GetRowSpan(UIElement element);
    public static void SetColumn(UIElement element, int value);
    public static void SetColumnSpan(UIElement element, int value);
    public static void SetIsSharedSizeScope(UIElement element, bool value);
    public static void SetRow(UIElement element, int value);
    public static void SetRowSpan(UIElement element, int value);
    public bool ShouldSerializeColumnDefinitions();
    public bool ShouldSerializeRowDefinitions();
    protected override Size ArrangeOverride(Size arrangeSize);
    protected override Visual GetVisualChild(int index);
    protected override Size MeasureOverride(Size constraint);
    protected internal override void OnVisualChildrenChanged(DependencyObject visualAdded, DependencyObject visualRemoved);

}
Grid有两个非常关键的属性 ColumnDefinitions 和 RowDefinitions ,分别表示列的数量集合和行的数量集合。
ColumnDefinitions 集合中的元素类型是 ColumnDefinition 类,RowDefinitions 集合中元素类型是 RowDefinition 类。
默认的 Grid 控件没有定义行数和列数,也就是说,Grid 默认情况下,行数和列数都等于 1,那么它就只有一个单元格。
先定义一个两行一列的 Grid,各放一个 Button 在里面:
MainWindow.xaml
<Window x:Class="GridSample1.MainWindow"
        xmlns="http://schemas.microsoft.com/winfx/2006/xaml/presentation"
        xmlns:x="http://schemas.microsoft.com/winfx/2006/xaml"
        xmlns:d="http://schemas.microsoft.com/expression/blend/2008"
        xmlns:mc="http://schemas.openxmlformats.org/markup-compatibility/2006"
        xmlns:local="clr-namespace:GridSample1"
        mc:Ignorable="d"
        Title="MainWindow" Height="450" Width="800">
    <Grid Background="Transparent">
        <Grid.RowDefinitions>
            <RowDefinition></RowDefinition>
            <RowDefinition></RowDefinition>
        </Grid.RowDefinitions>
        <Button x:Name="button1" Margin="17.5 20" Grid.Row="0" Content="Button1"></Button>
        <Button x:Name="button2" Margin="17.5 20" Grid.Row="1" Content="Button2"></Button>
    </Grid>
</Window>
界面:
3.4.1 跨行与跨列
跨行与跨列使用:RowSpanProperty 和 ColumnSpanProperty,示例如下:
<Window x:Class="ColumnSpanAndRowSpan.MainWindow"
        xmlns="http://schemas.microsoft.com/winfx/2006/xaml/presentation"
        xmlns:x="http://schemas.microsoft.com/winfx/2006/xaml"
        xmlns:d="http://schemas.microsoft.com/expression/blend/2008"
        xmlns:mc="http://schemas.openxmlformats.org/markup-compatibility/2006"
        xmlns:local="clr-namespace:ColumnSpanAndRowSpan"
        mc:Ignorable="d"
        Title="MainWindow" Height="450" Width="800">
    <Grid Background="Transparent">
        <Grid.RowDefinitions>
            <RowDefinition></RowDefinition>
            <RowDefinition></RowDefinition>
        </Grid.RowDefinitions>
        <Grid.ColumnDefinitions>
            <ColumnDefinition></ColumnDefinition>
            <ColumnDefinition></ColumnDefinition>
            <ColumnDefinition></ColumnDefinition>
        </Grid.ColumnDefinitions>
        <!--跨越一二列-->
        <Button x:Name="button1" Content="Button1" Height="50" Width="100" Grid.ColumnSpan="2" Grid.Row="0" Grid.Column="0"></Button>
        <!--跨越一二行-->
        <Button x:Name="button2" Content="Button2" Height="50" Width="100" Grid.RowSpan="2" Grid.Row="0" Grid.Column="2"></Button>
    </Grid>
</Window>
界面:
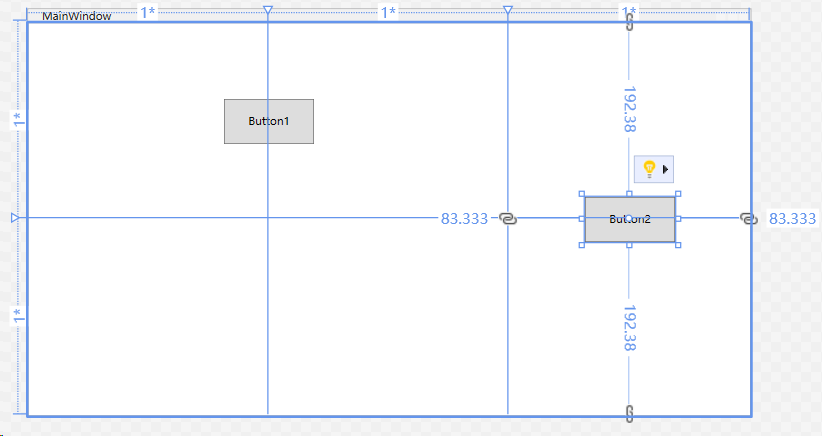
在跨列和跨行的时候,要指定 Grid.ColumnSpan 或者 Grid.RowSpan,然后配合 Gird.Row 以及 Grid.Column 决定具体的位置。
3.4.2 指定尺寸
在定义的时候,我们就可以指定控件的尺寸,如 Width 和 Height。如指定 Grid 的尺寸:
<Window x:Class="GridSize.MainWindow"
        xmlns="http://schemas.microsoft.com/winfx/2006/xaml/presentation"
        xmlns:x="http://schemas.microsoft.com/winfx/2006/xaml"
        xmlns:d="http://schemas.microsoft.com/expression/blend/2008"
        xmlns:mc="http://schemas.openxmlformats.org/markup-compatibility/2006"
        xmlns:local="clr-namespace:GridSize"
        mc:Ignorable="d"
        Title="MainWindow" Height="450" Width="800">
    <Grid>
        <Grid.ColumnDefinitions>
            <ColumnDefinition Width="100"></ColumnDefinition>
            <ColumnDefinition Width="150"></ColumnDefinition>
            <!--剩下的按照总比例分配,前者占1/3,后者 2/3-->
            <ColumnDefinition Width="*"></ColumnDefinition>
            <ColumnDefinition Width="2*"></ColumnDefinition>
        </Grid.ColumnDefinitions>
        <Grid.RowDefinitions>
            <!--除去明确指定的30,剩下的高度根据比例分配-->
            <RowDefinition Height="*"></RowDefinition>
            <RowDefinition Height="2*"></RowDefinition>
            <RowDefinition Height="*"></RowDefinition>
            <RowDefinition Height="30"></RowDefinition>
        </Grid.RowDefinitions>

    </Grid>
</Window>
示意图:
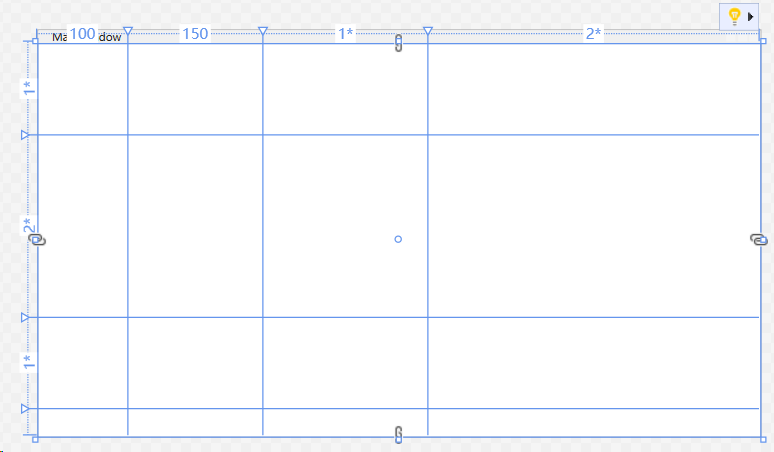
除开最后一行,给其他行都添加一个按钮和一个边框 Border,再给 Grid 添加:
<Window x:Class="GridSize.MainWindow"
        xmlns="http://schemas.microsoft.com/winfx/2006/xaml/presentation"
        xmlns:x="http://schemas.microsoft.com/winfx/2006/xaml"
        xmlns:d="http://schemas.microsoft.com/expression/blend/2008"
        xmlns:mc="http://schemas.openxmlformats.org/markup-compatibility/2006"
        xmlns:local="clr-namespace:GridSize"
        mc:Ignorable="d"
        Title="MainWindow" Height="450" Width="800">
    <Grid Background="Transparent" Margin="15">
        <Grid.ColumnDefinitions>
            <ColumnDefinition Width="100"></ColumnDefinition>
            <ColumnDefinition Width="150"></ColumnDefinition>
            <!--剩下的按照总比例分配,前者占1/3,后者 2/3-->
            <ColumnDefinition Width="*"></ColumnDefinition>
            <ColumnDefinition Width="2*"></ColumnDefinition>
        </Grid.ColumnDefinitions>
        <Grid.RowDefinitions>
            <!--除去明确指定的30,剩下的高度均分-->
            <RowDefinition Height="*"></RowDefinition>
            <RowDefinition Height="2*"></RowDefinition>
            <RowDefinition Height="*"></RowDefinition>
            <RowDefinition Height="30"></RowDefinition>
        </Grid.RowDefinitions>
        <Border BorderThickness="1 1 0 0" BorderBrush="Red" Grid.Column="0" Grid.Row="0">
            <Button Margin="10 25" Panel.ZIndex="1" Content="Button1"></Button>
        </Border>
        <Border BorderThickness="1 1 0 0" BorderBrush="Red" Grid.Column="1" Grid.Row="0">
            <Button Margin="10 25" Panel.ZIndex="1" Content="Button2"></Button>
        </Border>
        <Border BorderThickness="1 1 0 0" BorderBrush="Red" Grid.Column="2" Grid.Row="0">
            <Button Margin="10 25" Panel.ZIndex="1" Content="Button3"></Button>
        </Border>
        <Border BorderThickness="1 1 1 0" BorderBrush="Red" Grid.Column="3" Grid.Row="0">
            <Button Margin="10 25" Panel.ZIndex="1" Content="Button4"></Button>
        </Border>
        <Border BorderThickness="1 1 0 0" BorderBrush="Red" Grid.Column="0" Grid.Row="1">
            <Button Margin="10 25" Panel.ZIndex="1" Content="Button5"></Button>
        </Border>
        <Border BorderThickness="1 1 0 0" BorderBrush="Red" Grid.Column="1" Grid.Row="1">
            <Button Margin="10 25" Panel.ZIndex="1" Content="Button6"></Button>
        </Border>
        <Border BorderThickness="1 1 0 0" BorderBrush="Red" Grid.Column="2" Grid.Row="1">
            <Button Margin="10 25" Panel.ZIndex="1" Content="Button7"></Button>
        </Border>
        <Border BorderThickness="1 1 1 0" BorderBrush="Red" Grid.Column="3" Grid.Row="1">
            <Button Margin="10 25" Panel.ZIndex="1" Content="Button8"></Button>
        </Border>
        <Border BorderThickness="1 1 0 1" BorderBrush="Red" Grid.Column="0" Grid.Row="2">
            <Button Margin="10 25" Panel.ZIndex="1" Content="Button9"></Button>
        </Border>
        <Border BorderThickness="1 1 0 1" BorderBrush="Red" Grid.Column="1" Grid.Row="2">
            <Button Margin="10 25" Panel.ZIndex="1" Content="Button10"></Button>
        </Border>
        <Border BorderThickness="1 1 0 1" BorderBrush="Red" Grid.Column="2" Grid.Row="2">
            <Button Margin="10 25" Panel.ZIndex="1" Content="Button11"></Button>
        </Border>
        <Border BorderThickness="1 1 1 1" BorderBrush="Red" Grid.Column="3" Grid.Row="2">
            <Button Margin="10 25" Panel.ZIndex="1" Content="Button12"></Button>
        </Border>


    </Grid>
</Window>
界面:
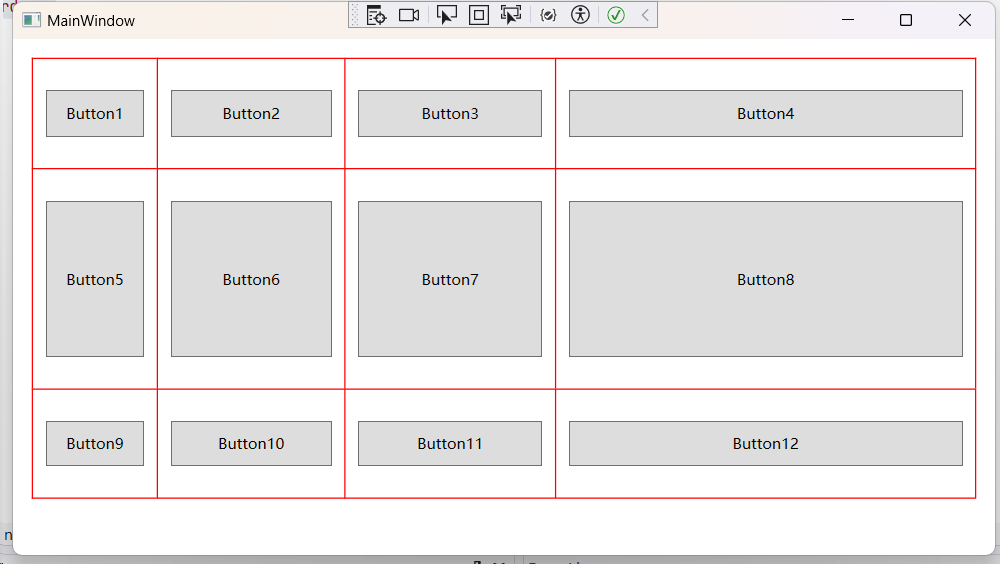
注意:
Border的BorderThickness和其他元素的Margin在每个方位上的数值都能单独设置,顺序为:左、上、右、下
当设置一个值时,即:左、上、右、下方向的值都相等
当设置两个值时,前一个值设定左、右,后一个值设定上、下
当设置四个值时,这些值的作用分别为:左、上、右、下
在进行界面设计时,
Margin和Padding都是对边距进行限制的,其区别在于“一个主外,一个主内”。Margin (边缘)是约束控件与容器控件的边距,设置值分别代表左上右下,使用
Margin="20"同时指定四个值。Padding (衬垫)是约束控件内部输入边距的,只有部分控件有此属性。
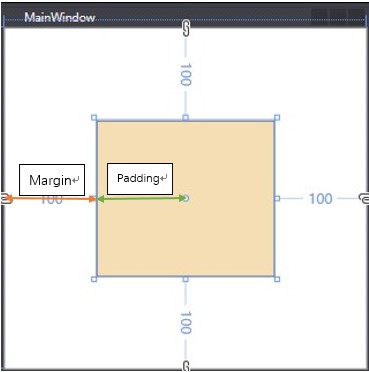
3.5 UniformGrid 面板
UniformGrid 面板是 Grid 的简略版,用于均等布局。它要求每个网格尺寸相同。下面是 UniformGrid 的源码:
#region Assembly PresentationFramework, Version=6.0.2.0, Culture=neutral, PublicKeyToken=31bf3856ad364e35
// C:\Program Files\dotnet\packs\Microsoft.WindowsDesktop.App.Ref\6.0.26\ref\net6.0\PresentationFramework.dll
#endregion


namespace System.Windows.Controls.Primitives
{
    //
    // Summary:
    //     Provides a way to arrange content in a grid where all the cells in the grid have
    //     the same size.
    public class UniformGrid : Panel
    {
        public static readonly DependencyProperty ColumnsProperty;
        public static readonly DependencyProperty FirstColumnProperty;
        public static readonly DependencyProperty RowsProperty;
        public UniformGrid();

        public int Columns { get; set; }
        public int FirstColumn { get; set; }
        public int Rows { get; set; }

        protected override Size ArrangeOverride(Size arrangeSize);
        protected override Size MeasureOverride(Size constraint);
    }
}
它有三个属性:Columns 、FirstColumn 和 Rows,FirstColumn 表示第一行要空几个单元格,后面两个属性分别用于设置行数和列数。
下面是一个使用 UniformGrid 布局的简单示例:
<Window x:Class="UniformGrid.MainWindow"
        xmlns="http://schemas.microsoft.com/winfx/2006/xaml/presentation"
        xmlns:x="http://schemas.microsoft.com/winfx/2006/xaml"
        xmlns:d="http://schemas.microsoft.com/expression/blend/2008"
        xmlns:mc="http://schemas.openxmlformats.org/markup-compatibility/2006"
        xmlns:local="clr-namespace:UniformGrid"
        mc:Ignorable="d"
        Title="UniformGrid" Height="450" Width="800">
    <Grid>
        <UniformGrid Margin="10" Rows="3" Columns="3" FirstColumn="1">
            <Button Content="Button1" x:Name="button1" Margin="10"></Button>
            <Button Content="Button2" x:Name="button2" Margin="10"></Button>
            <Button Content="Button3" x:Name="button3" Margin="10"></Button>
            <Button Content="Button4" x:Name="button4" Margin="10"></Button>
            <Button Content="Button5" x:Name="button5" Margin="10"></Button>
        </UniformGrid>
    </Grid>
</Window>
界面:
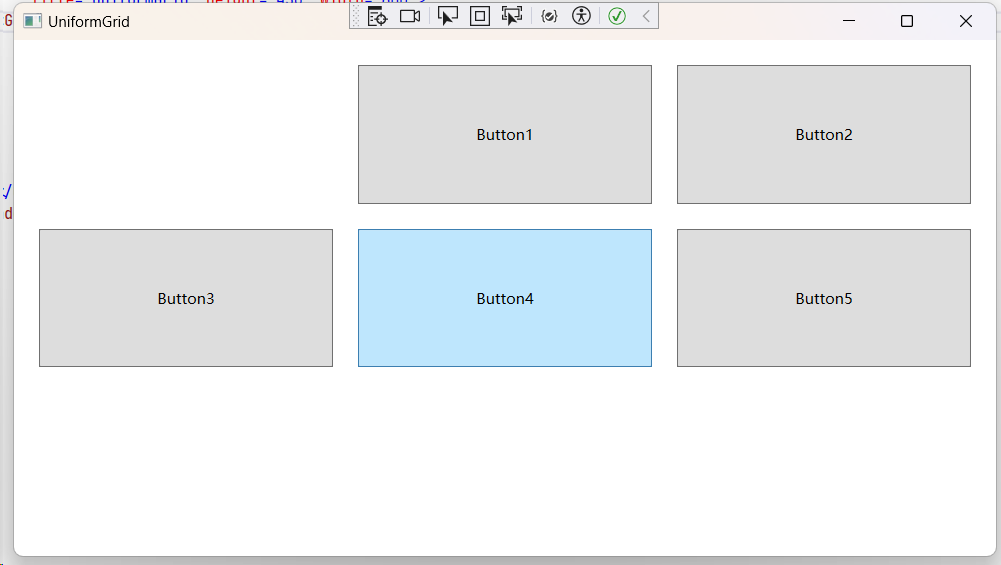
若没有指定 UniformGrid 的网格数目,那么它会根据里面元素的多少,然后自行进行均分,若指定了行数和列数,则会根据行列数生成均等的网格。
3.6 Canvas 控件(绝对布局)
Canvas 控件允许我们像 Winform 一样拖拽子控件进行布局,而子控件的位置相对于 Canvas 来说是绝对的,所以我将它称为绝对布局。我们来看看它的结构定义:
public class Canvas : Panel
{
    // 依赖属性,依赖该类的实例
    public static readonly DependencyProperty LeftProperty;
    public static readonly DependencyProperty TopProperty;
    public static readonly DependencyProperty RightProperty;
    public static readonly DependencyProperty BottomProperty;

    public Canvas();

    public static double GetBottom(UIElement element);
    public static double GetLeft(UIElement element);
    public static double GetRight(UIElement element);
    public static double GetTop(UIElement element);
    public static void SetBottom(UIElement element, double length);
    public static void SetLeft(UIElement element, double length);
    public static void SetRight(UIElement element, double length);
    public static void SetTop(UIElement element, double length);
    protected override Size ArrangeOverride(Size arrangeSize);
    protected override Geometry GetLayoutClip(Size layoutSlotSize);
    protected override Size MeasureOverride(Size constraint);

}
观察它的结构,我们可以看到它提供了 4 个依赖属性,分别是 LeftProperty ,RightProperty ,TopProperty 和 BottomProperty。其实是将这 4 个属性附加到子元素身上,以此来设置子元素距离 Canvas 上下左右的像素位置。
<Window x:Class="CanvasSample.MainWindow"
        xmlns="http://schemas.microsoft.com/winfx/2006/xaml/presentation"
        xmlns:x="http://schemas.microsoft.com/winfx/2006/xaml"
        xmlns:d="http://schemas.microsoft.com/expression/blend/2008"
        xmlns:mc="http://schemas.openxmlformats.org/markup-compatibility/2006"
        xmlns:local="clr-namespace:CanvasSample"
        mc:Ignorable="d"
        Title="CanvasSample" Height="350" Width="500">
    <Canvas>
        <!--没有指定上下左右停靠位置,所以会默认显示在左上角-->
        <Button Margin="10" Content="Button1"></Button>
        <Button Margin="10" Content="Button2"></Button>
        <Button Margin="10" Content="Button3"></Button>
        <Button Margin="10" Content="Button4"></Button>
        <Button Margin="10" Content="Button5"></Button>
    </Canvas>
</Window>
图示:
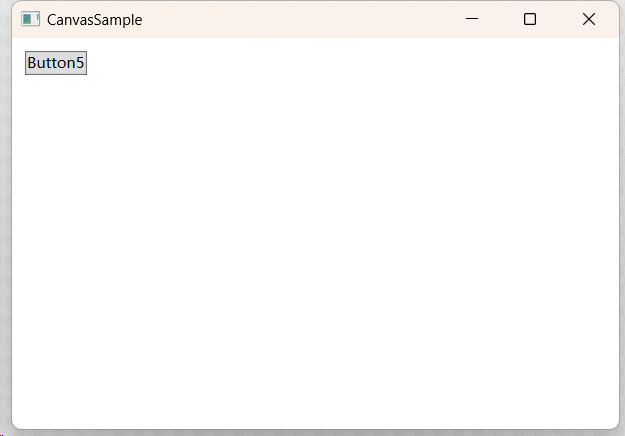
指定 Canvas 子元素上下左右停靠位置之后:
<Window x:Class="CanvasSample.MainWindow"
        xmlns="http://schemas.microsoft.com/winfx/2006/xaml/presentation"
        xmlns:x="http://schemas.microsoft.com/winfx/2006/xaml"
        xmlns:d="http://schemas.microsoft.com/expression/blend/2008"
        xmlns:mc="http://schemas.openxmlformats.org/markup-compatibility/2006"
        xmlns:local="clr-namespace:CanvasSample"
        mc:Ignorable="d"
        Title="CanvasSample" Height="350" Width="500">
    <Canvas>
        <!--没有指定上下左右停靠位置,所以会默认显示在左上角-->
        <Button Margin="10" Content="Button1" Canvas.Top="50"></Button>
        <Button Margin="10" Content="Button2" Canvas.Left="50"></Button>
        <Button Margin="10" Content="Button3" Canvas.Right="50"></Button>
        <Button Margin="10" Content="Button4" Canvas.Bottom="50"></Button>
        <Button Margin="10" Content="Button5" Canvas.Bottom="150" Canvas.Left="150"></Button>
    </Canvas>
</Window>
图示:
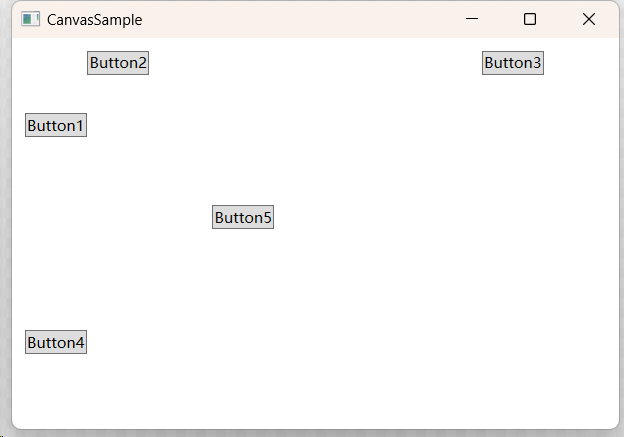
第一个按钮距离顶部 50,第二个按钮距离左侧 50,第三个按钮距离右侧 50,第四个按钮距离底部 50,第五个按钮距底部 150,距左侧 150
3.7 Border 布局(边框布局)
严格来说,Border 并不是一个布局控件,因为它并不是 Panel 的子类,而是 Decorator 装饰器的子类,而 Decorator 继承于 FrameworkElement。要了解 Border 的用法,我们要先看看它的父类 Decorator。
public class Decorator : FrameworkElement, IAddChild
{
    public Decorator();

    public virtual UIElement Child { get; set; }
    protected override int VisualChildrenCount { get; }
    protected internal override IEnumerator LogicalChildren { get; }

    protected override Size ArrangeOverride(Size arrangeSize);
    protected override Visual GetVisualChild(int index);
    protected override Size MeasureOverride(Size constraint);

}
Decorator 装饰器只有一个 Child 属性,说明 Decorator 只能容纳一个子元素(UIElement),也就是 Border 只能容纳一个子元素。那我们再看看 Border 的结构定义:
public class Border : Decorator
{
    // 依赖属性
    public static readonly DependencyProperty BorderThicknessProperty;
    public static readonly DependencyProperty PaddingProperty;
    public static readonly DependencyProperty CornerRadiusProperty;
    public static readonly DependencyProperty BorderBrushProperty;
    public static readonly DependencyProperty BackgroundProperty;

    public Border();

    public Thickness BorderThickness { get; set; }
    public Thickness Padding { get; set; }
    public CornerRadius CornerRadius { get; set; }
    public Brush BorderBrush { get; set; }
    public Brush Background { get; set; }

    protected override Size ArrangeOverride(Size finalSize);
    protected override Size MeasureOverride(Size constraint);
    protected override void OnRender(DrawingContext dc);

}
我们直接以表格的形式给出 Border 的相关属性。
| 属性 | 说明 |
|---|---|
BorderThickness |
设置 Border 边框的厚度(像素宽度) |
Padding |
设置子元素相对于 Border 边框的距离 |
CornerRadius |
设置 Border 的圆角 |
BorderBrush |
设置 Border 边框的颜色画刷 |
Background |
设置 Border 的背景颜色画刷 |
下面是一个简单的示例:
<Window x:Class="BorderSample.MainWindow"
        xmlns="http://schemas.microsoft.com/winfx/2006/xaml/presentation"
        xmlns:x="http://schemas.microsoft.com/winfx/2006/xaml"
        xmlns:d="http://schemas.microsoft.com/expression/blend/2008"
        xmlns:mc="http://schemas.openxmlformats.org/markup-compatibility/2006"
        xmlns:local="clr-namespace:BorderSample"
        mc:Ignorable="d"
        Title="BorderSample" Height="350" Width="500">
    <StackPanel Orientation="Horizontal" VerticalAlignment="Top" Margin="30 30" Background="Transparent">
        <Border Width="100" Height="50" Background="#ddd" Margin="5">
            <TextBlock HorizontalAlignment="Center" VerticalAlignment="Center" FontSize="15">Border示例1</TextBlock>
        </Border>
        <Border Width="100" Height="50" Background="#ddd" CornerRadius="10">
            <TextBlock HorizontalAlignment="Center" VerticalAlignment="Center" FontSize="15" >Border示例2</TextBlock>
        </Border>
        <Border Width="100" Height="100" Background="AliceBlue" CornerRadius="100" Margin="5">
            <TextBlock HorizontalAlignment="Center" VerticalAlignment="Center">Border示例3</TextBlock>
        </Border>
    </StackPanel>
</Window>
图示:
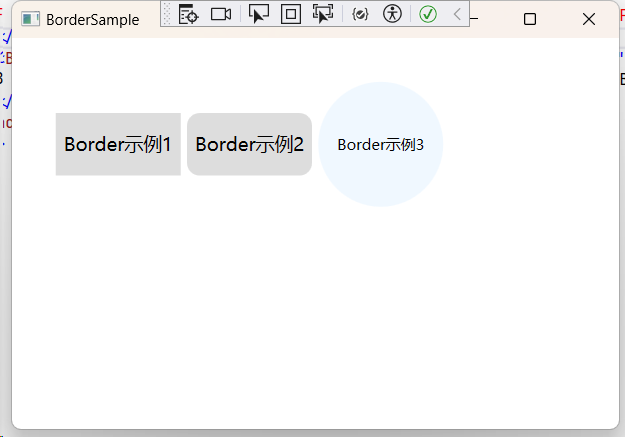
注意:如果想要使用
Border生成一个正圆, 要求Boreder的Height和Width要相等,若不相等则会生成一个椭圆。
3.8 GridSplitter 分割窗口
GridSplitter 控件用来分割窗体的布局,必须放在 Grid 栅格控件中配合使用,通过鼠标按住 GridSplitter 进行左右或上下拖动,即可调整行列尺寸。
注意事项:
-
如果您希望
GridSplitter控件可以水平调整左右的Grid列宽时,那么HorizontalAlignment属性必须设置为Stretch或者Center。 -
如果您希望
GridSplitter控件可以垂直调整行高,那么VerticalAlignment属性必须设置为Stretch或者Center。 -
ShowsPreview属性表示拖动时是否及时绘制调整尺寸,默认为False。建议采用默认值。
接下来,我们通过一个例子来说明它的用法
我们使用 Grid 生成一个三列的网格,第二列可以用来作 GridSplitter。示例如下:
<Window x:Class="GridSplitterSample.MainWindow"
        xmlns="http://schemas.microsoft.com/winfx/2006/xaml/presentation"
        xmlns:x="http://schemas.microsoft.com/winfx/2006/xaml"
        xmlns:d="http://schemas.microsoft.com/expression/blend/2008"
        xmlns:mc="http://schemas.openxmlformats.org/markup-compatibility/2006"
        xmlns:local="clr-namespace:GridSplitterSample"
        mc:Ignorable="d"
        Title="MainWindow" Height="450" Width="600">
    <Grid>
        <Grid.ColumnDefinitions>
            <ColumnDefinition></ColumnDefinition>
            <ColumnDefinition Width="auto"></ColumnDefinition>
            <ColumnDefinition></ColumnDefinition>
        </Grid.ColumnDefinitions>
        <Border Grid.Column="0" Background="AliceBlue">
            <TextBlock TextWrapping="Wrap" Padding="10">
                从空间上来说,冒泡事件和隧道事件是成对出现的。从时间来说,都是先触发隧道事件,然后是冒泡事件。从命名来说,隧道事件都是以Preview开头的事件。根据命名规则,我们可以大致猜测出一个结果,带Key的基本都是与键盘相关的事件(如按下键位、抬起键位),带Mouse的基本都是与鼠标相关的事件(如左键单击、双击),带Stylus的基本都是与触摸相关的事件,具体用到哪一类型的事件,再详细查阅一下相关说明文档即可。
            </TextBlock>
        </Border>
        <Border Grid.Column="2" Background="LightCoral">
            <TextBlock TextWrapping="Wrap" Padding="10">
                从空间上来说,冒泡事件和隧道事件是成对出现的。从时间来说,都是先触发隧道事件,然后是冒泡事件。从命名来说,隧道事件都是以Preview开头的事件。根据命名规则,我们可以大致猜测出一个结果,带Key的基本都是与键盘相关的事件(如按下键位、抬起键位),带Mouse的基本都是与鼠标相关的事件(如左键单击、双击),带Stylus的基本都是与触摸相关的事件,具体用到哪一类型的事件,再详细查阅一下相关说明文档即可。
            </TextBlock>
        </Border>
        <!--HorizontalAlignment 一定要设为居中,否则拖动功能很奇怪-->
        <GridSplitter Grid.Column="1" Width="5" HorizontalAlignment="Center"></GridSplitter>
    </Grid>
</Window>
图示:
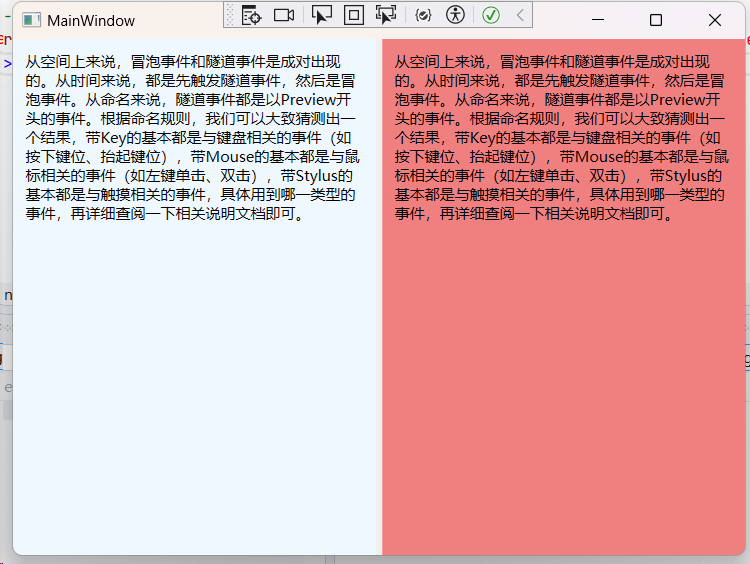
最好是为 GridSplitter 单独分配一行或者一列,同时,GridSplitter 需要跨越整行或整列,这样的效果会更好。
如上面的代码所示,我们在 Grid 中分割了3个单元格(3列),将 GridSplitter 居在放置,简单设置一下 GridSplitter 的属性,就可以达到我们的目的了。
3.9 布局 Demo
示例代码:
<Window x:Class="LayoutSample.MainWindow"
        xmlns="http://schemas.microsoft.com/winfx/2006/xaml/presentation"
        xmlns:x="http://schemas.microsoft.com/winfx/2006/xaml"
        xmlns:d="http://schemas.microsoft.com/expression/blend/2008"
        xmlns:mc="http://schemas.openxmlformats.org/markup-compatibility/2006"
        xmlns:local="clr-namespace:LayoutSample"
        mc:Ignorable="d"
        Title="系统管理面板" Height="800" Width="1200">
    <Grid>
        <!--定义三行两列-->
        <Grid.RowDefinitions>
            <RowDefinition Height="auto"></RowDefinition>
            <RowDefinition Height="*"></RowDefinition>
            <RowDefinition Height="auto"></RowDefinition>
        </Grid.RowDefinitions>
        <Grid.ColumnDefinitions>
            <ColumnDefinition Width="2*"></ColumnDefinition>
            <ColumnDefinition Width="4*"></ColumnDefinition>
        </Grid.ColumnDefinitions>
        <!--顶部-->
        <StackPanel Orientation="Horizontal" Grid.Column="0" Grid.Row="0" Background="#216974" Grid.ColumnSpan="2">
            <TextBlock FontSize="38" Foreground="#fff" VerticalAlignment="Center" HorizontalAlignment="Left" Padding="15">内部系统管理面板</TextBlock>
        </StackPanel>
        <Border Grid.Column="1" Width="100" Height="50"  Background="#c35400" HorizontalAlignment="Right" CornerRadius="20" Margin="10">
            <TextBlock HorizontalAlignment="Center" VerticalAlignment="Center" FontSize="18" Foreground="#fff">退出系统</TextBlock>
        </Border>
        <!--底部-->
        <StackPanel Grid.Row="2" Grid.ColumnSpan="2">
            <TextBlock Text="系统版本:1.0.0    版权所有:kobayashi, All Rights Reserved." Background="#c95500" Foreground="#fff" FontSize="14" Padding="5"></TextBlock>
        </StackPanel>
        <!--左侧-->
        <StackPanel Grid.Row="1">
            <Border Background="#4c9b84" Margin="15" Height="210">
                <TextBlock HorizontalAlignment="Center" VerticalAlignment="Center" Foreground="#fff" FontSize="20">参数区域1</TextBlock>
            </Border>
            <Border Background="#a1d97c" Margin="15 0" Height="210">
                <TextBlock HorizontalAlignment="Center" VerticalAlignment="Center" Foreground="#fff" FontSize="20">参数区域2</TextBlock>
            </Border>
            <Border Background="#e57953" Margin="15 15" Height="210">
                <TextBlock HorizontalAlignment="Center" VerticalAlignment="Center" Foreground="#fff" FontSize="20">参数区域3</TextBlock>
            </Border>
        </StackPanel>
        <!--右侧主体-->
        <Border BorderThickness="3" Grid.Row="1" Grid.Column="1" Margin="5">
            <StackPanel  Margin="5" Orientation="Vertical">
                <Border CornerRadius="10" Background="AliceBlue" BorderBrush="AliceBlue" Margin="0 0 0 20">
                    <TextBlock Height="500" Margin="10" FontSize="18">主体区域</TextBlock>
                </Border>
                <Border Width="100" Height="100" VerticalAlignment="Bottom" HorizontalAlignment="Center" Background="CadetBlue" CornerRadius="100" Margin="5">
                    <TextBlock VerticalAlignment="Center" HorizontalAlignment="Center" Foreground="#fff" FontSize="32">开始</TextBlock>
                </Border>
            </StackPanel>
        </Border>
    </Grid>
</Window>
图示:
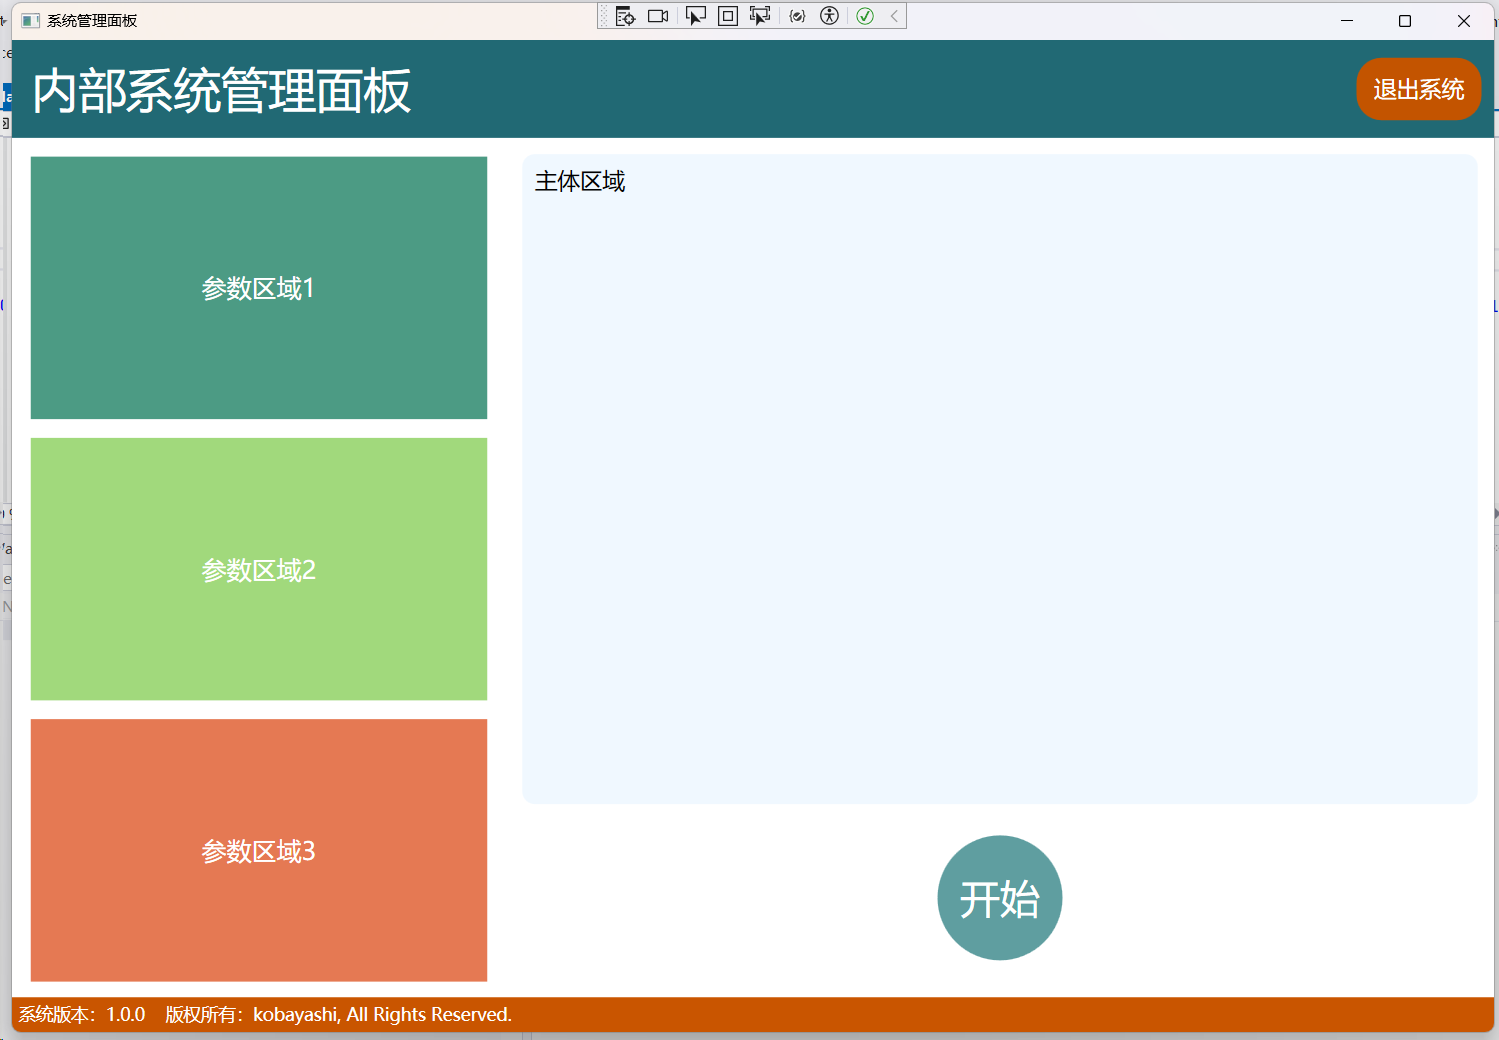
4. 内容控件
4.1 Control 基类
Control 是许多控件的基类。比如最常见的按钮(Button)、单选(RadioButton)、复选(CheckBox)、文本框(TextBox)、ListBox、DataGrid、日期控件 等等。
这些控件通常用于展示程序的数据或获取用户输入的数据,我们可以将这一类型的控件称为内容控件或数据控件,它们与前面的布局控件有一定的区别,布局控件更专注于界面,而内容控件更专注于数据(业务)。
Control 类虽然可以实例化,但是在界面上是不会有任何显示的。只有那些继承了 Control 的子类(控件)才会在界面上显示,而且所呈现的样子各不相同,为什么会是这样呢?
因为 Control 类提供了一个控件模板(ControlTemplate),而几乎所有的子类都对这个 ControlTemplate 进行了各自的实现,所以在呈现子类时,我们才会看到 Button 拥有 Button 的样子,TextBox 拥有 TextBox 的样子。
Control基类的ControlTemplate相当于一个白板,具体子类的实现形式,决定了它们的外观。
我们在这一章节并不对模板(Template)进行详细的介绍,只是先阐述模板的概念,接下来,我们先将目光聚焦到 Control 的结构定义:
public class Control : FrameworkElement
{
    public static readonly DependencyProperty BorderBrushProperty;
    public static readonly RoutedEvent PreviewMouseDoubleClickEvent;
    public static readonly DependencyProperty TemplateProperty;	// Template 依赖属性
    public static readonly DependencyProperty PaddingProperty;
    public static readonly DependencyProperty IsTabStopProperty;
    public static readonly DependencyProperty TabIndexProperty;
    public static readonly DependencyProperty VerticalContentAlignmentProperty;
    public static readonly DependencyProperty HorizontalContentAlignmentProperty;
    public static readonly RoutedEvent MouseDoubleClickEvent;
    public static readonly DependencyProperty FontStyleProperty;
    public static readonly DependencyProperty FontStretchProperty;
    public static readonly DependencyProperty FontSizeProperty;
    public static readonly DependencyProperty FontFamilyProperty;
    public static readonly DependencyProperty ForegroundProperty;
    public static readonly DependencyProperty BackgroundProperty;
    public static readonly DependencyProperty BorderThicknessProperty;
    public static readonly DependencyProperty FontWeightProperty;

    public Control();

    public FontStyle FontStyle { get; set; }
    public FontStretch FontStretch { get; set; }
    public double FontSize { get; set; }
    public FontFamily FontFamily { get; set; }
    public Brush Foreground { get; set; }
    public Brush Background { get; set; }
    public Thickness BorderThickness { get; set; }
    public bool IsTabStop { get; set; }
    public VerticalAlignment VerticalContentAlignment { get; set; }
    public int TabIndex { get; set; }
    public Thickness Padding { get; set; }
    public ControlTemplate Template { get; set; }	// Template 属性
    public FontWeight FontWeight { get; set; }
    public Brush BorderBrush { get; set; }
    public HorizontalAlignment HorizontalContentAlignment { get; set; }
    protected internal virtual bool HandlesScrolling { get; }

    public event MouseButtonEventHandler MouseDoubleClick;
    public event MouseButtonEventHandler PreviewMouseDoubleClick;

    public override string ToString();
    protected override Size ArrangeOverride(Size arrangeBounds);
    protected override Size MeasureOverride(Size constraint);
    protected virtual void OnMouseDoubleClick(MouseButtonEventArgs e);
    protected virtual void OnPreviewMouseDoubleClick(MouseButtonEventArgs e);
    protected virtual void OnTemplateChanged(ControlTemplate oldTemplate, ControlTemplate newTemplate);

}
Control 基类为它的子类提供的属性:
| 属性 | 说明 |
|---|---|
FontStyle |
获取或设置控件的字体结构,类似于Word中字体的常规、斜体或倾斜 |
FontStretch |
获取或设置紧缩或在屏幕上展开一种字体的程度。 |
FontSize |
获取或设置字体大小。 |
FontFamily |
获取或设置控件的字体系列。如:微软雅黑 = "Microsoft YaHei UI" |
Foreground |
获取或设置控件的字体颜色,也就是所谓的前景色画笔,它是一个刷子(Brush) |
Background |
获取或设置一个用于描述控件的背景画笔。 |
BorderThickness |
获取或设置控件的边框宽度。 |
IsTabStop |
获取或设置一个值,该值指示控件是否包括在选项卡上的导航窗格中。 |
VerticalContentAlignment |
获取或设置控件的内容的垂直对齐方式。 |
TabIndex |
获取或设置一个值,确定当用户导航控件通过使用 TAB 键元素接收焦点的顺序。 |
Padding |
获取或设置在控件中的填充量。 |
Template |
获取或设置控件模板。 |
FontWeight |
获取或设置指定的字体粗细。 |
BorderBrush |
获取或设置一个用于描述一个控件的边框背景画笔。 |
HorizontalContentAlignment |
获取或设置控件的内容的水平对齐方式。 |
4.1.1 Template 属性
大部分的属性都比较好理解,这里着重介绍一下 Template 属性。如果把人比作是一个Control(控件),那么”着装“就是 Template(模板)。在大街上,我们会看到不同着装的人来来往往。
所以 Control 的 Template 定义了控件的外观(着装)。
数据模板
与控件模板类似,还有一个概念叫数据模板。形象来说,还是把人比作控件,那么人体的五脏六腑就是这个控件的数据,而五脏六腑(数据)的外观就是指数据模板。
示例:
<Window x:Class="ControlSample.MainWindow"
        xmlns="http://schemas.microsoft.com/winfx/2006/xaml/presentation"
        xmlns:x="http://schemas.microsoft.com/winfx/2006/xaml"
        xmlns:d="http://schemas.microsoft.com/expression/blend/2008"
        xmlns:mc="http://schemas.openxmlformats.org/markup-compatibility/2006"
        xmlns:local="clr-namespace:ControlSample"
        mc:Ignorable="d"
        Title="ControlSample" Height="350" Width="500">
    <!--Control 控件 是不可见的,Background 不能直接发挥作用-->
    <Control Background="AliceBlue">
        <Control.Template>
            <!--为 Control 控件设置了新外观-->
            <ControlTemplate TargetType="Control">
                <!--使用 TemplateBinding 绑定Background 为外面的Control的颜色-->
                <Border Background="{TemplateBinding Background}" Margin="10">
                    <TextBlock Text="Hello, WPF!" VerticalAlignment="Center" HorizontalAlignment="Center" FontSize="32"></TextBlock>
                </Border>
            </ControlTemplate>
        </Control.Template>
    </Control>
</Window>
图示:
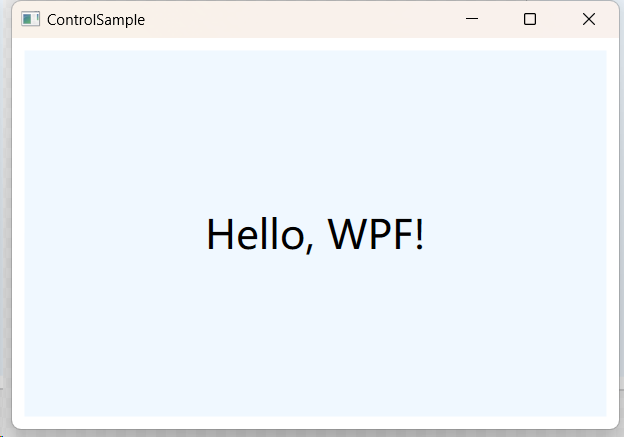
我们为 Control 的 Template 实例化了一个 ControlTemplate 对象,并在这个对象中增加了一个 Border,在 Border 中又增加了一个 TextBlock 子元素,于是 Control 就有了这样一件新衣服。
在这里,我们要明白一个要点是,Control 类的 Template 属性是 ControlTemplate 类型的。所以上面的代码才必须这样写才可以
4.1.2 Control 的事件
在这一小节里,您只要能明白 Template 的概念就行了。除了这个属性,Control 类还提供了两个事件,它们分别是 PreviewMouseDoubleClick 和 MouseDoubleClick。
| 事件名称 | 说明 |
|---|---|
PreviewMouseDoubleClick |
表示鼠标双击或多次单击时触发的事件 |
MouseDoubleClick |
表示鼠标双击或多次单击时触发的事件 |
以 Preview 开头的事件叫隧道事件或预览事件,而 MouseDoubleClick 没有以 Preview 开头,所以它叫冒泡事件。
隧道事件和冒泡事件
WPF的前端代码其实是一棵树,当我们在某个目标控件上进行鼠标操作时,所引发的事件有两个方向,一是从
Window根节点一直路由到目标控件上,看起来就好像是从外面一直沿着这棵树路由引发至里面,这就像我们开车进入隧道一样,所以Preview开头的事件叫隧道事件。冒泡事件事件的路由方向相反,是从目标控件位置开始,一直路由引发至最外层的
Window窗体。
通常,我们并不会直接实例化 Control 基类,确实这样做对我们实际帮助不大,我们要使用的——是它膝下各个子控件,而在这众多的子控件中,Button 是最常见最简单的控件了。不过,Button 的基类是 ButtonBase ,ButtonBase 的基类是 ContentControl ,ContentControl 的基类是 Control。如果我们要探讨 Button 控件,看样子必须要先介绍一下 ContentControl 基类和 ButtonBase 基类才行
4.2 ContentControl 类(内容控件)
ContentControl 在实际开发中非常常见,它是一个神奇的类,因为它有一个 Content 属性,关键是这个属性的类型是 object。也就是说,本质上,它可以接收任意引用类型的实例。
通常情况下,Content 属性接收 UI 控件。因为,ContentControl 控件最终会把 Content 属性里面的内容显示到界面上。
ContentControl 的定义:
public class ContentControl : Control, IAddChild
{
    public static readonly DependencyProperty ContentProperty;
    public static readonly DependencyProperty HasContentProperty;
    public static readonly DependencyProperty ContentTemplateProperty;
    public static readonly DependencyProperty ContentTemplateSelectorProperty;
    public static readonly DependencyProperty ContentStringFormatProperty;

    public ContentControl();

    public DataTemplate ContentTemplate { get; set; }	// 类型为 DataTemplate,决定了数据的呈现外观
    public bool HasContent { get; }
    public object Content { get; set; }
    public string ContentStringFormat { get; set; }
    public DataTemplateSelector ContentTemplateSelector { get; set; }
    protected internal override IEnumerator LogicalChildren { get; }

    public virtual bool ShouldSerializeContent();
    protected virtual void AddChild(object value);
    protected virtual void AddText(string text);
    protected virtual void OnContentChanged(object oldContent, object newContent);
    protected virtual void OnContentStringFormatChanged(string oldContentStringFormat, string newContentStringFormat);
    protected virtual void OnContentTemplateChanged(DataTemplate oldContentTemplate, DataTemplate newContentTemplate);
    protected virtual void OnContentTemplateSelectorChanged(DataTemplateSelector oldContentTemplateSelector, DataTemplateSelector newContentTemplateSelector);

}
那么,我如果非要把其它类型的对象(比如字符串)强行塞给 Content 属性呢?,下面是一个简单的示例:
<Window x:Class="ContentControlSample.MainWindow"
        xmlns="http://schemas.microsoft.com/winfx/2006/xaml/presentation"
        xmlns:x="http://schemas.microsoft.com/winfx/2006/xaml"
        xmlns:d="http://schemas.microsoft.com/expression/blend/2008"
        xmlns:mc="http://schemas.openxmlformats.org/markup-compatibility/2006"
        xmlns:local="clr-namespace:ContentControlSample"
        mc:Ignorable="d"
        Title="ContentControlSample" Height="350" Width="500">
    <ContentControl FontSize="32" HorizontalAlignment="Center" VerticalAlignment="Center" Foreground="CornflowerBlue" Background="LightCoral">
        <ContentControl.Content>
            Hello, WPF!
        </ContentControl.Content>
    </ContentControl>
</Window>
图示:
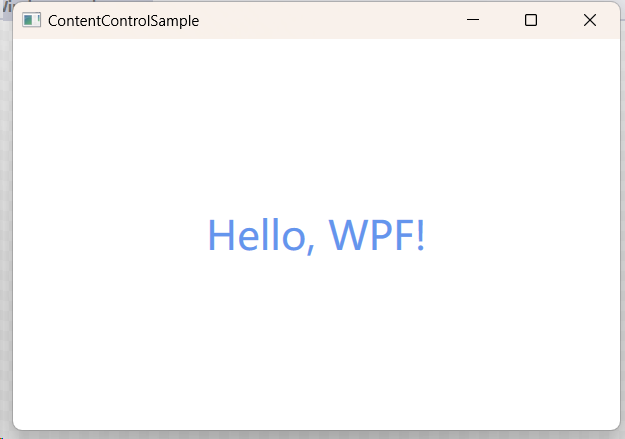
如上所示,我们在 ContentControl 内部只写了一句“Hello, WPF!”,并设置了 Foreground 和 FontSize 等属性,居然不但没报错,还将字符串显示出来了。
注意:
别忘记了
ContentControl继承于Control基类,所以我们的ContentControl也可以设置Foreground和FontSize。
4.2.1 ContentTemplate 模板
这个属性表示获取或设置用来显示的内容的数据模板,说白了,就是决定 “Hello, WPF!” 这几个字的样式,如果没有设置数据模板,它将以默认的数据模板来显示这几个字。接下来,我们演示一下这个属性的用法,并简要说明其中的关系。
<Window x:Class="ContentTemplateSample.MainWindow"
        xmlns="http://schemas.microsoft.com/winfx/2006/xaml/presentation"
        xmlns:x="http://schemas.microsoft.com/winfx/2006/xaml"
        xmlns:d="http://schemas.microsoft.com/expression/blend/2008"
        xmlns:mc="http://schemas.openxmlformats.org/markup-compatibility/2006"
        xmlns:local="clr-namespace:ContentTemplateSample"
        mc:Ignorable="d"
        Title="ContentTemplateSample" Height="350" Width="500">
    <ContentControl Background="AliceBlue" FontSize="42" HorizontalAlignment="Center" VerticalAlignment="Center">
        <!--使用 ContentControl 的 ContentTemplate 属性来设置内容的样式-->
        <ContentControl.ContentTemplate>
            <DataTemplate>
                <!-- Text="{Binding}" 绑定了 ContentControl.Content 中的字符串-->
                <TextBlock Text="{Binding}" Foreground="LightCoral" Background="Bisque" FontSize="32"></TextBlock>
            </DataTemplate>
        </ContentControl.ContentTemplate>
        <ContentControl.Content>
            Hello, WPF!
        </ContentControl.Content>
    </ContentControl>
</Window>
图示:
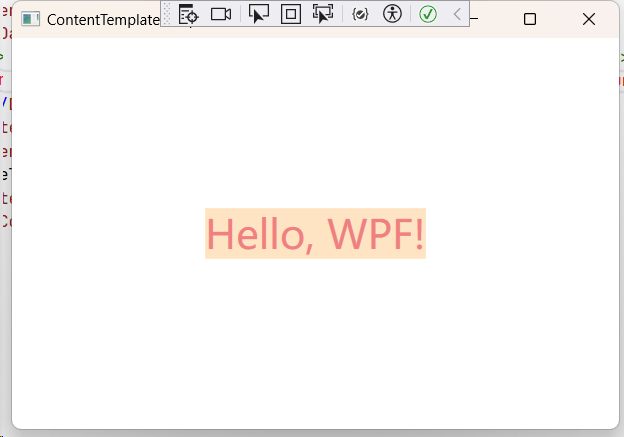
ContentControl 类的 ContentTemplate 属性是 DataTemplate 类型,所以我们在 XAML 中实例化了一个 DataTemplate(数据模板)对象,并在其中增加了一个 TextBlock 控件,将 TextBlock 控件的 Text 属性写成了 Binding 形式,并设置了字体颜色和大小。
关于数据模板中的 TextBlock 控件的 Text 属性写成了 Binding (绑定)形式,这是指将 ContentControl 控件的 Content 属性绑定到 TextBlock 控件的 Text 属性中,写成伪代码就是:
TextBlock.Text = ContentControl.Content
ContentControl控件能不能容纳多个子控件?
不能!因为
ContentControl控件只能显示Content属性里面的内容,而Content属性是object,只能接收一个对象。
HasContent属性:表示ContentControl是否有内容。
ContentStringFormat属性:获取或设置ContentControl要显示字符串的格式。
ContentTemplateSelector属性:模板选择器, 我们会在模板一章节介绍。
4.2.2 常规用法
下面是 ContentControl 的一种常规使用方法,我在 ContentControl 控件中添加了一个按钮,并设置了按钮的样式。
<Window x:Class="ContentControlSample1.MainWindow"
        xmlns="http://schemas.microsoft.com/winfx/2006/xaml/presentation"
        xmlns:x="http://schemas.microsoft.com/winfx/2006/xaml"
        xmlns:d="http://schemas.microsoft.com/expression/blend/2008"
        xmlns:mc="http://schemas.openxmlformats.org/markup-compatibility/2006"
        xmlns:local="clr-namespace:ContentControlSample1"
        mc:Ignorable="d"
        Title="ContentControlSample1" Height="250" Width="400">
    <!--ContentControl 设置字体颜色不起作用-->
    <ContentControl Width="200" Height="100" Foreground="AliceBlue" FontSize="32">
        <Button Content="Click Me!" Foreground="LightCoral" FontSize="36"></Button>
    </ContentControl>
</Window>
图示:
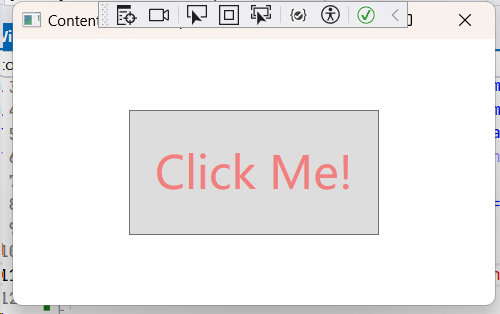
需要注意一点的是:Button 的字号会随着 ContentControl 的设置而变化(如果 ContentControl 和 Button 都有设置 FontSize,后者的相同设置会覆盖前者的),但是字体颜色不会随着 ContentControl 的设置而变化。
4.3 ButtonBase 基类
按钮,几乎每个具有UI界面的软件都会有它的身影,而按钮的形式也是有多种多样的,我们在这里简单的罗列一下。
| 按钮名称 | 说明 |
|---|---|
Button |
普通按钮 |
CheckBox |
复选框按钮 |
RadioButton |
单选框按钮 |
ToggleButton |
是 CheckBox、RadioButton 的基类,表示可以切换状态 |
RepeatButton |
重复,表示从按下到弹出过程中重复引发Click事件 |
GridViewColumnHeader |
表示 GridViewColumn 的列标题,其实它也是一个按钮 |
DataGridColumnHeader |
表示 DataGrid 列标题,也是一个按钮 |
DataGridRowHeader |
表示 DataGrid 行标题,也是一个按钮 |
上面便是WPF中的按钮体系,这些按钮都有一个共同的基类 ButtonBase,所以,我们了解清楚了 ButtonBase ,对于学习上面这些按钮,有莫大的帮助。
4.3.1 ButtonBase 概述
ButtonBase 是一个抽象类,所以,它不能被实例化。我们只能在它的子类中去使用它提供的一些属性、事件或方法成员。它只有一个事件,就是 Click 单击事件,因为鼠标双击事件在它的 Control 基类就有了(MouseDoubleClick 和 PreviewMouseDoubleClick 事件)。
另外,它还有一个非常厉害的 Command 属性,这个属性其实是一个接口,作用是在单击按钮时,去执行这个 Command 属性所指定的一个具体命令。
这个 Command 命令是 WPF 命令系统里面的角色,也是 WPF 优于 Winform 的一个具体表现,Command 命令也是 MVVM 模式中最重要的一环。会在后面专门探讨 WPF 的命令系统。
ButtonBase 的结构定义:
// 抽象类 ButtonBase 不能被实例化
public abstract class ButtonBase : ContentControl, ICommandSource
{
    public static readonly RoutedEvent ClickEvent;	// ClickEvent:是RoutedEvent的实例
    public static readonly DependencyProperty CommandProperty;
    public static readonly DependencyProperty CommandParameterProperty;
    public static readonly DependencyProperty CommandTargetProperty;
    public static readonly DependencyProperty IsPressedProperty;
    public static readonly DependencyProperty ClickModeProperty;

    protected ButtonBase();

    public IInputElement CommandTarget { get; set; }
    public object CommandParameter { get; set; }
    public ICommand Command { get; set; }
    public bool IsPressed { get; protected set; }
    public ClickMode ClickMode { get; set; }
    protected override bool IsEnabledCore { get; }

    public event RoutedEventHandler Click;

    protected override void OnAccessKey(AccessKeyEventArgs e);
    protected virtual void OnClick();
    protected virtual void OnIsPressedChanged(DependencyPropertyChangedEventArgs e);
    protected override void OnKeyDown(KeyEventArgs e);
    protected override void OnKeyUp(KeyEventArgs e);
    protected override void OnLostKeyboardFocus(KeyboardFocusChangedEventArgs e);
    protected override void OnLostMouseCapture(MouseEventArgs e);
    protected override void OnMouseEnter(MouseEventArgs e);
    protected override void OnMouseLeave(MouseEventArgs e);
    protected override void OnMouseLeftButtonDown(MouseButtonEventArgs e);
    protected override void OnMouseLeftButtonUp(MouseButtonEventArgs e);
    protected override void OnMouseMove(MouseEventArgs e);
    protected internal override void OnRenderSizeChanged(SizeChangedInfo sizeInfo);

}
注意:
RoutedEvent是 WPF(Windows Presentation Foundation)中的一个类,表示一个路由事件。路由事件是一种允许事件在元素树中的多个元素之间传播的事件类型。这允许在事件的冒泡或隧道阶段中处理事件。
4.3.2 ButtonBase 的属性与方法
ButtonBase 的属性
| 属性名称 | 说明 |
|---|---|
CommandTarget |
获取或设置要对其引发指定的命令的元素。 |
CommandParameter |
获取或设置一个命令参数,这个参数是传递给 Command 属性所指向的命令。 |
Command |
获取或设置要在按此按钮时调用的命令。 |
IsPressed |
获取当前按钮是否处于激活状态。 |
ClickMode |
获取或设置按钮的单击模式 |
IsEnabledCore |
获取的值 System.Windows.ContentElement.IsEnabled 属性。 |
ButtonBase 的方法
ButtonBase 还提供了两个虚方法,分别是 OnClick 和 OnIsPressedChanged。说明这两个方法也是可以重写的,OnClick 表示在按钮单击时执行的方法。
4.4 Button 控件
Button 控件是我们使用的最多的控件之一。
Button 因为继承了 ButtonBase,而 ButtonBase 又继承了 ContentControl,所以, Button 可以通过设置 Content 属性来设置要显示的内容。
如:
<Button Content="Hello, WPF!"></Button>
我们使用 Button 的时机,通常是鼠标点击事件需要有响应操作时,所以,Button 的 Click 事件是最好的选择。接下来,我们先看看它的结构定义:
public class Button : ButtonBase
{
    public static readonly DependencyProperty IsDefaultProperty;
    public static readonly DependencyProperty IsCancelProperty;
    public static readonly DependencyProperty IsDefaultedProperty;

    public Button();

    public bool IsDefault { get; set; }
    public bool IsCancel { get; set; }
    public bool IsDefaulted { get; }

    protected override void OnClick();
    protected override AutomationPeer OnCreateAutomationPeer();
}
属性分析
| 属性 | 说明 |
|---|---|
IsDefault |
按 ENTER 键时调用的默认按钮。 |
IsCancel |
用户可以通过按 ESC 键来激活取消按钮。 |
IsDefaulted |
获取按钮是否为按 ENTER 键时调用的默认按钮。 |
我们通过一个例子来分析 Button 控件的用法与特点。
页面示例:
MainWindow.xaml
<Window x:Class="ButtonBaseSample.MainWindow"
        xmlns="http://schemas.microsoft.com/winfx/2006/xaml/presentation"
        xmlns:x="http://schemas.microsoft.com/winfx/2006/xaml"
        xmlns:d="http://schemas.microsoft.com/expression/blend/2008"
        xmlns:mc="http://schemas.openxmlformats.org/markup-compatibility/2006"
        xmlns:local="clr-namespace:ButtonBaseSample"
        mc:Ignorable="d"
        Title="ButtonBaseSample" Height="200" Width="350">
    <Grid Background="Transparent">
        <!--Content 来自于 ContentControl-->
        <Button x:Name="button1" Content="Exit" Width="100" Height="25" Click="button1_Click" IsCancel="True"></Button>
    </Grid>
</Window>
MainWindow.xaml.cs
using System.Text;
using System.Windows;
using System.Windows.Controls;
using System.Windows.Data;
using System.Windows.Documents;
using System.Windows.Input;
using System.Windows.Media;
using System.Windows.Media.Imaging;
using System.Windows.Navigation;
using System.Windows.Shapes;

namespace ButtonBaseSample
{
    /// <summary>
    /// Interaction logic for MainWindow.xaml
    /// </summary>
    public partial class MainWindow : Window
    {
        public MainWindow()
        {
            InitializeComponent();
        }

        private void button1_Click(object sender, RoutedEventArgs e)
        {
            this.Close();
        }
    }
}
界面:
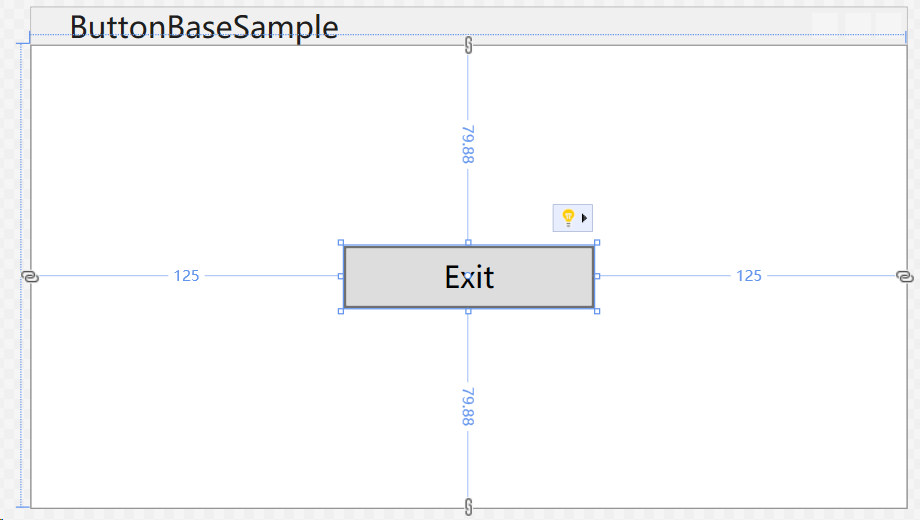
如上所示,我们在Window窗体中写了一个 Button 按钮,然后设置了一些属性,我们一一进行分析。
4.4.1 代码分析
x:Name 和 Name 的区别
Button 中第一个设置是 x:Name="button1",这里的 x 是一个命名空间,也就是:xmlns:x="http://schemas.microsoft.com/winfx/2006/xaml",Name 则是控件的名称。
请注意:由于 Button 继承了 FrameworkElement 类,而 FrameworkElement 类也有一个 Name 属性,但是这里设置的 x:Name="button1" 并不是引用了 FrameworkElement 类的Name 属性,而是指在 XAML 中为 Button 定义了一个叫 "button1" 的名称,并把这个 "button1" 映射到了 Button 的 Name 属性上,以便于我们在后端可以通过 "button1" 去引用这个按钮。
也就是说,如果某个控件本身也有一个 Name 属性,那么前端的 x:Name 就赋值给控件 Name 属性。
Content 属性
这是 ContentControl 控件的内容属性,用来设置 Button 的显示内容,除了是字符串,也可以设置为其它内容,比如一个图标、一个其它元素。
界面示例:
<Window x:Class="ButtonBaseSample.MainWindow"
        xmlns="http://schemas.microsoft.com/winfx/2006/xaml/presentation"
        xmlns:x="http://schemas.microsoft.com/winfx/2006/xaml"
        xmlns:d="http://schemas.microsoft.com/expression/blend/2008"
        xmlns:mc="http://schemas.openxmlformats.org/markup-compatibility/2006"
        xmlns:local="clr-namespace:ButtonBaseSample"
        mc:Ignorable="d"
        Title="ButtonBaseSample" Height="200" Width="350">
    <Grid Background="Transparent" ShowGridLines="True">
        <DockPanel Margin="10">
            <StackPanel Orientation="Horizontal" VerticalAlignment="Bottom" HorizontalAlignment="Right" DockPanel.Dock="Bottom" Margin="0 5 0 0">
                <Button x:Name="button1" Width="75" Height="25" Click="button1_Click" IsCancel="True" Margin="5 0">
                    <!--因为继承了 ContentControl,所以可以有单独的 Content 属性-->
                    <Button.Content>
                        <TextBlock Text="Close"></TextBlock>
                    </Button.Content>
                </Button>
                <!--Click 绑定后端的回调方法-->
                <Button x:Name="button2" Width="75" Height="25" IsDefault="True">
                    <!--因为继承了 ContentControl,所以可以有单独的 Content 属性-->
                    <Button.Content>
                        <TextBlock Text="Save"></TextBlock>
                    </Button.Content>
                </Button>
            </StackPanel>
            <Border CornerRadius="5" Background="AliceBlue" DockPanel.Dock="Top">
                <TextBlock DockPanel.Dock="Top"></TextBlock>
            </Border>
        </DockPanel>
    </Grid>
</Window>
图示:
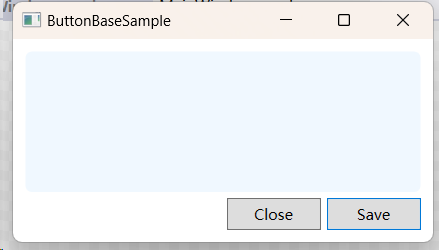
因为 button2 的 IsDefault=True ,所以默认 Save 按钮被激活。它的边缘是蓝色的。
4.5 ToggleButton 与选框
因为 ToggleButton 作为 CheckBox(复选框) 和 RadioButton(单选框)的基类,我们在学习 CheckBox 和 RadioButton 之前要先了解一下这个基类。
4.5.1 ToggleButton 基类
public class ToggleButton : ButtonBase
{
    public static readonly RoutedEvent CheckedEvent;
    public static readonly RoutedEvent UncheckedEvent;
    public static readonly RoutedEvent IndeterminateEvent;
    public static readonly DependencyProperty IsCheckedProperty;
    public static readonly DependencyProperty IsThreeStateProperty;

    public ToggleButton();

    public bool IsThreeState { get; set; }
    public bool? IsChecked { get; set; }

    public event RoutedEventHandler Checked;
    public event RoutedEventHandler Indeterminate;
    public event RoutedEventHandler Unchecked;

    public override string ToString();
    protected virtual void OnChecked(RoutedEventArgs e);
    protected override void OnClick();
    protected override AutomationPeer OnCreateAutomationPeer();
    protected virtual void OnIndeterminate(RoutedEventArgs e);
    protected virtual void OnUnchecked(RoutedEventArgs e);
    protected internal virtual void OnToggle();
}
ToggleButton基类提供了两个属性和三个事件
两个属性:
IsThreeState属性为true表示控件支持 3 个状态,IsChecked属性为true表示当前控件已被选中。
三个事件:
Checked事件表示选中时引发的事件,Unchecked事件表示从选中状态改为未选状态时引发的事件,Indeterminate事件表示不确定状态时引发的事件
4.5.2 CheckBox 复选框
CheckBox 继承于 ToggleButton,而 ToggleButton 才继承于 ButtonBase 基类。
CheckBox 控件的结构定义:
public class CheckBox : ToggleButton
{
    public CheckBox();

    protected override void OnAccessKey(AccessKeyEventArgs e);
    protected override AutomationPeer OnCreateAutomationPeer();
    protected override void OnKeyDown(KeyEventArgs e);

}
CheckBox 自身没有什么特别内容。一切都使用它的父类提供的属性、方法和事件。我们举例来说明它的用法。
示例代码:
MainWindow.xaml
<Window x:Class="CheckBoxSample.MainWindow"
        xmlns="http://schemas.microsoft.com/winfx/2006/xaml/presentation"
        xmlns:x="http://schemas.microsoft.com/winfx/2006/xaml"
        xmlns:d="http://schemas.microsoft.com/expression/blend/2008"
        xmlns:mc="http://schemas.openxmlformats.org/markup-compatibility/2006"
        xmlns:local="clr-namespace:CheckBoxSample"
        mc:Ignorable="d"
        Title="CheckBoxSample" Height="350" Width="500">
    <StackPanel Orientation="Vertical" Margin="5" HorizontalAlignment="Center" VerticalAlignment="Center">
        <TextBlock Text="今晚吃什么?" Margin="5"></TextBlock>
        <CheckBox x:Name="checkbox1" Content="胡萝卜" Margin="5"></CheckBox>
        <CheckBox x:Name="checkbox2" Content="水果" Margin="5"></CheckBox>
        <CheckBox x:Name="checkbox3" Content="香蕉" Margin="5"></CheckBox>
        <Button x:Name="button1" Content="查看菜单"  Click="button1_Click" Margin="5"></Button>
    </StackPanel>
</Window>
MainWindow.xaml.cs
using System.Text;
using System.Windows;
using System.Windows.Controls;
using System.Windows.Data;
using System.Windows.Documents;
using System.Windows.Input;
using System.Windows.Media;
using System.Windows.Media.Imaging;
using System.Windows.Navigation;
using System.Windows.Shapes;

namespace CheckBoxSample
{
    /// <summary>
    /// Interaction logic for MainWindow.xaml
    /// </summary>
    public partial class MainWindow : Window
    {
        public MainWindow()
        {
            InitializeComponent();
        }

        private void button1_Click(object sender, RoutedEventArgs e)
        {
            string order = String.Empty;
            if (this.checkbox1.IsChecked == true)
            {
                order += this.checkbox1.Content + " ";
            }
            if (this.checkbox2.IsChecked == true)
            {
                order += this.checkbox2.Content + " ";
            }
            if (this.checkbox3.IsChecked == true)
            {
                order += this.checkbox3.Content + " ";
            }

            if (!string.IsNullOrEmpty(order))
            {
                MessageBox.Show(order);
            }
        }
    }
}
图示:
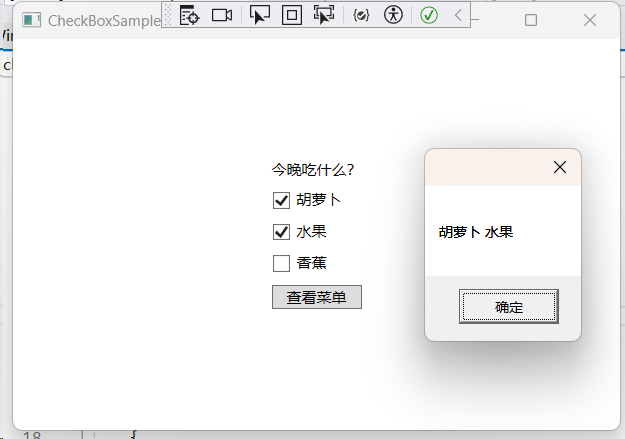
我们通过判断 CheckBox 的 IsChecked 属性,来获取前端用户的选择,这通常是 CheckBox 控件最常用的用法,由于 IsChecked 是一个依赖属性,它还可以参与绑定,形成 MVMM 的应用模式,待我们讲到数据绑定章节,还会进一步讲解控件属性的绑定应用。
4.5.3 RadioButton 单选框
RadioButton 也继承于 ToggleButton,作用是单项选择,所以被称为单选框。本质上,它依然是一个按钮,一旦被选中,不会清除,除非它”旁边“的单选框被选中。
public class RadioButton : ToggleButton
{
    public static readonly DependencyProperty GroupNameProperty;

    public RadioButton();

    public string GroupName { get; set; }

    protected override void OnAccessKey(AccessKeyEventArgs e);
    protected override void OnChecked(RoutedEventArgs e);
    protected override AutomationPeer OnCreateAutomationPeer();
    protected internal override void OnToggle();

}
这个控件有一个重要属性叫 GroupName —— 分组名称。默认值是一个空字符串。用来指定哪些RadioButton 之间是互相排斥的。
示例代码:
MainWindow.xaml
<Window x:Class="RadioButtonSample.MainWindow"
        xmlns="http://schemas.microsoft.com/winfx/2006/xaml/presentation"
        xmlns:x="http://schemas.microsoft.com/winfx/2006/xaml"
        xmlns:d="http://schemas.microsoft.com/expression/blend/2008"
        xmlns:mc="http://schemas.openxmlformats.org/markup-compatibility/2006"
        xmlns:local="clr-namespace:RadioButtonSample"
        mc:Ignorable="d"
        Title="RadioButtonSample" Height="350" Width="500">
    <StackPanel HorizontalAlignment="Center" VerticalAlignment="Center">
        <StackPanel Orientation="Horizontal" HorizontalAlignment="Center" VerticalAlignment="Center">
            <Border Background="#bbb" CornerRadius="5" Margin="5 0 0 0">
                <TextBlock Text="请任选其一:" Margin="5"></TextBlock>
            </Border>
            <RadioButton Margin="5" Content="鱼香茄子" x:Name="radioButton1"></RadioButton>
            <RadioButton Margin="5" Content="爆炒腰花" x:Name="radioButton2"></RadioButton>
            <RadioButton Margin="5" Content="烂肉粉丝" x:Name="radioButton3"></RadioButton>
        </StackPanel>
        <Button HorizontalAlignment="Left" x:Name="button1" Content="查看菜单" Padding="5" Margin="5" Click="button1_Click"></Button>
    </StackPanel>
</Window>
MainWindow.xaml.cs
using System.Text;
using System.Windows;
using System.Windows.Controls;
using System.Windows.Data;
using System.Windows.Documents;
using System.Windows.Input;
using System.Windows.Media;
using System.Windows.Media.Imaging;
using System.Windows.Navigation;
using System.Windows.Shapes;

namespace CheckBoxSample
{
    /// <summary>
    /// Interaction logic for MainWindow.xaml
    /// </summary>
    public partial class MainWindow : Window
    {
        public MainWindow()
        {
            InitializeComponent();
        }

        private void button1_Click(object sender, RoutedEventArgs e)
        {
            string order = String.Empty;
            if (this.checkbox1.IsChecked == true)
            {
                order += this.checkbox1.Content + " ";
            }
            if (this.checkbox2.IsChecked == true)
            {
                order += this.checkbox2.Content + " ";
            }
            if (this.checkbox3.IsChecked == true)
            {
                order += this.checkbox3.Content + " ";
            }

            if (!string.IsNullOrEmpty(order))
            {
                MessageBox.Show(order);
            }
        }
    }
}
图示:
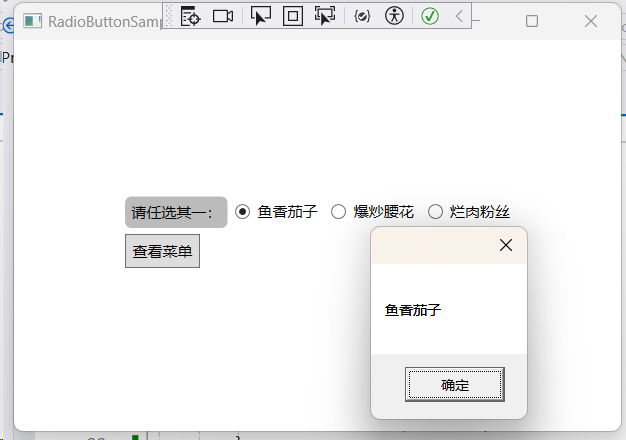
F5运行之后,我们会发现,无论我们怎么选,始终只有一个 RadioButton 按钮被选中。
如果我们希望 RadioButton 按分组进行单项选择,该怎么办呢?
我们可以使用 GroupName 分组属性,两两一组,让用户始终都只能选择一荤一素两个菜,请看代码。
MainWindow.xaml
<Window x:Class="RadioButtonGroupBySample.MainWindow"
        xmlns="http://schemas.microsoft.com/winfx/2006/xaml/presentation"
        xmlns:x="http://schemas.microsoft.com/winfx/2006/xaml"
        xmlns:d="http://schemas.microsoft.com/expression/blend/2008"
        xmlns:mc="http://schemas.openxmlformats.org/markup-compatibility/2006"
        xmlns:local="clr-namespace:RadioButtonGroupBySample"
        mc:Ignorable="d"
        Title="RadioButtonSample" Height="350" Width="500">
    <StackPanel Orientation="Vertical" VerticalAlignment="Center" HorizontalAlignment="Center">
        <TextBlock Text="请在下列菜品组别中各选一项进行组合:" Margin="5"></TextBlock>
        <!--组1-->
        <Border Background="#eee" CornerRadius="5">
            <TextBlock Text="组一:" Margin="5"></TextBlock>
        </Border>
        <RadioButton x:Name="rb1" Content="凉拌黄瓜" Margin="5" GroupName="素菜"></RadioButton>
        <RadioButton x:Name="rb2" Content="凉拌木耳" Margin="5" GroupName="素菜"></RadioButton>
        <RadioButton x:Name="rb3" Content="扣三丝" Margin="5" GroupName="素菜"></RadioButton>

        <!--组2-->
        <Border Background="#eee" CornerRadius="5">
            <TextBlock Text="组二:" Margin="5"></TextBlock>
        </Border>

        <RadioButton x:Name="rb4" Content="红烧牛肉" Margin="5" GroupName="荤菜"></RadioButton>
        <RadioButton x:Name="rb5" Content="酸菜鱼" Margin="5" GroupName="荤菜"></RadioButton>
        <RadioButton x:Name="rb6" Content="可乐鸡翅" Margin="5" GroupName="荤菜"></RadioButton>

        <Button x:Name="button1" Content="已选菜品" Click="button1_Click" HorizontalAlignment="Left" Margin="5"></Button>
    </StackPanel>
</Window>
MainWindow.xaml.cs
using System.Text;
using System.Windows;
using System.Windows.Controls;
using System.Windows.Data;
using System.Windows.Documents;
using System.Windows.Input;
using System.Windows.Media;
using System.Windows.Media.Imaging;
using System.Windows.Navigation;
using System.Windows.Shapes;

namespace RadioButtonGroupBySample
{
    /// <summary>
    /// Interaction logic for MainWindow.xaml
    /// </summary>
    public partial class MainWindow : Window
    {
        public MainWindow()
        {
            InitializeComponent();
        }

        private void button1_Click(object sender, RoutedEventArgs e)
        {
            string order = string.Empty;
            if (this.rb1.IsChecked == true)
            {
                order += this.rb1.Content + " ";
            }
            if (this.rb2.IsChecked == true)
            {
                order += this.rb2.Content + " ";
            }
            if (this.rb3.IsChecked == true)
            {
                order += this.rb3.Content + " ";
            }
            if (this.rb4.IsChecked == true)
            {
                order += this.rb4.Content + " ";
            }
            if (this.rb5.IsChecked == true)
            {
                order += this.rb5.Content + " ";
            }
            if (this.rb6.IsChecked == true)
            {
                order += this.rb6.Content + " ";
            }

            if (!string.IsNullOrEmpty(order))
            {
                MessageBox.Show(order);
            }
        }
    }
}
图示:
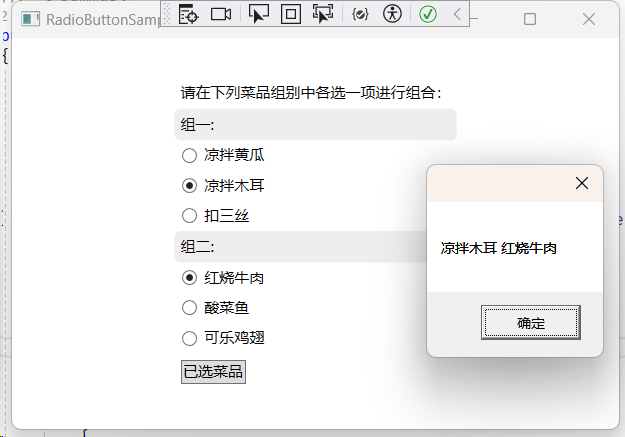
此时我们发现,组内只能多选一,但是不同组别可以组合起来。
4.5.4 RepeatButton 重复按钮
Repeatbutton 顾名思义,重复执行的按钮。就是当按钮被按下时,所订阅的回调函数会不断被执行。那么,多长时间执行一次?
public class RepeatButton : ButtonBase
{
    public static readonly DependencyProperty DelayProperty;
    public static readonly DependencyProperty IntervalProperty;

    public RepeatButton();

    public int Delay { get; set; }
    public int Interval { get; set; }

    protected override void OnClick();
    protected override AutomationPeer OnCreateAutomationPeer();
    protected override void OnKeyDown(KeyEventArgs e);
    protected override void OnKeyUp(KeyEventArgs e);
    protected override void OnLostMouseCapture(MouseEventArgs e);
    protected override void OnMouseEnter(MouseEventArgs e);
    protected override void OnMouseLeave(MouseEventArgs e);
    protected override void OnMouseLeftButtonDown(MouseButtonEventArgs e);
    protected override void OnMouseLeftButtonUp(MouseButtonEventArgs e);

}
属性分析:
RepeatButton 自身提供了两个整型属性,分别是 Delay 和 Interval 。
Delay属性:表示延时重复执行的毫秒数。就是说,RepeatButton被按下后会立即执行一次回调函数,如果您不松开鼠标,在等待Delay毫秒后,就开始进行重复执行阶段。Interval属性:表示重复执行回调函数的时间间隔毫秒数。
界面:
<Window x:Class="RepeatButtonSample.MainWindow"
        xmlns="http://schemas.microsoft.com/winfx/2006/xaml/presentation"
        xmlns:x="http://schemas.microsoft.com/winfx/2006/xaml"
        xmlns:d="http://schemas.microsoft.com/expression/blend/2008"
        xmlns:mc="http://schemas.openxmlformats.org/markup-compatibility/2006"
        xmlns:local="clr-namespace:RepeatButtonSample"
        mc:Ignorable="d"
        Title="RepeatButtonSample" Height="350" Width="500">
    <StackPanel Orientation="Horizontal" HorizontalAlignment="Center" VerticalAlignment="Center">
        <TextBlock Text="程序准备完毕" Margin="5 7 5 5"></TextBlock>
        <RepeatButton x:Name="button1" Content="开始挤牙膏" Delay="1000" Interval="500" Click="button1_Click" Margin="5"></RepeatButton>
    </StackPanel>
</Window>
后台:
using System.Diagnostics.Metrics;
using System.Text;
using System.Windows;
using System.Windows.Controls;
using System.Windows.Data;
using System.Windows.Documents;
using System.Windows.Input;
using System.Windows.Media;
using System.Windows.Media.Imaging;
using System.Windows.Navigation;
using System.Windows.Shapes;

namespace RepeatButtonSample
{
    /// <summary>
    /// Interaction logic for MainWindow.xaml
    /// </summary>
    public partial class MainWindow : Window
    {
        public MainWindow()
        {
            InitializeComponent();
        }

        private int counter = 0;
        private void button1_Click(object sender, RoutedEventArgs e)
        {
            Console.WriteLine($"重复时间:{DateTime.Now.ToString()} {DateTime.Now.Millisecond}, 重复次数:{counter++}");
        }
    }
}
界面图示:
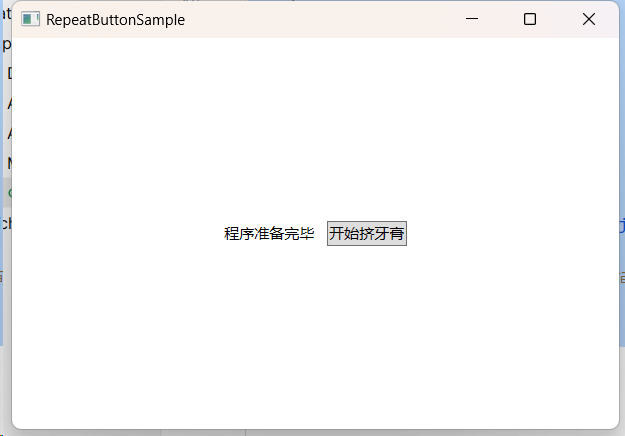
输出:
重复时间:2024-02-04 16:37:57 733, 重复次数:0
重复时间:2024-02-04 16:37:58 741, 重复次数:1
重复时间:2024-02-04 16:37:59 241, 重复次数:2
重复时间:2024-02-04 16:37:59 742, 重复次数:3
重复时间:2024-02-04 16:38:00 242, 重复次数:4
重复时间:2024-02-04 16:38:00 744, 重复次数:5
重复时间:2024-02-04 16:38:01 244, 重复次数:6
重复时间:2024-02-04 16:38:01 735, 重复次数:7
重复时间:2024-02-04 16:38:02 243, 重复次数:8
可以看到,长按 开始挤牙膏 按键之后,第一次打印和第二次打印之间相差了 1000ms ,之后每次打印之间相差了 500ms ,这是因为 Interval 属性被设置为500。
4.6 文本控件
4.6.1 Label 控件
Label 控件继承于 ContentControl 控件,它是一个文本标签,如果想要设置它的内容,需要使用 Content 属性。
界面:
MainWindow.xaml
<Window x:Class="LabelSample.MainWindow"
        xmlns="http://schemas.microsoft.com/winfx/2006/xaml/presentation"
        xmlns:x="http://schemas.microsoft.com/winfx/2006/xaml"
        xmlns:d="http://schemas.microsoft.com/expression/blend/2008"
        xmlns:mc="http://schemas.openxmlformats.org/markup-compatibility/2006"
        xmlns:local="clr-namespace:LabelSample"
        mc:Ignorable="d"
        Title="MainWindow" Height="350" Width="500">
    <StackPanel Orientation="Horizontal" HorizontalAlignment="Center" VerticalAlignment="Center" Margin="0 5 0 0">
        <Label Content="这是一个 Label 标签" />
        <Label>
            <Label.Content>
                <Button Content="确定" x:Name="confirmButton" Click="confirmButton_Click"></Button>
            </Label.Content>
        </Label>
    </StackPanel>
</Window>
MainWindow.xaml.cs
using System.Text;
using System.Windows;
using System.Windows.Controls;
using System.Windows.Data;
using System.Windows.Documents;
using System.Windows.Input;
using System.Windows.Media;
using System.Windows.Media.Imaging;
using System.Windows.Navigation;
using System.Windows.Shapes;

namespace LabelSample;

/// <summary>
/// Interaction logic for MainWindow.xaml
/// </summary>
public partial class MainWindow : Window
{
    public MainWindow()
    {
        InitializeComponent();
        // this.confirmButton.Click += (sender, args) => { this.Close(); };
    }

    private void confirmButton_Click(object sender, RoutedEventArgs e)
    {
        this.Close();
    }
}
界面:
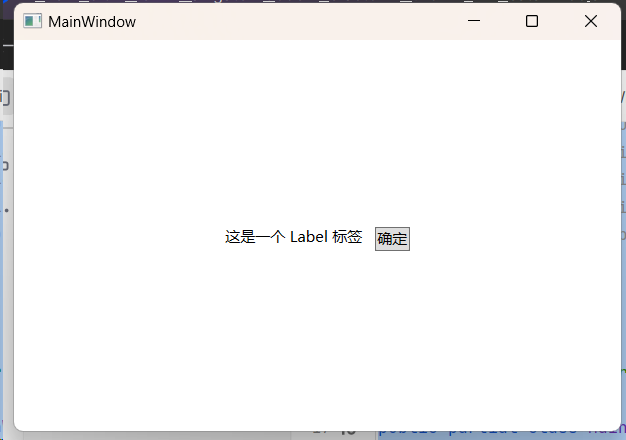
通常情况下,我们的 Label 只是用来显示一段文字,很少在 Content里面编写其它控件代码。如果要编写其它控件代码以实现更复杂的自定义控件效果,我们建议使用 UserControl 用户控件。
对于文本的显示,除了可以在 Label 中显示,我们还有一个控件也可以实现,那就是 TextBlock 文字块。而且,TextBlock 控件直接从 FrameworkElement 基类继承而来,效率比 Label 标签更高哦。
4.6.2 TextBlock 文字块控件
TextBlock 是专业处理文本显示的控件,在功能上比 Label 更全面。先看定义:
public class TextBlock : FrameworkElement, IContentHost, IAddChildInternal, IAddChild, IServiceProvider
{
    public static readonly DependencyProperty BaselineOffsetProperty;
    public static readonly DependencyProperty IsHyphenationEnabledProperty;
    public static readonly DependencyProperty TextWrappingProperty;
    public static readonly DependencyProperty TextAlignmentProperty;
    public static readonly DependencyProperty PaddingProperty;
    public static readonly DependencyProperty LineStackingStrategyProperty;
    public static readonly DependencyProperty LineHeightProperty;
    public static readonly DependencyProperty TextEffectsProperty;
    public static readonly DependencyProperty TextDecorationsProperty;
    public static readonly DependencyProperty TextTrimmingProperty;
    public static readonly DependencyProperty ForegroundProperty;
    public static readonly DependencyProperty FontSizeProperty;
    public static readonly DependencyProperty FontStretchProperty;
    public static readonly DependencyProperty FontWeightProperty;
    public static readonly DependencyProperty FontStyleProperty;
    public static readonly DependencyProperty FontFamilyProperty;
    public static readonly DependencyProperty TextProperty;
    public static readonly DependencyProperty BackgroundProperty;

    public TextBlock();
    public TextBlock(Inline inline);

    public FontWeight FontWeight { get; set; }
    public FontStyle FontStyle { get; set; }
    public FontFamily FontFamily { get; set; }
    public string Text { get; set; }
    public TextPointer ContentEnd { get; }
    public Typography Typography { get; }
    public LineBreakCondition BreakAfter { get; }
    public LineBreakCondition BreakBefore { get; }
    public FontStretch FontStretch { get; set; }
    public double BaselineOffset { get; set; }
    public double FontSize { get; set; }
    public TextWrapping TextWrapping { get; set; }
    public Brush Background { get; set; }
    public TextDecorationCollection TextDecorations { get; set; }
    public TextEffectCollection TextEffects { get; set; }
    public double LineHeight { get; set; }
    public LineStackingStrategy LineStackingStrategy { get; set; }
    public Thickness Padding { get; set; }
    public TextAlignment TextAlignment { get; set; }
    public TextTrimming TextTrimming { get; set; }
    public TextPointer ContentStart { get; }
    public bool IsHyphenationEnabled { get; set; }
    public Brush Foreground { get; set; }
    public InlineCollection Inlines { get; }
    protected virtual IEnumerator<IInputElement> HostedElementsCore { get; }
    protected override int VisualChildrenCount { get; }
    protected internal override IEnumerator LogicalChildren { get; }

    public static double GetBaselineOffset(DependencyObject element);
    public static FontFamily GetFontFamily(DependencyObject element);
    public static double GetFontSize(DependencyObject element);
    public static FontStretch GetFontStretch(DependencyObject element);
    public static FontStyle GetFontStyle(DependencyObject element);
    public static FontWeight GetFontWeight(DependencyObject element);
    public static Brush GetForeground(DependencyObject element);
    public static double GetLineHeight(DependencyObject element);
    public static LineStackingStrategy GetLineStackingStrategy(DependencyObject element);
    public static TextAlignment GetTextAlignment(DependencyObject element);
    public static void SetBaselineOffset(DependencyObject element, double value);
    public static void SetFontFamily(DependencyObject element, FontFamily value);
    public static void SetFontSize(DependencyObject element, double value);
    public static void SetFontStretch(DependencyObject element, FontStretch value);
    public static void SetFontStyle(DependencyObject element, FontStyle value);
    public static void SetFontWeight(DependencyObject element, FontWeight value);
    public static void SetForeground(DependencyObject element, Brush value);
    public static void SetLineHeight(DependencyObject element, double value);
    public static void SetLineStackingStrategy(DependencyObject element, LineStackingStrategy value);
    public static void SetTextAlignment(DependencyObject element, TextAlignment value);
    public TextPointer GetPositionFromPoint(Point point, bool snapToText);
    public bool ShouldSerializeBaselineOffset();
    public bool ShouldSerializeInlines(XamlDesignerSerializationManager manager);
    public bool ShouldSerializeText();
    protected sealed override Size ArrangeOverride(Size arrangeSize);
    protected virtual ReadOnlyCollection<Rect> GetRectanglesCore(ContentElement child);
    protected override Visual GetVisualChild(int index);
    protected sealed override HitTestResult HitTestCore(PointHitTestParameters hitTestParameters);
    protected virtual IInputElement InputHitTestCore(Point point);
    protected sealed override Size MeasureOverride(Size constraint);
    protected virtual void OnChildDesiredSizeChangedCore(UIElement child);
    protected override AutomationPeer OnCreateAutomationPeer();
    protected sealed override void OnPropertyChanged(DependencyPropertyChangedEventArgs e);
    protected sealed override void OnRender(DrawingContext ctx);

}
TextBlock 提供了非常丰富的文本相关的属性。
| 属性 | 说明 |
|---|---|
FontWeight |
获取或设置 TextBlock 的字体粗细 |
FontStyle |
获取或设置 TextBlock 的字体样式,如斜体字体 |
FontFamily |
获取或设置 TextBlock 的字体系列,如微软雅黑 |
Text |
获取或设置 TextBlock 的字体内容。 |
ContentEnd |
表示获取 TextBlock 内容的最末尾的 TextPointer 对象 |
Typography |
获取此元素的内容当前有效的版式变体。 |
FontStretch |
获取或设置 TextBlock 的常用字体拉伸特征。 |
BaselineOffset |
获取或设置文本的每个行相对于基线的偏移量。 |
FontSize |
获取或设置 TextBlock 的字号 |
TextWrapping |
获取或设置 TextBlock 的文字的换行方式 |
Background |
获取或设置 TextBlock 控件的背景颜色(画刷) |
TextEffects |
获取或设置要应用于此元素中的文本内容的效果。 |
LineHeight |
获取或设置各行内容的高度。 |
Padding |
指示内容区域的边界之间填充空间的宽度 |
TextAlignment |
指示文本内容的水平对齐方式。 |
TextTrimming |
获取或设置在内容超出内容区域时要采用的文本剪裁行为。 |
Foreground |
获取或设置文本内容的字体颜色(画刷) |
Inlines |
这个属性是一个集合,其中的元素表示内联流内容元素,简单点说,一行文本可以看成是一个 Inline 元素,而 TextBlock 可以接受多个 Inline。Run 继承于 Inline ,实际使用中,我们会创建多个 Run 实例,可以单独为每个 Run 对象设置字体字号颜色等等。 |
ContentStart |
表示获取 TextBlock 内容的最开始的 TextPointer 对象 |
接下来, 我们将上面常用的属性在例子中得以体现。
<Window x:Class="TextBlockSample.MainWindow"
        xmlns="http://schemas.microsoft.com/winfx/2006/xaml/presentation"
        xmlns:x="http://schemas.microsoft.com/winfx/2006/xaml"
        xmlns:d="http://schemas.microsoft.com/expression/blend/2008"
        xmlns:mc="http://schemas.openxmlformats.org/markup-compatibility/2006"
        xmlns:local="clr-namespace:TextBlockSample"
        mc:Ignorable="d"
        Title="TextBlockSample" Height="350" Width="500">
    <WrapPanel>
        <TextBlock Text="这是一个 TextBlock 文本框" Margin="5"></TextBlock>
        <TextBlock Text="粗体文字" FontWeight="Bold" Margin="5"></TextBlock>
        <TextBlock Text="细体文字" FontWeight="Light" Margin="5"></TextBlock>
        <TextBlock Text="斜体文字" FontStyle="Italic" Margin="5"></TextBlock>
        <TextBlock Text="微软雅黑" FontFamily="Microsoft YaHei UI" Margin="5"></TextBlock>
        <TextBlock Text="更纱黑体" FontFamily="Sarasa Term SC Nerd" Margin="5"></TextBlock>
        <TextBlock Text="大号字体" FontSize="30" Margin="5"></TextBlock>
        <TextBlock Text="红色字体" Foreground="Red" Margin="5"></TextBlock>
        <TextBlock Text="带底色的文字" Background="#bbb" Foreground="Yellow" Margin="5"></TextBlock>
        <TextBlock Text="内间距文字" Background="#bbb" Foreground="Yellow" Padding="10" Margin="5"></TextBlock>
        <TextBlock Background="LightGray" Height="25" Margin="5">
            <Run Foreground="Yellow" Text="这行文字"></Run>
            <Run Foreground="Red" Text="由三部分"></Run>
            <Run Foreground="Blue" Text="组成"></Run>
        </TextBlock>
        <Grid Width="150" Height="100" Background="LightGoldenrodYellow">
            <TextBlock Text="这段文本体现了文字的文本换行属性TextWrapping" TextWrapping="Wrap" Margin="10" FontFamily="Sarasa Term SC Nerd"></TextBlock>
        </Grid>

        <Grid>
            <TextBlock x:Name="textBlock"
                       Width="320"
                       Height="100"
                       FontSize="15"
                       FontFamily="Microsoft YaHei UI"
                       FontWeight="Black"
                       FontStretch="Condensed"
                       Foreground="#ddd"
                       Background="Teal"
                       TextAlignment="Center"
                       TextWrapping="Wrap"
                       TextTrimming="CharacterEllipsis"
                       Margin="5" Padding="10"
                       HorizontalAlignment="Left"
                       VerticalAlignment="Center"
                       LineHeight="30"
                       ToolTip="佚名">
                <Run Foreground="#CDB632" TextDecorations="Underline">新的生命要是生长,它的种子须是死的。</Run>
                <Run Text="一壶浊酒喜相逢。古今多少事,都付笑谈中。"></Run>
            </TextBlock>
        </Grid>
    </WrapPanel>
</Window>
图示:
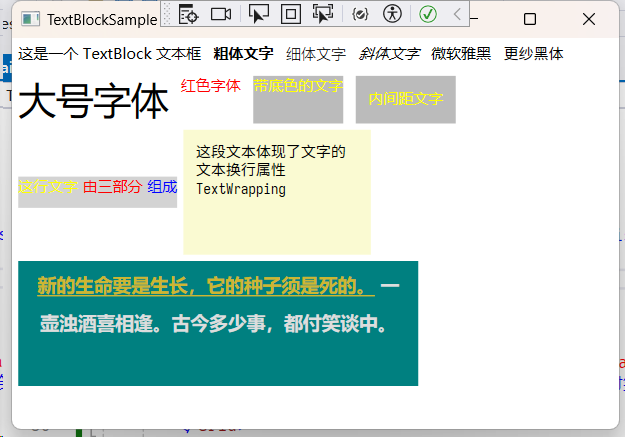
TextBlock 大多数的属性应用都比较简单,容易理解。
Inlines 属性是一个比较强大的属性,深入理解后,可以实现意想不到的效果。
TextEffects 也是一个非常强大的属性,这需要掌握 WPF 的动画、触发器、关键帧等知识,才能实现文本的动画特效。我们将在学完动画后,再回头探讨这些内容。
与文本相关的还有两个输入控件,即 TextBox 和 PasswordBox。
4.6.3 TextBox 文本框控件
几乎所有的文本、数字、符号的输入都是用 TextBox 文本框来完成的。
TextBox 用来获取用户的键盘输入的信息,这也是一个常用的控件。它继承于 TextBoxBase,而 TextBoxBase 又继承于 Control,我们在前面已经介绍过 Control 基类,我们先看看它及 TextBoxBase 基类的结构定义:
TextBoxBase 基类
public abstract class TextBoxBase : Control
{
    public static readonly DependencyProperty IsReadOnlyProperty;
    public static readonly RoutedEvent SelectionChangedEvent;
    public static readonly RoutedEvent TextChangedEvent;
    public static readonly DependencyProperty IsSelectionActiveProperty;
    public static readonly DependencyProperty CaretBrushProperty;
    public static readonly DependencyProperty SelectionOpacityProperty;
    public static readonly DependencyProperty SelectionBrushProperty;
    public static readonly DependencyProperty AutoWordSelectionProperty;
    public static readonly DependencyProperty IsInactiveSelectionHighlightEnabledProperty;
    public static readonly DependencyProperty IsUndoEnabledProperty;
    public static readonly DependencyProperty VerticalScrollBarVisibilityProperty;
    public static readonly DependencyProperty HorizontalScrollBarVisibilityProperty;
    public static readonly DependencyProperty AcceptsTabProperty;
    public static readonly DependencyProperty AcceptsReturnProperty;
    public static readonly DependencyProperty IsReadOnlyCaretVisibleProperty;
    public static readonly DependencyProperty UndoLimitProperty;

    public double ViewportWidth { get; }
    public double ExtentHeight { get; }
    public double ExtentWidth { get; }
    public ScrollBarVisibility VerticalScrollBarVisibility { get; set; }
    public bool AcceptsReturn { get; set; }
    public SpellCheck SpellCheck { get; }
    public bool AcceptsTab { get; set; }
    public bool IsReadOnlyCaretVisible { get; set; }
    public double ViewportHeight { get; }
    public ScrollBarVisibility HorizontalScrollBarVisibility { get; set; }
    public double HorizontalOffset { get; }
    public double SelectionOpacity { get; set; }
    public bool CanUndo { get; }
    public bool CanRedo { get; }
    public bool IsUndoEnabled { get; set; }
    public int UndoLimit { get; set; }
    public bool AutoWordSelection { get; set; }
    public Brush SelectionBrush { get; set; }
    public bool IsReadOnly { get; set; }
    public Brush CaretBrush { get; set; }
    public bool IsSelectionActive { get; }
    public bool IsInactiveSelectionHighlightEnabled { get; set; }
    public double VerticalOffset { get; }

    public event TextChangedEventHandler TextChanged;
    public event RoutedEventHandler SelectionChanged;

    public void AppendText(string textData);
    public void BeginChange();
    public void Copy();
    public void Cut();
    public IDisposable DeclareChangeBlock();
    public void EndChange();
    public void LineDown();
    public void LineLeft();
    public void LineRight();
    public void LineUp();
    public void LockCurrentUndoUnit();
    public override void OnApplyTemplate();
    public void PageDown();
    public void PageLeft();
    public void PageRight();
    public void PageUp();
    public void Paste();
    public bool Redo();
    public void ScrollToEnd();
    public void ScrollToHome();
    public void ScrollToHorizontalOffset(double offset);
    public void ScrollToVerticalOffset(double offset);
    public void SelectAll();
    public bool Undo();
    protected override void OnContextMenuOpening(ContextMenuEventArgs e);
    protected override void OnDragEnter(DragEventArgs e);
    protected override void OnDragLeave(DragEventArgs e);
    protected override void OnDragOver(DragEventArgs e);
    protected override void OnDrop(DragEventArgs e);
    protected override void OnGiveFeedback(GiveFeedbackEventArgs e);
    protected override void OnGotKeyboardFocus(KeyboardFocusChangedEventArgs e);
    protected override void OnKeyDown(KeyEventArgs e);
    protected override void OnKeyUp(KeyEventArgs e);
    protected override void OnLostFocus(RoutedEventArgs e);
    protected override void OnLostKeyboardFocus(KeyboardFocusChangedEventArgs e);
    protected override void OnMouseDown(MouseButtonEventArgs e);
    protected override void OnMouseMove(MouseEventArgs e);
    protected override void OnMouseUp(MouseButtonEventArgs e);
    protected override void OnMouseWheel(MouseWheelEventArgs e);
    protected override void OnPreviewKeyDown(KeyEventArgs e);
    protected override void OnQueryContinueDrag(QueryContinueDragEventArgs e);
    protected override void OnQueryCursor(QueryCursorEventArgs e);
    protected virtual void OnSelectionChanged(RoutedEventArgs e);
    protected override void OnTemplateChanged(ControlTemplate oldTemplate, ControlTemplate newTemplate);
    protected virtual void OnTextChanged(TextChangedEventArgs e);
    protected override void OnTextInput(TextCompositionEventArgs e);

}
我们看一看 TextBoxBase 基类都提供了哪些成员
-
属性成员
属性名称 说明 VerticalScrollBarVisibility垂直滚动条是否显示 HorizontalScrollBarVisibility水平滚动条是否显示 AcceptsReturn表示用户按下回车键时是否插入新行。 AcceptsTab用来设置用户按下tab键的响应,为true表示插入一个制表符,否则将焦点移动到标记为制表位的下一个控件且不插入制表符。 IsReadOnlyCaretVisible表示只读文本框是否显示插入符号,用得较少。 SelectionOpacity用来设置用户选中的文本的透明度。 IsUndoEnabled表示文本编辑控件是否启用撤消支持。 UndoLimit获取或设置存储在撤消队列中的操作数目。 AutoWordSelection表示自动选择字词,默认为false。 SelectionBrush表示用户选择的文本段落的画笔,比较常用。 IsReadOnly表示文本框是否只读,这个属性经常使用。 CaretBrush表示获取或设置用于绘制的文本框中插入符号的画笔。 IsInactiveSelectionHighlightEnabled表示获取或设置一个值,该值指示当文本框没有焦点时,文本框中是否显示选定的文本。 -
事件成员
TextBoxBase基类提供了两个事件,分别是TextChanged和SelectionChanged。TextChanged事件:只要文本框中的内容被修改,将会触发引事件,这通常用来做一些判断业务。比如某个文本框只能输入数字,那就可以去订阅TextChanged事件。SelectionChanged事件:选中的文本框内容发生改变时引发的事件。
TextBox 控件
在了解 TextBoxBase 基类之后,我们来看看这个控件本身提供了哪些属性、方法和事件。
public class TextBox : TextBoxBase, IAddChild, ITextBoxViewHost
{
    public static readonly DependencyProperty TextWrappingProperty;
    public static readonly DependencyProperty MinLinesProperty;
    public static readonly DependencyProperty MaxLinesProperty;
    public static readonly DependencyProperty TextProperty;
    public static readonly DependencyProperty CharacterCasingProperty;
    public static readonly DependencyProperty MaxLengthProperty;
    public static readonly DependencyProperty TextAlignmentProperty;
    public static readonly DependencyProperty TextDecorationsProperty;

    public TextBox();

    public int MinLines { get; set; }
    public int MaxLines { get; set; }
    public string Text { get; set; }
    public CharacterCasing CharacterCasing { get; set; }
    public int MaxLength { get; set; }
    public TextAlignment TextAlignment { get; set; }
    public int CaretIndex { get; set; }
    public int SelectionLength { get; set; }
    public int SelectionStart { get; set; }
    public Typography Typography { get; }
    public int LineCount { get; }
    public TextDecorationCollection TextDecorations { get; set; }
    public string SelectedText { get; set; }
    public TextWrapping TextWrapping { get; set; }
    protected internal override IEnumerator LogicalChildren { get; }

    public void Clear();
    public int GetCharacterIndexFromLineIndex(int lineIndex);
    public int GetCharacterIndexFromPoint(Point point, bool snapToText);
    public int GetFirstVisibleLineIndex();
    public int GetLastVisibleLineIndex();
    public int GetLineIndexFromCharacterIndex(int charIndex);
    public int GetLineLength(int lineIndex);
    public string GetLineText(int lineIndex);
    public int GetNextSpellingErrorCharacterIndex(int charIndex, LogicalDirection direction);
    public Rect GetRectFromCharacterIndex(int charIndex, bool trailingEdge);
    public Rect GetRectFromCharacterIndex(int charIndex);
    public SpellingError GetSpellingError(int charIndex);
    public int GetSpellingErrorLength(int charIndex);
    public int GetSpellingErrorStart(int charIndex);
    public void ScrollToLine(int lineIndex);
    public void Select(int start, int length);
    public bool ShouldSerializeText(XamlDesignerSerializationManager manager);
    protected override Size MeasureOverride(Size constraint);
    protected override AutomationPeer OnCreateAutomationPeer();
    protected override void OnPropertyChanged(DependencyPropertyChangedEventArgs e);

}
属性成员
| 属性名称 | 说明 |
|---|---|
MinLines |
获取或设置最小可见的行数。 |
MaxLines |
获取或设置可见行的最大数目。 |
Text |
获取或设置文本框的文本内容。 |
CharacterCasing |
获取或设置文本框字符的大小写形式,默认不转换。 它是一个枚举,Normal表示不转换大小写,Lower表示全部转换成小写,Upper表示全部转换成大写 |
MaxLength |
获取或设置最大可以在文本框中手动输入的字符数。 |
TextAlignment |
获取或设置文本框的内容的水平对齐方式。例如左对齐,右对齐,居在对齐和两端对齐。 |
CaretIndex |
获取或设置插入点移动的插入位置索引。 |
SelectionLength |
获取或设置一个值,该值在文本框中当前所选内容中的字符数。 |
SelectionStart |
获取或设置当前所选内容的起始位置的字符索引。 |
Typography |
获取文本框中的文本内容的当前有效的版式变体。 |
LineCount |
获取文本框中的总行数。 |
TextDecorations |
获取要应用于文本框中的文本修饰。 |
SelectedText |
获取或设置文本框中当前选择的内容。 |
TextWrapping |
获取或设置文本框中文本的换行方式。这个属性比较常用,在较长的文字段落显示时可以设置为Wrap,这样自动换行,界面呈现的效果比较令人满意。 |
TextBox 文本框本身没有任务事件,都是继承父类的事件。我们先看一下它的简单使用示例。
前端代码:
<Window x:Class="TextBoxSample.MainWindow"
        xmlns="http://schemas.microsoft.com/winfx/2006/xaml/presentation"
        xmlns:x="http://schemas.microsoft.com/winfx/2006/xaml"
        xmlns:d="http://schemas.microsoft.com/expression/blend/2008"
        xmlns:mc="http://schemas.openxmlformats.org/markup-compatibility/2006"
        xmlns:local="clr-namespace:TextBoxSample"
        mc:Ignorable="d"
        Title="TextBoxSample" Height="350" Width="500">
    <StackPanel Orientation="Horizontal" VerticalAlignment="Center" HorizontalAlignment="Center">
        <TextBlock Text="用户名" VerticalAlignment="Center" Margin="0 0 5 0" Background="Bisque"></TextBlock>
        <!--总长度不超过10个字符-->
        <TextBox x:Name="textbox1" Width="100" Height="25" MaxLength="10" CharacterCasing="Upper" VerticalAlignment="Center"></TextBox>
        <Button Content="确定" Height="25" Margin="5 0" Click="Button_Click"></Button>
    </StackPanel>
</Window>
后端代码:
using System.Text;
using System.Windows;
using System.Windows.Controls;
using System.Windows.Data;
using System.Windows.Documents;
using System.Windows.Input;
using System.Windows.Media;
using System.Windows.Media.Imaging;
using System.Windows.Navigation;
using System.Windows.Shapes;

namespace TextBoxSample
{
    /// <summary>
    /// Interaction logic for MainWindow.xaml
    /// </summary>
    public partial class MainWindow : Window
    {
        public MainWindow()
        {
            InitializeComponent();
        }

        private void Button_Click(object sender, RoutedEventArgs e)
        {
            MessageBox.Show($"您的用户名:{this.textbox1.Text}");
        }
    }
}
界面:
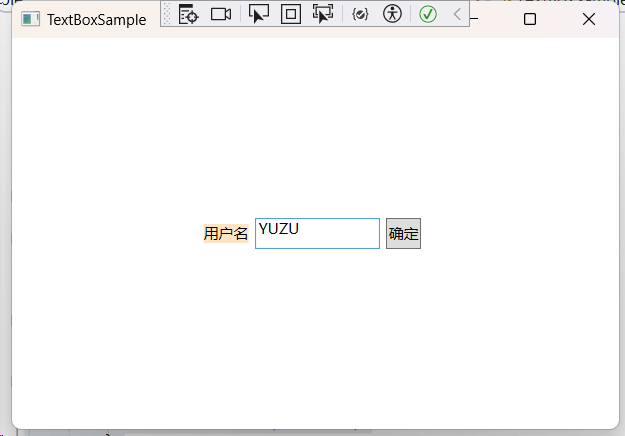
因为 TextBox 设置了 CharacterCasing="Upper",所以使用小写输入字母,TextBox 中的文字依旧是大写。另外,总长度不能超过10个字符。
最后要获取 TextBox 文本框的内容,使用 Text 属性即可。当我们在学习了样式之后,我们还会回过头来,对 TextBox 控件进行深入学习。
另外,TextBox 还有一个大哥,也是继承于 TextBoxBase 基类,它叫 RichTextBox 类。这个控件的功能更加强大,能够对 FlowDocument 流文档进行操作。如果想开发类似 Word 的桌面软件,RichTextBox 和 FlowDocument 搭配组合是非常好的选择。
4.6.4 RichTextBox 富文本框控件
RichTextBox 继承于 TextBoxBase 基类,所以很大程度上与 TextBox 控件类似,两者在某些情况下可以相互替换。但是,如果要为用户提供更强大的文本编辑能力,则非 RichTextBox 莫属。在学习这个控件之前,参考 FlowDocument (流文档)一节。
首先我们看看 RichTextBox 的结构定义:
public class RichTextBox : TextBoxBase, IAddChild
{
    public static readonly DependencyProperty IsDocumentEnabledProperty;

    public RichTextBox();
    public RichTextBox(FlowDocument document);

    public FlowDocument Document { get; set; }
    public bool IsDocumentEnabled { get; set; }
    public TextSelection Selection { get; }
    public TextPointer CaretPosition { get; set; }
    protected internal override IEnumerator LogicalChildren { get; }

    public TextPointer GetNextSpellingErrorPosition(TextPointer position, LogicalDirection direction);
    public TextPointer GetPositionFromPoint(Point point, bool snapToText);
    public SpellingError GetSpellingError(TextPointer position);
    public TextRange GetSpellingErrorRange(TextPointer position);
    public bool ShouldSerializeDocument();
    protected override Size MeasureOverride(Size constraint);
    protected override AutomationPeer OnCreateAutomationPeer();
    protected override void OnDpiChanged(DpiScale oldDpiScaleInfo, DpiScale newDpiScaleInfo);

}
RichTextBox 控件有一个带参数的构造函数,参数的类型是 FlowDocument 类,另外,它还有一个 Document 属性,类型也是 FlowDocument 类,说明 RichTextBox 控件的元素必须且只能是 FlowDocument 类,如果试图将 RichTextBox.Document=null,会发现它会报错。
假定对 FlowDocument 类有一定的了解,所以,我们直接看一下示例。
前端代码:
MainWindow.xaml
<Window x:Class="RichTextBoxSample.MainWindow"
        xmlns="http://schemas.microsoft.com/winfx/2006/xaml/presentation"
        xmlns:x="http://schemas.microsoft.com/winfx/2006/xaml"
        xmlns:d="http://schemas.microsoft.com/expression/blend/2008"
        xmlns:mc="http://schemas.openxmlformats.org/markup-compatibility/2006"
        xmlns:local="clr-namespace:RichTextBoxSample"
        mc:Ignorable="d"
        Title="RichTextBoxSample" Height="350" Width="500">
    <StackPanel>
        <RichTextBox x:Name="richTextBox1" Margin="10 5" Height="270">
            <FlowDocument>
                <Paragraph>RichTextBox 富文本框有什么强大的功能?
                    <Bold Foreground="DarkRed">请看下面</Bold>
                </Paragraph>
                <Paragraph Foreground="Blue">RichTextBox 唯一的子元素是 FlowDocument</Paragraph>
                <Paragraph Foreground="DarkGreen">
                    FlowDocument 是指流文档,一个流文档由一个或多个Block构成,
                    所以它有一个Blocks属性。Block只是一个抽象基类,
                    所以流文档的子元素其实是继承了Block的子类,例如:
                </Paragraph>
                <List MarkerOffset="25" MarkerStyle="Decimal" StartIndex="1">
                    <ListItem>
                        <Paragraph>BlockUIContainer(UI元素容器)</Paragraph>
                    </ListItem>
                    <ListItem>
                        <Paragraph>List(有序列表)</Paragraph>
                    </ListItem>
                    <ListItem>
                        <Paragraph>Paragraph(段落)</Paragraph>
                    </ListItem>
                    <ListItem>
                        <Paragraph>Section(分组)</Paragraph>
                    </ListItem>
                    <ListItem>
                        <Paragraph>Table(网格)</Paragraph>
                    </ListItem>
                </List>
            </FlowDocument>
        </RichTextBox>
        <Button x:Name="button1" Content="确定" HorizontalAlignment="Stretch" Margin="10 5" Click="button1_Click"></Button>
    </StackPanel>
</Window>
后端代码:
MainWindow.xaml.cs
using System.Text;
using System.Windows;
using System.Windows.Controls;
using System.Windows.Data;
using System.Windows.Documents;
using System.Windows.Input;
using System.Windows.Media;
using System.Windows.Media.Imaging;
using System.Windows.Navigation;
using System.Windows.Shapes;

namespace RichTextBoxSample
{
    /// <summary>
    /// Interaction logic for MainWindow.xaml
    /// </summary>
    public partial class MainWindow : Window
    {
        public MainWindow()
        {
            InitializeComponent();
        }

        private void button1_Click(object sender, RoutedEventArgs e)
        {
            TextRange textRange = new TextRange(this.richTextBox1.Document.ContentStart, this.richTextBox1.Document.ContentEnd);
            MessageBox.Show(textRange.Text);

            Paragraph paragraph = new Paragraph();
            Run run = new Run($"当前时间: {DateTime.Now}");
            run.Foreground = Brushes.Black;
            paragraph.Inlines.Add( run );
            richTextBox1.Document.Blocks.Add( paragraph );
        }
    }
}
如上所示,我们在窗体中实例化了一个 RichTextBox 控件,并实例化了一个 FlowDocument 对象。RichTextBox 唯一的子元素是 FlowDocument,Block 只是一个抽象基类,FlowDocument 流文档的子元素都继承了 Block 抽象基类,例如:
BlockUIContainer(UI元素容器)List(有序列表)Paragraph(段落)Section(分组)Table(网格)
BlockUIContainer 是一个非常强大的段落元素,因为它可以直接包含 WPF 的控件。这样一来,我们就可以将设计的 UI 写入到流文档中显示或打印。
上面这五个元素继承了 TextElement、FrameworkContentElement 和 ContentElement 三个父素,所以实际上这五个子元素就拥有了许多字体属性的设置、资源、样式、数据绑定、以及各种事件的应用。
如果要获取 RichTextBox 的文本信息,可以使用 TextRange 类。FlowDocument 类有两个属性,分别 ContentStart 和 ContentEnd,表示文字内容的开始和结束。
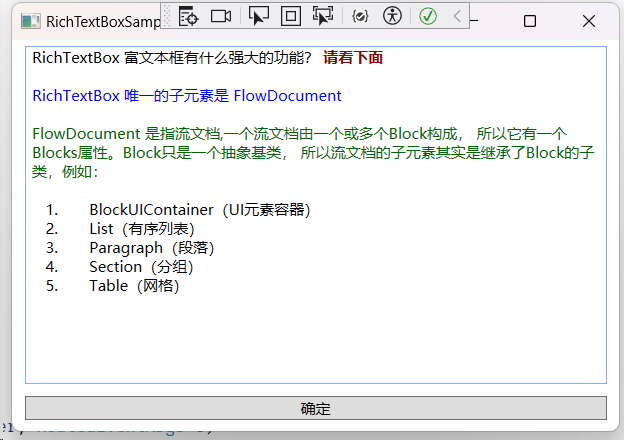
所以通过 TextRange 类的 Text,我们就能访问到 RichTextBox 控件的内容。
4.7 其他控件
4.7.1 ToolTip控件(提示控件)
ToolTip 继承于 ContentControl,它不能有逻辑或视觉父级,意思是说,它不能单独存在于 WPF 的视觉树上(不能以控件的形式实例化),它必须依附于某个控件。因为它的功能被设计成提示信息,当鼠标移动到某个控件上方时,悬停一会儿,就会显示这个 ToolTip 的内容。
通常 ToolTip 会显示一句话,用来阐述某个控件的说明。这个控件存在于 FrameworkElement 基类中,也就是 ToolTip 属性,这个属性在 FrameworkElement 虽然被声明成 object ,而不是 ToolTip 类型,但是,我们仍然可以自定义 ToolTip 的内容。重点:WPF几乎所有控件都可以拥有 ToolTip 小型提示弹窗!
因为 ToolTip 继承于 ContentControl 控件,所以,ToolTip 拥有的 Content 属性就可以显示任何类型,比如字符串、图像、其它控件组合布局。
ToolTip 类
public class ToolTip : ContentControl
{
    public static readonly DependencyProperty HorizontalOffsetProperty;
    public static readonly RoutedEvent OpenedEvent;
    public static readonly DependencyProperty StaysOpenProperty;
    public static readonly DependencyProperty CustomPopupPlacementCallbackProperty;
    public static readonly DependencyProperty PlacementProperty;
    public static readonly RoutedEvent ClosedEvent;
    public static readonly DependencyProperty PlacementTargetProperty;
    public static readonly DependencyProperty HasDropShadowProperty;
    public static readonly DependencyProperty IsOpenProperty;
    public static readonly DependencyProperty VerticalOffsetProperty;
    public static readonly DependencyProperty PlacementRectangleProperty;

    public ToolTip();

    public bool IsOpen { get; set; }
    public bool StaysOpen { get; set; }
    public CustomPopupPlacementCallback CustomPopupPlacementCallback { get; set; }
    public PlacementMode Placement { get; set; }	// 打开的方式1
    public Rect PlacementRectangle { get; set; }	// 打开的方式2
    public UIElement PlacementTarget { get; set; }
    public double HorizontalOffset { get; set; }
    public double VerticalOffset { get; set; }
    public bool HasDropShadow { get; set; }

    public event RoutedEventHandler Closed;
    public event RoutedEventHandler Opened;

    protected virtual void OnClosed(RoutedEventArgs e);
    protected override void OnContentChanged(object oldContent, object newContent);
    protected override AutomationPeer OnCreateAutomationPeer();
    protected virtual void OnOpened(RoutedEventArgs e);
    protected internal override void OnVisualParentChanged(DependencyObject oldParent);

}
下面是一个前端界面展示:
MainWindow.xaml
<Window x:Class="ToolTipSample.MainWindow"
        xmlns="http://schemas.microsoft.com/winfx/2006/xaml/presentation"
        xmlns:x="http://schemas.microsoft.com/winfx/2006/xaml"
        xmlns:d="http://schemas.microsoft.com/expression/blend/2008"
        xmlns:mc="http://schemas.openxmlformats.org/markup-compatibility/2006"
        xmlns:local="clr-namespace:ToolTipSample"
        mc:Ignorable="d"
        Title="MainWindow" Height="350" Width="500">
    <Grid>
        <Grid.RowDefinitions>
            <RowDefinition></RowDefinition>
            <RowDefinition></RowDefinition>
        </Grid.RowDefinitions>
        <!--简单使用-->
        <Button Content="Click Me!" ToolTip="这是一个按钮" Height="75" Width="150" FontSize="24" Grid.Row="0"></Button>
        <!--复杂使用-->
        <Button Grid.Row="1" Height="75" Width="150" Content="网站" FontSize="24" x:Name="button2" Click="button2_Click">
            <Button.ToolTip>
                <!--下面的子项就是 ToolTip 具体内容了-->
                <StackPanel Orientation="Vertical">
                    <TextBlock Text="官方网站" FontWeight="Bold"></TextBlock>
                    <TextBlock Text="点击这个按钮,进入官方网站"></TextBlock>
                    <Border BorderBrush="Silver" BorderThickness="0,1,0,0" Margin="0,4"></Border>
                    <TextBlock Text="https://www.github.com" FontStyle="Italic"></TextBlock>
                </StackPanel>
            </Button.ToolTip>
        </Button>

    </Grid>
</Window>
界面:当鼠标移动到“网站”这个按钮上,会出现一个提示框:
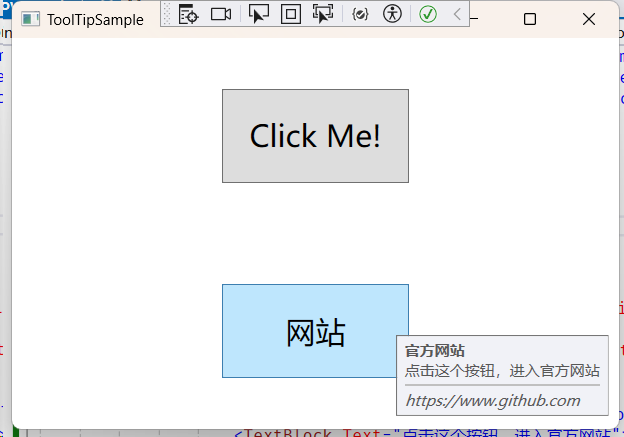
后端代码:
MainWindow.xaml.cs
using System.Diagnostics;
using System.Security.Policy;
using System.Text;
using System.Windows;
using System.Windows.Controls;
using System.Windows.Data;
using System.Windows.Documents;
using System.Windows.Input;
using System.Windows.Media;
using System.Windows.Media.Imaging;
using System.Windows.Navigation;
using System.Windows.Shapes;

namespace ToolTipSample
{
    /// <summary>
    /// Interaction logic for MainWindow.xaml
    /// </summary>
    public partial class MainWindow : Window
    {
        public MainWindow()
        {
            InitializeComponent();
            // 直接将打开方法添加到Click事件也可以,但要修改MainWindow.xaml的代码
            //string homePage = "www.github.com";
            //this.button2.Click += (sender, e) =>
            //{
            //    ProcessStartInfo psi = new ProcessStartInfo
            //    {
            //        UseShellExecute = true,
            //        FileName = homePage,
            //    };
            //    try { Process.Start(psi); } catch(Exception ex)
            //    {
            //        MessageBox.Show(ex.Message);
            //    }
			//};
        }

        public void OpenLink(string link)
        {
            ProcessStartInfo psi = new ProcessStartInfo
            {
                UseShellExecute = true,
                FileName = link
            };

            Process.Start(psi);
        }

        // 点击按钮,使用默认浏览器打开该地址
        private void button2_Click(object sender, RoutedEventArgs e)
        {
            string homePage = "www.github.com";
            try
            {
                OpenLink(homePage);
            }
            catch (Exception ex)
            {
                MessageBox.Show(ex.Message);
            }
        }
    }
}
4.7.2 Popup 弹出窗口
Popup 类似于 ToolTip,在指定的元素或窗体中弹出一个具有任意内容的窗口。Popup 继承于FrameworkElement,算得上是独门独户的控件,因为大多数控件都是从 Shape、Control 或Panel 三个类继承而来。
Popup 类
public class Popup : FrameworkElement, IAddChild
{
    public static readonly DependencyProperty ChildProperty;
    public static readonly DependencyProperty IsOpenProperty;
    public static readonly DependencyProperty PlacementProperty;
    public static readonly DependencyProperty CustomPopupPlacementCallbackProperty;
    public static readonly DependencyProperty StaysOpenProperty;
    public static readonly DependencyProperty HorizontalOffsetProperty;
    public static readonly DependencyProperty VerticalOffsetProperty;
    public static readonly DependencyProperty PlacementTargetProperty;
    public static readonly DependencyProperty PlacementRectangleProperty;
    public static readonly DependencyProperty PopupAnimationProperty;
    public static readonly DependencyProperty AllowsTransparencyProperty;
    public static readonly DependencyProperty HasDropShadowProperty;

    public Popup();

    public bool HasDropShadow { get; }
    public bool AllowsTransparency { get; set; }
    public PopupAnimation PopupAnimation { get; set; }
    public Rect PlacementRectangle { get; set; }
    public UIElement PlacementTarget { get; set; }
    public double VerticalOffset { get; set; }
    public double HorizontalOffset { get; set; }
    public bool StaysOpen { get; set; }
    public UIElement Child { get; set; }
    public bool IsOpen { get; set; }
    public PlacementMode Placement { get; set; }
    public CustomPopupPlacementCallback CustomPopupPlacementCallback { get; set; }
    protected internal override IEnumerator LogicalChildren { get; }

    public event EventHandler Closed;
    public event EventHandler Opened;

    public static void CreateRootPopup(Popup popup, UIElement child);
    protected override Size MeasureOverride(Size availableSize);
    protected virtual void OnClosed(EventArgs e);
    protected virtual void OnOpened(EventArgs e);
    protected override void OnPreviewMouseLeftButtonDown(MouseButtonEventArgs e);
    protected override void OnPreviewMouseLeftButtonUp(MouseButtonEventArgs e);
    protected override void OnPreviewMouseRightButtonDown(MouseButtonEventArgs e);
    protected override void OnPreviewMouseRightButtonUp(MouseButtonEventArgs e);
    protected internal override DependencyObject GetUIParentCore();

}
属性成员
| 属性名称 | 说明 |
|---|---|
HasDropShadow |
只读属性,控件是否有投影效果。 |
AllowsTransparency |
获取或设置控件是否包含透明内容。 |
PopupAnimation |
获取或设置控件打开或关闭时的动画效果,None 表示没有动画,Fade表示逐渐显示或淡出,Slide 表示向上向下滑入,Scroll 表示滚动效果。 |
PlacementRectangle |
获取或设置控件打开时的矩形位置 。 |
PlacementTarget |
获取或设置 Popup 控件在哪个控件身边打开(重点)。 |
VerticalOffset |
获取或设置目标原点和 popup 对齐点之间的垂直距离。 |
HorizontalOffset |
获取或设置目标原点和弹出项对齐之间的水平距离点。 |
StaysOpen |
默认值为true,表示 Popup 打开后,如果失去焦点,Popup 是否继续显示(重点)。 |
Child |
获取或设置控件的内容,类似于 ContentControl 的 Content 属性,只能拥有一个元素(重点)。 |
IsOpen |
获取或设置 Popup 控件是否可见。 |
Placement |
枚举类,表示 Popup 控件显示时的对齐方式。 |
事件成员
Opened 事件:Popup控件打开时引发的事件。
Closed 事件:Popup控件关闭时引发的事件。
前端界面:
<Window x:Class="PopupSample.MainWindow"
        xmlns="http://schemas.microsoft.com/winfx/2006/xaml/presentation"
        xmlns:x="http://schemas.microsoft.com/winfx/2006/xaml"
        xmlns:d="http://schemas.microsoft.com/expression/blend/2008"
        xmlns:mc="http://schemas.openxmlformats.org/markup-compatibility/2006"
        xmlns:local="clr-namespace:PopupSample"
        mc:Ignorable="d"
        Title="PopupSample" Height="450" Width="800">
    <StackPanel Orientation="Horizontal" HorizontalAlignment="Center" VerticalAlignment="Center">
        <CheckBox x:Name="checkbox" Content="WPF官网" IsChecked="True" Height="30" Margin="5" ToolTip="课程控件"></CheckBox>
        <Popup Name="myPopup"
               IsOpen="{Binding IsChecked, ElementName=checkbox}"
               PlacementTarget="{Binding ElementName=checkbox}"
               StaysOpen="True">
            <Border BorderThickness="1" Background="LightBlue" >
                <StackPanel>
                    <TextBlock Text="官方网站" FontWeight="Bold"></TextBlock>
                    <TextBlock  Text="点击这个按钮,进入 WPF 官网"></TextBlock>
                    <Border BorderThickness="0 1 0 0" Margin="0 4" BorderBrush="Silver"></Border>
                    <TextBlock Text="https://learn.microsoft.com/zh-cn/dotnet/desktop/wpf" FontStyle="Italic"></TextBlock>
                </StackPanel>
            </Border>
        </Popup>
    </StackPanel>
</Window>
界面:
点击 CheckBox 时候:
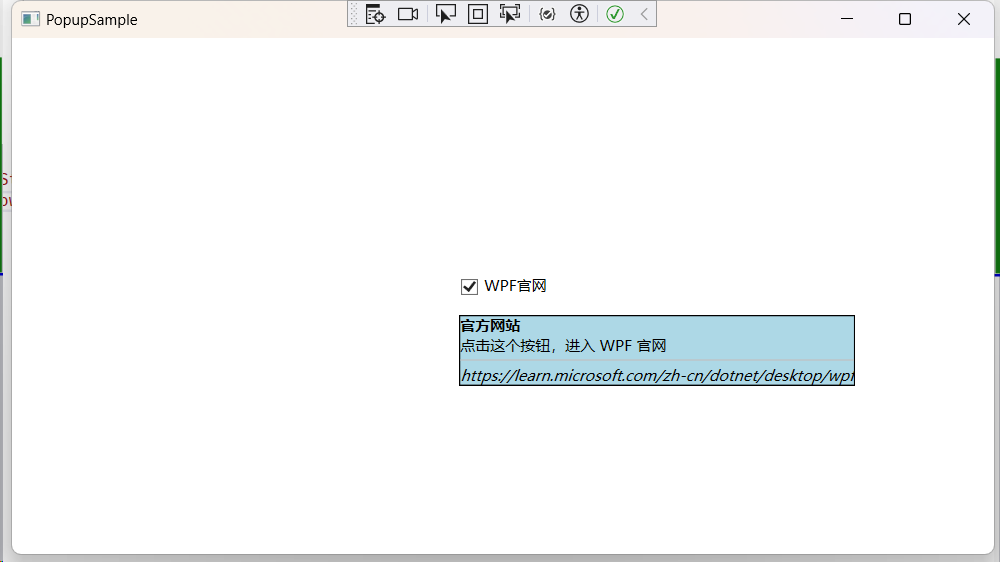
未点击 CheckBox 时候:
后台代码未更改。
我们分别实例化了名叫 checkbox 和 myPopup 控件,myPopup 的 IsOpen 属性绑定了 checkbox 的 IsChecked ,意思是, 当用户点击 checkbox 时,checkbox 的 IsChecked 属性为 true,myPopup 的 IsOpen 属性也为 true,于是就可以显示myPopup 的内容了。
同时, myPopup 的 PlacementTarget 属性也绑定到了 checkbox 控件,意味着 myPopup 将显示在 checkbox 控件身边,至于具体位置,可以设置 Placement 属性,有兴趣的小伙伴可以去尝试一下。
这里我们用到了 Binding 这个类,可以把它看成是一座桥梁,我们会在后面专门详细讲解 Binding的用法。
4.7.3 Image 图像控件
Image 也算是独门独户的控件,因为它也是直接继承于 FrameworkElement 基类。Image 控件,顾名思义,就是图像显示控件。
Image 类能够加载显示的图片格式有 .bmp、.gif、.ico、.jpg、.png、.wdp 和 .tiff。要注意的是,加载 .gif 动画图片时,仅显示第一帧。如果要显示gif图片,可以在 nuget 服务器中下载WpfAnimatedGif 组件。
Image 类
public class Image : FrameworkElement, IUriContext, IProvidePropertyFallback
{
    public static readonly DependencyProperty SourceProperty;
    public static readonly RoutedEvent DpiChangedEvent;
    public static readonly DependencyProperty StretchProperty;
    public static readonly DependencyProperty StretchDirectionProperty;
    public static readonly RoutedEvent ImageFailedEvent;

    public Image();

    public StretchDirection StretchDirection { get; set; }
    public Stretch Stretch { get; set; }
    public ImageSource Source { get; set; }
    protected virtual Uri BaseUri { get; set; }

    public event DpiChangedEventHandler DpiChanged;
    public event EventHandler<ExceptionRoutedEventArgs> ImageFailed;

    protected override Size ArrangeOverride(Size arrangeSize);
    protected override Size MeasureOverride(Size constraint);
    protected override AutomationPeer OnCreateAutomationPeer();
    protected override void OnDpiChanged(DpiScale oldDpi, DpiScale newDpi);
    protected override void OnRender(DrawingContext dc);

}
属性成员
| 属性名称 | 说明 |
|---|---|
StretchDirection |
枚举型,表示图像缩放的条件,UpOnly 表示内容仅在小于父级时缩放;DownOnly 表示内容仅大于父级时缩放;Both 表示兼容前面两种缩放条件。 |
Stretch |
枚举型,表示图像缩放的模式,None 表示内容保持其原始大小;Fill 表示调整内容大小以填充目标尺寸,且不保留纵横比;Uniform 表示在保留纵横比基础上缩放;UniformToFill 表示在保留纵横比基础上缩放,同时具有裁剪功能。 |
Source |
图像源,其类型为ImageSource。 |
BaseUri |
获取或设置基 统一资源标识符 (URI) 为 System.Windows.Controls.Image。 |
事件成员
| 事件名称 | 说明 |
|---|---|
DpiChanged |
显示图像的屏幕的 DPI 发生更改后触发。 |
ImageFailed |
在图像中失败时触发。 |
Image控件分析
Image 控件最关键的就是 Source 属性——即 ImageSource 类型。
ImageSource 是一个抽象类,表示具有高度、宽度及 ImageMetadata 对象的图像数据源。ImageSource 有多个子类,如 BitmapFrame、BitmapSource 和 DrawingImage。所以,我们如果要显示一张图片,需要将图片转化成 BitmapSource 或 DrawingImage 实例,赋值给Image 控件的 Source 属性就行了。
统一资源标识Uri
WPF引入了
统一资源标识 Uri(Unified Resource Identifier)来标识和访问资源。其中较为常见的情况是用Uri加载图像。Uri表达式的一般形式为:协议+授权+路径,协议:pack://,授权:有两种。
- 一种用于访问编译时已经知道的文件,用
application:///- 一种用于访问编译时不知道、运行时才知道的文件,用
siteoforigin:///
一般用逗号代替斜杠,也就是改写作application:,和pack:,
路径:分为绝对路径和相对路径。一般选用相对路径,普适性更强
前端界面:
MainWindow.xaml
<Window x:Class="ImageSample.MainWindow"
        xmlns="http://schemas.microsoft.com/winfx/2006/xaml/presentation"
        xmlns:x="http://schemas.microsoft.com/winfx/2006/xaml"
        xmlns:d="http://schemas.microsoft.com/expression/blend/2008"
        xmlns:mc="http://schemas.openxmlformats.org/markup-compatibility/2006"
        xmlns:local="clr-namespace:ImageSample"
        mc:Ignorable="d"
        Title="ImageSample" Height="450" Width="800">
    <Grid>
        <Grid.ColumnDefinitions>
            <ColumnDefinition></ColumnDefinition>
            <ColumnDefinition></ColumnDefinition>
            <ColumnDefinition></ColumnDefinition>
            <ColumnDefinition></ColumnDefinition>
        </Grid.ColumnDefinitions>
        <!--加载本地图片-->
        <Image Source="/Image/logo.png" Width="120" Height="120" Grid.Column="0"></Image>
        <!--使用Uri加载本地图片,编译时候已知-->
        <Image Source="pack://application:,,,/Image/logo.png" Width="120" Height="120"  Grid.Column="1"></Image>
        <!--加载本地图片,编译时候未知,需要后端代码-->
        <Image x:Name="image1" Width="120" Height="120" Grid.Column="2"></Image>
        <!--加载网络图片-->
        <Image Source="http://www.wpfsoft.com/wp-content/uploads/2023/08/2023080309592548.png" Height="120" Width="120" Grid.Column="3"></Image>
    </Grid>
</Window>
后端代码
MainWindow.xaml.cs
using System.Text;
using System.Windows;
using System.Windows.Controls;
using System.Windows.Data;
using System.Windows.Documents;
using System.Windows.Input;
using System.Windows.Media;
using System.Windows.Media.Imaging;
using System.Windows.Navigation;
using System.Windows.Shapes;

namespace ImageSample
{
    /// <summary>
    /// Interaction logic for MainWindow.xaml
    /// </summary>
    public partial class MainWindow : Window
    {
        public MainWindow()
        {
            InitializeComponent();

            // 使用Uri 加载本地图片(在已编译目录中),编译时候未知
            string path = Environment.CurrentDirectory + "\\Image\\" + "logo.png";
            var imageSource = BitmapFrame.Create(new Uri(path), BitmapCreateOptions.None, BitmapCacheOption.OnLoad);
            image1.Source = imageSource;
        }
    }
}
注意:生成的可执行程序运行时候看不见本地图片
如果发现在 Visual Studio 下编译,生成的可执行程序运行时候看不见本地图片,需要确保图片的
Build Action属性设置为Resource:在 Visual Studio 中,选中图片文件,在属性窗口中找到
Build Action属性,确保其值为Resource。
然后重新编译下项目
编译后界面:
4.7.4 GroupBox 标题容器控件
GroupBox 控件的功能是提供一个带标题的内容容器,它继承于 HeaderedContentControl 类,HeaderedContentControl 继承于 ContentControl 类。通常它用来做一些局部的布局。由于GroupBox 本身并没有什么成员,所以我们直接观察它的基类。
HeaderedContentControl 基类
public class HeaderedContentControl : ContentControl
{
    public static readonly DependencyProperty HeaderProperty;
    public static readonly DependencyProperty HasHeaderProperty;
    public static readonly DependencyProperty HeaderTemplateProperty;
    public static readonly DependencyProperty HeaderTemplateSelectorProperty;
    public static readonly DependencyProperty HeaderStringFormatProperty;

    public HeaderedContentControl();

    public DataTemplateSelector HeaderTemplateSelector { get; set; }
    public DataTemplate HeaderTemplate { get; set; }
    public string HeaderStringFormat { get; set; }
    public bool HasHeader { get; }
    public object Header { get; set; }
    protected internal override IEnumerator LogicalChildren { get; }

    public override string ToString();
    protected virtual void OnHeaderChanged(object oldHeader, object newHeader);
    protected virtual void OnHeaderStringFormatChanged(string oldHeaderStringFormat, string newHeaderStringFormat);
    protected virtual void OnHeaderTemplateChanged(DataTemplate oldHeaderTemplate, DataTemplate newHeaderTemplate);
    protected virtual void OnHeaderTemplateSelectorChanged(DataTemplateSelector oldHeaderTemplateSelector, DataTemplateSelector newHeaderTemplateSelector);

}
在这个基类中,我们可以看到他继承于 ContentControl 基类,所以 GroupBox 要显示的内容都会放到 Content 属性中,而 GroupBox 的标题则放在 Header 属性中,注意,Header 属性也是 object 。这足以说明 GroupBox 在私人定制方面的强大扩展性。
再加上 HeaderTemplate 属性,可以定制标题的外观。待在后面学了模板和样式,再回头来探讨这一类的属性的应用。
GroupBox 的简单用法如下
<Window x:Class="GroupBoxSample.MainWindow"
        xmlns="http://schemas.microsoft.com/winfx/2006/xaml/presentation"
        xmlns:x="http://schemas.microsoft.com/winfx/2006/xaml"
        xmlns:d="http://schemas.microsoft.com/expression/blend/2008"
        xmlns:mc="http://schemas.openxmlformats.org/markup-compatibility/2006"
        xmlns:local="clr-namespace:GroupBoxSample"
        mc:Ignorable="d"
        Title="GroupBoxSample" Height="350" Width="500">
    <GroupBox Header="缩略图" Margin="5">
        <WrapPanel>
            <Border BorderBrush="LightGray" BorderThickness="1" CornerRadius="5">
                <Image Source="pack://application:,,,/Image/logo.png" Height="100" Width="100"></Image>
            </Border> <Border BorderBrush="LightGray" BorderThickness="1" CornerRadius="5">
                <Image Source="pack://application:,,,/Image/logo.png" Height="100" Width="100"></Image>
            </Border> <Border BorderBrush="LightGray" BorderThickness="1" CornerRadius="5">
                <Image Source="pack://application:,,,/Image/logo.png" Height="100" Width="100"></Image>
            </Border> <Border BorderBrush="LightGray" BorderThickness="1" CornerRadius="5">
                <Image Source="pack://application:,,,/Image/logo.png" Height="100" Width="100"></Image>
            </Border> <Border BorderBrush="LightGray" BorderThickness="1" CornerRadius="5">
                <Image Source="pack://application:,,,/Image/logo.png" Height="100" Width="100"></Image>
            </Border> <Border BorderBrush="LightGray" BorderThickness="1" CornerRadius="5">
                <Image Source="pack://application:,,,/Image/logo.png" Height="100" Width="100"></Image>
            </Border> <Border BorderBrush="LightGray" BorderThickness="1" CornerRadius="5">
                <Image Source="pack://application:,,,/Image/logo.png" Height="100" Width="100"></Image>
            </Border> <Border BorderBrush="LightGray" BorderThickness="1" CornerRadius="5">
                <Image Source="pack://application:,,,/Image/logo.png" Height="100" Width="100"></Image>
            </Border> <Border BorderBrush="LightGray" BorderThickness="1" CornerRadius="5">
                <Image Source="pack://application:,,,/Image/logo.png" Height="100" Width="100"></Image>
            </Border>
        </WrapPanel>
    </GroupBox>

</Window>
图示:
因为 GroupBox 的 Content 属性只能显示一个内容对象,如果要显示多个对象,那把给 Content 一个集合控件,比如上面的 WrapPanel 控件,这样就可以在 WrapPanel 控件中放多个子元素了。
在使用上,有一个集合控件与 GroupBox 类似,因为 GroupBox 只能显示一个区域,如果区域过大,在有限的窗体无法全部显示出来,该怎么办呢?ScrollViewer 可以做到这一点。
4.7.5 ScrollViewer 控件
如果某个控件的尺寸太大,当前界面无法全部显示,则可以将这个控件包含在 ScrollViewer 中,因为 ScrollViewer 控件封装了一个水平滚动条 ScrollBar 和一个垂直滚动条 ScrollBar,所以, ScrollViewer 就是一个包含其它可视元素的可滚动区域控件。
ScrollViewer 继承于 ContentControl ,所以它也是一个内容控件,只能在 Content 属性中设置一个子元素,如果要在 ScrollViewer 中显示多个子元素,请设置一个集合控件。
ScrollViewer 控件既响应鼠标命令,也响应键盘命令,并定义许多可用于按预设的增量滚动内容的方法。 可以使用 ScrollChanged 事件来检测 ScrollViewer 状态的变化。
ScrollViewer 类
public class ScrollViewer : ContentControl
{
    public static readonly DependencyProperty CanContentScrollProperty;
    public static readonly DependencyProperty PanningRatioProperty;
    public static readonly DependencyProperty PanningDecelerationProperty;
    public static readonly DependencyProperty PanningModeProperty;
    public static readonly RoutedEvent ScrollChangedEvent;
    public static readonly DependencyProperty IsDeferredScrollingEnabledProperty;
    public static readonly DependencyProperty ViewportWidthProperty;
    public static readonly DependencyProperty ScrollableHeightProperty;
    public static readonly DependencyProperty ScrollableWidthProperty;
    public static readonly DependencyProperty ExtentHeightProperty;
    public static readonly DependencyProperty ViewportHeightProperty;
    public static readonly DependencyProperty ContentHorizontalOffsetProperty;
    public static readonly DependencyProperty ContentVerticalOffsetProperty;
    public static readonly DependencyProperty HorizontalOffsetProperty;
    public static readonly DependencyProperty ExtentWidthProperty;
    public static readonly DependencyProperty VerticalOffsetProperty;
    public static readonly DependencyProperty ComputedVerticalScrollBarVisibilityProperty;
    public static readonly DependencyProperty ComputedHorizontalScrollBarVisibilityProperty;
    public static readonly DependencyProperty VerticalScrollBarVisibilityProperty;
    public static readonly DependencyProperty HorizontalScrollBarVisibilityProperty;

    public ScrollViewer();

    public bool CanContentScroll { get; set; }
    public ScrollBarVisibility HorizontalScrollBarVisibility { get; set; }
    public ScrollBarVisibility VerticalScrollBarVisibility { get; set; }
    public Visibility ComputedHorizontalScrollBarVisibility { get; }
    public Visibility ComputedVerticalScrollBarVisibility { get; }
    public double HorizontalOffset { get; }
    public double VerticalOffset { get; }
    public double ExtentWidth { get; }
    public double ExtentHeight { get; }
    public double PanningDeceleration { get; set; }
    public double ScrollableHeight { get; }
    public double ViewportWidth { get; }
    public double ViewportHeight { get; }
    public double ContentVerticalOffset { get; }
    public double ContentHorizontalOffset { get; }
    public bool IsDeferredScrollingEnabled { get; set; }
    public PanningMode PanningMode { get; set; }
    public double ScrollableWidth { get; }
    public double PanningRatio { get; set; }
    protected internal override bool HandlesScrolling { get; }
    protected internal IScrollInfo ScrollInfo { get; set; }

    public event ScrollChangedEventHandler ScrollChanged;

    public static bool GetCanContentScroll(DependencyObject element);
    public static ScrollBarVisibility GetHorizontalScrollBarVisibility(DependencyObject element);
    public static bool GetIsDeferredScrollingEnabled(DependencyObject element);
    public static double GetPanningDeceleration(DependencyObject element);
    public static PanningMode GetPanningMode(DependencyObject element);
    public static double GetPanningRatio(DependencyObject element);
    public static ScrollBarVisibility GetVerticalScrollBarVisibility(DependencyObject element);
    public static void SetCanContentScroll(DependencyObject element, bool canContentScroll);
    public static void SetHorizontalScrollBarVisibility(DependencyObject element, ScrollBarVisibility horizontalScrollBarVisibility);
    public static void SetIsDeferredScrollingEnabled(DependencyObject element, bool value);
    public static void SetPanningDeceleration(DependencyObject element, double value);
    public static void SetPanningMode(DependencyObject element, PanningMode panningMode);
    public static void SetPanningRatio(DependencyObject element, double value);
    public static void SetVerticalScrollBarVisibility(DependencyObject element, ScrollBarVisibility verticalScrollBarVisibility);
    public void InvalidateScrollInfo();
    public void LineDown();
    public void LineLeft();
    public void LineRight();
    public void LineUp();
    public override void OnApplyTemplate();
    public void PageDown();
    public void PageLeft();
    public void PageRight();
    public void PageUp();
    public void ScrollToBottom();
    public void ScrollToEnd();
    public void ScrollToHome();
    public void ScrollToHorizontalOffset(double offset);
    public void ScrollToLeftEnd();
    public void ScrollToRightEnd();
    public void ScrollToTop();
    public void ScrollToVerticalOffset(double offset);
    protected override Size ArrangeOverride(Size arrangeSize);
    protected override HitTestResult HitTestCore(PointHitTestParameters hitTestParameters);
    protected override Size MeasureOverride(Size constraint);
    protected override AutomationPeer OnCreateAutomationPeer();
    protected override void OnKeyDown(KeyEventArgs e);
    protected override void OnManipulationCompleted(ManipulationCompletedEventArgs e);
    protected override void OnManipulationDelta(ManipulationDeltaEventArgs e);
    protected override void OnManipulationInertiaStarting(ManipulationInertiaStartingEventArgs e);
    protected override void OnManipulationStarting(ManipulationStartingEventArgs e);
    protected override void OnMouseLeftButtonDown(MouseButtonEventArgs e);
    protected override void OnMouseWheel(MouseWheelEventArgs e);
    protected virtual void OnScrollChanged(ScrollChangedEventArgs e);
    protected override void OnStylusSystemGesture(StylusSystemGestureEventArgs e);

}
属性成员
HorizontalScrollBarVisibility :是否隐藏水平滚动条,为 true 表示隐藏,此时水平方向不可滚动,默认值为 true。
VerticalScrollBarVisibility:是否隐藏竖直滚动条,为 true 表示隐藏,此时竖直方向不可滚动,默认值为 true。
事件成员
ScrollChanged:当控件的滚动位置发生变化时将触发此事件。
示例
MainWindow.xaml
<Window x:Class="ScrollVieverSample.MainWindow"
        xmlns="http://schemas.microsoft.com/winfx/2006/xaml/presentation"
        xmlns:x="http://schemas.microsoft.com/winfx/2006/xaml"
        xmlns:d="http://schemas.microsoft.com/expression/blend/2008"
        xmlns:mc="http://schemas.openxmlformats.org/markup-compatibility/2006"
        xmlns:local="clr-namespace:ScrollVieverSample"
        mc:Ignorable="d"
        Title="MainWindow" Height="350" Width="500">
    <ScrollViewer>
        <WrapPanel>
            <Border BorderBrush="LightGray" BorderThickness="1" CornerRadius="5">
                <Image Source="pack://application:,,,/Image/logo.png" Height="100" Width="100"></Image>
            </Border>
            <Border BorderBrush="LightGray" BorderThickness="1" CornerRadius="5">
                <Image Source="pack://application:,,,/Image/logo.png" Height="100" Width="100"></Image>
            </Border>
            <Border BorderBrush="LightGray" BorderThickness="1" CornerRadius="5">
                <Image Source="pack://application:,,,/Image/logo.png" Height="100" Width="100"></Image>
            </Border>
            <Border BorderBrush="LightGray" BorderThickness="1" CornerRadius="5">
                <Image Source="pack://application:,,,/Image/logo.png" Height="100" Width="100"></Image>
            </Border>
            <Border BorderBrush="LightGray" BorderThickness="1" CornerRadius="5">
                <Image Source="pack://application:,,,/Image/logo.png" Height="100" Width="100"></Image>
            </Border>
            <Border BorderBrush="LightGray" BorderThickness="1" CornerRadius="5">
                <Image Source="pack://application:,,,/Image/logo.png" Height="100" Width="100"></Image>
            </Border>
            <Border BorderBrush="LightGray" BorderThickness="1" CornerRadius="5">
                <Image Source="pack://application:,,,/Image/logo.png" Height="100" Width="100"></Image>
            </Border>
            <Border BorderBrush="LightGray" BorderThickness="1" CornerRadius="5">
                <Image Source="pack://application:,,,/Image/logo.png" Height="100" Width="100"></Image>
            </Border>
            <Border BorderBrush="LightGray" BorderThickness="1" CornerRadius="5">
                <Image Source="pack://application:,,,/Image/logo.png" Height="100" Width="100"></Image>
            </Border>
            <Border BorderBrush="LightGray" BorderThickness="1" CornerRadius="5">
                <Image Source="pack://application:,,,/Image/logo.png" Height="100" Width="100"></Image>
            </Border>
            <Border BorderBrush="LightGray" BorderThickness="1" CornerRadius="5">
                <Image Source="pack://application:,,,/Image/logo.png" Height="100" Width="100"></Image>
            </Border>
            <Border BorderBrush="LightGray" BorderThickness="1" CornerRadius="5">
                <Image Source="pack://application:,,,/Image/logo.png" Height="100" Width="100"></Image>
            </Border>
            <Border BorderBrush="LightGray" BorderThickness="1" CornerRadius="5">
                <Image Source="pack://application:,,,/Image/logo.png" Height="100" Width="100"></Image>
            </Border>
        </WrapPanel>
    </ScrollViewer>
</Window>
图示:
注意:别忘了设置图片属性中的
Build Action设置为Resource
如上所示,我们在 WrapPanel 中增加了许多子元素,然后在外面套了一层 ScrollViewer,由于WrapPanel 是自动换行显示所有子元素(图片),所以,ScrollViewer 会做出相应适配,只显示垂直滚动条。
既然 ScrollViewer 类封装了两个滚动条(ScrollBar),那我们就必须要了解一下 ScrollBar 的特性与用法,以加强我们对WPF控件的运用能力。下一节,我们将介绍 ScrollBar。
4.7.6 ScrollBar 滚动条
ScrollBar 表示一个滚动条,该滚动条具有一个滑动 Thumb,其位置对应于一个值。它继承于 RangeBase 抽象基类,RangeBase 基类继承于 Control 基类。
带滚动特质的还有两个控件,也继承于 RangeBase 抽象基类,它们分别是 ProgressBar(进度条)和 Slider(滑动条)。待我们探讨完 ScrollBar,再来探讨 ProgressBar 和 Slider。
RangeBase 抽象基类定义
public abstract class RangeBase : Control
{
    public static readonly RoutedEvent ValueChangedEvent;
    public static readonly DependencyProperty MinimumProperty;
    public static readonly DependencyProperty MaximumProperty;
    public static readonly DependencyProperty ValueProperty;
    public static readonly DependencyProperty LargeChangeProperty;
    public static readonly DependencyProperty SmallChangeProperty;

    protected RangeBase();

    public double LargeChange { get; set; }
    public double SmallChange { get; set; }
    public double Value { get; set; }
    public double Maximum { get; set; }
    public double Minimum { get; set; }

    public event RoutedPropertyChangedEventHandler<double> ValueChanged;

    public override string ToString();
    protected virtual void OnMaximumChanged(double oldMaximum, double newMaximum);
    protected virtual void OnMinimumChanged(double oldMinimum, double newMinimum);
    protected virtual void OnValueChanged(double oldValue, double newValue);

}
RangeBase 只有5个属性
| 属性名称 | 说明 |
|---|---|
LargeChange |
表示给Value属性加减的最大值。默认为1 |
SmallChange |
表示给Value属性加减的最小值。默认为0.1 |
Value |
获取或设置范围控件的当前数量。默认为0 |
Maximum |
获取或设置Value属性的最大值 |
Minimum |
获取或设置Value属性的最小值 |
RangeBase 事件成员
ValueChanged:当前 Value 属性发生改变时触发的事件。
总结:
ScrollBar、ProgressBar和Slider都将继承上面的属性、方面与事件成员。
ScrollBar 类定义
public class ScrollBar : RangeBase
{
    public static readonly RoutedEvent ScrollEvent;
    public static readonly RoutedCommand ScrollHereCommand;
    public static readonly RoutedCommand DeferScrollToVerticalOffsetCommand;
    public static readonly RoutedCommand DeferScrollToHorizontalOffsetCommand;
    public static readonly RoutedCommand ScrollToVerticalOffsetCommand;
    public static readonly RoutedCommand ScrollToHorizontalOffsetCommand;
    public static readonly RoutedCommand ScrollToTopCommand;
    public static readonly RoutedCommand ScrollToLeftEndCommand;
    public static readonly RoutedCommand ScrollToRightEndCommand;
    public static readonly RoutedCommand ScrollToHomeCommand;
    public static readonly RoutedCommand ScrollToEndCommand;
    public static readonly RoutedCommand ScrollToBottomCommand;
    public static readonly RoutedCommand PageLeftCommand;
    public static readonly RoutedCommand PageDownCommand;
    public static readonly RoutedCommand PageUpCommand;
    public static readonly RoutedCommand LineRightCommand;
    public static readonly RoutedCommand PageRightCommand;
    public static readonly RoutedCommand LineLeftCommand;
    public static readonly RoutedCommand LineDownCommand;
    public static readonly RoutedCommand LineUpCommand;
    public static readonly DependencyProperty ViewportSizeProperty;
    public static readonly DependencyProperty OrientationProperty;

    public ScrollBar();

    public Orientation Orientation { get; set; }
    public double ViewportSize { get; set; }
    public Track Track { get; }
    protected override bool IsEnabledCore { get; }

    public event ScrollEventHandler Scroll;

    public override void OnApplyTemplate();
    protected override void OnContextMenuClosing(ContextMenuEventArgs e);
    protected override void OnContextMenuOpening(ContextMenuEventArgs e);
    protected override AutomationPeer OnCreateAutomationPeer();
    protected override void OnPreviewMouseLeftButtonDown(MouseButtonEventArgs e);
    protected override void OnPreviewMouseRightButtonUp(MouseButtonEventArgs e);

}
ScrollBar 自身有两个属性是我们必须要掌握的,那就是 Orientation 和 ViewportSize 。
Orientation :表示当前滚动条是水平的还是垂直的。
ViewportSize:获取或设置当前可见的可滚动内容的数量。默认值为 0。
另外,它还有一个滚动事件 Scroll 可以使用。我们还是以实际的例子来说明它的用法吧:
前端代码:
<Window x:Class="ScrollBar.MainWindow"
        xmlns="http://schemas.microsoft.com/winfx/2006/xaml/presentation"
        xmlns:x="http://schemas.microsoft.com/winfx/2006/xaml"
        xmlns:d="http://schemas.microsoft.com/expression/blend/2008"
        xmlns:mc="http://schemas.openxmlformats.org/markup-compatibility/2006"
        xmlns:local="clr-namespace:ScrollBar"
        mc:Ignorable="d"
        Title="ScrollBarSample" Height="350" Width="500">
    <Grid x:Name="viewport1" >
        <Grid.RowDefinitions>
            <RowDefinition Height="115"/>
            <RowDefinition Height="auto"/>
            <RowDefinition/>
        </Grid.RowDefinitions>
        <Canvas>
            <StackPanel x:Name="element1" Orientation="Horizontal" Canvas.Left="{Binding CanvasLeft}">
                <Border BorderBrush="LightGray" BorderThickness="1" CornerRadius="5" Padding="3" Margin="3">
                    <Image Source="pack://application:,,,/Image/logo.png" Width="100" Height="100"/>
                </Border>
                <Border BorderBrush="LightGray" BorderThickness="1" CornerRadius="5" Padding="3" Margin="3">
                    <Image Source="pack://application:,,,/Image/logo.png" Width="100" Height="100"/>
                </Border>
                <Border BorderBrush="LightGray" BorderThickness="1" CornerRadius="5" Padding="3" Margin="3">
                    <Image Source="pack://application:,,,/Image/logo.png" Width="100" Height="100"/>
                </Border>
                <Border BorderBrush="LightGray" BorderThickness="1" CornerRadius="5" Padding="3" Margin="3">
                    <Image Source="pack://application:,,,/Image/logo.png" Width="100" Height="100"/>
                </Border>
                <Border BorderBrush="LightGray" BorderThickness="1" CornerRadius="5" Padding="3" Margin="3">
                    <Image Source="pack://application:,,,/Image/logo.png" Width="100" Height="100"/>
                </Border>
                <Border BorderBrush="LightGray" BorderThickness="1" CornerRadius="5" Padding="3" Margin="3">
                    <Image Source="pack://application:,,,/Image/logo.png" Width="100" Height="100"/>
                </Border>
                <Border BorderBrush="LightGray" BorderThickness="1" CornerRadius="5" Padding="3" Margin="3">
                    <Image Source="pack://application:,,,/Image/logo.png" Width="100" Height="100"/>
                </Border>
                <Border BorderBrush="LightGray" BorderThickness="1" CornerRadius="5" Padding="3" Margin="3">
                    <Image Source="pack://application:,,,/Image/logo.png" Width="100" Height="100"/>
                </Border>

            </StackPanel>
        </Canvas>
        <ScrollBar Grid.Row="1" Orientation="Horizontal"
                   Maximum="{Binding Maximum}"
                   Value="{Binding X}"
                   ViewportSize="{Binding ElementName=viewport1,Path=ActualWidth}"/>
        <TextBlock Grid.Row="2" Text="ScrollBar" HorizontalAlignment="Center" VerticalAlignment="Center" FontSize="24"/>
    </Grid>

</Window>
设计界面:

运行时界面:
观察这个UI设计,我们故意在 StackPanel 控件中增加了多张图片,使其不能完全在 Canvas 中显示出来,然后在下面实例化了一根水平滚动条。注意滚动条的其中三个参数使用了绑定,不熟悉的小伙伴可参阅数据绑定那一章节。
Maximum:表示这根滚动条的最大值。
Value:表示滚动条的当前值。
ViewportSize:表示滚动条要作用于某个控件的宽度(这里实际上指 Grid 的宽度)。
最后,我们将 StackPanel 控件的 Canvas.Left 依赖属性绑定到一个 CanvasLeft 属性。只要 CanvasLeft 属性的值发生改变,那么 StackPanel 相对 于Canvas 水平位置就发生改变。
那么 CanvasLeft 属性是怎样发生改变的呢?这一切将在后台代码中实现。
后台代码:
using System.ComponentModel;
using System.Windows;
namespace ScrollBar
{
    /// <summary>
    /// Interaction logic for MainWindow.xaml
    /// </summary>
    public partial class MainWindow : Window, INotifyPropertyChanged	// 不要忘记实现接口 INotifyPropertyChanged
    {
        public MainWindow()
        {
            InitializeComponent();

            DataContext = this; //将当前窗体作为ViewModel赋值给当前窗体的DataContext
            Loaded += (sender, e) =>
            {
                // 计算滚动条最大值
                Maximum = this.element1.ActualWidth - this.viewport1.ActualWidth;
            };
        }


        private double maximum = 0;
        /// <summary>
        /// 滚动条最大值
        /// </summary>
        public double Maximum
        {
            get { return maximum; }
            set
            {
                maximum = value;
                NotifyPropertyChanged("Maximum");
            }
        }

        private double x = 0;
        /// <summary>
        /// 滚动条当前值
        /// </summary>
        public double X
        {
            get { return x; }
            set
            {
                x = value;
                CanvasLeft = -x;
                NotifyPropertyChanged("X");
            }
        }


        private double canvasLeft = 0;
        /// <summary>
        /// 相对于 Canvas 控件 Left 边距
        /// </summary>
        public double CanvasLeft
        {
            get { return canvasLeft; }
            set
            {
                canvasLeft = value;
                NotifyPropertyChanged("CanvasLeft");
            }
        }

        public event PropertyChangedEventHandler? PropertyChanged;

        /// <summary>
        /// 属性通知方法
        /// </summary>
        /// <param name="propertyName"></param>
        protected virtual void NotifyPropertyChanged(string propertyName)
        {
            if (this.PropertyChanged != null)
            {
                this.PropertyChanged(this, new PropertyChangedEventArgs(propertyName));
            }
        }
    }
}
如上所示,我们获取到滚动条的值 X,然后取反后赋值给 CanvasLeft 属性,而 CanvasLeft 属性拥有“属性通知”功能,故而前端 StackPanel 的相对位置会随着用户拖动滚动条而变化。
关于属性通知及 INotifyPropertyChanged 接口,我们将在数据绑定一章讲解。
4.7.7 Slider 滑动条
Slider 滑动条与 ScrollBar 滚动条有点相似,甚至某些情况下,两者还可以互换使用。Slider 也继承于 RangeBase 基类,其功能是提供一个可以滑动取值的控件。
Slider 类定义
public class Slider : RangeBase
{
    public static readonly DependencyProperty OrientationProperty;
    public static readonly DependencyProperty IsMoveToPointEnabledProperty;
    public static readonly DependencyProperty SelectionEndProperty;
    public static readonly DependencyProperty SelectionStartProperty;
    public static readonly DependencyProperty IsSelectionRangeEnabledProperty;
    public static readonly DependencyProperty TickFrequencyProperty;
    public static readonly DependencyProperty TickPlacementProperty;
    public static readonly DependencyProperty TicksProperty;
    public static readonly DependencyProperty AutoToolTipPrecisionProperty;
    public static readonly DependencyProperty AutoToolTipPlacementProperty;
    public static readonly DependencyProperty IntervalProperty;
    public static readonly DependencyProperty DelayProperty;
    public static readonly DependencyProperty IsDirectionReversedProperty;
    public static readonly DependencyProperty IsSnapToTickEnabledProperty;

    public Slider();

    public static RoutedCommand MinimizeValue { get; }
    public static RoutedCommand IncreaseSmall { get; }
    public static RoutedCommand DecreaseSmall { get; }
    public static RoutedCommand MaximizeValue { get; }
    public static RoutedCommand DecreaseLarge { get; }
    public static RoutedCommand IncreaseLarge { get; }
    public bool IsSnapToTickEnabled { get; set; }
    public int AutoToolTipPrecision { get; set; }
    public AutoToolTipPlacement AutoToolTipPlacement { get; set; }
    public int Interval { get; set; }
    public int Delay { get; set; }
    public bool IsDirectionReversed { get; set; }
    public Orientation Orientation { get; set; }
    public double TickFrequency { get; set; }
    public DoubleCollection Ticks { get; set; }
    public double SelectionStart { get; set; }
    public TickPlacement TickPlacement { get; set; }
    public bool IsSelectionRangeEnabled { get; set; }
    public bool IsMoveToPointEnabled { get; set; }
    public double SelectionEnd { get; set; }

    public override void OnApplyTemplate();
    protected override Size ArrangeOverride(Size finalSize);
    protected override AutomationPeer OnCreateAutomationPeer();
    protected virtual void OnDecreaseLarge();
    protected virtual void OnDecreaseSmall();
    protected virtual void OnIncreaseLarge();
    protected virtual void OnIncreaseSmall();
    protected virtual void OnMaximizeValue();
    protected override void OnMaximumChanged(double oldMaximum, double newMaximum);
    protected virtual void OnMinimizeValue();
    protected override void OnMinimumChanged(double oldMinimum, double newMinimum);
    protected override void OnPreviewMouseLeftButtonDown(MouseButtonEventArgs e);
    protected virtual void OnThumbDragCompleted(DragCompletedEventArgs e);
    protected virtual void OnThumbDragDelta(DragDeltaEventArgs e);
    protected virtual void OnThumbDragStarted(DragStartedEventArgs e);
    protected override void OnValueChanged(double oldValue, double newValue);

}
属性成员
| 属性名称 | 说明 |
|---|---|
IsSnapToTickEnabled |
Slider 会有一些刻度线,如果要求 Thumb 移动到最近的刻度线,则可将该值设置为true。 |
AutoToolTipPrecision |
获取或设置 Slider 的值的小数点位数。 |
AutoToolTipPlacement |
获取或设置按下Thumb时是否显示提示工具。 |
Interval |
获取或设置用户按下 RepeatButton 时执行增加减少命令的时间间隔(毫秒)。 |
Delay |
获取或设置用户按下 RepeatButton 时延时多少毫秒后执行命令 |
IsDirectionReversed |
获取或设置增加值的方向。 |
Orientation |
获取或设置Slider的方向。水平或垂直。 |
TickFrequency |
获取或设置刻度线之间的间隔。默认为1.0 |
Ticks |
获取或设置为 System.Windows.Controls.Slider 显示的刻度线的位置。 |
SelectionStart |
获取或设置 System.Windows.Controls.Slider 的指定选择内容的最大值。 |
TickPlacement |
获取或设置刻度线的位置 |
IsSelectionRangeEnabled |
获取或设置显示选择范围 |
IsMoveToPointEnabled |
如果Thumb 立即移动到鼠标单击的位置,则为true。 |
SelectionEnd |
获取或设置 System.Windows.Controls.Slider 的指定选择内容的最大值。 |
Slider 示例
看 Slider如何通过拖动去改变元素的尺寸。
<Window x:Class="SliderSample.MainWindow"
        xmlns="http://schemas.microsoft.com/winfx/2006/xaml/presentation"
        xmlns:x="http://schemas.microsoft.com/winfx/2006/xaml"
        xmlns:d="http://schemas.microsoft.com/expression/blend/2008"
        xmlns:mc="http://schemas.openxmlformats.org/markup-compatibility/2006"
        xmlns:local="clr-namespace:SliderSample"
        mc:Ignorable="d"
        Title="SliderSample" Height="350" Width="500">
    <Grid>
        <Grid.RowDefinitions>
            <RowDefinition Height="*"></RowDefinition>
            <RowDefinition Height="auto"></RowDefinition>
            <RowDefinition Height="auto"></RowDefinition>
        </Grid.RowDefinitions>
        <Canvas Grid.Row="0">
            <Border BorderBrush="LightGray" BorderThickness="1" CornerRadius="5" Margin="3" Padding="3">
                <Image Source="pack://application:,,,/Image/logo.png"
                       Height="{Binding ElementName=slider, Path=Value}"
                       Width="{Binding ElementName=slider, Path=Value}"></Image>
            </Border>
        </Canvas>
        <DockPanel Grid.Row="1">
            <TextBlock Text="滑动改变图片大小" Margin="3" FontSize="14"></TextBlock>
            <Slider x:Name="slider" Minimum="50" Maximum="500" Value="50" Margin="3"></Slider>
        </DockPanel>
    </Grid>
</Window>
运行时界面:
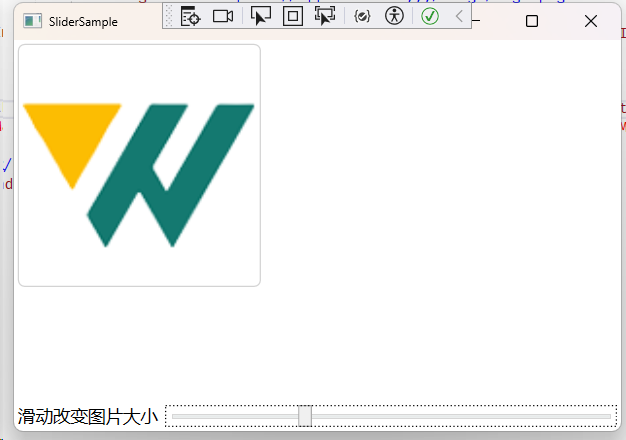
F5运行之后,我们可以拖动 Slider 的滑块,图片的尺寸因为绑定了 Slider 控件的 Value 属性,所以图片的大小会随着用户左右拖动而变化。
4.7.8 ProgressBar 进度条
ProgressBar 进度条通常在我们执行某个任务需要花费大量时间时使用,这时可以采用进度条显示任务或线程的执行进度,以便给用户良好的使用体验。
ProgressBar 类定义
public class ProgressBar : RangeBase
{
    public static readonly DependencyProperty IsIndeterminateProperty;
    public static readonly DependencyProperty OrientationProperty;

    public ProgressBar();

    public bool IsIndeterminate { get; set; }
    public Orientation Orientation { get; set; }

    public override void OnApplyTemplate();
    protected override AutomationPeer OnCreateAutomationPeer();
    protected override void OnMaximumChanged(double oldMaximum, double newMaximum);
    protected override void OnMinimumChanged(double oldMinimum, double newMinimum);
    protected override void OnValueChanged(double oldValue, double newValue);

}
ProgressBar 自身只有两个属性,分别是 IsIndeterminate 和 Orientation 。
IsIndeterminate 属性:如果为true,表示以动画从左到右滑动的方式展示进度效果。
Orientation 属性:表示进度条的方式,水平时从左至右增长,垂直时从下到上增长。
ProgressBar 例子
<Window x:Class="ProgressBarSample.MainWindow"
        xmlns="http://schemas.microsoft.com/winfx/2006/xaml/presentation"
        xmlns:x="http://schemas.microsoft.com/winfx/2006/xaml"
        xmlns:d="http://schemas.microsoft.com/expression/blend/2008"
        xmlns:mc="http://schemas.openxmlformats.org/markup-compatibility/2006"
        xmlns:local="clr-namespace:ProgressBarSample"
        mc:Ignorable="d"
        Title="ProgressBarSample" Height="350" Width="500">
    <StackPanel VerticalAlignment="Center">
        <ProgressBar IsIndeterminate="False"
                     x:Name="progressBar1"
                     Value="0"
                     Maximum="100"
                     Minimum="0"
                     Orientation="Horizontal"
                     Height="10"
                     Margin="15"></ProgressBar>
        <TextBlock x:Name="textBlock1" Text="0%" VerticalAlignment="Center" HorizontalAlignment="Center"></TextBlock>
    </StackPanel>
</Window>
注意:
布局的时候,如果有进度条,
StackPanel的HorizontalAlignment属性不可设为Center,否则进度条很小,看不见。
运行界面:
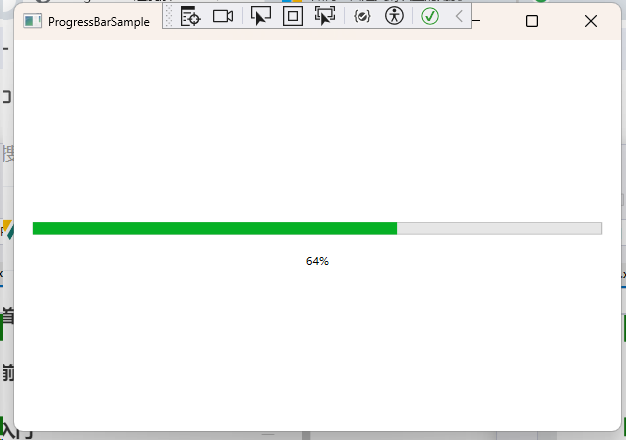
后端代码:
using System.Windows;

namespace ProgressBarSample
{
    /// <summary>
    /// Interaction logic for MainWindow.xaml
    /// </summary>
    public partial class MainWindow : Window
    {
        public MainWindow()
        {
            InitializeComponent();
            this.Loaded += (sender, e) =>
            {
                Task.Factory.StartNew(() =>
                {
                    for (int i = 0; i <= 100; i++)
                    {
                        Dispatcher.Invoke(() =>
                        {
                            this.textBlock1.Text = $"{i}%";
                            this.progressBar1.Value = i;
                        });
                        Task.Delay(25).Wait();
                    }
                });
            };
        }
    }
}
我们在主窗体的 Loaded 事件中增加了一个子线程,需要注意的是,在子线程中不可以直接更新UI线程的控件,所以我们利用 Dispatcher 类,将访问 UI 线程的代码成成一个匿名函数,交给 Dispatcher 去执行。F5运行后,您将看到一个进度条从0增长到100。
4.7.9 MediaElement 媒体播放器
MediaElement,一个可以播放音频或视频的控件,继承于 FrameworkElement 基类。 MediaElement 包含了常见的音频或视频格式,如果需要更强大的功能,可以考虑使用 VLC库。
官方说明:
MediaElement可以在两种不同的模式下使用,具体取决于驱动控件的内容:独立模式或时钟模式。
在独立模式下使用 时,
MediaElement类似于图像,Source可以直接指定 URI。在时钟模式下,
MediaElement可以将 视为动画的目标,因此它将在计时树中具有相应的Timeline和Clock条目。
MediaElement 的定义
public class MediaElement : FrameworkElement, IUriContext
{
    public static readonly DependencyProperty SourceProperty;
    public static readonly RoutedEvent ScriptCommandEvent;
    public static readonly RoutedEvent BufferingEndedEvent;
    public static readonly RoutedEvent BufferingStartedEvent;
    public static readonly RoutedEvent MediaOpenedEvent;
    public static readonly RoutedEvent MediaFailedEvent;
    public static readonly DependencyProperty StretchDirectionProperty;
    public static readonly RoutedEvent MediaEndedEvent;
    public static readonly DependencyProperty LoadedBehaviorProperty;
    public static readonly DependencyProperty UnloadedBehaviorProperty;
    public static readonly DependencyProperty ScrubbingEnabledProperty;
    public static readonly DependencyProperty IsMutedProperty;
    public static readonly DependencyProperty BalanceProperty;
    public static readonly DependencyProperty VolumeProperty;
    public static readonly DependencyProperty StretchProperty;

    public MediaElement();

    public MediaState LoadedBehavior { get; set; }
    public bool CanPause { get; }
    public bool IsBuffering { get; }
    public double DownloadProgress { get; }
    public double BufferingProgress { get; }
    public int NaturalVideoHeight { get; }
    public Duration NaturalDuration { get; }
    public bool HasAudio { get; }
    public bool HasVideo { get; }
    public TimeSpan Position { get; set; }
    public double SpeedRatio { get; set; }
    public MediaState UnloadedBehavior { get; set; }
    public int NaturalVideoWidth { get; }
    public bool ScrubbingEnabled { get; set; }
    public MediaClock Clock { get; set; }
    public double Balance { get; set; }
    public double Volume { get; set; }
    public StretchDirection StretchDirection { get; set; }
    public Stretch Stretch { get; set; }
    public Uri Source { get; set; }
    public bool IsMuted { get; set; }

    public event RoutedEventHandler BufferingEnded;
    public event RoutedEventHandler BufferingStarted;
    public event RoutedEventHandler MediaOpened;
    public event EventHandler<ExceptionRoutedEventArgs> MediaFailed;
    public event RoutedEventHandler MediaEnded;
    public event EventHandler<MediaScriptCommandRoutedEventArgs> ScriptCommand;

    public void Close();
    public void Pause();
    public void Play();
    public void Stop();
    protected override Size ArrangeOverride(Size finalSize);
    protected override Size MeasureOverride(Size availableSize);
    protected override AutomationPeer OnCreateAutomationPeer();
    protected override void OnRender(DrawingContext drawingContext);

}
成员属性
| 属性名称 | 说明 |
|---|---|
LoadedBehavior |
获取或设置加载媒体的行为,如果加载希望手动控制播放,请设置为 Manual 。 |
CanPause |
获取一个值,该值指示是否可以暂停媒体。 |
IsBuffering |
获取一个值,该值指示是否缓冲媒体。 |
DownloadProgress |
获取一个百分比值,该值为位于远程服务器上的内容完成的下载量。 |
BufferingProgress |
获取一个值,该值指示缓冲进度的百分比。0-1 之间 |
NaturalVideoHeight |
获取与媒体关联的视频的高度。 |
NaturalDuration |
获取介质的自然持续时间。也就是视频播放总时长。 |
HasAudio |
获取一个值,该值指示媒体是否具有音频。 |
HasVideo |
获取一个值,该值指示媒体是否具有视频。 |
Position |
通过媒体的播放时间获取或设置进度的当前位置。 |
SpeedRatio |
获取或设置媒体的速率。也就是按几倍播放视频。 |
UnloadedBehavior |
获取或设置卸载媒体的行为。 |
NaturalVideoWidth |
获取与媒体关联的视频的宽度。 |
ScrubbingEnabled |
获取或设置一个值,该值指示 MediaElement 是否将更新帧的查找操作在暂停状态。 |
Clock |
获取或设置 MediaElement 媒体播放相关联的时钟。 |
Balance |
获取或设置扬声器的音量比。 |
Volume |
获取或设置媒体的音量。0-1 之间,默认 0.5 |
StretchDirection |
获取或设置一个值,确定扩展的限制应用于映像。 |
Stretch |
获取或设置 MediaElement 媒体的拉伸方式。 |
Source |
获取或设置 MediaElement 媒体源[重点] |
IsMuted |
是否静音 |
事件成员
| 事件名称 | 说明 |
|---|---|
BufferingEnded |
媒体缓冲结束时发生。 |
BufferingStarted |
媒体缓冲开始时发生。 |
MediaOpened |
媒体加载已完成时发生。 |
MediaFailed |
遇到错误时发生。 |
MediaEnded |
媒体结束时发生。 |
ScriptCommand |
在媒体中遇到的脚本命令时发生。 |
MediaElement 示例
我们以 MediaElement 的独立模式为例,开发一个基础版本的视频播放器,该项目将会用到MediaElement、Gird、Border、TextBlock、Button、Slider、ProgressBar等控件,也算是对之前学过的控件章节一次总结和回顾。
前端代码:MainWindow.xaml
<Window x:Class="MediaElementSample.MainWindow"
        xmlns="http://schemas.microsoft.com/winfx/2006/xaml/presentation"
        xmlns:x="http://schemas.microsoft.com/winfx/2006/xaml"
        xmlns:d="http://schemas.microsoft.com/expression/blend/2008"
        xmlns:mc="http://schemas.openxmlformats.org/markup-compatibility/2006"
        xmlns:local="clr-namespace:MediaElementSample"
        mc:Ignorable="d"
        Title="MediaElementSample" Height="450" Width="800">
    <Grid>
        <Grid.RowDefinitions>
            <RowDefinition Height="Auto"></RowDefinition>
            <RowDefinition></RowDefinition>
            <RowDefinition Height="Auto"></RowDefinition>
            <RowDefinition Height="Auto"></RowDefinition>
            <RowDefinition Height="Auto"></RowDefinition>
        </Grid.RowDefinitions>
        <!--第一行:工具菜单-->
        <Menu x:Name="_Menu">
            <MenuItem Header="Open">
                <MenuItem Header="Open File" x:Name="_OpenFile" Click="_OpenFile_Click">
                    <MenuItem.Icon>
                        <Image Source="/Icon/open_video.png"></Image>
                    </MenuItem.Icon>
                </MenuItem>
                <MenuItem Header="Exit" x:Name="_CloseFile" Click="_CloseFile_Click">
                    <MenuItem.Icon>
                        <Image Source="/Icon/close_video.png"></Image>
                    </MenuItem.Icon>
                </MenuItem>
            </MenuItem>
            <MenuItem Header="About" x:Name="_About" Click="AboutClick">
            </MenuItem>
        </Menu>
        <!--第二行:播放区域-->
        <MediaElement  x:Name="_MediaElement" LoadedBehavior="Manual" Grid.Row="1"></MediaElement>
        <Border x:Name="_Border" Background="Black" Grid.Row="1" Margin="0 10">
            <TextBlock x:Name="_TextBlock" Text="MediaElement | 媒体播放器" Foreground="LightCoral" FontSize="18"
                       HorizontalAlignment="Center" VerticalAlignment="Center"></TextBlock>
        </Border>
        <!--第四行:进度条-->
        <Grid Grid.Row="3" >
            <ProgressBar x:Name="_ProgressBar" Height="10" Margin="5"></ProgressBar>
        </Grid>
        <!--第三行:按键-->
        <StackPanel Orientation="Horizontal" Grid.Row="2" HorizontalAlignment="Center">
            <Button Content="Open" Width="60" Height="25" Margin="5" Click="OpenMedia"></Button>
            <Button Content="Play" Width="60" Height="25" Margin="5" Click="PlayMedia"></Button>
            <Button Content="Pause" Width="60" Height="25" Margin="5" Click="PauseMedia"></Button>
            <Button Content="Stop" Width="60" Height="25" Margin="5" Click="StopMedia"></Button>
            <Button Content="Backward" Width="60" Height="25" Margin="5" Click="BackwardMedia"></Button>
            <Button Content="Forward" Width="60" Height="25" Margin="5" Click="ForwardMedia"></Button>
            <TextBlock Text="Volume"  Width="60" Height="25" Padding="5"></TextBlock>
            <!--音量滚动条-->
            <Slider x:Name="volumeSlider" Minimum="0"
                    Maximum="1" Value="0.5"
                    Width="70" VerticalAlignment="Center"
                    Foreground="White"
                    ValueChanged="ChangeMediaVolume"
                    HorizontalAlignment="Center"></Slider>
            <!--播放速度调整条-->
            <TextBlock Text="Speed"  Width="60" Height="25" Padding="5" ></TextBlock>
            <Slider x:Name="playSpeed" Minimum="0.75"
                    IsSnapToTickEnabled="True" TickPlacement="BottomRight"
                    AutoToolTipPlacement="BottomRight" AutoToolTipPrecision="1"
                    Maximum="4" Value="1" Ticks="0.75, 1, 1.25, 1.5, 2, 3, 4"
                    Width="70" VerticalAlignment="Center"
                    Foreground="White"
                    ValueChanged= "ChangePlaySpeed"
                    HorizontalAlignment="Center"/>
        </StackPanel>
    </Grid>
</Window>
注意:生成的可执行程序运行时候看不见本地图片
如果发现在 Visual Studio 下编译,生成的可执行程序运行时候看不见本地图片,需要确保图片的
Build Action属性设置为Resource:在 Visual Studio 中,选中图片文件,在属性窗口中找到
Build Action属性,确保其值为Resource。
然后重新生成当前解决方案
using System;
using System.Windows;
using System.Windows.Controls;
using System.Windows.Media;
using System.Windows.Threading;

namespace MediaElementSample
{
    /// <summary>
    /// Interaction logic for MainWindow.xaml
    /// </summary>
    public partial class MainWindow : Window
    {
        // 定义文件的路径
        private string file = string.Empty;
        private DispatcherTimer timer;
        private bool isPlaying = false;

        public MainWindow()
        {
            InitializeComponent();

            // 初始化计时器,每隔 1s 更新一次进度条
            timer = new DispatcherTimer();
            timer.Interval = TimeSpan.FromSeconds(1);
            timer.Tick += Timer_Tick;
            timer.Start();
        }

        // 得到当前播放的位置,
        private void Timer_Tick(object sender, EventArgs e)
        {
            if (_MediaElement.NaturalDuration.HasTimeSpan)
            {
                TimeSpan ts = _MediaElement.Position;
                _ProgressBar.Value = ts.TotalSeconds;	// 更新当前播放进度
            }
        }

        // 关于按钮
        private void AboutClick(object sender, RoutedEventArgs e)
        {
            MessageBox.Show("kobayashilin1\nAll Rights Reservesd");
        }

        // 打开文件
        private void OpenMedia(object sender, RoutedEventArgs e)
        {
            // 设置文件对话框的 Filter 和多选选项
            var openFileDialog = new Microsoft.Win32.OpenFileDialog()
            {
                Filter = "视频文件(.mp4)|*.mp4",
                Multiselect = false
            };

            bool? result = openFileDialog.ShowDialog();
            if (result == true)
            {
                file = openFileDialog.FileName;
                _MediaElement.MediaOpened -= _MediaElement_MediaOpened;
                _MediaElement.MediaOpened += _MediaElement_MediaOpened;
                _MediaElement.Source = new System.Uri(file);
                this.Title = file;
                _TextBlock.Text = file;
            }
        }

        private void _MediaElement_MediaOpened(object sender, RoutedEventArgs e)
        {
            if (_MediaElement.NaturalDuration.HasTimeSpan)
            {
                TimeSpan timeSpan = _MediaElement.NaturalDuration.TimeSpan;
                _ProgressBar.Maximum = timeSpan.TotalSeconds;  // 设置进度条的总长度
            }
        }

        // 播放
        private void PlayMedia(object sender, RoutedEventArgs e)
        {
            if (!isPlaying)
            {
                _MediaElement.Play();
                // 播放之后要将背景隐藏起来
                _Border.Visibility = Visibility.Collapsed;
                // 显示播放界面
                _MediaElement.Visibility = Visibility.Visible;
                isPlaying = true;
            }
        }

        // 暂停
        private void PauseMedia(object sender, RoutedEventArgs e)
        {
            if (_MediaElement.NaturalDuration.HasTimeSpan && isPlaying)
            {
                _MediaElement.Pause();
                isPlaying = false;
            }
        }

        // 停止
        private void StopMedia(object sender, RoutedEventArgs e)
        {
            _MediaElement.Stop();
            _MediaElement.Visibility = Visibility.Collapsed;    // 让媒体控件不可见
           _Border.Visibility = Visibility.Visible; // 重新让Border背景可见
            isPlaying = false ;
        }

        // 后退
        private void BackwardMedia(object sender, RoutedEventArgs e)
        {
            // 前进和后退控制的属性都是 Position
            _MediaElement.Position -= TimeSpan.FromSeconds(10);
        }

        // 前进
        private void ForwardMedia(object sender, RoutedEventArgs e)
        {
            _MediaElement.Position += TimeSpan.FromSeconds(10);
        }

        private void ChangeMediaVolume(object sender, RoutedPropertyChangedEventArgs<double> e)
        {
            // 滑动条控制当前音量
            _MediaElement.Volume = volumeSlider.Value;
        }

        private void ChangePlaySpeed(object sender, RoutedPropertyChangedEventArgs<double> e)
        {
            // 滑动条控制当前播放速度
            _MediaElement.SpeedRatio = playSpeed.Value;
        }

        private void _OpenFile_Click(object sender, RoutedEventArgs e)
        {
            OpenMedia(sender, e);
        }

        private void _CloseFile_Click(object sender, RoutedEventArgs e)
        {
            this.Close();
        }
    }
}
注意
- 采用
Microsoft.Win32.OpenFileDialog去获取视频文件地址,然后创建一个Uri实例,最后把这个实例赋值给MediaElement的Source属性MediaElement的LoadedBehavior属性必须设置为Manual才能以交互方式停止、暂停和播放媒体。- 音量条的值区间设为:0 ~ 1
- 构造函数里通过
DispatcherTimer开启了一个子线程,用以更新当前播放进度。DispatcherTimer是运行在UI线程上的定时器,可以直接更新UI元素,不会引发跨线程调用的异常
播放器运行截图:
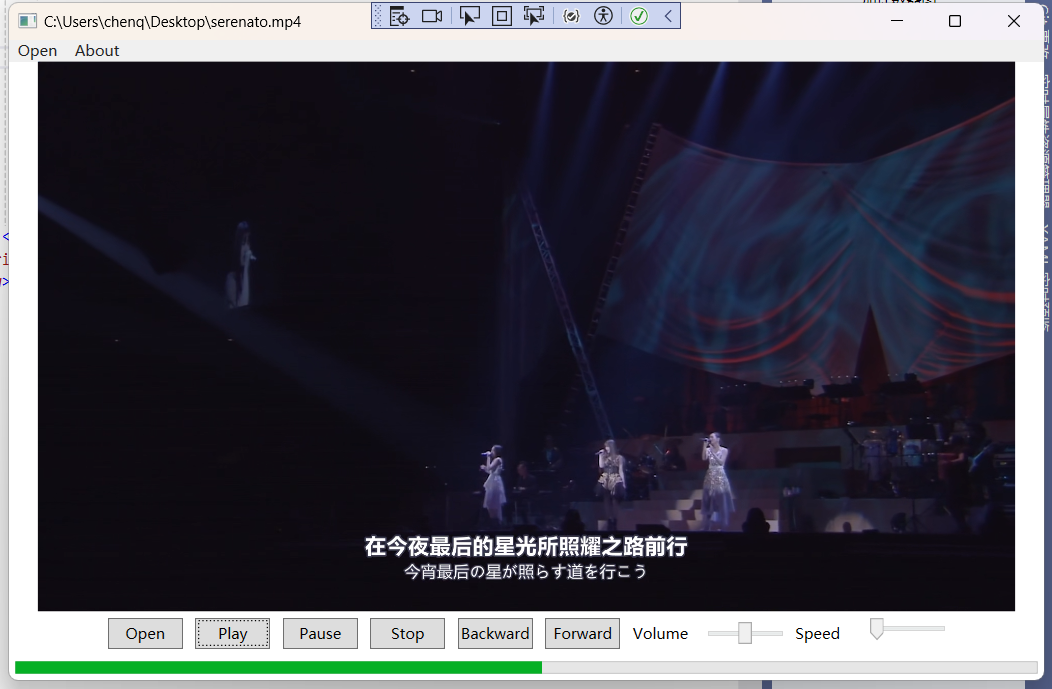
5. 集合控件
5.1 ItemsControl 基类
很多时候,我们需要显示大量的数据,这些数据虽然众多,但是数据类型结构相同的,由于内容控件只能显示单个元素,要显示或操作多个元素组成的集合,那么,集合控件就派上用场了。WPF 中的集合控件种类丰富,有类似表格的 DataGrid,有单列表的 ListBox,也有介于两者之前的 ListView,还有,软件的菜单通常也是一个集合控件,以及软件下方的状态栏,同样也是一个集合控件。
这些集合控件都有一个共同的基类控件,那就是 ItemsControl 类,下面我们以表格的形式展示一下即将要学习的集合控件。
| 控件名 | 说明 |
|---|---|
ItemsControl |
集合控件的基类,本身也是一个可以实例化的控件 |
ListBox |
一个列表集合控件 |
ListView |
表示用于显示数据项列表的控件,它可以有列头标题 |
DataGrid |
表示可自定义的网格中显示数据的控件。 |
ComboBox |
表示带有下拉列表的选择控件,通过单击控件上的箭头可显示或隐藏下拉列表。 |
TabControl |
表示包含多个共享相同的空间在屏幕上的项的控件。 |
TreeView |
用树结构(其中的项可以展开和折叠)中显示分层数据的控件 |
Menu |
表示一个 Windows 菜单控件,该控件可用于按层次组织与命令和事件处理程序关联的元素。 |
ContextMenu |
表示使控件能够公开特定于控件的上下文的功能的弹出菜单。 |
StatusBar |
表示应用程序窗口中的水平栏中显示项和信息的控件。 |
5.1.1 ItemsControl 类定义
public class ItemsControl : Control, IAddChild, IGeneratorHost, IContainItemStorage
{
    public static readonly DependencyProperty ItemsSourceProperty;
    public static readonly DependencyProperty HasItemsProperty;
    public static readonly DependencyProperty DisplayMemberPathProperty;
    public static readonly DependencyProperty ItemTemplateProperty;
    public static readonly DependencyProperty ItemTemplateSelectorProperty;
    public static readonly DependencyProperty ItemStringFormatProperty;
    public static readonly DependencyProperty ItemBindingGroupProperty;
    public static readonly DependencyProperty ItemContainerStyleProperty;
    public static readonly DependencyProperty ItemContainerStyleSelectorProperty;
    public static readonly DependencyProperty ItemsPanelProperty;
    public static readonly DependencyProperty IsGroupingProperty;
    public static readonly DependencyProperty GroupStyleSelectorProperty;
    public static readonly DependencyProperty AlternationCountProperty;
    public static readonly DependencyProperty AlternationIndexProperty;
    public static readonly DependencyProperty IsTextSearchEnabledProperty;
    public static readonly DependencyProperty IsTextSearchCaseSensitiveProperty;

    public ItemsControl();

    public int AlternationCount { get; set; }
    public GroupStyleSelector GroupStyleSelector { get; set; }
    public ObservableCollection<GroupStyle> GroupStyle { get; }
    public bool IsGrouping { get; }
    public ItemsPanelTemplate ItemsPanel { get; set; }
    public StyleSelector ItemContainerStyleSelector { get; set; }
    public Style ItemContainerStyle { get; set; }
    public BindingGroup ItemBindingGroup { get; set; }
    public string ItemStringFormat { get; set; }
    public DataTemplateSelector ItemTemplateSelector { get; set; }
    public DataTemplate ItemTemplate { get; set; }
    public string DisplayMemberPath { get; set; }
    public bool HasItems { get; }
    public ItemContainerGenerator ItemContainerGenerator { get; }
    public IEnumerable ItemsSource { get; set; }
    public ItemCollection Items { get; }	// Items 属性
    public bool IsTextSearchCaseSensitive { get; set; }
    public bool IsTextSearchEnabled { get; set; }
    protected internal override IEnumerator LogicalChildren { get; }

    public static DependencyObject ContainerFromElement(ItemsControl itemsControl, DependencyObject element);
    public static int GetAlternationIndex(DependencyObject element);
    public static ItemsControl GetItemsOwner(DependencyObject element);
    public static ItemsControl ItemsControlFromItemContainer(DependencyObject container);
    public override void BeginInit();
    public DependencyObject ContainerFromElement(DependencyObject element);
    public override void EndInit();
    public bool IsItemItsOwnContainer(object item);
    public bool ShouldSerializeGroupStyle();
    public bool ShouldSerializeItems();
    public override string ToString();
    protected virtual void AddChild(object value);
    protected virtual void AddText(string text);
    protected virtual void ClearContainerForItemOverride(DependencyObject element, object item);
    protected virtual DependencyObject GetContainerForItemOverride();
    protected virtual bool IsItemItsOwnContainerOverride(object item);
    protected virtual void OnAlternationCountChanged(int oldAlternationCount, int newAlternationCount);
    protected virtual void OnDisplayMemberPathChanged(string oldDisplayMemberPath, string newDisplayMemberPath);
    protected virtual void OnGroupStyleSelectorChanged(GroupStyleSelector oldGroupStyleSelector, GroupStyleSelector newGroupStyleSelector);
    protected virtual void OnItemBindingGroupChanged(BindingGroup oldItemBindingGroup, BindingGroup newItemBindingGroup);
    protected virtual void OnItemContainerStyleChanged(Style oldItemContainerStyle, Style newItemContainerStyle);
    protected virtual void OnItemContainerStyleSelectorChanged(StyleSelector oldItemContainerStyleSelector, StyleSelector newItemContainerStyleSelector);
    protected virtual void OnItemsChanged(NotifyCollectionChangedEventArgs e);
    protected virtual void OnItemsPanelChanged(ItemsPanelTemplate oldItemsPanel, ItemsPanelTemplate newItemsPanel);
    protected virtual void OnItemsSourceChanged(IEnumerable oldValue, IEnumerable newValue);
    protected virtual void OnItemStringFormatChanged(string oldItemStringFormat, string newItemStringFormat);
    protected virtual void OnItemTemplateChanged(DataTemplate oldItemTemplate, DataTemplate newItemTemplate);
    protected virtual void OnItemTemplateSelectorChanged(DataTemplateSelector oldItemTemplateSelector, DataTemplateSelector newItemTemplateSelector);
    protected override void OnKeyDown(KeyEventArgs e);
    protected override void OnTextInput(TextCompositionEventArgs e);
    protected virtual void PrepareContainerForItemOverride(DependencyObject element, object item);
    protected virtual bool ShouldApplyItemContainerStyle(DependencyObject container, object item);

}
5.1.2 ItemsControl 类分析
由于我们还没有讲模板、样式、数据绑定等内容,所以关于 ItemsControl 类的分析,我们先关注一些与模板样式和数据绑定无关的内容,先讲讲 ItemsControl 最基础的内容。
Items 属性
ItemsControl 类作为集合控件的基类,它提供了一个非常重要的属性,那就是 Items 属性 。这个属性的类型是 ItemCollection,也就是一个集合列表,那么这个列表的元素内容是什么呢?

从源码中看到,列表元素就是 object,说明我们可以在集合控件中放入任意引用类型的元素,并且可以通过下标轻松访问 ItemsControl 的子控件。
DisplayMemberPath 属性
这个属性用来获取或设置要显示的内容,它通常指某个数据源的某个属性名称,所以它是 string 类型。
HasItems 属性
用来判断当前结合是否有元素
IsTextSearchCaseSensitive 属性
搜索元素时候是否大小写敏感,该属性为 true 时,搜索元素的时候区分大小写
IsTextSearchEnable 属性
表示是否启用文字搜索
[重要] ItemsPanel 属性
由于一个集合控件里面会显示多个数据项(一个数据代表一个家),那么这些数据项怎么排版?是像 StackPanel 一样水平或垂直排列,还是像 WrapPanel 瀑布流一样排例?这个 ItemsPanel 属性来决定。
[重要] ItemTemplate 属性
在集合控件里,数据项有可能是一个复杂的实体,那么这些数据以什么样的 UI 布局界面呈现?也就是说,数据本身穿什么衣服? ItemTemplate 属性就是来决定数据的外观的。如果把每个 Item 元素看成一个家,那么前面的 ItemsPanel 属性就是来决定邻里之间的实际距离以及房子和房子的排例走势。
[重要] ItemContainerStyle 属性
ItemTemplate 属性只能决定数据的外观,相当于这个家的内部装修以及家电家具的样式,而这个家外墙的装饰,则必须由 ItemContainerStyle 属性来承包。
[重要] ItemContainerStyleSelector 属性
当我们选中这个集合控件中的某一项,并希望突出这一项,那就可以在 ItemTemplateSelector 属性中进行定义,也就是说,选择了某一项,某一项的外墙装饰发生改变。那同时要改变内部的样式呢?
[重要] ItemTemplateSelector 属性
如果选中了某一项,并希望它的数据模块被重新定义,以突出这一项被选中,可以设置 ItemTemplateSelector 属性
[重要] Template 属性
ItemsControl 类继承于 Control 类,而 Control 类中有一个叫 Template 的属性,所以 ItemsControl 类自然也就拥有了这个属性,它是 ControlTemplate 类,也就是控件模板,所以,如果我们希望把 ItemsControl 类本身的外观进行重定义,那就需要去设置 Template 属性。
虽然看起来是在学习
ItemsControl类的属性,但是别忘记了,将来要学习的那些集合子控件全都继承于ItemsControl类,意味着它们也都有这些模板属性可以使用。
5.1.3 ItemsControl 示例
<Window x:Class="ItemsControlSample.MainWindow"
        xmlns="http://schemas.microsoft.com/winfx/2006/xaml/presentation"
        xmlns:x="http://schemas.microsoft.com/winfx/2006/xaml"
        xmlns:d="http://schemas.microsoft.com/expression/blend/2008"
        xmlns:mc="http://schemas.openxmlformats.org/markup-compatibility/2006"
        xmlns:local="clr-namespace:ItemsControlSample"
        mc:Ignorable="d"
        Title="ItemsControlSample" Height="350" Width="500">
    <Grid>
        <ItemsControl x:Name="itemsControl">
            <Button Content="content" Margin="0 5" Click="Button_Click"></Button>
            <Border Height="30" Background="AliceBlue" Margin="0 5"></Border>
            <TextBlock Text="TextBlock 元素" Background="LightGray" Margin="0, 5"></TextBlock>
            <ItemsControl Height="35" Background="Aqua"></ItemsControl>
            <CheckBox Content="CheckBox元素"></CheckBox>
            <StackPanel Orientation="Horizontal" Margin="0 5">
                <RadioButton Content="初级"></RadioButton>
                <RadioButton Content="中级"></RadioButton>
                <RadioButton Content="高级"></RadioButton>
            </StackPanel>
            这是一串字符
            <Label Content="Label控件" Margin="0 5"></Label>
            <!--为什么Control是空白?-->
            <Control Background="OrangeRed" Height="30"></Control>
            <ProgressBar Value="50" Height="20" Margin="0 5"></ProgressBar>
        </ItemsControl>
    </Grid>
</Window>
下面是界面截图:
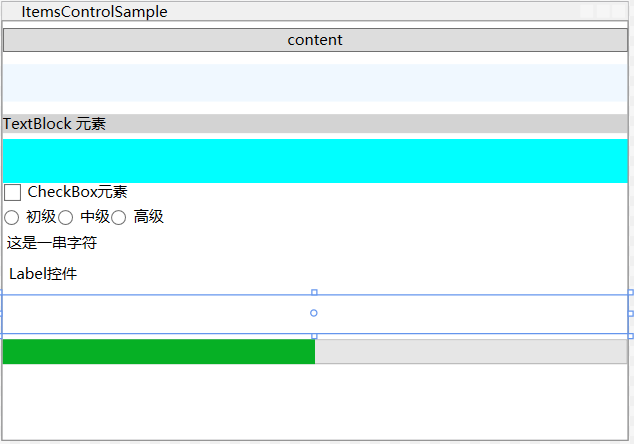
在上面的 xaml 代码中,我首先实例化了一个 ItemsControl 控件,然后在里面添加了一系列的子控件,有:Button、Border、TextBlock、ItemsControl、CheckBox、StackPanel、RadioButton、字符串、Label、Control、ProgressBar。
我们可以注意到,上述的控件都可以添加到 ItemsControl 控件中,只有 Control 控件并没有显示出来(虽然我给它的背景颜色设为了 OrangeRed),就连字符串都显示出来了,那么这是为什么呢?
注意!
Q1:为什么 ItemsControl 中的 Control 控件没有被显示出来?
A:这里需要引入一个知识点,即 控件模板,因为
Control基类虽然有Background属性,但我们没有给Control基类的Template属性设置一个控件模板(没有默认的控件模板),所以Control基类虽然能实例化,但不能显示。只能看到一个高度为 30 的区域。Q2:Border 在设置 Background 属性后,为什么能显示?
A:因为
Border是一个装饰器,它继承于Decorator基类。Q3:为什么字符串能够显示?它看起来没有被任何控件包裹。
A:实际上这个字符串外面被包裹了一层
ContentPresenter实例,这个字符串是被赋值到了ContentPresenter的Content属性上,而ContentPresenter的ContentTemplate有一个默认模板。Q4:要给 ItemsControl 集合控件绑定数据,要怎么做?
A:使用
ItemsSource这个依赖属性即可做到(后面数据绑定部分进行详解)。
后端代码:
MainWindow.xaml.cs
using System.Text;
using System.Windows;
using System.Windows.Controls;
using System.Windows.Data;
using System.Windows.Documents;
using System.Windows.Input;
using System.Windows.Media;
using System.Windows.Media.Imaging;
using System.Windows.Navigation;
using System.Windows.Shapes;

namespace ItemsControlSample
{
    /// <summary>
    /// Interaction logic for MainWindow.xaml
    /// </summary>
    public partial class MainWindow : Window
    {
        public MainWindow()
        {
            InitializeComponent();
        }

        private void Button_Click(object sender, RoutedEventArgs e)
        {
            var collection = this.itemsControl.Items;
            MessageBox.Show($"Total Children Controls : {collection.Count}");
        }
    }
}
后端代码断点分析:
- 在第 26 行打一个断点,然后开始调试该程序:
然后点击 content 按钮,触发断点。按 F11 跳出当前断点,就能得到 collection 的信息了,类型为:
System.Window.Controls.ItemCollection,将鼠标滚轮拖到最下面,查看“结果视图”,可以看到:collection 里面包含了 10 个子元素,即collection.Count为 10。
5.1.4 总结
ItemsControl 集合基类可以显示绝大多数控件,也就意味着,ListBox,ListView,DataGrid,ComboBox,TabControl,TreeView,Menu,ContextMenu,StatusBar 这些子控件在显示集合元素时,每一个元素的外观可以呈现出更复杂、更漂亮的 UI 效果,从而可以设计出更友好的交互界面。
有了这样一个基调,那接下来我们来 一一 细说各个子控件的基础功能,待学习模板和样式章节后,进一步探索这些子控件的强大功能。另外,ListBox,ListView,DataGrid,ComboBox,TabControl 这5个控件又都有一个共同的基类 ———— Selector 类,Selector 继承于 ItemsControl 基类。
5.2 Selector 基类
Selector 继承于 ItemsControl,但它是一个抽象类,所以不能被实例化。之前讲到的 ListBox,ListView,DataGrid,ComboBox,TabControl,TreeView,Menu,ContextMenu,StatusBar 这些子控件并不是直接继承于 ItemsControl,而是继承于 Selector。
5.2.1 Selector 类定义
public abstract class Selector : ItemsControl
{
    public static readonly RoutedEvent SelectionChangedEvent;
    public static readonly RoutedEvent SelectedEvent;
    public static readonly RoutedEvent UnselectedEvent;
    public static readonly DependencyProperty IsSelectionActiveProperty;
    public static readonly DependencyProperty IsSelectedProperty;
    public static readonly DependencyProperty IsSynchronizedWithCurrentItemProperty;
    public static readonly DependencyProperty SelectedIndexProperty;
    public static readonly DependencyProperty SelectedItemProperty;
    public static readonly DependencyProperty SelectedValueProperty;
    public static readonly DependencyProperty SelectedValuePathProperty;

    protected Selector();

    // 属性
    public object SelectedValue { get; set; }
    public object SelectedItem { get; set; }
    public int SelectedIndex { get; set; }
    public bool? IsSynchronizedWithCurrentItem { get; set; }
    public string SelectedValuePath { get; set; }

    // 事件
    public event SelectionChangedEventHandler SelectionChanged;

    public static void AddSelectedHandler(DependencyObject element, RoutedEventHandler handler);
    public static void AddUnselectedHandler(DependencyObject element, RoutedEventHandler handler);
    public static bool GetIsSelected(DependencyObject element);
    public static bool GetIsSelectionActive(DependencyObject element);
    public static void RemoveSelectedHandler(DependencyObject element, RoutedEventHandler handler);
    public static void RemoveUnselectedHandler(DependencyObject element, RoutedEventHandler handler);
    public static void SetIsSelected(DependencyObject element, bool isSelected);
    protected override void ClearContainerForItemOverride(DependencyObject element, object item);
    protected override void OnInitialized(EventArgs e);
    protected override void OnIsKeyboardFocusWithinChanged(DependencyPropertyChangedEventArgs e);
    protected override void OnItemsChanged(NotifyCollectionChangedEventArgs e);
    protected override void OnItemsSourceChanged(IEnumerable oldValue, IEnumerable newValue);
    protected virtual void OnSelectionChanged(SelectionChangedEventArgs e);
    protected override void PrepareContainerForItemOverride(DependencyObject element, object item);

}
接下来,来看看它提供了哪些可用的属性。
5.2.2 Selector 类的属性
| 属性名称 | 说明 |
|---|---|
SelectedValue |
获取或设置 SelectedValuePath 属性指定的元素的属性值 |
SelectedItem |
获取或设置当前所选内容中的第一项,若所选内容为空则返回 null |
SelectedIndex |
获取或设置当前所选内容或返回的第一项的索引,若索引为负一 (-1) 则所选内容为空。 |
SelectedValuePath |
获取或设置 SelectedItem 当前元素的某个属性名,这个元素属性名将决定 SelectedValue 的值 |
IsSynchronizedWithCurrentItem |
是否同步当前项。 |
SelectedItem 和 SelectedValue 有点类似,都是 object 类型。但是,他们俩不一定指同一个内容。比如,有这样一个数据实体类。
pulic class Person
{
    public string Name{ get; set; }
    public string Address{ get; set; }
    public int Age { get; set; }
}
然后我们实例化多个 Person 组成一个集合绑定到 Items 属性中,这个时候选中某一个元素,SelectedItem 便等于这个 Person 元素,但是 SelectedValue 是什么,就要看 SelectedValuePath 的值:
- 如果
SelectedValuePath的值指向的是Person.Name,那么SelectedValue就是一个字符串; - 如果
SelectedValuePath指向的是Person的Age,那么SelectedValue就是一个 int 整数; - 只有不设置
SelectedValuePath时,SelectedValue和SelectedItem两者才相等,即Person实例。
下一节会讨论 ListBox 时给出实例,并给出示例。
注意!
SelectedItem,SelectedValue,SelectedValuePath非常重要,一定要理解透彻!另外,还有一个属性叫
DisplayMemberPath,它在ItemsControl基类中,意思是设置要显示的属性名,而SelectedValuePath是设置要选择的属性名。
5.3 ListBox 列表控件
ListBox 是一个列表控件,用于显示条目类的数据,默认每行只能显示一个内容项,当然,我们可以通过修改它的数据模板,来自定义每一行(元素)的数据外观,达到显示更多数据的目的。
5.3.1 ListBox 的定义
namespace System.Windows.Controls
{
    public class ListBox : Selector
    {
        public static readonly DependencyProperty SelectedItemsProperty;
        public static readonly DependencyProperty SelectionModeProperty;	// 重要
        public ListBox();	// 构造函数

        public IList SelectedItems { get; }	// 多选保存结果
        public SelectionMode SelectionMode { get; set; }
        protected object AnchorItem { get; set; }
        protected internal override bool HandlesScrolling { get; }
        public void ScrollIntoView(object item);
        public void SelectAll();
        public void UnselectAll();
        protected override DependencyObject GetContainerForItemOverride();
        protected override bool IsItemItsOwnContainerOverride(object item);
        protected override AutomationPeer OnCreateAutomationPeer();
        protected override void OnIsMouseCapturedChanged(DependencyPropertyChangedEventArgs e);
        protected override void OnKeyDown(KeyEventArgs e);
        protected override void OnMouseMove(MouseEventArgs e);
        protected override void OnSelectionChanged(SelectionChangedEventArgs e);
        protected override void PrepareContainerForItemOverride(DependencyObject element, object item);
        protected bool SetSelectedItems(IEnumerable selectedItems);
    }
}
5.3.2 属性分析
ListBox 自身的属性比较少,SelectionMode 属性比较重要,它可以决定当前的 ListBox 控件是单选还是多选,它的值为 Extended 时,表示用户需要按下 shift 键才能多选。如果 SelectionMode 为多选状态,选择的结果保存在 SelectedItems 属性中。
ListBox 还自带了滚动条,如果内容超出显示区域,这时滚动条便起作用。
上一章节提过 DisplayMemberPath, SelectedValuePath, SelectedItem 和 SelectedValue,那么,我们以一个实际的例子来说明这几个属性的用途。
ListBox 示例:
MainWindows.xaml
<Window x:Class="ListBoxSample.MainWindow"
        xmlns="http://schemas.microsoft.com/winfx/2006/xaml/presentation"
        xmlns:x="http://schemas.microsoft.com/winfx/2006/xaml"
        xmlns:d="http://schemas.microsoft.com/expression/blend/2008"
        xmlns:mc="http://schemas.openxmlformats.org/markup-compatibility/2006"
        xmlns:local="clr-namespace:ListBoxSample"
        mc:Ignorable="d"
        Title="ListBoxSample" Height="350" Width="500">
    <Grid>
        <Grid.RowDefinitions>
            <RowDefinition></RowDefinition>
            <RowDefinition></RowDefinition>
        </Grid.RowDefinitions>
        <!--DisplayMemberPath 设置显示 Name ,也可以设置为别的 Person 类中的属性名称,即 ListBox 中展示的待选项内容-->
        <!--SelectedValuePath 设置获取的值为 Age ,也可以设置为别的 Person 类中的属性名称,即为选中 ListBox 中待选项之后得到的值-->
        <!--这里待选框中显示 Person 的 Name,选中后得到了 Person 的 Age-->
        <ListBox Grid.Row="0" x:Name="listBox" MinHeight="100"
                DisplayMemberPath="Name"
                SelectedValuePath="Age"></ListBox>
        <StackPanel Grid.Row="1">
            <Button Content="查看结果" Click="Button_Click"></Button>
            <Border Background="LightCyan" Margin="0 5" CornerRadius="2">
                <TextBlock x:Name="textBlock" VerticalAlignment="Center" HorizontalAlignment="Center"></TextBlock>
            </Border>
        </StackPanel>
    </Grid>

</Window>
MainWindow.xaml.cs
using System.Windows;

namespace ListBoxSample
{
    /// <summary>
    /// Interaction logic for MainWindow.xaml
    /// </summary>
    public partial class MainWindow : Window
    {
        public MainWindow()
        {
            InitializeComponent();

            Person p1 = new Person() { Address = "Shanghai", Name = "LiHua", Age = 12 };
            Person p2 = new Person() { Address = "Chengdu", Name = "HanMei", Age = 24 };
            Person p3 = new Person() { Address = "Singapore", Name = "NekoLin", Age = 18 };

            // 将元素添加到 listBox 中
            listBox.Items.Add(p1);
            listBox.Items.Add(p2);
            listBox.Items.Add(p3);
        }

        private void Button_Click(object sender, RoutedEventArgs e)
        {
            var selectedItem = listBox.SelectedItem;	// selectedItem 类型为 object,可以转换为 Person 类型
            var selectedValue = listBox.SelectedValue;
            textBlock.Text = $"selectedItem : {selectedItem}\nselectedValue : {selectedValue}";
        }
    }

    /// <summary>
    /// 定义需要使用到的元素
    /// </summary>
    public class Person
    {
        public string Name { get; set; } = string.Empty;
        public string Address { get; set; } = string.Empty;
        public int Age { get; set; } = -1;

    }
}
注意!
一定要明白第 14~20 行中
DisplayMemberPath和SelectedValuePath的作用:<ListBox Grid.Row="0" x:Name="listBox" MinHeight="100" DisplayMemberPath="Name" SelectedValuePath="Age"></ListBox>
DisplayMemberPath设置 listBox 中的待选项显示Name,也可以设置为别的 Person 类中的属性名称;SelectedValuePath设置选择待选项之后获取到的值为Age,也可以设置为别的 Person 类中的属性名称;
SelectedItem始终是选中的类的名称,在这里因为只有一个类Person作为 ListBox 的元素,所以SelectedItem始终为Person
图示:选择第三项,并点击按钮:
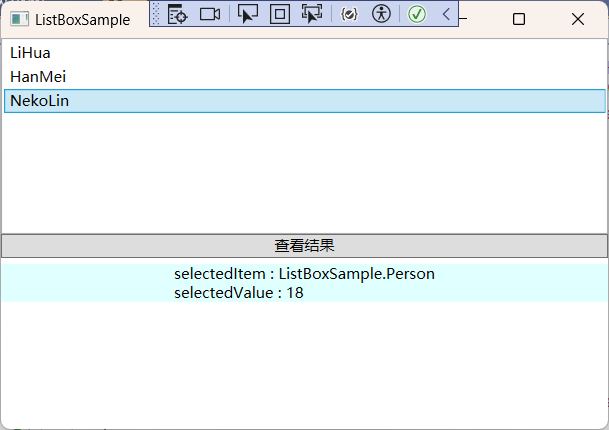
ListBox的ItemSource可以进行数据绑定,这个在后面再讲。
5.4 ListView 数据列表控件
ListView 继承于 ListBox,在 ListBox 控件的基础上增加了数据视图。从而让我们可以很轻松的设置每一列的标题,以显示某个数据表结构及内容。
5.4.1 ListView 定义
public class ListView : ListBox
{
    public static readonly DependencyProperty ViewProperty;	// View 属性

    public ListView();

    public ViewBase View { get; set; }

    protected override void ClearContainerForItemOverride(DependencyObject element, object item);
    protected override DependencyObject GetContainerForItemOverride();
    protected override bool IsItemItsOwnContainerOverride(object item);
    protected override AutomationPeer OnCreateAutomationPeer();
    protected override void OnItemsChanged(NotifyCollectionChangedEventArgs e);
    protected override void PrepareContainerForItemOverride(DependencyObject element, object item);

}
ListView 类增加了一个 View 属性,这个属性用来定义控件的数据样式,决定数据怎样显示。
View 属性的类型是 ViewBase,但是,我们真正在使用 View 属性时,实际上实例化的是 GridView 类,因为 GridView 类是 ViewBase 的子类。所以,我们要看了解一下 GridView 的定义。
public class GridView : ViewBase, IAddChild
{
    public static readonly DependencyProperty ColumnCollectionProperty;
    public static readonly DependencyProperty ColumnHeaderContainerStyleProperty;
    public static readonly DependencyProperty ColumnHeaderTemplateProperty;
    public static readonly DependencyProperty ColumnHeaderTemplateSelectorProperty;
    public static readonly DependencyProperty ColumnHeaderStringFormatProperty;
    public static readonly DependencyProperty AllowsColumnReorderProperty;
    public static readonly DependencyProperty ColumnHeaderContextMenuProperty;
    public static readonly DependencyProperty ColumnHeaderToolTipProperty;

    public GridView();

    public static ResourceKey GridViewItemContainerStyleKey { get; }
    public static ResourceKey GridViewStyleKey { get; }
    public static ResourceKey GridViewScrollViewerStyleKey { get; }
    public string ColumnHeaderStringFormat { get; set; }
    public DataTemplateSelector ColumnHeaderTemplateSelector { get; set; }
    public DataTemplate ColumnHeaderTemplate { get; set; }
    public Style ColumnHeaderContainerStyle { get; set; }
    public GridViewColumnCollection Columns { get; }
    public object ColumnHeaderToolTip { get; set; }
    public bool AllowsColumnReorder { get; set; }
    public ContextMenu ColumnHeaderContextMenu { get; set; }
    protected internal override object ItemContainerDefaultStyleKey { get; }
    protected internal override object DefaultStyleKey { get; }

    public static GridViewColumnCollection GetColumnCollection(DependencyObject element);
    public static void SetColumnCollection(DependencyObject element, GridViewColumnCollection collection);
    public static bool ShouldSerializeColumnCollection(DependencyObject obj);
    public override string ToString();
    protected virtual void AddChild(object column);
    protected virtual void AddText(string text);
    protected internal override void ClearItem(ListViewItem item);
    protected internal override IViewAutomationPeer GetAutomationPeer(ListView parent);
    protected internal override void PrepareItem(ListViewItem item);

}
GridView 提供了一些可供设置的模板和样式属性,这些我们先放一边,在 WPF 基础章节的内容学习中,我们先学习它的 Columns 属性,它是一个集合属性,而集合中元素的类型是 GridViewColumn。
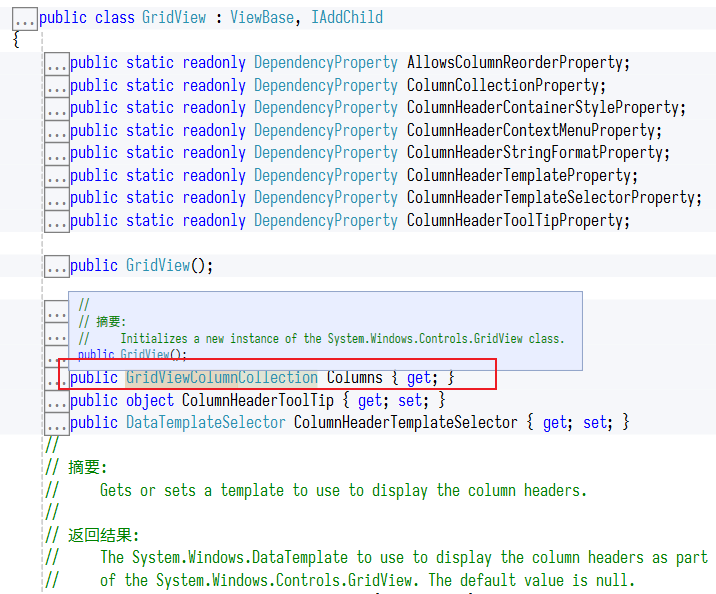
GridViewColumn 最关键的只有两个属性,分别是标题和要显示的成员(指向了 Person 实体的某个属性名)。
5.4.2 ListView 示例
实现效果:单击左边元素,将具体信息显示在右边
MainWindows.xaml
<Window x:Class="ListViewSample.MainWindow"
        xmlns="http://schemas.microsoft.com/winfx/2006/xaml/presentation"
        xmlns:x="http://schemas.microsoft.com/winfx/2006/xaml"
        xmlns:d="http://schemas.microsoft.com/expression/blend/2008"
        xmlns:mc="http://schemas.openxmlformats.org/markup-compatibility/2006"
        xmlns:local="clr-namespace:ListViewSample"
        mc:Ignorable="d"
        Title="ListViewSample" Height="350" Width="500">
    <Grid>
        <Grid.ColumnDefinitions>
            <ColumnDefinition></ColumnDefinition>
            <ColumnDefinition Width="200"></ColumnDefinition>
        </Grid.ColumnDefinitions>

        <!--点选不同条目触发 SelectionChanged 事件-->
        <ListView Grid.Column="0" x:Name="listView" SelectionChanged="listView_Selection">
            <ListView.View>
                <GridView>
                    <!--绑定信息-->
                    <GridViewColumn Header="姓名" DisplayMemberBinding="{Binding Name}"></GridViewColumn>
                    <GridViewColumn Header="年龄" DisplayMemberBinding="{Binding Age}"></GridViewColumn>
                    <GridViewColumn Header="地址" DisplayMemberBinding="{Binding Address}"></GridViewColumn>
                </GridView>
            </ListView.View>
        </ListView>
        <StackPanel Grid.Column="1">
            <StackPanel Orientation="Horizontal" Margin="5">
                <TextBlock Text="姓名:"></TextBlock>
                <TextBlock x:Name="textBlockName"></TextBlock>
            </StackPanel>
            <StackPanel Orientation="Horizontal" Margin="5">
                <TextBlock Text="年龄:"></TextBlock>
                <TextBlock x:Name="textBlockAge"></TextBlock>
            </StackPanel>
            <StackPanel Orientation="Horizontal" Margin="5">
                <TextBlock Text="地址:"></TextBlock>
                <TextBlock x:Name="textBlockAddress"></TextBlock>
            </StackPanel>
        </StackPanel>
    </Grid>
</Window>
MainWindow.xaml.cs
using System.Text;
using System.Windows;
using System.Windows.Controls;
using System.Windows.Data;
using System.Windows.Documents;
using System.Windows.Input;
using System.Windows.Media;
using System.Windows.Media.Imaging;
using System.Windows.Navigation;
using System.Windows.Shapes;

namespace ListViewSample
{
    /// <summary>
    /// Interaction logic for MainWindow.xaml
    /// </summary>
    public partial class MainWindow : Window
    {
        public MainWindow()
        {
            InitializeComponent();

            Person p1 = new Person() { Address = "Shanghai", Name = "LiHua", Age = 12 };
            Person p2 = new Person() { Address = "Chengdu", Name = "HanMei", Age = 24 };
            Person p3 = new Person() { Address = "Singapore", Name = "NekoLin", Age = 18 };

            listView.Items.Add(p1);
            listView.Items.Add(p2);
            listView.Items.Add(p3);
        }

        private void listView_Selection(object sender, SelectionChangedEventArgs e)
        {
            var listView = sender as ListView;
            if (listView == null)
            {
                return;
            }

            var person = listView.SelectedItem as Person;
            if (person == null)
            {
                return;
            }

            this.textBlockName.Text = person.Name;
            this.textBlockAddress.Text = person.Address;
            this.textBlockAge.Text = person.Age + " yr(s) old";
        }
    }

    public class Person
    {
        public string Name { get; set; } = string.Empty;
        public string Address { get; set; } = string.Empty;
        public int Age { get; set; } = -1;
    }
}
示例截图:
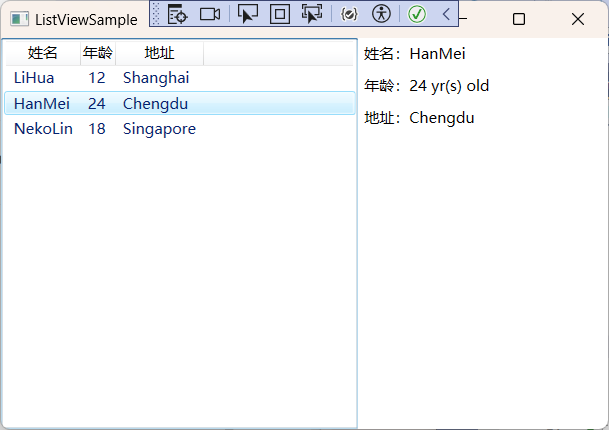
5.4.3 代码分析
首先,我们在前端实例化了一个 ListView 控件,并为依赖属性 View 实例化了一个 GridView 对象(注意 xaml 语法的写法),最后为 GridView 对象实例化了 3 列 GridViewColumn,分别设置为姓名、年龄和地址,特别需要注意的是 DisplayMemberBinding 属性的写法,这里采用了数据绑定的写法,意思是将 ListView 控件的数据源的 Name 属性显示在姓名那一列,Age 属性显示在年龄那一列, Address 属性显示在地址那一列(我们明确知道 ListView 数据源的类型就是Person的实例集合)。
<ListView Grid.Column="0" x:Name="listView" SelectionChanged="listView_Selection">
    <!--View依赖属性的写法: <ListView.View></ListView.View>-->
    <ListView.View>
        <GridView>
            <GridViewColumn Header="姓名" DisplayMemberBinding="{Binding Name}"></GridViewColumn>
            <GridViewColumn Header="年龄" DisplayMemberBinding="{Binding Age}"></GridViewColumn>
            <GridViewColumn Header="地址" DisplayMemberBinding="{Binding Address}"></GridViewColumn>
        </GridView>
    </ListView.View>
</ListView>
事件处理
事件处理相关代码:
private void listView_Selection(object sender, SelectionChangedEventArgs e)
{
    var listView = sender as ListView;
    if (listView == null)
    {
       return;
    }

    var person = listView.SelectedItem as Person;
    if (person == null)
    {
        return;
    }

    this.textBlockName.Text = person.Name;
    this.textBlockAddress.Text = person.Address;
    this.textBlockAge.Text = person.Age + " yr(s) old";
}
在 ListView 控件的 SelectionChanged 事件中,我们先将 sender 转成 ListView ,再从中获取当前选中项(即 person),最后显示详细信息在界面上即可。这样就演示了数据怎么加载显示到ListView,又怎么样从 ListView 上获取的过程。
而类似于 ListView 的效果效果,还有一个专门用来显示数据的控件,它叫 DataGrid,从某种意义上来说,它甚至可以开发类似 Excel 表格的效果。
5.5 DataGrid 数据列表控件
DataGrid 是一个可以多选的数据表格控件。它继承自一个可以多选的父类:MultiSelector。
public abstract class MultiSelector : Selector
{
    protected MultiSelector();

    public IList SelectedItems { get; }	// 只读属性
    protected bool CanSelectMultipleItems { get; set; }
    protected bool IsUpdatingSelectedItems { get; }	// 只读属性

    public void SelectAll();
    public void UnselectAll();
    protected void BeginUpdateSelectedItems();
    protected void EndUpdateSelectedItems();

}
DataGrid 多选的结果会保存在 SelectedItems 只读属性中,CanSelectMultipleItems 属性用来设置是否开启多选。目前学习基本用法,以后学习模板样式还会学习它的更多用法。
5.5.1 DataGrid 定义
public class DataGrid : MultiSelector
{
    public static readonly DependencyProperty CanUserResizeColumnsProperty;
    public static readonly DependencyProperty CurrentItemProperty;
    public static readonly DependencyProperty CurrentColumnProperty;
    public static readonly DependencyProperty CurrentCellProperty;
    public static readonly DependencyProperty CanUserAddRowsProperty;
    public static readonly DependencyProperty CanUserDeleteRowsProperty;
    public static readonly DependencyProperty RowDetailsVisibilityModeProperty;
    public static readonly DependencyProperty AreRowDetailsFrozenProperty;
    public static readonly DependencyProperty RowDetailsTemplateProperty;
    public static readonly DependencyProperty RowDetailsTemplateSelectorProperty;
    public static readonly DependencyProperty CanUserResizeRowsProperty;
    public static readonly DependencyProperty NewItemMarginProperty;
    public static readonly DependencyProperty SelectionModeProperty;
    public static readonly DependencyProperty SelectionUnitProperty;
    public static readonly DependencyProperty CanUserSortColumnsProperty;
    public static readonly DependencyProperty AutoGenerateColumnsProperty;
    public static readonly DependencyProperty FrozenColumnCountProperty;
    public static readonly DependencyProperty NonFrozenColumnsViewportHorizontalOffsetProperty;
    public static readonly DependencyProperty EnableColumnVirtualizationProperty;
    public static readonly DependencyProperty CanUserReorderColumnsProperty;
    public static readonly DependencyProperty DragIndicatorStyleProperty;
    public static readonly DependencyProperty DropLocationIndicatorStyleProperty;
    public static readonly DependencyProperty ClipboardCopyModeProperty;
    public static readonly DependencyProperty CellsPanelHorizontalOffsetProperty;
    public static readonly DependencyProperty IsReadOnlyProperty;
    public static readonly RoutedCommand CancelEditCommand;
    public static readonly DependencyProperty EnableRowVirtualizationProperty;
    public static readonly RoutedCommand BeginEditCommand;
    public static readonly RoutedCommand CommitEditCommand;
    public static readonly DependencyProperty ColumnWidthProperty;
    public static readonly DependencyProperty MinColumnWidthProperty;
    public static readonly DependencyProperty MaxColumnWidthProperty;
    public static readonly DependencyProperty HorizontalGridLinesBrushProperty;
    public static readonly DependencyProperty VerticalGridLinesBrushProperty;
    public static readonly DependencyProperty RowStyleProperty;
    public static readonly DependencyProperty RowValidationErrorTemplateProperty;
    public static readonly DependencyProperty RowStyleSelectorProperty;
    public static readonly DependencyProperty RowBackgroundProperty;
    public static readonly DependencyProperty AlternatingRowBackgroundProperty;
    public static readonly DependencyProperty RowHeightProperty;
    public static readonly DependencyProperty GridLinesVisibilityProperty;
    public static readonly DependencyProperty RowHeaderWidthProperty;
    public static readonly DependencyProperty VerticalScrollBarVisibilityProperty;
    public static readonly DependencyProperty MinRowHeightProperty;
    public static readonly DependencyProperty HorizontalScrollBarVisibilityProperty;
    public static readonly DependencyProperty RowHeaderTemplateProperty;
    public static readonly DependencyProperty RowHeaderStyleProperty;
    public static readonly DependencyProperty RowHeaderTemplateSelectorProperty;
    public static readonly DependencyProperty CellStyleProperty;
    public static readonly DependencyProperty HeadersVisibilityProperty;
    public static readonly DependencyProperty ColumnHeaderHeightProperty;
    public static readonly DependencyProperty RowHeaderActualWidthProperty;
    public static readonly DependencyProperty ColumnHeaderStyleProperty;

    public DataGrid();

    public static ComponentResourceKey FocusBorderBrushKey { get; }
    public static RoutedUICommand SelectAllCommand { get; }
    public static IValueConverter HeadersVisibilityConverter { get; }
    public static IValueConverter RowDetailsScrollingConverter { get; }
    public static RoutedUICommand DeleteCommand { get; }
    public DataTemplate RowHeaderTemplate { get; set; }
    public DataTemplateSelector RowHeaderTemplateSelector { get; set; }
    public ScrollBarVisibility VerticalScrollBarVisibility { get; set; }
    public ScrollBarVisibility HorizontalScrollBarVisibility { get; set; }
    public bool CanUserAddRows { get; set; }
    public object CurrentItem { get; set; }
    public DataGridColumn CurrentColumn { get; set; }
    public DataGridCellInfo CurrentCell { get; set; }
    public bool CanUserDeleteRows { get; set; }
    public Style RowHeaderStyle { get; set; }
    public DataGridRowDetailsVisibilityMode RowDetailsVisibilityMode { get; set; }
    public bool IsReadOnly { get; set; }
    public Style ColumnHeaderStyle { get; set; }
    public Style RowStyle { get; set; }
    public DataGridHeadersVisibility HeadersVisibility { get; set; }
    public bool AreRowDetailsFrozen { get; set; }
    public Brush AlternatingRowBackground { get; set; }
    public Brush RowBackground { get; set; }
    public StyleSelector RowStyleSelector { get; set; }
    public ObservableCollection<ValidationRule> RowValidationRules { get; }
    public ControlTemplate RowValidationErrorTemplate { get; set; }
    public Brush VerticalGridLinesBrush { get; set; }
    public Brush HorizontalGridLinesBrush { get; set; }
    public DataGridGridLinesVisibility GridLinesVisibility { get; set; }
    public double MaxColumnWidth { get; set; }
    public double MinColumnWidth { get; set; }
    public DataGridLength ColumnWidth { get; set; }
    public bool CanUserResizeColumns { get; set; }
    public ObservableCollection<DataGridColumn> Columns { get; }
    public double RowHeaderWidth { get; set; }
    public double RowHeaderActualWidth { get; }
    public double ColumnHeaderHeight { get; set; }
    public Style CellStyle { get; set; }
    public DataTemplate RowDetailsTemplate { get; set; }
    public double MinRowHeight { get; set; }
    public bool CanUserResizeRows { get; set; }
    public double RowHeight { get; set; }
    public DataTemplateSelector RowDetailsTemplateSelector { get; set; }
    public double CellsPanelHorizontalOffset { get; }
    public DataGridClipboardCopyMode ClipboardCopyMode { get; set; }
    public Style DropLocationIndicatorStyle { get; set; }
    public bool CanUserReorderColumns { get; set; }
    public bool EnableColumnVirtualization { get; set; }
    public bool EnableRowVirtualization { get; set; }
    public Style DragIndicatorStyle { get; set; }
    public double NonFrozenColumnsViewportHorizontalOffset { get; }
    public int FrozenColumnCount { get; set; }
    public bool AutoGenerateColumns { get; set; }
    public Thickness NewItemMargin { get; }
    public bool CanUserSortColumns { get; set; }
    public DataGridSelectionUnit SelectionUnit { get; set; }
    public DataGridSelectionMode SelectionMode { get; set; }
    public IList<DataGridCellInfo> SelectedCells { get; }
    protected internal override bool HandlesScrolling { get; }

    public event DataGridSortingEventHandler Sorting;
    public event EventHandler AutoGeneratedColumns;
    public event EventHandler<DataGridAutoGeneratingColumnEventArgs> AutoGeneratingColumn;
    public event EventHandler<DragDeltaEventArgs> ColumnHeaderDragDelta;
    public event EventHandler<DragStartedEventArgs> ColumnHeaderDragStarted;
    public event EventHandler<DragCompletedEventArgs> ColumnHeaderDragCompleted;
    public event SelectedCellsChangedEventHandler SelectedCellsChanged;
    public event EventHandler<DataGridColumnReorderingEventArgs> ColumnReordering;
    public event EventHandler<DataGridRowDetailsEventArgs> RowDetailsVisibilityChanged;
    public event EventHandler<DataGridRowEventArgs> UnloadingRow;
    public event EventHandler<DataGridRowDetailsEventArgs> LoadingRowDetails;
    public event InitializingNewItemEventHandler InitializingNewItem;
    public event EventHandler<DataGridPreparingCellForEditEventArgs> PreparingCellForEdit;
    public event EventHandler<DataGridBeginningEditEventArgs> BeginningEdit;
    public event EventHandler<EventArgs> CurrentCellChanged;
    public event EventHandler<DataGridCellEditEndingEventArgs> CellEditEnding;
    public event EventHandler<DataGridRowEditEndingEventArgs> RowEditEnding;
    public event EventHandler<DataGridRowEventArgs> LoadingRow;
    public event EventHandler<DataGridColumnEventArgs> ColumnDisplayIndexChanged;
    public event EventHandler<DataGridRowDetailsEventArgs> UnloadingRowDetails;
    public event EventHandler<AddingNewItemEventArgs> AddingNewItem;
    public event EventHandler<DataGridRowClipboardEventArgs> CopyingRowClipboardContent;
    public event EventHandler<DataGridColumnEventArgs> ColumnReordered;

    public static Collection<DataGridColumn> GenerateColumns(IItemProperties itemProperties);
    public bool BeginEdit();
    public bool BeginEdit(RoutedEventArgs editingEventArgs);
    public bool CancelEdit();
    public bool CancelEdit(DataGridEditingUnit editingUnit);
    public void ClearDetailsVisibilityForItem(object item);
    public DataGridColumn ColumnFromDisplayIndex(int displayIndex);
    public bool CommitEdit();
    public bool CommitEdit(DataGridEditingUnit editingUnit, bool exitEditingMode);
    public Visibility GetDetailsVisibilityForItem(object item);
    public override void OnApplyTemplate();
    public void ScrollIntoView(object item);
    public void ScrollIntoView(object item, DataGridColumn column);
    public void SelectAllCells();
    public void SetDetailsVisibilityForItem(object item, Visibility detailsVisibility);
    public void UnselectAllCells();
    protected override void ClearContainerForItemOverride(DependencyObject element, object item);
    protected override DependencyObject GetContainerForItemOverride();
    protected override bool IsItemItsOwnContainerOverride(object item);
    protected override Size MeasureOverride(Size availableSize);
    protected virtual void OnAddingNewItem(AddingNewItemEventArgs e);
    protected virtual void OnAutoGeneratedColumns(EventArgs e);
    protected virtual void OnAutoGeneratingColumn(DataGridAutoGeneratingColumnEventArgs e);
    protected virtual void OnBeginningEdit(DataGridBeginningEditEventArgs e);
    protected virtual void OnCanExecuteBeginEdit(CanExecuteRoutedEventArgs e);
    protected virtual void OnCanExecuteCancelEdit(CanExecuteRoutedEventArgs e);
    protected virtual void OnCanExecuteCommitEdit(CanExecuteRoutedEventArgs e);
    protected virtual void OnCanExecuteCopy(CanExecuteRoutedEventArgs args);
    protected virtual void OnCanExecuteDelete(CanExecuteRoutedEventArgs e);
    protected virtual void OnCellEditEnding(DataGridCellEditEndingEventArgs e);
    protected override void OnContextMenuOpening(ContextMenuEventArgs e);
    protected virtual void OnCopyingRowClipboardContent(DataGridRowClipboardEventArgs args);
    protected override AutomationPeer OnCreateAutomationPeer();
    protected virtual void OnCurrentCellChanged(EventArgs e);
    protected virtual void OnExecutedBeginEdit(ExecutedRoutedEventArgs e);
    protected virtual void OnExecutedCancelEdit(ExecutedRoutedEventArgs e);
    protected virtual void OnExecutedCommitEdit(ExecutedRoutedEventArgs e);
    protected virtual void OnExecutedCopy(ExecutedRoutedEventArgs args);
    protected virtual void OnExecutedDelete(ExecutedRoutedEventArgs e);
    protected virtual void OnInitializingNewItem(InitializingNewItemEventArgs e);
    protected override void OnIsMouseCapturedChanged(DependencyPropertyChangedEventArgs e);
    protected override void OnItemsChanged(NotifyCollectionChangedEventArgs e);
    protected override void OnItemsSourceChanged(IEnumerable oldValue, IEnumerable newValue);
    protected override void OnKeyDown(KeyEventArgs e);
    protected virtual void OnLoadingRow(DataGridRowEventArgs e);
    protected virtual void OnLoadingRowDetails(DataGridRowDetailsEventArgs e);
    protected override void OnMouseMove(MouseEventArgs e);
    protected virtual void OnRowEditEnding(DataGridRowEditEndingEventArgs e);
    protected virtual void OnSelectedCellsChanged(SelectedCellsChangedEventArgs e);
    protected override void OnSelectionChanged(SelectionChangedEventArgs e);
    protected virtual void OnSorting(DataGridSortingEventArgs eventArgs);
    protected override void OnTemplateChanged(ControlTemplate oldTemplate, ControlTemplate newTemplate);
    protected override void OnTextInput(TextCompositionEventArgs e);
    protected virtual void OnUnloadingRow(DataGridRowEventArgs e);
    protected virtual void OnUnloadingRowDetails(DataGridRowDetailsEventArgs e);
    protected override void PrepareContainerForItemOverride(DependencyObject element, object item);
    protected internal virtual void OnColumnDisplayIndexChanged(DataGridColumnEventArgs e);
    protected internal virtual void OnColumnHeaderDragCompleted(DragCompletedEventArgs e);
    protected internal virtual void OnColumnHeaderDragDelta(DragDeltaEventArgs e);
    protected internal virtual void OnColumnHeaderDragStarted(DragStartedEventArgs e);
    protected internal virtual void OnColumnReordered(DataGridColumnEventArgs e);
    protected internal virtual void OnColumnReordering(DataGridColumnReorderingEventArgs e);
    protected internal virtual void OnPreparingCellForEdit(DataGridPreparingCellForEditEventArgs e);
    protected internal virtual void OnRowDetailsVisibilityChanged(DataGridRowDetailsEventArgs e);

}
5.5.2 属性分析
DataGrid 提供了大量的依赖属性,合理充分利用这些属性,在开发 ERP、CMS、报表 等软件时可达到事半功倍的效果。下面我们以表格的形式,先了解一下各属性的功能,然后在本节中学习一些基础属性,以掌握该控件的基本用法,剩下的属性放到模板样式的章节中学习。
| 属性名称 | 说明 | 备注 |
|---|---|---|
FocusBorderBrushKey |
获取引用焦点的单元格的默认边框画笔的键。 | |
SelectAllCommand |
表示指示想要选择的所有单元格的命令 | |
HeadersVisibilityConverter |
获取标题显示隐藏的转换器,即 HeadersVisibility 属性的转换器 |
|
RowDetailsScrollingConverter |
获取将转换为一个布尔值转换器 | |
DeleteCommand |
表示指示想要删除当前行的命令。 | |
RowHeaderTemplate |
获取或设置行标题的模板。 | 重要 |
RowHeaderTemplateSelector |
获取或设置行标题的模板选择器。 | |
VerticalScrollBarVisibility |
是否显示垂直滚动条 | |
HorizontalScrollBarVisibility |
是否显示水平滚动条 | |
CanUserAddRows |
是否可以添加新行 | 重要 |
CurrentItem |
当前选中行(一般指绑定的数据源的某一个元素) | 常用 |
CurrentColumn |
获取或设置包含当前单元格的列。 | |
CurrentCell |
获取或设置具有焦点的单元格。 | |
CanUserDeleteRows |
是否可以删除行 | 重要 |
RowHeaderStyle |
获取或设置应用于所有行标题的样式。 | 重要 |
RowDetailsVisibilityMode |
获取或设置一个值,该值指示何时显示某行的详细信息部分。 | |
IsReadOnly |
当前控件是否只读 | 常用 |
ColumnHeaderStyle |
获取或设置所有列标题的样式 | 重要 |
RowStyle |
获取或设置应用到的所有行的样式。 | 重要 |
HeadersVisibility |
获取或设置用于指定行和列标题的可见性的值。 | |
AreRowDetailsFrozen |
获取或设置一个值,该值指示是否可水平滚动行详细信息。 | |
AlternatingRowBackground |
获取或设置交替行上使用的背景画笔。 | 重要 |
RowBackground |
获取或设置用于行背景的默认画笔。 | |
RowStyleSelector |
获取或设置行的样式选择器。 | |
RowValidationRules |
获取用于验证每个行中的数据的规则。 | |
RowValidationErrorTemplate |
获取或设置用于以可视方式指示行验证中的错误的模板。 | |
VerticalGridLinesBrush |
获取或设置用于绘制垂直网格线的画笔。 | 常用 |
HorizontalGridLinesBrush |
获取或设置用于绘制水平网格线的画笔。 | |
GridLinesVisibility |
获取或设置一个值,该值指示显示哪些网格线。 | |
MaxColumnWidth |
获取或设置列和标头中的最大宽度约束 | |
MinColumnWidth |
获取或设置列和标头中的最小宽度约束 | |
ColumnWidth |
获取或设置标准宽度和列和中的标头的大小调整模式 | |
CanUserResizeColumns |
获取或设置用户是否可以通过使用鼠标调整列的宽度。 | |
Columns |
获取一个集合中的所有列 | 常用 |
RowHeaderWidth |
获取或设置行标题列的宽度。 | |
RowHeaderActualWidth |
获取呈现的行标题列的宽度。 | |
ColumnHeaderHeight |
获取或设置列标题行的高度。 | |
CellStyle |
获取或设置所有单元格的样式 | 常用 |
RowDetailsTemplate |
获取或设置用于显示行详细信息的模板。 | |
MinRowHeight |
获取或设置行和中的标头的最小高度约束 | |
CanUserResizeRows |
获取或设置用户是否可以通过使用鼠标调整行的高度。 | |
RowHeight |
获取或设置的所有行的建议的高度。 | |
RowDetailsTemplateSelector |
获取或设置用于行详细信息的模板选择器。 | |
CellsPanelHorizontalOffset |
获取 DataGridCellsPanel 的水平偏移量 |
|
ClipboardCopyMode |
获取或设置一个值,指示如何将内容复制到剪贴板。 | |
NonFrozenColumns ViewportHorizontalOffset |
获取在视区的可滚动列的水平偏移量。 | |
FrozenColumnCount |
获取或设置非滚动列的数量。 | 常用 |
AutoGenerateColumns |
获取或设置一个值,该值指示是否自动创建列。 | 常用 |
NewItemMargin |
获取或设置新的项目行的边距。 | |
CanUserSortColumns |
是否可以单击列标题来对列排序。 | 常用 |
SelectionUnit |
选择行的模式 | |
SelectionMode |
是否支持多选 | 重要 |
SelectedCells |
获取当前选定的单元格的列表。 | |
HandlesScrolling |
是否支持自定义键盘滚动。 |
在上述表格中,Columns 属性是 DataGrid 最基本的一个属性。它是一个 ObservableCollection<DataGridColumn> 类型的集合,表示 DataGrid 的列的集合。
其实 DataGridColumn 只是一个抽象基类,我们真正在实例化时,是实例化 DataGridColumn 的子类,然后放到 Columns 属性中。
DataGrid有哪些子类?
DataGridTextColumn表示文本内容的列DataGridCheckBoxColumn表示复选框的列DataGridComboBoxColumn表示下拉框的列DataGridTemplateColumn表示模板的列(万金油)
在这里,以简单的 DataGridTextColumn 举例。
5.5.3 事件成员
DataGrid 共有23个事件,如下:
| 事件名称 | 说明 |
|---|---|
Sorting |
对列进行排序时发生。 |
AutoGeneratedColumns |
所有列的自动生成完成后发生。 |
AutoGeneratingColumn |
自动生成单独的列时出现。 |
ColumnHeaderDragDelta |
每次鼠标位置发生更改时在用户拖动列标题时发生。 |
ColumnHeaderDragStarted |
当用户开始使用鼠标拖动列标题时发生。 |
ColumnHeaderDragCompleted |
当用户使用鼠标拖动后释放列标题时发生。 |
SelectedCellsChanged |
发生时 DataGrid.SelectedCells 集合更改。 |
ColumnReordering |
在列移至的显示顺序中的新位置之前发生。 |
RowDetailsVisibilityChanged |
当某一行的可见性详细信息元素更改时发生。 |
UnloadingRow |
发生时 DataGridRow 对象将成为可供重用。 |
LoadingRowDetails |
新的行的详细信息模板应用于行时发生。 |
InitializingNewItem |
创建一个新项时出现。 |
PreparingCellForEdit |
在单元格进入编辑模式时发生。 |
BeginningEdit |
发生行或单元格进入编辑模式之前。 |
CurrentCellChanged |
在 DataGrid.CurrentCell 属性的值更改后发生。 |
CellEditEnding |
在单元格的编辑将在提交或取消前发生。 |
RowEditEnding |
在提交或取消行编辑之前发生。 |
LoadingRow |
加载 row 时 |
ColumnDisplayIndexChanged |
其中一个列更改属性时 |
UnloadingRowDetails |
行详细信息元素成为可供重用时发生。 |
AddingNewItem |
新项添加到 DataGrid 之前发生 |
CopyingRowClipboardContent |
默认行内容准备好之后发生。 |
ColumnReordered |
在列移至的显示顺序中的新位置时发生。 |
5.5.4 简单示例
前端界面:
MainWindow.xaml
<Window x:Class="DataGridSample.MainWindow"
        xmlns="http://schemas.microsoft.com/winfx/2006/xaml/presentation"
        xmlns:x="http://schemas.microsoft.com/winfx/2006/xaml"
        xmlns:d="http://schemas.microsoft.com/expression/blend/2008"
        xmlns:mc="http://schemas.openxmlformats.org/markup-compatibility/2006"
        xmlns:local="clr-namespace:DataGridSample"
        mc:Ignorable="d"
        Title="DataGridSample" Height="350" Width="500">
    <Grid>
        <Grid.ColumnDefinitions>
            <ColumnDefinition></ColumnDefinition>
            <ColumnDefinition Width="200"></ColumnDefinition>
        </Grid.ColumnDefinitions>
        <!--DataGrid 属性设置-->
        <DataGrid x:Name="dataGrid"
                  SelectionMode="Extended"
                  IsReadOnly="False"
                  SelectionChanged="dataGrid_SelectionChanged"
                  Grid.Column="0">
            <DataGrid.Columns>
                <DataGridTextColumn Header="姓名" Binding="{Binding Name}"></DataGridTextColumn>
                <DataGridTextColumn Header="年龄" Binding="{Binding Age}"></DataGridTextColumn>
                <DataGridTextColumn Header="地址" Binding="{Binding Address}"></DataGridTextColumn>
            </DataGrid.Columns>
        </DataGrid>
        <StackPanel Grid.Column="1" Orientation="Vertical">
            <StackPanel Orientation="Horizontal" Margin="5">
                <TextBlock Text="姓名:"></TextBlock>
                <TextBlock x:Name="textBlockName"></TextBlock>
            </StackPanel>
            <StackPanel Orientation="Horizontal" Margin="5">
                <TextBlock Text="年龄:"></TextBlock>
                <TextBlock x:Name="textBlockAge"></TextBlock>
            </StackPanel>
            <StackPanel Orientation="Horizontal" Margin="5">
                <TextBlock Text="地址:"></TextBlock>
                <TextBlock x:Name="textBlockAddress"></TextBlock>
            </StackPanel>
        </StackPanel>
    </Grid>
</Window>
后端代码:
MainWindow.xaml.cs
using System.Text;
using System.Windows;
using System.Windows.Controls;
using System.Windows.Data;
using System.Windows.Documents;
using System.Windows.Input;
using System.Windows.Media;
using System.Windows.Media.Imaging;
using System.Windows.Navigation;
using System.Windows.Shapes;

namespace DataGridSample
{
    /// <summary>
    /// Interaction logic for MainWindow.xaml
    /// </summary>
    public partial class MainWindow : Window
    {
        public MainWindow()
        {
            InitializeComponent();

            this.dataGrid.Items.Add(new Person() { Name = "kobayashi", Age = 100, Address = "China" });
            this.dataGrid.Items.Add(new Person() { Name = "NekoLin", Age = 18, Address = "Singapore" });
            this.dataGrid.Items.Add(new Person() { Name = "Asuka", Age = 29, Address = "Japan" });
        }

        private void dataGrid_SelectionChanged(object sender, SelectionChangedEventArgs e)
        {
            // sender 要转为 DataGrid 类型,才能获取 SelectedItem(s)
            var dataGridContent = sender as DataGrid;
            if (sender == null) return;

            Person person = dataGridContent.SelectedItem as Person;
            if (person == null) return;

            this.textBlockName.Text = person.Name;
            this.textBlockAge.Text = person.Age.ToString();
            this.textBlockAddress.Text = person.Address;
        }
    }

    public class Person
    {
        public string Name { get; set; } = string.Empty;
        public int Age { get; set; }
        public string Address { get; set; } = string.Empty;
    }
}
在这个示例中,尽量做了一个和 ListView 类似的功能。但是上面的代码在某些环境中编译,可能存在如下问题:
将 DataGrid 的 IsReadOnly 属性设为 True 之后,鼠标双击内容条目,报如下所示错误:
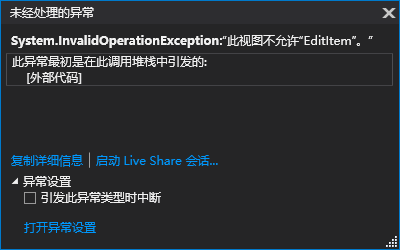
可以采用 ItemsControl 基类中的 ItemsSource 数据源属性解决这个问题。将 MainWindow 方法的代码做如下修改:
public MainWindow()
{
    InitializeComponent();

    // 1. 新建一个元素类型为 Person 的列表
    List<Person> personList = new List<Person>();

    // 2. 将 Person 元素添加进列表
    personList.Add(new Person() { Name = "kobayashi", Age = 100, Address = "China" });
    personList.Add(new Person() { Name = "NekoLin", Age = 18, Address = "Singapore" });
    personList.Add(new Person() { Name = "Asuka", Age = 29, Address = "Japan" });

    // 2. 将 dataGrid 的 ItemsSource 属性设为 personList
    this.dataGrid.ItemsSource = personList;
}
ItemsSource的类型为:IEnumerable,是可枚举的所有非泛型集合的基接口。
同时前端 xaml 代码中 DataGrid 属性改为如下所示:
 <DataGrid x:Name="dataGrid"
           SelectionMode="Extended"
           IsReadOnly="False"
           AutoGenerateColumns="False"
           SelectionChanged="dataGrid_SelectionChanged"
           Grid.Column="0">
     <!--下面没变-->
     <DataGrid.Columns>
         <DataGridTextColumn Header="姓名" Binding="{Binding Name}"></DataGridTextColumn>
         <DataGridTextColumn Header="年龄" Binding="{Binding Age}"></DataGridTextColumn>
         <DataGridTextColumn Header="地址" Binding="{Binding Address}"></DataGridTextColumn>
     </DataGrid.Columns>
 </DataGrid>
如此,我们便可以在 DataGrid 中新增一行,并输入新的数据。
本节只是演示了 DataGrid 中最基本的数据加载、显示与获取的功能。
5.6 ComboBox 下拉框控件
ComboBox 表示带有下拉列表的控件。实际上可以看作两个部分:
- 类似于
TextBox的文本输入框,所以它有一个Text属性 - 类似
ListBox的列表框,用于显示ComboBox绑定的所有数据源
ComboBox 继承于 Selector ,所以它只能是单选操作。由于这个控件是两部分组成,所以在用法上,也可以有两种用法:类似 TextBox 用法和类似 ListBox 用法。
5.6.1 ComboBox 定义
[Localizability(LocalizationCategory.ComboBox)]
    [StyleTypedProperty(Property = "ItemContainerStyle", StyleTargetType = typeof(ComboBoxItem))]
    [TemplatePart(Name = "PART_EditableTextBox", Type = typeof(TextBox))]
    [TemplatePart(Name = "PART_Popup", Type = typeof(Popup))]
public class ComboBox : Selector
{
    public static readonly DependencyProperty MaxDropDownHeightProperty;
    public static readonly DependencyProperty IsDropDownOpenProperty;
    public static readonly DependencyProperty ShouldPreserveUserEnteredPrefixProperty;
    public static readonly DependencyProperty IsEditableProperty;
    public static readonly DependencyProperty TextProperty;
    public static readonly DependencyProperty IsReadOnlyProperty;
    public static readonly DependencyProperty SelectionBoxItemProperty;
    public static readonly DependencyProperty SelectionBoxItemTemplateProperty;
    public static readonly DependencyProperty SelectionBoxItemStringFormatProperty;
    public static readonly DependencyProperty StaysOpenOnEditProperty;

    public ComboBox();

    public bool ShouldPreserveUserEnteredPrefix { get; set; }
    public bool IsEditable { get; set; }
    public string Text { get; set; }
    public bool IsReadOnly { get; set; }
    public object SelectionBoxItem { get; }
    public double MaxDropDownHeight { get; set; }
    public string SelectionBoxItemStringFormat { get; }
    public bool StaysOpenOnEdit { get; set; }
    public bool IsSelectionBoxHighlighted { get; }
    public bool IsDropDownOpen { get; set; }
    public DataTemplate SelectionBoxItemTemplate { get; }
    protected internal override bool HandlesScrolling { get; }
    protected internal override bool HasEffectiveKeyboardFocus { get; }

    public event EventHandler DropDownClosed;
    public event EventHandler DropDownOpened;

    public override void OnApplyTemplate();
    protected override DependencyObject GetContainerForItemOverride();
    protected override bool IsItemItsOwnContainerOverride(object item);
    protected override AutomationPeer OnCreateAutomationPeer();
    protected virtual void OnDropDownClosed(EventArgs e);
    protected virtual void OnDropDownOpened(EventArgs e);
    protected override void OnIsKeyboardFocusWithinChanged(DependencyPropertyChangedEventArgs e);
    protected override void OnIsMouseCapturedChanged(DependencyPropertyChangedEventArgs e);
    protected override void OnKeyDown(KeyEventArgs e);
    protected override void OnMouseLeftButtonUp(MouseButtonEventArgs e);
    protected override void OnPreviewKeyDown(KeyEventArgs e);
    protected override void OnSelectionChanged(SelectionChangedEventArgs e);
    protected override void PrepareContainerForItemOverride(DependencyObject element, object item);

}
5.6.2 属性成员
| 属性名称 | 说明 |
|---|---|
ShouldPreserveUserEnteredPrefix |
是否保留用户的输入,或者输入替换匹配项。 |
IsEditable |
是否启用或禁用编辑文本框中文本 |
Text |
获取或设置当前选定项的文本。 |
IsReadOnly |
文本内容是否只读 |
SelectionBoxItem |
获取在选择框中显示的项。 |
MaxDropDownHeight |
获取或设置一个组合框下拉列表的最大高度。 |
SelectionBoxItemStringFormat |
指定选择框中文本的显示格式 |
StaysOpenOnEdit |
在编辑输入框文本时,希望下拉框保持打开,则为 true |
IsSelectionBoxHighlighted |
是否突出显示 SelectionBoxItem |
IsDropDownOpen |
是否打开组合框下拉列表。 |
SelectionBoxItemTemplate |
获取选择框内容的项模板。 |
5.6.3 ComboBox 示例
前端界面代码:
MainWindow.xaml
<Window x:Class="ComboBoxSample.MainWindow"
        xmlns="http://schemas.microsoft.com/winfx/2006/xaml/presentation"
        xmlns:x="http://schemas.microsoft.com/winfx/2006/xaml"
        xmlns:d="http://schemas.microsoft.com/expression/blend/2008"
        xmlns:mc="http://schemas.openxmlformats.org/markup-compatibility/2006"
        xmlns:local="clr-namespace:ComboBoxSample"
        mc:Ignorable="d"
        Title="ComboBoxSample" Height="350" Width="500">
    <Grid>
        <Grid.ColumnDefinitions>
            <ColumnDefinition></ColumnDefinition>
            <ColumnDefinition Width="230"></ColumnDefinition>
        </Grid.ColumnDefinitions>

        <StackPanel Grid.Column="0">
            <!--TextBlock 式使用方法,绑定事件:TextBoxBase.TextChanged-->
            <ComboBox x:Name="comboBox1" IsEditable="True"
                      Height="30" Margin="20 10"
                      TextBoxBase.TextChanged="comboBox1_TextChanged"></ComboBox>
            <!--ListBox 式使用方法,绑定事件:SelectionChanged-->
            <ComboBox x:Name="comboBox2" IsEditable="True" StaysOpenOnEdit="True" VerticalAlignment="Top"
                      Height="30" Margin="20 10"
                      SelectionChanged="comboBox2_SelectionChanged"
                      DisplayMemberPath="Name"></ComboBox>
        </StackPanel>

        <StackPanel Grid.Column="1" Orientation="Vertical">
            <StackPanel Orientation="Horizontal" Margin="5">
                <TextBlock Text="电话:"></TextBlock>
                <TextBlock x:Name="telephoneTextBox"></TextBlock>
            </StackPanel>
            <StackPanel Orientation="Horizontal" Margin="5">
                <TextBlock Text="姓名:"></TextBlock>
                <TextBlock x:Name="nameTextBox" ></TextBlock>
            </StackPanel>
            <StackPanel Orientation="Horizontal" Margin="5">
                <TextBlock Text="年龄:" ></TextBlock>
                <TextBlock x:Name="ageTextBox" ></TextBlock>
            </StackPanel>
            <StackPanel Orientation="Horizontal" Margin="5">
                <TextBlock Text="地址:"></TextBlock>
                <TextBlock x:Name="addressTextBox"></TextBlock>
            </StackPanel>
        </StackPanel>
    </Grid>
</Window>
我们在 xaml 中实例化了两个 ComboBox ,第一个直接当成了 TextBox 来使用;第二个则绑定了一个数据源,并在 xaml 中指定了 DisplayMemberPath 属性显示 Person 的 Name,最后在后端代码中,依然使用 SelectedItem 属性获取当前选中项,转化成 Person,以获取实际的选中数据。
图示:
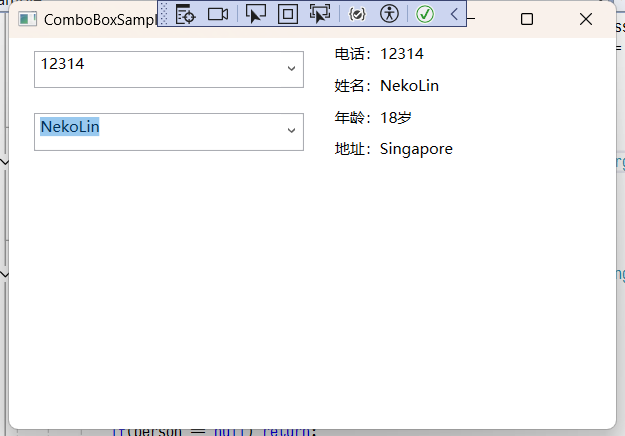
后端代码:
MainWindow.xaml.cs
using System.Text;
using System.Windows;
using System.Windows.Controls;
using System.Windows.Data;
using System.Windows.Documents;
using System.Windows.Input;
using System.Windows.Media;
using System.Windows.Media.Imaging;
using System.Windows.Navigation;
using System.Windows.Shapes;

namespace ComboBoxSample
{
    /// <summary>
    /// Interaction logic for MainWindow.xaml
    /// </summary>
    public partial class MainWindow : Window
    {
        public MainWindow()
        {
            InitializeComponent();

            List<Person> personList = new List<Person>();

            personList.Add(new Person() { Name = "kobayashi", Age = 100, Address = "China" });
            personList.Add(new Person() { Name = "NekoLin", Age = 18, Address = "Singapore" });
            personList.Add(new Person() { Name = "Aoko", Age = 25, Address = "Japan" });

            this.comboBox2.ItemsSource = personList;
        }

        private void comboBox1_TextChanged(object sender, TextChangedEventArgs e)
        {
            this.telephoneTextBox.Text = comboBox1.Text;
        }

        private void comboBox2_SelectionChanged(object sender, SelectionChangedEventArgs e)
        {
            ComboBox comboBoxContent = sender as ComboBox;

            if(comboBoxContent == null) return;

            Person person = comboBoxContent.SelectedItem as Person;
            if(person == null) return;

            this.nameTextBox.Text = person.Name;
            this.ageTextBox.Text = person.Age.ToString() + "岁";
            this.addressTextBox.Text = person.Address;
        }
    }

    public class Person
    {
        public string Name { get; set; }
        public int Age { get; set; }
        public string Address { get; set; }

    }
}
5.7 TabControl 控件
TabControl 表示包含多个共享相同的空间在屏幕上的项的控件。它也是继承于 Selector 基类,所以 TabControl 也只支持单选操作。
另外,TabControl 的元素只能是 TabItem,这个 TabItem 继承于 HeaderedContentControl 类,所以 TabControl 的元素实际上是一个带标题的 ContentControl 内容控件。
曾经在聊 GroupBox 控件和 Expander 折叠控件时都曾提到过这个 HeaderedContentControl 类,原来大家都用了这个带标题的内容控件。所以 TabControl 控件看起来就像是多个 GroupBox 组合而来。
5.7.1 TabControl 的定义
public class TabControl : Selector
{
    public static readonly DependencyProperty TabStripPlacementProperty;
    public static readonly DependencyProperty SelectedContentProperty;
    public static readonly DependencyProperty SelectedContentTemplateProperty;
    public static readonly DependencyProperty SelectedContentTemplateSelectorProperty;
    public static readonly DependencyProperty SelectedContentStringFormatProperty;
    public static readonly DependencyProperty ContentTemplateProperty;
    public static readonly DependencyProperty ContentTemplateSelectorProperty;
    public static readonly DependencyProperty ContentStringFormatProperty;

    public TabControl();

    public DataTemplate ContentTemplate { get; set; }
    public string SelectedContentStringFormat { get; }
    public DataTemplateSelector SelectedContentTemplateSelector { get; }
    public DataTemplate SelectedContentTemplate { get; }
    public object SelectedContent { get; }
    public Dock TabStripPlacement { get; set; }
    public string ContentStringFormat { get; set; }
    public DataTemplateSelector ContentTemplateSelector { get; set; }

    public override void OnApplyTemplate();
    protected override DependencyObject GetContainerForItemOverride();
    protected override bool IsItemItsOwnContainerOverride(object item);
    protected override AutomationPeer OnCreateAutomationPeer();
    protected override void OnInitialized(EventArgs e);
    protected override void OnItemsChanged(NotifyCollectionChangedEventArgs e);
    protected override void OnKeyDown(KeyEventArgs e);
    protected override void OnSelectionChanged(SelectionChangedEventArgs e);

}
5.7.2 属性成员
| 属性名称 | 说明 |
|---|---|
ContentTemplate |
表示 TabItem 元素的内容模板 |
SelectedContentStringFormat |
当前所选内容的格式 |
SelectedContentTemplateSelector |
获取当前选定的 TabItem 项的模板选择器 |
SelectedContentTemplate |
当前选定的 TabItem 项的模板 |
SelectedContent |
当前选定的 TabItem 项里面的内容(也是一些控件) |
TabStripPlacement |
获取或设置选项卡标题相对于选项卡上内容的对齐方式。 |
ContentStringFormat |
指定如何设置内容的格式 |
ContentTemplateSelector |
获取或设置内容模板选择器 |
TabControl 的 SelectedContent 可能是我们比较常用的一个属性,事实上,TabControl 通常被当成布局控件来使用。
5.7.3 TabControl 示例
页面:
MainWindow.xaml
<Window x:Class="TabControlSample.MainWindow"
        xmlns="http://schemas.microsoft.com/winfx/2006/xaml/presentation"
        xmlns:x="http://schemas.microsoft.com/winfx/2006/xaml"
        xmlns:d="http://schemas.microsoft.com/expression/blend/2008"
        xmlns:mc="http://schemas.openxmlformats.org/markup-compatibility/2006"
        xmlns:local="clr-namespace:TabControlSample"
        mc:Ignorable="d"
        Title="TabControlSample" Height="350" Width="500">
    <Grid>
        <Grid.RowDefinitions>
            <RowDefinition></RowDefinition>
            <RowDefinition Height="50"></RowDefinition>
        </Grid.RowDefinitions>
        <TabControl x:Name="tabControl" SelectionChanged="tabControl_SelectionChanged" >
            <TabItem Header="首页">
                <Border Background="AliceBlue">
                    <TextBlock Text="首页的内容界面" FontSize="18" HorizontalAlignment="Center" VerticalAlignment="Center"></TextBlock>
                </Border>
            </TabItem>
            <TabItem Header="文档">
                <Border Background="DarkCyan">
                    <TextBlock Text="文档的内容界面" FontSize="18" HorizontalAlignment="Center" VerticalAlignment="Center"></TextBlock>
                </Border>
            </TabItem>
            <TabItem Header="示例">
                <Border Background="LightCoral">
                    <TextBlock Text="示例的内容界面" FontSize="18" HorizontalAlignment="Center" VerticalAlignment="Center"></TextBlock>
                </Border>
            </TabItem>
        </TabControl>
        <TextBlock x:Name="textBlock" TextWrapping="Wrap" Grid.Row="1"></TextBlock>
    </Grid>
</Window>
界面:
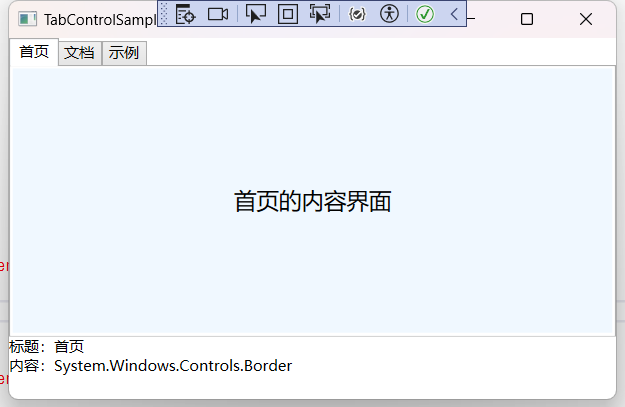
后端:
MainWindow.xaml.cs
using System.Text;
using System.Windows;
using System.Windows.Controls;
using System.Windows.Data;
using System.Windows.Documents;
using System.Windows.Input;
using System.Windows.Media;
using System.Windows.Media.Imaging;
using System.Windows.Navigation;
using System.Windows.Shapes;

namespace TabControlSample
{
    /// <summary>
    /// Interaction logic for MainWindow.xaml
    /// </summary>
    public partial class MainWindow : Window
    {
        public MainWindow()
        {
            InitializeComponent();
        }

        private void tabControl_SelectionChanged(object sender, SelectionChangedEventArgs e)
        {
            TabControl tab = sender as TabControl;
            if (tab == null) return;

            var item = tabControl.SelectedItem as TabItem;
            var content = tab.SelectedContent;

            this.textBlock.Text = "标题:" + item.Header.ToString() + "\n内容:" + content;
        }
    }
}
我们订阅了 TabControl 控件的 SelectionChanged 事件,并在回调函数中获取了当前选中的 TabItem 对象以及它里面的内容。
5.8 TreeView 树控件
TreeView 其实是一个比较复杂的控件,像操作系统的资源管理器就是一个 TreeView。所以它常用于显示文件夹、目录等具有层级结构的数据。TreeView 由节点和分支构成,每个节点可以包含零个或多个子节点,分支表示父子关系。
在 TreeView 中,每个节点表示为 TreeViewItem 对象,可以通过 TreeView 的 Items 属性来获取或设置 TreeViewItem 对象集合。
在使用 TreeView 加载节点时,需要掌握一些递归思想。
5.8.1 TreeViewItem 元素简介
TreeViewItem 作为 TreeView 唯一的元素类型,它继承于 HeaderedItemsControl,而 HeaderedItemsControl 又继承于 ItemsControl,由此可见,TreeViewItem 元素本身也是一个集合控件。
TreeViewItem 有两个常见的属性,分别是 IsSelected 属性和 IsExpanded 属性,前者表述当前元素是否被选中,后者表示当前元素是否被展开。
TreeView 类的定义:
public class TreeView : ItemsControl
{
    public static readonly DependencyProperty SelectedItemProperty;
    public static readonly DependencyProperty SelectedValueProperty;
    public static readonly DependencyProperty SelectedValuePathProperty;
    public static readonly RoutedEvent SelectedItemChangedEvent;

    public TreeView();

    public string SelectedValuePath { get; set; }
    public object SelectedValue { get; }
    public object SelectedItem { get; }
    protected internal override bool HandlesScrolling { get; }

    public event RoutedPropertyChangedEventHandler<object> SelectedItemChanged;

    protected virtual bool ExpandSubtree(TreeViewItem container);
    protected override DependencyObject GetContainerForItemOverride();
    protected override bool IsItemItsOwnContainerOverride(object item);
    protected override AutomationPeer OnCreateAutomationPeer();
    protected override void OnGotFocus(RoutedEventArgs e);
    protected override void OnIsKeyboardFocusWithinChanged(DependencyPropertyChangedEventArgs e);
    protected override void OnItemsChanged(NotifyCollectionChangedEventArgs e);
    protected override void OnKeyDown(KeyEventArgs e);
    protected virtual void OnSelectedItemChanged(RoutedPropertyChangedEventArgs<object> e);

}
依赖属性讲解:
SelectedValuePath属性:获取或设置SelectedItem或SelectedValue的路径;SelectedValue属性:获取SelectedItem的值;SelectedItem属性:获取当前选中的项。
5.8.2 TreeView 示例
模仿操作系统的资源管理器的目录加载。
前端代码:
MainWindow.xaml
<Window x:Class="TreeViewSample.MainWindow"
        xmlns="http://schemas.microsoft.com/winfx/2006/xaml/presentation"
        xmlns:x="http://schemas.microsoft.com/winfx/2006/xaml"
        xmlns:d="http://schemas.microsoft.com/expression/blend/2008"
        xmlns:mc="http://schemas.openxmlformats.org/markup-compatibility/2006"
        xmlns:local="clr-namespace:TreeViewSample"
        mc:Ignorable="d"
        Title="TreeViewSample" Height="350" Width="500">
    <Grid>
        <Grid.RowDefinitions>
            <RowDefinition Height="auto"/>
            <RowDefinition/>
        </Grid.RowDefinitions>
        <StackPanel Orientation="Horizontal">
            <TextBlock Text="根目录" VerticalAlignment="Center" Margin="3"/>
            <TextBox x:Name="textBox" Width="380" Height="25" Margin="3"/>
            <Button Content="选择..." MinWidth="45" Margin="3" Click="Button_Click"/>
        </StackPanel>
        <TreeView x:Name="treeView" Grid.Row="1" SelectedItemChanged="treeView_SelectedItemChanged"/>
    </Grid>
</Window>
后端代码:
MainWindow.xaml.cs
using System.IO;
using System.Text;
using System.Windows;
using System.Windows.Controls;
using System.Windows.Data;
using System.Windows.Documents;
using System.Windows.Input;
using System.Windows.Media;
using System.Windows.Media.Imaging;
using System.Windows.Navigation;
using System.Windows.Shapes;

namespace TreeViewSample
{
    public partial class MainWindow : Window
    {
        public MainWindow()
        {
            InitializeComponent();
        }

        private void Button_Click(object sender, RoutedEventArgs e)
        {
            System.Windows.Forms.FolderBrowserDialog dialog = new System.Windows.Forms.FolderBrowserDialog();
            if (dialog.ShowDialog() == System.Windows.Forms.DialogResult.OK)
            {
                this.textBox.Text = dialog.SelectedPath;
                LoadTreeView(dialog.SelectedPath);

            }
        }

        private void LoadTreeView(string rootPath)
        {
            // 设置根节点
            TreeViewItem rootNode = new TreeViewItem();
            rootNode.Header = "根目录";

            // 加载子文件夹和文件
            LoadSubDirectory(rootNode, rootPath);

            // 将根节点添加到TreeView中
            this.treeView.Items.Add(rootNode);
        }

        private void LoadSubDirectory(TreeViewItem node, string path)
        {
            try
            {
                DirectoryInfo dirInfo = new DirectoryInfo(path);

                // 加载子文件夹
                foreach (DirectoryInfo subDirInfo in dirInfo.GetDirectories())
                {
                    TreeViewItem subNode = new TreeViewItem();
                    subNode.Header = subDirInfo.Name;

                    LoadSubDirectory(subNode, subDirInfo.FullName);

                    node.Items.Add(subNode);
                }

                // 加载文件
                foreach (FileInfo fileInfo in dirInfo.GetFiles())
                {
                    TreeViewItem subNode = new TreeViewItem();
                    subNode.Header = fileInfo.Name;

                    node.Items.Add(subNode);
                }
            }
            catch (Exception ex)
            {
                System.Windows.MessageBox.Show(ex.Message);
            }
        }

        private void treeView_SelectedItemChanged(object sender, RoutedPropertyChangedEventArgs<object> e)
        {
            // 获取选中的节点
            TreeViewItem? selectedNode = this.treeView.SelectedItem as TreeViewItem;

            // 显示选中节点的 Header
            if (selectedNode != null)
            {
                System.Windows.MessageBox.Show(selectedNode.Header.ToString());
            }
        }
    }
}
首先,通过鼠标操作,选择 TreeView 的根目录,然后,利用 DirectoryInfo 获取当前所有目录,再利用递归调用,一层一层的获取所有子目录,最后以 TreeViewItem 元素一层层加载到控件中。
❗注意:通常情况下不建议 WPF 和 WindowsForms 混用,因为可能导致名称空间问题
若是
System.Windows.Forms部分报错,在TreeViewSample.csproj中添加<UseWindowsForms>true</UseWindowsForms>标签,启用即可:<Project Sdk="Microsoft.NET.Sdk"> <PropertyGroup> <OutputType>WinExe</OutputType> <TargetFramework>net6.0-windows</TargetFramework> <Nullable>enable</Nullable> <ImplicitUsings>enable</ImplicitUsings> <UseWPF>true</UseWPF> <UseWindowsForms>true</UseWindowsForms> </PropertyGroup> </Project>在启用
WindowsForms之后,如果App.xaml.cs的Application类也发生名称空间冲突,那么应当指明具体的名称空间,改成如下所示:using System.Configuration; using System.Data; using System.Windows; namespace TreeViewSample { // 将 Application 改为 System.Windows.Application public partial class App : System.Windows.Application { } }
截图演示:
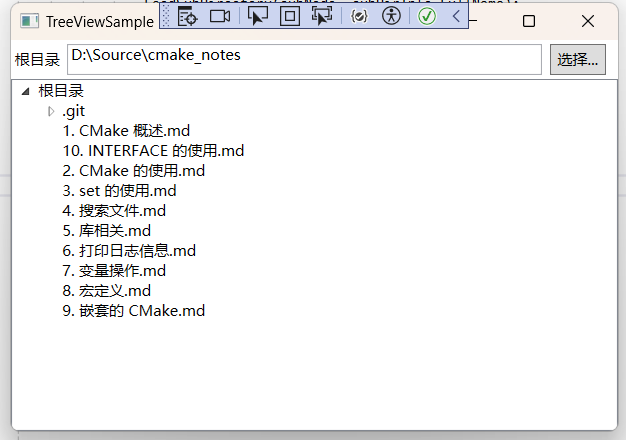
5.9 Menu 菜单控件
Menu 控件继承于 MenuBase,而 MenuBase 继承于 ItemsControl,所以学习 Menu 之前,要先了解下 MenuBase 类,它是一个抽象类,拥有一个 ItemContainerTemplateSelector 模板选择器,并重写了关于键盘和鼠标的方法。
Menu 的子项必须是 MenuItem。这个 MenuItem 和前面的 TreeViewItem 类似,拥有共同的 HeaderedItemsControl 父类,也就是说,MenuItem 本身也是一个集合控件,若要以代码形式加载 Menu 的内容,也必须掌握递归的加载思路。
在该部分,我们以两种方式加载 Menu 的数据,在此之前,先熟悉下 MenuItem 元素,实际上我们更多操作的是 MenuItem 元素。
5.9.1 MenuItem 元素
public class MenuItem : HeaderedItemsControl, ICommandSource
{
    public static readonly RoutedEvent ClickEvent;
    public static readonly DependencyProperty UsesItemContainerTemplateProperty;
    public static readonly DependencyProperty ItemContainerTemplateSelectorProperty;
    public static readonly DependencyProperty IsSuspendingPopupAnimationProperty;
    public static readonly DependencyProperty IconProperty;
    public static readonly DependencyProperty InputGestureTextProperty;
    public static readonly DependencyProperty StaysOpenOnClickProperty;
    public static readonly DependencyProperty IsCheckedProperty;
    public static readonly DependencyProperty IsHighlightedProperty;
    public static readonly DependencyProperty IsCheckableProperty;
    public static readonly DependencyProperty IsPressedProperty;
    public static readonly DependencyProperty IsSubmenuOpenProperty;
    public static readonly DependencyProperty CommandTargetProperty;
    public static readonly DependencyProperty CommandParameterProperty;
    public static readonly DependencyProperty CommandProperty;
    public static readonly RoutedEvent SubmenuClosedEvent;
    public static readonly RoutedEvent SubmenuOpenedEvent;
    public static readonly RoutedEvent UncheckedEvent;
    public static readonly RoutedEvent CheckedEvent;
    public static readonly DependencyProperty RoleProperty;

    public MenuItem();

    public static ResourceKey SubmenuHeaderTemplateKey { get; }
    public static ResourceKey SubmenuItemTemplateKey { get; }
    public static ResourceKey SeparatorStyleKey { get; }
    public static ResourceKey TopLevelItemTemplateKey { get; }
    public static ResourceKey TopLevelHeaderTemplateKey { get; }
    public bool IsCheckable { get; set; }
    public object CommandParameter { get; set; }
    public IInputElement CommandTarget { get; set; }
    public bool IsSubmenuOpen { get; set; }
    public MenuItemRole Role { get; }
    public bool IsPressed { get; protected set; }
    public bool IsHighlighted { get; protected set; }
    public bool StaysOpenOnClick { get; set; }
    public string InputGestureText { get; set; }
    public object Icon { get; set; }
    public bool IsSuspendingPopupAnimation { get; }
    public ItemContainerTemplateSelector ItemContainerTemplateSelector { get; set; }
    public bool UsesItemContainerTemplate { get; set; }
    public bool IsChecked { get; set; }
    public ICommand Command { get; set; }
    protected override bool IsEnabledCore { get; }
    protected internal override bool HandlesScrolling { get; }

    public event RoutedEventHandler Unchecked;
    public event RoutedEventHandler Click;
    public event RoutedEventHandler Checked;
    public event RoutedEventHandler SubmenuClosed;
    public event RoutedEventHandler SubmenuOpened;

    public override void OnApplyTemplate();
    protected override DependencyObject GetContainerForItemOverride();
    protected override bool IsItemItsOwnContainerOverride(object item);
    protected override void OnAccessKey(AccessKeyEventArgs e);
    protected virtual void OnChecked(RoutedEventArgs e);
    protected virtual void OnClick();
    protected override AutomationPeer OnCreateAutomationPeer();
    protected override void OnGotKeyboardFocus(KeyboardFocusChangedEventArgs e);
    protected override void OnInitialized(EventArgs e);
    protected override void OnIsKeyboardFocusWithinChanged(DependencyPropertyChangedEventArgs e);
    protected override void OnItemsChanged(NotifyCollectionChangedEventArgs e);
    protected override void OnKeyDown(KeyEventArgs e);
    protected override void OnMouseEnter(MouseEventArgs e);
    protected override void OnMouseLeave(MouseEventArgs e);
    protected override void OnMouseLeftButtonDown(MouseButtonEventArgs e);
    protected override void OnMouseLeftButtonUp(MouseButtonEventArgs e);
    protected override void OnMouseMove(MouseEventArgs e);
    protected override void OnMouseRightButtonDown(MouseButtonEventArgs e);
    protected override void OnMouseRightButtonUp(MouseButtonEventArgs e);
    protected virtual void OnSubmenuClosed(RoutedEventArgs e);
    protected virtual void OnSubmenuOpened(RoutedEventArgs e);
    protected virtual void OnUnchecked(RoutedEventArgs e);
    protected override void PrepareContainerForItemOverride(DependencyObject element, object item);
    protected override bool ShouldApplyItemContainerStyle(DependencyObject container, object item);
    protected internal override void OnVisualParentChanged(DependencyObject oldParent);

}
MenuItem 从鼠标的交互上,提供了两种方式。
- 第一种:
Click事件,开发者可以订阅该事件以编写相应的业务逻辑; - 第二种:
ICommand接口属性和CommandParameter命令参数,以 WPF 命令的形式开发业务逻辑。
由于第二种现在还没学过,所以在这里以第一种为例。
5.9.2 Menu 示例
前端页面:
MainWindow.xaml
<Window x:Class="MenuSample.MainWindow"
        xmlns="http://schemas.microsoft.com/winfx/2006/xaml/presentation"
        xmlns:x="http://schemas.microsoft.com/winfx/2006/xaml"
        xmlns:d="http://schemas.microsoft.com/expression/blend/2008"
        xmlns:mc="http://schemas.openxmlformats.org/markup-compatibility/2006"
        xmlns:local="clr-namespace:MenuSample"
        mc:Ignorable="d"
        Title="MenuSample" Height="350" Width="500">
    <Grid>
        <Grid.RowDefinitions>
            <RowDefinition Height="auto"></RowDefinition>
            <RowDefinition></RowDefinition>
        </Grid.RowDefinitions>
        <Menu x:Name="menu" Grid.Row="0">
            <MenuItem Header="文件">
                <MenuItem Header="新建"></MenuItem>
                <MenuItem Header="打开" Click="MenuItem_Click">
                    <MenuItem.Icon>
                        <Image Source="/Img/1.png"></Image>
                    </MenuItem.Icon>
                </MenuItem>
            </MenuItem>
            <MenuItem Header="编辑"></MenuItem>
            <MenuItem Header="视图"></MenuItem>
            <MenuItem Header="项目"></MenuItem>
            <MenuItem Header="调试"></MenuItem>
            <MenuItem Header="分析"></MenuItem>
            <MenuItem Header="工具"></MenuItem>
            <MenuItem Header="帮助"></MenuItem>
        </Menu>
        <TextBlock x:Name="textBlock" Grid.Row="1" HorizontalAlignment="Center" VerticalAlignment="Center"></TextBlock>
    </Grid>
</Window>
后端代码:
MainWindow.xaml.cs
using Microsoft.Win32;
using System.Text;
using System.Windows;
using System.Windows.Controls;
using System.Windows.Data;
using System.Windows.Documents;
using System.Windows.Input;
using System.Windows.Media;
using System.Windows.Media.Imaging;
using System.Windows.Navigation;
using System.Windows.Shapes;
using System.Windows.Forms;

namespace MenuSample
{

    public partial class MainWindow : Window
    {
        public MainWindow()
        {
            InitializeComponent();
        }

        private void MenuItem_Click(object sender, RoutedEventArgs e)
        {


            var item = sender as MenuItem;

            if (item == null) return;
            this.textBlock.Text = $"你点击了 {item.Header.ToString()}";

            OpenFileConfig();
        }

        private void OpenFileConfig()
        {
            System.Windows.Forms.OpenFileDialog fileDialog = new System.Windows.Forms.OpenFileDialog()
            {
                Multiselect = false,
                Title = "请选择文件夹",
                Filter = "图片文件(*.png)|*.png|(*.jpg)|*.jpg|(*.gif)|*.gif"
            };

            if (fileDialog.ShowDialog() == System.Windows.Forms.DialogResult.OK)
            {
                string file = fileDialog.FileName;
            }
        }
    }
}
❗注意
在使用 .Net 8 及以上版本,WPF 中原生提供了打开文件夹功能,不建议使用 WindowsForms 中的
System.Windows.Forms.OpenDialog类,而是使用System.Microsoft.Win32.OpenFileDialog类,可以参照这里。
界面:
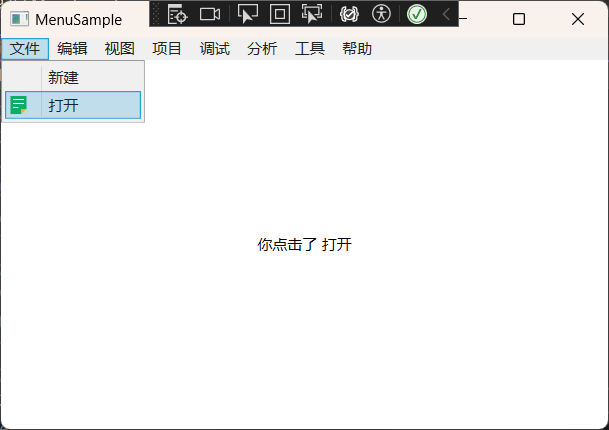
上面演示了 Menu 最基本的用法,如果希望采用数据绑定的方式加载菜单,则可以参考下面的作法。
5.9.3 Menu 数据绑定
我们创建一个实体类,来代表 Menu 的每一项:
MenuModel.cs
using System;
using System.Collections.Generic;
using System.Linq;
using System.Text;
using System.Threading.Tasks;

namespace MenuDataBindingSample
{
    // 主菜单实体
    public class MenuModel
    {
        public string Name { get; set; }
        public List<MenuModel> Children { get; set; } = new List<MenuModel>();
        public string View { get; set; }
    }
}
前端代码:
MainWindow.xaml
<Window x:Class="MenuDataBindingSample.MainWindow"
        xmlns="http://schemas.microsoft.com/winfx/2006/xaml/presentation"
        xmlns:x="http://schemas.microsoft.com/winfx/2006/xaml"
        xmlns:d="http://schemas.microsoft.com/expression/blend/2008"
        xmlns:mc="http://schemas.openxmlformats.org/markup-compatibility/2006"
        xmlns:local="clr-namespace:MenuDataBindingSample"
        mc:Ignorable="d"
        Title="MenuSampleDataBinding" Height="350" Width="500">
    <Grid>
        <Grid.RowDefinitions>
            <RowDefinition Height="auto"></RowDefinition>
            <RowDefinition></RowDefinition>
        </Grid.RowDefinitions>
        <Menu x:Name="menu" Grid.Row="0">
            <Menu.ItemTemplate>
                <HierarchicalDataTemplate ItemsSource="{Binding Children}">
                    <TextBlock Text="{Binding Name}"></TextBlock>
                </HierarchicalDataTemplate>
            </Menu.ItemTemplate>
        </Menu>
        <TextBlock x:Name="textBlock" Grid.Row="1" HorizontalAlignment="Center" VerticalAlignment="Center"></TextBlock>
    </Grid>
</Window>
因为 MenuModel 实体中有 Children 集合,所以在前端将 Children 作为HierarchicalDataTemplate 的 ItemsSource。并将 Name 显示出来。
最后,实例化一些子项数据,形成一个数据源,将这个数据源绑定到 Menu 的 ItemsSource 即可。
图示:
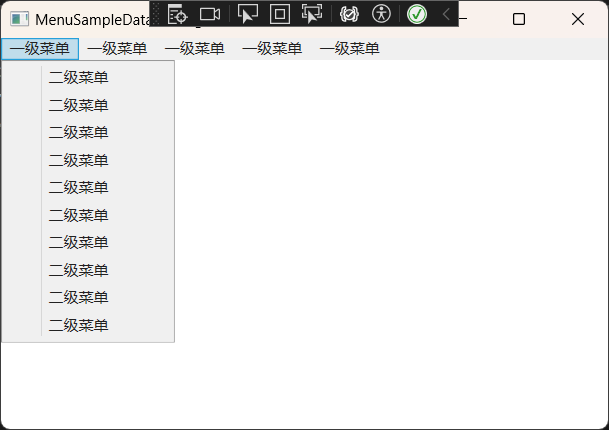
后端代码:
MainWindow.xaml.cs
using System.Text;
using System.Windows;
using System.Windows.Controls;
using System.Windows.Data;
using System.Windows.Documents;
using System.Windows.Input;
using System.Windows.Media;
using System.Windows.Media.Imaging;
using System.Windows.Navigation;
using System.Windows.Shapes;
using System.Windows.Forms;

namespace MenuDataBindingSample
{
    public partial class MainWindow : Window
    {
        public List<MenuModel> MenuSource { get; set; } = new List<MenuModel>();

        public MainWindow()
        {
            InitializeComponent();

            for (int i = 0; i < 5; ++i)
            {
                MenuModel parent = new MenuModel();
                parent.Name = $"一级菜单";
                for (int j = 0; j < 10; ++j)
                {
                    MenuModel child = new MenuModel();
                    child.Name = $"二级菜单";
                    parent.Children.Add(child);
                }
                MenuSource.Add(parent);
            }
            this.menu.ItemsSource = MenuSource;

        }

        private void MenuItem_Click(object sender, RoutedEventArgs e)
        {


            var item = sender as MenuItem;

            if (item == null) return;
            this.textBlock.Text = $"你点击了 {item.Header.ToString()}";

        }
    }
}
5.10 ContextMenu 上下文菜单
ContextMenu 上下文菜单必须要依附一个“宿主控件”,由于 FrameworkElement 基类有一个叫 ContextMenu 的属性,代表了鼠标右键时弹出一个菜单,所以大多数控件都可以设置“上下文菜单”。
ContexMenu 继承于 MenuBase,而 MenuBase 继承于 ItemsControl 。所以 ContextMenu 本质上也是一个集合控件,而它的元素则是 MenuItem。在用法上,与 Menu 控件差不多。
5.10.1 ContextMenu 的定义
public class ContextMenu : MenuBase
{
    public static readonly DependencyProperty HorizontalOffsetProperty;
    public static readonly RoutedEvent OpenedEvent;
    public static readonly DependencyProperty StaysOpenProperty;
    public static readonly DependencyProperty CustomPopupPlacementCallbackProperty;
    public static readonly DependencyProperty HasDropShadowProperty;
    public static readonly RoutedEvent ClosedEvent;
    public static readonly DependencyProperty PlacementRectangleProperty;
    public static readonly DependencyProperty PlacementTargetProperty;
    public static readonly DependencyProperty IsOpenProperty;
    public static readonly DependencyProperty VerticalOffsetProperty;
    public static readonly DependencyProperty PlacementProperty;

    public ContextMenu();

    public double HorizontalOffset { get; set; }
    public bool StaysOpen { get; set; }
    public CustomPopupPlacementCallback CustomPopupPlacementCallback { get; set; }
    public bool HasDropShadow { get; set; }
    public PlacementMode Placement { get; set; }
    public Rect PlacementRectangle { get; set; }
    public UIElement PlacementTarget { get; set; }
    public bool IsOpen { get; set; }
    public double VerticalOffset { get; set; }
    protected internal override bool HandlesScrolling { get; }

    public event RoutedEventHandler Closed;
    public event RoutedEventHandler Opened;

    protected virtual void OnClosed(RoutedEventArgs e);
    protected override AutomationPeer OnCreateAutomationPeer();
    protected override void OnIsKeyboardFocusWithinChanged(DependencyPropertyChangedEventArgs e);
    protected override void OnKeyDown(KeyEventArgs e);
    protected override void OnKeyUp(KeyEventArgs e);
    protected virtual void OnOpened(RoutedEventArgs e);
    protected override void PrepareContainerForItemOverride(DependencyObject element, object item);
    protected internal override void OnVisualParentChanged(DependencyObject oldParent);

}
属性成员
| 属性名称 | 说明 |
|---|---|
HorizontalOffset |
获取或设置目标原点和弹出项对齐之间的水平距离点。 |
StaysOpen |
是否保持打开状态 |
CustomPopupPlacementCallback |
获取或设置 ContextMenu 指示在屏幕位置的回调 |
HasDropShadow |
是否有投影出现的上下文菜单。 |
Placement |
获取或设置 ContextMenu 显示的相对位置 |
PlacementRectangle |
获取或设置相对于其上下文菜单位于在打开时的区域。 |
PlacementTarget |
获取或设置 ContextMenu 打开时的相对控件 |
IsOpen |
是否打开 |
VerticalOffset |
获取或设置目标原点和弹出项对齐之间的垂直距离点。 |
5.10.2 ContextMenu 示例
前端代码:
MainWindow.xaml
<Window x:Class="ContextMenuSample.MainWindow"
        xmlns="http://schemas.microsoft.com/winfx/2006/xaml/presentation"
        xmlns:x="http://schemas.microsoft.com/winfx/2006/xaml"
        xmlns:d="http://schemas.microsoft.com/expression/blend/2008"
        xmlns:mc="http://schemas.openxmlformats.org/markup-compatibility/2006"
        xmlns:local="clr-namespace:ContextMenuSample"
        mc:Ignorable="d"
        Title="ContextMenuSample" Height="350" Width="500">
    <Grid>
        <Border Background="LightBlue" Width="200" Height="100" CornerRadius="15">
            <Border.ContextMenu>
                <ContextMenu>
                    <MenuItem Header="复制"></MenuItem>
                    <MenuItem Header="粘贴"></MenuItem>
                    <MenuItem Header="剪切"></MenuItem>
                    <MenuItem Header="删除"></MenuItem>
                </ContextMenu>
            </Border.ContextMenu>
        </Border>
    </Grid>
</Window>
图示:
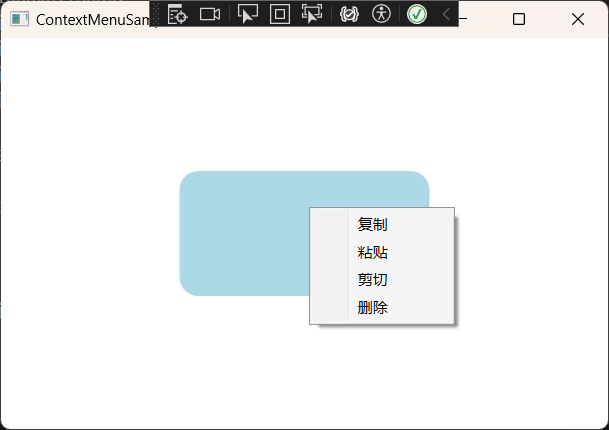
后端代码:未改变生成代码。
5.11 StatusBar 状态栏
StatusBar 是一个“包容性”极强的控件,通常的作用是作为程序的状态内容显示。它同样继承于 ItemsControl 基类,所以,它也是一个集合控件。
它的元素是 StatusBarItem 类型,而 StatusBarItem 继承于 ContentControl 内容控件,所以,本质上讲,StatusBar 的元素可以是任意类型的控件。因为 StatusBarItem 元素有一个叫 Content 的属性。
这个控件其实并不常用,通常情况下被当成一个布局控件来使用,如下所示:
MainWindow.xaml
<Window x:Class="StatusBarSample.MainWindow"
        xmlns="http://schemas.microsoft.com/winfx/2006/xaml/presentation"
        xmlns:x="http://schemas.microsoft.com/winfx/2006/xaml"
        xmlns:d="http://schemas.microsoft.com/expression/blend/2008"
        xmlns:mc="http://schemas.openxmlformats.org/markup-compatibility/2006"
        xmlns:local="clr-namespace:StatusBarSample"
        mc:Ignorable="d"
        Title="StatusBarSample" Height="350" Width="550">
    <Grid>
        <Grid.RowDefinitions>
            <RowDefinition></RowDefinition>
            <RowDefinition Height="auto"></RowDefinition>
        </Grid.RowDefinitions>
        <StatusBar Grid.Row="1">
            <StatusBarItem Content="版权所有:@kobayashilin1"></StatusBarItem>
            <StatusBarItem>
                <CheckBox Content="CheckBox"></CheckBox>
            </StatusBarItem>
            <StatusBarItem>
                <WrapPanel Orientation="Horizontal">
                    <RadioButton Content="RadioButton1" GroupName="group1"></RadioButton>
                    <RadioButton Content="RadioButton2" GroupName="group1" IsChecked="True"></RadioButton>
                </WrapPanel>
            </StatusBarItem>
            <StatusBarItem>
                <Button Content="Button1"></Button>
            </StatusBarItem>
            <TextBlock Text="文字块"></TextBlock>
        </StatusBar>
    </Grid>
</Window>
图示:
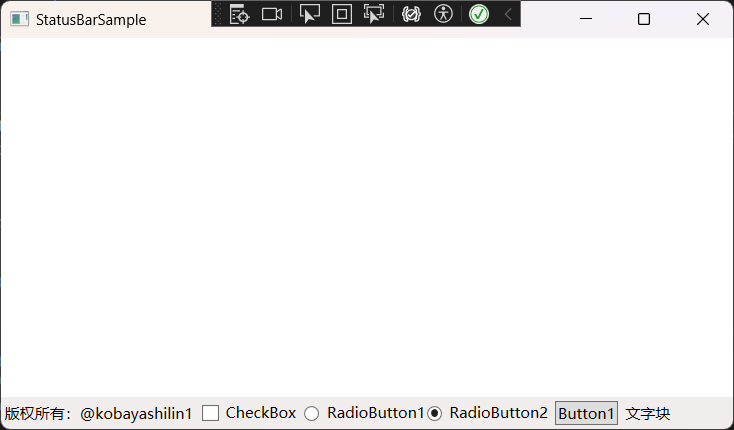
StatusBar 的元素除了 StatusBarItem,甚至可以直接实例化其它控件,比如最后一个 TextBlock。
6. 图形控件
暂时没必要专门进行讲解,有需要后自行学习。


