FreeSWITCH安装教程
最近学习freeswitch,网络上搜罗了大把的安装教程,基本都有坑。然而,对于解决坑的过程是坑坑有惊喜。在此记录一下安装及采坑的过程。如有问题,欢迎大家留言探讨~~~
1、基础环境。
操作系统:
CentOS Linux release 7.9.2009位数:
Linux SSUAiServer 3.10.0-1160.el7.x86_64 #1 SMP Mon Oct 19 16:18:59 UTC 2020 x86_64 x86_64 x86_64 GNU/Linux内存CPU:
48G 16核2、安装方式
使用源码编译安装
3、在安装Freeswitch之前,先安装依赖
yum install -y git alsa-lib-devel autoconf automake bison broadvoice-devel bzip2 curl-devel libdb4-devel e2fsprogs-devel erlang flite-devel g722_1-devel gcc-c++ gdbm-devel gnutls-devel ilbc2-devel ldns-devel libcodec2-devel libcurl-devel libedit-devel libidn-devel libjpeg-devel libmemcached-devel libogg-devel libsilk-devel libsndfile-devel libtheora-devel libtiff-devel libtool libuuid-devel libvorbis-devel libxml2-devel lua-devel lzo-devel mongo-c-driver-devel ncurses-devel net-snmp-devel openssl-devel opus-devel pcre-devel perl perl-ExtUtils-Embed pkgconfig portaudio-devel postgresql-devel python-devel python-devel soundtouch-devel speex-devel sqlite-devel unbound-devel unixODBC-devel wget which yasm zlib-devel libshout-devel libmpg123-devel lame-devel4、下载cmake并进行编译安装,在/usr/local/src目录下执行
wget https://cmake.org/files/v3.14/cmake-3.14.0.tar.gz
tar vzxf cmake-3.14.0.tar.gz
cd cmake-3.14.0
./configure
make -dj
make install
5、下载libks并进行编译安装,在/usr/local/src目录下执行
yum install libatomic
git clone https://github.com/signalwire/libks.git
cd libks
cmake .
make -dj
make install
6、下载signalwire-c并进行编译安装,在/usr/local/src目录下执行
git clone https://github.com/signalwire/signalwire-c.git
cd signalwire-c/
cmake .
make -dj
make install
ln -sf /usr/local/lib64/pkgconfig/signalwire_client.pc /usr/lib64/pkgconfig/signalwire_client.pc
7、下载x264并进行编译安装,在/usr/local/src目录下执行
git clone http://git.videolan.org/git/x264.git
./configure
make -dj
make install
8、编译安装mod_av模块
wget http://download1.rpmfusion.org/free/el/updates/7/x86_64/x/x264-libs-0.148-24.20170521gitaaa9aa8.el7.x86_64.rpm
wget http://download1.rpmfusion.org/free/el/updates/7/x86_64/x/x264-devel-0.148-24.20170521gitaaa9aa8.el7.x86_64.rpm
rpm -hiv x264-libs-0.148-24.20170521gitaaa9aa8.el7.x86_64.rpm
rpm -hiv x264-devel-0.148-24.20170521gitaaa9aa8.el7.x86_64.rpm
cd /usr/local/src
git clone https://gitee.com/nwaycn/libav.git
cd libav
./configure --enable-pic --enable-shared  --enable-libx264 --enable-gpl --extra-libs="-ldl"
make
make install
cp /usr/local/lib/pkgconfig/libavcodec.pc    /usr/lib64/pkgconfig/
cp /usr/local/lib/pkgconfig/libavdevice.pc   /usr/lib64/pkgconfig/
cp /usr/local/lib/pkgconfig/libavfilter.pc   /usr/lib64/pkgconfig/
cp /usr/local/lib/pkgconfig/libavformat.pc   /usr/lib64/pkgconfig/
cp /usr/local/lib/pkgconfig/libavresample.pc /usr/lib64/pkgconfig/
cp /usr/local/lib/pkgconfig/libavutil.pc     /usr/lib64/pkgconfig/
cp /usr/local/lib/pkgconfig/libswscale.pc    /usr/lib64/pkgconfig/
ldconfig  #动态链接库管理命令,目的让动态链接库为系统所共享
9、在freeswitch官网下载源码,选择1.10.2版本。下载地址
https://freeswitch.org/confluence/display/FREESWITCH/FreeSWITCH+1.10.x+Release+notes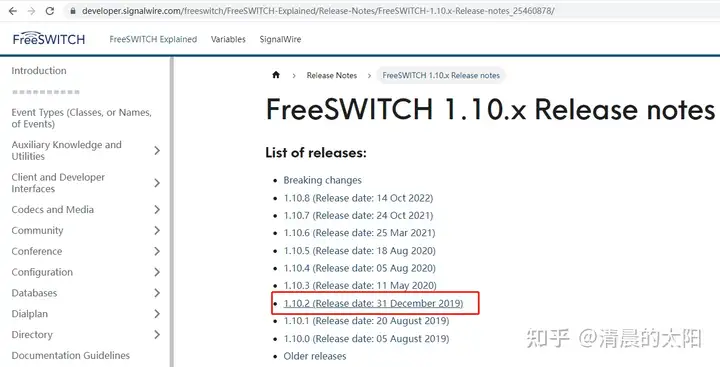
10、源码上传到CentOS7系统中

11、进行解压,解压指令:tar -zxvf freeswitch-1.10.2.-release.tar.gz
进入到解压的目录,开始编译安装
cd freeswitch-1.10.2.-release
./configure
make
make install
在执行make时,遇到报错 *** You must install libopusdev to build mod opus. Stop

解決方法:首先进入源的配置文件夹
cd /etc/yum.repos.d/创建文件
touch linuxtech.repo使用vi 打开linuxtech.repo文件
vi linuxtech.repo把下面的内容复制进去
[linuxtech]
 name=LinuxTECH
 baseurl=http://pkgrepo.linuxtech.net/el6/release/
 enabled=1
 gpgcheck=1
 gpgkey=http://pkgrepo.linuxtech.net/el6/release/RPM-GPG-KEY-LinuxTECH.NET
进行安装libopus-devel
yum install libopus-devel升级opus,下载opus-1.3.1安装包并进行编译安装,在/usr/local/src目录下执行
wget https://archive.mozilla.org/pub/opus/opus-1.3.1.tar.gz
tar xvfz opus-1.3.1.tar.gz
cd opus-1.3.1
./configure
make
make install
cp /usr/lib/pkgconfig/opus.* /usr/lib64/pkgconfig/
再次进入到在freeswitch-1.10.2.-release源码解压目录下
make clean
./configure
make
make install
最后安装编译出现freeswitch logo表示安装成功了
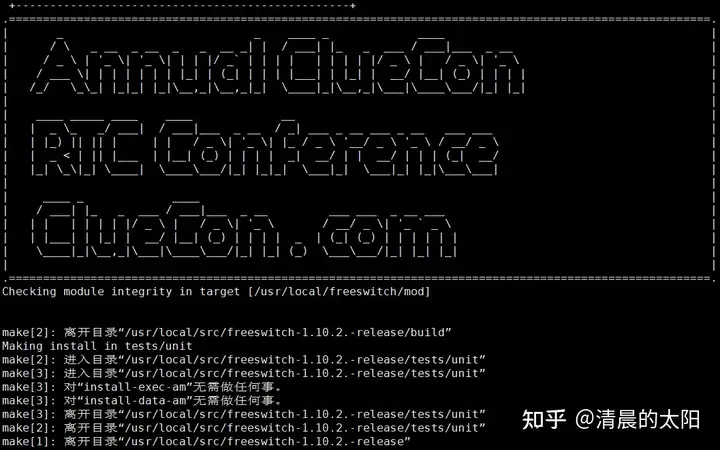
12、freeswitch默认编译安装的目录在/usr/local/freeswitch

13、启动验证
后台启动
freeswitch -nc -nonat查看进程和5060端口

注意:
查看防火墙是否开启,如果开启则需要开放5060端口,或者暂停防火墙服务
14、使用客户端工具进行拨号测试
IOS端,下载PortSIP UC,这个工具还是蛮友好的,一旦出错会有友好的提示
Android端,下载Linphone
PC端,下载Linphone
15、移动端使用PortSIP UC拨号PC端,进行语音、视频通话测试
进行登录拨号
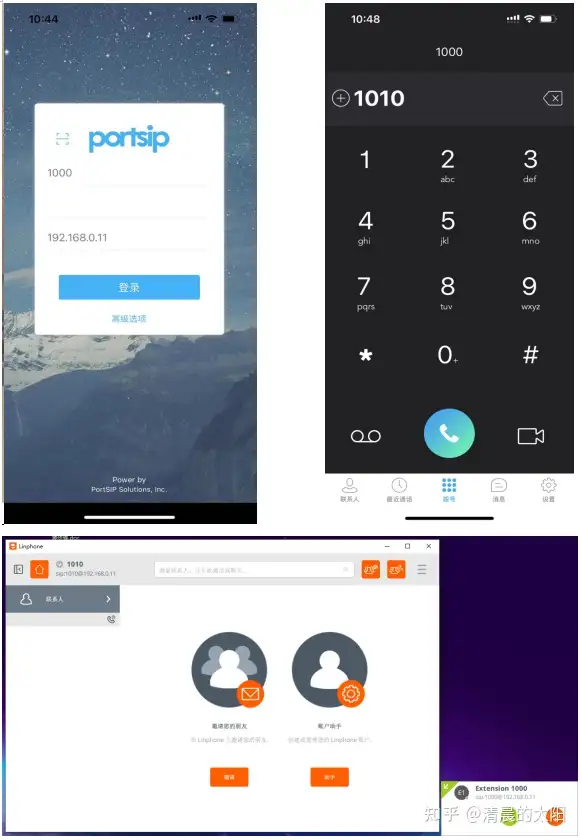
语音通话
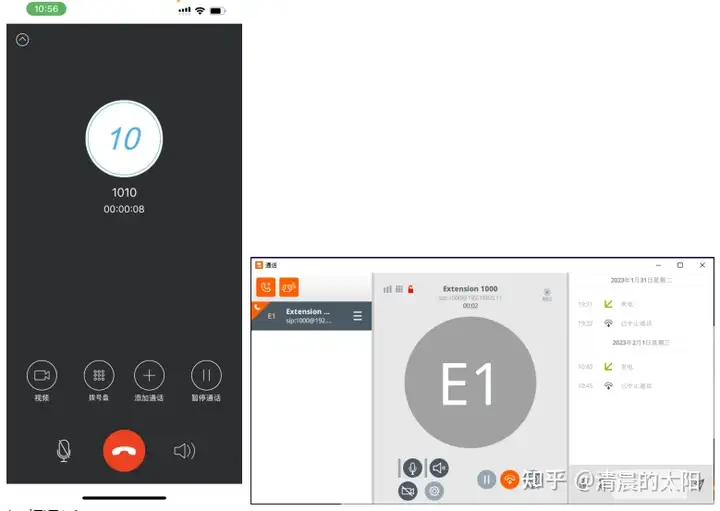
视频通话
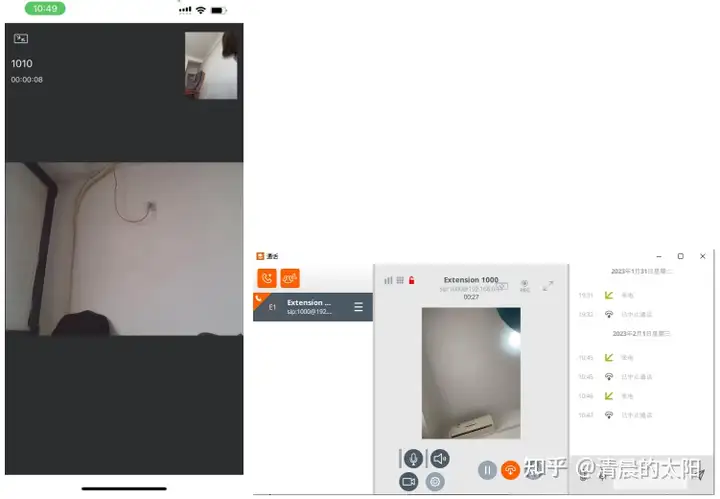
16、freeswitch基础操作指令
#详细启动日志并进入控制台模式命令
freeswitch -c -nonat -rp#退出详细模式启动命令
shutdown#后台启动freeswitch服务(推荐使用)
freeswitch -nc -nonat#进入控制台模式命令
fs_cli#退出控制台命令
/exit#关闭freeswitch命令
freeswitch -stop#在控制台中查看freeswitch的运行状态
status(控制台模式执行)#在控制台中查看freewitch内置用户是否注册
sofia status profile internal reg(控制台模式执行)


【推荐】国内首个AI IDE,深度理解中文开发场景,立即下载体验Trae
【推荐】编程新体验,更懂你的AI,立即体验豆包MarsCode编程助手
【推荐】抖音旗下AI助手豆包,你的智能百科全书,全免费不限次数
【推荐】轻量又高性能的 SSH 工具 IShell:AI 加持,快人一步
· 全程不用写代码,我用AI程序员写了一个飞机大战
· DeepSeek 开源周回顾「GitHub 热点速览」
· MongoDB 8.0这个新功能碉堡了,比商业数据库还牛
· 记一次.NET内存居高不下排查解决与启示
· 白话解读 Dapr 1.15:你的「微服务管家」又秀新绝活了