

喵星之旅-狂奔的兔子-springboot整合rabbitmq
官方api参考文档:
https://docs.spring.io/spring-amqp/docs/2.2.9.RELEASE/api/
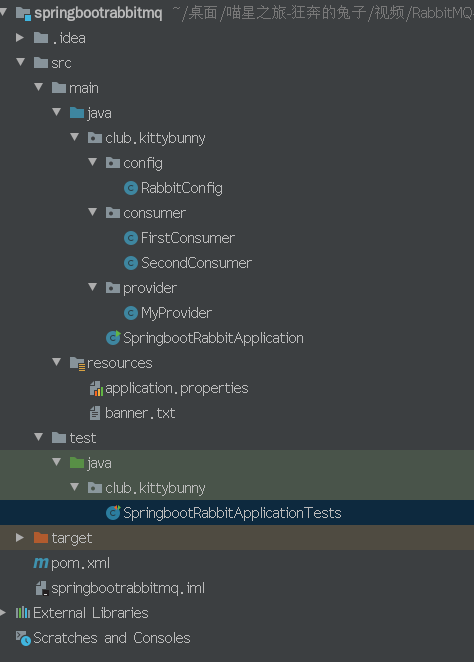
一、新建maven项目
如图所示目录结构和文件
二、引入依赖
最终的pom文件为:
<?xml version="1.0" encoding="UTF-8"?>
<project xmlns="http://maven.apache.org/POM/4.0.0"
         xmlns:xsi="http://www.w3.org/2001/XMLSchema-instance"
         xsi:schemaLocation="http://maven.apache.org/POM/4.0.0 http://maven.apache.org/xsd/maven-4.0.0.xsd">
    <modelVersion>4.0.0</modelVersion>

    <groupId>club.kittybunny</groupId>
    <artifactId>springboot-rabbitmq</artifactId>
    <version>0.0.1-SNAPSHOT</version>
    <packaging>jar</packaging>

    <name>springboot-rabbitmq</name>
    <description>kittybunny.club</description>

    <parent>
        <groupId>org.springframework.boot</groupId>
        <artifactId>spring-boot-starter-parent</artifactId>
        <version>2.0.4.RELEASE</version>
        <relativePath/> <!-- lookup parent from repository -->
    </parent>

    <properties>
        <project.build.sourceEncoding>UTF-8</project.build.sourceEncoding>
        <project.reporting.outputEncoding>UTF-8</project.reporting.outputEncoding>
        <java.version>1.8</java.version>
    </properties>

    <dependencies>
        <dependency>
            <groupId>org.springframework.boot</groupId>
            <artifactId>spring-boot-starter-amqp</artifactId>
        </dependency>

        <dependency>
            <groupId>org.springframework.boot</groupId>
            <artifactId>spring-boot-starter-test</artifactId>
            <scope>test</scope>
        </dependency>
    </dependencies>

    <build>
        <plugins>
            <plugin>
                <groupId>org.springframework.boot</groupId>
                <artifactId>spring-boot-maven-plugin</artifactId>
            </plugin>
        </plugins>
    </build>
</project>
三、配置文件
application.properties:指定连接参数
spring.rabbitmq.listener.direct.retry.enabled=true
spring.rabbitmq.listener.direct.acknowledge-mode=
spring.rabbitmq.listener.type=simple
spring.rabbitmq.template.retry.enabled=true
spring.rabbitmq.listener.simple.acknowledge-mode=auto
spring.rabbitmq.listener.simple.prefetch=1

spring.rabbitmq.host=127.0.0.1
spring.rabbitmq.port=5672
spring.rabbitmq.virtual-host=/mybunny
spring.rabbitmq.username=bunny
spring.rabbitmq.password=bunny

spring.rabbitmq.listener.=
四、创建配置类
创建一个类做为配置文件,添加@Configuration
通过@Bean("topicExchange")定义交换机、队列和绑定关系
内容如下:
package club.kittybunny.config;

import org.springframework.amqp.core.*;


import org.springframework.beans.factory.annotation.Qualifier;
import org.springframework.context.annotation.Bean;
import org.springframework.context.annotation.Configuration;

import java.util.HashMap;
import java.util.Map;

/**
 * @Author: bunny
 * @Description: 我是兔子我会喵,我叫喵星兔
 */
@Configuration
public class RabbitConfig {
    // 两个交换机
    @Bean("topicEx")
    public TopicExchange getTopicExchange(){

        return new TopicExchange("BUNNY_TOPIC_EXCHANGE");//交换机名字
    }

    @Bean("fanoutEx")
    public FanoutExchange getFanoutExchange(){
        return  new FanoutExchange("BUNNY_FANOUT_EXCHANGE");
    }

    // 两个队列,不同方式定义

    //queue: QueueName, //队列名称
    //durable: false, //队列是否持久化.false:队列在内存中,服务器挂掉后,队列就没了;true:服务器重启后,队列将会重新生成.注意:只是队列持久化,不代表队列中的消息持久化!!!!
    //exclusive: false, //队列是否专属,专属的范围针对的是连接,也就是说,一个连接下面的多个信道是可见的.对于其他连接是不可见的.连接断开后,该队列会被删除.注意,不是信道断开,是连接断开.并且,就算设置成了持久化,也会删除.
    //autoDelete: true, //如果所有消费者都断开连接了,是否自动删除.如果还没有消费者从该队列获取过消息或者监听该队列,那么该队列不会删除.只有在有消费者从该队列获取过消息后,该队列才有可能自动删除(当所有消费者都断开连接,不管消息是否获取完)
    //arguments: null //队列的配置
    //第5个参数: arguments 它的类型是一个键值对集合
    @Bean("firstQueue")
    public Queue getFirstQueue(){
        Map<String, Object> args = new HashMap<String, Object>();
        args.put("x-message-ttl",6000);
        Queue queue = new Queue("BUNNY_FIRST_QUEUE", false, false, true, args);
        return queue;
    }

    @Bean("secondQueue")
    public Queue getSecondQueue(){
        return new Queue("BUNNY_SECOND_QUEUE");//队列名字
    }

    // 三个绑定
    @Bean
    public Binding bindOne(@Qualifier("firstQueue") Queue queue, @Qualifier("topicEx") TopicExchange exchange){//使用bean的名字
        return BindingBuilder.bind(queue).to(exchange).with("#.bunny.#");
    }
    @Bean
    public Binding bindSecond(@Qualifier("secondQueue") Queue queue, @Qualifier("topicEx") TopicExchange exchange){
        return BindingBuilder.bind(queue).to(exchange).with("changsha.#");
    }
    @Bean
    public Binding bindThird(@Qualifier("secondQueue") Queue queue,@Qualifier("fanoutEx") FanoutExchange exchange){
        return BindingBuilder.bind(queue).to(exchange);
    }


}
五、消费者类
编写消费者类
@Component注册为bean
方法上添加@RabbitListener(queues = "BUNNY_FIRST_QUEUE"),指定队列的名字
package club.kittybunny.consumer;

import org.springframework.amqp.core.Message;
import org.springframework.amqp.rabbit.annotation.RabbitListener;
import org.springframework.stereotype.Component;

@Component

public class FirstConsumer {

    @RabbitListener(queues = "BUNNY_FIRST_QUEUE")//队列名字,不是bean的名字
    public void process(Message message){
        System.out.println(" first queue received msg : " + new String(message.getBody()));
    }
}
package club.kittybunny.consumer;

import org.springframework.amqp.core.Message;
import org.springframework.amqp.rabbit.annotation.RabbitListener;
import org.springframework.stereotype.Component;

@Component

public class SecondConsumer {

    @RabbitListener(queues = "BUNNY_SECOND_QUEUE")
    public void process(Message message){
        System.out.println(" second queue received msg : " + new String(message.getBody()));
    }
}
六、生产者类
编写生产者
注入 @Autowired
AmqpTemplate amqpTemplate;
随意方法,使用amqpTemplate.convertAndSend(交换机名字,key,信息)
如果交换机名字“” ,则key可以直接指定队列名字
package club.kittybunny.provider;

import org.springframework.amqp.core.AmqpTemplate;
import org.springframework.beans.factory.annotation.Autowired;
import org.springframework.stereotype.Component;

/**
 * @Author: bunny
 * @Description: 我是兔子我会喵,我叫喵星兔
 */
@Component
public class MyProvider {

    @Autowired
    AmqpTemplate amqpTemplate;

    public void send(){
        // 发送4条消息

        amqpTemplate.convertAndSend("","BUNNY_FIRST_QUEUE","-------- a direct msg");//直接指定队列名字

        amqpTemplate.convertAndSend("BUNNY_TOPIC_EXCHANGE","shanghai.bunny.teacher","-------- a topic msg : shanghai.bunny.teacher");
        amqpTemplate.convertAndSend("BUNNY_TOPIC_EXCHANGE","changsha.student","-------- a topic msg : changsha.student");

        amqpTemplate.convertAndSend("BUNNY_FANOUT_EXCHANGE","","-------- a fanout msg");//交换机名字,不是bean的名字

    }

}
七、启动和测试类
package club.kittybunny;

import org.springframework.boot.SpringApplication;
import org.springframework.boot.autoconfigure.SpringBootApplication;

@SpringBootApplication
public class SpringbootRabbitApplication {

    public static void main(String[] args) {
        SpringApplication.run(SpringbootRabbitApplication.class, args);

    }
}
package club.kittybunny;

import club.kittybunny.provider.MyProvider;
import org.junit.Test;
import org.junit.runner.RunWith;
import org.springframework.beans.factory.annotation.Autowired;
import org.springframework.boot.test.context.SpringBootTest;
import org.springframework.test.context.junit4.SpringRunner;

@RunWith(SpringRunner.class)
@SpringBootTest
public class SpringbootRabbitApplicationTests {

    @Autowired
    MyProvider provider;

    @Test
    public void contextLoads() {
        provider.send();
    }

}
项目地址:
svn://47.105.188.20/kitty/3%20ideas/springbootrabbitmq
用户名密码:reader/reader
作者:喵星兔
出处:https://www.cnblogs.com/kittybunny/
喵星之旅:https://www.cnblogs.com/kittybunny/p/12148641.html
我的视频:https://space.bilibili.com/518581788
更多内容:不咬人的小兔子
本博客所有文章仅用于学习、研究和交流目的,欢迎非商业性质转载。
我是兔子,我会喵,我叫喵星兔~~
