8、自定义监控模板
版权声明:原创作品,谢绝转载!否则将追究法律责任。 ————— 作者:kirin
模板:定义好了,一些监控项,应用集,触发器,图形等资源
模板可以包含子模板
模板,可以导入导出,可以分享
11.1.自定义模板,监控Nginx七种状态
[root@web01 ~]# egrep -v '^$|#' /etc/nginx/nginx.conf.default > /etc/nginx/nginx.conf
[root@web01 ~]# vim /etc/nginx/nginx.conf
[root@web01 ~]# cat /etc/nginx/nginx.conf
worker_processes  1;
events {
    worker_connections  1024;
}
http {
    include       mime.types;
    default_type  application/octet-stream;
    sendfile        on;
    keepalive_timeout  65;
    server {
        listen       80;
        server_name  localhost;
        location / {
            root   html;
            index  index.html index.htm;
        }
	location = /nginx_status {
		stub_status;
		access_log off;
	}
    }
}

[root@web01 ~]# nginx -t
nginx: the configuration file /etc/nginx/nginx.conf syntax is ok
nginx: configuration file /etc/nginx/nginx.conf test is successful

#重启服务。curl测试
[root@web01 ~]# systemctl restart nginx
[root@web01 ~]# curl http://127.0.0.1/nginx_status
Active connections: 1
server accepts handled requests
 1 1 1
Reading: 0 Writing: 1 Waiting: 0

#修改配置文件
[root@web01 ~]# vim /etc/zabbix/zabbix_agent2.d/zbx_nginx.conf
[root@web01 ~]# cat /etc/zabbix/zabbix_agent2.d/zbx_nginx.conf
UserParameter=nginx_status,netstat -lntp|grep -c nginx
UserParameter=nginx_accepts,curl http://127.0.0.1/nginx_status 2>/dev/null |awk 'NR==3 {print $1}'
UserParameter=nginx_active_con,curl http://127.0.0.1/nginx_status 2>/dev/null |awk 'NR==1 {print $NF}'
UserParameter=nginx_handled,curl http://127.0.0.1/nginx_status 2>/dev/null |awk 'NR==3 {print $3}'
UserParameter=nginx_Reading,curl http://127.0.0.1/nginx_status 2>/dev/null |awk 'NR==4 {print $2}'
UserParameter=nginx_Writing,curl http://127.0.0.1/nginx_status 2>/dev/null |awk 'NR==4 {print $4}'
UserParameter=nginx_Waiting,curl http://127.0.0.1/nginx_status 2>/dev/null |awk 'NR==4 {print $NF}'

#重启服务
[root@web01 ~]# systemctl restart zabbix-agent2.service

#服务端测试
[root@zabbix-server ~]# zabbix_get -s 10.0.0.7 -k nginx_active_con
1
[root@zabbix-server ~]# zabbix_get -s 10.0.0.7 -k nginx_handled
22
[root@zabbix-server ~]# zabbix_get -s 10.0.0.7 -k nginx_Waiting
0
11.2.在web界面操作
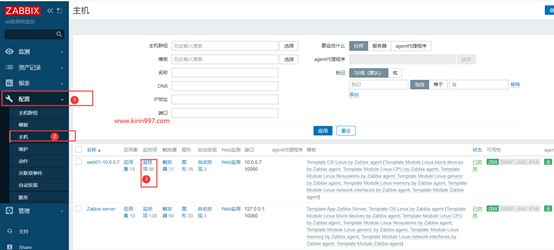

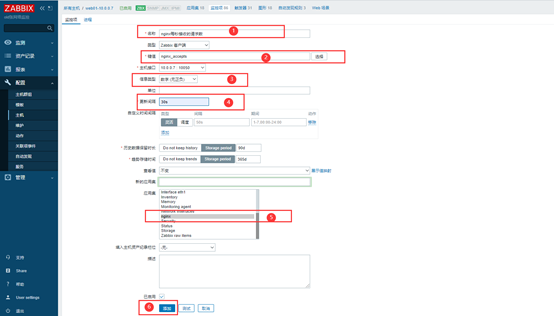
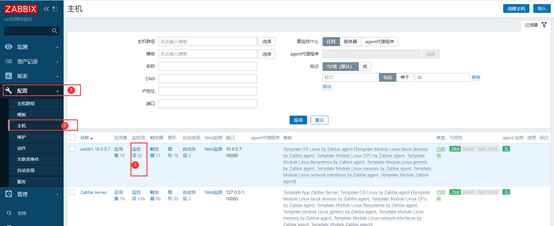
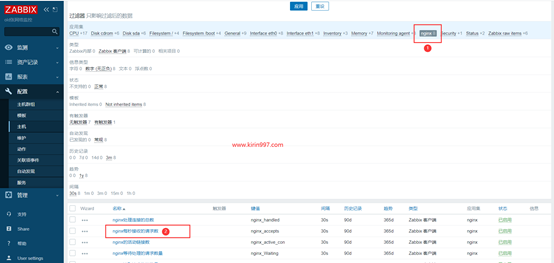
#一台一台的创建可麻烦死了,点击已经创建的,然后点击克隆,只修改下名称和键值就行

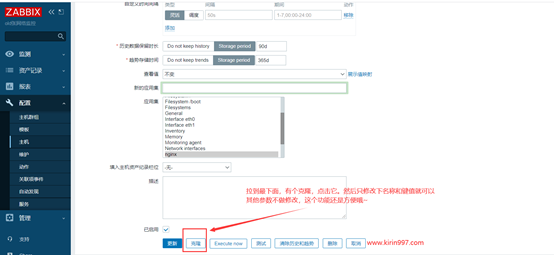
#全部添加完成:

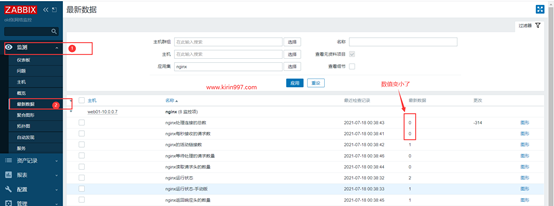
#去 监测——最新数据看看能不能取到值
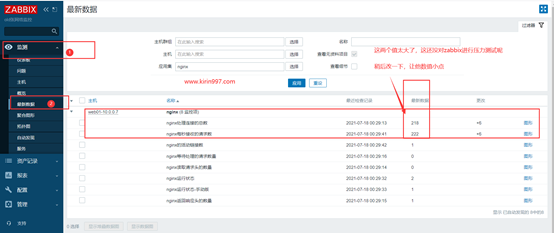


#然后重启下zabbix-server
[root@zabbix-server ~]# systemctl restart zabbix-server.service
#重新查看最新数据,数值变小了
#接下来准备压力测试下zabbix
[root@zabbix-server ~]# yum install -y httpd-tools
[root@zabbix-server ~]# ab -n 20000 -c 30 http://10.0.0.7/
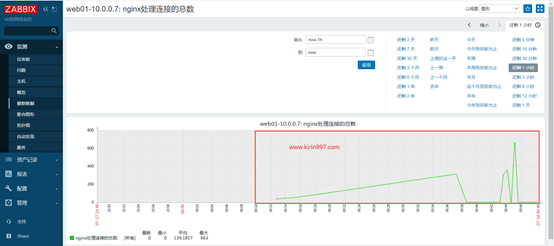
#刷新下浏览器界面
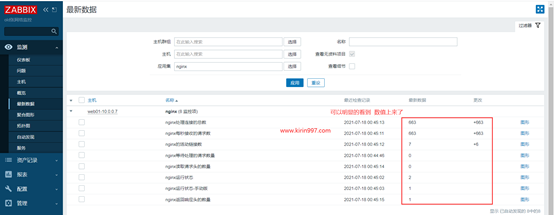
#可以点击图形查看
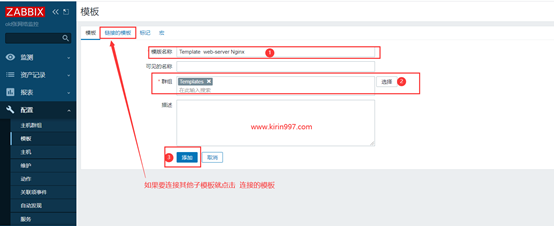
11.3.制作模板

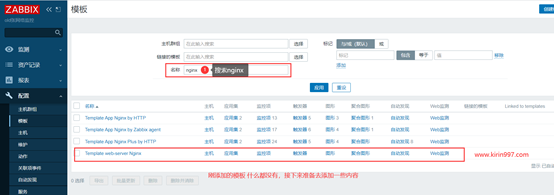
#添加监控项
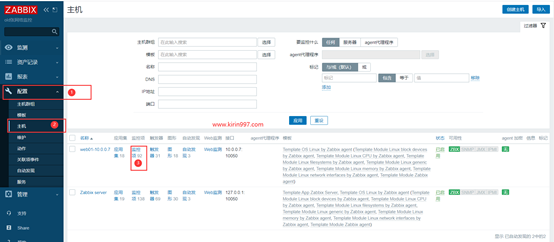
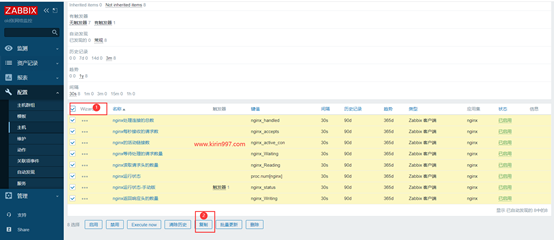

#再次回到模板那边查看
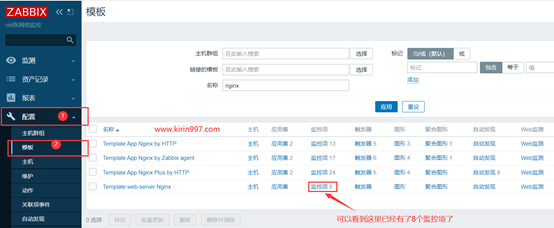
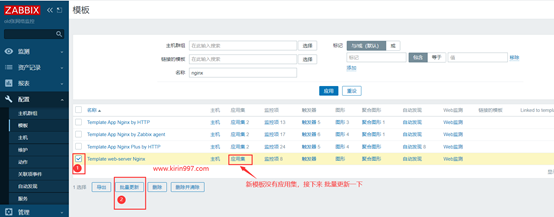
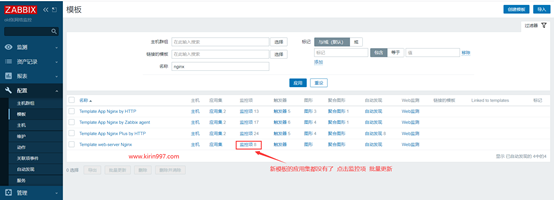
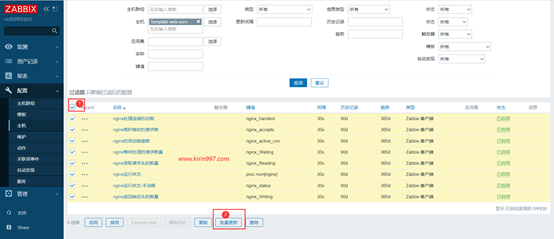
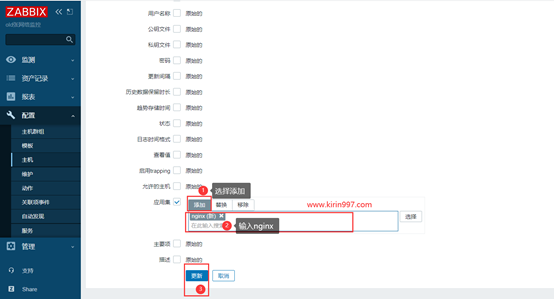

#接下来在去复制下触发器,和上面操作差不多,就不上图了

11.4.接下来使用一下zabbix的模板导入导出功能

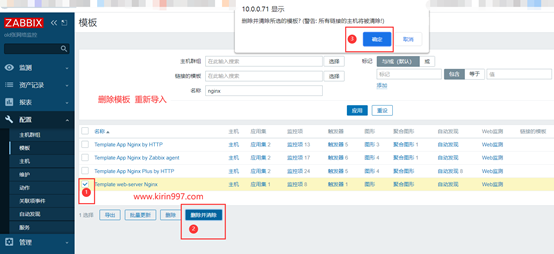

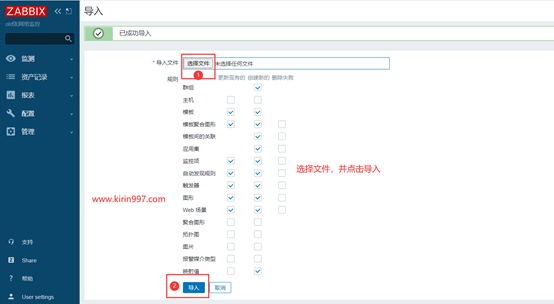

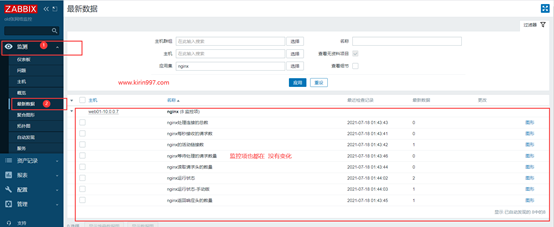
#接下来,如果要使用这个模板的话,是需要去主机上连接模板才可以使用的

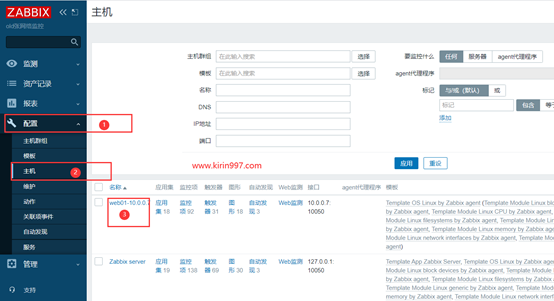


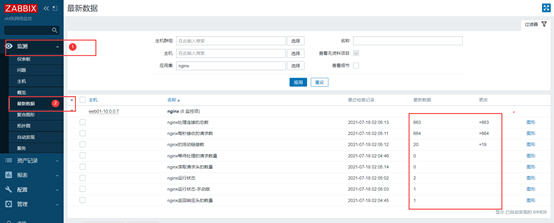
11.5.准备一台新机器,使用自定义模板来监控它
环境准备:
主机名称:web02
主机ip:10.0.0.8
#下载zabbix-agent2
[root@web02 ~]# rpm -ivh https://mirrors.tuna.tsinghua.edu.cn/zabbix/zabbix/5.0/rhel/7/x86_64/zabbix-agent2-5.0.8-1.el7.x86_64.rpm

#编辑配置文件
[root@web02 ~]# vim /etc/zabbix/zabbix_agent2.conf
[root@web02 ~]# cat /etc/zabbix/zabbix_agent2.conf|grep -w '^Server'
Server=10.0.0.71

#重启服务。并设置开机自启
[root@web02 ~]# systemctl restart zabbix-agent2.service
[root@web02 ~]# systemctl enable zabbix-agent2.service

#安装nginx服务,启动并且加入开机自启
[root@web02 ~]# yum install -y nginx
[root@web02 ~]# systemctl restart nginx
[root@web02 ~]# systemctl enable nginx
11.6.在web界面添加监控主机
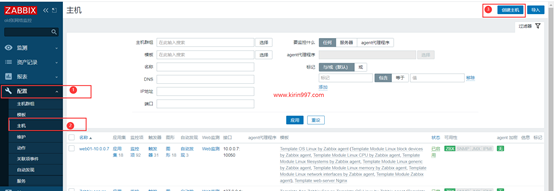


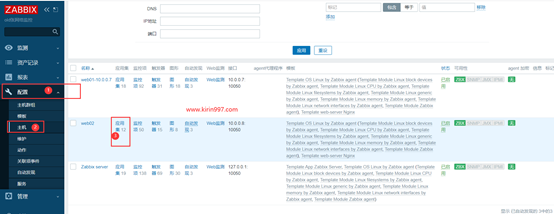
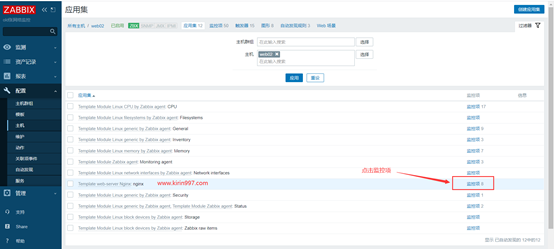
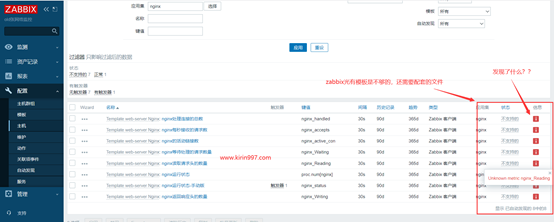
#接下来去把web01上的文件scp到web02上
[root@web01 ~]# scp /etc/zabbix/zabbix_agent2.d/zbx_nginx.conf root@10.0.0.8:/etc/zabbix/zabbix_agent2.d/

#web02重启zabbix-agent2
[root@web02 ~]# systemctl restart zabbix-agent2.service
#然后刷新web界面
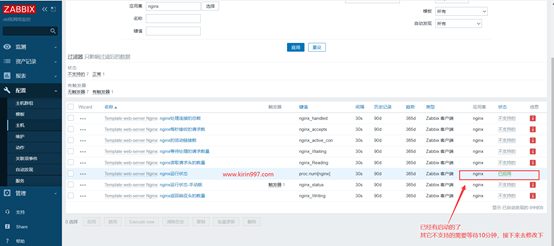
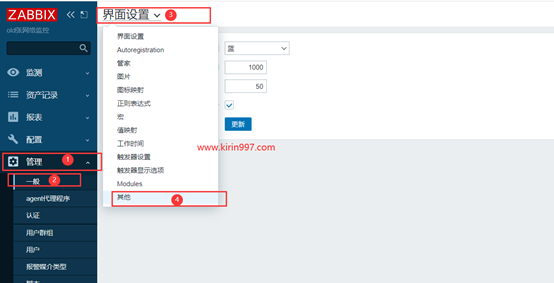
#接下来去修改默认不支持的监控项的等待时间

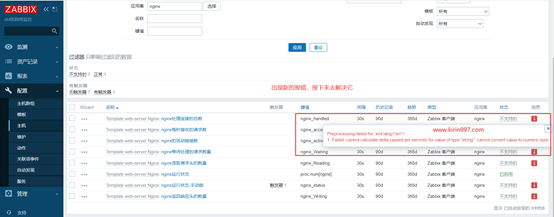
#上面的报错原因是没有权限,接下来去赋予权限
[root@web02 ~]# which netstat
/usr/bin/netstat
[root@web02 ~]# chmod u+s /usr/bin/netstat

#把web01上的nginx配置文件也拷到指定位置
[root@web01 ~]# scp /etc/nginx/nginx.conf root@10.0.0.8:/etc/nginx/

#检查
[root@web02 ~]# nginx -t
nginx: the configuration file /etc/nginx/nginx.conf syntax is ok
nginx: configuration file /etc/nginx/nginx.conf test is successful

#重启nginx服务
[root@web02 ~]# systemctl restart nginx
#然后再去web界面刷新

11.7.使用模板注意事项:
#开启监控页面
#导入模板、测试兼容性
#把zabbix的取值配置文件,放入到指定目录/etc/zabbix/zabbix_agentd.d/
#如果有取值脚本,需要把取值也放在对应的目录
#zabbix-get调试取值
#在目标主机链接刚导入的模板
#验证,查看最新数据
#教程
11.8.恢复环境、使用网络上的模板
#删除web02的模板,删除配置文件,并重启服务

[root@web02 ~]# gzip /etc/zabbix/zabbix_agent2.d/zbx_nginx.conf
[root@web02 ~]# systemctl restart zabbix-agent2.service

#下载软件
[root@web02 ~]# git clone https://gitee.com/kirin365/zabbix.git
[root@web02 ~]# cd zabbix/nginx/
[root@web02 ~/zabbix/nginx]# ll
total 40
-rw-r--r-- 1 root root   517 Jul 18 16:32 default.conf
-rw-r--r-- 1 root root  1649 Jul 18 16:32 nginx.sh
-rw-r--r-- 1 root root  2635 Jul 18 16:32 README.md
-rw-r--r-- 1 root root   325 Jul 18 16:32 userparameter_nginx.conf
-rw-r--r-- 1 root root 21126 Jul 18 16:32 zbx_export_templates.xml

#给文件改一个认识的名字,下载到桌面
[root@web02 ~/zabbix/nginx]# mv zbx_export_templates.xml zbx_nginx_export_templates.xml
[root@web02 ~/zabbix/nginx]# sz zbx_nginx_export_templates.xml
#然后把下载好的模板导入到zabbix

#然后把下载目录的文件拷贝至对应的目录上
[root@web02 ~/zabbix/nginx]# cp userparameter_nginx.conf /etc/zabbix/zabbix_agent2.d/

#创建脚本指定目录、修改文件内容
[root@web02 ~]# mkdir -p /server/scripts
[root@web02 ~]# vim /etc/zabbix/zabbix_agent2.d/userparameter_nginx.conf
[root@web02 ~]# egrep  '^U' /etc/zabbix/zabbix_agent2.d/userparameter_nginx.conf
UserParameter=nginx.status[*],/server/scripts/nginx.sh $1

#再把脚本移动到指定位置,并重启服务
[root@web02 ~]# cp zabbix/nginx/nginx.sh /server/scripts/
[root@web02 ~]# systemctl restart zabbix-agent2.service
[root@web02 ~]# chmod +x /server/scripts/nginx.sh
#打开微博页面看下模板里的监控项
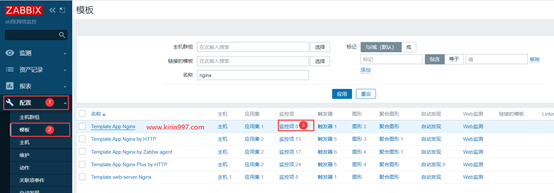
#这里可以看到它的一些键值''

#接下来去zabbix-server上测试取值
[root@zabbix-server ~]# zabbix_get -s 10.0.0.8 -k nginx.status[active]

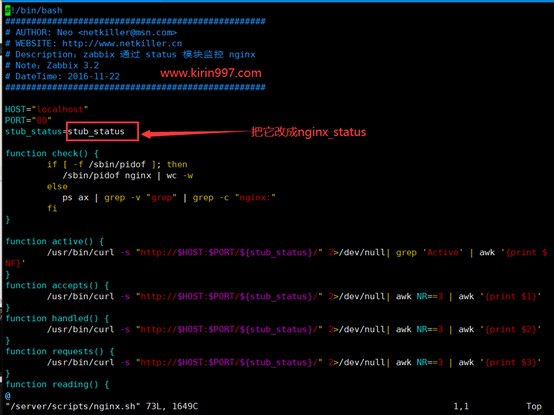
#结果是个空值,原因是它的文件路径跟我们自己的站点路径不一致,修改一下脚本
[root@web02 ~]# vim /server/scripts/nginx.sh
[root@web02 ~]# vim /etc/nginx/nginx.conf
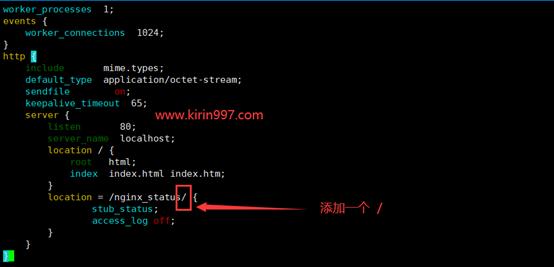
#检查语法。并重启nginx服务
[root@web02 ~]# nginx -t
nginx: the configuration file /etc/nginx/nginx.conf syntax is ok
nginx: configuration file /etc/nginx/nginx.conf test is successful
[root@web02 ~]# systemctl restart nginx.service

#再去服务端测试取值、OK没问题
[root@zabbix-server ~]# zabbix_get -s 10.0.0.8 -k nginx.status[active]
1
[root@zabbix-server ~]# zabbix_get -s 10.0.0.8 -k nginx.status[reading]
0
[root@zabbix-server ~]# zabbix_get -s 10.0.0.8 -k nginx.status[requests]
5
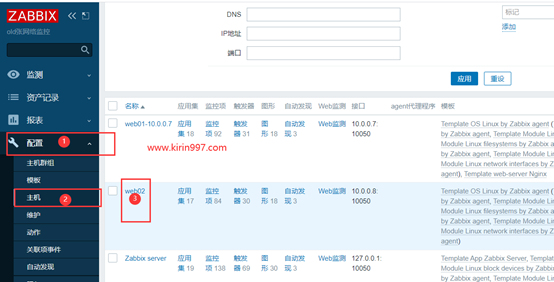
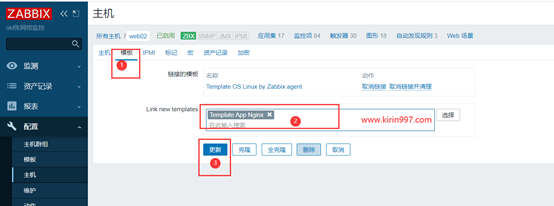
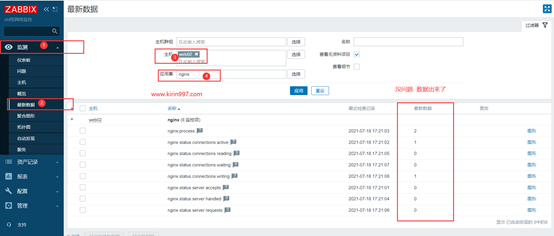
11.9.测试无问题后,在web界面上连接模板
11.10.为新机器配置钉钉报警与动作
11.10.1.创建钉钉机器人
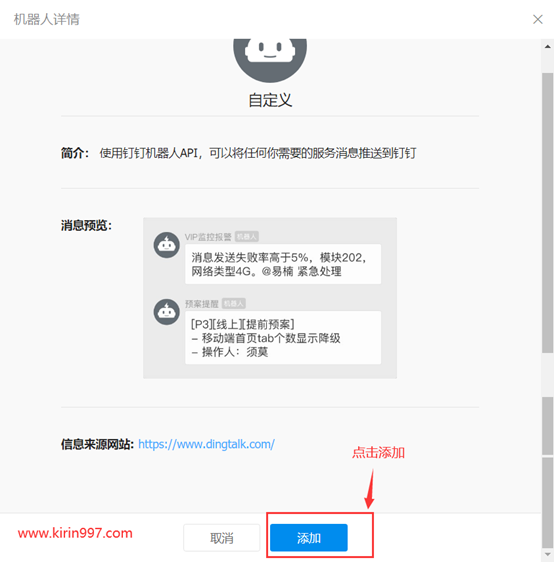
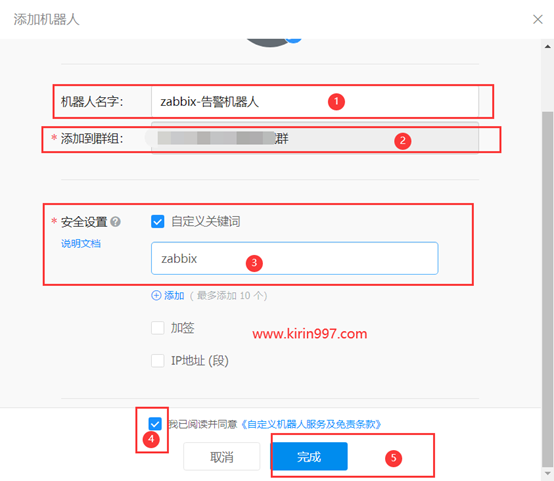
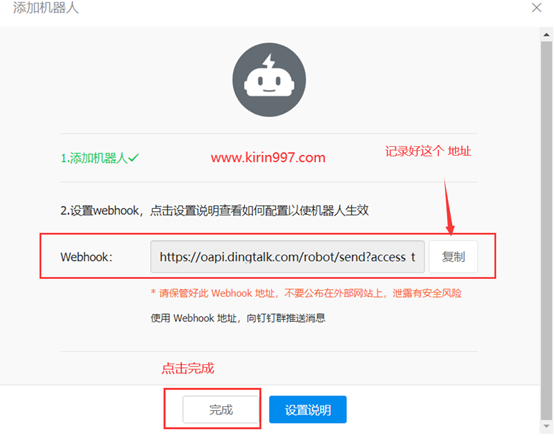
步骤:设置--->智能群助手--->添加机器人--->自定义--->添加



11.10.2.找到zabbix默认存放脚本的目录
[root@zabbix-server ~]# cat /etc/zabbix/zabbix_server.conf|egrep '^A'
AlertScriptsPath=/usr/lib/zabbix/alertscripts

#到该目录下编写dingding.py脚本(脚本中包含钉钉机器人的webhook值):
[root@zabbix-server /usr/lib/zabbix/alertscripts]# vim dingding.py
[root@zabbix-server /usr/lib/zabbix/alertscripts]# cat dingding.py
#!/usr/bin/env python
#coding:utf-8
#zabbix钉钉报警
import requests,json,sys,os,datetime
webhook="https://oapi.dingtalk.com/robot/send?access_token=dfcxxxxxxxxxxxxx…………"
user=sys.argv[1]
text=sys.argv[3]
data={
    "msgtype": "text",
    "text": {
        "content": text
    },
    "at": {
        "atMobiles": [
            user
        ],
        "isAtAll": False
    }
}
headers = {'Content-Type': 'application/json'}
x=requests.post(url=webhook,data=json.dumps(data),headers=headers)
if os.path.exists("/usr/lib/zabbix/logs/dingding.log"):
    f=open("/usr/lib/zabbix/logs/dingding.log","a+")
else:
    f=open("/usr/lib/zabbix/logs/dingding.log","w+")
f.write("\n"+"--"*30)
if x.json()["errcode"] == 0:
    f.write("\n"+str(datetime.datetime.now())+"    "+str(user)+"    "+"发送成功"+"\n"+str(text))
    f.close()
else:
    f.write("\n"+str(datetime.datetime.now()) + "    " + str(user) + "    " + "发送失败" + "\n" + str(text))
    f.close()

#创建上面脚本日志的路径和文件
[root@zabbix-server /usr/lib/zabbix/alertscripts]# mkdir -p /usr/lib/zabbix/logs/
[root@zabbix-server /usr/lib/zabbix/alertscripts]# touch /usr/lib/zabbix/logs/dingding.log
[root@zabbix-server /usr/lib/zabbix/alertscripts]# chmod 755 dingding.py
[root@zabbix-server /usr/lib/zabbix/alertscripts]#  chown zabbix.zabbix dingding.py
[root@zabbix-server /usr/lib/zabbix/alertscripts]# chown zabbix.zabbix /usr/lib/zabbix/logs/dingding.log

#测试脚本
[root@zabbix-server /usr/lib/zabbix/alertscripts]# ./dingding.py  a  b  "zabbix: 这是测试"

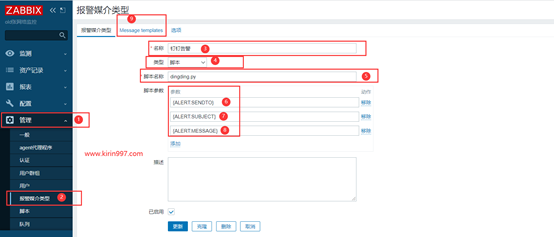
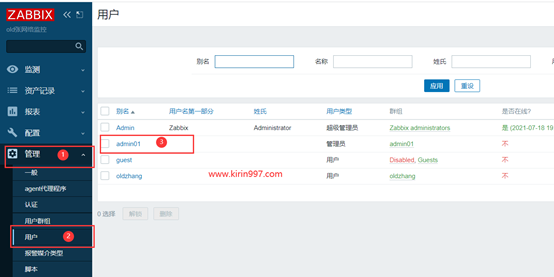
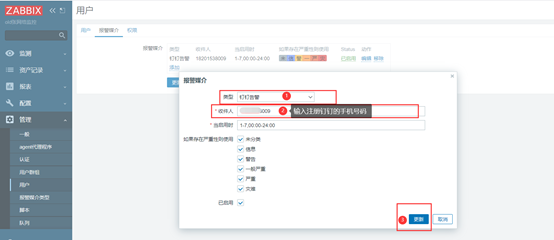
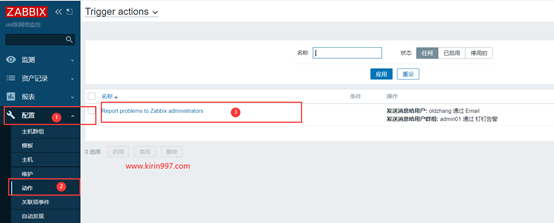
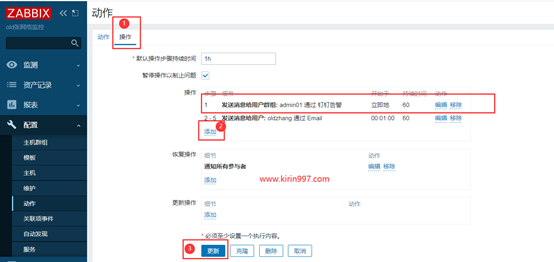
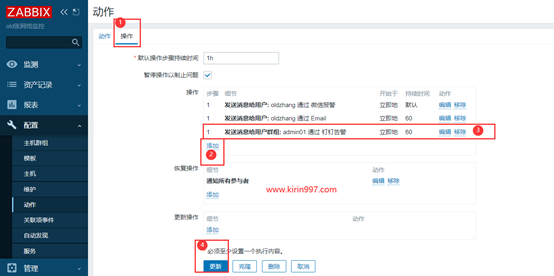
11.10.3.Zabbix监控界面配置
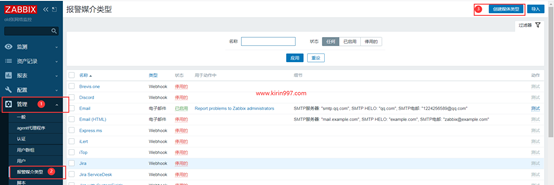
创建报警媒介. 三个参数分别是:
{ALERT.SENDTO}
{ALERT.SUBJECT}
{ALERT.MESSAGE}


#接下来去停止web01的Nginx服务
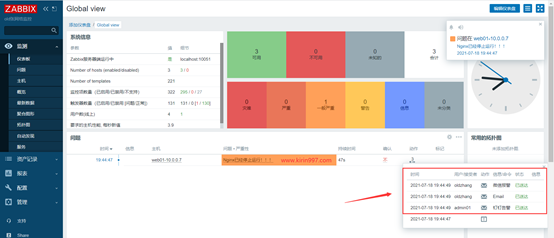
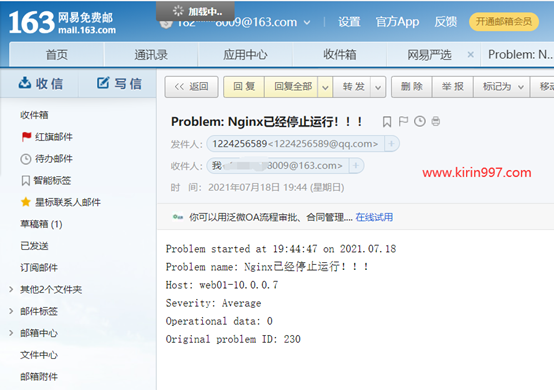
[root@web01 ~]# systemctl stop nginx.service
#刷新web界面


#测试成功
zabbix监控角度总结
物理层: 物理服务器、物理交换机
物理服务器:cpu温度、主板温度、功率、电压、风扇转速、 ipmi协议、ipmitool
物理交换机:接口流量、snmp模板
系统层:cpu,负载,内存,磁盘,网络,系统 zabbix自带模板
应用层:nginx/lvs/haproxy/phpfpm/mysql/pgsql/tomcat/nfs/glusterfs... 模板监控
业务层:网站访问速度,用户访问量pv\uv\ip,用户活跃度 日活,周活,月活 订单量,利润
本文来自博客园,作者:kirin(麒麟),转载请注明原文链接:https://www.cnblogs.com/kirin365/articles/16387096.html


