学习笔记-Mysql数据库-006_控制台博客系统
我们使用博客系统项目对前序进行梳理和补充
1 需求梳理
案例博客系统建立于控制台中,功能需要包含基本的:
- 登陆博客
- 注册博客
- 发布博客
- 支持分页查看的博客列表
- 显示博客标题
- 创建时间
- 阅读数量
- 评论数量
- 赞数量
- 博客详情
- 博文详情
- 评论
- 发表评论
- 赞 or 踩
- 阅读数 + 1
2 数据库设计
2.1 数据库表结构设计
-
用户表:user
由于存在用户注册登录的功能,所以使用用户表存储 id、用户名、昵称、手机号、密码、电子邮件、注册时间
| id | username | nickname | mobile | password | ctime | |
|---|---|---|---|---|---|---|
| 1 | kinght | 不到160不改昵称 | 17204729532 | admin123 | kinght@geekxk.com | 2022/12/04 01:50 |
| 2 | aym | 老夫的少女心 | 17860962953 | 123admin | aym@geekxk.com | 2022/12/07 08:23 |
| 3 | amber | 咸鱼篓子 | 19002329532 | root | amber@geekxk.com | 2022/12/09 21:54 |
-
文章表:article
文章表存储了每个文章的id、名称、正文信息、阅读数量、评论数量、赞的数量、踩的数量、发表者id、发表时间
| id | title | text | read_count | comment_count | up_count | down_count | user_id | ctime |
|---|---|---|---|---|---|---|---|---|
| 1 | 安服混子的摸鱼 | 文章正文此处省略10000个字 | 101 | 10 | 1 | 1 | 1 | 2022/12/09 21:54 |
| 2 | 论删库后怎么提桶跑路 | 修复代码 rm -rf /* | 10000 | 2 | 10 | 0 | 1 | 2022/12/09 21:54 |
-
评论表:comment
评论表存储了评论的id、评论内容、评论的用户id、文章id、评论时间
理论来说拥有了评论表不需要在文章表中列出评论个数,但是如果每次获取都需要计算一次评论条数,会导致效率的降低
| id | content | uesr_id | article_id | ctime |
|---|---|---|---|---|
| 1 | 不错 | 1 | 1 | 2022/12/09 21:54 |
| 2 | 学到了 | 2 | 1 | 2022/12/09 21:54 |
| 3 | 腿被打断了,来医院看我 | 3 | 2 | 2022/12/09 21:54 |
-
推荐表:up_down(1表示赞 0表示踩)
每个用户对一篇文章只能赞或者踩任选其一,遇到某用户已经赞或者踩,再次输入的情况,则选择直接修改原来的数据值
| id | choice | user_id | article_id | ctime |
|---|---|---|---|---|
| 1 | 1 | 1 | 1 | 2022/12/09 21:54 |
| 2 | 0 | 2 | 1 | 2022/12/09 21:54 |
| 3 | 1 | 3 | 2 | 2022/12/09 21:54 |
2.2 表关系设计
- 每张表的id列都创建 自增 + 主键
- 用户表
- 用户名 + 密码 创建联合索引
- 由于登录会经常使用用户名加密码的组合,所以需要提升他们的关联保证查询速度
- 联合索引:InnoDB会使用主键索引B+树来维护索引和数据文件。联合索引会让B+树的data部分存储的是联合索引所在的主键值
- 手机号 创建唯一索引
- 邮箱 创建唯一索引
- 用户名 + 密码 创建联合索引
- 推荐表
- user_id和article_id创建联合唯一索引
- 每个用户对一篇文章只能赞或者踩任选其一
- user_id和article_id创建联合唯一索引
2.3 构建数据库
# 初始化需要删除可能影响的数据库
MariaDB [(none)]> drop database if exists mysql_blog; # 如果数据库存在则删除
# 创建数据库 mysql_glog 编码规则 utf8 校对规则 大小写不敏感
MariaDB [(none)]> create database mysql_blog default charset utf8 collate utf8_general_ci;
# 进入数据库
MariaDB [(none)]> use mysql_blog;

# 创建数据表
create table user(
	id int auto_increment primary key, -- id为主键
    username varchar(16) not null,	# 用户名
    nickname varchar(16) not null,	# 昵称
    mobile char(11) not null,
    password varchar(64) not null,
    email varchar(64) not null,
    ctime datetime not null,
    index ix_username_password(username,password), -- 联合索引 名(索引列1,索引列2)
    unique ix_mobile(mobile),	-- 唯一索引 取名为 ix_mobile
    unique ix_email(email) -- 唯一索引不能重复
)default charset=utf8;

create table article(
	id int auto_increment primary key,
    title varchar(255) not null,
    text text not null,	-- mysql支持text类型
    read_count int default 0, -- 阅读数量 默认为0
    comment_count int default 0, -- 评论数量 默认为0
    up_count int default 0, -- 顶数量 默认为0
    down_count int default 0, -- 踩数量 默认为0
    user_id int not null, -- 发表者id
    ctime datetime not null, -- 发表时间
    constraint fk_article_user foreign key(user_id) references user(id)
    -- 给约束取个名字 fk_article_user
)default charset=utf8;

create table comment(
	id int auto_increment primary key,
    content varchar(255) not null, -- 评论内容
    user_id int not null, -- 评论者id
    article_id int not null, -- 文章id
    ctime datetime not null, -- 发表时间
    constraint fk_comment_user foreign key (user_id) references user(id),
    constraint fk_comment_article foreign key(article_id) references article(id)
)default charset=utf8;

create table up_down(
	id int auto_increment primary key,
    choice tinyint not null,	-- 踩 or 赞 1表示赞 0表示踩
    user_id int not null,	-- 踩 or 赞 的 用户id
    article_id int not null, -- 文章id
    ctime datetime not null, -- 时间
    constraint fk_up_down_user foreign key(user_id) references user(id),
    constraint fk_up_down_article foreign key(article_id) references article(id),
    unique ix_user_article(user_id,article_id) -- 文章 同一个用户 只能选择踩或者赞
)default charset=utf8;
3 软件开发
在代码讲解阶段,会适当省略无关代码
3.1 软件规划
由于我们只是控制台程序,并不计划具体的原型图,不过简单的流程和功能会有一个规划,按照软件开发目录规范,我们将目录分为
config - 存放配置文件
	settings.py
src
	account.py
	article.py
	handler.py -- 主要功能代码
utils
	context.py
	db.py
	validator.py
app.py -- 运行入口
app.py只是作为一个程序入口,具体逻辑代码还是src/handler.py
文件名:app.py
'''
加在主程序 src/handler
'''

from src.handler import handler # 导入直接实例化对象

if __name__ == '__main__':
    handler.run()
文件名:src/handler.py
# 为了后续兼容多用户同时操作,在这里采用了类,每次调用handler会进行实例化对象
class Handler(object):
    LOGIN_USER_DICT = UserDict()
    NAV = []
    def wrapper(self,method):
        pass	# 菜单导航栏规划
    def login(self):
        pass	# 登录窗口
    def register(self):
        pass	# 注册窗口
    def publish_blog(self):
        pass	# 发布博客
    def blog_list(self):
        pass	# 查看博客列表
    def article_detail(self,article_id,article_object):
        pass	# 查看博客正文
    def run(self):
        pass	# 首页窗口 -- 入口文件调用
handler = Handler() # 实例化对象
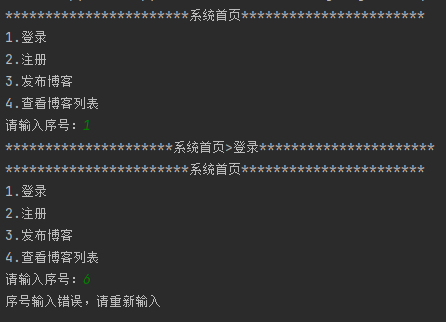
3.2 首页窗口
控制台博客程序的首页窗口就是功能选择页面,
文件名:src/handler.py
from utils.context import Context # 菜单栏格式

class Handler(object):
    LOGIN_USER_DICT = UserDict()
    NAV = []
    def wrapper(self,method):
        def inner(*args,**kwargs):
            # 再次生成导航栏地址
            print(">".join(self.NAV).center(50,"*"))
            res = method(*args,**kwargs)
            self.NAV.pop(-1) # 剔除最后一列元素
            return res
        # 只返回inner的内存地址,并不直接执行
        return inner
    def login(self):
        pass	# 登录窗口
    def register(self):
        pass	# 注册窗口
    def publish_blog(self):
        pass	# 发布博客
    def blog_list(self):
        pass	# 查看博客列表
    def article_detail(self,article_id,article_object):
        pass	# 查看博客正文
	def run(self):
        # 当前页面路径展示 NAV列表进行拼接
        self.NAV.append("系统首页") # 在首页就将系统首页添加入NAV这个类变量
        mapping = {
            # Context初始化生成对象 Context.text='登录' Context.method='功能的地址空间'
            "1": Context('登录',self.wrapper(self.login)), # 进入self.wrapper(self.login)
            "2": Context('注册',self.wrapper(self.register)),
            "3": Context('发布博客',self.wrapper(self.publish_blog)),
            "4": Context('查看博客列表',self.wrapper(self.blog_list)),
        }

        # 拼接功能菜单输出 k=序号 v.text=Context.text
        message = "\n".join(["{}.{}".format(k,v.text) for k,v in mapping.items()])

        while True:
            # 通过读取类变量NAV进行拼接,达到导航栏输出的目的
            # 效果: ***********************系统首页***********************
            print(">".join(self.NAV).center(50,"*"))
            print(message)
            choice = input("请输入序号:").strip()
            if not choice:
                continue
            if choice.upper()=="Q":
                return
            context = mapping.get(choice)   # 取Context生成的对象地址
            if not context:
                # 对象地址为空 则说明输入错误
                print("序号输入错误,请重新输入\n")
                continue
            self.NAV.append(context.text) # 将选择到的功能列表添加到 类变量NAV中
            context.method() # 运行context函数中 也就是 wrapper返回的inner
文件名:utils/context.py
class Context(object):
    def __init__(self,text,method):
        self.text = text	# 存放功能名称
        self.method = method	# 存放对象的空间地址
功能调试
3.3 数据库连接
由于后续功能需要数据库的参与,所以我们首先进行数据库的连接配置工作
文件名:config/settings.py
# 数据库连接信息放置于此

# 连接池类PooledDB支持直接接收 creator=连接函数,**kwargs={字典参数,}

DB_POOL_CONN = {
    "maxconnections":5,
    "mincached":2,
    "maxcached":3,
    "blocking":True,
    "setsession":[],
    "ping":0,
    "host":'192.168.0.115',
    "port":3306,
    "user":"root",
    "password":"123456",
    "database":"mysql_blog",
    "charset":"utf8"
}
文件名:utils/db.py
# 该文件封装连接操作为 with...open...数据库管理类
import pymysql
from dbutils.pooled_db import PooledDB
from config import settings

POOL = PooledDB(creator=pymysql,**settings.DB_POOL_CONN)

# 将连接制作成上下文管理的SQL工具类

class Connect(object):
    def __init__(self):
        self.conn = conn = POOL.connection() # 申请连接池连接 然后交给self.conn
        self.cursor = conn.cursor(pymysql.cursors.DictCursor) # 输出方式修改为字典
    def __enter__(self):
        return self # 返回该方法所定义的类的实例
    def __exit__(self, exc_type, exc_val, exc_tb):
        self.cursor.close()
        self.conn.close()
    def exec(self,sql,*args,**kwargs):
        params = args or kwargs
        '''
        args = ('admin', 'admin')
        kwargs = {'username': 'admin', 'password': 'admin'}
        '''
        row = self.cursor.execute(sql,params)
        self.conn.commit()
        return row
    def fetch_one(self,sql,*args,**kwargs):
        params = args or kwargs
        self.cursor.execute(sql,params)
        result = self.cursor.fetchone()
        return result
    def fetch_all(self,sql,*args,**kwargs):
        params = args or kwargs
        self.cursor.execute(sql,params)
        result = self.cursor.fetchall()
        return result
3.4 注册窗口
在src/handelr.py中编写注册账号的逻辑,而注册时校验工作则交给utils/validator.py进行,具体的数据操作工作交给utils/account.py进行
文件名:src/handler.py
from utils.context import Context,UserDict
from utils import validator
from src import account

class Handler(object):
    NAV=[]
    LOGIN_USER_DICT = UserDict()
    def wrapper(self,method):
        pass
    def login(self):
        pass
    def register(self):
        '''注册'''
        while True:
            try:
                nickname = validator.while_input('昵称(Q/q退出:)')
                if nickname.upper == "Q":
                    return
                user = validator.while_input("用户名:")
                pwd = validator.while_input("密码:")
                # 只传递validator.email内存地址,在validator执行
                email = validator.while_input("邮箱:",validator.email)
                mobile = validator.while_input("手机号:",validator.mobile)
            except Exception as e:
                print("注册失败,请重新注册。")
                continue

            if not account.register(user,pwd,nickname,mobile,email):
                print("注册失败,请重新注册。")
                continue
            print("注册成功,请登录。")
            return
	def publish_blog(self):
        pass
    def blog_list(self):
        pass
    def article_detail(self,article_id,article_object):
        pass	# 查看博客正文
    def run(self):
        pass
handler = Handler() # 实例化对象
文件名:utils/validator.py
import re,random
import utils.em as em # 要保证run程序能够找到该文件路径
def mobile(text):
    '''电话号码'''
    return re.match("^1[3-9]\d{9}$", text)

def email(text):
    '''电子邮箱 并 进行真实性校验'''
    email_number = re.match("^[a-zA-Z0-9_-]+@[a-zA-Z0-9_-]+\.[a-zA-Z0-9_-]+$",text).group()
    # 发送电子邮件
    v_code = random.randint(10000,99999)
    text = "欢迎注册控制台博客程序,您的验证码是{}".format(v_code)
    em.send_email(email_number,'注册验证邮件',text)
    ci = 1
    while ci <= 3:
        inp_v_code = input("请输入验证码:").strip()
        try:
            inp_v_code = int(inp_v_code)
        except Exception:
            print("验证码输入错误,请重新输入")
            ci += 1
            continue
        if not v_code == inp_v_code:
            print("验证码输入错误,请重新输入")
            ci += 1
            continue
        else:
            return email_number
    else:
        print("密码错误次数过多")
        return

def while_input(text,validator=None):
    '''文本输入'''
    while True:
        data = input(text).strip()
        if not data:
            print("输入不能为空,请重新输入。")
            continue
        if not validator:
            return data
        if not validator(data):
            # validator会赋值经过mobile和email处理过的值 如果为空 则说明正则校验失败 需要重新输入
            print("格式错误,请重新输入")
            continue
        return data
为了支持邮箱校验功能,编写了utils/em.py函数,并且在config/setting.py中添加了相关配置文件
文件名:utils/em.py
import smtplib
from email.mime.text import MIMEText
from email.utils import formataddr
from config.settings import EMAIL_NUMBER

# content == 邮件内容
# title == 邮件名称
# email == 目的邮箱地址
def send_email(email,title,content):
    msg = MIMEText(content,'html','utf-8')
    msg['from'] = formataddr(['控制台博客系统邮件',EMAIL_NUMBER['email_number']])
    msg['Subject'] = title
    server = smtplib.SMTP_SSL(EMAIL_NUMBER['smtp_host'])
    server.login(EMAIL_NUMBER["email_number"],EMAIL_NUMBER["email_pwd"])
    server.sendmail("kinght@geekxk.com",email,msg.as_string())
    server.quit()
文件名:config/settings.py
EMAIL_NUMBER = {
    "email_number":'kinght@geekxk.com',
    "email_pwd":"邮箱密码或授权码",
    "smtp_host":"smtp.exmail.qq.com"
}
在完成所有的校验工作后,使用src/account.py将其写入数据库
TIPS:使用明文保存密码可能会导致拖库风险
文件名:src/account.py
import datetime
import hashlib
from utils.db import Connect

def encrypt(origin,salt="sadw@D!12d21"):
    '''密码加密'''
    hash_object = hashlib.md5(salt.encode('utf-8')) # 加盐
    hash_object.update(origin.encode('utf-8')) # 加密
    result = hash_object.hexdigest()
    return result

def register(user,pwd,nickname,mobile,email):
    with Connect() as conn:
        sql = "insert into user(username,password,nickname,mobile,email,ctime) values(%s,%s,%s,%s,%s,%s)"
        password = encrypt(pwd)  # 加密密码
        # 组成注册语句 并 执行
        result = conn.exec(sql,user,password,nickname,mobile,email,datetime.datetime.now())
        return result
3.5 登录窗口
src/handler.py只完成基本架构,登录需要满足两个功能需求
1.需要校验用户输入的账号密码和数据库中是否一致
交给src/account.py完成
2.需要在类中添加登陆状态
交给utils/context.py完成
文件名:src/handler.py
from utils.context import Context,UserDict
from utils import validator
from src import account

class Handler(object):
    # UserDict类实例化对象LOGIN_USER_DICT
    LOGIN_USER_DICT = UserDict()
    NAV = []
    def wrapper(self,method):
        pass	# 菜单导航栏规划
    def login(self):
        '''登录'''
        while True:
            user = input('用户名(Q/q退出):')
            if user.upper() == 'Q':
                return
            pwd = input("密码:")
            user_dict = account.login(user,pwd)
            if not user_dict:
                print('用户名或密码错误,请重新输入')
                continue
            print("登录成功")
            # 将用户信息赋值给 LOGIN_USER_DICT
            self.LOGIN_USER_DICT.set_info(user_dict)
            # 将用户名放入NAV列表中
            self.NAV.insert(0,self.LOGIN_USER_DICT.nickname)
            return
    def register(self):
        pass	# 注册窗口
    def publish_blog(self):
        pass	# 发布博客
    def blog_list(self):
        pass	# 查看博客列表
    def article_detail(self,article_id,article_object):
        pass	# 查看博客正文
    def run(self):
        pass	# 首页窗口 -- 入口文件调用
handler = Handler() # 实例化对象
文件名:src/account.py
import datetime
import hashlib
from utils.db import Connect

def encrypt(origin,salt="sadw@D!12d21"):
    '''密码加密'''
    hash_object = hashlib.md5(salt.encode('utf-8')) # 加盐
    hash_object.update(origin.encode('utf-8')) # 加密
    result = hash_object.hexdigest()
    return result

def login(username,password):
    with Connect() as conn:
        sql = "select id,nickname from user where username=%(username)s and password=%(password)s"
        password = encrypt(password) # 加密密码
        result = conn.fetch_one(sql,username=username,password=password)
        return result # 返回为空 即账号密码错误
文件名:utils/context.py
class UserDict(object):
    def __init__(self):
        self.id = None  # self.id = 1
        self.nickname = None # self.id = kinght
    def set_info(self, user_dict):
        for k,v in user_dict.items():
            setattr(self,k,v) # 等于 self.k = v
            # self.id = user_dict['id']
            # self.method = user_dict['nickname']
    @property # 内置函数可读
    def is_login(self):
        if self.id: # id不为None代表已登录
            return True
3.6 发布文章
发布文章首先需要校验是否是登陆状态,如果是,则需要将标题、正文、发布者id、当前时间填入数据库
1.handler.py进行基本的逻辑
2.article.py进行发布数据库的交互
文件名:src/handler.py
import time
from utils.context import Context,UserDict
from utils import validator
from src import account,article

class Handler(object):
    LOGIN_USER_DICT = UserDict()
    NAV = []
    def wrapper(self,method):
        pass	# 菜单导航栏规划
    def login(self):
        pass	# 登录窗口
    def register(self):
        pass	# 注册窗口
    def publish_blog(self):
        '''发布博客'''
        if not self.LOGIN_USER_DICT.is_login:
            print("未登录用户不允许发布博客,请登陆后访问。")
            time.sleep(2)
            return
        while True:
            title = validator.while_input("标题:")
            text = validator.while_input("正文:")
            if not article.publish(title,text,self.LOGIN_USER_DICT.id):
                # 交给article.publish进行数据库交互,成功返回
                print("发布失败,请重试")
                time.sleep(1)
                continue
            print("发布成功,请进入博客列表查看")
            return
    def blog_list(self):
        pass	# 查看博客列表
    def article_detail(self,article_id,article_object):
        pass	# 查看博客正文
    def run(self):
        pass	# 首页窗口 -- 入口文件调用
handler = Handler() # 实例化对象
文件名:src/article.py
import datetime
from utils.db import Connect

def publish(title,text,user_id):
    '''发布文章'''
    try:
        with Connect() as conn:
            sql = "insert into article(title,text,user_id,ctime) values (%s,%s,%s,%s)"
            result = conn.exec(sql,title,text,user_id,datetime.datetime.now())
            # result直接接收状态码1
            return result
    except Exception as e:
        pass
功能测试
***********************系统首页***********************
1.登录
2.注册
3.发布博客
4.查看博客列表
请输入序号:3
********************系统首页>发布博客*********************
未登录用户不允许发布博客,请登陆后访问。
*********************系统首页>登录**********************
用户名(Q/q退出):kinghtxg
密码:admin
登录成功
***********************系统首页***********************
1.登录
2.注册
3.发布博客
4.查看博客列表
请输入序号:3
*****************kinght>系统首页>发布博客*****************
标题:测试demo1
正文:这是一个简单的测试博客
发布成功,请进入博客列表查看

3.7 文章列表
文章列表为首页最后一个功能,他需要起到一个输出文章名称,连接文章详情的作用,由于文章的数量也许会非常庞大,所以文章列表需要一个分栏作用,计划每十行为一栏
文件名:src/handler.py
    def blog_list(self):
        '''博客列表'''
         # 获取数据库当前数据量
        total_count = article.total_count() # 1.跳转到src/article.py的total_count()
        # 每页显示10行数据
        per_page_count = 10
        # 总共需要多少页来展示数据
        ## divmod() 函数把除数和余数运算结果结合起来,返回一个包含商和余数的元组(a // b, a % b)
        max_page_num,div = divmod(total_count,per_page_count)
        if div:
            # 如果有余数则需要加一页
            max_page_num += 1
        # 当前想查看的页数 默认第一页
        current_page_num = 1
        if not max_page_num:
            print("无数据") # 没有余数也没有商 等于没有数据
            return
        # 当前查看页数
        counter = 0
        while True:
            if counter:
                print(">".join(self.NAV).center(50,"*"))
            counter += 1 # counter不为0 就输出 标题栏
            data_list = article.page_list(per_page_count,(current_page_num - 1)*per_page_count)
            # 2.跳转到src/article.py的page_list
            # 得到的结果为降序
            print("文章列表:")
            for row in data_list:
                line = "    {id}.{title}".format(**row)
                # 直接对row进行拆分 id 放入 {id} title放入{title}
                print(line)
            print("\n注意:输入p数字格式,表示翻页;仅输入文章ID,表示查看文章详情页")
            text = input("请输入(Q/q退出):").strip()
            if text.upper() == "Q":
                return
            # 1.翻页
            # startswith判断字符是否以p开头
            if text.startswith("p"):
                page_num = int(text[1:]) # 截取除了p以后的其他数字
                if 0< page_num <= max_page_num: # 翻页要小于等于最大页数
                    current_page_num = page_num
                continue
            # 2.查看文章
            if not text.isdecimal(): # 不是整数的
                print("格式错误,请重新输入")
                continue
            article_id = int(text) # 得到文章id
            # 根据文章id去数据获取文章信息
            article_object = article.get_article(article_id) # 得到文章对象
            # 3.跳转到src/article.py的get_article
            if not article_object:
                print("文章不存在,请重新输入")
                continue
            self.NAV.append("文章详情")
            self.wrapper(self.article_detail)(article_id,article_object)
            # 跳转到src/handler.py的wrapper函数
使用数据库的聚合函数对数据量进行统计
文件名:src/article.py
def total_count():
    with Connect() as conn:
        # count() mysql的聚合函数 计数
        sql = "select count(id) as ct from article"
        result = conn.fetch_one(sql)
        if not result:
            return 0
        return result['ct']
数据库补充知识:
count(*) 和 count(1)和count(列名)区别
执行效果上:

count(*)包括了所有的列,相当于行数,在统计结果的时候,不会忽略为NULL的值。
count(1)包括了忽略所有列,用1代表代码行,在统计结果的时候,不会忽略为NULL的值。
count(列名)只包括列名那一列,在统计结果的时候,会忽略列值为空(这里的空不是指空字符串或者0,而是表示null)的计数,即某个字段值为NULL时,不统计。
执行效率上:

列名为主键,count(列名)会比count(1)快
列名不为主键,count(1)会比count(列名)快
如果表多个列并且没有主键,则 count(1 的执行效率优于 count(*)
如果有主键,则 select count(主键)的执行效率是最优的
如果表只有一个字段,则 select count(*)最优
文件名:src/src/article.py
def page_list(limit,offset):
    with Connect() as conn:
        # desc 是 数据库降序
        sql = "select id,title from article order by id desc limit %s offset %s"
        # limit 取几行 offset 从哪行之后开始取
        result = conn.fetch_all(sql,limit,offset)
        # return [{'id': 2, 'title': '测试demo2'}, {'id': 1, 'title': '测试demo1'}]
        return result
文件名:src/article.py
from utils.context import ArticleModel
def get_article(aid):
    with Connect() as conn:
        # 将ArticleModel.db_fields()获取的key带入查询
        sql = """
            select
                {}
            from
                article
                left join user on article.user_id = user.id
            where article.id=%s
        """.format(ArticleModel.db_fields()) # 跳转到utils/context.py
        # where artilce.id = aid
        result = conn.fetch_one(sql,aid)
        if not result:
            return None
        # 返回ArticleModel({'title': '测试demo2001', 'text': '这是第2001个测试博客', 'read_count': 2, 'up_count': 0, 'down_count': 0, 'nickname': 'kinght'})
        return ArticleModel(result) # 返回utils/context.py定义的__init__
文件名:utils/context.py
 class ArticleModel(object):
    fields = {
        "title": "标题",
        "text": "内容",
        "read_count": "阅读数",
        "comment_count": "评论数",
        "up_count": "赞数",
        "down_count": "踩数",
        "nickname": "作者",
    }
    def __init__(self,row_dict):
        for key in self.fields:
            setattr(self,key,row_dict.get(key))
            # self.title = row_dict.get("title")
            # self.text = row_dict.get("text")
    @classmethod
    def db_fields(cls):
        # 返回 title、text、read_count等key
        return ",".join([k for k in cls.fields])
文件名:src/handler.py
class Handler(object):
    NAV=[]
    LOGIN_USER_DICT = UserDict() # 将UserDict() 实例化对象交给LOGIN_USER_DICT
    def wrapper(self,method):
        def inner(*args,**kwargs):
            print(">".join(self.NAV).center(50,"*"))
            # *****************系统首页>查看博客列表>文章详情*****************
            res = method(*args,**kwargs) # 执行文章详情函数 article_detail(文章id,文章对象)
            self.NAV.pop(-1) # 剔除最后一列元素
            return res
        # 只返回inner的内存地址,并不直接执行
        return inner
3.8 文章详情
在文章详情的wrapper.inner中调用了article_detail,也就是src/article.py的article_detail文章详情函数
文件名:src/handler.py
import time
from utils.context import Context,UserDict
from utils import validator
from src import account,article

class Handler(object):
    LOGIN_USER_DICT = UserDict()
    NAV = []
    def wrapper(self,method):
        def inner(*args,**kwargs):
            print(">".join(self.NAV).center(50,"*"))
            res = method(*args,**kwargs)
            self.NAV.pop(-1)
            return res
    def article_detail(self,article_id,article_object):
        # 展示文章信息 article_object封装了所有的数据
        article_object.show()
        # 阅读数+1
        article.update_read_count(article_id)

        def up():
            # 先在数据中心获取 当前用户对这篇文章的踩赞记录
            up_down_object = article.fetch_up_down(self.LOGIN_USER_DICT.id,article_id)
            if not up_down_object:
                if article.up(self.LOGIN_USER_DICT.id,article_id):
                    print("点赞成功")
                else:
                    print("点赞失败")
            if up_down_object.choice == 1:
                print("已赞过,不能重复操作")
                return
            if article.update_down_to_up(article_id,up_down_object.id):
                # 踩修改为赞
                print("点赞成功")
            else:
                print("点赞失败")
        def down():
            up_down_object = article.fetch_up_down(self.LOGIN_USER_DICT.id,article_id)
            if not up_down_object:
                if article.down(self.LOGIN_USER_DICT.id,article_id):
                    print("踩成功")
                else:
                    print("踩失败")
                return
            if up_down_object.choice == 0:
                print("以踩过,不能重复操作")
                return
            if article.update_up_to_down(article_id,up_down_object.id):
                print("踩成功")
            else:
                print("踩失败")
        def comment():
            comment_text = validator.while_input("请输入评论内容:")
            if article.comment(self.LOGIN_USER_DICT.id,article_id,comment_text):
                print("评论成功")
            else:
                print("评论失败")

        # 选项
        mapping = {
            "1":Context("赞",up),
            "2":Context("踩",down),
            "3":Context('评论',comment),
        }
        message = ";".join(["{}.{}".format(k , v.text) for k,v in mapping.items()])
        message = "\n提示:{}".format(message)
        while True:
            print(message)
            choice = input("请输入(Q/q退出):").strip()
            if choice.upper() == "Q":
                break
            if not self.LOGIN_USER_DICT.is_login:
                print("用户未登录,无法进行操作")
                time.sleep(2)
                return
            if not choice:
                continue
            ctx = mapping.get(choice)
            if not ctx:
                print("输入错误,请重新输入")
                continue
            ctx.method()
文件名:utils/context.py
输出文章的状态详情
class ArticleModel(object):
    def show(self):
        row_display = ['title','text']
        for k in row_display:
            line = "{}:{}".format(self.fields[k],getattr(self,k))
            # 反射函数 相当于 key:self.key
            print(line)
        column_display = ["nickname", "read_count", "comment_count", "up_count", "down_count"]
        section_list = [] # 文章状态列表
        for k in column_display:
            section_list.append("{}:{}".format(self.fields[k],getattr(self,k)))
        others = " ".join(section_list)
        # 作者:kinght 阅读数:0 评论数:0 赞数:0 踩数:0
        print(others)
文件名:src/article.py
阅读数+1
def update_read_count(aid):
    with Connect() as conn:
        sql = "update article set read_count=read_count+1 where id=%s"
        result = conn.exec(sql,aid)
        conn.conn.commit()
        return result
文件名:src/article.py 和 utils/context.py
查询当前user_id对文章aid的踩赞选择
# src/article.py
from utils.context import ArticleModel,UpDownModel
def fetch_up_down(user_id,aid):
    '''查询当前user_id对文章aid的踩赞选择'''
    with Connect() as conn:
        sql = "select id,choice from up_down where user_id=%s and article_id=%s"
        result = conn.fetch_one(sql,user_id,aid)
        if result:
            res = UpDownModel(result) # 实例化对象
            return res
# utils/context.py
class UpDownModel(object):
    fields = {
        "id":'ID',
        "choice":'踩或者赞', # 1 赞 0 踩
    }
    def __init__(self,row_dict):
        for k in self.fields:
            setattr(self,k,row_dict.get(k))
文件名:src/article.py
踩和赞
def up(user_id,aid):
    '''赞'''
    with Connect() as conn:
        conn.conn.begin() # 开启事务
        try:
            # 插入赞记录
            sql = "insert into up_down(user_id,article_id,choice,ctime) values(%s,%s,1,%s)"
            conn.cursor.execute(sql,[user_id,aid,datetime.datetime.now()])
            # 赞个数加1
            up_sql = "update article set up_count=up_count+1 where id=%s"
            conn.cursor.execute(up_sql,[aid])
            conn.conn.commit()
            return True
        except Exception as e:
            conn.conn.rollback()

def update_down_to_up(aid,uid):
    '''踩修改为赞'''
    with Connect() as conn:
        conn.conn.begin()
        try:
            # choice 踩0 修改为 赞1
            sql = "update up_down set choice=1 where id = %s"
            conn.cursor.execute(sql,[uid])
            # 踩-1 赞+1
            up_sql = "update article set up_count=up_count+1,down_count=down_count-1 where id=%s"
            conn.cursor.execute(up_sql,[aid])
            conn.conn.commit()
            return True
        except Exception as e:
            conn.conn.rollback()

def down(user_id,aid):
    '''踩'''
    with Connect() as conn:
        conn.conn.begin() # 开启事务
        try:
            # 插入踩记录
            sql = "insert into up_down(user_id,article_id,choice,ctime) values (%s,%s,0,%s)"
            conn.cursor.execute(sql,[user_id,aid,datetime.datetime.now()])
            # 踩个数加1
            down_sql = "update article set down_count = down_count+1 where id=%s"
            conn.cursor.execute(down_sql,[aid])
            conn.conn.commit()
            return True
        except Exception as e:
            conn.conn.rollback()
def update_up_to_down(aid,uid):
    '''赞修改为踩'''
    with Connect() as conn:
        conn.conn.begin()
        try:
            # choice 赞1 修改为 踩0
            sql = "update up_down set choice=0 where id=%s"
            conn.cursor.execute(sql,[uid])
            # 踩+1 赞-1
            down_sql = "update article set up_count=up_count-1,down_count=down_count+1 where id = %s"
            conn.cursor.execute(down_sql,[aid])
            conn.conn.commit()
            return True
        except Exception as e:
            conn.conn.rollback()
文件名:src/article.py
发表评论
def comment(user_id,article_id,content):
    """评论"""
    with Connect() as conn:
        conn.conn.begin()
        try:
            # 插入评论
            sql = "insert into comment(user_id,article_id,content,ctime) values(%s,%s,%s,%s)"
            conn.cursor.execute(sql,[user_id,article_id,content,datetime.datetime.now()])
            # 评论数 +1
            up_sql = "update article set comment_count=comment_count+1 where id=%s"
            conn.cursor.execute(up_sql,[article_id])
            conn.conn.commit()
            return True
        except Exception as e:
            conn.conn.rollback()
4 github地址
https://github.com/kinghtxg/home_work/tree/main/Python/mysql%E8%AE%BA%E5%9D%9B%E7%B3%BB%E7%BB%9F
本文来自博客园,作者:kinghtxg,转载请注明原文链接:https://www.cnblogs.com/kinghtxg/articles/17158125.html

