

Quartz3.0定时任务学习之异步调度器
前言
Quartz3与Quartz2的主要区别有两点:
1,Quartz3将它的资源类库拆的更细了,比如,想使用Quartz3开发,最少要引用Quartz,Quartz.Jobs,Quartz.Plugins这三个类库。
2,Quartz3整体上使用的是异步创建实例,所以我们使用时就必须要async,await的语法。
下面我们用Quartz3来做一个任务调度。
创建调度器管理类
首先创建Jops类库,然后在Nuget中搜索Quartz.Plugins;如下图:

因为Quartz.Plugins依赖于Quartz,所以引入Quartz.Plugins就会自动引入Quartz。
然后我们创建任务调度管理类—ScheduleControler。代码如下:
public class ScheduleControler
{
private static IScheduler scheduler;
private static Dictionary<IJobDetail, IReadOnlyCollection<ITrigger>> dicJop = new Dictionary<IJobDetail, IReadOnlyCollection<ITrigger>>();
private static int triggerId = 0;
private static string defaultGroupName = "默认组";
/// <summary>
/// 初始化调度器
/// </summary>
/// <returns></returns>
public static async Task Init()
{
try
{
//quartz.config配置文件里的键值对
//NameValueCollection props = new NameValueCollection
//{
// { "quartz.serializer.type", "binary" }
//};
StdSchedulerFactory factory = new StdSchedulerFactory();
scheduler = await factory.GetScheduler();
await scheduler.Start();
}
catch (SchedulerException se)
{
System.Console.WriteLine(se);
}
}
/// <summary>
/// 运行调度器任务
/// </summary>
/// <returns></returns>
public static async Task Run()
{
try
{
await scheduler.ScheduleJobs(dicJop, true);
}
catch (SchedulerException se)
{
System.Console.WriteLine(se);
}
}
/// <summary>
/// 关闭调度器
/// </summary>
/// <returns></returns>
public static async Task Shutdown()
{
try
{
await scheduler.Shutdown();
}
catch (SchedulerException se)
{
System.Console.WriteLine(se);
}
}
/// <summary>
/// 添加任务
/// </summary>
/// <typeparam name="T">任务类型,继承Ijop</typeparam>
/// <param name="jopName">任务名</param>
/// <param name="Interval">运行间隔时间/秒**最小为1秒</param>
/// <param name="period">等待启动时间/秒**-1为马上启动</param>
/// <param name="repeatTime">重复次数**-1为永远运行</param>
/// <param name="endAt">在指定时间后结束/秒**0为不指定结束时间,默认值0</param>
public static void PushJop<T>(string jopName, int Interval, int period=-1,int repeatTime=-1,int endAt=0) where T:IJob
{
try
{
if (Interval <= 0)
{
Interval = 1;
}
if (period < -1)
{
period = -1;
}
if (repeatTime < -1)
{
repeatTime = -1;
}
if (endAt < 0)
{
endAt = -1;
}
IJobDetail job = JobBuilder.Create<T>().WithIdentity(jopName, defaultGroupName).UsingJobData("Name", "IJobDetail").Build();
var triggerBuilder = TriggerBuilder.Create().WithIdentity($"{jopName}.trigger{triggerId}", defaultGroupName);
if (period == -1)
{
triggerBuilder = triggerBuilder.StartNow();
}
else
{
DateTimeOffset dateTimeOffset = DateTimeOffset.Now.AddSeconds(period);
triggerBuilder = triggerBuilder.StartAt(dateTimeOffset);
}
if (endAt > 0)
{
triggerBuilder = triggerBuilder.EndAt(new DateTimeOffset(DateTime.Now.AddSeconds(endAt)));
}
if (repeatTime == -1)
{
triggerBuilder = triggerBuilder.WithSimpleSchedule(x => x.WithIntervalInSeconds(Interval).RepeatForever());
}
else
{
triggerBuilder = triggerBuilder.WithSimpleSchedule(x => x.WithRepeatCount(Interval).WithRepeatCount(repeatTime));
}
ITrigger trigger = triggerBuilder.UsingJobData("Name", "ITrigger")
.WithPriority(triggerId)//设置触发器优先级,当有多个触发器在相同时间出发时,优先级最高[数字最大]的优先
.Build();
dicJop.Add(job, new HashSet<ITrigger>() { trigger });
triggerId++;
}
catch (SchedulerException se)
{
System.Console.WriteLine(se);
}
}
public static void PushJop<T>(string jopName, string cronExpress) where T : IJob
{
try
{
IJobDetail job = JobBuilder.Create<T>().WithIdentity(jopName, defaultGroupName).UsingJobData("Name", "IJobDetail").Build();
ITrigger trigger = TriggerBuilder.Create()
.WithIdentity($"{jopName}.trigger{triggerId}", defaultGroupName)
.WithCronSchedule(cronExpress)
.ForJob(job)
.Build();
dicJop.Add(job, new HashSet<ITrigger>() { trigger });
triggerId++;
}
catch (SchedulerException se)
{
System.Console.WriteLine(se);
}
}
}
可以看到调度器管理类中包含四个主要函数,如下:
运行调度器任务(Run)
初始化调度器(Init)
关闭调度器(Shutdown)
添加任务(PushJop)
应用程序通过这四个函数的调用,就可以使用Quartz了。
添加配置文件
quartz.config
quartz.config是调度器工厂StdSchedulerFactory的配置文件,我们可以在初始化调度器时配置,但显然在配置文件里设置更易于修改。
quartz.config内容如下:
# You can configure your scheduler in either <quartz> configuration section # or in quartz properties file # Configuration section has precedence quartz.scheduler.instanceName = QuartzTest # configure thread pool info quartz.threadPool.type = Quartz.Simpl.SimpleThreadPool, Quartz quartz.threadPool.threadCount = 10 quartz.threadPool.threadPriority = Normal # job initialization plugin handles our xml reading, without it defaults are used quartz.plugin.xml.type = Quartz.Plugin.Xml.XMLSchedulingDataProcessorPlugin, Quartz.Plugins #指定quartz_jobs.xml路径 #quartz.plugin.xml.fileNames = ~/quartz_jobs.xml # export this server to remoting context 使用CrystalQuartz 放开如下注释 quartz.scheduler.exporter.type = Quartz.Simpl.RemotingSchedulerExporter, Quartz quartz.scheduler.exporter.port = 555 quartz.scheduler.exporter.bindName = QuartzScheduler quartz.scheduler.exporter.channelType = tcp quartz.scheduler.exporter.channelName = httpQuartz
如果在初始化时配置,参考如下代码:
NameValueCollection props = new NameValueCollection
{
   { "quartz.serializer.type", "binary" }
};
StdSchedulerFactory factory = new StdSchedulerFactory(props);
quartz_jobs.xml
quartz_jobs.xml是任务配置文件,用于配置任务的。不过本文的调度器管理类已经通过的PushJop函数对任务进行了配置,所以就不需要在quartz_jobs.xml文件中配置了,不过为了测试方便,我们还是添加一个quartz_jobs.xml文件,因为quartz.config文件中指定配置了quartz_jobs.xml,所以没有它会异常。
这里我们添加一个空的quartz_jobs.xml文件,如下:
<?xml version="1.0" encoding="UTF-8"?>
<!-- This file contains job definitions in schema version 2.0 format -->
<job-scheduling-data xmlns="http://quartznet.sourceforge.net/JobSchedulingData" xmlns:xsi="http://www.w3.org/2001/XMLSchema-instance" version="2.0">
  <processing-directives>
    <overwrite-existing-data>true</overwrite-existing-data>
  </processing-directives>
  <schedule>
  </schedule>
</job-scheduling-data>
创建任务
创建一个任务类(Jop)用于处理业务操作,任务类需继承IJop接口,代码如下。
 public class HelloJob : IJob
 {
     public async Task Execute(IJobExecutionContext context)
     {
         Task task = new Task(() => {
             LogicMethod(context);
         });
         task.Start();
         await task;
     }
     public void LogicMethod(IJobExecutionContext context)
     {
         Console.Out.WriteLine($"HelloJob DateTime:{DateTime.Now.ToString("yyyy-MM-dd HH:mm:ss")}  Key:{context.JobDetail.Key} ");
     }
 }
测试Quartz
创建一个新控制台项目—QuartzNetTest,引入Jops类库和Quartz.Plugins。
然后修改Main函数,配置HelloJob任务每三秒运行一次,如下:
static void Main(string[] args)
{
    ScheduleControler.Init().GetAwaiter().GetResult();
    ScheduleControler.PushJop<HelloJob>("HelloWord", 3);
    ScheduleControler.Run().GetAwaiter().GetResult();
    var info = Console.ReadKey();
    if (info.Key == ConsoleKey.Enter)
    {
        ScheduleControler.Shutdown().GetAwaiter().GetResult();
        Console.WriteLine("结束");
    }
    Console.Read();
}
运行项目,如下图:
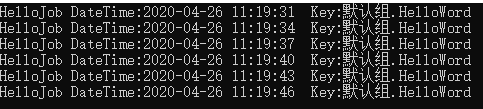
Quartz运行成功。
Quartz任务管理器
QuartzNet除了定时运行任务,还提供了任务管理器。下面我们一起新建一个Quartz的任务管理。
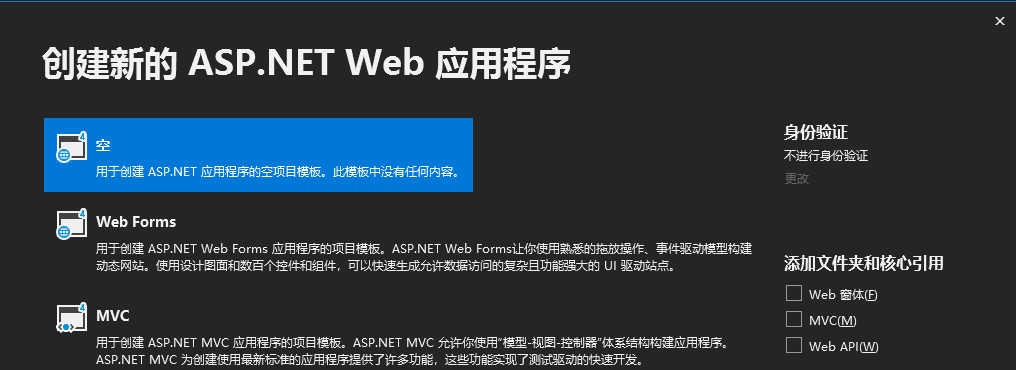
创建一个空的Web项目——QuartzNetWebManager。
添加依赖类库
Nuget搜索CrystalQuartz.Remote安装。

再搜索Quartz安装,注意这里安装的Quartz不是Quartz.Plugins。

这样Quartz的任务管理就创建完成了。
然后我们打开WebConfig,可以看到configuration下多了一个crystalQuartz节点,webServer下多了一个handlers,阅读配置文件,发现Quartz的任务管理器指定了网页CrystalQuartzPanel.axd为访问地址,。
WebConfig如下:
<crystalQuartz>
    <provider>
      <add property="Type" value="CrystalQuartz.Core.SchedulerProviders.RemoteSchedulerProvider, CrystalQuartz.Core" />
      <!-- Edit scheduler host value below =================================== -->
      <add property="SchedulerHost" value="tcp://localhost:555/QuartzScheduler" />
      <!--                                 =================================== -->
    </provider>
</crystalQuartz>
<system.webServer>
    <handlers>
      <add name="CrystalQuartzPanel" verb="*" path="CrystalQuartzPanel.axd" type="CrystalQuartz.Web.PagesHandler, CrystalQuartz.Web" />
    </handlers>
  </system.webServer>
访问网址https://localhost:44302/CrystalQuartzPanel.axd,管理界面如下:

可以看到管理器中除了显示当前运行的任务,还提供删除任务,马上执行等等功能;非常方便。
当然,Quartz还有很多功能,我们可以去官网学习。
QuartzNet官网:https://www.quartz-scheduler.net/
----------------------------------------------------------------------------------------------------
代码已经传到Github上了,欢迎大家下载。
Github地址:https://github.com/kiba518/QuartzTest
----------------------------------------------------------------------------------------------------
注:此文章为原创,任何形式的转载都请联系作者获得授权并注明出处!
若您觉得这篇文章还不错,请点击下方的【推荐】,非常感谢!
https://www.cnblogs.com/kiba/p/12794928.html


 浙公网安备 33010602011771号