
轻松搞定-zabbix 监控安装
轻松搞定-zabbix 监控的安装
Zbbix监控的安装与配置(cga1)
|
组件 |
版本要求 |
|
操作系统 |
CentOS 7.5 X86_64 |
|
Zabbbix -版本 |
3.4.3. |
|
LNMP -安装方式 |
源码编译安装 |
|
Mysql版本 |
7.2.20 |
|
PHP 版本 |
5.7.19 |
|
|
|
|
安装情况 |
|
|
主机名 |
安装内容 |
|
Cga1 |
Zabbix-Server |
|
Cga25 |
Zabbix-Agent |
|
Cga26 |
Zabbix-Agent |
CGA1已经搭建完成LNMP,可以进zabbix的搭建,LNMP的安装可参照linux 服务基本安装(4)
1安装Zabbix-server部署
1.1解压
[root@CGA1]#tar-zxvf zabbix-3.4.3.tar.gz -C/usr/local/src/
[root@CGA1~]#cd /usr/local/src/zabbix-3.4.3/
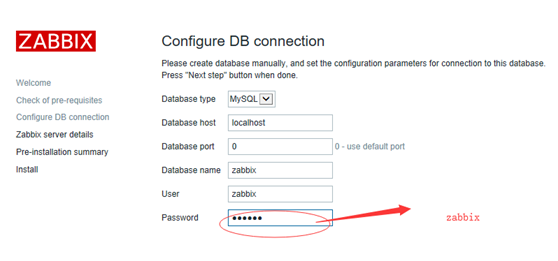
1.2创建Zabbix使用数据库
[root@CGA1zabbix-3.4.3]#mysql –uroot -p123456
mysql>create database zabbix;
QueryOK,1rowaffected(0.00sec)
mysql>grant all on zabbix.* to zabbix@localhost identified by 'zabbix';
QueryOK,0rowsaffected,1warning(0.05sec)
mysql>flush privileges;
QueryOK,0rowsaffected(0.02sec)
1.3按顺序导入数据到zabbix
schema.sql images.sql data.sql
[root@CGA1mysql]#cd /usr/local/src/zabbix-3.4.3/database/mysql
[root@CGA1mysql]#mysql -uzabbix -pzabbix zabbix<schema.sql
mysql:[Warning]Usingapasswordonthecommandlineinterfacecanbeinsecure.
[root@CGA1mysql]#mysql -uzabbix -pzabbix zabbix< images.sql
mysql:[Warning]Usingapasswordonthecommandlineinterfacecanbeinsecure.
[root@CGA1mysql]#mysql -uzabbix -pzabbix zabbix<data.sql
mysql:[Warning]Usingapasswordonthecommandlineinterfacecanbeinsecure.
1.4添加zabbix用户
[root@CGA1mysql]#useradd -s /sbin/nologin zabbix
1.5解决依赖
[root@CGA1mysql]# yum install -y net-snmp-devel
[root@CGA1mysql]# yum install libevent libevent-devel -y
2.1编译安装 Zabbix
[root@CGA1~]#cd/usr/local/src/zabbix-3.4.3/
[root@CGA1zabbix-3.4.3]# ./configure --prefix=/usr/local/zabbix --enable-server --enable-agent --with-mysql=/var/lib/mysql/bin/mysql_config --with-net-snmp --with-libcurl
[root@CGA1zabbix-3.4.3]#echo$?
0
[root@CGA1zabbix-3.4.3]#make install
[root@CGA1zabbix-3.4.3]#echo$?
0
2.2配置Zabbix-Server
[root@CGA1zabbix-3.4.3]#vim/usr/local/zabbix/etc/zabbix_server.conf
修改:
85 DBHost=cga81
95 DBName=zabbix
111 DBUser=zabbix
119 DBPassword=zabbix
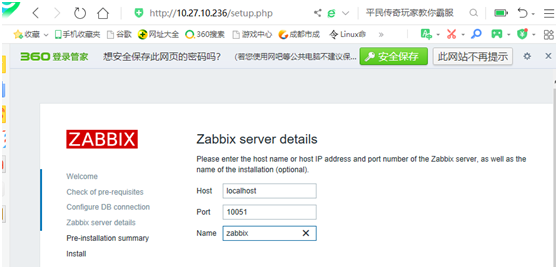
2.3监控Zabbix-Server本身,agentd
[root@CGA1zabbix-3.4.3]#vim/usr/local/zabbix/etc/zabbix_agentd.conf
93 Server=127.0.0.1
134 ServerActive=127.0.0.1
145 Hostname=Zabbixserver
改:280 #UnsafeUserParameters=0
为:280 UnsafeUserParameters=1
2.4启动服务zabbix_server
[root@CGA1zabbix-3.4.3]#/usr/local/zabbix/sbin/zabbix_server
/usr/local/zabbix/sbin/zabbix_server:errorwhileloadingsharedlibraries:libmysqlclient.so.20:cannotopensharedobjectfile:Nosuchfileordirectory
解决方法:
[root@CGA1zabbix-3.4.3]#vim /etc/ld.so.conf
添加一行
includeld.so.conf.d/*.conf
/usr/local/mysql/lib
库文件生效
[root@CGA1zabbix-3.4.3]#ldconfig
开机启动zabbix_server
[root@CGA1zabbix-3.4.3]#echo /usr/local/zabbix/sbin/zabbix_server>>/etc/rc.local
[root@CGA1~]#/usr/local/zabbix/sbin/zabbix_server
[root@CGA1~]#netstat -antup|grep zabbix
Tcp 0 00.0.0.0:10051 0.0.0.0:* LISTEN11571/zabbix_server
[root@CGA1~]#cd /usr/local/src/zabbix-3.4.3/misc/init.d/
[root@CGA1init.d]#cp fedora/core/* /etc/rc.d/init.d/
[root@CGA1init.d]#vim /etc/init.d/zabbix_server
修改22行
22 BASEDIR=/usr/local/zabbix
[root@CGA1init.d]#chkconfig zabbix_server on
2.5启动服务zabbix_agentd start
[root@CGA1init.d]#vim/etc/init.d/zabbix_agentd
修改22行
22BASEDIR=/usr/local/zabbix
[root@CGA1init.d]#/etc/init.d/zabbix_agentd start
Startingzabbix_agentd(viasystemctl):[确定]
[root@CGA1init.d]#chkconfig zabbix_agentd on
[root@CGA1init.d]#netstat-antup|grep zabbix
Tcp 0 00.0.0.0:10050 0.0.0.0:* LISTEN13727/zabbix_agentd
Tcp 0 00.0.0.0:10051 0.0.0.0:* LISTEN11571/zabbix_server
3 Zabbix----WEB的安装
3.1 编辑php页面控制文件
[root@CGA1html]#cp-r/usr/local/src/zabbix-3.4.3/frontends/php/*/usr/local/nginx/html/
[root@CGA1html]#vim/usr/local/nginx/conf/nginx.conf
修改nginx的配置文件,添加index.php
43 location/{
44 roothtml;
45 index index.php index.html index.htm;
重新启动加载
[root@CGA1html]#/usr/local/nginx/sbin/nginx -s reload
[root@CGA1html]#/etc/init.d/zabbix_server restart
Restartingzabbix_server(viasystemctl):[确定]
[root@CGA1html]#/etc/init.d/php-fpm restart
Gracefullyshuttingdownphp-fpm.done
Startingphp-fpmdone
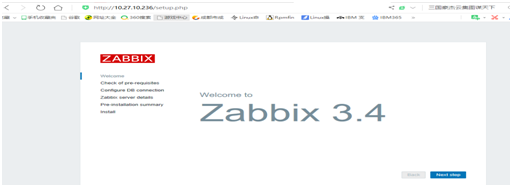
3.2安装Zabbix-Web
http://10.27.10.236/setup.php
3.3修改配置文件
[root@CGA1html]#vim/usr/local/php/php.ini
改:383 max_execution_time=30
为:383 max_execution_time=300
改:393 max_input_time=60
为:393 max_input_time=300
改:671 post_max_size=8M
为:671 post_max_size=16M
改:939 ;date.timezone=
为:939 date.timezone=Asia/Shanghai
改:1170 mysqli.default_socket= #指定php连接mysql的sock路径
为:1170 mysqli.default_socket=/var/lib/mysql/mysql.sock
always_populate_raw_post_data=-1 #在文件末尾处添加
[root@CGA1html]#/etc/init.d/php-fpm restart
Gracefullyshuttingdownphp-fpm.done
Startingphp-fpm done
3.4 PHP LDAP模块安装
[root@CGA1/]#cd /usr/local/src/php-7.2.20/ext/ldap/
[root@CGA1ldap]#/usr/local/php/bin/phpize
Configuringfor:
PHPApiVersion:20170718
ZendModuleApiNo:20170718
ZendExtensionApiNo:320170718
安装依赖包
[root@CGA1ldap]#yum install openldap-devel openldap –y
编译安装
[root@CGA1ldap]#rsync –avz /usr/lib64/libldap* /usr/lib/
[root@CGA1ldap]# ./configure --with-php-config=/usr/local/php/bin/php-config --with-ldap
[root@CGA1ldap]#make&&make install
在文件末尾处添加
[root@CGA1ldap]#vim /usr/local/php/php.ini
extension=ldap.so
[root@CGA1ldap]#/etc/init.d/php-fpm restart
Gracefullyshuttingdownphp-fpm.done
Startingphp-fpmdone
现在可以进行zabbixweb安装
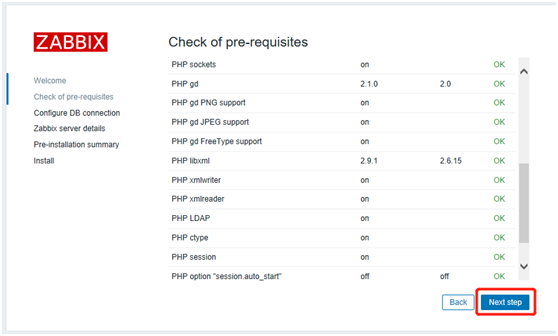
下一步

直接download这个配置文件,然后上传该配置到Linux主机上
[root@CGA1~]#cd /usr/local/nginx/html/conf
[root@CGA1~]#mv zabbix.conf.php /usr/local/nginx/html/conf/
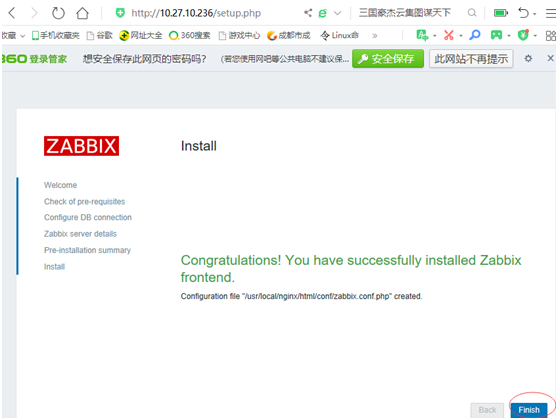
完成安装

 浙公网安备 33010602011771号