vue3中VNode渲染节点的实现
vue的源码包含三大核心:
Compiler模块:编译模板系统
Runtime模块:也可以称之为Renderer模块,真正的渲染的模块
Reactivity模块:响应式系统
三个系统之间如何协同工作呢?
实现一个Mini-Vue
包含三个模块:
渲染系统模块
可响应式系统模块
应用程序入口模块
渲染系统的实现
该模块主要包含三个功能:
功能一:h函数,用于返回一个VNode对象;
功能二:mount函数,用于将VNode挂载到DOM
功能三:patch函数,用于对两个VNode进行对比,决定如何处理新的VNode
第一步,创建一个renderer.js文件,定义一个h函数
const h = (tag, props, children) => {
    // vnode就是一个JavaScript对象
    return {
        tag,
        props,
        children
    }
}
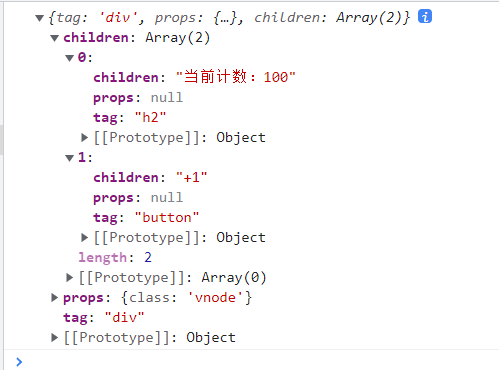
在html文件中,引入文件,并创建一个虚拟节点,可以输出打印一下这个vnode
   <div id="app"></div>
        <script src="./renderer.js"></script>
        <script>
            // 1、 通过h函数来创建一个vnode
            const vnode = h('div', {
                class: 'vnode'
            }, [
                h('h2', null, '当前计数:100'),
                h('button', null, "+1")
            ])
            console.log(vnode)
        </script>
第二步,实现挂载功能
在renderer.js文件中定义mount方法
const mount = (vnode, container) => {
    //1、 将vnode变为elemnt,创建出真实的dom,并且在vnode上保存一份el
    const el = vnode.el = document.createElement(vnode.tag)
    //    2、处理props
    if (vnode.props) {
        for (const key in vnode.props) {
            const value = vnode.props[key]
            // 判断传递过来的是否是方法,比如onClick
            if (key.startsWith("on")) {
                el.addEventListener(key.slice(2).toLowerCase(), value)
            }
            // 设置属性
            el.setAttribute(key, value)
        }
    }
    // 3、处理children
    if (vnode.children) {
        // 如果子节点存在并且子节点是字符串,说明是其中的内容
        if (typeof vnode.children === 'string') {
            // 将内容放进去
            el.textContent = vnode.children
        } else {
            // 说明子节点中是一个数组,其内部还有子节点
            vnode.children.forEach((item) => {
                // 再次调用挂载到el上
                mount(item,el)
            })
        }
    }
    // 4、将el挂载到container上
    container.appendChild(el)
}
在html文件中调用该mount方法
// 2、通过mount函数,将vnode挂载到#app上
            mount(vnode,document.getElementById('app'))
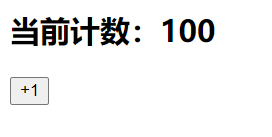
再次刷新页面的时候就可以看到界面已经加载出来了vnode
第三步实现diff算法
第一种情况:节点不相同
新建一个vnode
 // 3、创建一个新的vnode
            const vnode1 = h('h2', {
                class: 'vnode'
            }, 'jerry')
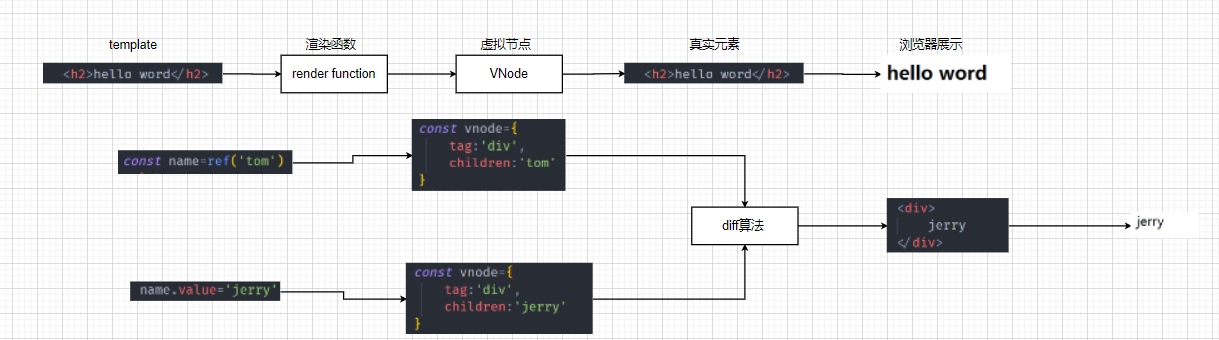
将新的vnode替换旧的vnode,两个vnode之间进行一个diff算法,根据diff算法找到需要修改真实dom的那个地方,找到之后在进行修改
在renderer.js文件中定义一个patch方法
const patch=(n1,n2)=>{
    // 判断两个vnode的类型是否一样,比如说n1为div,n2为h2
    if(n1.tag!==n2.tag){
        // 拿到n1节点的父元素
        const n1ElementParent=n1.el.parentElement;
        // 移除n1节点
        n1ElementParent.removeChild(n1.el)
        // 将n2节点添加上去
        mount(n2,n1ElementParent)
    }else{

    }
}
在html文件中使用patch方法
patch(vnode,vnode1)
再次刷新页面可以看到已经替换
第二种情况:节点相同,类名不同
patch方法
const patch = (n1, n2) => {
    // 判断两个vnode的类型是否一样,比如说n1为div,n2为h2
    if (n1.tag !== n2.tag) {
        // 拿到n1节点的父元素
        const n1ElementParent = n1.el.parentElement;
        // 移除n1节点
        n1ElementParent.removeChild(n1.el)
        // 将n2节点添加上去
        mount(n2, n1ElementParent)
    } else {
        // 1、拿出element对象,并在n2中保留一份
        const el = n2.el = n1.el
        // 2、处理props
        const oldProps = n1.props || {}
        const newProps = n2.props || {}
        // 2、1获取所有的newProps添加到el中
        for (const key in newProps) {
            const oldValue = oldProps[key]
            const newValue = newProps[key]
            if (newValue !== oldValue) {
                // 判断传递过来的是否是方法,比如onClick
                if (key.startsWith("on")) {
                    el.addEventListener(key.slice(2).toLowerCase(), newValue)
                } else {
                    el.setAttribute(key, newValue)
                }
            }
        }
        // 2、2删除旧的props
        for(const key in oldProps){
            if(!(key in  newProps)){
                if (key.startsWith("on")) {
                    const value=oldProps[key]
                    el.removeEventListener(key.slice(2).toLowerCase(), value)
                } else {
                    el.removeAttribute(key)
                }
            }
        }
        // 3、处理children
    }
}
在html中新建一个节点,调用patch方法
            // 3、创建一个新的vnode
            const vnode1 = h('div', {
                class: 'jerry'
            }, 'jerry')
            patch(vnode,vnode1)
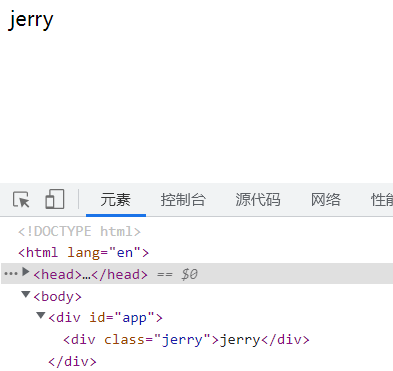
之前

更新之后

接下来处理子节点
    // 3、处理children
        const oldChildren = n1.children || [];
        const newChildren = n2.children || [];
        // 情况一:newChildren是一个string类型
        if (typeof newChildren === "string") {
            if (typeof oldChildren === "string") {
                if (newChildren !== oldChildren) {
                    el.textContent = newChildren
                }
            } else {
                el.innerHTML = newChildren;
            }
        }else{
            // 情况二:newChildren是一个数组
            if(typeof oldChildren==='string'){
                el.innerHTML=""
                newChildren.forEach(item=>{
                    mount(item,el)
                })
            }else{
                // oldChildren:[n1,n2,n3]
                // newChildren:[n1,n2,n3,n4,n5]
                // 前面有相同节点的元素进行patch操作
                const commonLength=Math.min(oldChildren.length,newChildren.length)
                for(let i=0;i<commonLength;i++){
                    patch(oldChildren[i],newChildren[i])
                }
                // 如果newChildren.length>oldChildren
                // oldChildren:[n1,n2,n3]
                // newChildren:[n1,n2,n3,n4,n5]
                if(newChildren.length>oldChildren.length){
                    newChildren.slice(oldChildren.length).forEach(item=>{
                        mount(item,el)
                    })
                }
                // 如果newChildren.length<oldChildren
                // oldChildren:[n1,n2,n3,n4,n5]
                // newChildren:[n1,n2,n3]
                if(newChildren.length<oldChildren.length){
                   oldChildren.slice(newChildren.length).forEach(item=>{
                       el.removeChild(item.el)
                   })
                }
            }
        }
    }
创建两个不同的节点,在进行patch操作
 // 1、 通过h函数来创建一个vnode
            const vnode = h('div', {
                class: 'vnode'
            }, [
                h('h2', null, '当前计数:100'),
                h('button',{onClick:function(){}}, "+1")
            ])

            // 2、通过mount函数,将vnode挂载到#app上
            mount(vnode,document.getElementById('app'))
            // 3、创建一个新的vnode
            const vnode1 = h('div', {
                class: 'jerry'
            }, 'jerry')
            patch(vnode,vnode1)
此时页面就成为: