Dll文件的创建与测试C#
创建Dll文件
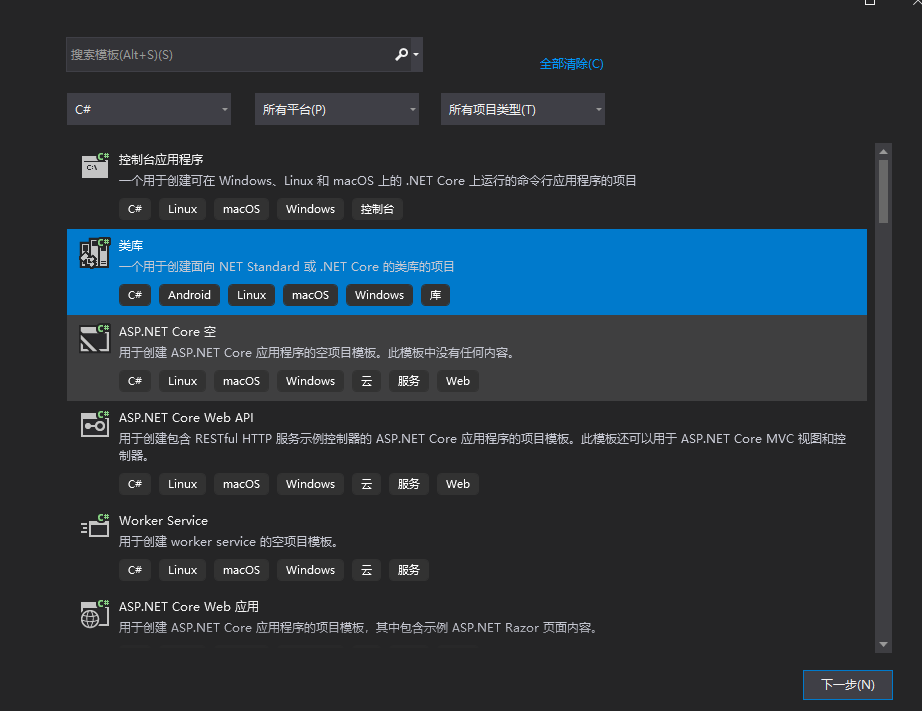
首先使用VS 2019创建Dll项目,创建项目时选择“类库”,如下图

在项目中创建类文件,添加测试代码:
namespace PlantSim_C_Interface_Test
{
    public class CommunicateWithPS
    {
        public string readValue(string index)
        {
            switch (index)
            {
                case "a":
                    return "The return value of a is AAA";
                    break;
                case "b":
                    return "The return value of a is BBB";
                    break;
                case "c":
                    return "The return value of a is CCC";
                    break;
                case "d":
                    return "The return value of a is DDD";
                    break;
                default:
                    return $"The return Value of {index} is NONE";
                    break;
            }

        }

        public string writeValue(float value)
        {
            return $"Received value is {value} , and write successed.";
        }
    }
}
然后按Ctrl + F5运行项目,在项目目录中会生成dll文件

测试dll文件
新建控制台应用程序,在项目目录上右键,添加项目引用,选择“浏览”,找到创建的dll文件。

在Program.cs文件中,添加引用代码,并添加调用dll方法的代码,完整代码如下:
using System;
using PlantSim_C_Interface_Test;
using System.Runtime.InteropServices;

namespace Test_Dll
{
    class Program
    {
        //[DllImport("PlantSim_C_Interface_Test.dll")]
        //public static extern string readValue(string index);

        //[DllImport("PlantSim_C_Interface_Test.dll")]
        //public static extern string writeValue(float a);
        static void Main(string[] args)
        {
            Console.WriteLine("Hello World!");

            CommunicateWithPS cps = new CommunicateWithPS();

            string rs = cps.readValue("d");
            Console.WriteLine(rs);

            string rw = cps.writeValue(15.0f);
            Console.WriteLine(rw);

            Console.ReadKey();

        }
    }
}
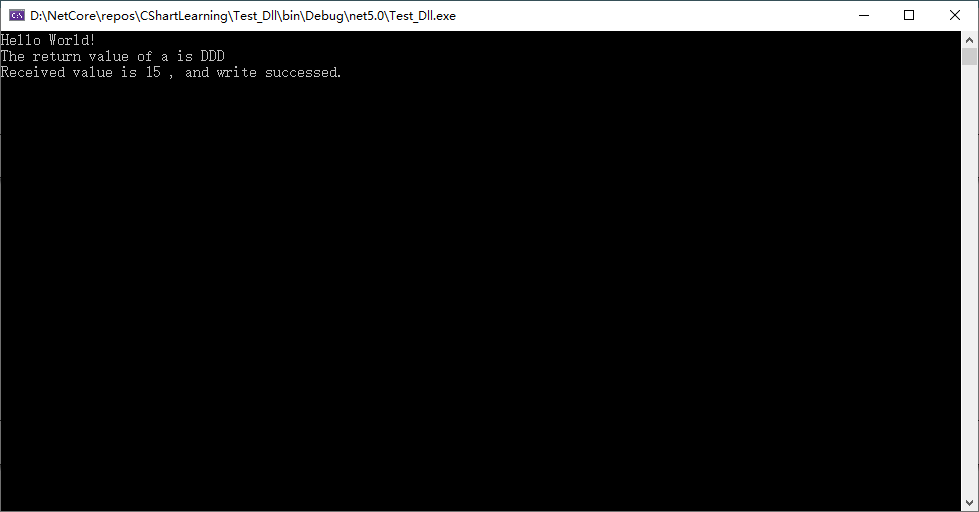
使用Ctrl + F5 运行项目,可以看到调用后的输出结果。

大功告成!


