IdentityServer4入门二
在 IdentityServer4入门一 我们准备好了一个认证的服务端,这里做一个需要保护的API服务
首先,向解决方案新增一个项目。我们同样使用入门一的方式新增一个asp.net core Web程序(模型视图控制器)
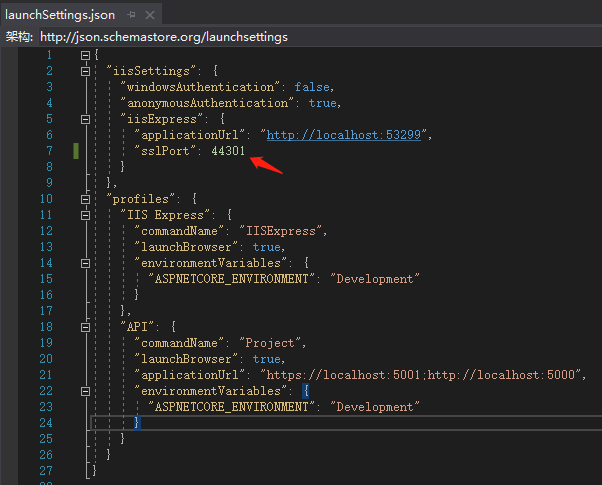
同样的将端口修改一下,API的端口我们使用44301。打开Properties\launchSettings.json文件
利用nuget安装引用
Microsoft.AspNetCore.Authentication.JwtBearer
新增控制器
在controlers目录下新增“API控制器-空”,名为:IdentityController
[Route("api/[controller]")]
[ApiController]
[Authorize]
public class IdentityController : ControllerBase
{
    [HttpGet]
    public IActionResult Get()
    {
        return new JsonResult(from c in User.Claims select new { c.Type, c.Value });
    }
}
修改startup.cs
using System;
using System.Collections.Generic;
using System.Linq;
using System.Threading.Tasks;
using Microsoft.AspNetCore.Builder;
using Microsoft.AspNetCore.Hosting;
using Microsoft.AspNetCore.HttpsPolicy;
using Microsoft.Extensions.Configuration;
using Microsoft.Extensions.DependencyInjection;
using Microsoft.Extensions.Hosting;

namespace API
{
    public class Startup
    {
        public Startup(IConfiguration configuration)
        {
            Configuration = configuration;
        }

        public IConfiguration Configuration { get; }

        // This method gets called by the runtime. Use this method to add services to the container.
        public void ConfigureServices(IServiceCollection services)
        {
            services.AddControllersWithViews();
//增加这一段
            services.AddAuthentication("Bearer")
            .AddJwtBearer("Bearer", options =>
            {
                options.Authority = "https://localhost:44300";
                //options.RequireHttpsMetadata = false;
                options.Audience = "api1";
            });
        }

        // This method gets called by the runtime. Use this method to configure the HTTP request pipeline.
        public void Configure(IApplicationBuilder app, IWebHostEnvironment env)
        {
            if (env.IsDevelopment())
            {
                app.UseDeveloperExceptionPage();
            }
            else
            {
                app.UseExceptionHandler("/Home/Error");
                // The default HSTS value is 30 days. You may want to change this for production scenarios, see https://aka.ms/aspnetcore-hsts.
                app.UseHsts();
            }
            app.UseAuthentication();//增加这一句

            app.UseHttpsRedirection();
            app.UseStaticFiles();

            app.UseRouting();

            app.UseAuthorization();

            app.UseEndpoints(endpoints =>
            {
                endpoints.MapControllerRoute(
                    name: "default",
                    pattern: "{controller=Home}/{action=Index}/{id?}");
            });
        }
    }
}
以上代码声明要使用JWTBearer认证作为安全方式。Bearer认证(也叫做令牌认证)是一种HTTP认证方案,其中包含的安全令牌的叫做Bearer Token。因此Bearer认证的核心是Token。那如何确保Token的安全是重中之重。一种方式是使用Https,另一种方式就是对Token进行加密签名。而JWT就是一种比较流行的Token编码方式。
JWT(Json Web Token)
Json web token (JWT), 是为了在网络应用环境间传递声明而执行的一种基于JSON的开放标准(RFC 7519)。该token被设计为紧凑且安全的,特别适用于分布式站点的单点登录(SSO)场景。JWT的声明一般被用来在身份提供者和服务提供者间传递被认证的用户身份信息,以便于从资源服务器获取资源,也可以增加一些额外的其它业务逻辑所必须的声明信息,该token也可直接被用于认证,也可被加密。
JWT有三部分组成:
<header>.<payload>.<signature>
- Header:由
alg和typ组成,alg是algorithm的缩写,typ是type的缩写,指定token的类型。该部分使用Base64Url编码。 - Payload:主要用来存储信息,包含各种声明,同样该部分也由
BaseURL编码。 - Signature:签名,使用服务器端的密钥进行签名。以确保Token未被篡改。
好了,现在试试调试运行,并在地址栏录入 https://localhost:44301/api/identity ,当然你在IE看的话,什么都看不到,空白的一页,其实浏览器收到服务器的错误码401。
为了进一步验证,下面写一个console的程序调用一下这个API
新增项目:控制台应用(.NET core),名为:ClientConsole
利用nuget安装以下引用
IdentityServer4
修改主方法如下
static async Task Main(string[] args)
{
    //Console.WriteLine("Hello World!");
    var client = new HttpClient();

    string token = "empty token";
    client.SetBearerToken(token);

    var response = await client.GetAsync("https://localhost:44301/api/identity");
    if (!response.IsSuccessStatusCode)
    {
        Console.WriteLine(response.StatusCode);
    }
    else
    {
        var content = await response.Content.ReadAsStringAsync();
        Console.WriteLine(JArray.Parse(content));
    }
}
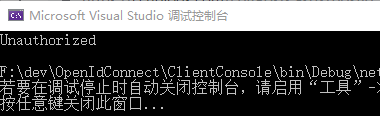
以上程序结果是response.IsSuccessStatusCode==false,所以直接打印respone.StatusCode
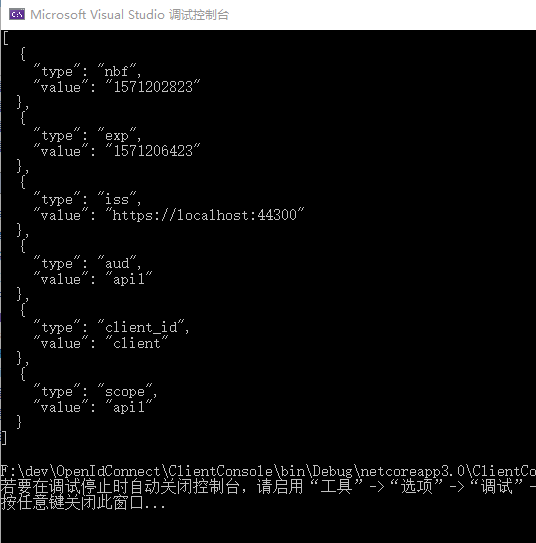
以下代码是完整的过程:向44300授权访问"api1",得到token后,访问44301的api/identity
using IdentityModel.Client;
using Newtonsoft.Json.Linq;
using System;
using System.Net.Http;
using System.Threading.Tasks;

namespace ClientConsole
{
    class Program
    {
        static async Task Main(string[] args)
        {
            //Console.WriteLine("Hello World!");
            var client = new HttpClient();
            // discover endpoints from metadata
            var disco = await client.GetDiscoveryDocumentAsync("https://localhost:44300");
            if (disco.IsError)
            {
                Console.WriteLine(disco.Error);
                return;
            }
            // request token
            var tokenResponse = await client.RequestClientCredentialsTokenAsync(new ClientCredentialsTokenRequest
            {
                Address = disco.TokenEndpoint,
                ClientId = "client",
                ClientSecret = "secret",
                Scope = "api1"
            });

            if (tokenResponse.IsError)
            {
                Console.WriteLine(tokenResponse.Error);
                return;
            }
            // call api
            string tokenStr = tokenResponse.AccessToken;
            //string tokenStr = "test";
            var apiClient = new HttpClient();
            apiClient.SetBearerToken(tokenStr);

            var response = await apiClient.GetAsync("https://localhost:44301/api/identity");
            if (!response.IsSuccessStatusCode)
            {
                Console.WriteLine(response.StatusCode);
            }
            else
            {
                var content = await response.Content.ReadAsStringAsync();
                Console.WriteLine(JArray.Parse(content));
            }
        }
    }
}
正常的话,应能看到类似内容