IdentityServer4入门一
这几天学习IdentityServer4,感觉内容有点乱,也可能自己水平有限吧。但为了巩固学习的内容,也打算自己理一下思路。
首先IdentityServer解决什么问题?
下图是我们的一个程序的组织形式
详情可以看看官网的描述:https://identityserver4.readthedocs.io/en/latest/intro/big_picture.html
我的理解是:IdentityServer就是解决多点登录及API授权、WEB授权的问题
第一个例子
我们将重现官网上的第一个范例来学习相关概念,但与官网的不同,我打算一开始就将服务端从一个MVC网站开始。官网的第一个范例:https://identityserver4.readthedocs.io/en/latest/quickstarts/1_client_credentials.html
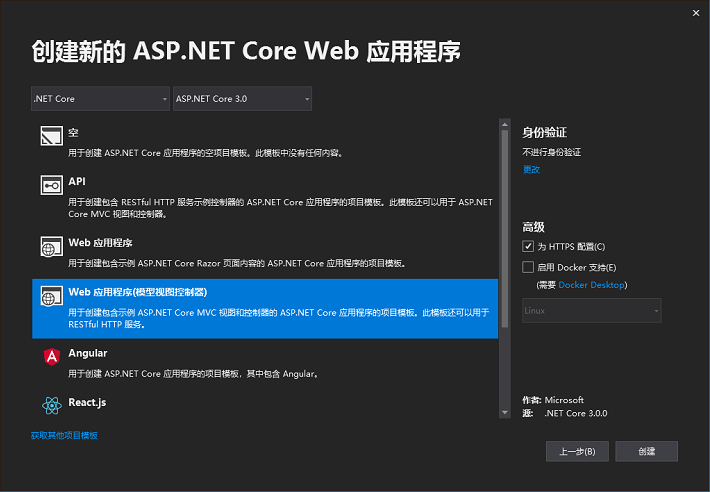
下面截图和代码来自VS.NET2019+asp.net core 3.0
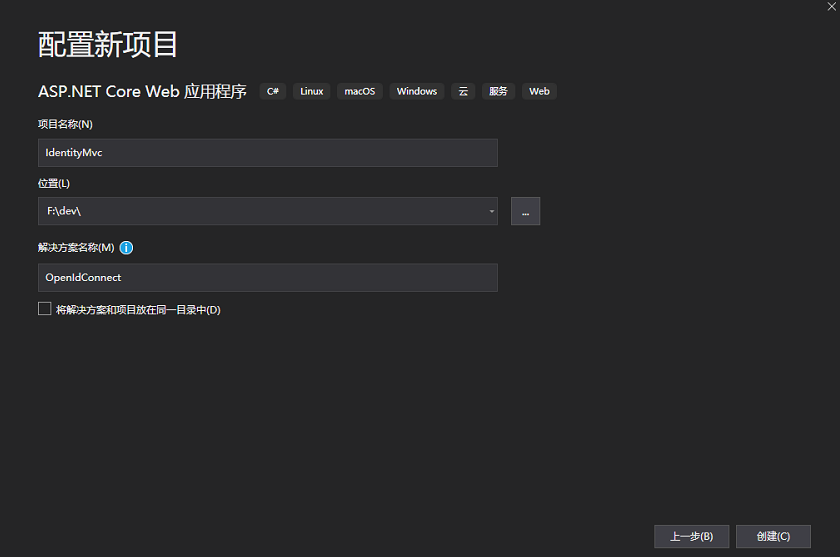
新建服务端
新增asp.net core Web应用程序,项目名称IdentityMvc。因为还要后面加上测试的客户端,所以解决方案我使用了另外的一个名称OpenIdConnect
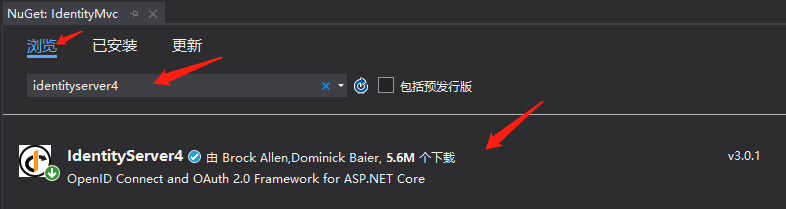
利用nuget添加(安装)引用
IdentityServer4
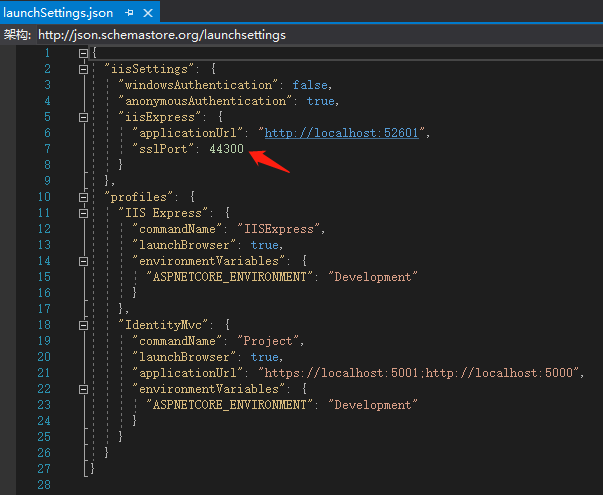
将端口修改一下,授权服务的端口我们使用44300。打开Properties\launchSettings.json文件
新增Config.cs文件
using IdentityServer4.Models;
using System.Collections.Generic;

namespace IdentityMvc
{
    public static class Config
    {
        public static IEnumerable<IdentityResource> GetIdentityResources()
        {
            return new IdentityResource[]
            {
                new IdentityResources.OpenId()
            };
        }

        public static IEnumerable<ApiResource> GetApis()
        {
            return new List<ApiResource>
            {
                new ApiResource("api1", "My API")
            };
        }

        public static IEnumerable<Client> GetClients()
        {
            return new List<Client>
            {
                new Client
                {
                    ClientId = "client",

                    // no interactive user, use the clientid/secret for authentication
                    AllowedGrantTypes = GrantTypes.ClientCredentials,

                    // secret for authentication
                    ClientSecrets =
                    {
                        new Secret("secret".Sha256())
                    },

                    // scopes that client has access to
                    AllowedScopes = { "api1" }
                }
            };
        }
    }
}
修改startup.cs文件
在ConfigureServices(IServiceCollection services)文件添加以下代码
var builder = services.AddIdentityServer()
                .AddInMemoryIdentityResources(Config.GetIdentityResources())
                .AddInMemoryApiResources(Config.GetApiResources())
                .AddInMemoryClients(Config.GetClients());
在Configure(IApplicationBuilder app, IWebHostEnvironment env)方法,添加app.UseIdentityServer();
public void Configure(IApplicationBuilder app, IWebHostEnvironment env)
{
    if (env.IsDevelopment())
    {
        app.UseDeveloperExceptionPage();
    }
    else
    {
        app.UseExceptionHandler("/Home/Error");
        // The default HSTS value is 30 days. You may want to change thi
        app.UseHsts();
    }
    app.UseIdentityServer();//添加这一句

    app.UseHttpsRedirection();
    app.UseStaticFiles();
    //...省略下方代码
至此,保护API的服务端就做好了。我们可以点击调试运行,IDE会打开IE并访问home页。home页一般能正常打开,但如何测试授权服务是否正常呢,可以在地址栏添加.well-known/openid-configuration,应能看到类似的内容
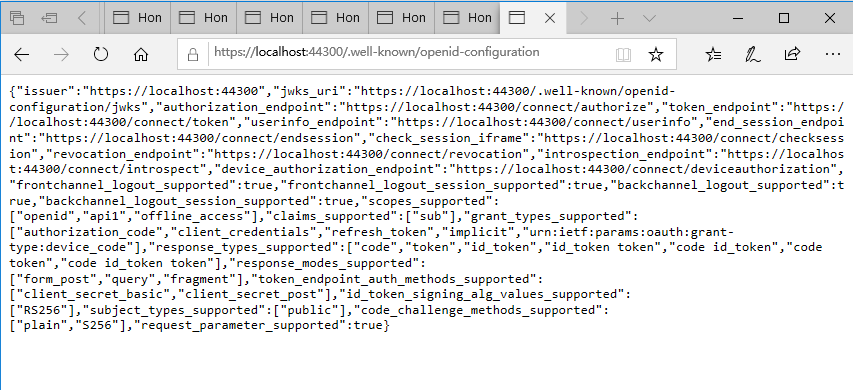
上图的地址的端口可能会有所不同。如果openid-configuration页面看到是空白的话,估计我们少加入了app.UseIdentityServer()方法。
好了,授权服务端就这样的了。接着就是需要一个API的服务程序,和一个调用API的客户端。

 浙公网安备 33010602011771号