


Swagger ui登录功能实现方案
1. Swagger ui登录功能实现方案
https://www.cnblogs.com/zeng1994/p/c08f48f27ddfcf71950a9c1fac80fade.html
2. swagger登录进行用户名和密码认证
_____________________________________________________________________________________________________________________________________________________________________
在项目开发过程中,swagger ui是个非常好用的在线接口文档生成工具。但他有个缺点,不够安全,可以直接访问。虽然生产环境一般会关闭它,但难免有时候有人会把它开启,所以它需要一个登录的功能。本文将叙述登录功能的两种实现方案,两种方案随便一种都可以使用,看个人喜好。
一、环境说明
springboot 版本 2.2.10
    <parent>
        <groupId>org.springframework.boot</groupId>
        <artifactId>spring-boot-starter-parent</artifactId>
        <version>2.2.10.RELEASE</version>
        <relativePath/> <!-- lookup parent from repository -->
    </parent>
swagger-ui版本 2.9.2
        <dependency>
            <groupId>io.springfox</groupId>
            <artifactId>springfox-swagger-ui</artifactId>
            <version>2.9.2</version>
        </dependency>
二、方案一
使用第三方组件swagger-bootstrap-ui 提供的登录功能
(1)引依赖
pom文件中引入如下依赖
        <dependency>
            <groupId>com.github.xiaoymin</groupId>
            <artifactId>swagger-bootstrap-ui</artifactId>
            <version>1.9.6</version>
        </dependency>
(2)启用配置
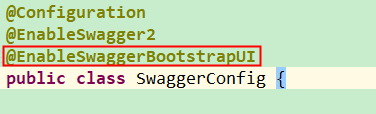
在swagger的配置类中,添加@EnableSwaggerBootstrapUI注解,参考下图
(3)配置账号密码
application.yml中配置账号密码
swagger:
  basic:
    # 开启身份认证功能
    enable: true
    username: root
    password: 123456
(4)原理说明
原理很简单,参考下面两个类
com.github.xiaoymin.swaggerbootstrapui.filter.SecurityBasicAuthFilter----这个核心实现类
com.github.xiaoymin.swaggerbootstrapui.configuration.SecurityConfiguration----配置类
三、方案二
自己利用SpringSecurity来的Basic认证来实现登录功能
(1)实现代码
swagger配置类
package com.zxy.original.admin.config;

import com.github.xiaoymin.swaggerbootstrapui.annotations.EnableSwaggerBootstrapUI;
import lombok.Data;
import lombok.extern.slf4j.Slf4j;
import org.springframework.beans.factory.annotation.Autowired;
import org.springframework.boot.autoconfigure.condition.ConditionalOnProperty;
import org.springframework.boot.context.properties.ConfigurationProperties;
import org.springframework.boot.context.properties.EnableConfigurationProperties;
import org.springframework.context.annotation.Bean;
import org.springframework.context.annotation.Configuration;
import org.springframework.context.annotation.Profile;
import org.springframework.core.annotation.Order;
import org.springframework.security.config.annotation.authentication.builders.AuthenticationManagerBuilder;
import org.springframework.security.config.annotation.web.builders.HttpSecurity;
import org.springframework.security.config.annotation.web.configuration.WebSecurityConfigurerAdapter;
import org.springframework.security.crypto.bcrypt.BCryptPasswordEncoder;
import springfox.documentation.builders.ApiInfoBuilder;
import springfox.documentation.builders.PathSelectors;
import springfox.documentation.builders.RequestHandlerSelectors;
import springfox.documentation.service.Contact;
import springfox.documentation.spi.DocumentationType;
import springfox.documentation.spring.web.plugins.Docket;
import springfox.documentation.swagger.web.UiConfiguration;
import springfox.documentation.swagger.web.UiConfigurationBuilder;
import springfox.documentation.swagger2.annotations.EnableSwagger2;

/**
 * swagger文档配置
 * @date 2021-06-23
 */
@Profile("dev")
@Configuration
@EnableSwagger2
public class SwaggerConfig {

    /**
     * 添加摘要信息(Docket)
     */
    @Bean
    public Docket controllerApi() {
        return new Docket(DocumentationType.SWAGGER_2)
                .apiInfo(new ApiInfoBuilder()
                        .title("管理后台文档")
                        .description("管理后台-接口文档")
                        .contact(new Contact("youname", null, "wwww@swagger.com.cn"))
                        .version("V1.3")
                        .build())
                .select()
                .apis(RequestHandlerSelectors.basePackage("com.zxy.original.admin.controller"))
                .paths(PathSelectors.any())
                .build();
    }

    @Bean
    public UiConfiguration uiConfiguration() {
        return UiConfigurationBuilder.builder().defaultModelsExpandDepth(0).build();
    }


    /******************************************下面为使用SpringSecurity扩展的swagger ui的登录认证功能 **************************************************/

    /**
     * swagger ui 登录功能配置类,依赖了SpringSecurity,
     * <br/>下面一定要添加@Order注解,解决项目中有多个SpringSecurity配置类时配置优先级问题
     * @author ZENG.XIAO.YAN
     * @Date 2021-06-23
     * @version 1.0
     */
    @Configuration
    @ConditionalOnProperty(name = "swagger.config.login", havingValue = "true")
    @EnableConfigurationProperties(value = SwaggerConfig.SwaggerConfigBeanProperties.class)
    @Order(1)
    @Slf4j
    public static class SwaggerSecurityConfig extends WebSecurityConfigurerAdapter {
        @Autowired
        private SwaggerConfigBeanProperties swaggerConfigBeanProperties;

        public SwaggerSecurityConfig() {
            log.error("^_^----------------启用了Swagger ui 的身份认证功能,需要登录后才能访问---------------^_^");
        }

        @Override
        protected void configure(HttpSecurity http) throws Exception {

            //  这个配置只针对 swagger-ui 相关请求
            http.requestMatchers()
                    .antMatchers("/swagger-resources/**",
                            "/webjars/**", "/v2/**", "/swagger-ui.html/**",  "/doc.html/**")
                    .and()
                    // swaggerui 下所有请求都要认证
                    .authorizeRequests().anyRequest().authenticated()
                    // 启用httpBasic认证模式
                    .and().httpBasic()
                    // 禁用csrf
                    .and().csrf().disable();
        }

        @Override
        protected void configure(AuthenticationManagerBuilder auth) throws Exception {
            BCryptPasswordEncoder passwordEncoder = new BCryptPasswordEncoder();
            auth.inMemoryAuthentication()
                    .passwordEncoder(new BCryptPasswordEncoder())
                    .withUser(swaggerConfigBeanProperties.getUsername())
                    .password(passwordEncoder.encode(swaggerConfigBeanProperties.getPassword()))
                    .roles("admin");
        }
    }


    /**
     * swagger ui 的一些配置,这里不加@Configuration,在上面用@EnableConfigurationProperties来启用
     * @author ZENG.XIAO.YAN
     * @Date 2021-06-23
     * @version 1.0
     */
    @ConfigurationProperties(prefix = "swagger.config")
    @Data
    public static class SwaggerConfigBeanProperties {
        /** swagger 用户名,默认值swagger */
        private String username = "swagger";
        /** swagger密码,默认值123456 */
        private String password = "123456";
        /** 启用身份认证功能 */
        private boolean login;
    }
}
application.yml中配置登录的账号密码等信息
# swagger 登录认证功能
swagger:
  config:
    login: true
    username: root
password: 123456(2)注意事项
- 需要引入SpringSecurity的依赖
- 如果项目中已经使用了SpringSecurity,那么需要保证Swagger里面的SpringSecurity的配置类的优先级更高
四、小结
- 两种实现方案,如果项目中用了swagger-bootstrap-ui ,那么肯定用方案一
- 如果不想引入swagger-bootstrap-ui ,那么就用方案二
_____________________________________________________________________________________________________________________________________________________________________
swagger登录进行用户名和密码认证
因安全检查,需要对swagger-ui登录需要用户名密码登录
1、添加依赖
     <dependency>
            <groupId>com.github.xiaoymin</groupId>
            <artifactId>swagger-bootstrap-ui</artifactId>
            <version>1.9.6</version>
        </dependency>

        <dependency>
            <groupId>io.springfox</groupId>
            <artifactId>springfox-swagger2</artifactId>
            <version>2.9.2</version>
        </dependency>
        <!-- https://mvnrepository.com/artifact/io.springfox/springfox-swagger-ui -->
        <dependency>
            <groupId>io.springfox</groupId>
            <artifactId>springfox-swagger-ui</artifactId>
            <version>2.9.2</version>
        </dependency>
2、添加拦截器
import cn.evun.sweet.framework.common.util.AntPathMatcher;
import org.springframework.core.io.Resource;
import org.springframework.core.io.support.PathMatchingResourcePatternResolver;
import org.springframework.core.io.support.ResourcePatternResolver;
import org.springframework.util.FileCopyUtils;
import org.springframework.web.servlet.handler.HandlerInterceptorAdapter;
import sun.misc.BASE64Decoder;

import javax.servlet.http.HttpServletRequest;
import javax.servlet.http.HttpServletResponse;
import java.io.IOException;
import java.io.PrintWriter;

public class SwaggerInterceptor extends HandlerInterceptorAdapter {
    private String username;
    private String password;
    public SwaggerInterceptor(String username, String password) {
        this.username = username;
        this.password = password;
    }
    @Override
    public boolean preHandle(HttpServletRequest request, HttpServletResponse response, Object handler) throws Exception {
        String authorization = request.getHeader("Authorization");
        boolean isAuthSuccess = httpBasicAuth(authorization);
        if (!isAuthSuccess) {
            response.setCharacterEncoding("utf-8");
            response.setStatus(401);
//            response.setStatus(401,"Unauthorized");
            response.setHeader("WWW-authenticate", "Basic realm=\"Realm\"");
            try (PrintWriter writer = response.getWriter()) {
                writer.print("Forbidden, unauthorized user");
            }
        }
        return isAuthSuccess;
    }
    public boolean httpBasicAuth(String authorization) throws IOException {
        if (authorization != null && authorization.split(" ").length == 2) {
            String userAndPass = new String(new BASE64Decoder().decodeBuffer(authorization.split(" ")[1]));
            String username = userAndPass.split(":").length == 2 ? userAndPass.split(":")[0] : null;
            String password = userAndPass.split(":").length == 2 ? userAndPass.split(":")[1] : null;
            if (