UE4植被系统(Foliage)
虚幻引擎提供了两种方式来种植植被:① 使用植被工具(Foliage Tool)来种植 ② 在Landscape中使用带植被的地形材质来种植
这两种方式各有侧重点,方式①一般用来种植大的树木;方式②一般用来跟随地形来种植Grass、灌木等比较矮的植物。
第②种方式在后续的Landscape地形系统中讲解,今天只讲解第①种方式来种植植被。
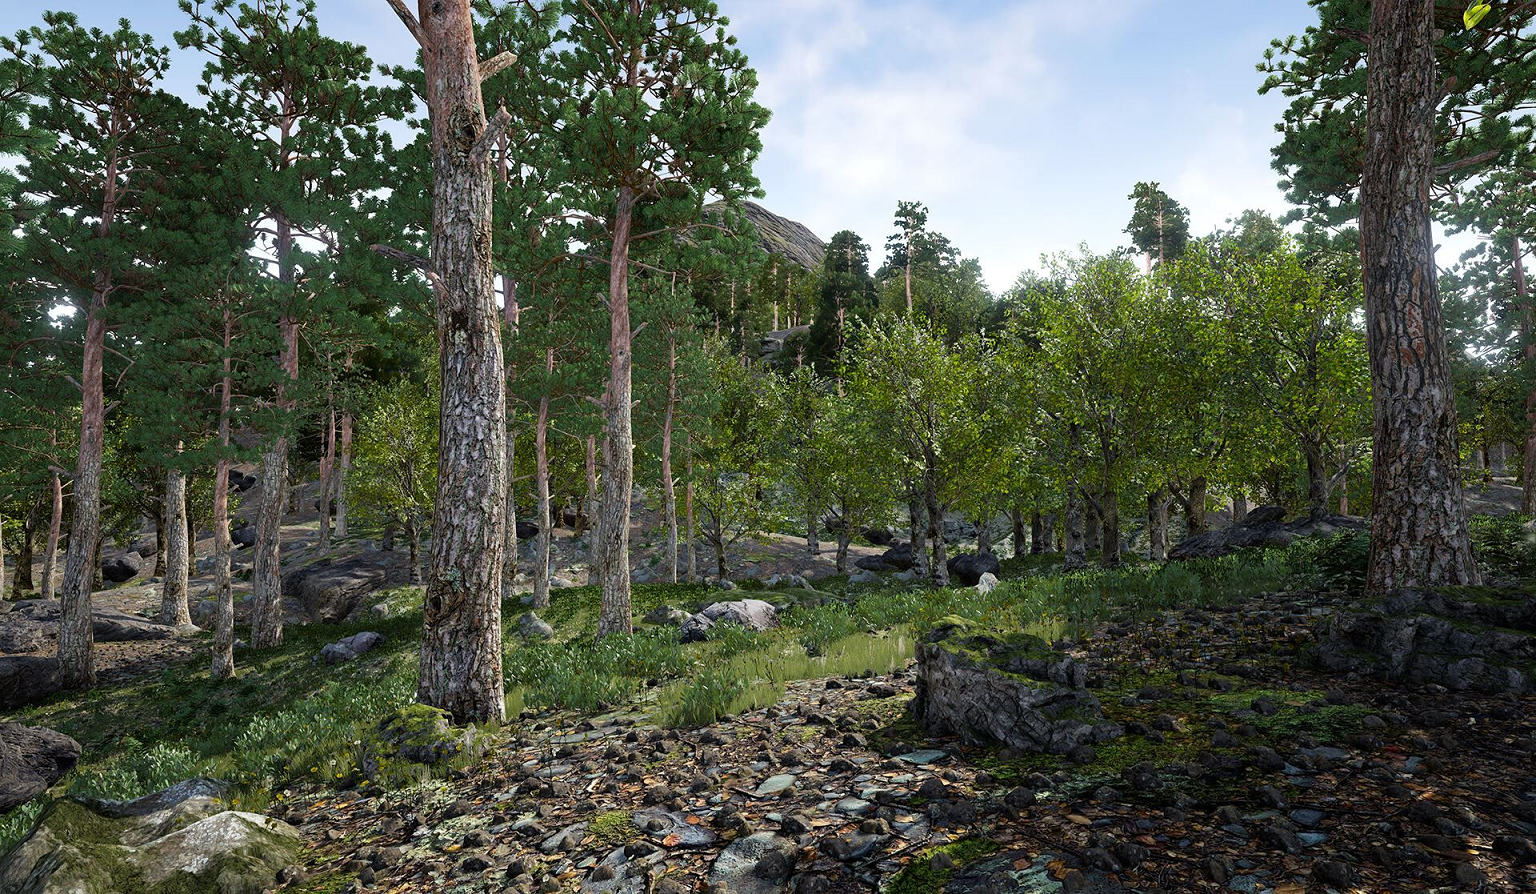
概述
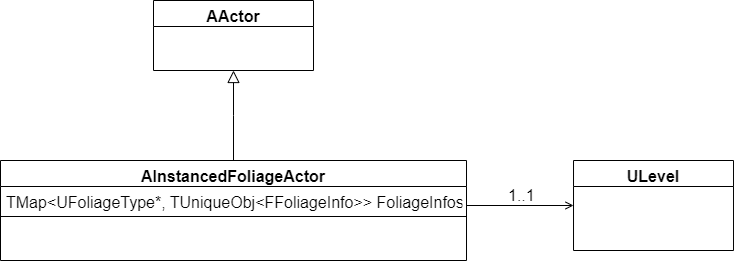
一个关卡中只有一个植被Actor对象(AInstancedFoliageActor)。
在关卡中所有种植的植被(FFoliageInfo),都会按类别(UFoliageType)存放到该植被Actor对象的TMap表中。
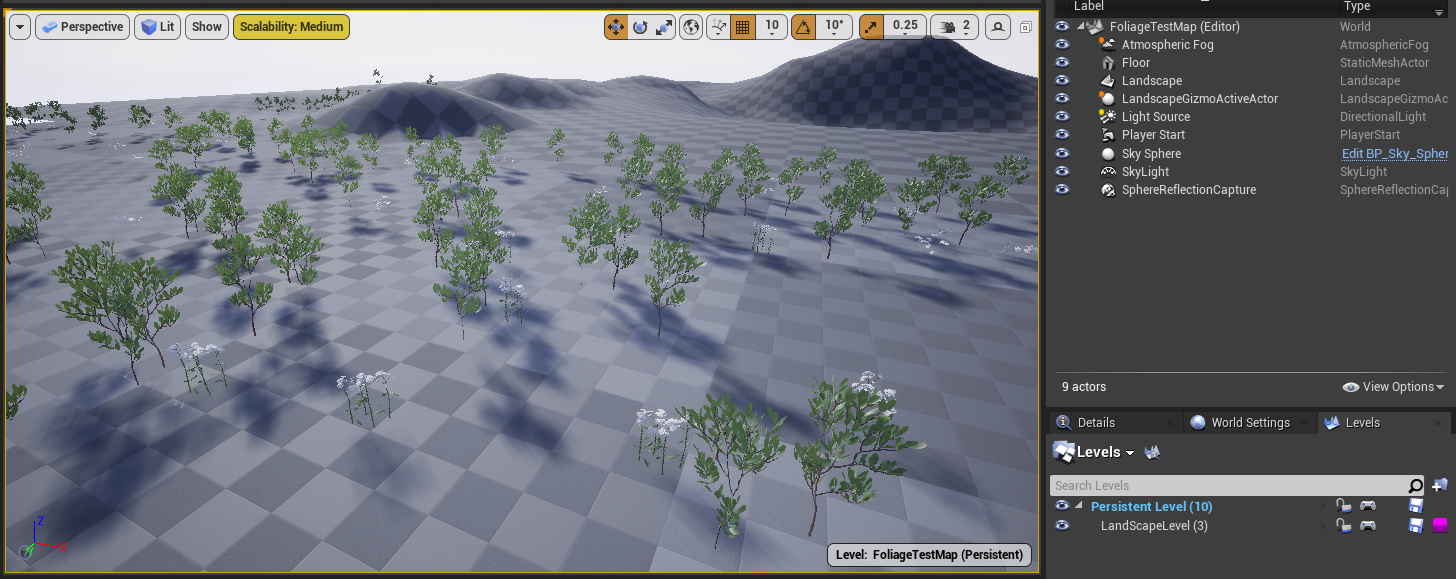
注1:在两个关卡都种植一些植被
注2:植被Actor在World Outerliner列表中不可见
通过obj list class=Actor -alphasort命令查看场景中InstancedFoliageActor个数和大小
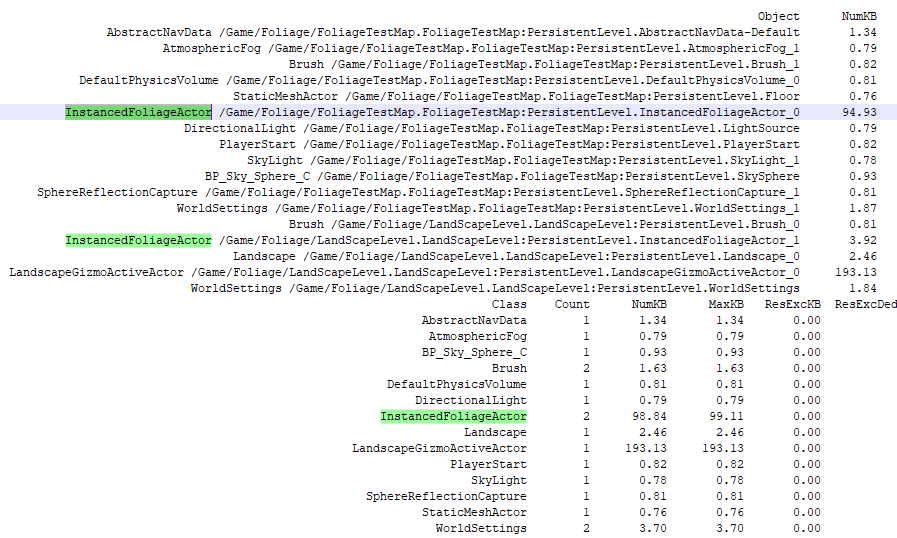
关于AWorldSettings对象的说明:
注1:有几个关卡对象就有几个AWorldSettings对象,它们是一一对应的
注2:打开主关卡,World Setttings面板中显示的是主关卡AWorldSettings对象的数据
注3:要想查看和修改其他关卡AWorldSettings对象的数据,只能单独打开该关卡,然后在World Setttings面板中查看和修改
进入植被模式,选择某个关卡中的植被后,就可以在Details面板中对该关卡的InstancedFoliageActor对象的属性进行修改
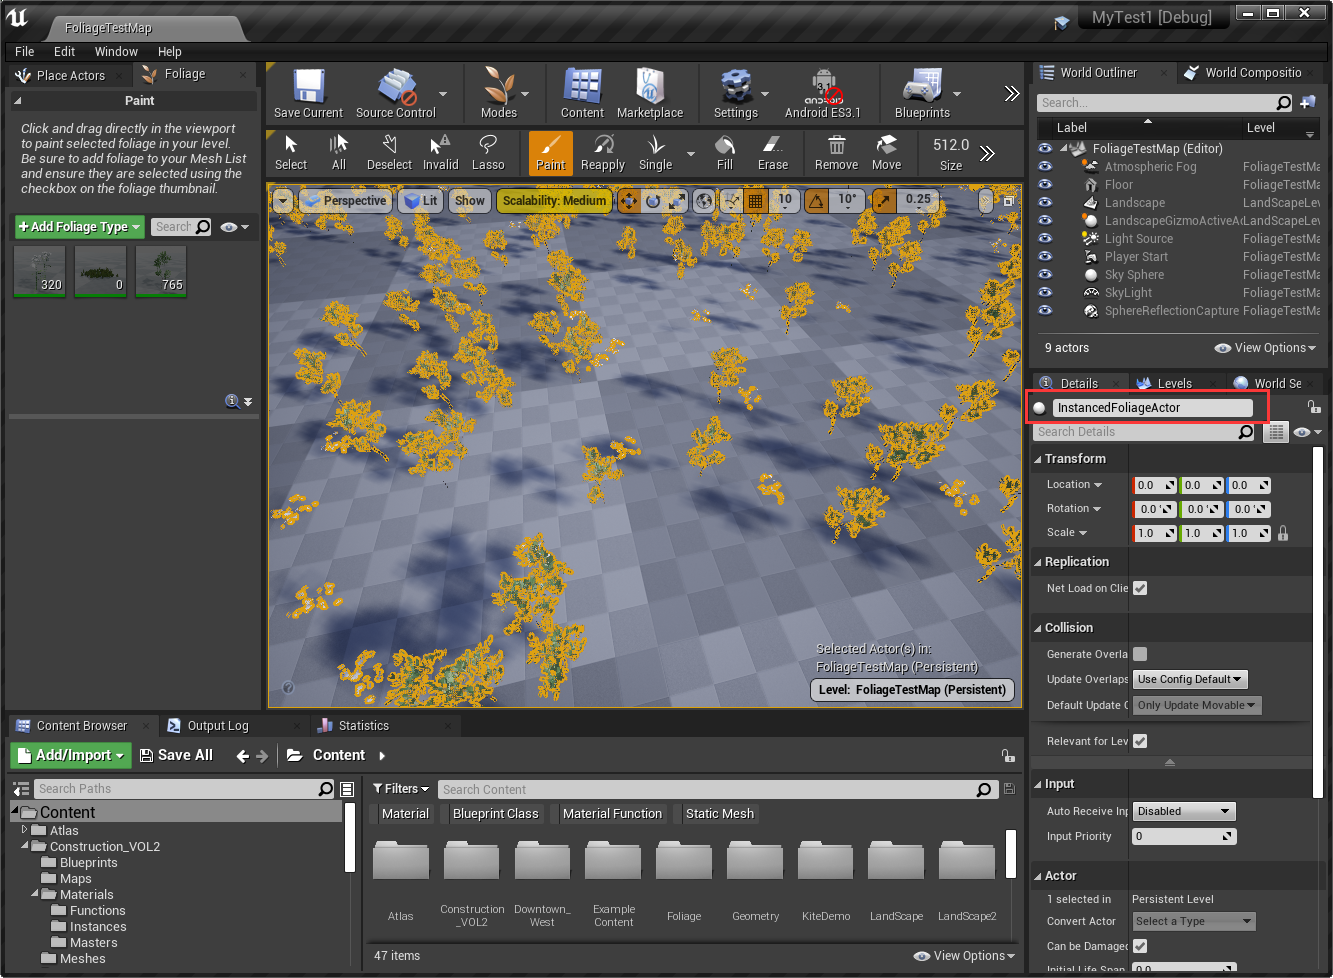
植被模式主界面
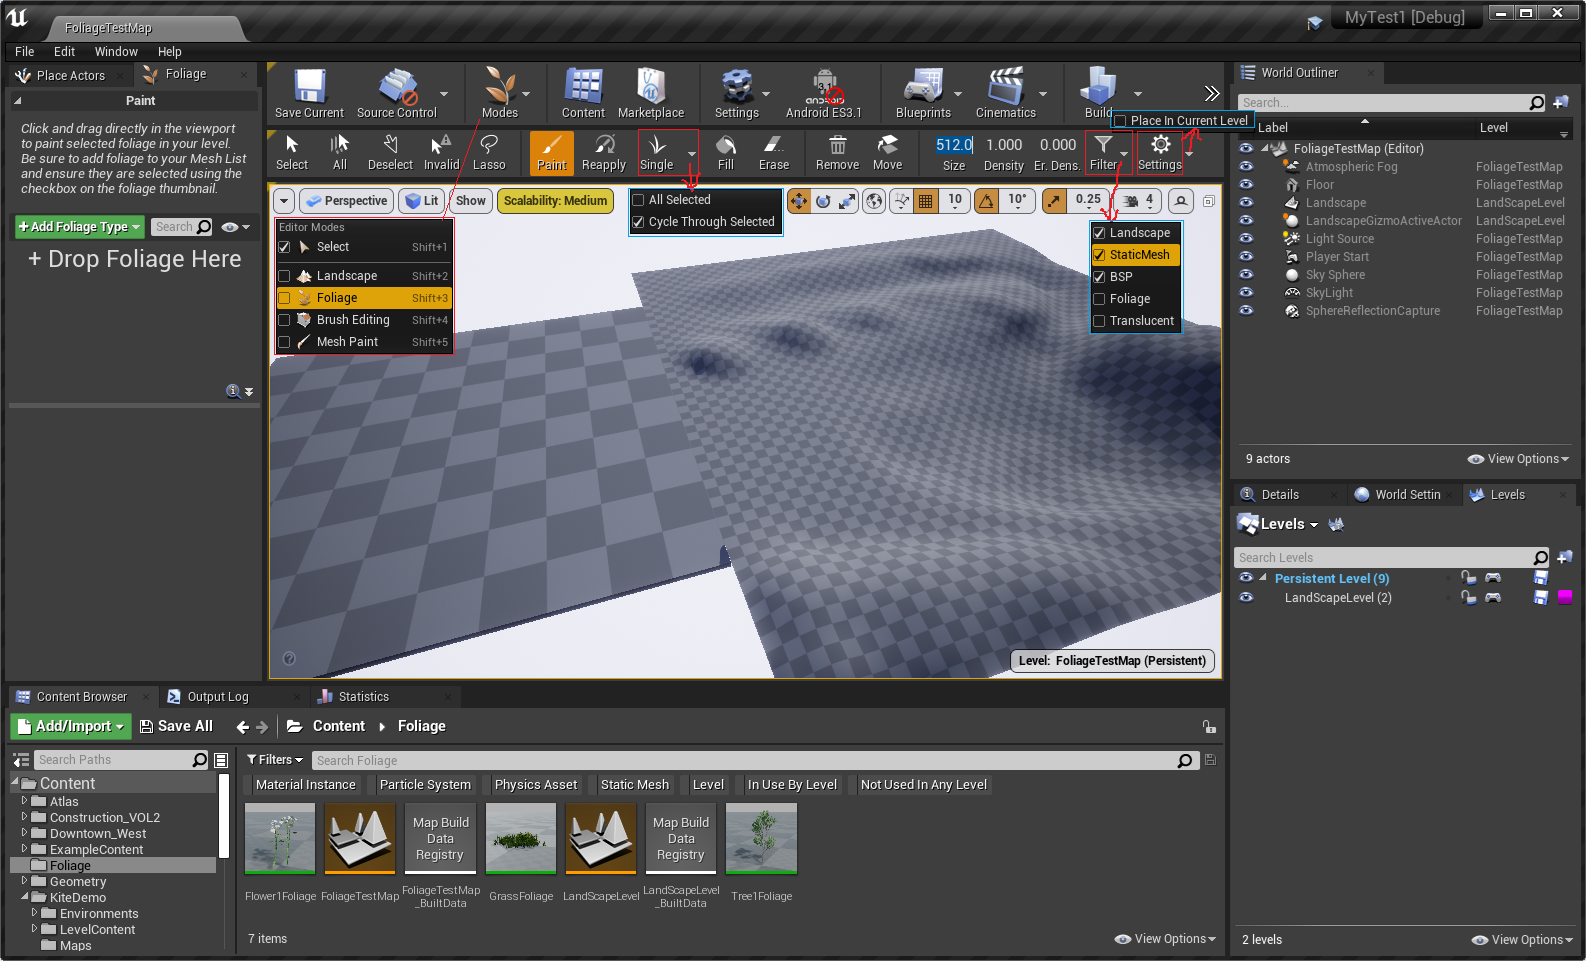
注1:Filter:即可以在哪些物体的表面上放置植被。勾选项有:LandScape(地形)、StaticMesh(静态网格体)、BSP、Foliage(植被)、Translucent(半透明物体)
注2:Setting里面的Place In Current Level:若勾选,则种下的植被会强制放到当前关卡中。若不勾选,则种下的植被会自动放到与所种表面物体的关卡中。
笔刷

笔刷的设置:
|
属性名 |
说明 |
|
Size |
笔刷半球体的半径 |
|
Density |
绘制密度。范围为[0.0, 1.0],为0时不会绘制上植被,为1时会按尽量铺面植被 |
|
Er. Dens |
擦除密度。范围为[0.0, 1.0],为0时会全部擦除植被,为1时不会擦除植被 |
四种笔刷:
|
类型 |
受影响的属性 |
说明 |
|
Paint(绘制笔刷) |
Size、Density |
在笔刷范围内添加植被。 |
|
Erase(擦除笔刷) |
Size、Er. Dens |
用于删除笔刷范围内的植被。 |
|
Lasso(选择笔刷) |
Size |
选中笔刷范围内的植被。 |
|
Reapply(重应用笔刷) |
Size |
重应用新的属性到笔刷范围内的植被上。 |
添加植被类型
① 拖动StaticMesh来添加

② 通过Add Foliage Type来添加

注:也可以从已创建好的FoliageType中选择
③ 在Content Browser中提前创建好Foliage类型,然后拖放这些类型来添加


种植植被
通过勾选植被左上方的勾来选择当前要种植的植被。

选择完植被后,就可以用以下三种方式来种植了:
① 使用Fill来快速全范围种植
按照当前Density的绘制密度来在所点击物体的整体表面上种植植被
注:由于Landscape无法被点中,因此Fill方式不能在Landscape对象上使用
② 使用Paint笔刷来快速区域化种植
按照当前Size的大小和Density绘制密度来在所点击物体的整体表面上种植植被
③ 使用Single笔刷来点击单个精准种植
All Selected:点击一下,所有选上的植被都在点击处各都种上一棵
Cycle Through Selected:轮流种植所选的植被。点击一下,只种一棵。
种植完后,可见当前FoliageTestMap(Persistent)关卡中,有花320朵,草0株,小树800棵:

选择植被
① 点击Select按钮来逐个选择或取消选择植被(按住Ctrl可多选)
② 点击All按钮来选中所有植被
③ 点击Deselect按钮来取消所有植被选择
④ 点击Invalid按钮来选中所有没有贴着表面的植被 注1:选中后,可按End快捷键快速将这些植被贴地 注2:也可以通过拖动坐标轴来将其调整到正确的位置
⑤ 使用Lasso笔刷,根据选择植被,来快速区域化选择这些类型的植被。
⑥ 点击Select等按钮进入选择模式,然后在要选择植被上右键,弹出快捷菜单,点击Select All Instances选择所有该类型的植被

注1:点击Deselect All Instances取消所有该类型的植被的选择
注2:点击Select Invalid Instances选择所有没有贴着表面的植被
删除植被
① 选择植被后,点击Remove按钮或按Delete键来删除
② 使用Erase笔刷,根据选择植被,按照Er. Dens密度设置,来快速区域化删除这些类型的植被。
③ 在使用Fill笔刷时,按住Shift键,根据选择植被,来删除所点击物体的整体表面上所有这些类型的植被。
④ 在使用Paint笔刷时,按住Shift键,根据选择植被,按照Er. Dens密度设置,来快速区域化删除这些类型的植被。
移动所选植被到当前关卡
① 选择植被后,设置新的当前关卡,点击Move按钮就可以将选中的植被都移动到新的当前关卡中
② 选择植被后,按Ctrl + X剪切,设置新的当前关卡,再按Ctrl + V将选中的植被都移动到新的当前关卡中
将新的属性重应用到某些植被实例上
选择植被后,勾选红框属性的复选框并修改属性数值,然后使用Reapply画笔,来快速区域化选择这些类型的植被的实例对象来应用新的属性

控制台命令
| foliage.CullAll | If greater than zero, everything is considered culled. |
| foliage.CullAllInVertexShader | Debugging, if this is greater than 0, cull all instances in the vertex shader. |
| foliage.DebugBuildTreeAsyncDelayInSeconds | Adds a delay (in seconds) to BuildTreeAsync tasks for debugging |
| foliage.DensityScale | Controls the amount of foliage to render. Foliage must opt-in to density scaling through the foliage type. |
| foliage.DisableCull | If greater than zero, no culling occurs based on frustum. |
| foliage.DiscardDataOnLoad | 1: Discard foliage data on load if the foliage type has it enabled; 0: Keep foliage data regardless of whether the foliage type has it enabled or not (requires reloading level) |
| foliage.DitheredLOD | If greater than zero, dithered LOD is used, otherwise popping LOD is used. |
| foliage.ForceLOD | If greater than or equal to zero, forces the foliage LOD to that level. |
| foliage.Freeze | Useful for debugging. Freezes the foliage culling and LOD. |
| foliage.InstanceRuns | Whether to use the InstanceRuns feature of FMeshBatch to compress foliage draw call data sent to the renderer. Not supported by the Mesh Draw Command pipeline. |
| foliage.LODDistanceScale | Scale factor for the distance used in computing LOD for foliage. |
| foliage.LogFoliageFrame | Useful for debugging. Logs all foliage rendered in a frame. |
| foliage.MaxOcclusionQueriesPerComponent | Controls the granularity of occlusion culling. 16-128 is a reasonable range. |
| foliage.MaxTrianglesToRender | This is an absolute limit on the number of foliage triangles to render in one traversal. This is used to prevent a silly LOD parameter mistake from causing the OS to kill the GPU. |
| foliage.MinimumScreenSize | This controls the screen size at which we cull foliage instances entirely. |
| foliage.MinInstancesPerOcclusionQuery | Controls the granualrity of occlusion culling. 1024 to 65536 is a reasonable range. This is not exact, actual minimum might be off by a factor of two. |
| foliage.MinLOD | Used to discard the top LODs for performance evaluation. -1: Disable all effects of this cvar. |
| foliage.MinOcclusionQueriesPerComponent | Controls the granularity of occlusion culling. 2 should be the Min. |
| foliage.MinVertsToSplitNode | Controls the accuracy between culling and LOD accuracy and culling and CPU performance. |
| foliage.OnlyLOD | If greater than or equal to zero, only renders the foliage LOD at that level. |
| foliage.OverestimateLOD | If greater than zero and dithered LOD is not used, then we use an overestimate of LOD instead of an underestimate. |
| foliage.RandomLODRange | Random distance added to each instance distance to compute LOD. |
| foliage.RebuildFoliageTrees | Rebuild the trees for non-grass foliage. |
| foliage.SplitFactor | This controls the branching factor of the foliage tree. |
| foliage.Test | Useful for debugging. |
| foliage.ToggleVectorCull | Useful for debugging. Toggles the optimized cull. |
| foliage.UnFreeze | Useful for debugging. Freezes the foliage culling and LOD. |
扩展阅读
视频:UE4 Foliage Pack 60fps4K marketplace
UE4 Foliage LOD Optimization / From 3 FPS To 70 FPS.
#32 Create a Forest using the Foliage Tool in Unreal Engine 4 | UE4 Tutorial
Create a Forest in UE4 in 1 Hour
Populating Scenes With The Foliage Tool - #17 Unreal Engine 4 Level Design Tutorial Series
How To Create And Use Procedural Foliage Volumes - UE4 Tutorial


【推荐】国内首个AI IDE,深度理解中文开发场景,立即下载体验Trae
【推荐】编程新体验,更懂你的AI,立即体验豆包MarsCode编程助手
【推荐】抖音旗下AI助手豆包,你的智能百科全书,全免费不限次数
【推荐】轻量又高性能的 SSH 工具 IShell:AI 加持,快人一步
· 全程不用写代码,我用AI程序员写了一个飞机大战
· DeepSeek 开源周回顾「GitHub 热点速览」
· 记一次.NET内存居高不下排查解决与启示
· MongoDB 8.0这个新功能碉堡了,比商业数据库还牛
· .NET10 - 预览版1新功能体验(一)