Spring Security
1.引入依赖(基于SpringBoot项目)
        <dependency>
            <groupId>org.springframework.boot</groupId>
            <artifactId>spring-boot-starter-security</artifactId>
        </dependency>
2.配置用户名密码的三种方式:(默认用户名为user,密码为控制台输出的值)
2.1.在配置文件中配置
spring.security.user.name=username
spring.security.user.password=password
2.2.通过配置类
@Configuration
public class SecurityConfig extends WebSecurityConfigurerAdapter {
    @Override
    protected void configure(AuthenticationManagerBuilder auth) throws Exception {
        // 密码加密
        BCryptPasswordEncoder bCryptPasswordEncoder = new BCryptPasswordEncoder();
        auth.inMemoryAuthentication().withUser("username").password(bCryptPasswordEncoder.encode("password")).roles("admin");
    }

    @Bean
    PasswordEncoder password() {
        return new BCryptPasswordEncoder();
    }
}
2.3.自定义实现类设置(推荐)
2.3.1.创建配置类,设置使用哪个userDetailsService
@Configuration
public class SecurityConfig extends WebSecurityConfigurerAdapter {
    @Autowired
    private UserDetailsService userDetailsService;

    @Override
    protected void configure(AuthenticationManagerBuilder auth) throws Exception {
        auth.userDetailsService(userDetailsService).passwordEncoder(password());
    }

    @Bean
    PasswordEncoder password() {
        return new BCryptPasswordEncoder();
    }
}
2.3.2.编写实现类,返回User对象
@Service("userDetailsService")
public class MyUserDetailsService implements UserDetailsService {
    @Override
    public UserDetails loadUserByUsername(String s) throws UsernameNotFoundException {
        // 此处可查询数据库获取用户名密码
        List<GrantedAuthority> auths = AuthorityUtils.commaSeparatedStringToAuthorityList("role");
        return new User("username", new BCryptPasswordEncoder().encode("password"), auths);
    }
}
3.连接数据库配置用户名密码
3.1.引入依赖:
        <dependency>
            <groupId>com.baomidou</groupId>
            <artifactId>mybatis-plus-boot-starter</artifactId>
            <version>3.0.5</version>
        </dependency>
        <dependency>
            <groupId>mysql</groupId>
            <artifactId>mysql-connector-java</artifactId>
        </dependency>
        <dependency>
            <groupId>org.projectlombok</groupId>
            <artifactId>lombok</artifactId>
            <optional>true</optional>
        </dependency>
3.2.创建对应实体类:
@Data
public class Users {
    private Integer id;
    private String username;
    private String password;
}
3.3.添加对应的mapper
@Repository
public interface UsersMapper extends BaseMapper<Users> {
}
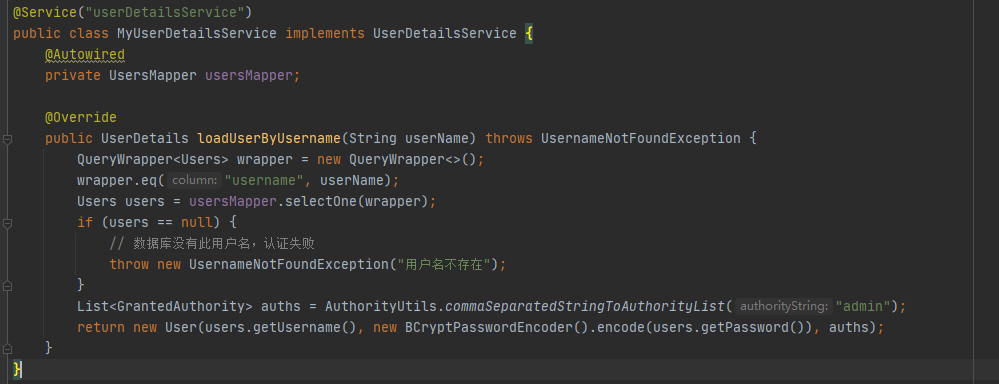
3.4.配置用户查询逻辑
@Service("userDetailsService")
public class MyUserDetailsService implements UserDetailsService {
    @Autowired
    private UsersMapper usersMapper;

    @Override
    public UserDetails loadUserByUsername(String userName) throws UsernameNotFoundException {
        QueryWrapper<Users> wrapper = new QueryWrapper<>();
        wrapper.eq("username", userName);
        Users users = usersMapper.selectOne(wrapper);
        if (users == null) {
            // 数据库没有此用户名,认证失败
            throw new UsernameNotFoundException("用户名不存在");
        }
        List<GrantedAuthority> auths = AuthorityUtils.commaSeparatedStringToAuthorityList("role");
        return new User(users.getUsername(), new BCryptPasswordEncoder().encode(users.getPassword()), auths);
    }
}
3.5.启动类增加@MapperScan注解
@SpringBootApplication
@MapperScan("com.hexin.securitydemo1.mapper")
public class Securitydemo1Application {

    public static void main(String[] args) {
        SpringApplication.run(Securitydemo1Application.class, args);
    }

}
4.自定义登录页面,部分页面不需要认证即可访问等的配置
4.1.增加配置类
@Configuration
public class SecurityConfig extends WebSecurityConfigurerAdapter {
    @Autowired
    private UserDetailsService userDetailsService;

    @Override
    protected void configure(AuthenticationManagerBuilder auth) throws Exception {
        auth.userDetailsService(userDetailsService).passwordEncoder(password());
    }

    @Bean
    PasswordEncoder password() {
        return new BCryptPasswordEncoder();
    }

    // 采用此方法完成设置
    @Override
    protected void configure(HttpSecurity http) throws Exception {
        // 自定义登录页面
        http.formLogin().loginPage("/login.html")
                // 登录访问路径(点击登录,将表单提交到哪个controller)
                .loginProcessingUrl("/user/login")
                // 登录成功后跳转路径
                .defaultSuccessUrl("/test/index").permitAll()
                // 配置哪些路径不需要认证
                .and().authorizeRequests().antMatchers("/", "/test/hello", "/user/login").permitAll()
                .anyRequest().authenticated()
                // 关闭csrf防护
                .and().csrf().disable();
    }
}
4.2.设置登录页
<!DOCTYPE html>
<html lang="en">
<head>
    <meta charset="UTF-8">
    <title>Title</title>
</head>
<body>
<!--注意name必须为username和password,具体逻辑可以查看UsernamePasswordAuthenticationFilter中attemptAuthentication方法-->
<form action="/user/login" method="post">
    用户名:<input type="text" name="username">
    <br>
    密码:<input type="password" name="password">
    <br>
    <input type="submit" value="login">
</form>
</body>
</html>
5.基于角色或权限进行访问控制
5.1.方案一:针对某一项权限,可以在配置类中利用hasAuthority方法进行限制
    // 采用此方法完成设置
    @Override
    protected void configure(HttpSecurity http) throws Exception {
        // 自定义登录页面
        http.formLogin().loginPage("/login.html")
                // 登录访问路径(点击登录,将表单提交到哪个controller)
                .loginProcessingUrl("/user/login")
                // 登录成功后跳转路径
                .defaultSuccessUrl("/test/index").permitAll()
                // 配置哪些路径不需要认证
                .and().authorizeRequests()
                .antMatchers("/", "/test/hello", "/user/login").permitAll()
                // 当前登录用户必须具有admin权限才可以访问/test/index
                .antMatchers("/test/index").hasAuthority("admin")
                .anyRequest().authenticated()
                // 关闭csrf防护
                .and().csrf().disable();
    }
此处与UserDetailsService中配置相关:
只有此用户具有admin权限才能访问
权限不够则会跳转至403错误页:

5.2.方案二:具有多个权限中一个即可方法,可以在配置类中利用hasAnyAuthority方法进行限制
.antMatchers("/test/index").hasAnyAuthority("admin1", "admin")
5.3.方案三:用户具有指定角色才可访问,可以在配置类中利用hasRole方法进行限制
注意hasRole方法会在内容前加前缀'ROLE_'
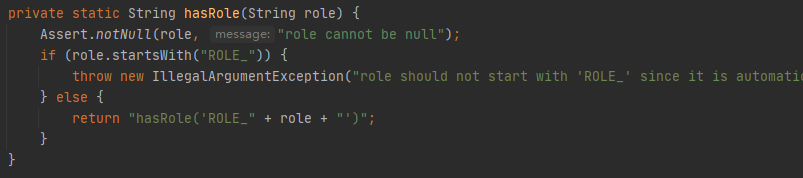
.antMatchers("/test/index").hasRole("sale")
在UserDetailsService中需要增加对应角色
@Service("userDetailsService")
public class MyUserDetailsService implements UserDetailsService {
    @Autowired
    private UsersMapper usersMapper;

    @Override
    public UserDetails loadUserByUsername(String userName) throws UsernameNotFoundException {
        QueryWrapper<Users> wrapper = new QueryWrapper<>();
        wrapper.eq("username", userName);
        Users users = usersMapper.selectOne(wrapper);
        if (users == null) {
            // 数据库没有此用户名,认证失败
            throw new UsernameNotFoundException("用户名不存在");
        }
        List<GrantedAuthority> auths = AuthorityUtils.commaSeparatedStringToAuthorityList("admin,ROLE_sale");
        return new User(users.getUsername(), new BCryptPasswordEncoder().encode(users.getPassword()), auths);
    }
}
5.4.方案四:用户具有指定角色中某一个即可访问,可以在配置类中利用hasAnyRole方法进行限制
.antMatchers("/test/index").hasAnyRole("sale","show")
6.自定义403没有权限访问的页面
在配置类中添加如下逻辑
    @Override
    protected void configure(HttpSecurity http) throws Exception {
        // 配置没有权限访问跳转自定义页面
        http.exceptionHandling().accessDeniedPage("/unauth.html");
    }
7.认证授权中注解的使用
7.1.@Secured
此注解表示用户具有某角色,才可以对方法进行访问
首先需要在配置类上开启注解功能:
@SpringBootApplication
@MapperScan("com.hexin.securitydemo1.mapper")
@EnableGlobalMethodSecurity(securedEnabled = true)
public class Securitydemo1Application {
    public static void main(String[] args) {
        SpringApplication.run(Securitydemo1Application.class, args);
    }
}
之后在controller上使用注解
    // 满足其中一个角色即可
    @GetMapping("update")
    @Secured({"ROLE_admin1","ROLE_manager"})
    public String update() {
        return "hello update";
    }
7.2.@PreAuthorize
此注解表示进入方法前的权限验证
启用注解:
@EnableGlobalMethodSecurity(prePostEnabled = true)
之后在controller上使用注解
    @GetMapping("update1")
    // 四种方法均可在此处使用
    @PreAuthorize("hasRole('ROLE_sale')")
    public String update1() {
        return "hello update";
    }
7.3.@PostAuthorize
此注解表示方法执行之后的权限验证,适合带有返回值的权限
启用注解:
@EnableGlobalMethodSecurity(prePostEnabled = true)
之后在controller上使用注解
    @GetMapping("update3")
    // 四种方法均可在此处使用
    @PostAuthorize("hasRole('ROLE_sale1')")
    public String update3() {
        // 无权限此处也会执行
        System.out.println("_____update3_____");
        return "hello update";
    }
7.4.@PostFilter
此注解表示在权限验证之后对数据进行过滤
    @GetMapping("update4")
    @PreAuthorize("hasRole('ROLE_sale')")
    // 表达式中filterObject是对返回值list中元素的引用
    @PostFilter("filterObject.name == 'admin1'")
    public List<UserInfo> update4() {
        List<UserInfo> list = new ArrayList<>();
        list.add(new UserInfo("admin1", 19));
        list.add(new UserInfo("admin2", 21));
        // 仅返回第一条数据
        return list;
    }
7.5.@PreFilter
进入控制器之前对数据进行过滤,即对参数进行过滤
    @RequestMapping("update5")
    @PreAuthorize("hasRole('ROLE_sale')")
    // 表达式中filterObject是对参数list中元素的引用
    @PreFilter("filterObject.age % 2 == 0")
    public List<UserInfo> update5(@RequestBody List<UserInfo> list) {
        return list;
    }
8.用户注销
在配置类中增加退出配置
    @Override
    protected void configure(HttpSecurity http) throws Exception {
        // 增加用户退出配置(不添加permitAll无法顺利跳转到logout.html)
        http.logout().logoutUrl("/logout").logoutSuccessUrl("/logout.html").permitAll();
        // 配置没有权限访问跳转自定义页面
        http.exceptionHandling().accessDeniedPage("/unauth.html");
        // 自定义登录页面
        http.formLogin().loginPage("/login.html")
                // 登录访问路径(点击登录,将表单提交到哪个controller)
                .loginProcessingUrl("/user/login")
                // 登录成功后跳转路径
                .defaultSuccessUrl("/success.html").permitAll()
                // 配置哪些路径不需要认证
                .and().authorizeRequests()
                .antMatchers("/", "/test/hello", "/user/login").permitAll()
                // 当前登录用户必须具有admin权限才可以访问/test/index
//                .antMatchers("/test/index").hasAuthority("admin")
//                .antMatchers("/test/index").hasAnyAuthority("admin1", "admin")
//                .antMatchers("/test/index").hasRole("sale")
//                .antMatchers("/test/index").hasAnyRole("sale", "show")
                .anyRequest().authenticated()
                // 关闭csrf防护
                .and().csrf().disable();
    }
success.html:
<!DOCTYPE html>
<html lang="en">
<head>
    <meta charset="UTF-8">
    <title>Title</title>
</head>
<body>
<a href="/logout">退出</a>
</body>
</html>
9.自动登录(记住我)
9.1.实现原理:
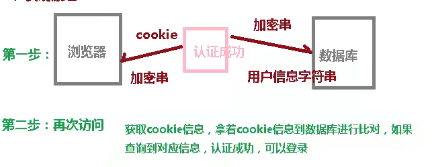
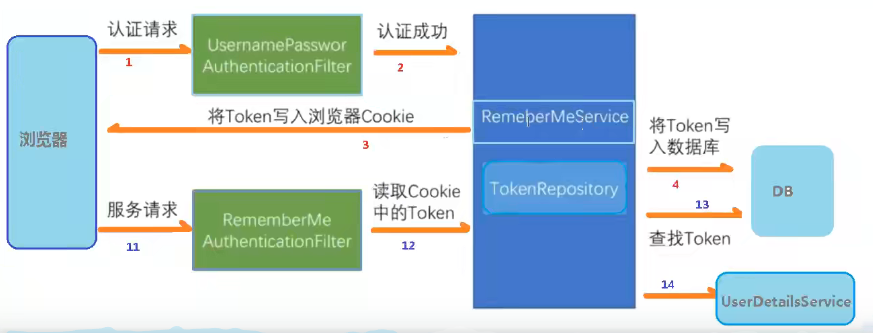
9.2.实现步骤:
9.2.1.创建表:执行JdbcTokenRepositoryImpl中CREATE_TABLE_SQL对应的sql:
create table persistent_logins (username varchar(64) not null, series varchar(64) primary key, token varchar(64) not null, last_used timestamp not null)
或者在下面编写配置类的时候使用jdbcTokenRepository.setCreateTableOnStartup(true);自动创建表
9.2.2.修改配置类(注入数据源,配置数据库操作对象)
@Configuration
public class SecurityConfig extends WebSecurityConfigurerAdapter {
    @Autowired
    private DataSource dataSource;

    @Bean
    public PersistentTokenRepository persistentTokenRepository() {
        JdbcTokenRepositoryImpl jdbcTokenRepository = new JdbcTokenRepositoryImpl();
        jdbcTokenRepository.setDataSource(dataSource);
        // 自动创建相关表
        // jdbcTokenRepository.setCreateTableOnStartup(true);
        return jdbcTokenRepository;
    }
}
9.2.3.修改自动登录配置
@Configuration
public class SecurityConfig extends WebSecurityConfigurerAdapter {
    @Autowired
    private UserDetailsService userDetailsService;
    @Autowired
    private DataSource dataSource;

    @Bean
    public PersistentTokenRepository persistentTokenRepository() {
        JdbcTokenRepositoryImpl jdbcTokenRepository = new JdbcTokenRepositoryImpl();
        jdbcTokenRepository.setDataSource(dataSource);
        // 自动创建相关表
        // jdbcTokenRepository.setCreateTableOnStartup(true);
        return jdbcTokenRepository;
    }

    @Override
    protected void configure(AuthenticationManagerBuilder auth) throws Exception {
        auth.userDetailsService(userDetailsService).passwordEncoder(password());
    }

    @Bean
    PasswordEncoder password() {
        return new BCryptPasswordEncoder();
    }

    // 采用此方法完成设置
    @Override
    protected void configure(HttpSecurity http) throws Exception {
        // 增加用户退出配置
        http.logout().logoutUrl("/logout").logoutSuccessUrl("/logout.html").permitAll();
        // 配置没有权限访问跳转自定义页面
        http.exceptionHandling().accessDeniedPage("/unauth.html");
        // 自定义登录页面
        http.formLogin().loginPage("/login.html")
                // 登录访问路径(点击登录,将表单提交到哪个controller)
                .loginProcessingUrl("/user/login")
                // 登录成功后跳转路径
                .defaultSuccessUrl("/success.html").permitAll()
                // 配置哪些路径不需要认证
                .and().authorizeRequests()
                .antMatchers("/", "/test/redis", "/test/hello", "/user/login").permitAll()
                // 当前登录用户必须具有admin权限才可以访问/test/index
//                .antMatchers("/test/index").hasAuthority("admin")
//                .antMatchers("/test/index").hasAnyAuthority("admin1", "admin")
//                .antMatchers("/test/index").hasRole("sale")
//                .antMatchers("/test/index").hasAnyRole("sale", "show")
                .anyRequest().authenticated()
                // 设置token有效时间为60秒
              .and().rememberMe().tokenRepository(persistentTokenRepository()).tokenValiditySeconds(60)
                // 关闭csrf防护
                .and().csrf().disable();
    }
}
9.2.4.自动登录按钮
<input type="checkbox" name="remember-me">记住密码
注意name必须为remember-me
10.CSRF
Spring Security CSRF会对PATCH、POST、PUT、DELETE请求进行保护
导入pom依赖:
        <dependency>
            <groupId>org.springframework.boot</groupId>
            <artifactId>spring-boot-starter-thymeleaf</artifactId>
        </dependency>
        <dependency>
            <groupId>org.thymeleaf.extras</groupId>
            <artifactId>thymeleaf-extras-springsecurity5</artifactId>
        </dependency>
配置类:
    @Override
    protected void configure(HttpSecurity http) throws Exception {
        // 增加用户退出配置
        http.logout().logoutUrl("/logout").logoutSuccessUrl("/logout.html").permitAll();
        // 配置没有权限访问跳转自定义页面
        http.exceptionHandling().accessDeniedPage("/unauth.html");
        // 自定义登录页面
        http.formLogin().loginPage("/test/login")
                // 登录访问路径(点击登录,将表单提交到哪个controller)
                .loginProcessingUrl("/user/login")
                // 登录成功后跳转路径
                .defaultSuccessUrl("/success.html").permitAll()
                // 配置哪些路径不需要认证
                .and().authorizeRequests()
                .antMatchers("/", "/test/redis", "/test/hello", "/user/login").permitAll()
                // 当前登录用户必须具有admin权限才可以访问/test/index
//                .antMatchers("/test/index").hasAuthority("admin")
//                .antMatchers("/test/index").hasAnyAuthority("admin1", "admin")
//                .antMatchers("/test/index").hasRole("sale")
//                .antMatchers("/test/index").hasAnyRole("sale", "show")
                .anyRequest().authenticated()
                // 设置token有效时间为60秒
                .and().rememberMe().tokenRepository(persistentTokenRepository()).tokenValiditySeconds(60);
        // 关闭csrf防护
//                .and().csrf().disable();
    }
配置登录controller:
@Controller
@RequestMapping("/test")
public class LoginController {
    @GetMapping("login")
    public String login() {
        return "login";
    }
}
login.html:
<!DOCTYPE html>
<html lang="en"
      xmlns:th="http://www.thymeleaf.org"
      xmlns:sec="http://www.thymeleaf.org/extras/spring-security">
<head>
    <meta charset="UTF-8">
    <title>Title</title>
</head>
<body>
<!--注意name必须为username和password,具体逻辑可以查看UsernamePasswordAuthenticationFilter中attemptAuthentication方法-->
<form action="/user/login" method="post">
    <input type="hidden" th:name="${_csrf.parameterName}" th:value="${_csrf.token}">
    用户名:<input type="text" name="username">
    <br>
    密码:<input type="password" name="password">
    <br>
    <input type="checkbox" name="remember-me">记住密码
    <input type="submit" value="login">
</form>
</body>
</html>
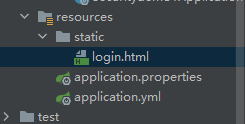
application.properties:
spring.thymeleaf.cache=false
spring.thymeleaf.prefix=classpath:/static/
spring.thymeleaf.suffix=.html
spring.thymeleaf.encoding=UTF-8
spring.thymeleaf.enabled=true
spring.thymeleaf.mode=HTML5

 浙公网安备 33010602011771号