

SpringBoot整合SpringSecurity. 详细笔记 ----第二波
参考: https://www.bilibili.com/video/BV17h41147Jq
maven依赖
<dependency>
            <groupId>org.springframework.boot</groupId>
            <artifactId>spring-boot-starter-security</artifactId>
</dependency>
---发现加了依赖其实就生效了,访问 /login 就是security默认登录页面
账号 user 密码 在控制台打印有(每次启动都是不一样的)

查看密码加密后是否一致的方法 -----自定义登录需要,因为正常存入数据库密码为加密的,先用账户名查到对应密码 把前端传过来的密码加密看看是否和一致
import org.springframework.security.crypto.bcrypt.BCryptPasswordEncoder;
import org.springframework.security.crypto.password.PasswordEncoder;

@GetMapping("/checkpwd")
    public boolean pwd() {
        PasswordEncoder pe =new BCryptPasswordEncoder();
        String encode =pe.encode("123");
        System.out.println(encode);
        return pe.matches("123",encode);
    }
已下为我的实战
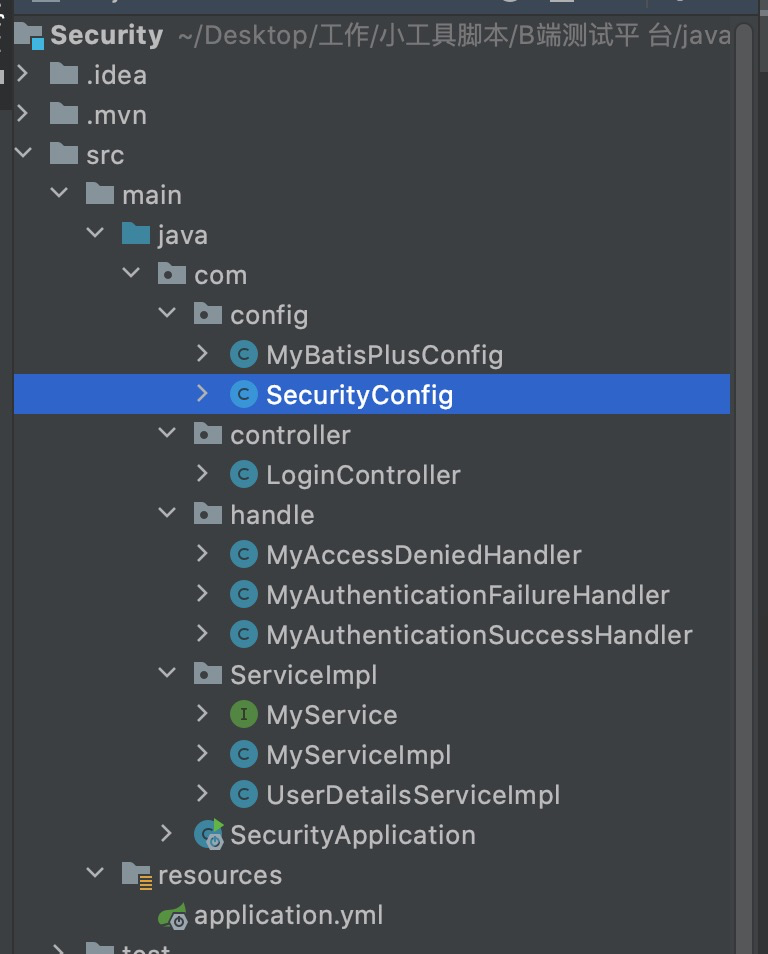
一、目录结构
MyBatisPlusConfig
package com.config;


import com.baomidou.mybatisplus.extension.plugins.PerformanceInterceptor;
import org.springframework.context.annotation.Bean;
import org.springframework.context.annotation.Configuration;

//MyBatisPlus配置
@Configuration
public class MyBatisPlusConfig {
    //    sql执行效率插件
    @Bean
    public PerformanceInterceptor PerformanceInterceptor(){
        PerformanceInterceptor PerformanceInterceptor = new PerformanceInterceptor();
        PerformanceInterceptor.setMaxTime(1111);//设置sql执行的最大时间,如果超过了则不执行,抛异常
        PerformanceInterceptor.setFormat(true); //开启sql格式化
        return PerformanceInterceptor;
    }
}
SecurityConfig
package com.config;

import com.handle.MyAccessDeniedHandler;
import com.handle.MyAuthenticationFailureHandler;
import com.handle.MyAuthenticationSuccessHandler;
import org.springframework.beans.factory.annotation.Autowired;
import org.springframework.context.annotation.Bean;
import org.springframework.context.annotation.Configuration;
import org.springframework.http.HttpMethod;
import org.springframework.security.config.annotation.authentication.builders.AuthenticationManagerBuilder;
import org.springframework.security.config.annotation.web.builders.HttpSecurity;
import org.springframework.security.config.annotation.web.configuration.WebSecurityConfigurerAdapter;
import org.springframework.security.core.userdetails.UserDetailsService;
import org.springframework.security.crypto.password.PasswordEncoder;
import org.springframework.security.web.authentication.AuthenticationFailureHandler;
import org.springframework.security.crypto.bcrypt.BCryptPasswordEncoder;
import org.springframework.security.web.authentication.rememberme.JdbcTokenRepositoryImpl;
import org.springframework.security.web.authentication.rememberme.PersistentTokenRepository;

import javax.sql.DataSource;


@Configuration
@EnableWebSecurity //加不加都行
public class SecurityConfig extends WebSecurityConfigurerAdapter {
    //引入自定义异常处理类
    @Autowired
    private MyAccessDeniedHandler myAccessDeniedHandler;

    //自定义登录逻辑
    @Autowired
    private UserDetailsService userDetailsService;

    //持久化数据库操作
    @Autowired
    private DataSource dataSource;
    @Autowired
    private PersistentTokenRepository persistentTokenRepository;


    @Override
    protected void configure(HttpSecurity http) throws Exception{

        //授权认证
        http.authorizeRequests()
//                内置访问方法
                //设置不需要认证都可以访问的链接,结合通配符--
                // 下面的另外一种写法,.antMatchers("/loginfail/**","/login/**").sccess("permitAll()")
//                ?: 匹配一个字符
//                * : 匹配多个字符
//                ** : 匹配0个或多个目录
//                .antMatchers("/loginfail/**","/login/**","/no").permitAll()
//                放行相关文件
                .antMatchers("/**/**.png").permitAll()
//                指定这个接口只能使用POST请求 才能放行
                .regexMatchers(HttpMethod.POST,"/hah").permitAll()
//                正则表达式匹配链接
                .regexMatchers(".+[*]png").permitAll()
//                指定访问这个接口uri要加上/xxx
                .mvcMatchers("/demo").servletPath("/xxx").permitAll()
                //权限控制
//                指定单个权限可访问地址
//                .antMatchers("/no").hasAuthority("admin")
//                指定多个权限可访问地址--也可以直接传多个权限的字符"admin,normal"
//                .antMatchers("/no").hasAnyAuthority("admin","normal")
//                指定一个角色可以访问的地址
//                .antMatchers("/no").hasRole("abc2")
//                指定多个角色可以访问的地址--也可以直接传多个角色的字符"abc2,abc",自定义登录角色设置为ROLE_abc,这里指定abc即可
//                .antMatchers("/no").hasAnyRole("abc2","abc")
//                指定接口可以访问的服务器IP,一般用于微服务,指定某个服务可调用我们
//                .antMatchers("/no").hasIpAddress("192.168.101")
                //所有请求都必须被认证,必须登录之后才被访问
                .anyRequest().authenticated();
//                自定义方法实现权限----登录后,再访问uri走这个逻辑判断
//                .anyRequest().access("@myServiceImpl.hasPermission(request,authentication)");

//        没有权限默认跳转到登录页面,要把不用权限访问的uri先配置好
        //登录表单提交
        http.formLogin()
                .usernameParameter("user")        //接收user作为账号--定义接口传的餐素
                .passwordParameter("pwd")   //接收pwd作为密码--定义接口传的参数
                .loginProcessingUrl("/ccc")          //定义登录接口的uri--改变默认接口请求的/login


                //登录成功的动作
//                .defaultSuccessUrl("/loginsuccess")    //登录成功后,浏览器页面要跳转的url--这个是get的方法
                .successForwardUrl("/loginsuccess")  //登录成功后执行这个请求 要用post请求--会把这个方法返回信息响应给前端

//                登录成功自定义处理器,用了successHandler 就不可以用successForwardUrl,不然会报错--
//                可以参考下https://blog.csdn.net/YCJ_xiyang/article/details/95231324?utm_medium=distribute.wap_relevant.none-task-blog-2~default~baidujs_utm_term~default-16.wap_blog_relevant_default&spm=1001.2101.3001.4242.9&utm_relevant_index=19
//                .successHandler(new MyAuthenticationSuccessHandler("http://baidu.com"))

                //登录失败的动作
                .failureForwardUrl("/loginfail") ;  //登录失败后执行这个请求 要用post请求--会把这个方法返回信息响应给前端可以控制响应码
//              登录失败自定义处理器,用了failureHandler 就不可以用failureForwardUrl,不然会报错--
//                .failureHandler(new MyAuthenticationFailureHandler("http://weixiao.qq.com"));


//        这里也可以用.and()去接着连接
        //rememberMe为开启记住我功能--其实就是设置了cookie的有效时长
        //做持久化应该试为了服务器重启后,登录态依旧有效
//        持久化记住我功能
        http.rememberMe()
                //失效时间,单位秒
                .tokenValiditySeconds(60)
                //自定义记住我 接口传的参数名
                .rememberMeParameter("rem")
                //自定义登录逻辑
                .userDetailsService(userDetailsService)   //不做持久化的rememberMe 到这一步就可以了
//                //持久层对象
                .tokenRepository(persistentTokenRepository);

        http.csrf().disable();//禁用跨站csrf攻击防御--开启后接口只需要传账号和密码 可做前后端分离 要加这个 或者等于关闭防火墙


//        自定义403等接口返回,异常处理
        http.exceptionHandling()
                .accessDeniedHandler(myAccessDeniedHandler);

        //注销 开启注销功能--默认就有这个功能
        http.logout()
//                更改退出登录的接口uri
                .logoutUrl("/user/logout")
//        退出后的跳转页面
                .logoutSuccessUrl("/");
    }


    //重写加密方法给自定义登录逻辑UserDetailsServiceImpl调用
    @Bean
    public PasswordEncoder getPw(){
        return new BCryptPasswordEncoder();
    }


    //连接数据库做记住我功能持久化
    @Bean
    public PersistentTokenRepository getPersistenntTokenRepository(){
        JdbcTokenRepositoryImpl jdbcTokenRepository =new JdbcTokenRepositoryImpl();
        jdbcTokenRepository.setDataSource(dataSource);
        //自动建表,第一次启动时需要,第二次启动注释掉!!!!不然会报错
//        jdbcTokenRepository.setCreateTableOnStartup(true);
        return jdbcTokenRepository;
    }


}
LoginController
---里面获取用户的身份权限信息User类建议重写User类(比较方便获取信息) 见 https://www.cnblogs.com/kaibindirver/p/16037172.html
package com.controller;

import org.springframework.http.HttpHeaders;
import org.springframework.http.ResponseEntity;
import org.springframework.security.access.annotation.Secured;
import org.springframework.security.access.prepost.PreAuthorize;
import org.springframework.security.core.Authentication;
import org.springframework.security.core.context.SecurityContextHolder;
import org.springframework.security.core.userdetails.User;
import org.springframework.web.bind.annotation.GetMapping;
import org.springframework.web.bind.annotation.PostMapping;
import org.springframework.web.bind.annotation.RestController;

@RestController
public class LoginController {

    //角色注解,这个方法只有 ROLE_abc 角色可以访问---注解也可以用在 server层
    @Secured("ROLE_abc")
    //角色注解,这个方法只有 ROLE_abc 角色可以访问,传参时也可以不加ROLE_
    // 在类和方法执前判断角色---注解也可以用在 server层
//    @PreAuthorize("hasRole('ROLE_abc')")
    @GetMapping("/no")
    //获取用户信息的方法 用Authentication类
    public String NO(Authentication authentication){
//        System.out.println(authentication.getName());
//        System.out.println(authentication.getAuthorities());
//        System.out.println(authentication.getDetails());
//        System.out.println(authentication.getPrincipal());
        System.out.println("没有授权不可访问的接口");
        return "没有授权不可访问的接口";
    }


    @PostMapping("/loginsuccess")
    public String loginsuccess(){
        System.out.println("登录成功请求这个接口");
        System.out.println(SecurityContextHolder.getContext()); //获取请求用户的身份
        System.out.println(SecurityContextHolder.getContext().getAuthentication().getPrincipal()); //判断用户是否登录
        User user=(User) SecurityContextHolder.getContext().getAuthentication().getPrincipal();
        System.out.println(user.getUsername()); //账号 为空 框架机制
        System.out.println(user.getPassword()); //密码
        System.out.println(user.getAuthorities()); //权限
        return "登录成功请求这个接口";
    }


    //登录失败让接口报401
    @PostMapping("/loginfail")
    public ResponseEntity<String> loginfail(){
        HttpHeaders headers = new HttpHeaders();
        headers.set("yyyy","111111");
        System.out.println("登录失败请求这个接口");
        return ResponseEntity.status(401).headers(headers)
                .body( "登录失败请求这个接口");
    }


    @GetMapping("/no2")
    //获取用户信息的方法 用Authentication类
    public String NO2(Authentication authentication){
//        System.out.println(authentication.getName());
//        System.out.println(authentication.getAuthorities());
//        System.out.println(authentication.getDetails());
//        System.out.println(authentication.getPrincipal());
        System.out.println("没有授权不可访问的接口2");
        return "没有授权不可访问的接口2";
    }

    }
MyAccessDeniedHandler
package com.handle;


import com.fasterxml.jackson.databind.ObjectMapper;
import org.springframework.beans.factory.annotation.Autowired;
import org.springframework.security.access.AccessDeniedException;
import org.springframework.security.web.access.AccessDeniedHandler;
import org.springframework.stereotype.Component;

import javax.servlet.ServletException;
import javax.servlet.http.HttpServletRequest;
import javax.servlet.http.HttpServletResponse;
import java.io.IOException;
import java.io.PrintWriter;
import java.util.HashMap;
import java.util.Map;

//重写自定义403、401等接口的响应
@Component
public class MyAccessDeniedHandler implements AccessDeniedHandler {

    @Autowired
    private ObjectMapper objectMapper;

    @Override
    public void handle(HttpServletRequest httpServletRequest, HttpServletResponse httpServletResponse, AccessDeniedException e) throws IOException, ServletException {
//        设置需要响应状态码
        httpServletResponse.setStatus(HttpServletResponse.SC_FORBIDDEN);
        httpServletResponse.setHeader("Content-type","text/html;charset=UTF-8");
        PrintWriter writer = httpServletResponse.getWriter();
        Map<String,Object> map = new HashMap<String,Object>();
        map.put("code",403);
        map.put("message","没有访问权限");
        writer.write(objectMapper.writeValueAsString(map));
        writer.flush();
        writer.close();
    }

}
MyAuthenticationFailureHandler
package com.handle;

import org.springframework.security.core.AuthenticationException;
import org.springframework.security.web.authentication.AuthenticationFailureHandler;

import javax.servlet.ServletException;
import javax.servlet.http.HttpServletRequest;
import javax.servlet.http.HttpServletResponse;
import java.io.IOException;


//配置文件 failureHandler-登录失败处理器 走下面的方法
public class MyAuthenticationFailureHandler implements AuthenticationFailureHandler {

    private String url;

    public MyAuthenticationFailureHandler(String url){
        this.url=url;
    }

    @Override
    public void onAuthenticationFailure(HttpServletRequest httpServletRequest, HttpServletResponse httpServletResponse, AuthenticationException e) throws IOException, ServletException {
        //重定向地址
        httpServletResponse.sendRedirect(url);
    }
}
MyAuthenticationSuccessHandler
package com.handle;

import org.springframework.security.core.Authentication;
import org.springframework.security.core.userdetails.User;
import org.springframework.security.web.authentication.AuthenticationSuccessHandler;

import javax.servlet.ServletException;
import javax.servlet.http.HttpServletRequest;
import javax.servlet.http.HttpServletResponse;
import java.io.IOException;

//配置文件 successHandler-登录成功处理器 走下面的方法
public class MyAuthenticationSuccessHandler  implements AuthenticationSuccessHandler {

    private String url;

    public MyAuthenticationSuccessHandler (String url){
        this.url=url;
    }


    @Override
    public void onAuthenticationSuccess(HttpServletRequest httpServletRequest, HttpServletResponse httpServletResponse, Authentication authentication) throws IOException, ServletException {
        //获取发送请求的服务器IP地址
        System.out.println(httpServletRequest.getRemoteAddr());

//        ---获取用户的提交信息
        User user= (User) authentication.getPrincipal();
        //获取身份和权限
        System.out.println(user.getAuthorities());
        //获取登录的账号
        System.out.println(user.getUsername());
        //框架的安全机制,获取登录密码输出为null
        System.out.println(user.getPassword());
        //重定向地址
        httpServletResponse.sendRedirect(url);
    }
}
MyService
package com.ServiceImpl;
import org.springframework.security.core.Authentication;

import javax.servlet.http.HttpServletRequest;

//自定义方法实现权限控制的接口
public interface MyService {
    boolean hasPermission(HttpServletRequest request, Authentication authentiication);
}
MyServiceImpl。 -------感觉可以在这块查数据库 判断这个账号的权限
package com.ServiceImpl;


import org.springframework.security.core.Authentication;
import org.springframework.security.core.GrantedAuthority;
import org.springframework.security.core.authority.SimpleGrantedAuthority;
import org.springframework.security.core.userdetails.UserDetails;
import org.springframework.stereotype.Service;

import javax.servlet.http.HttpServletRequest;
import java.util.Collection;

@Service
public class MyServiceImpl implements MyService{

    //自定义方法实现权限控制---登录后 再访问uri 才会走这个逻辑
    @Override
    public boolean hasPermission(HttpServletRequest request, Authentication authentication) {
        Object obj = authentication.getPrincipal();
        System.out.println("看是什么用户");
        System.out.println(obj);
//        判断用户是否赋予权限
        if (obj  instanceof UserDetails){
            UserDetails userDetails = (UserDetails) obj;
            System.out.println("用户已登录的信息");
            System.out.println(userDetails);
            Collection<? extends GrantedAuthority> authorities=userDetails.getAuthorities();
            System.out.println(authorities); //打印角色和权限 [ROLE_abc, add, admin, delete]
            System.out.println(new SimpleGrantedAuthority(request.getRequestURI()));  //当前用户访问的uri
            System.out.println(authorities.contains(new SimpleGrantedAuthority(request.getRequestURI())));
            return authorities.contains(new SimpleGrantedAuthority(request.getRequestURI())); //判断是否有权限访问,没有就返回false
        }
        return false;
    }
}
UserDetailsServiceImpl
package com.ServiceImpl;

import org.springframework.beans.factory.annotation.Autowired;
import org.springframework.security.core.authority.AuthorityUtils;
import org.springframework.security.core.userdetails.User;
import org.springframework.security.core.userdetails.UserDetails;
import org.springframework.security.core.userdetails.UserDetailsService;
import org.springframework.security.core.userdetails.UsernameNotFoundException;


import org.springframework.security.crypto.password.PasswordEncoder;
import org.springframework.stereotype.Service;


//登录时的自定义逻辑实现
@Service
public class UserDetailsServiceImpl implements UserDetailsService {

    @Autowired
    private PasswordEncoder pw;

    //登录的时候会触发这个实现类,在这里写逻辑去校验
    @Override
    public UserDetails loadUserByUsername(String username) throws UsernameNotFoundException {
//        获取请求的账号
        System.out.println(username);
        //1、查询数据库判断用户是否存在,如果不存在会抛出UsernameNotFoundException异常
        if (!"lucax".equals(username)) {
            System.out.println("用户不存在");
            throw new UsernameNotFoundException("用户不存在!");
        }
        else{
            // 2、根据用户名从数据库把查询出来的密码(注册时已加密过) 进行解析,或者直接把密码放入构造方法
            String password = pw.encode("123456");
            System.out.println("用户存在");

            //账号密码符合,存在给用户赋予权限和角色
            return new User(
//                   admin,normal 是权限
                    username, password,
                    AuthorityUtils.commaSeparatedStringToAuthorityList
//                    ROLE_abc 是设置角色 , admin,add,delete是权限, /no是路径
                            ("admin,add,delete,ROLE_abc"));
        }
    }
}
SecurityApplication
package com;

import org.springframework.boot.SpringApplication;
import org.springframework.boot.autoconfigure.SpringBootApplication;
import org.springframework.security.access.annotation.Secured;
import org.springframework.security.config.annotation.method.configuration.EnableGlobalMethodSecurity;

@SpringBootApplication
//开启Security的权限注解--要使用注解的话就好加这个
//securedEnabled 对应开启 @Secured注解
//prePostEnabled 对应开启 @PreAuthorize注解
@EnableGlobalMethodSecurity(securedEnabled = true, prePostEnabled = true)
public class SecurityApplication {
    public static void main(String[] args) {
        SpringApplication.run(SecurityApplication.class, args);
    }

}
application.yml
# 应用名称
spring:
  application:
    name: Security


  datasource:
    dynamic:
      primary: master #设置默认的数据源或者数据源组,默认值即为master
      strict: false #严格匹配数据源,默认false. true未匹配到指定数据源时抛异常,false使用默认数据源
      datasource:
        master:
          # 数据库连接地址
          url: jdbc:mysql://localhost:3306/security?useUnicode=true&characterEncoding=UTF-8&serverTimezone=GMT%2b8
          # 数据库用户名&密码:
          username: root
          password: 123456
          driver-class-name: com.mysql.jdbc.Driver # 3.2.0开始支持SPI可省略此配置


#配置日志
mybatis-plus:
  configuration:
    log-impl: org.apache.ibatis.logging.stdout.StdOutImpl
pom.xml
<?xml version="1.0" encoding="UTF-8"?>
<project xmlns="http://maven.apache.org/POM/4.0.0" xmlns:xsi="http://www.w3.org/2001/XMLSchema-instance"
         xsi:schemaLocation="http://maven.apache.org/POM/4.0.0 https://maven.apache.org/xsd/maven-4.0.0.xsd">
    <modelVersion>4.0.0</modelVersion>
    <groupId>com.example</groupId>
    <artifactId>Security</artifactId>
    <version>0.0.1-SNAPSHOT</version>
    <name>Security</name>
    <description>Demo project for Spring Boot</description>

    <properties>
        <java.version>1.8</java.version>
        <project.build.sourceEncoding>UTF-8</project.build.sourceEncoding>
        <project.reporting.outputEncoding>UTF-8</project.reporting.outputEncoding>
        <spring-boot.version>2.3.7.RELEASE</spring-boot.version>
    </properties>

    <dependencies>
    <!--        security依赖-->
        <dependency>
            <groupId>org.springframework.boot</groupId>
            <artifactId>spring-boot-starter-security</artifactId>
        </dependency>

        <dependency>
            <groupId>com.baomidou</groupId>
            <artifactId>dynamic-datasource-spring-boot-starter</artifactId>
            <version>3.5.0</version>
        </dependency>


<!--        连接接数据库-->
        <dependency>
        <groupId>mysql</groupId>
        <artifactId>mysql-connector-java</artifactId>
        <scope>runtime</scope>
        </dependency>

        <dependency>
            <groupId>com.baomidou</groupId>
            <artifactId>mybatis-plus-boot-starter</artifactId>
            <version>3.0.5</version>
        </dependency>

        <dependency>
            <groupId>org.springframework.boot</groupId>
            <artifactId>spring-boot-starter-web</artifactId>
        </dependency>

        <dependency>
            <groupId>mysql</groupId>
            <artifactId>mysql-connector-java</artifactId>
            <scope>runtime</scope>
        </dependency>
        <dependency>
            <groupId>org.projectlombok</groupId>
            <artifactId>lombok</artifactId>
            <optional>true</optional>
        </dependency>
        <dependency>
            <groupId>org.springframework.boot</groupId>
            <artifactId>spring-boot-starter-test</artifactId>
            <scope>test</scope>
            <exclusions>
                <exclusion>
                    <groupId>org.junit.vintage</groupId>
                    <artifactId>junit-vintage-engine</artifactId>
                </exclusion>
            </exclusions>
        </dependency>
        <dependency>
            <groupId>org.springframework.security</groupId>
            <artifactId>spring-security-test</artifactId>
            <scope>test</scope>
        </dependency>
    </dependencies>

    <dependencyManagement>
        <dependencies>
            <dependency>
                <groupId>org.springframework.boot</groupId>
                <artifactId>spring-boot-dependencies</artifactId>
                <version>${spring-boot.version}</version>
                <type>pom</type>
                <scope>import</scope>
            </dependency>
        </dependencies>
    </dependencyManagement>

    <build>
        <plugins>
            <plugin>
                <groupId>org.apache.maven.plugins</groupId>
                <artifactId>maven-compiler-plugin</artifactId>
                <version>3.8.1</version>
                <configuration>
                    <source>1.8</source>
                    <target>1.8</target>
                    <encoding>UTF-8</encoding>
                </configuration>
            </plugin>
            <plugin>
                <groupId>org.springframework.boot</groupId>
                <artifactId>spring-boot-maven-plugin</artifactId>
                <version>2.3.7.RELEASE</version>
                <configuration>
                    <mainClass>com.SecurityApplication</mainClass>
                </configuration>
                <executions>
                    <execution>
                        <id>repackage</id>
                        <goals>
                            <goal>repackage</goal>
                        </goals>
                    </execution>
                </executions>
            </plugin>
        </plugins>
    </build>

</project>
分类:
SpingBoot


【推荐】国内首个AI IDE,深度理解中文开发场景,立即下载体验Trae
【推荐】编程新体验,更懂你的AI,立即体验豆包MarsCode编程助手
【推荐】抖音旗下AI助手豆包,你的智能百科全书,全免费不限次数
【推荐】轻量又高性能的 SSH 工具 IShell:AI 加持,快人一步
· 25岁的心里话
· 闲置电脑爆改个人服务器(超详细) #公网映射 #Vmware虚拟网络编辑器
· 零经验选手,Compose 一天开发一款小游戏!
· 因为Apifox不支持离线,我果断选择了Apipost!
· 通过 API 将Deepseek响应流式内容输出到前端