🎉TinyVue v3.19.0 正式发布!Tree 组件终于支持虚拟滚动啦!UI 也升级啦,更更符合现代审美~
你好,我是 Kagol,个人公众号:前端开源星球。
我们非常高兴地宣布,2024年10月28日,TinyVue 发布了 v3.19.0 🎉。
本次 3.19.0 版本主要有以下重大变更:
- 所有组件全面升级到 OpenTiny Design 新设计规范,UI 更美观、更符合现代审美。
- 增加 VirtualTree 虚拟树组件。
- 增加 VirtualScrollBox 虚拟化容器组件。
- 增加 Sticky 粘性布局组件。
详细的 Release Notes 请参考:https://github.com/opentiny/tiny-vue/releases/tag/v3.19.0
本次版本共有16位贡献者参与开发,其中 Nowitzki41 / Simon-He95 / BWrong 是新朋友👏
- Nowitzki41 - 新增贡献者✨
- Simon-He95 - 新增贡献者✨
- BWrong - 新增贡献者✨
- shenjunjian
- kagol
- zzcr
- gimmyhehe
- GaoNeng-wWw
- wuyiping0628
- gweesin
- James-9696
- chenxi-20
- MomoPoppy
- AcWrong02
- Davont
- Youyou-smiles
也感谢新老朋友们对 TinyVue 的辛苦付出!
你可以更新 @opentiny/vue@3.19.0 进行体验!
我们一起来看看都有哪些更新吧!
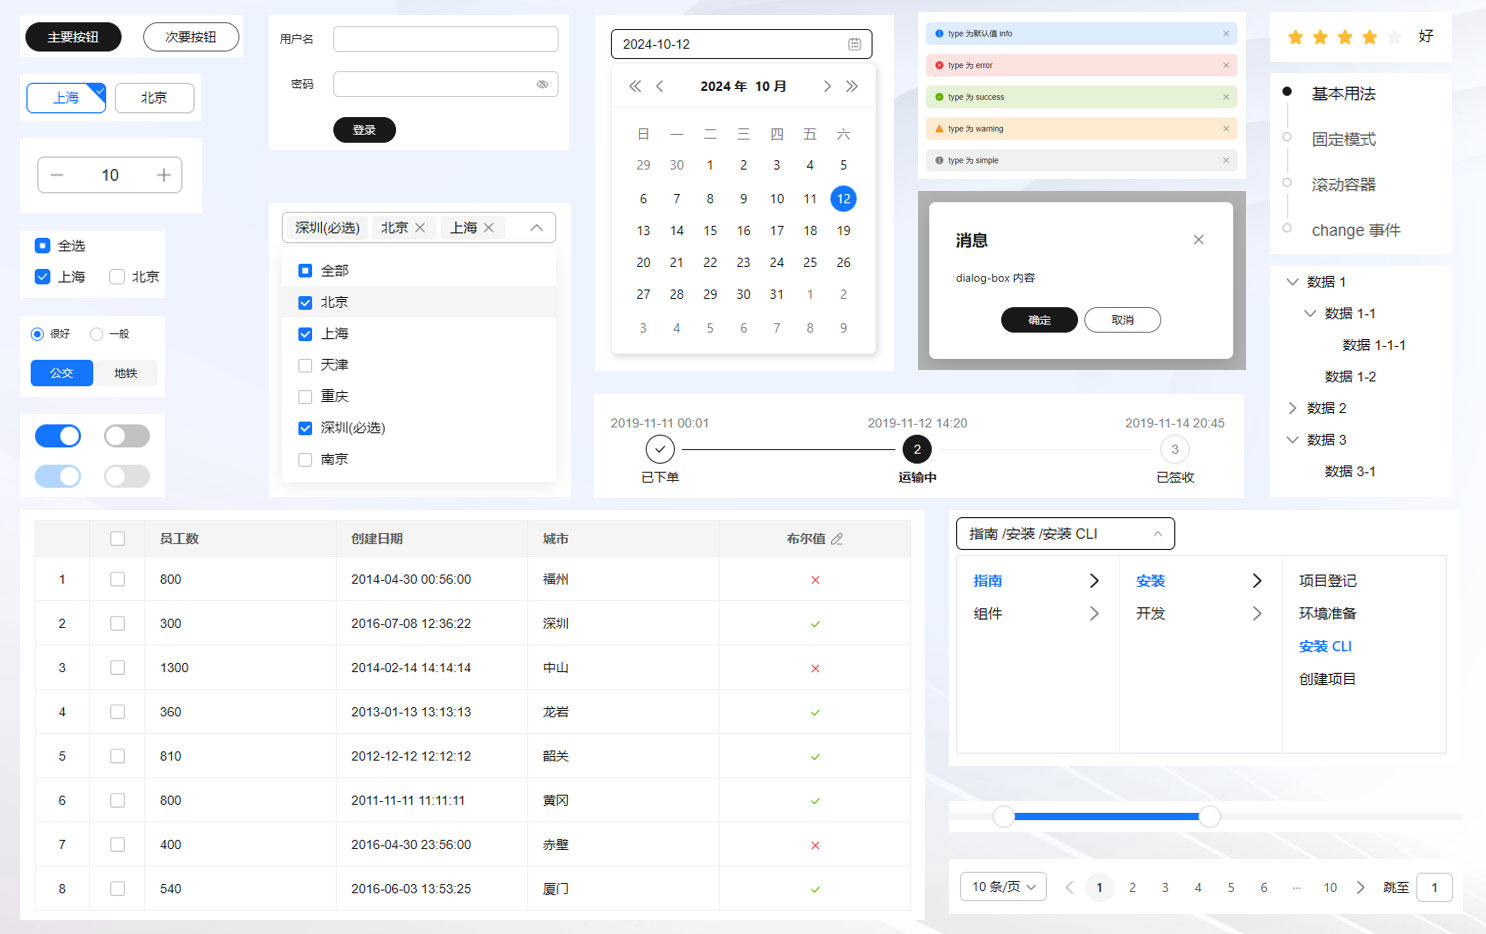
全面升级新 UI,更符合现代审美
自从 TinyVue 组件库去年开源以来,一直有小伙伴反馈我们的 UI 不够美观,风格陈旧,不太满足现阶段审美。
于是我们花了大量时间对组件 UI 进行优化,全面适配了 OpenTiny Design 新设计规范,并终于在 v3.19.0 正式发布!
整体效果如下:

如果你安装 v3.19.0 版本的 TinyVue 组件库,默认效果就是新设计规范。
# 安装依赖
npm i @opentiny/vue@3.19.0
<script setup lang="ts">
// 引入 TinyVue 的组件
import { TinyButton, TinyAlert } from '@opentiny/vue'
</script>

<template>
  <div>
    <tiny-button>取消</tiny-button>
    <tiny-button type="primary">确定</tiny-button>
  </div>
  <tiny-alert description="TinyVue 是一套跨端、跨框架的企业级 UI 组件库,支持 Vue 2 和 Vue 3,支持 PC 端和移动端。"></tiny-alert>
</template>
效果图:

新旧 UI 的效果对比,可以阅读以下文章:
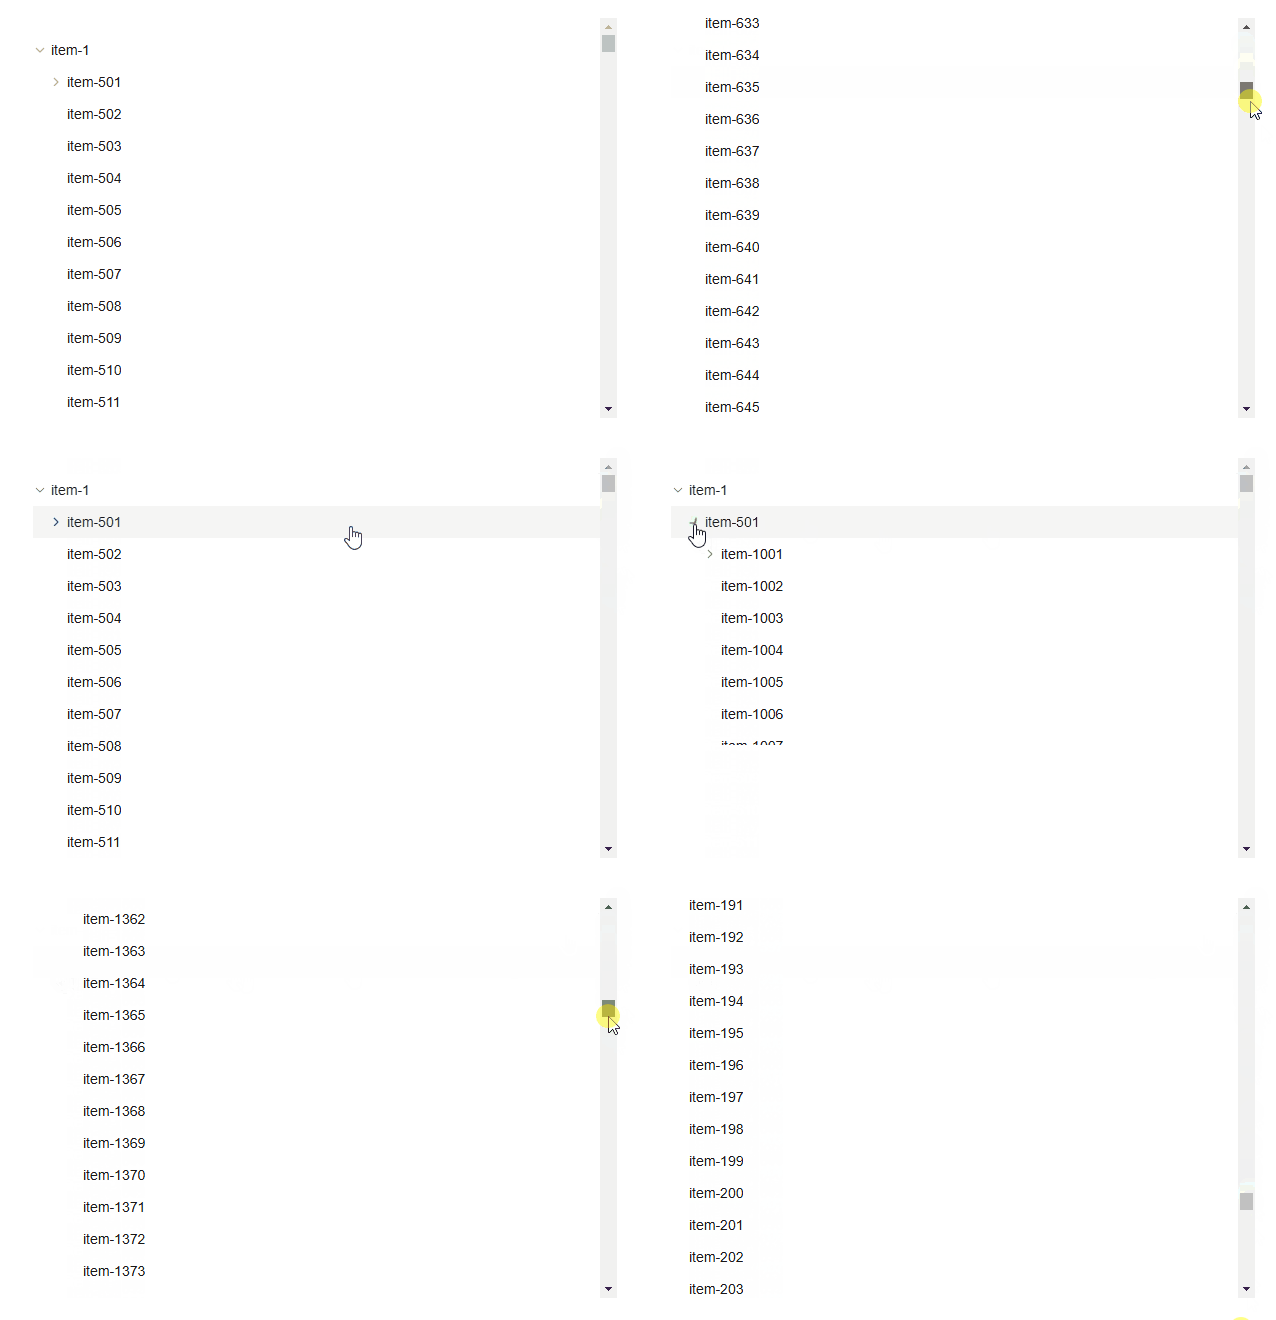
增加 VirtualTree 虚拟树组件
说到 Tree 组件的虚拟滚动,还要回到2023年7月12日开发者 zouzhixiang 提交的一个 issue:✨ [Feature]: tree树形控件能增加虚拟滚动功能吗? #317。
现在 Tree 组件终于支持上虚拟滚动功能了!🎉🎉🎉
我们一起来体验下吧!
只需要配置下数据源和高度即可。
<script setup>
import { computed } from 'vue'
import { TinyVirtualTree } from '@opentiny/vue'

const treeOp = computed(() => ({
  nodeKey: 'label',
  data: data5.value
}))

<template>
  <tiny-virtual-tree
    height="600"
    :tree-op="treeOp"
  ></tiny-virtual-tree>
</template>
效果如下:

更多 VirtualTree 组件的功能,欢迎到 TinyVue 官网进行体验:https://opentiny.design/tiny-vue/zh-CN/smb-theme/components/virtual-tree
增加 VirtualScrollBox 虚拟化容器组件
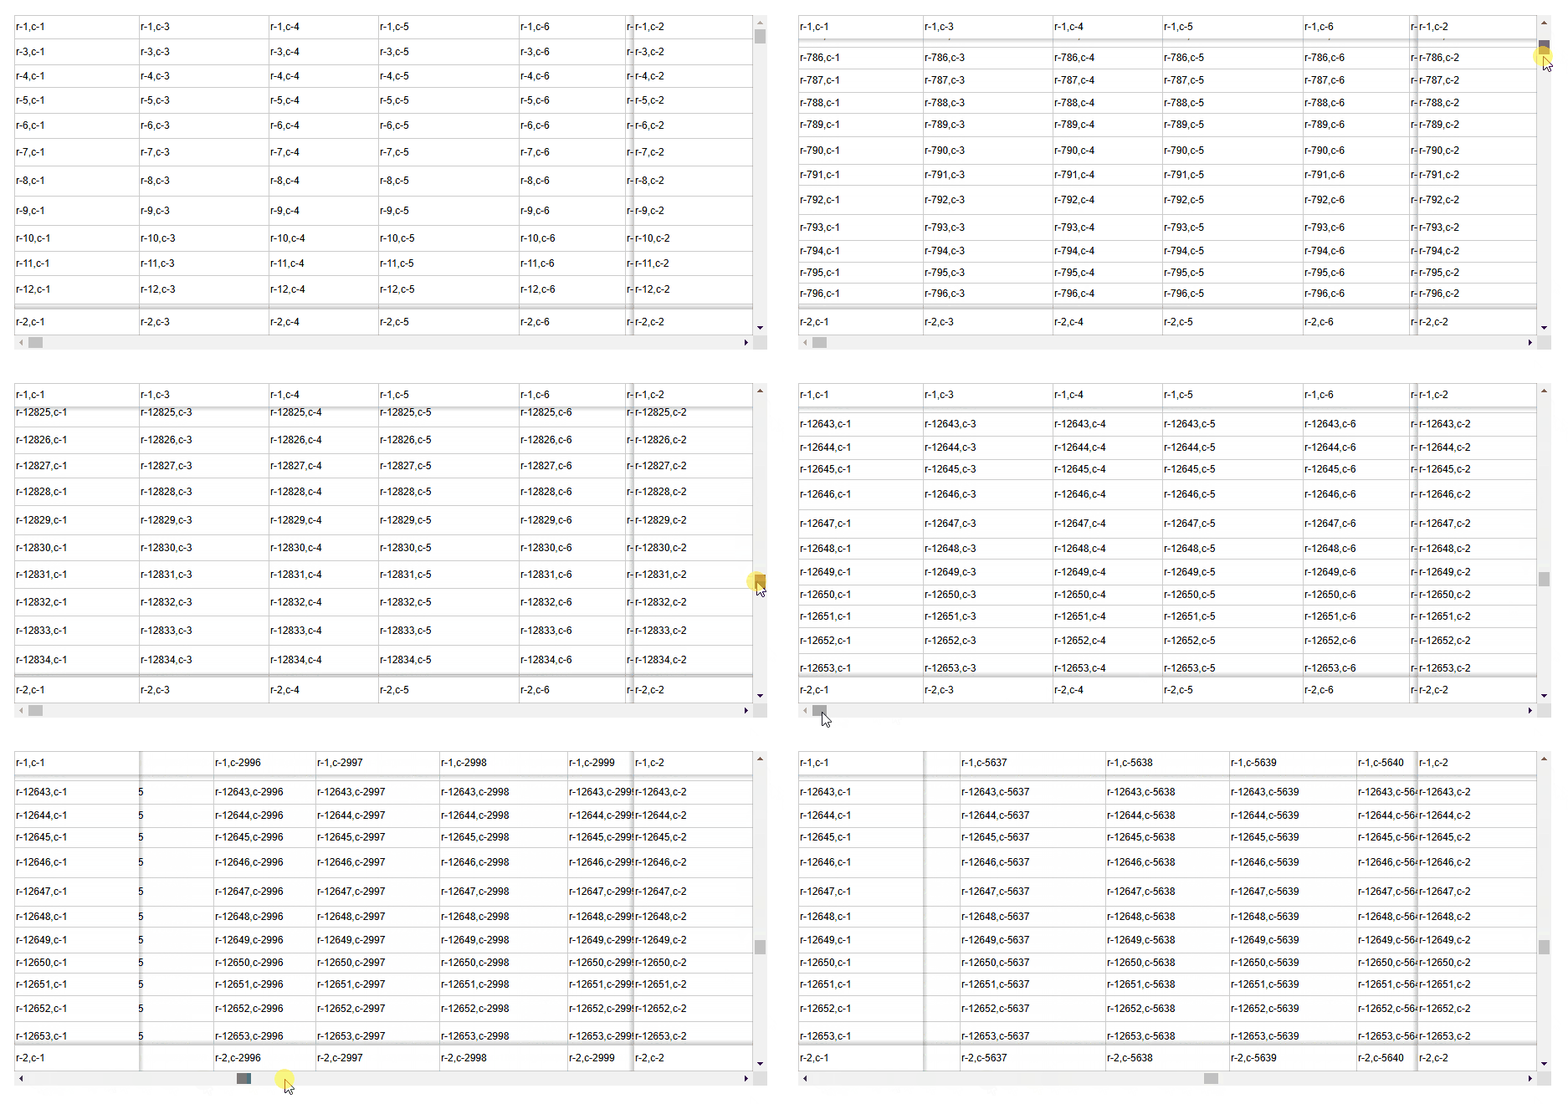
我们不仅实现了 Tree 的虚拟滚动,还抽取了一个通用的虚拟滚动组件,可以将该组件用在任意列表类的场景,让大数据列表拥有虚拟滚动的能力,我们以表格组件为例,实现一个水平和垂直方向都能虚拟滚动的表格。
<template>
  <tiny-virtual-scroll-box v-bind="config">
    <template #default="{ params: { viewRows, viewCols, isScrollX, isScrollY, isTop, isBottom, isLeft, isRight } }">
      <div
        v-for="viewRow in viewRows"
        :key="viewRow.key"
        :style="viewRow.style"
        :class="rowClass({ viewRow, isScrollY, isTop, isBottom })"
      >
        <div
          v-for="viewCol in viewCols"
          :key="viewCol.key"
          :style="colStyle({ viewRow, viewCol })"
          :class="colClass({ viewCol, isScrollX, isLeft, isRight })"
        >
          <div class="vs-grid-cell">
            {{ viewRow.info.raw + ',' + viewCol.info.raw }}
          </div>
        </div>
      </div>
    </template>
  </tiny-virtual-scroll-box>
</template>

<script setup>
import { reactive } from 'vue'
import { TinyVirtualScrollBox } from '@opentiny/vue'

const genColumn = (total) => {
  const columns = []
  const columnSizes = []

  for (let i = 1; i <= total; i++) {
    columns.push(`c-${i}`)
    // 列宽在 120 到 180
    columnSizes.push(Math.round(120 + Math.random() * 60))
  }

  return { columns, columnSizes }
}

const genRow = (total) => {
  const rows = []
  const rowSizes = []

  for (let i = 1; i <= total; i++) {
    rows.push(`r-${i}`)
    // 行高在 24 到 36
    rowSizes.push(Math.round(24 + Math.random() * 12))
  }

  return { rows, rowSizes }
}

// 生成 10000 列
const { columns, columnSizes } = genColumn(10000)
// 生成 20000 行
const { rows, rowSizes } = genRow(20000)

const config = reactive({
  width: 900,
  height: 400,
  rowBuffer: 120,
  columnBuffer: 240,
  columns,
  columnSizes,
  rows,
  rowSizes,
  fixedColumns: [[0], [1]],
  fixedRows: [[0], [1]],
  spanConfig: [[3, 3, 2, 2]]
})

const rowClass = ({ viewRow, isScrollY, isTop, isBottom }) => {
  return {
    [viewRow.key]: true,
    'vs-row': true,
    'vs-fixed-top-last': viewRow.info.startLast && !isTop && isScrollY,
    'vs-fixed-bottom-first': viewRow.info.endFirst && !isBottom && isScrollY,
    'vs-is-last-row': viewRow.info.isLast
  }
}
const colClass = ({ viewCol, isScrollX, isLeft, isRight }) => {
  return {
    [viewCol.key]: true,
    'vs-cell': true,
    'vs-fixed-left-last': viewCol.info.startLast && !isLeft && isScrollX,
    'vs-fixed-right-first': viewCol.info.endFirst && !isRight && isScrollX,
    'vs-is-last-col': viewCol.info.isLast
  }
}
const colStyle = ({ viewRow, viewCol }) => {
  return { height: viewRow.style.height, ...viewCol.style }
}
</script>

<style scoped>
/* 样式部分省略 */
</style>
效果如下:

虚拟树也可以结合 VirtualScrollBox + Tree 组件进行实现,具体代码可以参考以下链接:
https://opentiny.design/tiny-vue/zh-CN/smb-theme/components/virtual-scroll-box#tree
更多 VirtualScrollBox 组件的功能,欢迎到 TinyVue 官网进行体验:https://opentiny.design/tiny-vue/zh-CN/smb-theme/components/virtual-scroll-box
增加 Sticky 粘性布局组件
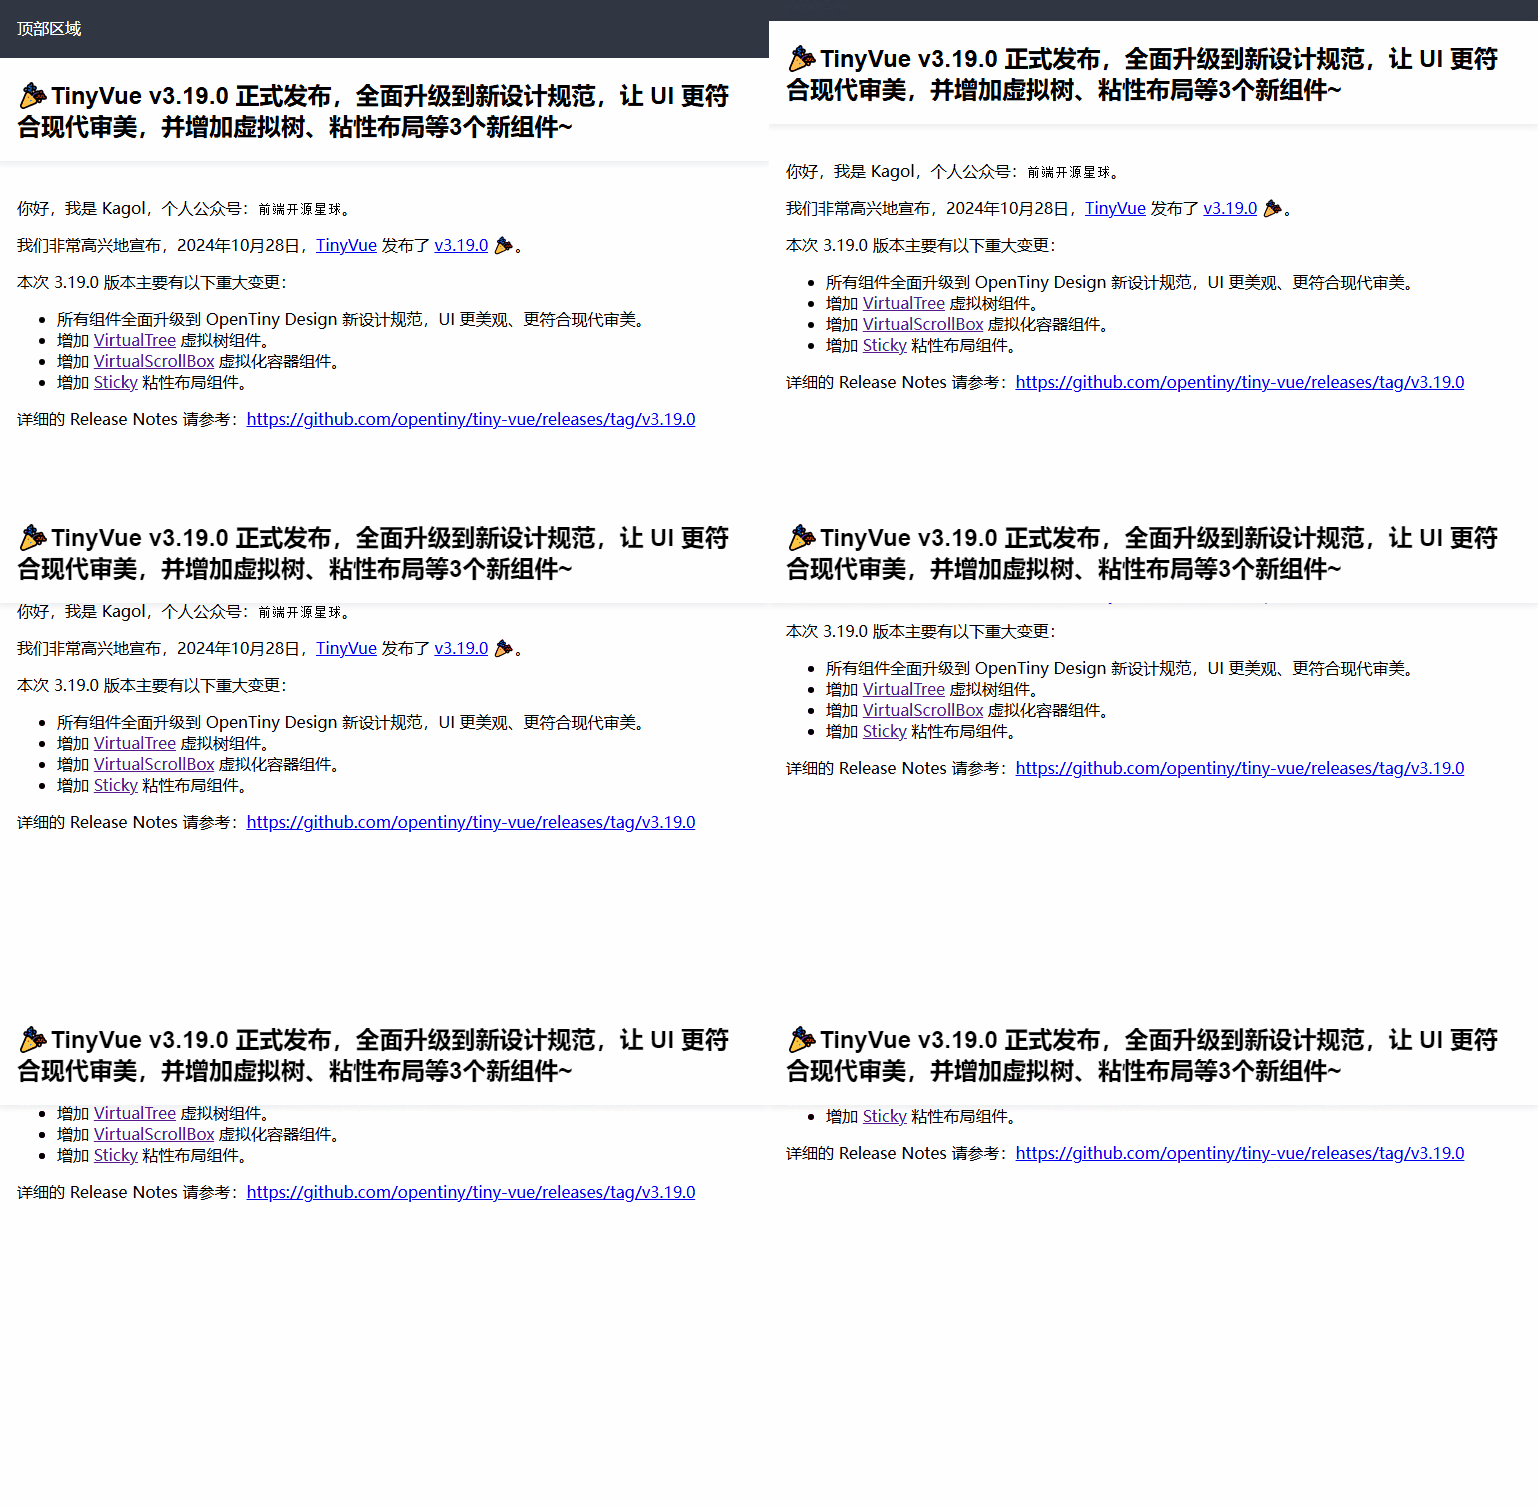
Sticky 组件与 CSS 中 position: sticky 属性实现的效果一致,当组件在屏幕范围内时,会按照正常的布局排列,当组件滚出屏幕范围时,始终会固定在屏幕顶部。
“吸顶”效果在某些场景下能够有效提升网页的可用性和用户体验。
- 导航栏:Sticky 组件常用于固定页面顶部的导航栏。当用户滚动页面时,导航栏会保持在视口的顶部,方便用户随时访问其他页面链接。这种设计提升了用户体验,尤其是在内容较长的页面中。
- 文章标题:在长篇文章中,可以将章节标题设置为 Sticky。当用户滚动到该章节时,标题会固定在视口顶部,帮助用户更好地了解当前阅读的位置和内容结构。
使用起来也非常简单,只需要把需要“吸顶”的元素用 Sticky 组件包裹起来就行。
<tiny-sticky>
  <h2>🎉TinyVue v3.19.0 正式发布,全面升级到新设计规范,让 UI 更符合现代审美,并增加虚拟树、粘性布局等3个新组件~</h2>
</tiny-sticky>
默认是“吸顶”的,还可以配置“吸底”,设置偏移量、层级等。
- offset:偏移距离,默认为
0px - position:吸附位置,可选值有
top(默认) /bottom - z-index:元素层级,默认为
100
效果如下:

更多 Sticky 组件的功能,欢迎到 TinyVue 官网进行体验:https://opentiny.design/tiny-vue/zh-CN/smb-theme/components/sticky
联系我们
GitHub:https://github.com/opentiny/tiny-vue(欢迎 Star ⭐)
官网:https://opentiny.design/tiny-vue
B站:https://space.bilibili.com/15284299
个人博客:https://kagol.github.io/blogs
小助手微信:opentiny-official
公众号:OpenTiny


【推荐】国内首个AI IDE,深度理解中文开发场景,立即下载体验Trae
【推荐】编程新体验,更懂你的AI,立即体验豆包MarsCode编程助手
【推荐】抖音旗下AI助手豆包,你的智能百科全书,全免费不限次数
【推荐】轻量又高性能的 SSH 工具 IShell:AI 加持,快人一步
· 震惊!C++程序真的从main开始吗?99%的程序员都答错了
· winform 绘制太阳,地球,月球 运作规律
· 【硬核科普】Trae如何「偷看」你的代码?零基础破解AI编程运行原理
· 上周热点回顾(3.3-3.9)
· 超详细:普通电脑也行Windows部署deepseek R1训练数据并当服务器共享给他人
2018-11-10 Web性能优化的一些思考