[mysql]root用户登录mysql,输入密码后报错:Access denied for user 'root'@'localhost' |ERROR 1045 (28000): Access denied for user 'root'@'localhost' (using password: YES)
问题如下:
wangju@wangju-HP-348-G4:~$ mysql -u root -p
Enter password:
ERROR 1698 (28000): Access denied for user 'root'@'localhost'
解决办法: 分2步
- 配置mysql不用密码也能登录
- 重新配置mysql用户名密码
首先:配置mysql不用密码也能登录
step1:
使用find全局搜索mysql配置文件
root@wangju-HP-348-G4:/home/wangju# find / -name mysqld.cnf
/etc/mysql/mysql.conf.d/mysqld.cnf
step2:
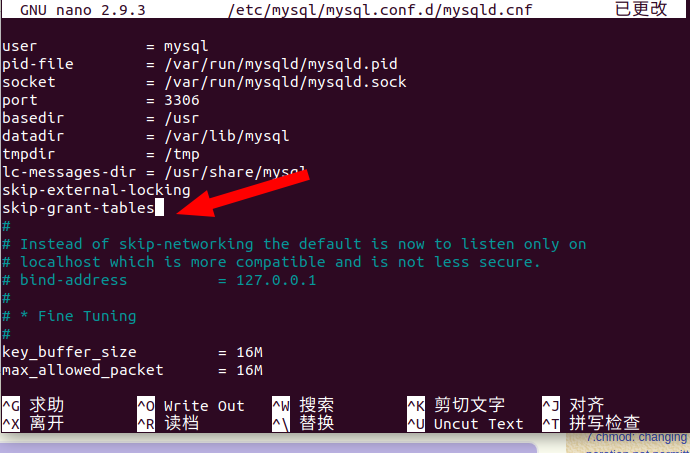
在mysql的配置文件[mysqld]中加入下面这句话:
skip-grant-tables <-- add here

作用:就是让你可以不用密码登录进去mysql。
step3:
保存修改,重新启动mysql
service mysql restart
step4:
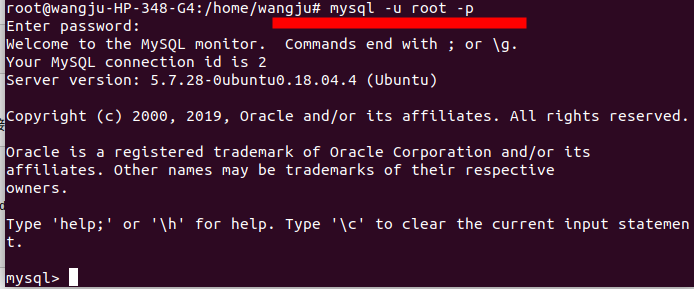
在终端上输入mysql -u root -p,遇见输入密码的提示直接回车即可进入mysql

然后:重新配置mysql用户名密码
step1:
进入mysql后分别执行下面三句话配置root用户密码
use mysql;   然后敲回车

update user set authentication_string=password("你的密码") where user="root";  然后敲回车

flush privileges;  然后敲回车
结果如下:
mysql> use mysql;
Reading table information for completion of table and column names
You can turn off this feature to get a quicker startup with -A

Database changed
mysql> update user set authentication_string=password("admin123456") where user="root";
Query OK, 1 row affected, 1 warning (0.02 sec)
Rows matched: 2  Changed: 1  Warnings: 1

mysql> flush privileges;
Query OK, 0 rows affected (0.01 sec)
然后输入quit,退出mysql。
step2:
重新进入到mysqld.cnf文件中去把刚开始加的skip-grant-tables这条语句给注释掉。

再返回终端输入mysql -u root -p,报错:
root@wangju-HP-348-G4:/home/wangju# mysql -u root -p
Enter password:
ERROR 1524 (HY000): Plugin 'auth_socket' is not loaded
再把刚才注释掉的skip-external-locking取消注释,然后重启mysql
执行下面的命令:
use mysql;
#切换数据库

select user,plugin from user;
#查询user表 user列,plugin列的值
#从查询结果可以看出plugin root的字段是auth_socket,把它改为mysql_native_password

update user set authentication_string=password("admin123456"),plugin='mysql_native_password' where user='root';
#更新user表plugin root
执行结果:mysql> use mysql;
Reading table information for completion of table and column names
You can turn off this feature to get a quicker startup with -A
Database changed
mysql> select user,plugin from user;
+------------------+-----------------------+
| user | plugin |
+------------------+-----------------------+
| root | auth_socket |
| mysql.session | mysql_native_password |
| mysql.sys | mysql_native_password |
| debian-sys-maint | mysql_native_password |
| root | mysql_native_password |
| tester | mysql_native_password |
+------------------+-----------------------+
6 rows in set (0.00 sec)
mysql> update user set authentication_string=password("admin123456"),plugin='mysql_native_password' where user='root';
Query OK, 1 row affected, 1 warning (0.00 sec)
Rows matched: 2 Changed: 1 Warnings: 1
再输入select user,plugin from user;回车,我们能看到root用户的字段改成功了。
mysql> select user,plugin from user;
+------------------+-----------------------+
| user             | plugin                |
+------------------+-----------------------+
| root             | mysql_native_password |
| mysql.session    | mysql_native_password |
| mysql.sys        | mysql_native_password |
| debian-sys-maint | mysql_native_password |
| root             | mysql_native_password |
| tester           | mysql_native_password |
+------------------+-----------------------+
6 rows in set (0.00 sec)
step3:
quit退出,再执行step3,重启mysql
结果:
再用mysql -u root -p,回车,输入密码之后,就可以登录成功了
参考文档:


