阿里云大数据利器之-使用sql实现流计算做实时展现业务( flume故障转移版 )
摘要: 实时业务处理的需求越来越多,也有各种处理方案,比如storm,spark等都可以。那以数据流的方向可以总结成数据源-数据搜集-缓存队列-实时处理计算-数据展现。本文就用阿里云产品简单实现了一个实时处理的方案。
实时业务处理的需求越来越多,也有各种处理方案,比如storm,spark等都可以。那以数据流的方向可以总结成数据源-数据搜集-缓存队列-实时处理计算-数据展现。本文就用阿里云产品简单实现了一个实时处理的方案。
按照数据流向
数据采集:flume(配置故障转移)
缓存队列:datahub
https://help.aliyun.com/product/53345.html?spm=5176.7618386.3.4.cigK2v
数据计算:阿里流计算(StreamCompute)
https://help.aliyun.com/video_list/54212.html?spm=5176.7618386.3.2.COgP6l
数据落地:rds(mysql)
https://help.aliyun.com/document_detail/26092.html?spm=5176.7841871.6.539.9FTjxU
二,搭建过程
1,flume配置搭建
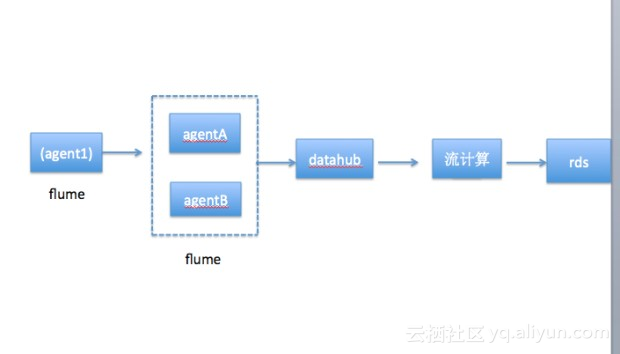
flume在数据采集的开源框架中还是比较常用的,但是在采集输送到datahub中有可能网络断了或者服务器挂了。那这里配置了故障转移,如图,其中sink1和sink2为上面架构中的agentA和agentB.把agentA和agentB分别部署在两台服务器上。
在搭建flume时需要安装DatahubSink插件,参考https://help.aliyun.com/knowledge_detail/42843.html
那看下配置文件
# Name the components on this agent
a1.sources = r1
a1.sinks = k1 k2
a1.channels = c1

# Describe/configure the source这里监控一个文件变化,写了一个定时脚本每秒插入一条
a1.sources.r1.type = exec
a1.sources.r1.channels=c1
a1.sources.r1.command=tail -F /usr/local/shangdan/test.txt

#define sinkgroups,在这里配置故障转移的sink组
a1.sinkgroups=g1
a1.sinkgroups.g1.sinks=k1 k2
a1.sinkgroups.g1.processor.type=failover
a1.sinkgroups.g1.processor.priority.k1=10//这里设置sink的优先级,优先发送到级别高的sink里
a1.sinkgroups.g1.processor.priority.k2=5
a1.sinkgroups.g1.processor.maxpenalty=10000

#define the sink 1,发送到agentA
a1.sinks.k1.type=avro
a1.sinks.k1.hostname=agentA的ip
a1.sinks.k1.port=5555

#define the sink 2 ,发送到agentB
a1.sinks.k2.type=avro
a1.sinks.k2.hostname=agentB的ip
a1.sinks.k2.port=5555


# Use a channel which buffers events in memory
a1.channels.c1.type = memory
a1.channels.c1.capacity = 1000
a1.channels.c1.transactionCapacity = 100

# Bind the source and sink to the channel
a1.sources.r1.channels = c1
a1.sinks.k1.channel = c1
a1.sinks.k2.channel=c1
~
agentA和agentB的配置文件出了ip地址不一样,其他完全一致,这里贴其中一个
A single-node Flume configuration for Datahub
# Name the components on this agent
a1.sources = r1
a1.sinks = k1
a1.channels = c1
# Describe/configure the source
a1.sources.r1.type = avro
a1.sources.r1.channels=c1
a1.sources.r1.bind= agentA的ip
a1.sources.r1.port= 5555
# Describe the sink
a1.sinks.k1.type = com.aliyun.datahub.flume.sink.DatahubSink
a1.sinks.k1.datahub.accessID = ******
a1.sinks.k1.datahub.accessKey = **********
a1.sinks.k1.datahub.endPoint = http://dh-cn-hangzhou.aliyun-inc.com
a1.sinks.k1.datahub.project = shangdantest
a1.sinks.k1.datahub.topic = databubtest
a1.sinks.k1.serializer = DELIMITED
a1.sinks.k1.serializer.delimiter = ,//这里配置数据的分隔符
a1.sinks.k1.serializer.fieldnames = line//配置数据的字段
a1.sinks.k1.batchSize = 1
a1.sinks.k1.serializer.charset = UTF-8
a1.sinks.k1.shard.number = 1
a1.sinks.k1.shard.maxTimeOut = 60
# Use a channel which buffers events in memory
a1.channels.c1.type = memory
a1.channels.c1.capacity = 1000
a1.channels.c1.transactionCapacity = 1000
# Bind the source and sink to the channel
a1.sources.r1.channels = c1
a1.sinks.k1.channel = c1
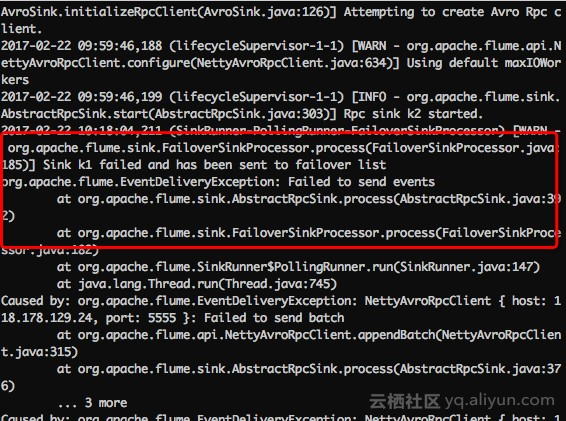
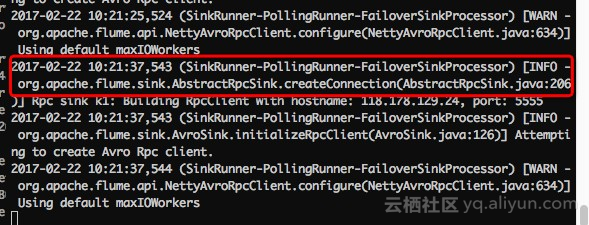
三台服务配置完成后启动flume(先启动agentA和agentB)预期结果是agent1发送数据到agentA(优先级高的),如果停止agentA服务,会自动转换发送到agentB。重启agegtA的服务后,再次切回到agentA。
如图:正常启动数据正常传输经过agent1-agentB-datahub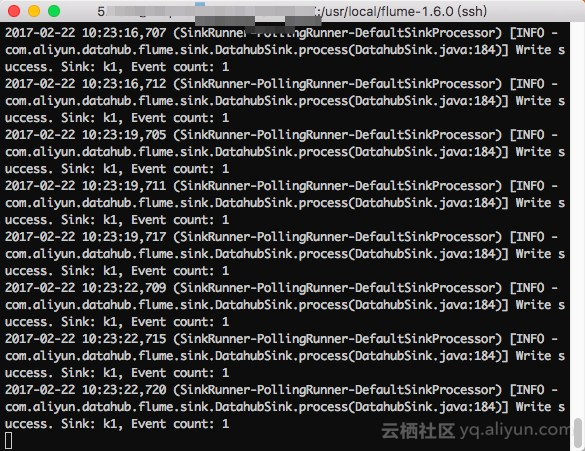
2,datahub创建,
在datahub控制台创建项目和topic,
设置分片和生命周期,具体方法见链接
https://help.aliyun.com/document_detail/47448.html?spm=5176.doc47443.6.584.UrSX1A;
datahub中看到有flume传过来的数据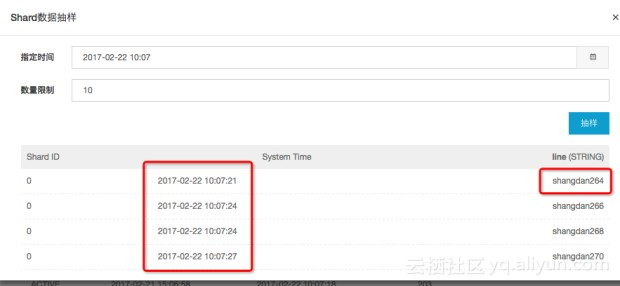
3,配置阿里流计算
登录阿里流计算控制台
注册数据源datahub/rds(也支持阿里其他类型数据源)-编写流计算脚本-调试-上线-启动
如图先注册数据源供脚本使用。必须要有数据来源表和数据结果表。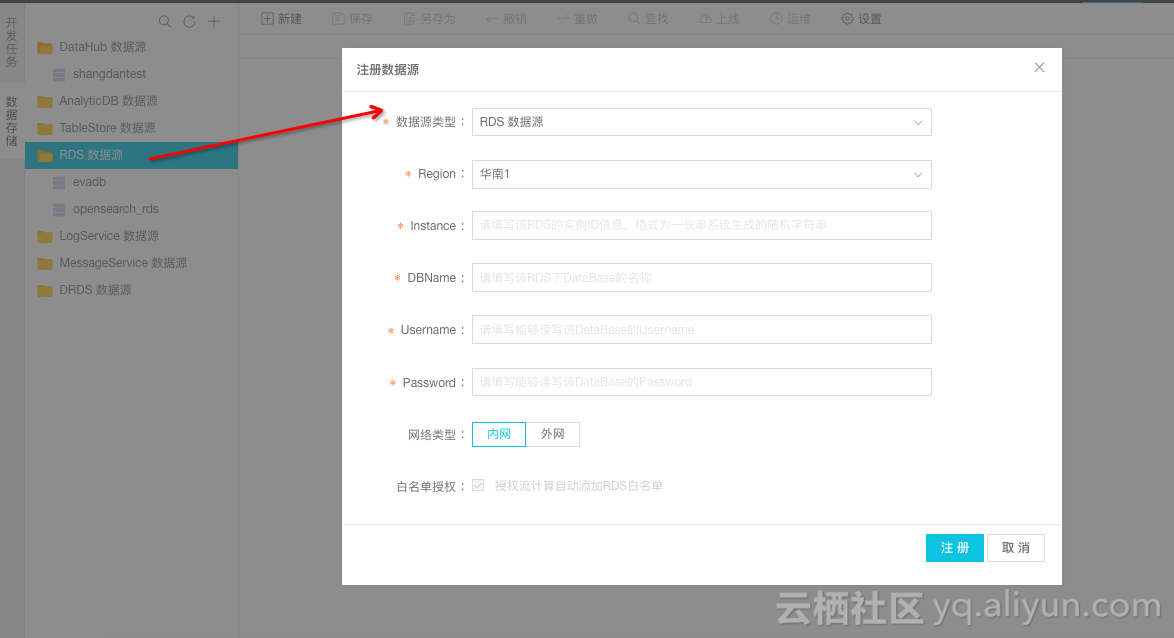
在编写脚本时,可以直接引用表,会自动插入表结构和配置信息,非常方便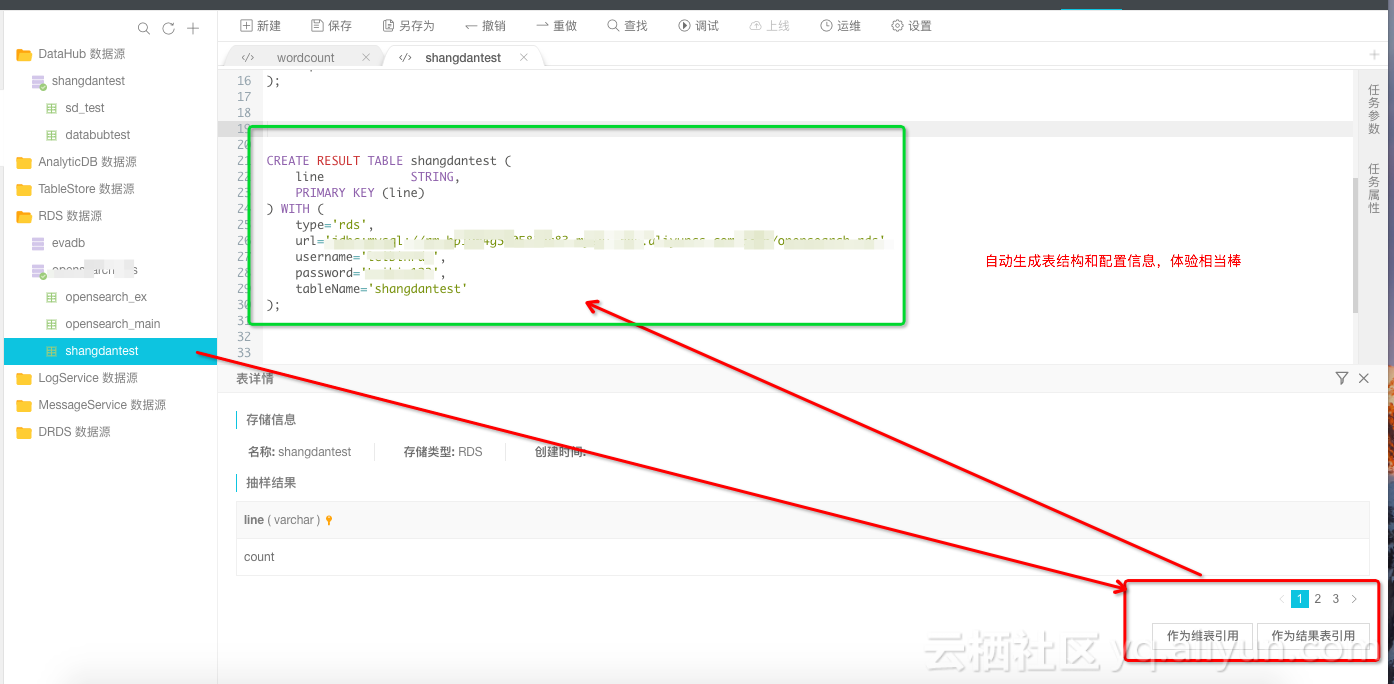
那开始编写脚本必须包括三部分
1,创建数据来源表,这里是datahub表
2,创建数据结果表,这里是rds表
3,将来源表数据写入结果表,并进行计算
如图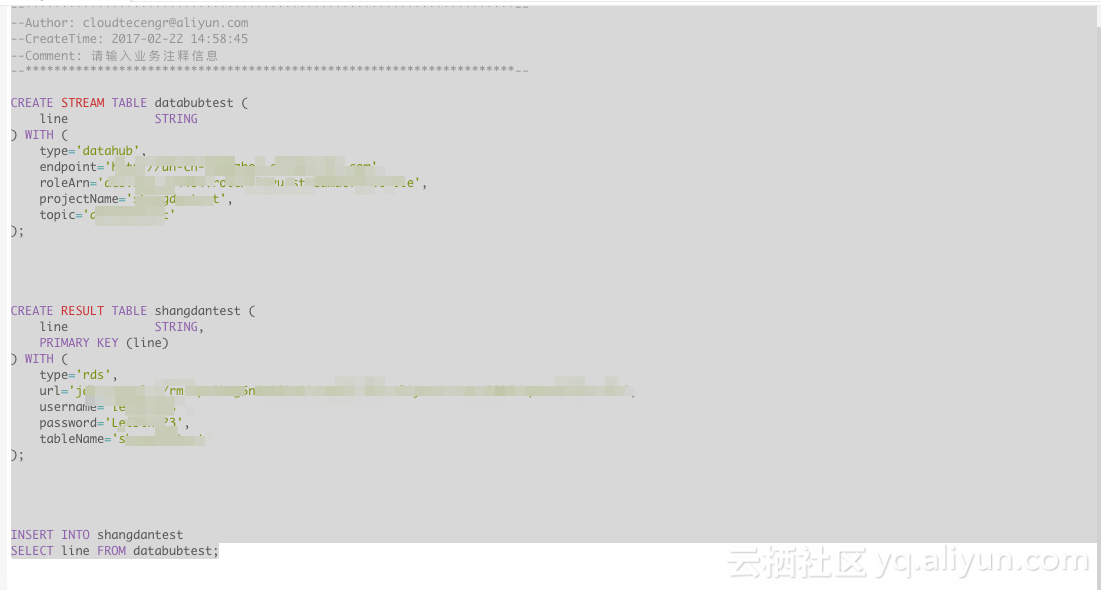
三、测试
脚本编写完毕,点击上方【调试】,可以自己先准备一些数据上传测试。也可以直接线上测试,点击上面【上线】,上线成功后在【运维】中能看到项目,点击启动,项目启动几秒就工作了如图:
然后可以看到监控状态,计算延迟,数据是否倾斜等指标,也有更详细的链路可以查看


