TFT-eSPI入门使用教程
一、准备资料
- 开发板:ESP32-S3
- 屏驱动是:ST7789_DRIVER
- 开发环境:VS Code + PlatformIO
注意:以上是我使用的环境,不一定需要和是使用的东西一样,这里主要是学习TFT-eSPI开源驱
二、获取TFT-eSPI
GitHub:https://github.com/Bodmer/TFT_eSPI
三、配置User_Setup.h文件
在路径TFT_eSPI/User_Setup.h,中找到User_Setup.h文件,进行以下设置
-
设置驱动程序
-
设置屏幕的驱动
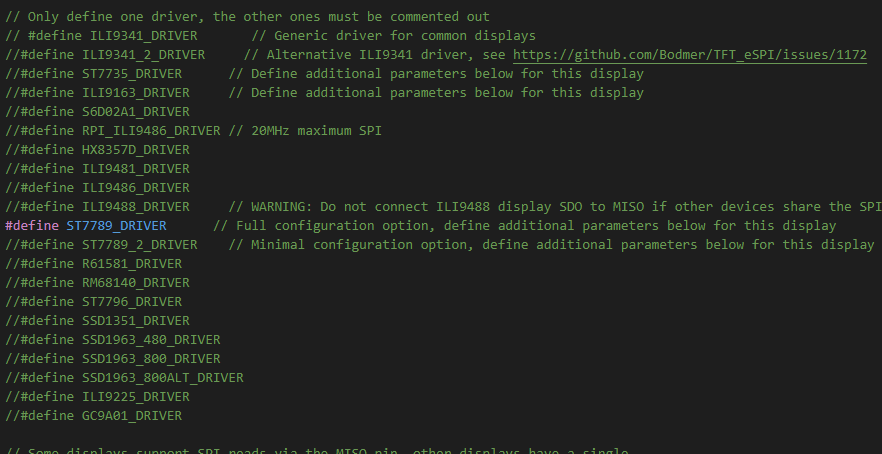
-
设置屏幕尺寸

-
颜色设置

注意:只有配置完成后发现颜色不对时才进行颜色配置,并且只能开启其中一个选项 -
设置屏幕尺寸

-
设置颜色反转

注意:根据需要开启
-
-
设置引脚
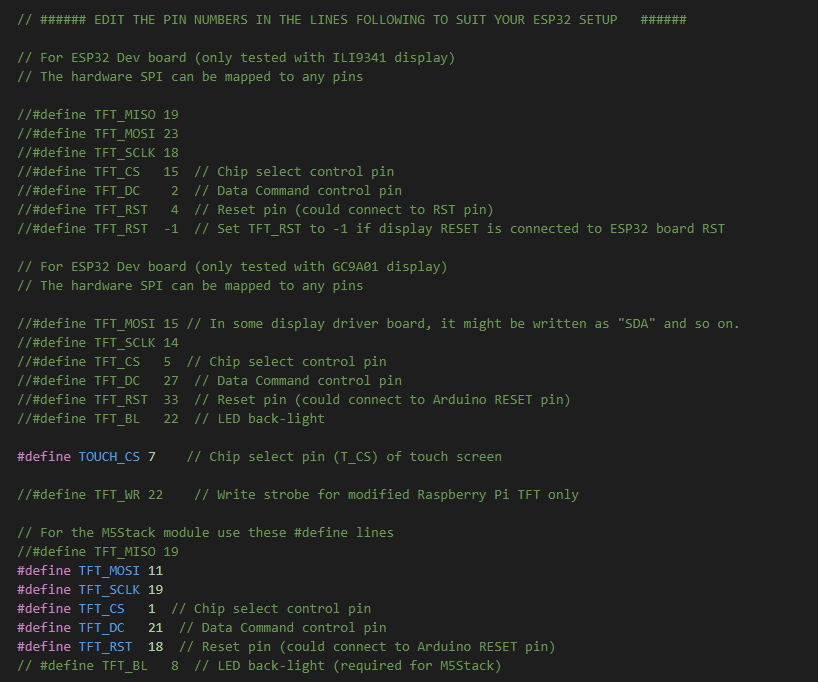
-
设置字体
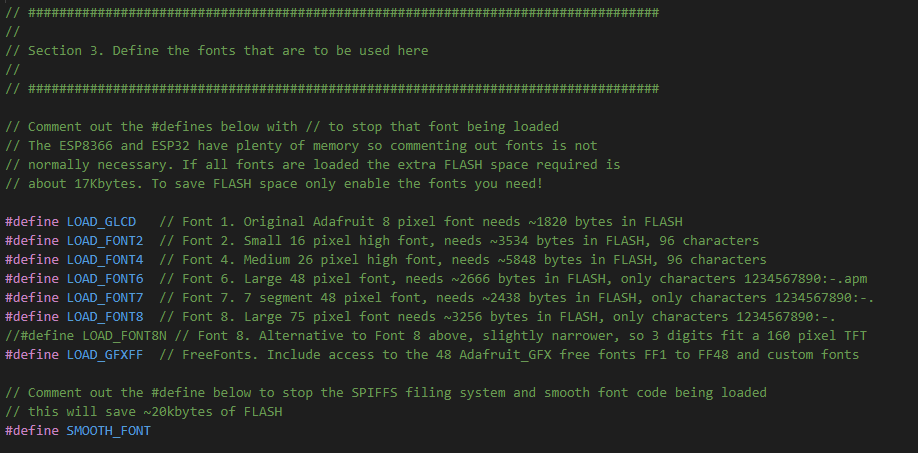
-
设置频率
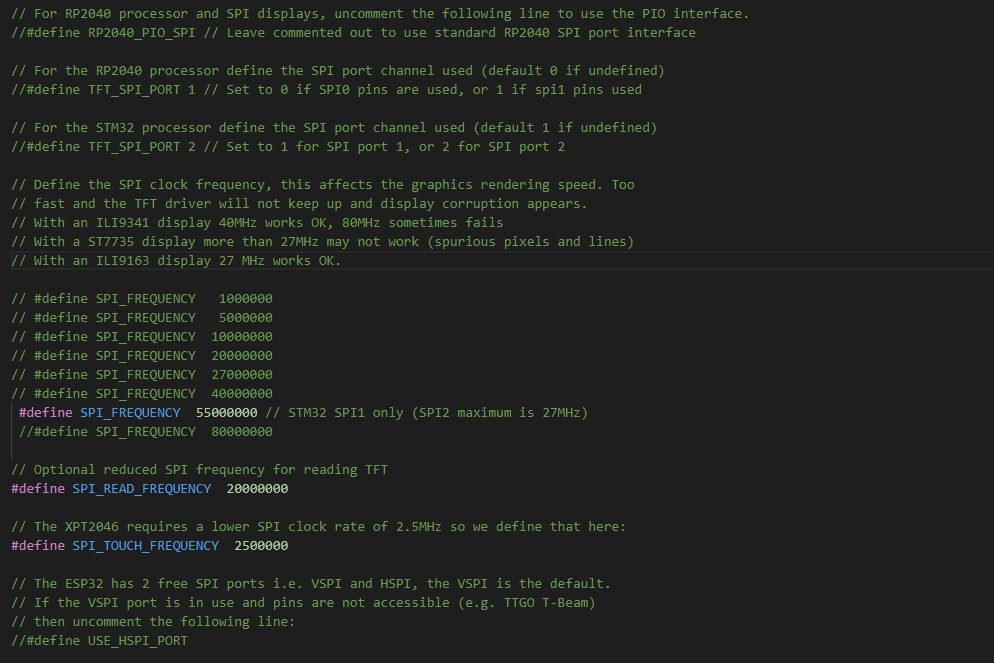
注意:设置频率时,不能超过引脚的最高频率
四、TFT_eSPI常用函数
-
创建对象
TFT_eSPI tft = TFT_eSPI() TFT_eSPI tft = TFT_eSPI(320,240) // 在创建对象的时候设置屏幕尺寸 -
初始化
void init(uint8_t tc = TAB_COLOUR) void begin(uint8_t tc = TAB_COLOUR) 注意:begin与init是相同的,可以在源码中看到,在begin直接调用了init函数。
-
清屏
void fillScreen(uint32_t color) // 用某一颜色填充屏幕 -
屏幕方向
void setRotation(uint8_t r); // 设置显示图像旋转方向,r可选参数为0、1、2、3 uint8_t getRotation(void) // 读取当前旋转角度 注意:0, 1, 2, 3 分别代表 0°、90°、180°、270°,4为镜像。
-
颜色转换
uint16_t color565(uint8_t red, uint8_t green, uint8_t blue) // 将8位红色、绿色和蓝色转换为16位 uint16_t color8to16(uint8_t color332) // 将8位颜色转换为16位 uint8_t color16to8(uint16_t color565) // 将16位颜色转换为8位 uint32_t color16to24(uint16_t color565) // 将16位颜色转换为24位 uint32_t color24to16(uint32_t color888) // 将24位颜色转换为16位 -
颜色反转
void invertDisplay(bool i) //反转所有显示颜色i = true反转,i = false正常 -
文字设置
/* 游标 */ void setCursor(int16_t x, int16_t y) // 设置tft.print()的光标 void setCursor(int16_t x, int16_t y, uint8_t font) // 设置tft.print()的光标和字号 int16_t getCursorX(void) // 读取当前光标x位置(随tft.print()移动) int16_t getCursorY(void) // 读取当前光标y位置 /* 设置字体颜色 */ void setTextColor(uint16_t color) // 仅设置字符的颜色 void setTextColor(uint16_t fgcolor, uint16_t bgcolor, bool bgfill = false) // 设置字符前景色和背景色,可选的背景填充以平滑字体 /* 设置字号 */ void setTextSize(uint8_t size) // 设置字符大小乘数(这会增加像素大小) void setTextWrap(bool wrapX, bool wrapY = false) // 打开/关闭TFT宽度和/或高度中文本的换行 /* 文本基准位置 */ void setTextDatum(uint8_t datum) // 设置文本基准位置(默认为左上角) uint8_t getTextDatum(void) // 获取文本基准位置 /* 设置背景填充,可以用作清除指定区域的显示 */ void setTextPadding(uint16_t x_width) // 以像素为单位设置文本填充(背景空白/重写)宽度 uint16_t getTextPadding(void) // 获取文本填充 注意:从上面函数可知,想要打印显示的文本,只需使用
tft.print()函数即可。 -
TFT_eSPI更多函数
我也查找了一下,网上好像没有 TFT_eSPI 的 API,开源的代码中好像也没提供,但是不要怕,我们可以从源码中的注释查看每个函数的说明。-
仔细观察便可发现,使用 TFT_eSPI 是都是直接使用 TFT_eSPI 的对象进行调用的,所以我们只要看查看 TFT_eSPI.h 和 TFT_eSPI.cpp 文件中的注释即可,如下图所示:
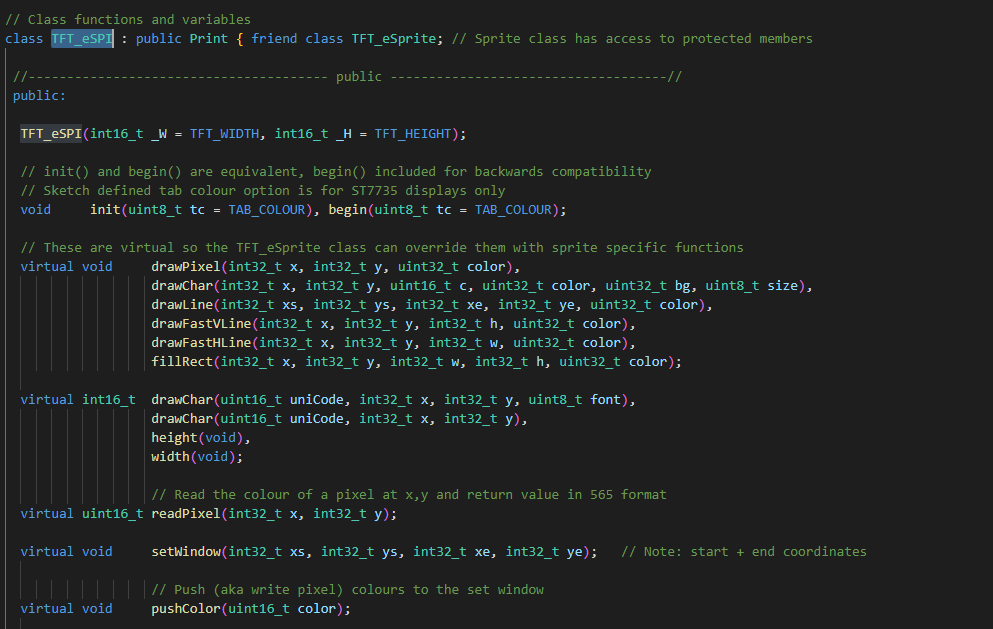
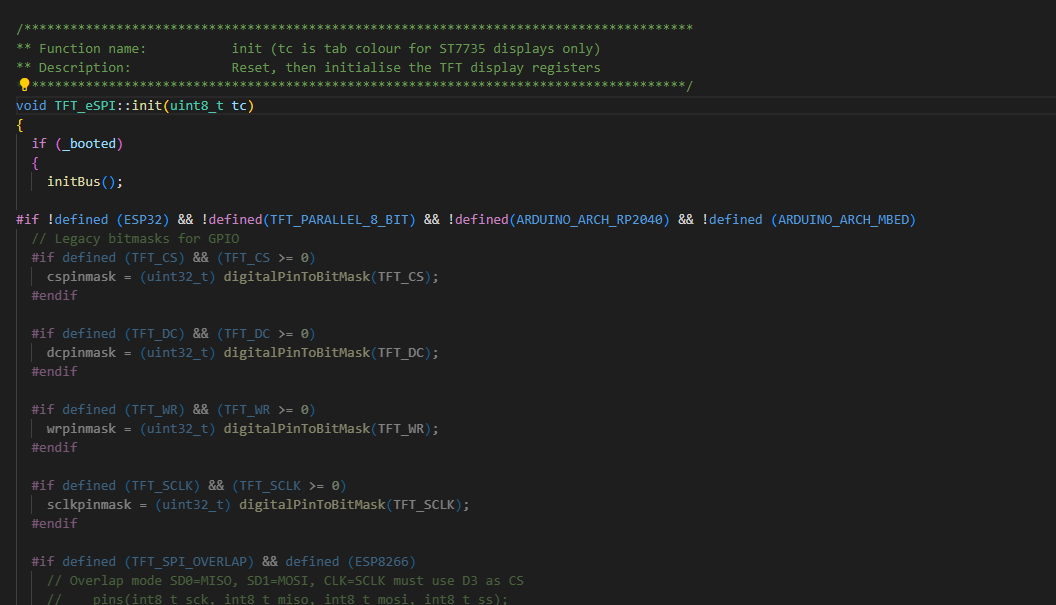
-
如果发现 TFT_eSPI 类中的函数不能满足自己的需求也不要慌,我们这在 Extensions 文件中查找是否有自己需要的功能,Extensions 文件中所提供的类都是直接或间接集成 TFT_eSPI 类写的。当然厉害的小伙伴也可以直接集成 TFT_eSPI 自己写需要的功能
-
-
重要文件
从 GitHub 上获取文件后,直接导入项目中会显得项目文件比较乱,比如 .git 等文件,在项目中用不上,所以只需要导入以下文件即可
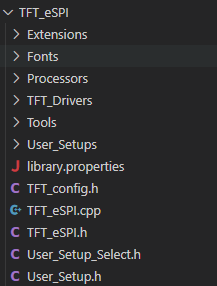
五、新建项目
-
新建项目
还不会使用 VSCode 创建项目的小伙伴看我之前的笔记使用VS Code 搭建 platformio 平台 -
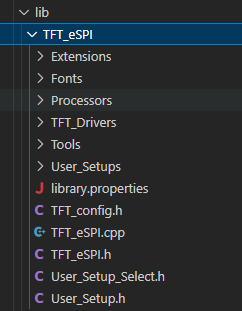
添加 TFT_eSPI 资源库
只需要在 lib 文件中导入 TFT_eSPI 资源即可,如下图所示:
-
在 c_cpp_properties.json 文件中的 includePath 和 path 中添加 TFT_eSPI 的路径
"c:/Users/Administrator/Desktop/TFT_test/lib/TFT_eSPI", 注意:自己的项目路径,我这里只是举例。
六、测试程序
main.cpp
#include <Arduino.h> #include <TFT_eSPI.h> #define TFT_GREY 0x5AEB // New colour TFT_eSPI tft = TFT_eSPI(); #define LCD_BL_PIN 6 // PWD 的 IO 引脚 #define LCD_BL_PWM_CHANNEL 0 // Channel 通道, 0 ~ 16,高速通道(0 ~ 7)由80MHz时钟驱动,低速通道(8 ~ 15)由 1MHz 时钟驱动 void displayes() { Serial.begin(115200); /* 清屏函数,将背景颜色设置为灰色 */ tft.fillScreen(TFT_GREY); /* 将“光标”设置在显示器的左上角(0,0),并选择字体2 */ tft.setCursor(0, 0, 2); /* 将字体颜色设置为白色,背景为黑色,将文本大小倍增设置为1 */ tft.setTextColor(TFT_WHITE,TFT_BLACK); tft.setTextSize(1); // We can now plot text on screen using the "print" class tft.println("Hello World!"); // Set the font colour to be yellow with no background, set to font 7 tft.setTextColor(TFT_YELLOW,TFT_BLACK); tft.setTextFont(7); tft.println(1234.56); // Set the font colour to be green with black background, set to font 4 tft.setTextColor(TFT_GREEN,TFT_BLACK); tft.setTextFont(4); tft.println("Groop"); tft.println("I implore thee,"); // Change to font 2 tft.setTextFont(2); tft.println("my foonting turlingdromes."); tft.println("And hooptiously drangle me"); tft.println("with crinkly bindlewurdles,"); // This next line is deliberately made too long for the display width to test // automatic text wrapping onto the next line tft.println("Or I will rend thee in the gobberwarts with my blurglecruncheon, see if I don't!"); // Test some print formatting functions float fnumber = 123.45; // Set the font colour to be blue with no background, set to font 4 tft.setTextColor(TFT_BLUE); tft.setTextFont(4); tft.print("Float = "); tft.println(fnumber); // Print floating point number tft.print("Binary = "); tft.println((int)fnumber, BIN); // Print as integer value in binary tft.print("Hexadecimal = "); tft.println((int)fnumber, HEX); // Print as integer number in Hexadecimal } void setup() { // /* 配置LED PWM通道属性,PWD通道为 0,频率为1KHz */ ledcSetup(LCD_BL_PWM_CHANNEL, 1000, 8); // /* 配置LED PWM通道属性 */ ledcAttachPin(LCD_BL_PIN, LCD_BL_PWM_CHANNEL); ledcWrite(LCD_BL_PWM_CHANNEL, (int)(1 * 255)); tft.init(); tft.setRotation(0); tft.invertDisplay(0); displayes(); } void loop() { // put your main code here, to run repeatedly: }
测试结果
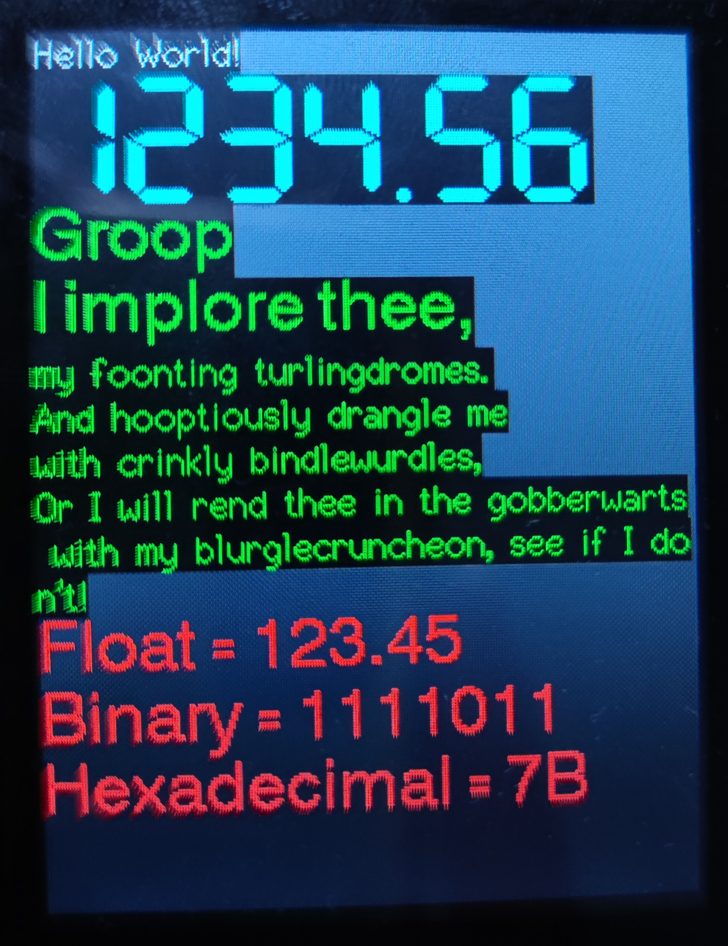
本文来自博客园,作者:浇筑菜鸟,转载请注明原文链接:https://www.cnblogs.com/jzcn/p/16687980.html
如本博客的内容侵犯了你的权益,请与以下地址联系,本人获知后,马上删除。同时本人深表歉意,并致以崇高的谢意! cn_jiaozhu@qq.com


【推荐】国内首个AI IDE,深度理解中文开发场景,立即下载体验Trae
【推荐】编程新体验,更懂你的AI,立即体验豆包MarsCode编程助手
【推荐】抖音旗下AI助手豆包,你的智能百科全书,全免费不限次数
【推荐】轻量又高性能的 SSH 工具 IShell:AI 加持,快人一步
· TypeScript + Deepseek 打造卜卦网站:技术与玄学的结合
· Manus的开源复刻OpenManus初探
· AI 智能体引爆开源社区「GitHub 热点速览」
· 三行代码完成国际化适配,妙~啊~
· .NET Core 中如何实现缓存的预热?
2021-09-13 QT之静态函数发送信号