

开源IT和资产管理软件
开源IT和资产管理软件
-
GLPI
GLPI是法语Gestionnaire libre de parc informatique的缩写,翻译过来应该是开源IT和资产管理软件,在法国等欧洲国家和地区应用广泛并取得了很好的用户口碑。
GLPI提供功能全面的IT资源管理接口,你可以用它来建立数据库全面管理IT的电脑,显示器,服务器,打印机,网络设备,电话,甚至硒鼓和墨盒等。
GLPI提供Helpdesk用户支持平台;联系人,合同,合作商,以及文档的管理;提供资源预定,知识库的管理等功能。
官网链接:
http://www.glpi.org.cn/
安装部署:
本次部署组件版本:
操作系统:CentOS Linux release 7.6.1810 (Core)
GLPI版本:glpi-9.5.3
Apache版本:Apache/2.4.6 (CentOS)
PHP版本:PHP 7.4.14 (cli) (built: Jan 5 2021 10:45:06) ( NTS )
Mariadb版本:10.5.8-MariaDB MariaDB Server
一、部署环境准备
systemctl disable --now NetworkManager

systemctl disable --firewalld

sed -i 's/SELINUX=enforcing/SELINUX=disabled/'

/etc/selinux/config

mv /etc/yum.repos.d//CentOS-Base.repo
/etc/yum.repos.d/CentOS-Base.repo.backup

wget  http://mirrors.aliyun.com/repo/Centos-7.repo -O /etc/yum.repos.d/CentOS-Base.repo


mv /etc/yum.repos.d/epel.repo /etc/yum.repos.d/epel.repo.backup

wget -O /etc/yum.repos.d/epel.repo http://mirrors.aliyun.com/repo/epel-7.repo

sed -i 's|^#baseurl=https://download.fedoraproject.org/pub|baseurl=https://mirrors.aliyun.com|' /etc/yum.repos.d/epel*
sed -i 's|^metalink|#metalink|' /etc/yum.repos.d/epel*

yum -y install epel-release

yum makecache
二、安装LAMP平台
2.1安装nginx,启动服务并验证
yum install -y nginx

systemctl enable --now nginx

#验证
nginx -v
nginx version: nginx/1.20.1
2.2 安装mariadb
2.2.1先将系统自带的旧版本mariadb的相关包移除
yum remove $(yum list installed | grep mariadb|awk '{print $1}') > /dev/null 2>&1
2.2.2创建mariadb最新版本的yum源
vim /etc/yum.repos.d/mariadb.repo
#
[mariadb]

name = MariaDB

baseurl = https://mirrors.tuna.tsinghua.edu.cn/mariadb/yum/10.5/centos7-amd64/

gpgkey =  https://mirrors.tuna.tsinghua.edu.cn/mariadb/yum/RPM-GPG-KEY-MariaDB

gpgcheck = 1
##
##

 yum list | grep mariadb

 yum -y install MariaDB-server MariaDB-client

systemctl enable mariadb

#安全初始化
mysql_secure_installation
2.2.4配置mariadb字符集
vim /etc/my.cnf 添加如下内容:
[mysqld]

init_connect='SET collation_connection = utf8_general_ci'

init_connect='SET NAMES utf8'

character-set-server=utf8

collation-server=utf8_general_ci

skip-character-set-client-handshake

[client]
default-character-set=utf8
#
#
 systemctl restart mariadb
2.3 安装php-7.4
因为自GLPI-9.5.0以后,php的版本要是是php-7.2+,而最新稳定版为7.4.14,是2021-01-07发布,因此采用该版本作为实验版本;
2.3.1 yum安装必要的存储库
 yum -y install https://rpms.remirepo.net/enterprise/remi-release-7.rpm

 yum clean all && yum makecache
2.3.2 启用存储库
#安装yum 工具包

yum -y install yum-utils

#启用php74仓库
yum-config-manager --enable remi-php74
2.3.3 安装php-7.4.14以及glpi需要的扩展包
yum -y install php php-cli php-fpm php-mysqlnd php-zip php-devel php-gd php-mcrypt php-mbstring php-curl php-xml php-pear php-bcmath php-json php-redis php-fileinfo php-mysqli php-session php-zlib php-simplexml php-intl php-domxml php-ldap php-openssl php-xmlrpc php-pecl-apcu php-pear-CAS php-opcache
systemctl start --now php-fpm.service
#查看php版本
php -v
#查看已安装的php模块
 php --modules
四、安装glpi-9.5.3(该版本为当前最新版)
wget -O /opt/https://github.com/glpi-project/glpi/releases/download/9.5.3/glpi-9.5.3.tgz

tar xf /opt/glpi-9.5.3.tgz -C /var/www/html

cd  /var/www/html

chown -R nginx:nginx /var/www/html
4.2 安装GLPI
在浏览器中输入nginx服务器地址
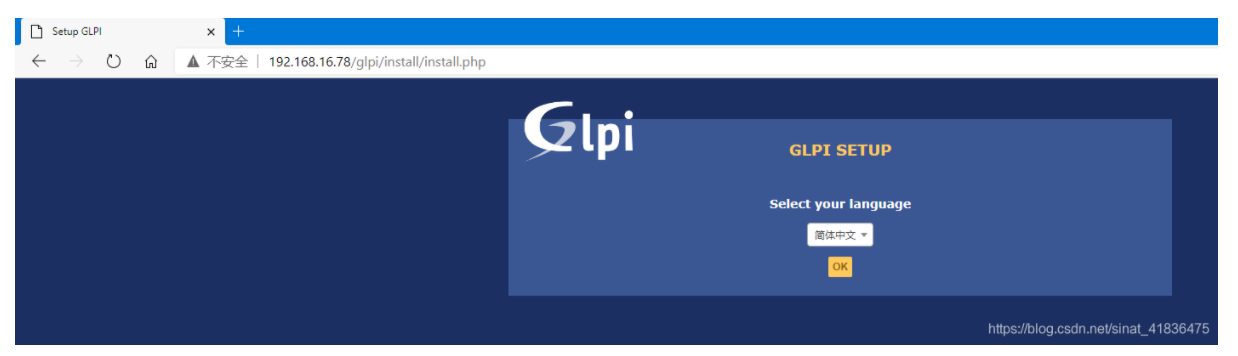
1)选择安装语言——简体中文
2)同意许可条款
3)开始安装(如果后续推出新版本,可选择升级即可
4)检查运行环境要求,若显示相关报错,如果缺少安装包就装包,如果提示权限不足就查权限是否设置正确;
5)连接数据库——输入服务器地址、用户名、密码
6)创建glpi数据库——其实也可以自己手动登录数据库中进行创建,这里使用页面进行创建
7)初始化数据库——时间可能稍微长一点
8)初始化完成,点击继续
9)数据收集,直接点击继续即可
10)直接点继续即可
11)记录重要登录信息,点击使用GLPI
12)登录GLPI管理控制台
14)安全设置
更改install.php 格式
mv /var/www/html/glpi/install/install.php{,.bac}
五、安装FusionInventory插件
FusionInventory概述:FusionInventory就像网关一样,收集代理发送的信息。它会在管理员不费吹灰之力的情况下创建或更新GLPI中的信息。目前,支持以下类别的设备:电脑网络设备印表机虚拟机Android手机
安装插件:设置——插件——查找插件目录
下载安装包——注:GLPI和FusionInventory的版本必须适配
参考:
https://blog.csdn.net/sinat_41836475/article/details/112647804
- Snipe-IT 开源资产管理系统
一、介绍 Snipe-IT 是一个免费的开源IT资产管理web应用程序。是一款基于Laravel5.4的免费的开源IT资产管理系统。Snipe-IT用于IT资产管理,IT部门可通过它能够跟踪谁拥有哪些笔记本电脑,何时购买、包含哪些软件许可证和可用的附件等。 主要的功能特性:可托管在云主机、强大的REST API、快速更新、保证APP和Platform的安全性、一键备份、LDAP登录/用户同步。
项目:https://github.com/snipe
部署环境:LNMP
git clone https://github.com/snipe/snipe-it snipe-it
安装过程参考:
https://blog.51cto.com/u_5001660/2435211
https://www.52pojie.cn/thread-1341424-1-1.html
总结全过跟wordpress一的
Snipe-IT需要生产key
本文来自博客园,作者:看啥,转载请注明原文链接:https://www.cnblogs.com/jykn92/p/15142376.html
