

SSH登录添加Google动态验证码
1.安装ntpdate用来定时校准时间
yum install ntpdate -y
安装完成以后,手动测试一下:sudo ntpdate 0.asia.pool.ntp.org
如果同步成功后,则会显示时间的差异
2.配置定时同步
每小时同步一次:
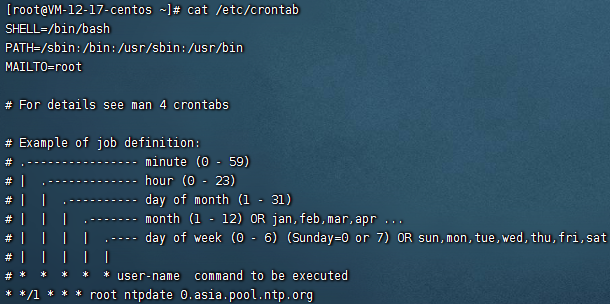
nano /etc/crontab
【执行对应命令就可以直接跳到第5步】
apt:
sudo apt-get install libpam-google-authenticator -y
yum:
sudo yum install epel-release -y
sudo yum install -y google-authenticator
3.安装一些必要的组件
yum install -y git make gcc libtool pam-devel
4.编译安装谷歌验证器
git clone https://github.com/google/google-authenticator-libpam
cd google-authenticator-libpam/
./bootstrap.sh
./configure
make
make install
ln -s /usr/local/lib/security/pam_google_authenticator.so /usr/lib64/security/
5.配置SSH服务
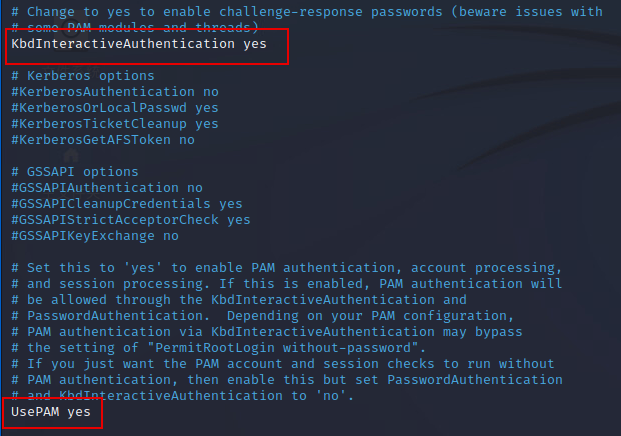
nano /etc/ssh/sshd_config
修改以下配置:
ChallengeResponseAuthentication yes
UsePAM yes
如果系统为kali则对应文件请确保这两项为yes即可
6.重启SSH服务后配置PAM
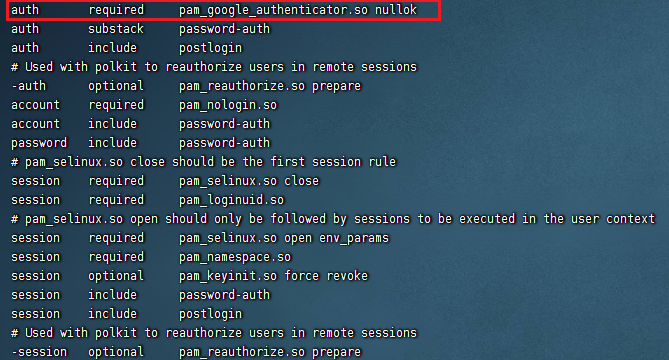
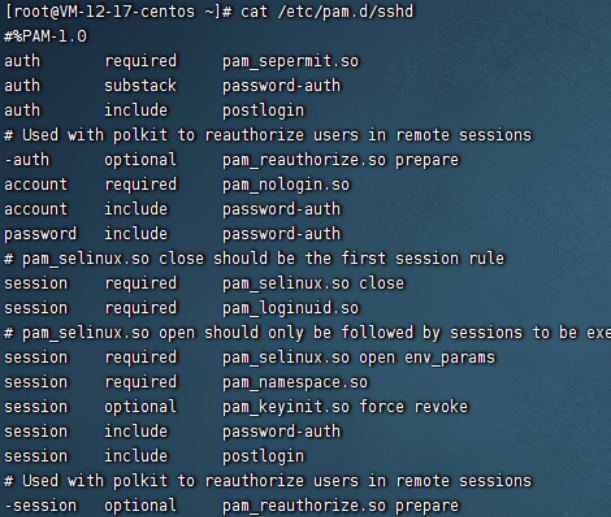
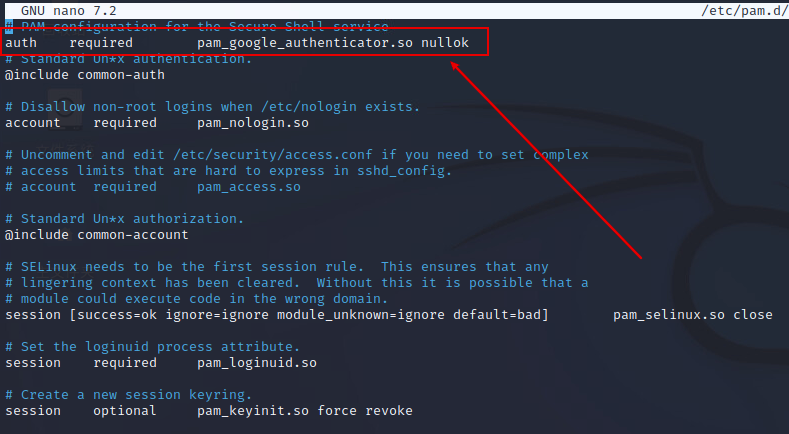
配置 /etc/pam.d/sshd 文件
nano /etc/pam.d/sshd
将那行改为如图所示的内容
重载并重启ssh进程
sudo systemctl restart sshd
sudo service ssh restart
原来的样子:
注:若是kali则对应文件直接添加一行即可,如图
7.启用谷歌验证器
google-authenticator
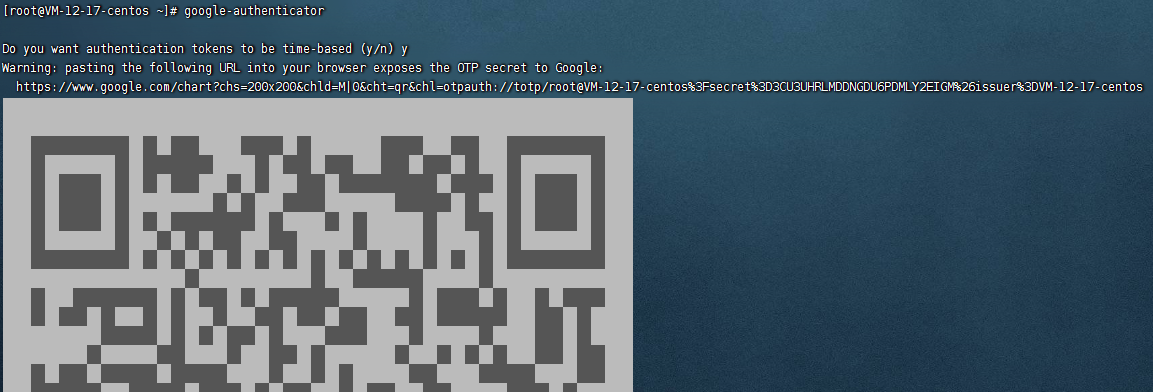
手机下载Google Authenticator后扫描生成的这个二维码
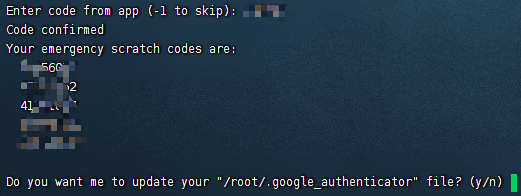
然后命令行中输入手机上的动态验证码
会生成5个紧急救援码,记得保留
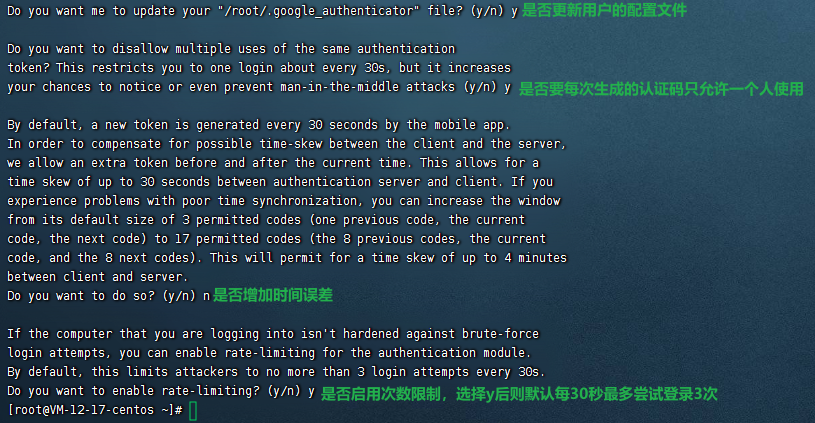
下面除了一个是否增加时间误差选择n以外,其余全部选择y
8.效果展示
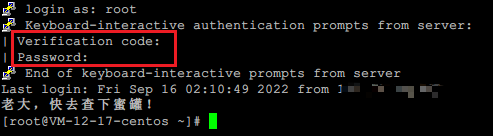
第一次是需要输入手机上的动态验证码,第二次是需要输入正常的ssh密码。遇到问题,请查看日志文件 /var/log/secure。
9.出问题重新配置
命令行输入 google-authenticator 后重新配置即可
本文作者:漫天残星,若转载请注明原文链接:https://www.cnblogs.com/juzi2333/p/16698544.html

【推荐】国内首个AI IDE,深度理解中文开发场景,立即下载体验Trae
【推荐】编程新体验,更懂你的AI,立即体验豆包MarsCode编程助手
【推荐】抖音旗下AI助手豆包,你的智能百科全书,全免费不限次数
【推荐】轻量又高性能的 SSH 工具 IShell:AI 加持,快人一步