

06Prism WPF 入门实战 - Log&控件库
1.概要
源码及PPT地址:https://github.com/JusterZhu/wemail
视频地址:https://www.bilibili.com/video/BV1KQ4y1C7tg?share\source=copy\web
本章分为以下几个部分来了解:
Part1 日志
Part1.1 全局异常捕捉
Part1.2 Dump
Part2 引入控件库
2.详细内容
Part1 日志
(1)Nuget安装:
Microsoft.Extensions.Logging.Abstractions
NLog.Extensions.Logging
NLog.Config
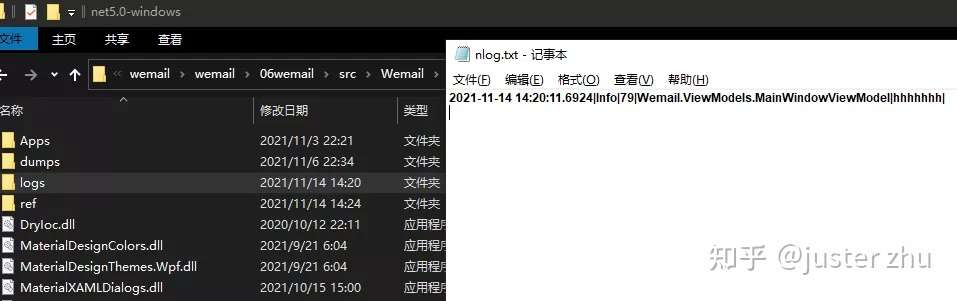
(2)配置Nlog.config
<?xml version="1.0" encoding="utf-8" ?>
<nlog xmlns="http://www.nlog-project.org/schemas/NLog.xsd"
      xmlns:xsi="http://www.w3.org/2001/XMLSchema-instance"
      autoReload="true"
      internalLogLevel="info"
      throwException ="true"
      internalLogFile="logs/internal-nlog.txt">    //日志的错误位置文件

  <variable name="logDirectory" value="${basedir}/logs"/>
  <!-- the targets to write to -->
  <targets async="true">
    <!-- write logs to file  -->
    <target xsi:type="File" name="allfile" fileName="${logDirectory}/nlog-all-${shortdate}.log"
            layout="${longdate}|${event-properties:item=EventId_Id}|${uppercase:${level}}|${logger}|${message} ${exception:format=tostring}" />

    <!-- another file log, only own logs. Uses some ASP.NET core renderers -->
    <target xsi:type="File" name="ownFile-web" fileName="${logDirectory}/nlog-own-${shortdate}.log"
            layout="${longdate}|${event-properties:item=EventId_Id}|${uppercase:${level}}|${logger}|${message} ${exception:format=tostring}" />
    <!--|url: ${aspnet-request-url}|action: ${aspnet-mvc-action}-->


    <!-- write log message to database -->
    <!--<target name="db"  xsi:type="AsyncWrapper" queueLimit="5000" overflowAction="Discard">-->
    <target type="Database" name="db" dbProvider="Npgsql.NpgsqlConnection,Npgsql"    《这里的数据库名字注意查找》connectionString="Database=backofficev2;Host=*;User Id=*;Password=*;pooling=false;port=*;">
      <commandText>  //使用postgresql 这里的字段要加双引号,timestamp要将string类型的转换为timestamp类型
        INSERT INTO "SystemLog"("Source","Level","Content","CreatedAt") VALUES(@source, @level, @content, TO_TIMESTAMP(@createdAt, 'YYYY-MM-DD HH24:MI:SS'));
      </commandText>
      <!-- database connection parameters  ${logger}  Server-->   <-数据库中要写的字段->
      <parameter name="@source" layout="Server" />
      <parameter name="@level" layout="${level}" />
      <parameter name="@content" layout="${message}" />
      <parameter name="@createdAt" layout="${date}" />
    </target>
    <!--</target>-->

  </targets>

  <!-- rules to map from logger name to target -->
  <rules>
   <!--TRACE,DEBUG,INFO,WARN,ERROR,FATAL警告级别控制-->
    <logger name="*" minlevel="Trace" writeTo="allfile" />
    <!--INFO,WARN,ERROR,FATAL-->
    <logger name="AiEcgWebApi.Controllers.*" minlevel="Warn" writeTo="db" />
    <!--DEBUG,INFO,WARN,ERROR,FATAL-->
    <logger name="*" minlevel="Debug" writeTo="ownFile-web" />
  </rules>
</nlog>
(3)App.cs注入log组件
protected override void RegisterTypes(IContainerRegistry containerRegistry)
{
    var factory = new NLog.Extensions.Logging.NLogLoggerFactory();
    Microsoft.Extensions.Logging.ILogger logger = factory.CreateLogger("NLog");
    containerRegistry.RegisterInstance(logger);
}
(4)ViewModel构造函数获取log引用
public MainWindowViewModel(ILogger logger)
{
     logger.LogInformation("hhhhhhh");
}
Part1.1 全局异常捕捉
出错的任务中未观察到的异常将触发异常呈报策略时出现。
/// <summary>
/// 应用程序启动时创建Shell
/// </summary>
/// <returns></returns>
protected override Window CreateShell()
{
    //UI线程未捕获异常处理事件
    this.DispatcherUnhandledException += OnDispatcherUnhandledException;
    //Task线程内未捕获异常处理事件
    TaskScheduler.UnobservedTaskException += OnUnobservedTaskException;
    //多线程异常
    AppDomain.CurrentDomain.UnhandledException += OnUnhandledException;
    return Container.Resolve<MainWindow>();
}
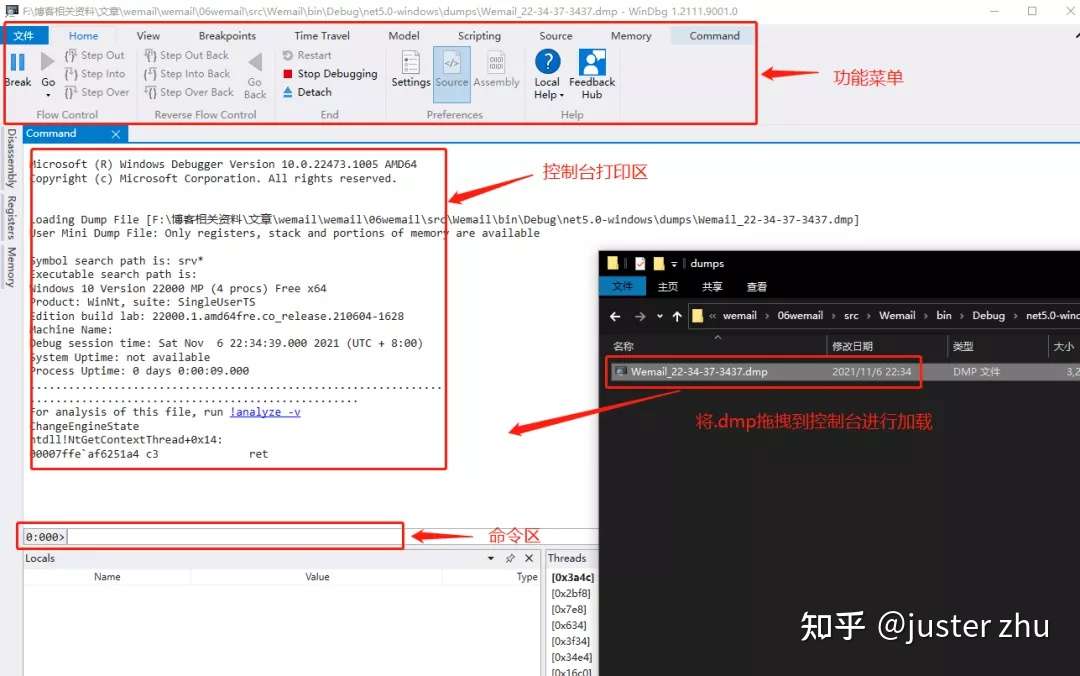
Part1.2 Dump
程序异常崩溃前使用此类为进程创建DUMP文件,之后可以使用WinDbg等工具进行分析。(该文件包含一些敏感信息切勿将公司项目中的dump文件公布到互联网上)
Windebug分析案例:
https://mp.weixin.qq.com/s/i6cJHTrIPweDIplzzfHnVQ
Windebug分析教程:
Windebug命令:

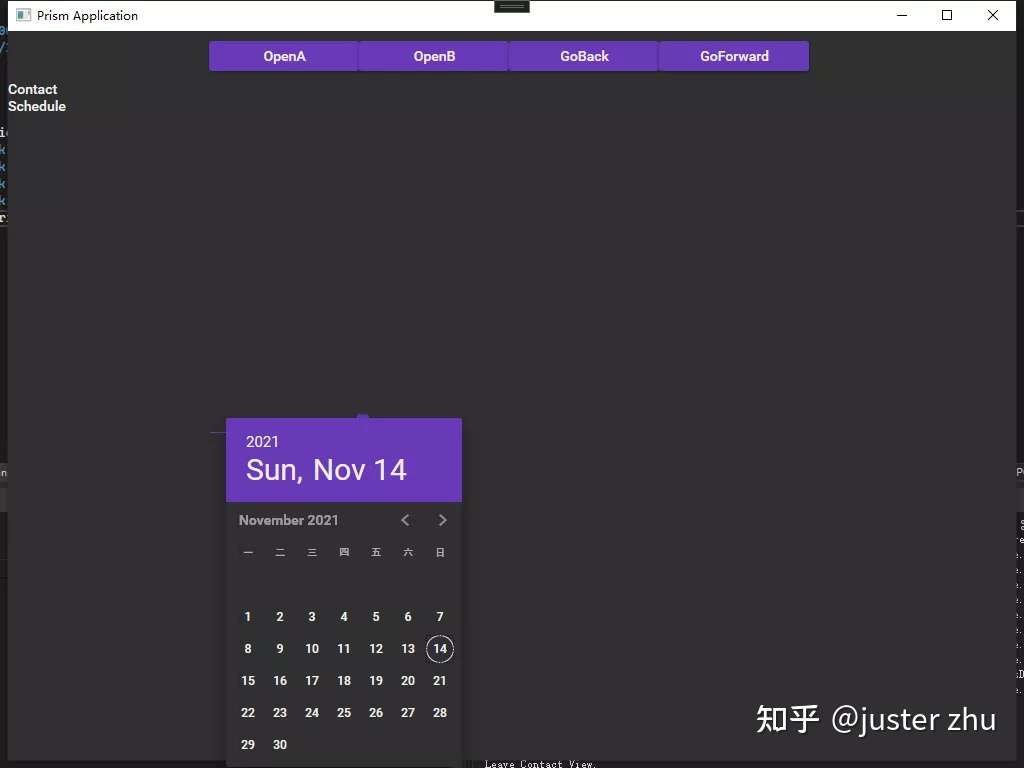
Part2 控件库
1.Nuget安装:MaterialDesignInXamlToolkit

2.选择主题
Light theme:<ResourceDictionary Source="pack://application:,,,/MaterialDesignThemes.Wpf;component/Themes/MaterialDesignTheme.Light.xaml" />
Dark theme:   <ResourceDictionary Source="pack://application:,,,/MaterialDesignThemes.Wpf;component/Themes/MaterialDesignTheme.Dark.xaml" />

3.App文件:
<Application x:Class="MaterialTest.App"
             xmlns="http://schemas.microsoft.com/winfx/2006/xaml/presentation"
             xmlns:x="http://schemas.microsoft.com/winfx/2006/xaml"
             StartupUri="MainWindow.xaml">
    <Application.Resources>
        <ResourceDictionary>
            <ResourceDictionary.MergedDictionaries>
                <ResourceDictionary Source="pack://application:,,,/MaterialDesignThemes.Wpf;component/Themes/MaterialDesignTheme.Light.xaml" />
                <ResourceDictionary Source="pack://application:,,,/MaterialDesignThemes.Wpf;component/Themes/MaterialDesignTheme.Defaults.xaml" />
                <ResourceDictionary Source="pack://application:,,,/MaterialDesignColors;component/Themes/Recommended/Primary/MaterialDesignColor.DeepPurple.xaml" />
                <ResourceDictionary Source="pack://application:,,,/MaterialDesignColors;component/Themes/Recommended/Accent/MaterialDesignColor.Lime.xaml" />
            </ResourceDictionary.MergedDictionaries>
        </ResourceDictionary>
    </Application.Resources>
</Application>

4.配置View
<Window [...]
        TextElement.Foreground="{DynamicResource MaterialDesignBody}"
        Background="{DynamicResource MaterialDesignPaper}"
        TextElement.FontWeight="Medium"
        TextElement.FontSize="14"
        FontFamily="pack://application:,,,/MaterialDesignThemes.Wpf;component/Resources/Roboto/#Roboto"
        [...] >


【推荐】国内首个AI IDE,深度理解中文开发场景,立即下载体验Trae
【推荐】编程新体验,更懂你的AI,立即体验豆包MarsCode编程助手
【推荐】抖音旗下AI助手豆包,你的智能百科全书,全免费不限次数
【推荐】轻量又高性能的 SSH 工具 IShell:AI 加持,快人一步
· 阿里最新开源QwQ-32B,效果媲美deepseek-r1满血版,部署成本又又又降低了!
· 单线程的Redis速度为什么快?
· SQL Server 2025 AI相关能力初探
· AI编程工具终极对决:字节Trae VS Cursor,谁才是开发者新宠?
· 展开说说关于C#中ORM框架的用法!