
Linux软件包管理
获取程序包的途径
1、官方网站获取
最稳妥的获取方式,除了提供最新的版本之外,一般都会提供各种历史版本。同时提供各种不同类型的包,并且有安装说明。
2、软件仓库获取
当安装软件的主机可以连接互联网或者有内网软件仓库时,这是最方便的获取方式。通常,红帽系列系统的软件仓库命令行访问工具为:yum;Debian系列系统的软件仓库命令行访问方式为:apt或apt-get。
国内几大常用开源镜像站:

http://mirrors.aliyun.com
http://mirrors.sohu.com
http://mirrors.sohu.com/centos/7.5.1804/os/x86_64/Packages/
http://mirrors.163.com

epel,提供centos众多额外的第三方包,可信任的第三方软件包组织:

http://mirrors.sohu.com/fedora-epel/7/x86_64/Packages/
https://mirrors.aliyun.com/epel/7/x86_64/Packages/m/
搜索引擎
http://www.rpmfind.net/linux/mageia/distrib/7/x86_64/media/core/release/lrzsz-0.12.21-22.mga7.x86_64.rpm
3、第三方平台获取
这里通常是一些开源社区,有官方社区,也有非官方社区。由于这些平台发布的软件包都是网友自己打包的,鱼龙混杂,如果是生产环境使用,不建议从这种途径获取,或者经过严格测试后再使用。
4、二次开发获取
这种就高大上了,一般都是有实力的公司,从官方获取源码包,再进行内部二次开发而来,是软件更适合于本公司的业务。
rpm命令安装
rpm命令:rpm [OPTIONS] [PACKAGE_FILE]
# i表示安装 v显示详细过程 h以进度条显示,每个#表示2%进度
安装软件的命令格式 rpm -ivh filename.rpm
升级软件的命令格式 rpm -Uvh filename.rpm
卸载软件的命令格式 rpm -e filename.rpm
查询软件描述信息的命令格式 rpm -qpi filename.rpm
列出软件文件信息的命令格式 rpm -qpl filename.rpm
查询文件属于哪个 RPM 的命令格式   rpm -qf filename

#案例

使用wget下载rpm包,具体网站可以到官网或者上面的开源站点进行下载

[root@junwu_server ~]# wget http://www.rpmfind.net/linux/openmandriva/cooker/repository/aarch64/main/release/nginx-1.23.3-4-omv2390.aarch64.rpm

[root@junwu_server ~]# rpm -ivh nginx-1.23.3-4-omv2390.aarch64.rpm
warning: nginx-1.23.3-4-omv2390.aarch64.rpm: Header V4 RSA/SHA256 Signature, key ID bf81de15: NOKEY
error: Failed dependencies:
ld-linux-aarch64.so.1()(64bit) is needed by nginx-1.23.3-4.aarch64
ld-linux-aarch64.so.1(GLIBC_2.17)(64bit) is needed by nginx-1.23.3-4.aarch64
libc.so.6(GLIBC_2.27)(64bit) is needed by nginx-1.23.3-4.aarch64
libc.so.6(GLIBC_2.28)(64bit) is needed by nginx-1.23.3-4.aarch64
libc.so.6(GLIBC_2.32)(64bit) is needed by nginx-1.23.3-4.aarch64
libc.so.6(GLIBC_2.33)(64bit) is needed by nginx-1.23.3-4.aarch64
libc.so.6(GLIBC_2.34)(64bit) is needed by nginx-1.23.3-4.aarch64
libcrypt.so.1(XCRYPT_2.0)(64bit) is needed by nginx-1.23.3-4.aarch64
libcrypto.so.3()(64bit) is needed by nginx-1.23.3-4.aarch64
libcrypto.so.3(OPENSSL_3.0.0)(64bit) is needed by nginx-1.23.3-4.aarch64
libpcre2-8.so.0()(64bit) is needed by nginx-1.23.3-4.aarch64
libssl.so.3()(64bit) is needed by nginx-1.23.3-4.aarch64
libssl.so.3(OPENSSL_3.0.0)(64bit) is needed by nginx-1.23.3-4.aarch64
rpmlib(PayloadIsZstd) <= 5.4.18-1 is needed by nginx-1.23.3-4.aarch64
www-user is needed by nginx-1.23.3-4.aarch64
可以看到使用rpm包格式安装需要解决依赖关系,这对新手来说并不友好,所以不推荐
yum工具安装(yum其实也是一个rpm软件)
[root@junwu_server ~]# rpm -qa yum
yum-3.4.3-168.el7.centos.noarch

#使用yum的前提是需要配置好yum仓库,在/etc/yum.repos.d/文件下的repo文件

默认使用的仓库文件,是用国外的站点进行下载,速度较慢,所以我们要修改为国内yum源

[root@junwu_server yum.repos.d]# ls
CentOS-Base.repo CentOS-Debuginfo.repo CentOS-Sources.repo epel.repo
CentOS-Base.repo.backup CentOS-fasttrack.repo CentOS-Vault.repo
CentOS-CR.repo CentOS-Media.repo CentOS-x86_64-kernel.repo

[root@junwu_server yum.repos.d]# cat CentOS-Base.repo
# CentOS-Base.repo
#
# The mirror system uses the connecting IP address of the client and the
# update status of each mirror to pick mirrors that are updated to and
# geographically close to the client. You should use this for CentOS updates
# unless you are manually picking other mirrors.
#
# If the mirrorlist= does not work for you, as a fall back you can try the
# remarked out baseurl= line instead.
#
#

[base]
name=CentOS-$releasever - Base
mirrorlist=http://mirrorlist.centos.org/?release=$releasever&arch=$basearch&repo=os&infra=$infra
#baseurl=http://mirror.centos.org/centos/$releasever/os/$basearch/
gpgcheck=1
gpgkey=file:///etc/pki/rpm-gpg/RPM-GPG-KEY-CentOS-7

#released updates
[updates]
name=CentOS-$releasever - Updates
mirrorlist=http://mirrorlist.centos.org/?release=$releasever&arch=$basearch&repo=updates&infra=$infra
#baseurl=http://mirror.centos.org/centos/$releasever/updates/$basearch/
gpgcheck=1
gpgkey=file:///etc/pki/rpm-gpg/RPM-GPG-KEY-CentOS-7

#additional packages that may be useful
[extras]
name=CentOS-$releasever - Extras
mirrorlist=http://mirrorlist.centos.org/?release=$releasever&arch=$basearch&repo=extras&infra=$infra
#baseurl=http://mirror.centos.org/centos/$releasever/extras/$basearch/
gpgcheck=1
gpgkey=file:///etc/pki/rpm-gpg/RPM-GPG-KEY-CentOS-7

#additional packages that extend functionality of existing packages
[centosplus]
name=CentOS-$releasever - Plus
mirrorlist=http://mirrorlist.centos.org/?release=$releasever&arch=$basearch&repo=centosplus&infra=$infra
#baseurl=http://mirror.centos.org/centos/$releasever/centosplus/$basearch/
gpgcheck=1
enabled=0
gpgkey=file:///etc/pki/rpm-gpg/RPM-GPG-KEY-CentOS-7

使用国内yum源
配置方法(转载centos镜像_centos下载地址_centos安装教程-阿里巴巴开源镜像站 (aliyun.com))
通知:CentOS 8操作系统版本结束了生命周期(EOL),Linux社区已不再维护该操作系统版本。建议您切换到Anolis或Alinux。如果您的业务过渡期仍需要使用CentOS 8系统中的一些安装包,请根据下文切换CentOS 8的源。
1. 备份
mv /etc/yum.repos.d/CentOS-Base.repo /etc/yum.repos.d/CentOS-Base.repo.backup
2. 下载新的 CentOS-Base.repo 到 /etc/yum.repos.d/
centos8(centos8官方源已下线,建议切换centos-vault源)
wget -O /etc/yum.repos.d/CentOS-Base.repo https://mirrors.aliyun.com/repo/Centos-vault-8.5.2111.repo

或者

curl -o /etc/yum.repos.d/CentOS-Base.repo https://mirrors.aliyun.com/repo/Centos-vault-8.5.2111.repo

centos6(centos6官方源已下线,建议切换centos-vault源)

wget -O /etc/yum.repos.d/CentOS-Base.repo https://mirrors.aliyun.com/repo/Centos-vault-6.10.repo

或者

curl -o /etc/yum.repos.d/CentOS-Base.repo https://mirrors.aliyun.com/repo/Centos-vault-6.10.repo

CentOS 7

wget -O /etc/yum.repos.d/CentOS-Base.repo https://mirrors.aliyun.com/repo/Centos-7.repo

或者

curl -o /etc/yum.repos.d/CentOS-Base.repo https://mirrors.aliyun.com/repo/Centos-7.repo
3. 运行 yum makecache 生成缓存
4. 其他
非阿里云ECS用户会出现 Couldn't resolve host 'mirrors.cloud.aliyuncs.com' 信息,不影响使用。用户也可自行修改相关配置: eg:
sed -i -e '/mirrors.cloud.aliyuncs.com/d' -e '/mirrors.aliyuncs.com/d' /etc/yum.repos.d/CentOS-Base.repo
源代码编译安装,俗称编译三部曲
前提条件:准备好开发工具、开发环境以及软件包
开发工具:gcc make等
开发组件:
yum groupinstall "Development Tools"
yum groupinstall "Server Platform Development"
第一曲,执行脚本configure文件
./configure --prefix=软件安装路径
第二曲,执行make命令
make是Linux开发套件里面自动化编译的一个控制程序,他通过借助 Makefile 里面编写的编译规范进行自动化的调用 gcc 、ld 以及运行某些需要的程序进行编译的程序。一般情况下,他所使用的 Makefile 控制代码,由 configure 这个设置脚本根据给定的参数和系统环境生成。

make这一步就是编译,大多数的源代码包都经过这一步进行编译(当然有些perl或python编写的软件需要调用perl或python来进行编译)

make 的作用是开始进行源代码编译,以及一些功能的提供,这些功能由他的 Makefile 设置文件提供相关的功能,比如 make install 一般表示进行安装,make uninstall 是卸载,不加参数就是默认的进行源代码编译。
第三曲:开始安装 make install
开始安装软件到./configure指定的安装路径
源码编译安装nginx
1、准备编译环境

[root@junwu_server yum.repos.d]# yum groupinstall "Development Tools"

2、到官网获取nginx源码包

[root@junwu_server ~]# wget https://nginx.org/download/nginx-1.23.3.tar.gz

3、解压缩nginx源码包

[root@junwu_server ~]# tar -zxvf nginx-1.23.3.tar.gz

4、进入源码目录

[root@junwu_server ~]# cd nginx-1.23.3

5、开始编译三部曲,--prefix指定编译目录

[root@junwu_server nginx-1.23.3]# ./configure --prefix=/opt/nginx1.23.3/

此时编译后会多出一个Makefile文件

6、继续在当前目录下执行make,调用gcc等编译工具

[root@junwu_server nginx-1.23.3]# make

7、开始安装

[root@junwu_server nginx-1.23.3]# make install

8、安装后启动nginx文件,找到二进制程序,以绝对路径执行

[root@junwu_server nginx-1.23.3]# cd /opt/nginx1.23.3/
[root@junwu_server nginx1.23.3]# ls
conf html logs sbin
[root@junwu_server nginx1.23.3]# /opt/nginx1.23.3/sbin/nginx

9、手动配置环境变量,否则必须使用绝对路径才能使用nginx

编辑文件/etc/profile.d/nginx.sh

写入export PATH=/opt/nginx1.23.3/sbin:$PATH

10、重新登录机器

logout

11、检查环境变量

[root@junwu_server ~]# cat /etc/profile.d/nginx.sh
export PATH=/opt/nginx1.23.3/sbin:$PATH

12、启动nginx,访问页面

[root@junwu_server ~]# systemctl start nginx
Job for nginx.service failed because the control process exited with error code. See "systemctl status nginx.service" and "journalctl -xe" for details.
报错
检查发现80端口被占用
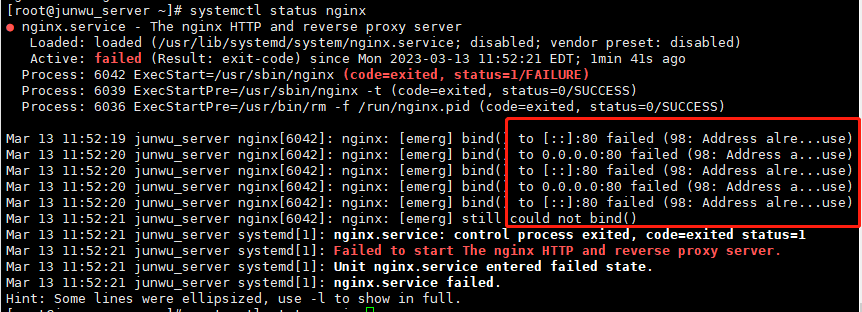

停止http服务,重启nginx
[root@junwu_server ~]# systemctl stop httpd
[root@junwu_server ~]# netstat -tunlp |grep 80
[root@junwu_server ~]# systemctl start nginx
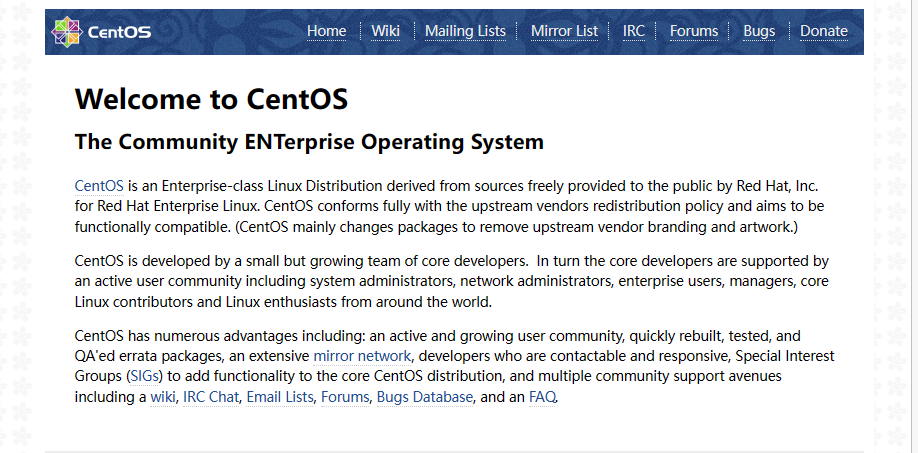
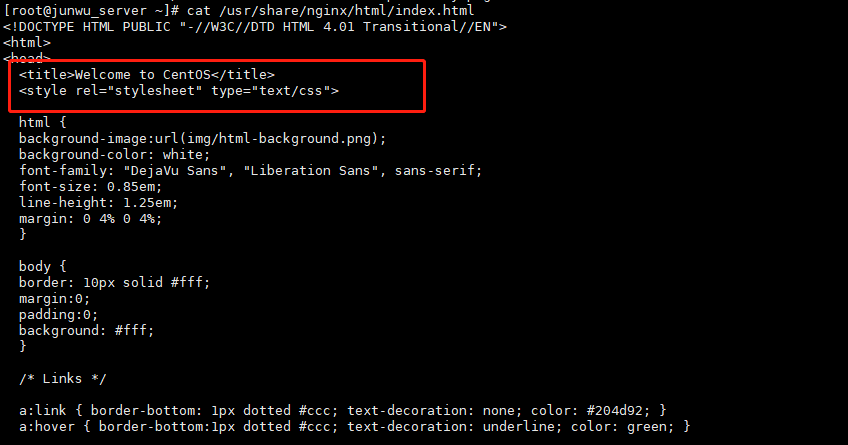
发现访问到centos页面,这是什么问题呢
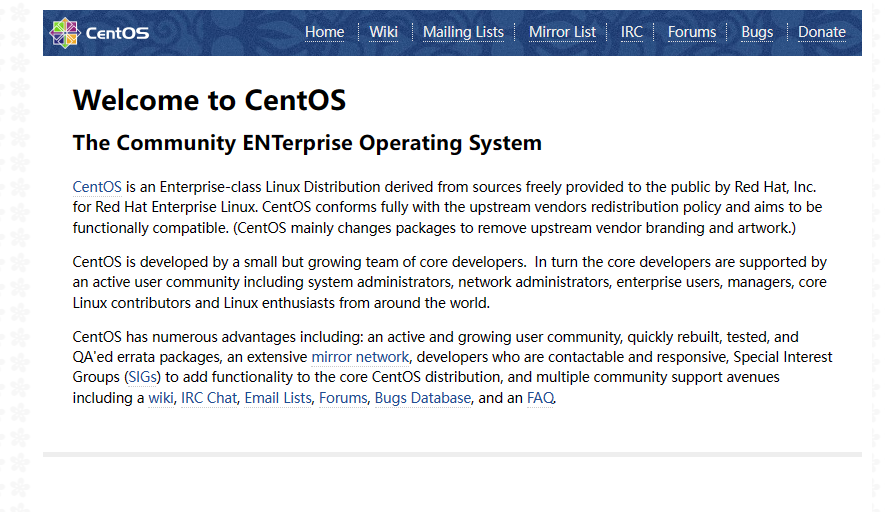
原因在于nginx配置文件下指定的html页面就是如此,其实这不是什么错误,不影响使用nginx
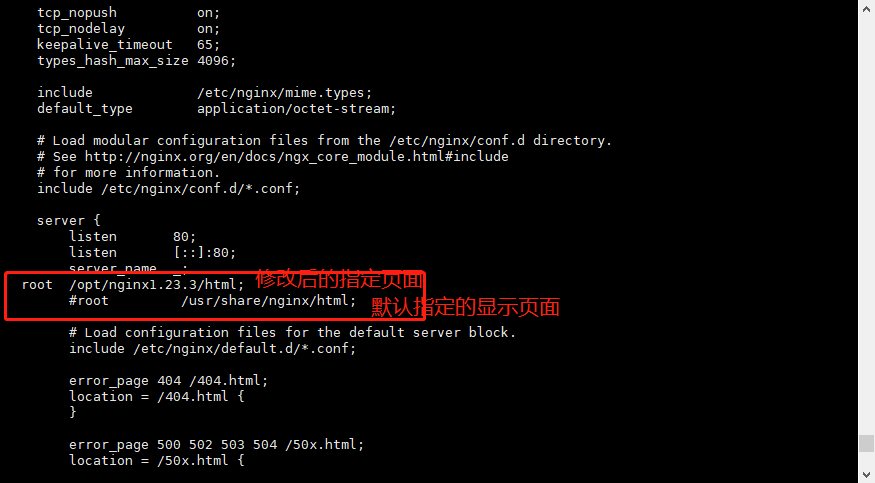
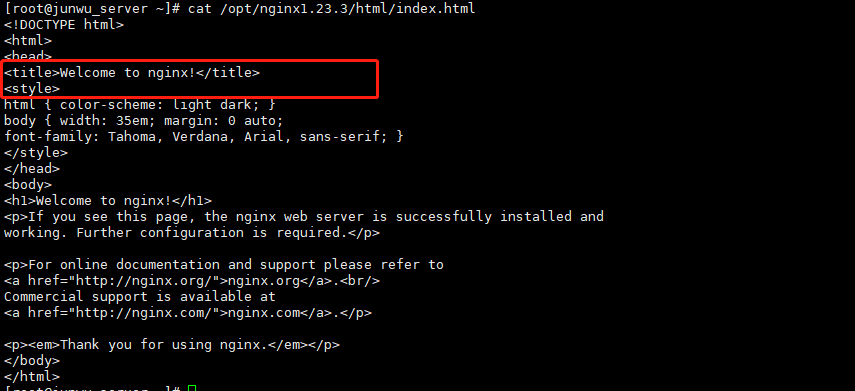
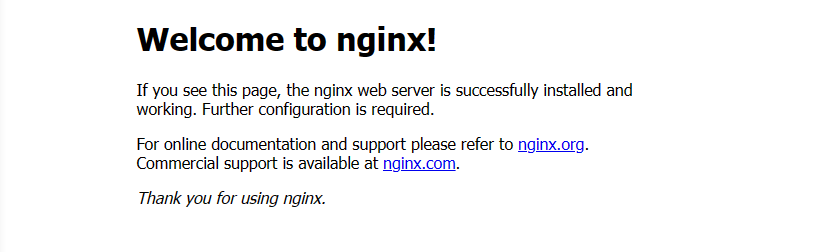
修改后可以访问页面了

 浙公网安备 33010602011771号