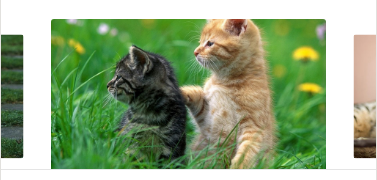
Taro -- Swiper的图片由小变大3d轮播效果
Swiper的图片由小变大3d轮播效果

this.state = ({
      nowIdx:0,
      swiperH:'',
      imgList:[
        {img:'../../assets/12.jpg'},
        {img:'../../assets/23.jpg'},
        {img:'../../assets/34.jpg'}
      ],
})
 //获取swiper高度
  getHeight = (e) => {
    var winWid = Taro.getSystemInfoSync().windowWidth - 2*50;//获取当前屏幕的宽度
    var imgh = e.detail.height;//图片高度
    var imgw = e.detail.width;//图片宽度
    console.log(imgh,imgw);
    var sH = winWid * imgh / imgw + "px"
    this.setState({
        swiperH: sH//设置高度
    },()=>{
      console.log(this.state.swiperH)
    })
  }
  //swiper滑动事件
  swiperChange = (e) => {
    this.setState({
        nowIdx: e.detail.current
    })
  }
<Swiper
        previousMargin='50px'
        nextMargin='50px'
        onChange={this.swiperChange}
        className='test-h'
        circular
        interval='2000'
        autoplay>
        {this.state.imgList.map((list, index) => {
           return <SwiperItem>
              <View className='demo-text-1'>
                <Image onLoad={this.getHeight} style={`height:${this.state.swiperH}`} className={`swiper-img ${this.state.nowIdx === index ? "swiper-active" : ""}`} src={list.img}></Image>
              </View>
            </SwiperItem>
         })}
</Swiper>
swiper {
    padding-top: 30px;
 }
.swiper-img {
    width: 100%;
    display: block;
    transform: scale(0.8);
    transition: all 0.3s ease;
    border-radius: 6px;
}
.swiper-img.swiper-active {
    transform: scale(1);  //放大缩放的效果
 }
(1) previousMargin 和 nextMargin 表示前边距和后边距
(2) onChange={this.swiperChange} 就是Swiper的切换事件
(4) getHeight 是获取图片的宽高,然后再去设置高度这样才能让图片等比缩放


