基于pybind11实现Python调用c++编写的CV算法--下 (Linux+Cmake)
C++ 是一种编译型(compiled)语言,设计重点是性能、效率和使用灵活性,偏向于系统编程、嵌入式、资源受限的软件和系统。
Python是一种解释型(interpreted)语言,同样也支持不同的编程范式。Python 内置了常用数据结构(str, tuple, list, dict),简洁的语法、丰富的内置库(os,sys,urllib,...)和三方库(numpy, tf, torch ...),功能强大。最为重要的是和能够和多种服务(flask…)和tensorflow、pytorch等无缝联合,从而方便将你的算法开放出去。
一方面,我们需要编译型语言(C++)性能;一方面,也需要解释型语言(Python)的灵活。这时,pybind11 可以用作 C++ 和 Python 之间沟通的桥梁。
Pybind11 是一个轻量级只包含头文件的库,用于 Python 和 C++ 之间接口转换,可以为现有的 C++ 代码创建 Python 接口绑定。Pybind11 通过 C++ 编译时的自省来推断类型信息,来最大程度地减少传统拓展 Python 模块时繁杂的样板代码, 已经实现了 STL 数据结构、智能指针、类、函数重载、实例方法等到Python的转换,其中函数可以接收和返回自定义数据类型的值、指针或引用。
由于在Windows上和在Linux上使用会有较大不同,所以我这里将分为两个部分来说明问题,本文为下篇,具体说明Linux+Cmake实现。
我认为在Linux上使用python调用c++函数更有现实价值,毕竟许多新的服务、深度运算等都是运行在linux上的。具体步骤可以参考如下。
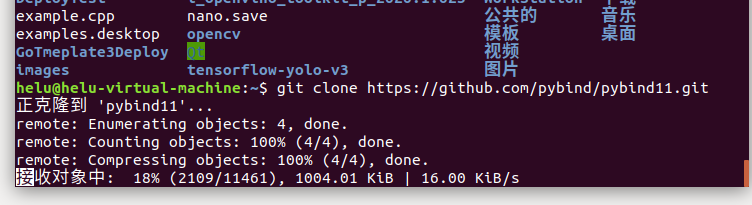
下载pybind11git clone https://github.com/pybind/pybind11.git
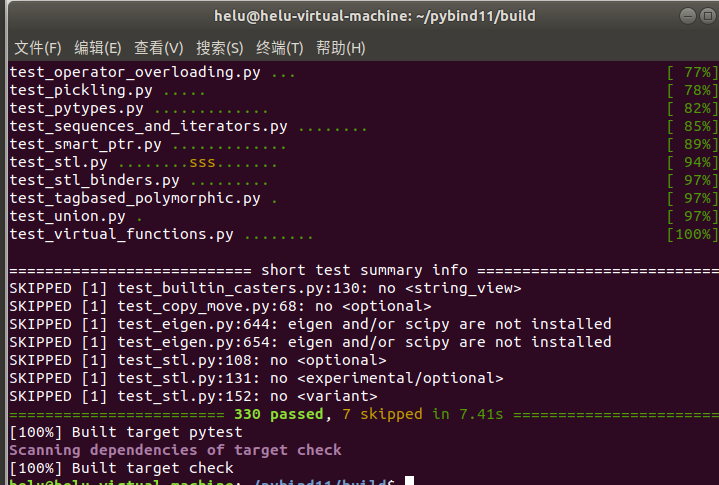
安装pytestpip install pytest
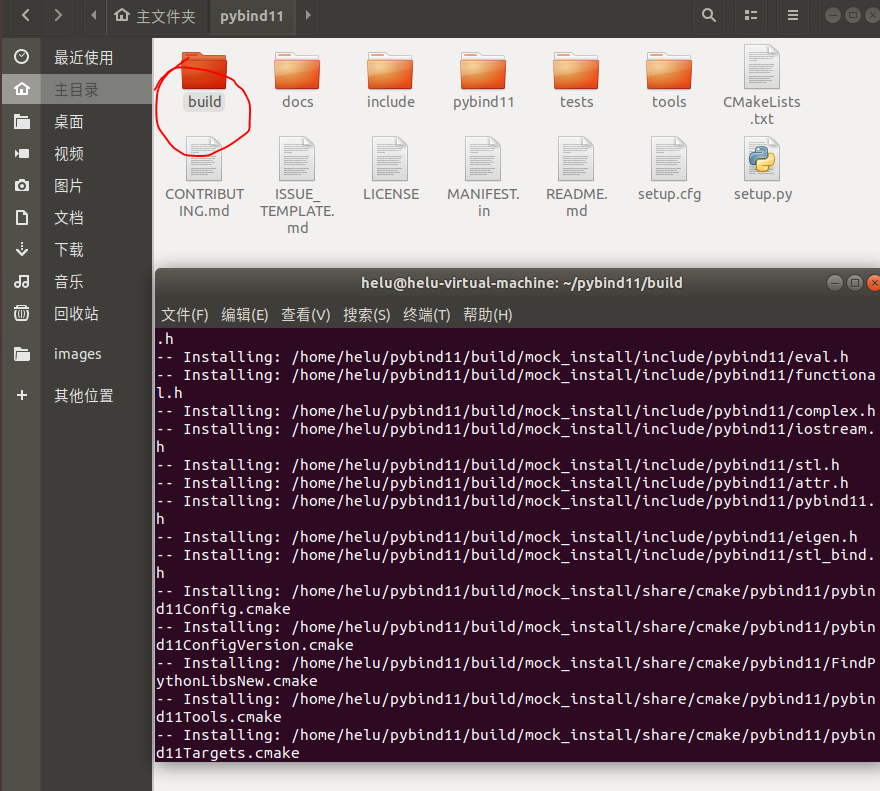
编译安装。这个地方我建议你首先将下载下来的pybind11备份一份
      cd pybind11


      mkdir build


      cd build


      cmake ..


      cmake
      --
      build .
      --
      config Release
      --
      target check
     $ c
     ++
     -
     O3
     -
     Wall
     -
     shared
     -
     std
     =
     c
     ++
     11
     -
     fPIC
     `
     python3
     -
     m pybind11
     --
     includes
     `
      example.cpp
     -
     o example
     `
     python3
     -
     config
     --
     extension
     -
     suffix
     `

        cmake_minimum_required(VERSION
        2.
        8.
        12)

project(example)


add_subdirectory(pybind11)

pybind11_add_module(example example.cpp)

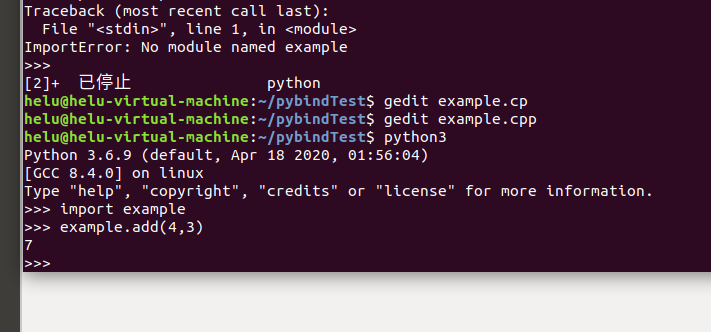
     cmake .

make

     import example

example.add(
     3,
     4)

[out]
     :
     7
project(example)
cmake_minimum_required(VERSION 2.8.12)
find_package(OpenCV REQUIRED)
include_directories(${OpenCV_INCLUDE_DIRS})
add_subdirectory(pybind11)
pybind11_add_module(example example.cpp)
target_link_libraries(example PRIVATE ${OpenCV_LIBS})
project(example)
cmake_minimum_required(VERSION
2.
8.
12)
find_package(OpenCV REQUIRED)
include_directories(${OpenCV_INCLUDE_DIRS})
add_subdirectory(pybind11)
SET(SOURCES
${CMAKE_CURRENT_SOURCE_DIR}
/example.cpp
)
pybind11_add_module(example ${SOURCES})
target_link_libraries(example
PRIVATE
${OpenCV_LIBS})
简单分析一下这段Cmake,除了必须的项目名称等以外,就是简单地去寻找OpenCV等的地址,而后将lib输入进去。
pybind11_add_module相当于建立项目,使用Set方法方便批量处理。
其中注意两点:
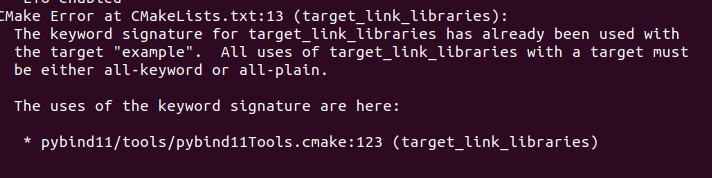
1、target_link_libraries(example PRIVATE ${OpenCV_LIBS}) 放最后
2、xample PRIVATE 不可缺少,否则报这个错
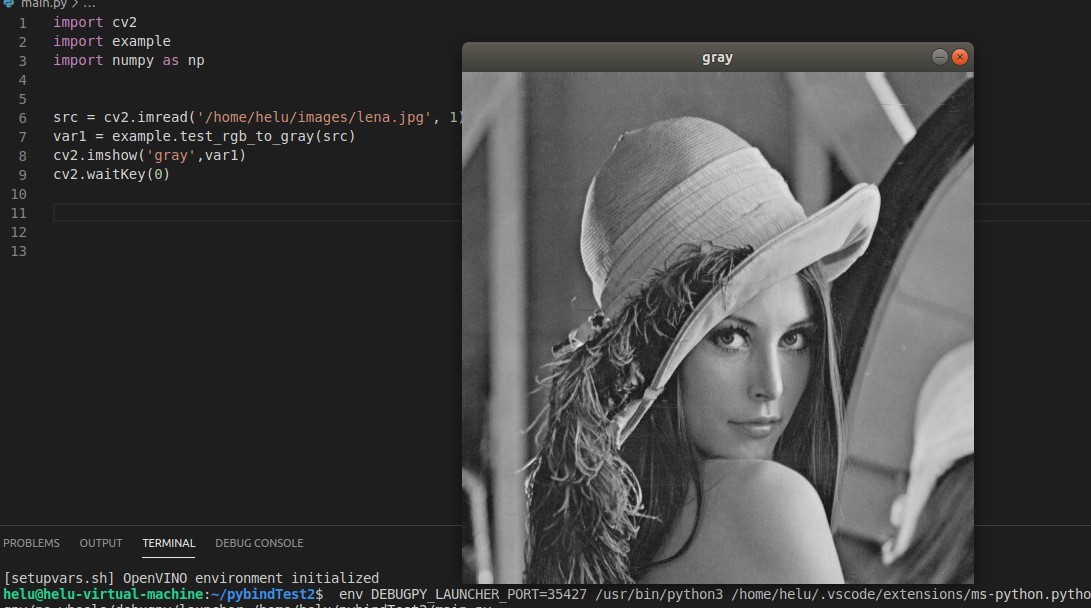
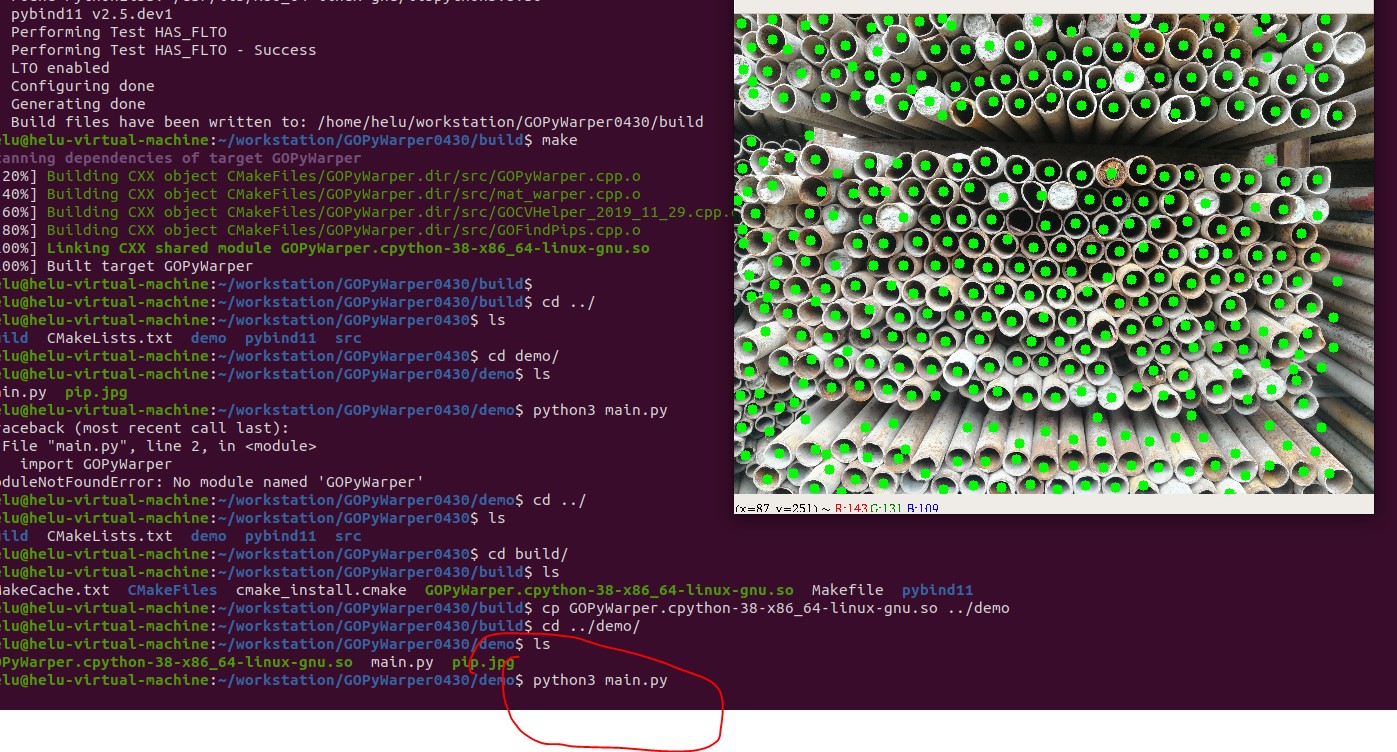
 成功调用结果,
注意绝对地址。
成功调用结果,
注意绝对地址。


      project(example)

cmake_minimum_required(VERSION
      2.
      8.
      12)


find_package(OpenCV REQUIRED)

include_directories(${OpenCV_INCLUDE_DIRS})

add_subdirectory(pybind11)


SET(SOURCES

  ${CMAKE_CURRENT_SOURCE_DIR}
      /example.cpp

  ${CMAKE_CURRENT_SOURCE_DIR}
      /mat_warper.h

  ${CMAKE_CURRENT_SOURCE_DIR}
      /mat_warper.cpp

)


pybind11_add_module(example ${SOURCES})

target_link_libraries(example PRIVATE ${OpenCV_LIBS})
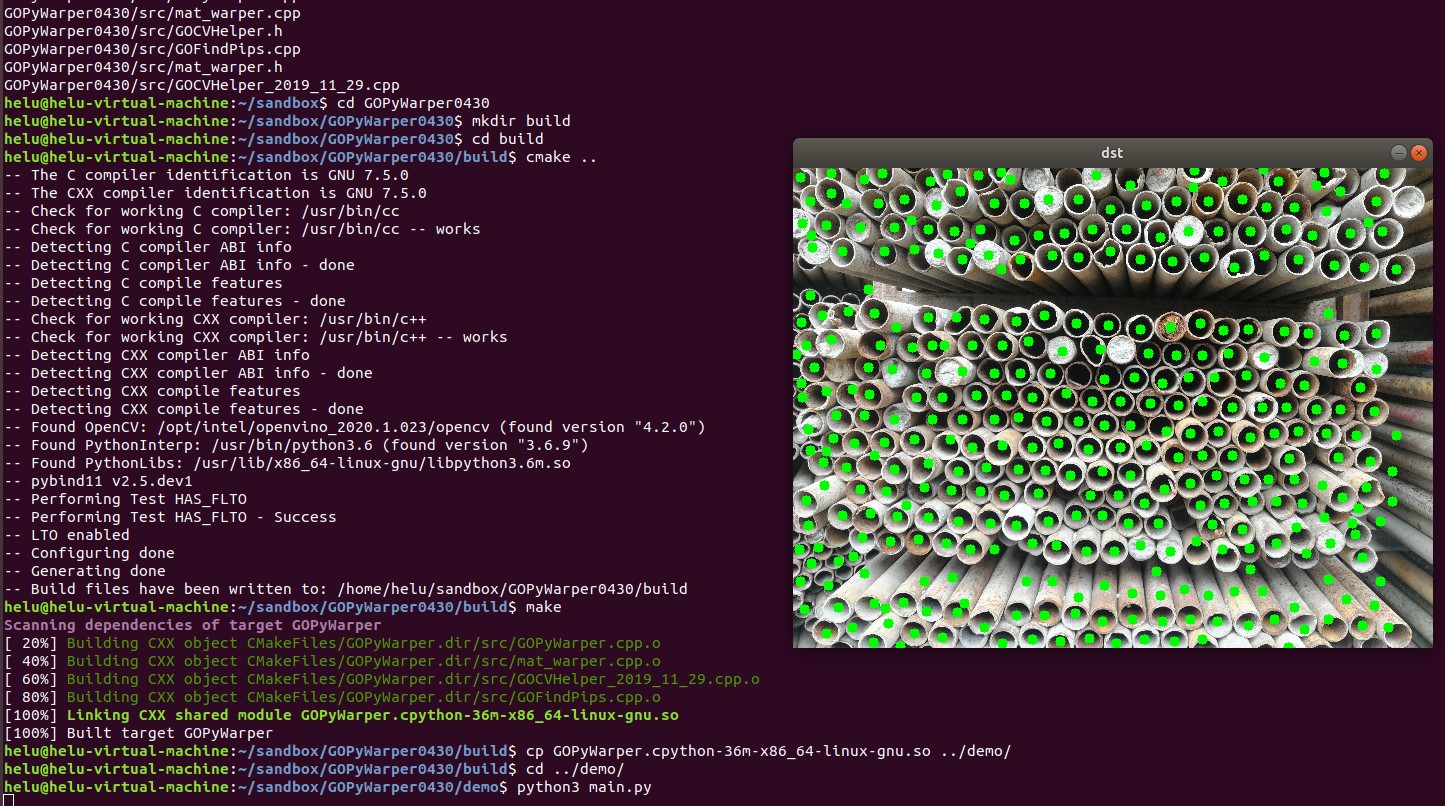
     tar
    -xvf GOPyWarper0429.tar
     mkdir build


     cd build


     cmake ..

make

cp GOPyWarper.cpython
     -
     36m
     -x86_64
     -linux
     -gnu.so ../demo


     cd ../demo


     python3 main.py
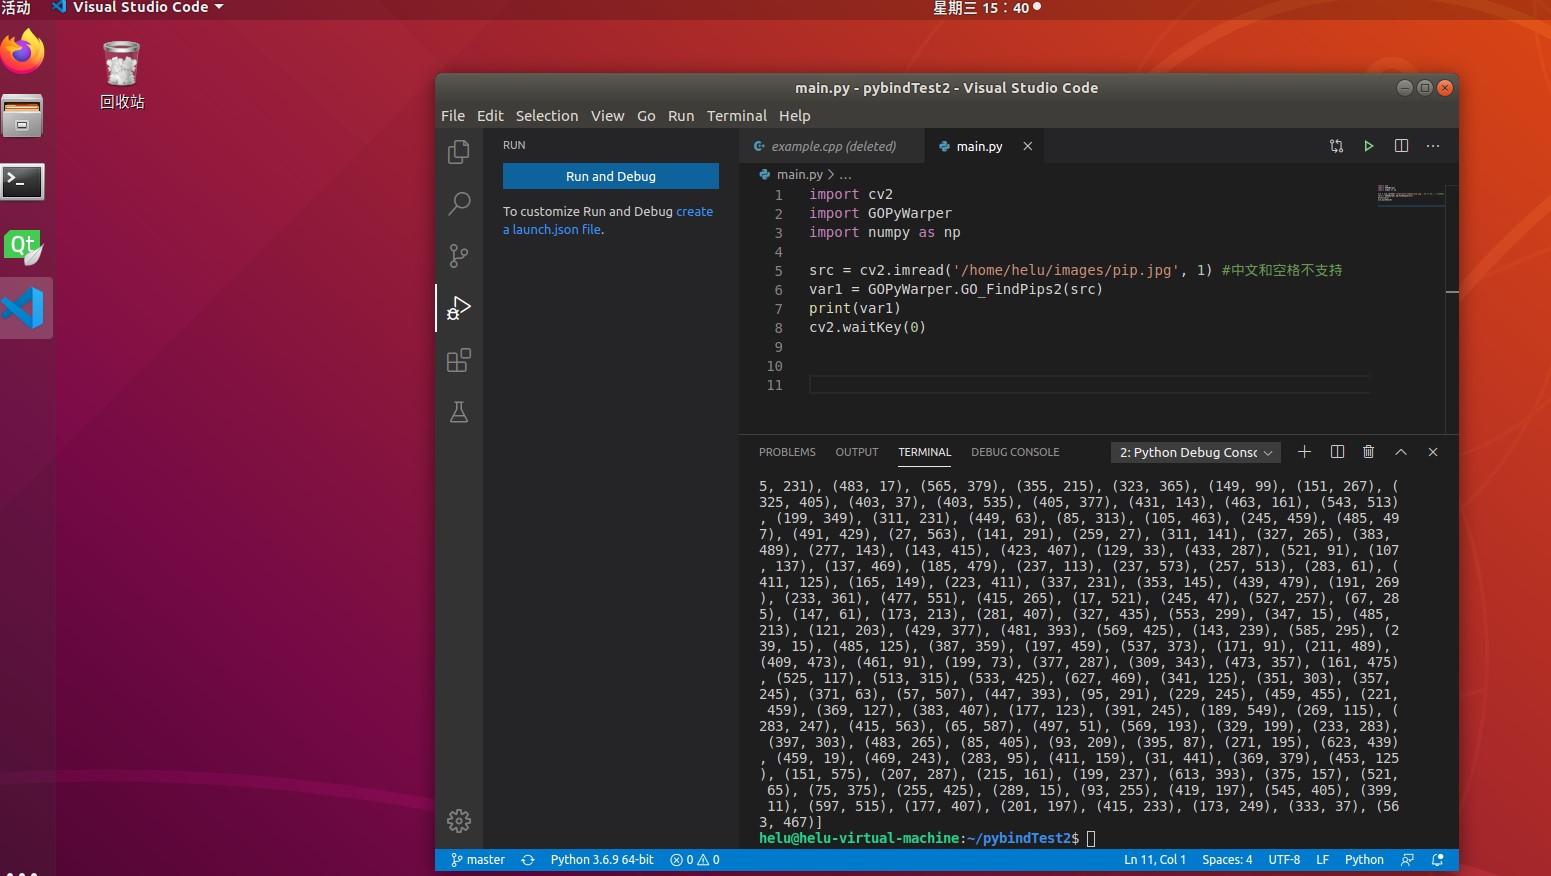
    import cv2


    import GOPyWarper


    import numpy as np


    #获取图片,彩色3通道。


    #中文和空格不支持

src
    = cv2.imread(
    'pip.jpg',
    1)


    #GO_FindPips


    #输入mat,输出为list(point1,point2,……),其中point代表一个找到的圆心。.

varCircles
    = GOPyWarper.GO_FindPips(src)


    #print(varCircles)


    #GO_Resize


    #输入mat,输出为规则化后文件大小

varResize
    = GOPyWarper.GO_Resize(src)


    #绘图

dst
    =cv2.resize(src,((
    int)(varResize[
    0]),(
    int)(varResize[
    1])),interpolation
    =cv2.INTER_CUBIC)


    for i
    in varCircles[
    :]
    :

    cv2.circle(dst,(i[
    0],i[
    1]),
    5,(
    0,
    255,
    0),
    -
    1)


cv2.imshow(
    "dst",dst)

cv2.waitKey(
    0)
    helu@helu
    -virtual
    -machine
    :
    ~
    /sandbox$ tar
    -cvf GOPyWarper0430.tar GOPyWarper0430

......

helu@helu
    -virtual
    -machine
    :
    ~
    /sandbox$ cd GOPyWarper0430

helu@helu
    -virtual
    -machine
    :
    ~
    /sandbox
    /GOPyWarper0430$ mkdir build

helu@helu
    -virtual
    -machine
    :
    ~
    /sandbox
    /GOPyWarper0430$ cd build

helu@helu
    -virtual
    -machine
    :
    ~
    /sandbox
    /GOPyWarper0430
    /build$ cmake ..

......

helu@helu
    -virtual
    -machine
    :
    ~
    /sandbox
    /GOPyWarper0430
    /build$ make

Scanning dependencies of target GOPyWarper

[
    20
    %] Building CXX object CMakeFiles
    /GOPyWarper.dir
    /src
    /GOPyWarper.cpp.o

[
    40
    %] Building CXX object CMakeFiles
    /GOPyWarper.dir
    /src
    /mat_warper.cpp.o

[
    60
    %] Building CXX object CMakeFiles
    /GOPyWarper.dir
    /src
    /GOCVHelper_2019_11_29.cpp.o

[
    80
    %] Building CXX object CMakeFiles
    /GOPyWarper.dir
    /src
    /GOFindPips.cpp.o

[
    100
    %] Linking CXX shared module GOPyWarper.cpython
    -
    36m
    -x86_64
    -linux
    -gnu.so

[
    100
    %] Built target GOPyWarper

helu@helu
    -virtual
    -machine
    :
    ~
    /sandbox
    /GOPyWarper0430
    /build$
    cp GOPyWarper.cpython
    -
    36m
    -x86_64
    -linux
    -gnu.so ..
    /demo
    /

helu@helu
    -virtual
    -machine
    :
    ~
    /sandbox
    /GOPyWarper0430
    /build$ cd ..
    /demo
    /

helu@helu
    -virtual
    -machine
    :
    ~
    /sandbox
    /GOPyWarper0430
    /demo$ python3 main.py

      helu@helu
      -virtual
      -machine
      :
      ~
      /workstation
      /GOPyWarper0430$ cd build
      /

helu@helu
      -virtual
      -machine
      :
      ~
      /workstation
      /GOPyWarper0430
      /build$ cmake ..


      -- Found OpenCV
      :
      /usr
      /local (found version
      "4.3.0")


      -- Found PythonInterp
      :
      /usr
      /bin
      /python3.
      8 (found version
      "3.8.2")


      -- Found PythonLibs
      :
      /usr
      /lib
      /x86_64
      -linux
      -gnu
      /libpython3.
      8.so


      -- pybind11 v2.
      5.dev1


      -- Performing Test HAS_FLTO


      -- Performing Test HAS_FLTO
      - Success


      -- LTO enabled


      -- Configuring
      done


      -- Generating
      done


      -- Build files have been written to
      :
      /home
      /helu
      /workstation
      /GOPyWarper0430
      /build

helu@helu
      -virtual
      -machine
      :
      ~
      /workstation
      /GOPyWarper0430
      /build$ make

Scanning dependencies of target GOPyWarper

[
      20
      %] Building CXX object CMakeFiles
      /GOPyWarper.dir
      /src
      /GOPyWarper.cpp.o

[
      40
      %] Building CXX object CMakeFiles
      /GOPyWarper.dir
      /src
      /mat_warper.cpp.o

[
      60
      %] Building CXX object CMakeFiles
      /GOPyWarper.dir
      /src
      /GOCVHelper_2019_11_29.cpp.o

[
      80
      %] Building CXX object CMakeFiles
      /GOPyWarper.dir
      /src
      /GOFindPips.cpp.o

[
      100
      %] Linking CXX shared module GOPyWarper.cpython
      -
      38
      -x86_64
      -linux
      -gnu.so

[
      100
      %] Built target GOPyWarper

helu@helu
      -virtual
      -machine
      :
      ~
      /workstation
      /GOPyWarper0430
      /build$
| GaussBlur | windows实体机 c++原生 | ubuntu虚拟机 opencv_python | ubuntu虚拟机 pbind11 |
| 1次 | 32 | 34 | 40 |
| 重复100次 | 2819 | 3740 | 3891 |
      int main() {

    string path
      =
      "e:/template/lena.jpg";

    cv
      :
      :Mat src
      = cv
      :
      :imread(path);

    Mat     dst;


      //开始计时


      double dstart
      = (
      double)cv
      :
      :getTickCount();


      for (
      int i
      =
      0;i
      <
      =
      100;i
      ++)

    {

        cv
      :
      :GaussianBlur(src, dst, cv
      :
      :Size(
      101,
      101),
      1.
      0,
      1.
      0);

        printf(
      "%d times %f ms\n", i,
      1000
      * (getTickCount()
      - dstart)
      / getTickFrequency());


    }

    cv
      :
      :waitKey(
      0);


      return
      0;

}
      import cv2


      import GOPyWarper


      import numpy as np


src
      = cv2.imread(
      '/home/helu/images/lena.jpg',
      1)

dstart
      = cv2.getTickCount()


      for i
      in
      range(
      100)
      :

    blur
      = cv2.GaussianBlur(src,(
      101,
      101),
      1.
      0,
      None,
      1.
      0,borderType
      =
      4)


      print(
      1000
      * ( cv2.getTickCount()
      - dstart)
      /cv2.getTickFrequency())
      import cv2


      import GOPyWarper


      import numpy as np


      #获取图片,彩色3通道。


      #中文和空格不支持

src
      = cv2.imread(
      '/home/helu/images/lena.jpg',
      1)

dstart
      = cv2.getTickCount()


      for i
      in
      range(
      100)
      :

    blur
      = GOPyWarper.test_gaussblur(src)


      print(
      1000
      * ( cv2.getTickCount()
      - dstart)
      /cv2.getTickFrequency())


 浙公网安备 33010602011771号