Python for mac 中包安装管理——No module named numpy引发的一系列探索
目录
前言
一 管理虚拟环境软件
1.1 Mac Python管理虚拟环境软件安装-Pyenv具体的流程
1.2 Mac Python管理虚拟环境软件安装-Anaconda具体的流程
1.3 Mac Python管理虚拟环境软件安装-pip具体的流程
二 探索的起因
2.1 具体的问题(报错)
2.2 先检查Python的安装与路径
2.3 安装包——Numpy
2.4 安装包——matplotlib
2.5 安装包——scipy
2.6 安装pandas
2.7 安装TensorFlow
前言
大家要在开发中,使用多个python版本的,强烈建议使用安装管理器和工具管理虚拟环境,不然就会出现以下一系列报错。因此会教你如何安装Python的 pandas等各类包。
安装brew,安装教程。我们通过brew可以快捷方便的下载我们需要的各类软件,包括pyenv,Anaconda,virtualenv(虚拟环境)等。我们通过以下途径来完成python包的管理:
1. Anaconda:安装pandas、Python和SciPy最简单的方式是用Anaconda。Anaconda是关于Python数据分析和科学计算的分发包。
2. Miniconda
使用Anaconda会安装一百多个依赖包,如果想灵活控制安装的依赖包或带宽有限,使用Miniconda是个不错的选择。
Conda是个包管理器,Anaconda就是建立在它的基础上。Conda不只跨平台还与语言无关,与pip和virtualenv相结合的作用相似。
Miniconda允许先创建包含Python的安装包,然后用conda安装其他的依赖包。
3. pip
pandas可以通过pip安装,但要安装相关的依赖包。
[plain] view plain copy
pip install pandas
4. 包管理器
可以用linux的包管理器进行安装,如
[plain] view plain copy
sudo apt-get install python-pandas
zypper in python-pandas
5. 源码安装
从源码安装需要安装最新的Cython,可用easy-install -U cython安装。源码位于http://github.com/pydata/pandas,安装过程为[plain] view plain copy
git clone git://github.com/pydata/pandas.git
cd pandas
python setup.py install
一 管理虚拟环境软件
1.1 Mac Python管理虚拟环境软件安装-Pyenv具体的流程
1 先安装管理软件pyenv
个人安装信息
87:~ jss$ brew install pyenv
Updating Homebrew...
==> Auto-updated Homebrew!
Updated 1 tap (homebrew/core).
==> Updated Formulae
app-engine-java geth lorem radare2
bit getmail mapnik roswell
calabash gtk+ node s-nail
cayley gutenberg node@4 sassc
conan gxml node@6 saxon
diffuse heroku node@8 spigot
django-completion igv nspr syncthing
docfx jbake odpi tile38
flow jenkins onetime yaml-cpp
fluent-bit just openimageio yarn
flyway kerl php
fn libsass plank
==> Installing dependencies for pyenv: autoconf, pkg-config, openssl, readline
==> Installing pyenv dependency: autoconf
==> Downloading https://homebrew.bintray.com/bottles/autoconf-2.69.high_sierra.b
######################################################################## 100.0%
==> Pouring autoconf-2.69.high_sierra.bottle.4.tar.gz
==> Caveats
Emacs Lisp files have been installed to:
/usr/local/share/emacs/site-lisp/autoconf
==> Summary
🍺 /usr/local/Cellar/autoconf/2.69: 71 files, 3.0MB
==> Installing pyenv dependency: pkg-config
==> Downloading https://homebrew.bintray.com/bottles/pkg-config-0.29.2.high_sier
######################################################################## 100.0%
==> Pouring pkg-config-0.29.2.high_sierra.bottle.tar.gz
🍺 /usr/local/Cellar/pkg-config/0.29.2: 11 files, 627.2KB
==> Installing pyenv dependency: openssl
==> Downloading https://homebrew.bintray.com/bottles/openssl-1.0.2n.high_sierra.
######################################################################## 100.0%
==> Pouring openssl-1.0.2n.high_sierra.bottle.tar.gz
==> Caveats
A CA file has been bootstrapped using certificates from the SystemRoots
keychain. To add additional certificates (e.g. the certificates added in
the System keychain), place .pem files in
/usr/local/etc/openssl/certs
and run
/usr/local/opt/openssl/bin/c_rehash
This formula is keg-only, which means it was not symlinked into /usr/local,
because Apple has deprecated use of OpenSSL in favor of its own TLS and crypto libraries.
If you need to have this software first in your PATH run:
echo 'export PATH="/usr/local/opt/openssl/bin:$PATH"' >> ~/.bash_profile
For compilers to find this software you may need to set:
LDFLAGS: -L/usr/local/opt/openssl/lib
CPPFLAGS: -I/usr/local/opt/openssl/include
For pkg-config to find this software you may need to set:
PKG_CONFIG_PATH: /usr/local/opt/openssl/lib/pkgconfig
==> Summary
🍺 /usr/local/Cellar/openssl/1.0.2n: 1,792 files, 12.3MB
==> Installing pyenv dependency: readline
==> Downloading https://homebrew.bintray.com/bottles/readline-7.0.3_1.high_sierr
######################################################################## 100.0%
==> Pouring readline-7.0.3_1.high_sierra.bottle.tar.gz
==> Caveats
This formula is keg-only, which means it was not symlinked into /usr/local,
because macOS provides the BSD libedit library, which shadows libreadline.
In order to prevent conflicts when programs look for libreadline we are
defaulting this GNU Readline installation to keg-only..
For compilers to find this software you may need to set:
LDFLAGS: -L/usr/local/opt/readline/lib
CPPFLAGS: -I/usr/local/opt/readline/include
==> Summary
🍺 /usr/local/Cellar/readline/7.0.3_1: 46 files, 1.5MB
==> Installing pyenv
==> Downloading https://homebrew.bintray.com/bottles/pyenv-1.2.2.high_sierra.bot
######################################################################## 100.0%
==> Pouring pyenv-1.2.2.high_sierra.bottle.tar.gz
🍺 /usr/local/Cellar/pyenv/1.2.2: 593 files, 2.4MB
2 安装后添加环境变量,在terminal中输入
sudo vi ~/.bash_profile
3 填写的具体变量内容
(个人信息:修改后备份 export PATH=${PATH}:/usr/local/mysql/bin )
export PYENV_ROOT=/usr/local/var/pyenv

if which pyenv > /dev/null; then eval "$(pyenv init -)"; fi
4 使环境变量生效,需要使环境变量生效,运行命令
. ~/.bash_profile

#或者

source ~/.bash_profile
参考:
❌https://www.jianshu.com/p/972512527e9a -简书/Mac OSX下Python多版本管理器pyenv的安装及使用
http://blog.csdn.net/suyumingxiangguan/article/details/69942055 -csdn/Mac多Python版本共存,多个独立Python开发环境切换。
1.2 Mac Python管理虚拟环境软件安装-Anaconda具体的流程
a Anaconda简介
然后就是多方式安装包或者模块。其中优先conda,其次pip,再次https://www.lfd.uci.edu/~gohlke/pythonlibs/或者各种官网,最后自己编译
conda下载的是二进制,pip有的会下载源码编译
Anaconda软件集成了很多python的库,包括pandas,用python做数据分析的很多人都用这个
Anaconda 是一个用于科学计算的Python发行版,支持 Linux, Mac, Windows系统,提供了包管理与环境管理的功能,可以很方便地解决多版本python并存、切换以及各种第三方包安装问题。
Anaconda利用工具/命令conda来进行package和environment的管理,并且已经包含了Python和相关的配套工具。 这里先解释下conda、anaconda这些概念的差别。是一个打包的集合,里面预装好了conda、某个版本的python、众多packages、科学计算工具等等,所以也称为Python的一种发行版。
conda可以理解为一个工具,也是一个可执行命令,其核心功能是包管理与环境管理。包管理与pip的使用类似,环境管理则允许用户方便地安装不同版本的python并可以快速切换。
参考:
http://blog.csdn.net/superdont/article/details/54233017 - csdn/Anaconda的安装与配置/镜像的配置
http://www.cnblogs.com/welhzh/p/6009246.html -cnblog/python 安装anaconda, numpy, pandas, matplotlib 等/terminal conda的操作与镜像的配置
https://www.zhihu.com/question/47003185 -知乎/如何优雅的安装Python的pandas?
https://www.jianshu.com/p/2f3be7781451 -简书/Anaconda使用总结
http://blog.csdn.net/cxsydjn/article/details/71057124 -csdn/Mac OS下 Anaconda Python2 和 Python3 配置/界面简介和python不同版本安装
https://www.cnblogs.com/amanda-x/p/7739467.html -cnblogs/Anaconda安装与环境配置
1.3 Mac Python管理虚拟环境软件安装-pip具体的流程
1 优缺点
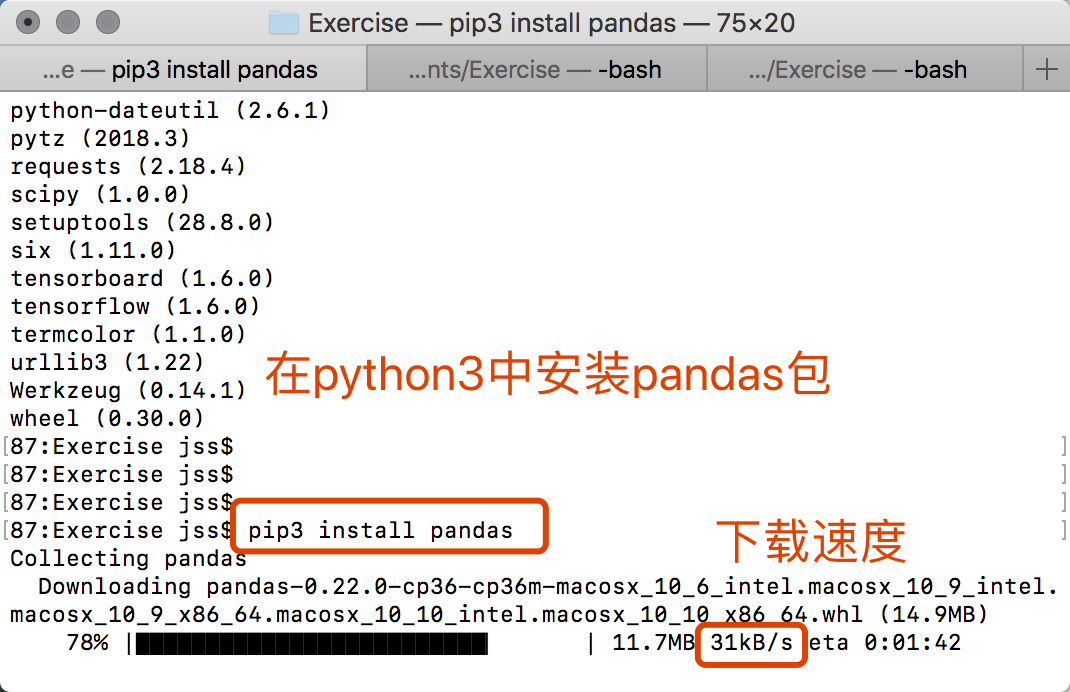
缺点:下载速度慢,20180308安装中,下载速度介于20-50kb/s
优点:方便简单,无需太多的安装与操作

2 查看已安装包列表
#适用于mac中python2.x 版本
pip list
#适用于mac中python3.x 版本
pip3 list
3 安装依赖包和模块
#适用于mac中python2.x 版本,xx是包名称
pip install xx
#适用于mac中python3.x 版本,xx是包名称
pip3 install xx
参考:
✅https://www.cnblogs.com/tensorflownews/p/7298646.html -cnbolg/在 Mac OS X 上安装 TensorFlow
https://www.jianshu.com/p/4646dedaaff5 -简书/Python安装与版本管理/pip使用沙盒使用
二 探索的起因
2.1 具体的问题(报错)
半路出家,调试代码中出现以下错误
Traceback (most recent call last):
File "<stdin>", line 1, in <module>
ModuleNotFoundError: No module named 'numpy'
Traceback (most recent call last):
File "MLCNN.py", line 8, in <module>
import matplotlib.pyplot as plt
ModuleNotFoundError: No module named 'matplotlib'
Traceback (most recent call last):
File "MLCNN.py", line 9, in <module>
import scipy.io
ModuleNotFoundError: No module named 'scipy'
Traceback (most recent call last):
File "MLCNN.py", line 11, in <module>
import tensorflow as tf
ModuleNotFoundError: No module named 'tensorflow'
Traceback (most recent call last):
File "MLCNN.py", line 12, in <module>
import pandas as pd
ModuleNotFoundError: No module named 'pandas'
2.2 先检查Python的版本与路径
1 查看python版本
#注意:‘-V‘中‘V’为大写字母,只有一个‘-’
python -V
#注意:‘--version'中有两个‘-’
python --version
2 查看python安装位置
python3以上的版本 注意print的时候使用的是括号,python3以下版本的不需要括号
python -c "import sys; print (sys.executable)"
python -c "import os; print (os.sys.executable)" python -c "import os; path = os.sys.executable;folder=path[0 : path.rfind(os.sep)]; print folder"
2.3 安装包——Numpy(pip)
1 查看Numpy版本
python -c "import numpy; print (numpy.version.version)"
python3 -c "import numpy; print (numpy.__version__)"
2 查看Numpy安装路径
#python2.x版本
python -c "import numpy; print (numpy.__file__)"
python -c "import numpy; print (numpy.__file__)"
#python3.x版本
python3 -c "import numpy; print (numpy.__file__)"
python3 -c "import numpy; print (numpy.__file__)"
3 安装
$pip install --user numpy scipy matplotlib ipython jupyter pandas sympy nose --prefix=~/local
4 将package安装到指定目录:通过源码安装一个python包的时候,例如安装xlrd,目标路径为/usr/local/lib/python2.7/site-packages/
$ pip install -t /usr/local/lib/python2.7/site-packages/ xlrd
5 或者我已经测试成功的,网站为
$mac os x: Python 3 安装(scipy,numpy,matplotlib. . .)
2.4 安装包——matplotlib
方法一 使用Pip
先安装pip,参考标准pip安装指令
curl -O https://bootstrap.pypa.io/get-pip.py
安装到Python2.7
python get-pip.py
安装到Python3
python3 get-pip.py
安装Matplotlib
pip install matplotlib
报错:猜测可能是因为多个版本造成的问题,我的目标安装是python36,最后在这个论坛里找到解决方法。
Requirement already satisfied: matplotlib in /System/Library/Frameworks/Python.framework/Versions/2.7/Extras/lib/python
Requirement already satisfied: numpy>=1.5 in /System/Library/Frameworks/Python.framework/Versions/2.7/Extras/lib/python (from matplotlib)
Requirement already satisfied: python-dateutil in /System/Library/Frameworks/Python.framework/Versions/2.7/Extras/lib/python (from matplotlib)
Requirement already satisfied: tornado in ./Library/Python/2.7/lib/python/site-packages (from matplotlib)
Requirement already satisfied: pyparsing>=1.5.6 in /System/Library/Frameworks/Python.framework/Versions/2.7/Extras/lib/python (from matplotlib)
Requirement already satisfied: nose in ./Library/Python/2.7/lib/python/site-packages (from matplotlib)
Requirement already satisfied: singledispatch in ./Library/Python/2.7/lib/python/site-packages (from tornado->matplotlib)
Requirement already satisfied: certifi in ./Library/Python/2.7/lib/python/site-packages (from tornado->matplotlib)
Requirement already satisfied: backports_abc>=0.4 in ./Library/Python/2.7/lib/python/site-packages (from tornado->matplotlib)
Requirement already satisfied: six in /System/Library/Frameworks/Python.framework/Versions/2.7/Extras/lib/python (from singledispatch->tornado->matplotlib)
我的pip list
DEPRECATION: The default format will switch to columns in the future. You can use --format=(legacy|columns) (or define a format=(legacy|columns) in your pip.conf under the [list] section) to disable this warning.
altgraph (0.10.2)
appnope (0.1.0)
backports-abc (0.5)
backports.functools-lru-cache (1.5)
backports.shutil-get-terminal-size (1.0.0)
bdist-mpkg (0.5.0)
bleach (2.1.2)
bonjour-py (0.3)
certifi (2018.1.18)
configparser (3.5.0)
cycler (0.10.0)
decorator (4.2.1)
entrypoints (0.2.3)
enum34 (1.1.6)
functools32 (3.2.3.post2)
html5lib (1.0.1)
ipykernel (4.8.2)
ipython (5.5.0)
ipython-genutils (0.2.0)
ipywidgets (7.1.2)
Jinja2 (2.10)
jsonschema (2.6.0)
jupyter (1.0.0)
jupyter-client (5.2.2)
jupyter-console (5.2.0)
jupyter-core (4.4.0)
lxml (4.1.1)
macholib (1.5.1)
Markdown (2.6.9)
MarkupSafe (1.0)
matplotlib (2.1.2)
mistune (0.8.3)
modulegraph (0.10.4)
mpmath (1.0.0)
nbconvert (5.3.1)
nbformat (4.4.0)
nose (1.3.7)
notebook (5.4.0)
numpy (1.14.1)
pandas (0.22.0)
pandocfilters (1.4.2)
pathlib2 (2.3.0)
pexpect (4.4.0)
pickleshare (0.7.4)
pip (9.0.1)
prompt-toolkit (1.0.15)
ptyprocess (0.5.2)
py2app (0.7.3)
Pygments (2.2.0)
pyobjc-core (2.5.1)
pyobjc-framework-Accounts (2.5.1)
pyobjc-framework-AddressBook (2.5.1)
pyobjc-framework-AppleScriptKit (2.5.1)
pyobjc-framework-AppleScriptObjC (2.5.1)
pyobjc-framework-Automator (2.5.1)
pyobjc-framework-CFNetwork (2.5.1)
pyobjc-framework-Cocoa (2.5.1)
pyobjc-framework-Collaboration (2.5.1)
pyobjc-framework-CoreData (2.5.1)
pyobjc-framework-CoreLocation (2.5.1)
pyobjc-framework-CoreText (2.5.1)
pyobjc-framework-DictionaryServices (2.5.1)
pyobjc-framework-EventKit (2.5.1)
pyobjc-framework-ExceptionHandling (2.5.1)
pyobjc-framework-FSEvents (2.5.1)
pyobjc-framework-InputMethodKit (2.5.1)
pyobjc-framework-InstallerPlugins (2.5.1)
pyobjc-framework-InstantMessage (2.5.1)
pyobjc-framework-LatentSemanticMapping (2.5.1)
pyobjc-framework-LaunchServices (2.5.1)
pyobjc-framework-Message (2.5.1)
pyobjc-framework-OpenDirectory (2.5.1)
pyobjc-framework-PreferencePanes (2.5.1)
pyobjc-framework-PubSub (2.5.1)
pyobjc-framework-QTKit (2.5.1)
pyobjc-framework-Quartz (2.5.1)
pyobjc-framework-ScreenSaver (2.5.1)
pyobjc-framework-ScriptingBridge (2.5.1)
pyobjc-framework-SearchKit (2.5.1)
pyobjc-framework-ServiceManagement (2.5.1)
pyobjc-framework-Social (2.5.1)
pyobjc-framework-SyncServices (2.5.1)
pyobjc-framework-SystemConfiguration (2.5.1)
pyobjc-framework-WebKit (2.5.1)
pyOpenSSL (0.13.1)
pyparsing (2.2.0)
python-dateutil (2.6.1)
pytz (2018.3)
pyzmq (17.0.0)
qtconsole (4.3.1)
scandir (1.7)
scipy (0.13.0b1)
Send2Trash (1.5.0)
setuptools (18.5)
simplegeneric (0.8.1)
singledispatch (3.4.0.3)
six (1.11.0)
subprocess32 (3.2.7)
sympy (1.1.1)
terminado (0.8.1)
testpath (0.3.1)
tornado (4.5.3)
traitlets (4.3.2)
virtualenv (15.1.0)
wcwidth (0.1.7)
webencodings (0.5.1)
widgetsnbextension (3.1.4)
xattr (0.6.4)
zope.interface (4.1.1)
执行的命令
python3 -m pip install --user --upgrade matplotlib
方法二 Macports
Python 2.7
sudo port install py27-pipsudo pip-2.7 install matplotlib
Python 3.6:
sudo port install py36-pipsudo pip-3.6 install matplotlib
2.5 安装包——scipy(pip)
python3 -m pip install scipy import scipy
测试一下
import scipy
2.6 安装pandas
1. Anaconda:安装pandas、Python和SciPy最简单的方式是用Anaconda。Anaconda是关于Python数据分析和科学计算的分发包。
2. Miniconda
使用Anaconda会安装一百多个依赖包,如果想灵活控制安装的依赖包或带宽有限,使用Miniconda是个不错的选择。
Conda是个包管理器,Anaconda就是建立在它的基础上。Conda不只跨平台还与语言无关,与pip和virtualenv相结合的作用相似。
Miniconda允许先创建包含Python的安装包,然后用conda安装其他的依赖包。
3. Pypi
pandas可以通过pip安装,但要安装相关的依赖包。
[plain] view plain copy
pip install pandas
4. 包管理器
可以用linux的包管理器进行安装,如
[plain] view plain copy
sudo apt-get install python-pandas
zypper in python-pandas
5. 源码安装
从源码安装需要安装最新的Cython,可用easy-install -U cython安装。源码位于http://github.com/pydata/pandas,安装过程为
[plain] view plain copy
git clone git://github.com/pydata/pandas.git
cd pandas
python setup.py install
2.7 安装TensorFlow(pip)
#python2版本
pip install tensorflow
#python3版本
pip3 install tensorflow
安装成功后,如果仍然报错
Traceback (most recent call last):
File "MLCNN.py", line 10, in <module>
import tensorflow as tf
ModuleNotFoundError: No module named 'tensorflow'
解决方案1——卸载重装tensorflow(未解决)
(pip重装后测试无效果)
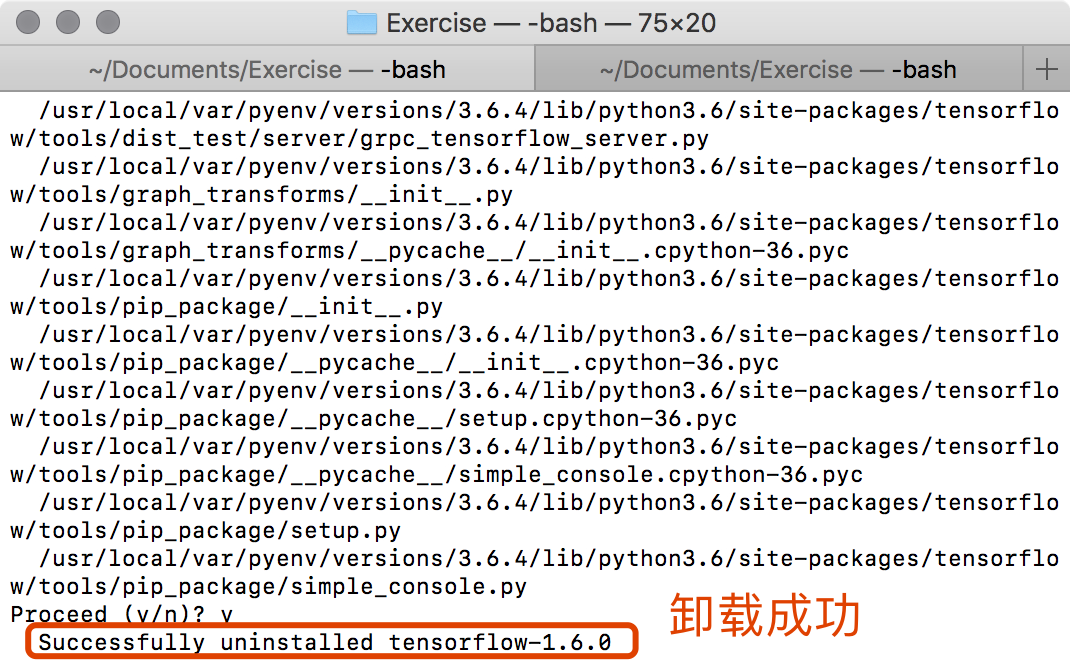
$ pip uninstall tensorflow
$ pip3 uninstall tensorflow

http://bbs.csdn.net/topics/392322815?list=lz -csdn/Python与TensorFlow安装遇到问题求助
http://blog.csdn.net/evaljy/article/details/70209957 -csdn/tensorflow在win上的安装常见错误及正确安装步骤(包含anaconda spyder)/报错集合
解决方案2——用Anaconda来进行激活使用(未解决)
首先安装Anaconda,安装成功后,创建一个conda环境
conda create -n tensorflow pip python = 2.7
conda create -n tensorflow pip python = 3.6
#或python = 3.3等
激活环境
source activate tensorflow
# (targetDirectory)$   Your prompt should change
在环境中安装Tensorflow
pip install --ignore-installed --upgrade \  https://storage.googleapis.com/tensorflow/mac/cpu/tensorflow-1.6.0-py2-none-any.whl

#TensorFlow for Python 2.7的纯CPU版本
pip install --ignore-installed --upgrade \  https://storage.googleapis.com/tensorflow/mac/cpu/tensorflow-1.6.0-py3-none-any.whl

#Python 3.4,3.5或3.6
参考:
https://www.tensorflow.org/install/install_mac -tensorflow官网
正确的安装方法
⭐️http://blog.csdn.net/u012373815/article/details/73555460 -csdn/mac/linux 安装tensorflow和安装Anaconda
tensorflow拓展学习
http://www.tensorflownews.com/category/course/ -tensorflownews/tensorflownews/个人网站
参考:
✅http://www.cnblogs.com/tensorflownews/p/7298646.html -cnblogs/在 Mac OS X 上安装 TensorFlow
参考:
https://jingyan.baidu.com/article/fec7a1e5ec30341190b4e7e5.html -Mac下如何安装配置Homebrew
http://blog.csdn.net/ybuiipl/article/details/60875304 -Linux/numpy的下载与安装教程——(解决No module named numpy问题)
https://www.cnblogs.com/klchang/p/4543032.html -python和numpy的版本、安装位置
https://www.zhihu.com/question/21731171 -安装Numpy
http://blog.csdn.net/ciyiquan5963/article/details/77531932 -Mac/MAC 使用pycharm出现ImportError: No module named numpy 解决方法
http://rstevens.iteye.com/blog/1214143 -安装python package到指定目录
http://blog.csdn.net/techfield/article/details/52618130 -多版本Python共存时pip给指定版本的python安装package的方法
https://www.jianshu.com/p/21bb9d06cf79 -[Mac] Python Numpy Scipy Matplotlib 快速安装
⭐️http://blog.topspeedsnail.com/archives/704 -mac os x: Python 3 安装(scipy,numpy,matplotlib. . .)
https://stackoverflow.com/questions/33888760/importerror-no-module-named-matplotlib -ImportError: No module named matplotlib
http://blog.csdn.net/a595130080/article/details/55506237 - tensorflow
2018-03-0809:00:00
2018-03-0821:17:12

