

照着官网来安装openstack pike之glance安装
镜像服务image service(glance)的安装还是在控制节点上进行:
1、前提条件,数据库为glance创建库和账户密码来连接数据库
# mysql -u root -p
MariaDB [(none)]> CREATE DATABASE glance;
MariaDB [(none)]> GRANT ALL PRIVILEGES ON glance.* TO 'glance'@'localhost' IDENTIFIED BY 'glance';
MariaDB [(none)]> GRANT ALL PRIVILEGES ON glance.* TO 'glance'@'%'IDENTIFIED BY 'glance';
2、在为glance在keystone上创建用户项目等时,需要先连接keystone,这里使用keystone的admin账号来登录
# source admin-openrc
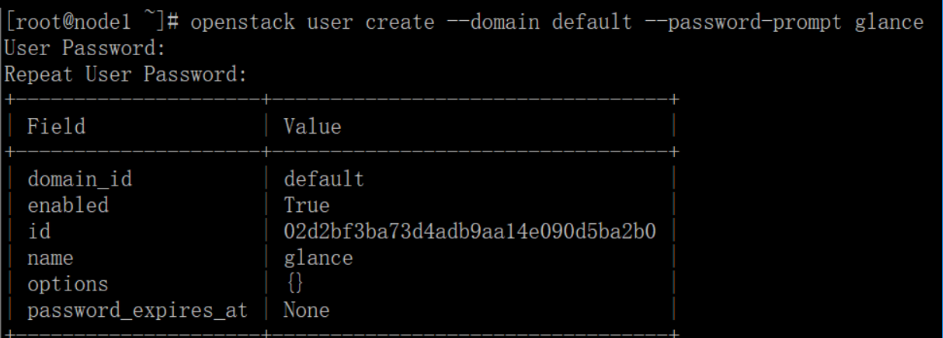
然后在创建glance用户:
# openstack user create --domain default --password-prompt glance
输入密码:glance
将admin角色添加到glance用户和service项目中:
# openstack role add --project service --user glance admin
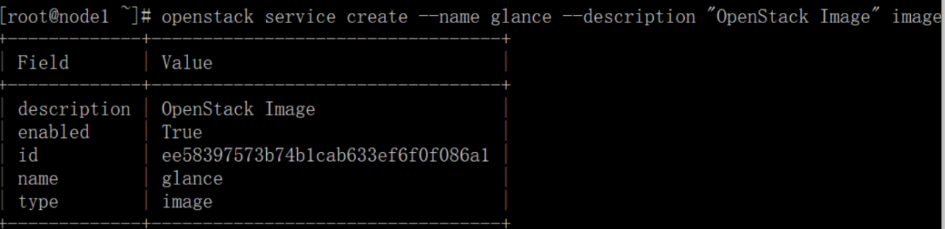
为glance创建服务实体:
# openstack service create --name glance --description "OpenStack Image" image
为镜像服务创建API endpoints:
# openstack endpoint create --region RegionOne image public http://192.168.101.10:9292
# openstack endpoint create --region RegionOne image internal http://192.168.101.10:9292
# openstack endpoint create --region RegionOne image admin http://192.168.101.10:9292
安装和配置glance:
# yum install openstack-glance
修改配置文件:/etc/glance/glance-api.conf,在[database]部分:
connection = mysql+pymysql://glance:glance@192.168.101.10/glance
在[keystone_authtoken]和[paste_deploy]分别做如下设置:
[keystone_authtoken]
auth_uri = http://192.168.101.10:5000
auth_url = http://192.168.101.10:35357
memcached_servers = 192.168.101.10:11211
auth_type = password
project_domain_name = default
user_domain_name = default
project_name = service
username = glance
password = glance

[paste_deploy]
flavor = keystone
在[glance_store]部分设置一个本地文件系统用来存储本地镜像:
[glance_store]
stores = file,http
default_store = file
filesystem_store_datadir = /var/lib/glance/images/
修改配置文件:/etc/glance/glance-registry.conf,在[database]配置数据库的连接:
connection = mysql+pymysql://glance:glance@192.168.101.10/glance
在[keystone_authtoken]和[paste_deploy]配置如下内容:
[keystone_authtoken]
auth_uri = http://192.168.101.10:5000
auth_url = http://192.168.101.10:35357
memcached_servers = 192.168.101.10:11211
auth_type = password
project_domain_name = default
user_domain_name = default
project_name = service
username = glance
password = glance

[paste_deploy]
flavor = keystone
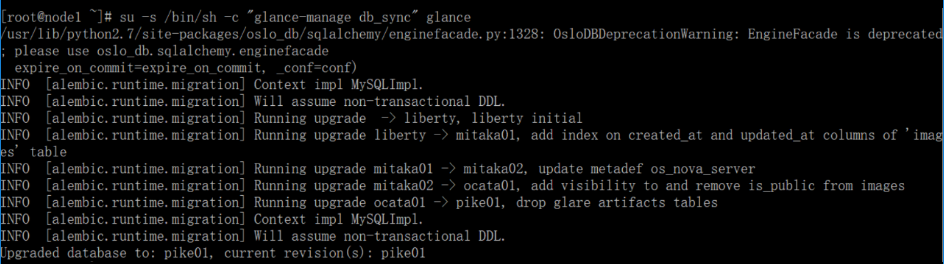
向glance库导入填充数据:
# su -s /bin/sh -c "glance-manage db_sync" glance
Ignore any deprecation messages in this output.
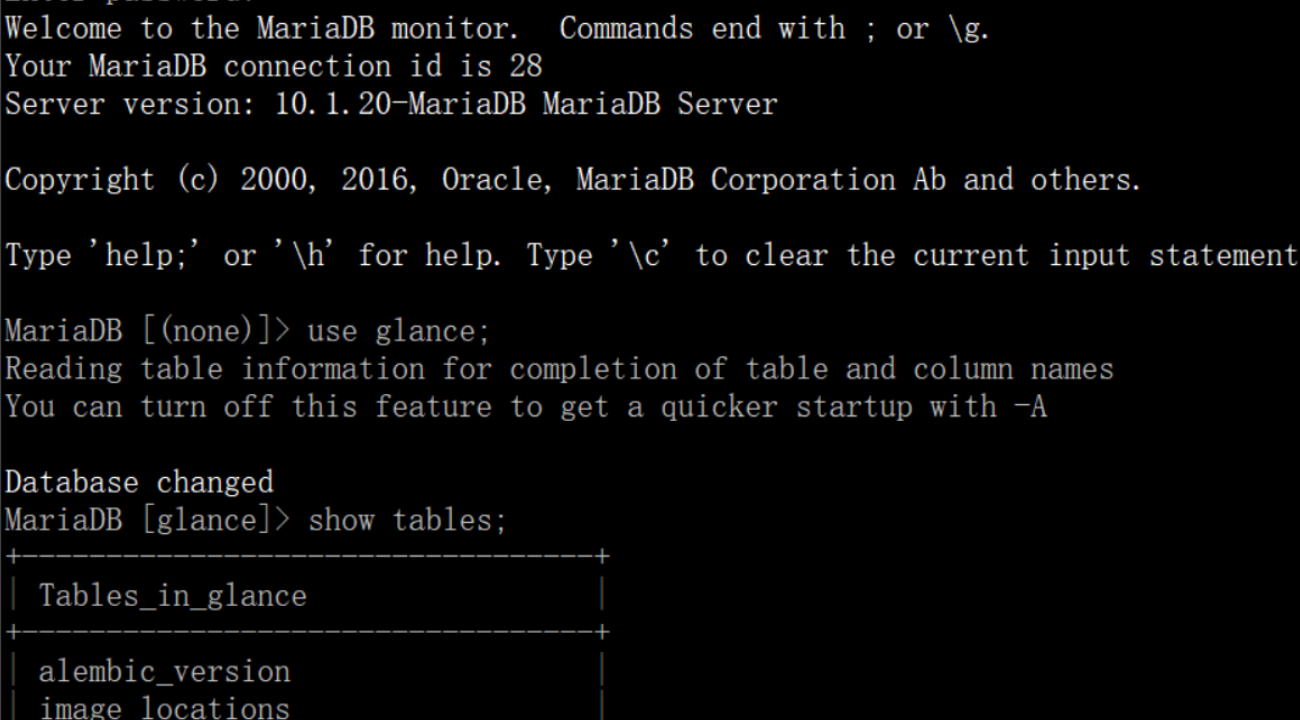
验证glance是否有table?
最后开启glance服务:
# systemctl enable openstack-glance-api.service openstack-glance-registry.service
# systemctl start openstack-glance-api.service openstack-glance-registry.service
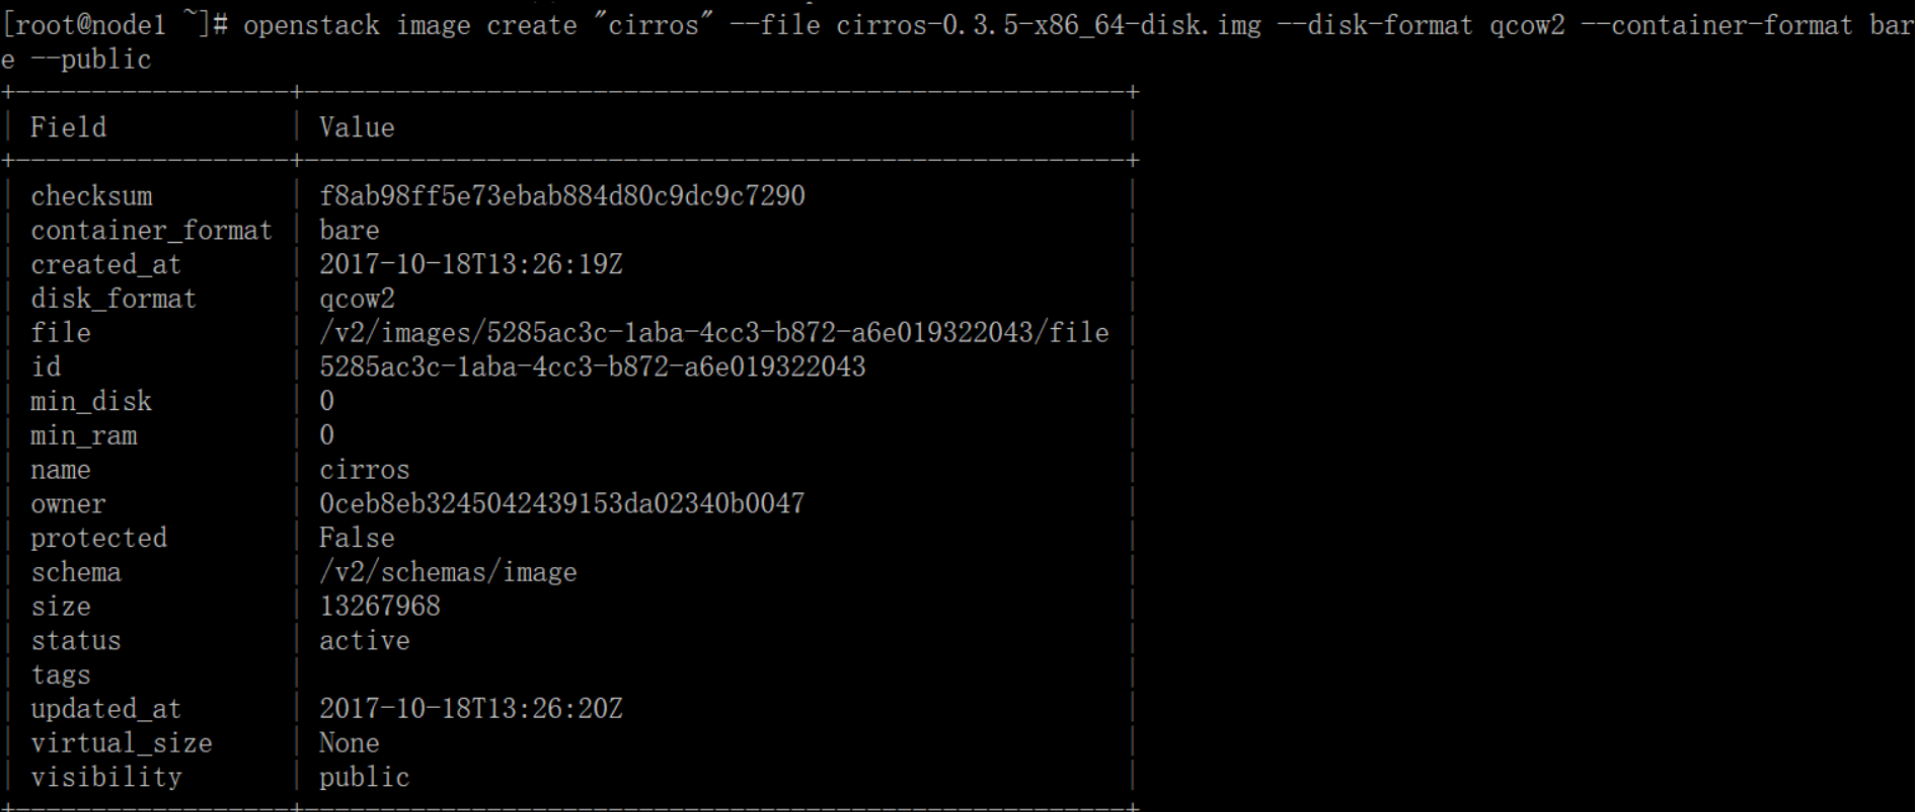
校验glance:校验image service是否安装成功?
# source admin-openrc
# wget http://download.cirros-cloud.net/0.3.5/cirros-0.3.5-x86_64-disk.img
# openstack image create "cirros" --file cirros-0.3.5-x86_64-disk.img --disk-format qcow2 --container-format bare --public
上传镜像到镜像服务上,使用格式qcow2磁盘格式,权限为public,所有的项目都能访问它
# openstack image list 查看镜像列表
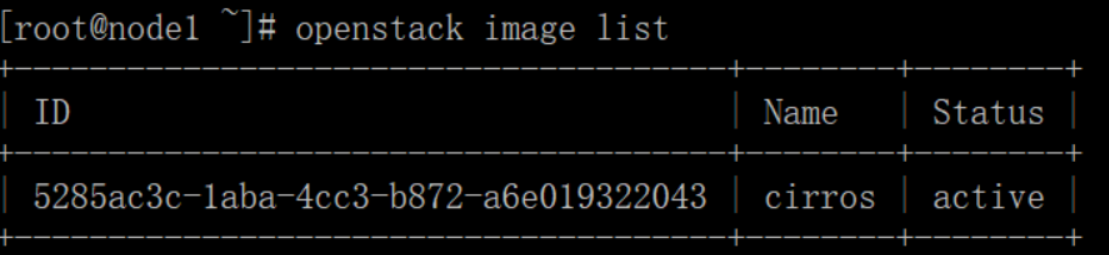
至此glance的image service组件安装成功
贴出glance两个配置文件的配置:
1、/etc/glance/glance-api.conf
[root@node1 ~]# egrep -v "^$|^#" /etc/glance/glance-api.conf
[DEFAULT]
[cors]
[database]
connection = mysql+pymysql://glance:glance@192.168.101.10/glance
[glance_store]
stores = file,http
default_store = file
filesystem_store_datadir = /var/lib/glance/images/
[image_format]
[keystone_authtoken]
auth_uri = http://192.168.101.10:5000
auth_url = http://192.168.101.10:35357
memcached_servers = 192.168.101.10:11211
auth_type = password
project_domain_name = default
user_domain_name = default
project_name = service
username = glance
password = glance
[matchmaker_redis]
[oslo_concurrency]
[oslo_messaging_amqp]
[oslo_messaging_kafka]
[oslo_messaging_notifications]
[oslo_messaging_rabbit]
[oslo_messaging_zmq]
[oslo_middleware]
[oslo_policy]
[paste_deploy]
flavor = keystone
[profiler]
[store_type_location_strategy]
[task]
[taskflow_executor]
2、配置文件/etc/glance/glance-registry.conf
[root@node1 ~]# egrep -v "^$|^#" /etc/glance/glance-registry.conf
[DEFAULT]
[database]
connection = mysql+pymysql://glance:glance@192.168.101.10/glance
[keystone_authtoken]
auth_uri = http://192.168.101.10:5000
auth_url = http://192.168.101.10:35357
memcached_servers = 192.168.101.10:11211
auth_type = password
project_domain_name = default
user_domain_name = default
project_name = service
username = glance
password = glance
[matchmaker_redis]
[oslo_messaging_amqp]
[oslo_messaging_kafka]
[oslo_messaging_notifications]
[oslo_messaging_rabbit]
[oslo_messaging_zmq]
[oslo_policy]
[paste_deploy]
flavor = keystone
[profiler]

 浙公网安备 33010602011771号