
saltstack之nginx、php的配置
saltstack为nginx提供状态配置
1、创建nginx配置需要的目录
mkdir /srv/salt/prod/nginx
mkdir /srv/salt/prod/nginx/files
2、将需要用到的nginx的源码包、启动脚本以及配置文件提供到files文件中
[root@node1 nginx]# ll files/
total 824
-rw-r--r-- 1 root root 833473 Oct 11 15:51 nginx-1.8.1.tar.gz
-rw-r--r-- 1 root root   1012 Oct 11 15:52 nginx.conf
-rwxr-xr-x 1 root root   2687 Oct 11 14:53 nginx.init
3、编写nginx安装的配置文件,并将nginx启动脚本添加到系统服务
[root@node1 nginx]# cat install.sls
include:
  - pkg.pkg-init

nginx-install:
  file.managed:
    - name: /usr/local/src/nginx-1.8.1.tar.gz
    - source: salt://nginx/files/nginx-1.8.1.tar.gz
    - user: root
    - group: root
    - mode: 755
  cmd.run:
    - name: useradd -M -s /sbin/nologin nginx && cd /usr/local/src && tar xf nginx-1.8.1.tar.gz && cd nginx-1.8.1 && yum install libxslt-devel -y gd gd-devel GeoIP GeoIP-devel pcre pcre-devel && ./configure --user=nginx --group=nginx --prefix=/usr/local/nginx --with-file-aio --with-ipv6 --with-http_ssl_module  --with-http_spdy_module --with-http_realip_module    --with-http_addition_module    --with-http_xslt_module   --with-http_image_filter_module    --with-http_geoip_module  --with-http_sub_module  --with-http_dav_module --with-http_flv_module    --with-http_mp4_module --with-http_gunzip_module  --with-http_gzip_static_module  --with-http_auth_request_module  --with-http_random_index_module   --with-http_secure_link_module   --with-http_degradation_module   --with-http_stub_status_module && make && make install && chown -R nginx:nginx /usr/local/nginx/
    - unless: test -d /usr/local/nginx
    - require:
      - pkg: pkg-init
      - file: /usr/local/src/nginx-1.8.1.tar.gz

nginx-init:
  file.managed:
    - name: /etc/init.d/nginx
    - source: salt://nginx/files/nginx.init
    - user: root
    - group: root
    - mode: 755
  cmd.run:
    - name: chkconfig --add nginx
    - unless: chkconfig --list|grep nginx
    - require:
      - file: /etc/init.d/nginx
执行nginx安装配置文件:
salt 'node1' state.sls nginx.install saltenv=prod
当然可以将上述的install.sls中的几个部分分割开:
1、nginx服务的用户,可以自定义nginx-user.sls
nginx-user-group:
  group.present:
    - name: nginx
    - gid: 1000

  user.present:
    - name: nginx
    - fullname: nginx
    - shell: /sbin/nologin
    - uid: 1000
    - gid: 1000
2、编译nginx安装时需要依赖的包
nginx-require:
  pkg.installed:
    - names:
      - libxslt-devel
      - gd
      - gd-devel
      - GeoIP
      - GeoIP-devel
      - pcre
      - pcre-devel
4、nginx安装完成后,需要给nginx提供配置文件,并将nginx服务开启
[root@node1 nginx]# cat service.sls
include:
  - nginx.install

/usr/local/nginx/conf/nginx.conf:
  file.managed:
    - source: salt://nginx/files/nginx.conf
    - user: nginx
    - group: nginx
    - mode: 644

nginx-service:
  file.directory:
    - name: /usr/local/nginx/conf/vhost
    - require:
      - file: nginx-install
  service.running:
    - name: nginx
    - enable: True
    - reload: True
    - require:
      - file: /etc/init.d/nginx
      - cmd: nginx-init
    - watch:
      - file: /usr/local/nginx/conf/nginx.conf
执行整个nginx项目配置文件
salt 'node1' state.sls nginx.service saltenv=prod
nginx框架图:
[root@node1 nginx]# tree
.
├── files
│   ├── nginx-1.8.1.tar.gz
│   ├── nginx.conf
│   └── nginx.init
├── install.sls
└── service.sls
将nginx项目整合到base环境的top.sls文件中:
[root@node1 base]# cat top.sls
base:
  '*':
    - init.env_init

prod:
  '*':
    - cluster.haproxy-outside
    - cluster.haproxy-outside-keepalived
    - nginx.service
nginx的配置文件如下:
[root@node1 nginx]# cat files/nginx.conf
user  nginx;
worker_processes  1;
error_log  logs/error.log  error;
pid        logs/nginx.pid;
worker_rlimit_nofile 30000;


events {
    worker_connections  1024;
    use epoll;
}


http {
    include       mime.types;
    default_type  application/octet-stream;

    log_format  main  '$remote_addr - $remote_user [$time_local] "$request" '
                      '$status $body_bytes_sent "$http_referer" '
                      '"$http_user_agent" "$http_x_forwarded_for"';
    access_log  logs/access.log  main;
    sendfile        on;
    tcp_nopush     on;
    underscores_in_headers on;
    keepalive_timeout  10;
    send_timeout 60;
    gzip  on;
include /usr/local/nginx/conf/vhost/*.conf;
    server {
        listen       8080;
        server_name  localhost;
        location /nginx_status {
            stub_status on;
            access_log off;
            allow 192.168.44.0/24;
            deny all;
        }
    }
}
nginx启动脚本如下:
[root@node1 nginx]# cat files/nginx.init
#!/bin/sh
#
# nginx - this script starts and stops the nginx daemon
#
# chkconfig:   - 85 15
# description:  NGINX is an HTTP(S) server, HTTP(S) reverse \
#               proxy and IMAP/POP3 proxy server
# processname: nginx
# config:      /etc/nginx/nginx.conf
# config:      /etc/sysconfig/nginx
# pidfile:     /var/run/nginx.pid

# Source function library.
. /etc/rc.d/init.d/functions

# Source networking configuration.
. /etc/sysconfig/network

# Check that networking is up.
[ "$NETWORKING" = "no" ] && exit 0

nginx="/usr/local/nginx/sbin/nginx"
prog=$(basename $nginx)

NGINX_CONF_FILE="/usr/local/nginx/conf/nginx.conf"

[ -f /etc/sysconfig/nginx ] && . /etc/sysconfig/nginx

lockfile=/var/lock/subsys/nginx

make_dirs() {
   # make required directories
   user=`$nginx -V 2>&1 | grep "configure arguments:.*--user=" | sed 's/[^*]*--user=\([^ ]*\).*/\1/g' -`
   if [ -n "$user" ]; then
      if [ -z "`grep $user /etc/passwd`" ]; then
         useradd -M -s /bin/nologin $user
      fi
      options=`$nginx -V 2>&1 | grep 'configure arguments:'`
      for opt in $options; do
          if [ `echo $opt | grep '.*-temp-path'` ]; then
              value=`echo $opt | cut -d "=" -f 2`
              if [ ! -d "$value" ]; then
                  # echo "creating" $value
                  mkdir -p $value && chown -R $user $value
              fi
          fi
       done
    fi
}

start() {
    [ -x $nginx ] || exit 5
    [ -f $NGINX_CONF_FILE ] || exit 6
    make_dirs
    echo -n $"Starting $prog: "
    daemon $nginx -c $NGINX_CONF_FILE
    retval=$?
    echo
    [ $retval -eq 0 ] && touch $lockfile
    return $retval
}

stop() {
    echo -n $"Stopping $prog: "
    killproc $prog -QUIT
    retval=$?
    echo
    [ $retval -eq 0 ] && rm -f $lockfile
    return $retval
}

restart() {
    configtest || return $?
    stop
    sleep 1
    start
}

reload() {
    configtest || return $?
    echo -n $"Reloading $prog: "
    killproc $nginx -HUP
    RETVAL=$?
    echo
}

force_reload() {
    restart
}

configtest() {
  $nginx -t -c $NGINX_CONF_FILE
}

rh_status() {
    status $prog
}

rh_status_q() {
    rh_status >/dev/null 2>&1
}

case "$1" in
    start)
        rh_status_q && exit 0
        $1
        ;;
    stop)
        rh_status_q || exit 0
        $1
        ;;
    restart|configtest)
        $1
        ;;
    reload)
        rh_status_q || exit 7
        $1
        ;;
    force-reload)
        force_reload
        ;;
    status)
        rh_status
        ;;
    condrestart|try-restart)
        rh_status_q || exit 0
            ;;
    *)
        echo $"Usage: $0 {start|stop|status|restart|condrestart|try-restart|reload|force-reload|configtest}"
        exit 2
esac
saltstack为php提供状态配置
1、安装php的依赖包
2、编译安装php
3、安装PHP插件:pdo_mysql
4、提供php配置文件php-ini
5、提供php-fpm配置文件
6、给php-fpm提供启动脚本、将服务添加到启动项、开启php-fpm服务
1、创建php项目需要的目录
mkdir /srv/salt/prod/php
mkdir /srv/salt/prod/php/files
2、编译安装php需要用到的文件脚本和源码包
[root@node1 files]# ll
total 14760
-rw-r--r-- 1 root root     2354 Oct 11 20:03 init.d.php-fpm
-rw-r--r-- 1 root root 15011816 Oct 11 19:23 php-5.6.30.tar.bz2
-rw-r--r-- 1 root root    22794 Oct 11 20:05 php-fpm.conf.default
-rw-r--r-- 1 root root    73685 Oct 11 20:01 php.ini-production
3、编写状态配置文件
3.1编写libmcrypt状态配置
mkdir /srv/salt/prod/libmcrypt
mkdir /srv/salt/prod/libmcrypt/files
[root@node1 files]# ll
total 512
-rw-r--r-- 1 root root 523321 Oct 11 20:13 libmcrypt-2.5.7.tar.gz
[root@node1 files]# pwd
/srv/salt/prod/libmcrypt/files
[root@node1 libmcrypt]# pwd
/srv/salt/prod/libmcrypt
[root@node1 libmcrypt]# tree
.
├── files
│   └── libmcrypt-2.5.7.tar.gz
└── install.sls
[root@node1 libmcrypt]# cat install.sls
libmcrypt-install:
  file.managed:
    - name: /usr/local/src/libmcrypt-2.5.7.tar.gz
    - source: salt://libmcrypt/files/libmcrypt-2.5.7.tar.gz
    - user: root
    - group: root
    - mode: 755
  cmd.run:
    - name: cd /usr/local/src/ && tar xf libmcrypt-2.5.7.tar.gz && cd libmcrypt-2.5.7 && ./configure && make && make install
    - unless: test -d /usr/local/src/libmcrypt-2.5.7
    - require:
      - file: /usr/local/src/libmcrypt-2.5.7.tar.gz
5.2编译安装php
[root@node1 php]# cat install.sls
pkg-php:                                 编写依赖包状态配置
  pkg.installed:
    - names:
      - libxml2
      - libxml2-devel
      - bzip2
      - bzip2-devel
      - libjpeg-turbo
      - libjpeg-turbo-devel
      - libpng
      - libpng-devel
      - freetype
      - freetype-devel
      - zlib
      - zlib-devel
      - libcurl
      - libcurl-devel

php-install:                        php编译安装状态配置
  file.managed:
    - name: /usr/local/src/php-5.6.30.tar.bz2
    - source: salt://php/files/php-5.6.30.tar.bz2
    - user: root
    - group: root
    - mode: 755
  cmd.run:
    - name: cd /usr/local/src/ && tar xf php-5.6.30.tar.bz2 && cd php-5.6.30 && ./configure --prefix=/usr/local/php --with-pdo-mysql=mysqlnd --with-mysqli=mysqlnd --with-mysql=mysqlnd --with-openssl --enable-mbstring --with-freetype-dir --with-jpeg-dir --with-png-dir --with-mcrypt --with-zlib --with-libxml-dir=/usr --enable-xml  --enable-sockets --enable-fpm --with-config-file-path=/usr/local/php/etc --with-bz2 --with-gd && make && make install
    - unless: test -d /usr/local/php
    - require:
      - pkg: pkg-php                   由于上面安装的依赖于是基于pkg模式
      - file: /usr/local/src/php-5.6.30.tar.bz2

pdo-plugin:                          php插件pdo_mysql状态配置
  cmd.run:
    - name: cd /usr/local/src/php-5.6.30/ext/pdo_mysql && /usr/local/php/bin/phpize && ./configure --with-php-config=/usr/local/php/bin/php-config && make&& make install
    - unless: test -f /usr/local/php/lib/php/extensions/*/pdo_mysql.so
    - require:
      - file: php-install

php-ini:                                  提供php的php-ini配置文件
  file.managed:
    - name: /usr/local/php/etc/php.ini
    - source: salt://php/files/php.ini-production
    - user: root
    - group: root
    - mode: 644

php-fpm:                                 提供php-fpm的配置文件
  file.managed:
    - name: /usr/local/php/etc/php-fpm.conf
    - source: salt://php/files/php-fpm.conf.default
    - user: root
    - group: root
    - mode: 644

php-service:                           将php-fpm服务添加到系统服务中
  file.managed:
    - name: /etc/init.d/php-fpm
    - source: salt://php/files/init.d.php-fpm
    - user: root
    - group: root
    - mode: 755
  cmd.run:
    - name: chkconfig --add php-fpm
    - unless: chkconfig --list|grep php-fpm
    - require:
      - file: /etc/init.d/php-fpm
  service.running:
    - name: php-fpm
    - enable: True
    - require:
      - cmd: php-service
    - watch:
      - file: php-ini
      - file: php-fpm
执行[root@node1 php]# salt 'node1' state.sls php.install saltenv=prod
查看php-fpm:
[root@node1 php]# netstat -tunlp
Active Internet connections (only servers)
Proto Recv-Q Send-Q Local Address               Foreign Address             State       PID/Program name
tcp        0      0 0.0.0.0:8080                0.0.0.0:*                   LISTEN      122333/nginx
tcp        0      0 192.168.44.10:80            0.0.0.0:*                   LISTEN      107737/haproxy
tcp        0      0 0.0.0.0:22                  0.0.0.0:*                   LISTEN      1265/sshd
tcp        0      0 0.0.0.0:4505                0.0.0.0:*                   LISTEN      42708/python2.7
tcp        0      0 0.0.0.0:8090                0.0.0.0:*                   LISTEN      107737/haproxy
tcp        0      0 0.0.0.0:4506                0.0.0.0:*                   LISTEN      42714/python2.7
tcp        0      0 127.0.0.1:9000              0.0.0.0:*                   LISTEN      117298/php-fpm
tcp        0      0 :::22                       :::*                        LISTEN      1265/sshd
udp        0      0 0.0.0.0:68                  0.0.0.0:*                               1092/dhclient
php项目构建图:
[root@node1 php]# tree
.
├── files
│   ├── init.d.php-fpm
│   ├── php-5.6.30.tar.bz2
│   ├── php-fpm.conf.default
│   └── php.ini-production
└── install.sls
将nginx和php-fpm结合起来,提供配置文件
mkdir /srv/salt/prod/html
mkdir /srv/salt/prod/html/files
[root@node1 files]# ll
total 8
-rw-r--r-- 1 root root 1034 Oct 11 21:24 fastcgi_params
-rw-r--r-- 1 root root  278 Oct 11 21:10 www.conf
[root@node1 files]# pwd
/srv/salt/prod/html/files
[root@node1 html]# tree
.
├── files
│   ├── fastcgi_params            将nginx和php进行结合
│   └── www.conf                     添加应用配置文件
└── www.sls
[root@node1 html]# cat www.sls
include:                                 包含了nginx和php的安装
  - php.install
  - nginx.service

nginx-php-conf:
  file.managed:
    - name: /usr/local/nginx/conf/fastcgi_params
    - source: salt://html/files/fastcgi_params
    - user: nginx
    - group: nginx
    - mode: 755

html-www:
  file.managed:
    - name: /usr/local/nginx/conf/vhost/www.conf
    - source: salt://html/files/www.conf
    - user: root
    - group: root
    - mode: 644
    - require:
      - service: php-service
    - watch_in:
      - service: nginx-service
提供的fastcgi_params配置文件
[root@node1 html]# cat files/fastcgi_params

fastcgi_param  QUERY_STRING       $query_string;
fastcgi_param  REQUEST_METHOD     $request_method;
fastcgi_param  CONTENT_TYPE       $content_type;
fastcgi_param  CONTENT_LENGTH     $content_length;

fastcgi_param  SCRIPT_NAME        $fastcgi_script_name;
fastcgi_param  SCRIPT_FILENAME    $document_root$fastcgi_script_name;
fastcgi_param  REQUEST_URI        $request_uri;
fastcgi_param  DOCUMENT_URI       $document_uri;
fastcgi_param  DOCUMENT_ROOT      $document_root;
fastcgi_param  SERVER_PROTOCOL    $server_protocol;
fastcgi_param  HTTPS              $https if_not_empty;

fastcgi_param  GATEWAY_INTERFACE  CGI/1.1;
fastcgi_param  SERVER_SOFTWARE    nginx/$nginx_version;

fastcgi_param  REMOTE_ADDR        $remote_addr;
fastcgi_param  REMOTE_PORT        $remote_port;
fastcgi_param  SERVER_ADDR        $server_addr;
fastcgi_param  SERVER_PORT        $server_port;
fastcgi_param  SERVER_NAME        $server_name;

# PHP only, required if PHP was built with --enable-force-cgi-redirect
fastcgi_param  REDIRECT_STATUS    200;
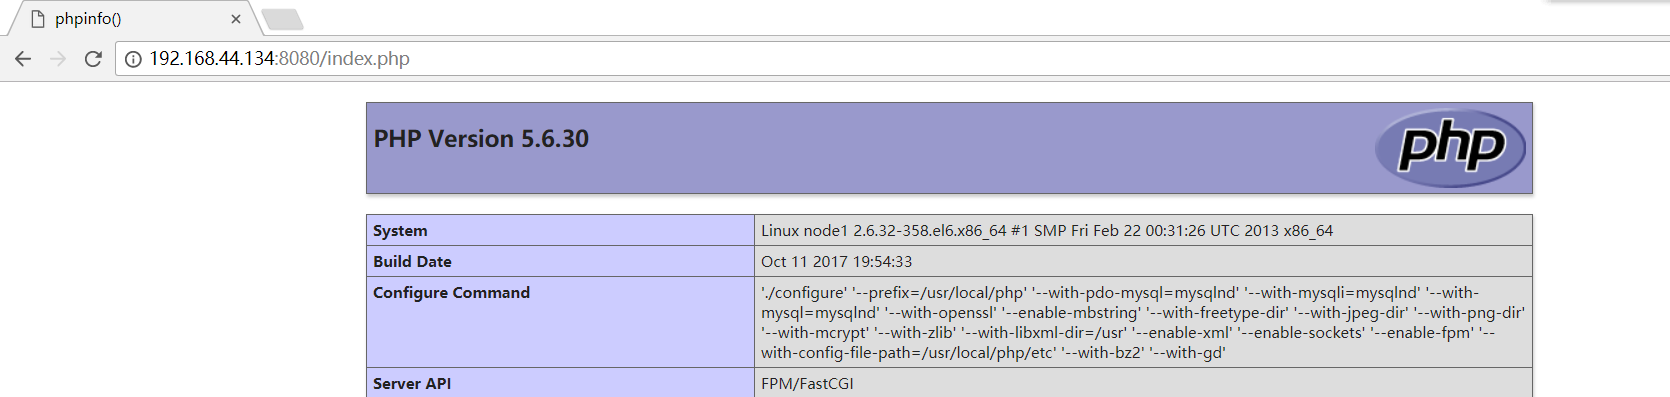
提供的index.php测试文件:
[root@node1 conf]# cat ../html/index.php
<?php
  phpinfo();
?>
测试效果:
构建树info如下:
[root@node1 prod]# tree libmcrypt/
libmcrypt/
├── files
│   └── libmcrypt-2.5.7.tar.gz
└── install.sls

[root@node1 prod]# tree nginx/
nginx/
├── files
│   ├── nginx-1.8.1.tar.gz
│   ├── nginx.conf
│   └── nginx.init
├── install.sls
└── service.sls

[root@node1 prod]# tree php/
php/
├── files
│   ├── init.d.php-fpm
│   ├── php-5.6.30.tar.bz2
│   ├── php-fpm.conf.default
│   └── php.ini-production
└── install.sls

[root@node1 prod]# tree html/
html/
├── files
│   ├── fastcgi_params
│   └── www.conf
└── www.sls
将项目nginx和php和html结合到top.sls文件中:
[root@node1 base]# cat top.sls
base:
  '*':
    - init.env_init

prod:
  '*':
    - cluster.haproxy-outside
    - cluster.haproxy-outside-keepalived
    - html.www                     该项目包含了nginx和php的安装

 浙公网安备 33010602011771号